
Are you ready to experience the authentic flavors of Switzerland right in your own kitchen? If so, you’ve landed in the right spot! This gipfeli recipe will guide you through the process of crafting light, flaky pastries reminiscent of a classic Swiss breakfast. Often compared to French croissants, gipfeli have a distinct personality—slightly denser, subtly sweet, yet undeniably buttery. Moreover, they’re perfect for early morning treats or a cozy weekend brunch.
Undoubtedly, gipfeli recipe aficionados insist on high-quality ingredients, because fresh flour and top-notch butter can make all the difference. Throughout this article, you’ll discover how to prepare the dough, shape these pastries for maximum flakiness, and troubleshoot any snags that might pop up along the way. Additionally, we’ll sprinkle in tips gathered from Swiss bakery traditions to ensure each bite is just as irresistible as the last. So, let’s delve into the dough, shall we?
Part 1: Embracing Swiss Bakery Traditions
The Essence of a Swiss Gipfeli Recipe
Swiss bakery culture is rich, steeped in heritage, and altogether fascinating. Gipfeli, sometimes referred to as Swiss croissants, are emblematic of this tradition because they embody precision, patience, and quality. Although they share similarities with French croissants, there are notable distinctions that make them stand out. Chiefly, gipfeli are often slightly sweeter, and their texture is comparatively denser, giving them that hearty, melt-in-your-mouth character. Certainly, many Swiss families enjoy these pastries during special occasions, while others consider them a staple for breakfast or brunch gatherings.
Gipfeli recipe enthusiasts generally emphasize the importance of butter. Indeed, Swiss pastry chefs believe the butter-to-flour ratio is critical because it affects both flavor and layering. Moreover, the use of fresh yeast can contribute to a more pronounced taste. Additionally, some bakers incorporate a touch of sugar or honey for a subtle sweetness, but never enough to overpower the buttery essence.
Key Ingredients and Their Roles
When it comes to assembling the perfect gipfeli recipe, each ingredient plays a pivotal part. First and foremost, high-quality flour is a must. It provides the dough’s structure and interacts with yeast to create those tender layers. Secondly, milk offers richness and a slightly creamy flavor, while water alone can produce a drier crumb. Meanwhile, sugar adds a hint of sweetness—albeit not excessively—so that the buttery goodness remains the star of the show. Additionally, salt is indispensable because it balances flavor and strengthens the dough’s gluten network.
Most bakers gravitate toward unsalted butter to control sodium content. Nevertheless, a pinch of salt is recommended to enhance taste. Hence, choosing the best possible butter brand is paramount, as it can elevate every bite of your gipfeli recipe. If you’re looking for general guidelines on butter quality, you might visit the USDA FoodData Central for nutritional information and insights into product varieties.
Secrets Behind the Dough Preparation
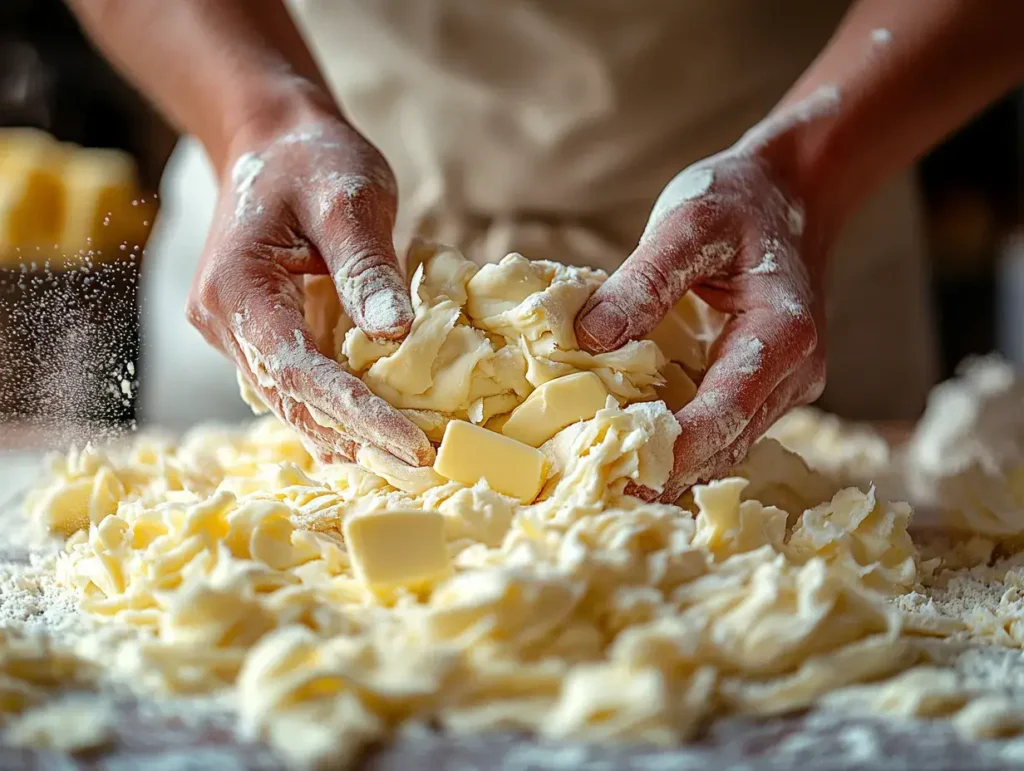
The steps for making dough for gipfeli are quite simple, but each phase must be done carefully. First, mix your dry ingredients—flour, sugar, salt, and yeast. Then add softened butter and lukewarm milk, making sure every bit of flour gets moistened. Next, gently knead the dough to form enough gluten without going too far. Too little kneading can leave lumps, while too much can make the pastry tough and hurt its lightness.
After kneading, let the dough rest. Some bakers let it rise in a cooler spot to slow fermentation and boost flavor. Once the dough has doubled in size, move on to lamination. This process involves folding butter into the dough to create flaky layers. Although lamination may seem tricky at first, you’ll soon see how it adds a delicate texture to each bite.
Remember, the best gipfeli recipe is often one that you adapt to suit your personal tastes. Whether you prefer a sweeter dough or a more savory version, tweak the proportions to discover your perfect bite. Soon enough, you’ll be mastering Swiss bakery traditions in the comfort of your home, impressing family and friends with your newfound pastry prowess!
Perfecting the Gipfeli Recipe Technique
Preparing and Laminating the Dough
Gipfeli recipe success hinges on two foundational steps—preparing an elastic dough and mastering lamination. Firstly, ensure your dough has had enough time to rest after the initial kneading, because this brief pause helps relax the gluten, making it more malleable for rolling. Afterward, dust your work surface with flour and roll the chilled dough into a rectangular shape. Subsequently, place thin slabs of cold butter on two-thirds of the dough. Then, fold the unbuttered section over half of the buttered portion, and fold again so all the butter is neatly sealed within the dough.
Meanwhile, keep an eye on dough temperature. If it becomes too warm, the butter may melt and seep out, consequently ruining those coveted flaky layers. To counter this, gently transfer the dough to the refrigerator between each set of folds. Certainly, this process of folding and chilling—often referred to as lamination—demands patience. However, the resulting layers will reward you with a melt-in-your-mouth texture that elevates any gipfeli recipe from ordinary to extraordinary.
Shaping and Baking to Perfection
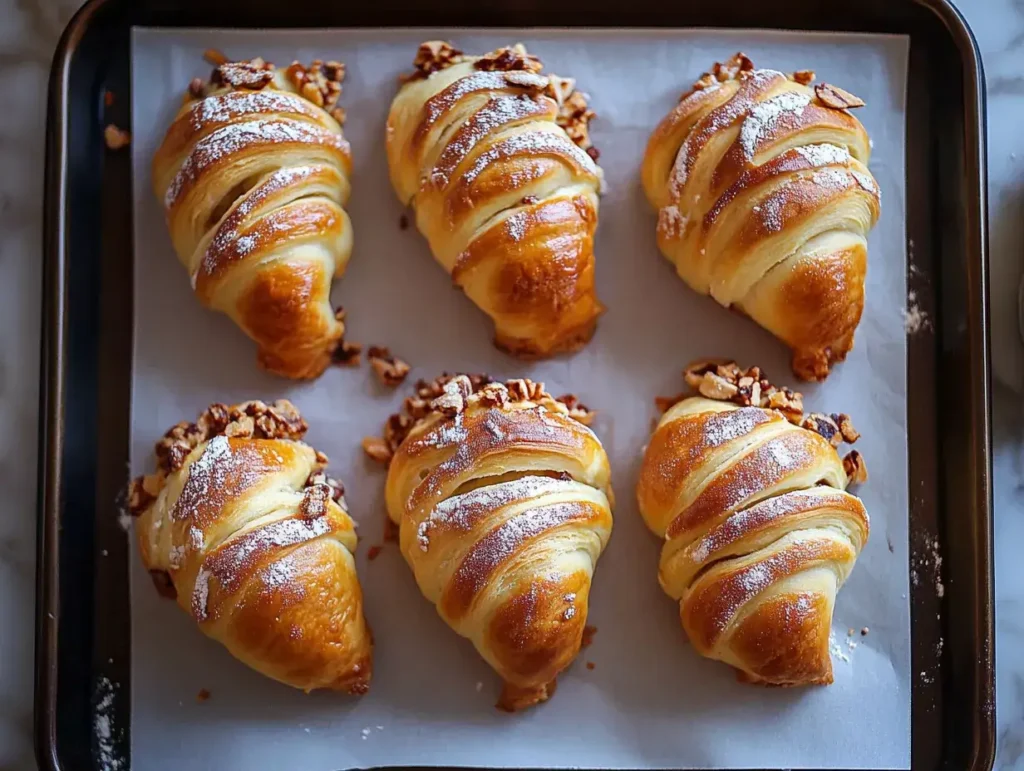
Shaping each gipfeli is where your artistic flair gets to shine. Afterwards, roll the dough into a large rectangle, aiming for an even thickness. Use a sharp knife or pizza cutter to slice the sheet into long triangles—typically, you want the base of each triangle to be about twice as long as its height. Next, place any desired fillings (e.g., chocolate, almond paste, or savory cheese) at the wide end. Then, roll each triangle from base to tip, ensuring the tip of the triangle is tucked under to hold its shape during baking.
Comparatively, this shaping technique resembles forming croissants, yet gipfeli recipe triangles are sometimes smaller for easy handling. Before baking, brush each pastry with an egg wash, which lends them a tempting golden glow. Moreover, a quick sprinkle of seeds or coarse sugar can add visual appeal if you’re experimenting with flavors. Preheat your oven to around 200°C (392°F), and bake these morsels for approximately 15–20 minutes, or until the tops are lightly browned. Obviously, every oven varies, so keep a watchful eye to prevent overbrowning.
for different flours or butter types, you can refer to the USDA FoodData Central for insights on product variations and nutritional details.
Variations and Flavor Twists
If you’ve mastered the basic gipfeli recipe, consequently, you’re perfectly poised to test out creative twists. For example, sweet fillings like fruit jam, cinnamon sugar, or Nutella can be swirled into the dough before rolling. Similarly, savory aficionados might opt for ham and cheese, spinach and feta, or even a spicy jalapeño cheddar version. Furthermore, you can brush a light milk wash instead of an egg wash for a subtler shine if you prefer an egg-free pastry.
Try incorporating whole wheat flour for a heartier gipfeli recipe. However, remember that whole wheat flours usually absorb more moisture, so you may need to adjust the liquid content. Surely, experimentation is part of the fun—especially if you enjoy adding personal flair to your baking.
Troubleshooting & Elevating Your Gipfeli Recipe
Tackling Common Dough Challenges
Even experienced bakers face problems with a gipfeli recipe. One of the most common issues is dough that’s either too hard or too soft. A hard dough can happen if you use too much flour, so it’s best to weigh it for accuracy. On the other hand, sticky dough often means there isn’t enough flour or there’s too much liquid—especially in humid weather. Small changes, like adding a little more flour, can help fix the problem.
Another common issue is butter leaking during layering. To avoid this, always keep the butter and dough cold. If butter starts to leak, stop, put everything in the fridge, and let it firm up. Be gentle when rolling the dough because pressing too hard can damage the layers and ruin the pastry’s light and airy texture.
Enhancing Flavor and Texture
Your gipfeli recipe can be enhanced in countless ways. For instance, you might add a hint of lemon zest or vanilla extract to the dough for extra fragrance. Additionally, replacing a portion of milk with cream brings richer taste and slightly more tender crumb. If you’re looking for health-conscious tweaks, you could explore alternative sweeteners such as honey or maple syrup—though do so sparingly, lest the flavor overshadows that classic buttery taste.
Moreover, consider a final dusting of powdered sugar or a drizzle of melted chocolate to turn your pastries into a dessert delight. If you want more advanced pastry tips, explore our Quickmealsrecipes for in-depth tutorials on flavor infusion and creative toppings.
Keeping Your Gipfeli Recipe Fresh
If you happen to end up with leftovers—though that’s unlikely storing gipfeli properly is essential to retain their crispness. Once they cool, place them in an airtight container at room temperature. Shortly afterward, you can reheat them in a low-temperature oven to restore freshness. Alternatively, freeze unbaked shaped dough on a tray, then transfer the frozen pastries to a sealed bag. You can bake them straight from frozen with just a few extra minutes in the oven, saving time on future mornings.
Overall, remember that your gipfeli recipe journey is as unique as you are. Take these tips in stride, explore creative flavors, and keep an open mind whenever you troubleshoot. With each baking session, you’ll inch closer to perfecting the art of Swiss pastry-making in your own home—keeping tradition alive, one buttery layer at a time!
Elevating Your Gipfeli Recipe
Tips for Success
If you want to perfect your gipfeli recipe, there are several simple tips to make sure your pastries are flaky and delicious. First, keep all your ingredients cold—especially butter—while making the layers. Also, handle the dough gently to protect the thin layers, and roll it out carefully instead of pressing hard. Weighing your ingredients helps keep the right balance and prevents the dough from being too dry or too wet. Patience is also important: give the dough enough time to rise, as rushing can make the pastry heavy.
Using good-quality ingredients is another key step. For example, butter with more fat adds better flavor and creates clearer layers, making a big difference in your gipfeli recipe. Some bakers add a little sugar or honey to make the pastry sweeter without losing the buttery taste. Salt is also important, as it balances the sweetness and improves the overall flavor.
Variations and Substitutions
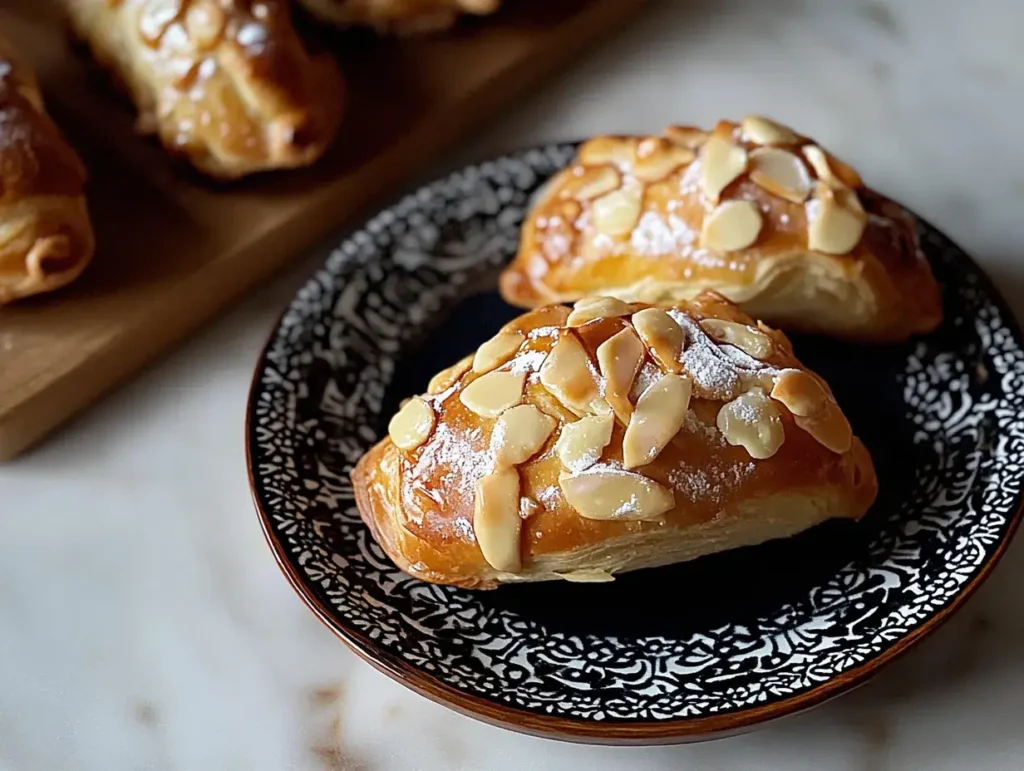
Though the classic gipfeli recipe is mouthwateringly delicious, experimenting with flavors can be exciting. Consequently, sweet tooth enthusiasts might try a chocolate or almond paste filling, adding a subtle richness to each bite. Alternatively, savory options like smoked salmon or cheese and herbs bring a satisfying contrast to the buttery dough. However, always ensure the filling complements rather than overpowers the pastry’s delicate texture.
If you follow a special diet, there are still ways to enjoy a fabulous gipfeli recipe. Undoubtedly, dairy-free butter alternatives and plant-based milks work well, though you may need to adjust the dough’s moisture. Similarly, gluten-free flour blends can be substituted; yet, be prepared for minor textural differences. Nevertheless, with a bit of patience and creativity, you’ll find a variation that suits your preferences while keeping the spirit of Swiss pastries intact.
Wrapping Up Your Gipfeli Recipe Adventure
Conclusion
All in all, this gipfeli recipe captures the very essence of Swiss pastry craftsmanship. Certainly, the layers of buttery dough, painstakingly formed through lamination, produce a flaky masterpiece that can transform any breakfast into a gourmet experience. Hence, by mastering essential tips—such as keeping ingredients cold, measuring accurately, and allowing your dough to rest—you’ll consistently achieve results that rival your favorite bakery.
Moreover, feel free to tailor the gipfeli recipe to your taste buds by experimenting with sweet or savory fillings. Surely, each batch will boost your confidence in the kitchen, inspiring you to tackle more advanced recipes and share your newfound skills with family and friends.
Mastering Final Details for Your Gipfeli Recipe
Maximizing Flavor in Your Gipfeli Recipe
A truly unforgettable gipfeli recipe requires attention to flavor-boosting details that make each flaky bite a delight. Firstly, consider infusing your dough with subtle ingredients like grated citrus zest or a pinch of nutmeg—these enhancements brighten the buttery layers without overwhelming them. Additionally, experiment with premium European-style butter because its higher fat content intensifies flavor and yields extra-luscious results. Similarly, sprinkling sea salt flakes or crushed nuts over the egg wash can add contrasting textures that complement the pastry’s softer interior.
Moreover, shape and size play a significant role in delivering that melt-in-your-mouth consistency. Generally, a thinner dough sheet will yield more delicate layers, whereas a thicker one may result in a dense interior. Hence, roll out your dough consistently, ensuring even thickness across every triangle. Certainly, a well-preheated oven also matters, so aim for about 200°C (392°F) and maintain steady heat for uniform browning. Undoubtedly, each oven behaves differently, so keep a close eye on the pastries during baking to prevent overcooking.
Presentation and Serving Ideas
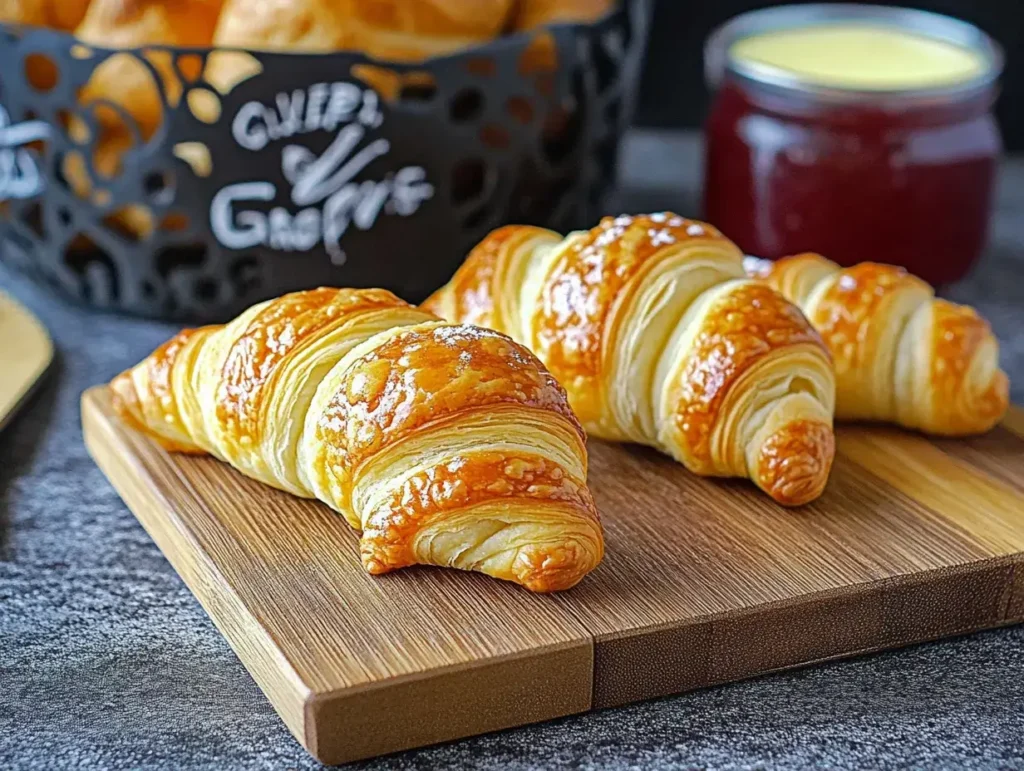
When it comes to wowing guests, the aesthetics of your gipfeli recipe presentation matter. Consequently, consider arranging the freshly baked pastries on a wooden board or a sleek serving tray for a rustic yet refined look. Additionally, garnish the platter with seasonal fruit or tiny bowls of jam to encourage dipping. Likewise, a side of whipped cream or honey butter complements sweet variants perfectly, whereas savory versions pair nicely with a cheese board or cured meats.
Comparatively, plating these Swiss pastries with fresh greenery—like a sprig of rosemary or thyme—adds an elegant pop of color that makes the golden crusts stand out. Afterward, a gentle dusting of powdered sugar or a drizzle of melted chocolate can give your gipfeli recipe that bakery-level finish. Overall, your creativity, combined with impeccable layering and baking techniques, will keep everyone asking for second helpings.
Your Gipfeli Recipe FAQs and Final Words
Addressing Common Queries
Curious about how a gipfeli recipe compares to a French croissant? Certainly, these pastries share a flaky structure, but gipfeli often have a slightly denser crumb and sometimes feature subtle sweet undertones. Additionally, if you’re wondering about egg-wash alternatives, a simple milk wash can still deliver a beautiful sheen albeit with a gentler color. Moreover, when it comes to storing leftover pastries, keep them in an airtight container at room temperature to maintain freshness for up to two days. However, for extended storage, freeze the unbaked dough and simply add a few extra minutes to your baking time.
Final Thoughts on Your Gipfeli Recipe Journey
Embarking on this gipfeli recipe adventure undoubtedly enriches your baking repertoire. Hence, mastering the lamination process and fine-tuning those delicate layers might seem challenging at first. Nevertheless, with patience, quality ingredients, and a few helpful tips, you’ll soon elevate your homemade pastries to Swiss-bakery status. Enjoy every buttery, golden-brown bite, and don’t hesitate to share your baking triumphs (or challenges) in the comments. Eventually, your persistence will pay off, and you’ll relish the sweet taste of success—literally!