The Best Leftover Rotisserie Chicken Recipes for Every Occasion

Introduction

Rotisserie chicken is a lifesaver in the kitchen. It’s cheap, tasty, and easy to use, making it a great choice for quick, yummy meals. But what can you do with the leftovers? That’s where these leftover rotisserie chicken recipes come in! From soups and salads to casseroles and wraps, there’s something for everyone. This guide will show you how to turn your leftovers into delicious meals, cut down on waste, and save time in the kitchen. Let’s jump in and explore all the ways you can use leftover rotisserie chicken!

Why Leftover Rotisserie Chicken is a Culinary Lifesaver

The Magic of Leftover Rotisserie Chicken in Your Kitchen

Using leftover rotisserie chicken is not just a practical choice it’s a game-changer for home cooks. Packed with flavor, it’s already seasoned and cooked, saving you loads of time and effort. Whether you’re whipping up a quick lunch or preparing a hearty dinner, leftover chicken is your secret weapon to elevate dishes with minimal prep.

The Benefits of Using Rotisserie Chicken in Recipes

First, it’s a money-saver. Instead of buying more raw chicken and cooking supplies, you can reuse leftovers in new meals. It’s also a great way to cut down on food waste. Plus, rotisserie chicken is super easy to use—it fits perfectly into meals like soups, salads, casseroles, and stir-fries.

Overview of the Versatility of Rotisserie Chicken

Rotisserie chicken works well with various cuisines, from Mexican enchiladas to Mediterranean wraps. Whether you’re after low-carb meals, comfort food, or a high-protein salad, the possibilities are endless. By keeping some staple ingredients like rice, pasta, and veggies on hand, you’ll always have the building blocks for a delicious meal.

Quick and Easy Meals with Leftover Rotisserie Chicken

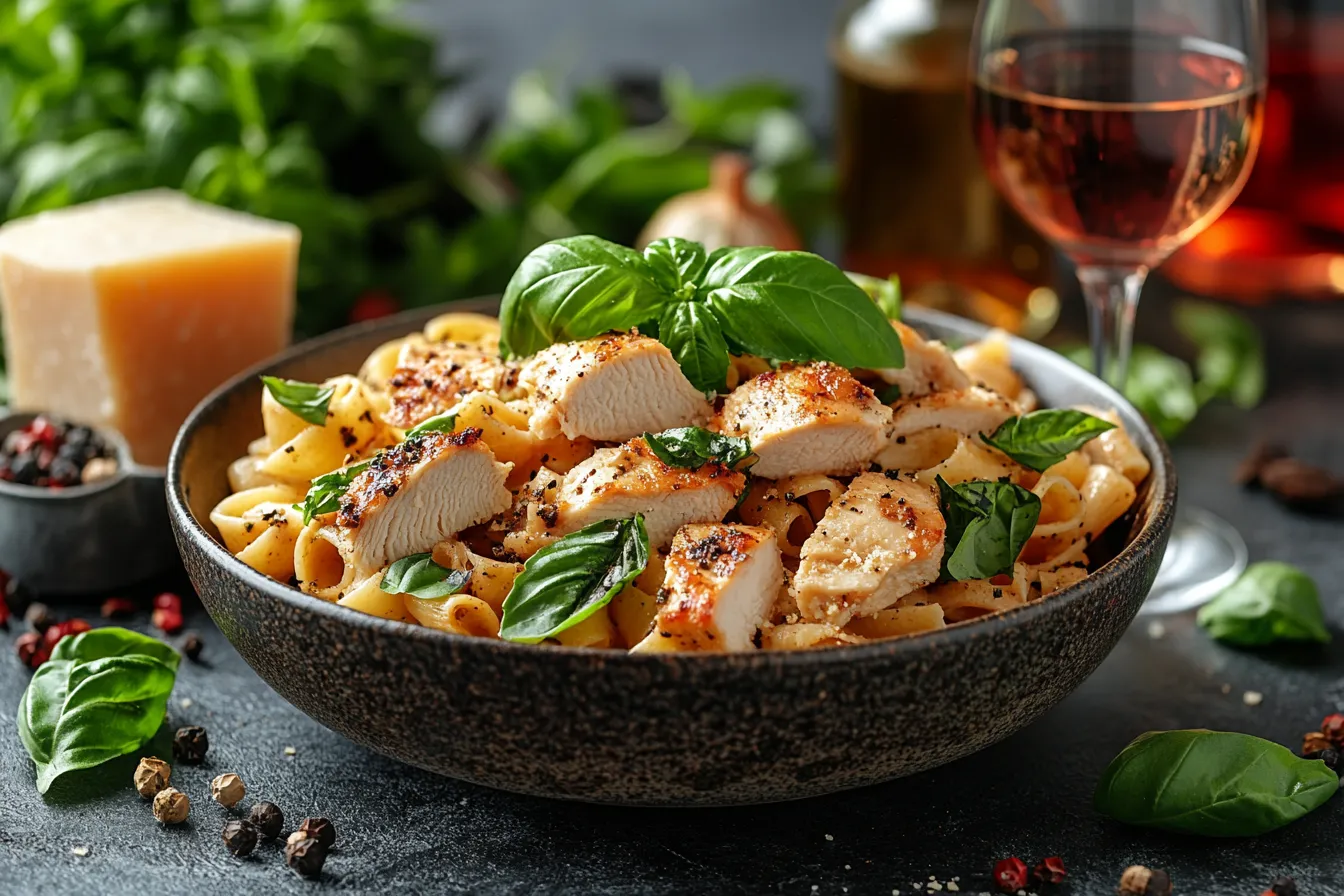
One-Pan Rotisserie Chicken Pasta

Transform leftover rotisserie chicken into a mouthwatering one-pan pasta dish! First, sauté garlic and onions in olive oil. Next, toss in your shredded chicken, and add canned tomatoes for a rich sauce. Then, stir in cooked pasta, sprinkle some parmesan, and garnish with fresh basil. This easy recipe therefore brings comfort to your table in under 30 minutes, making it perfect for busy weeknights.

For more quick dinner ideas, check out this guide to cheesy chicken sloppy joes.

Hearty Chicken Quesadillas

Who doesn’t love quesadillas? Spread shredded chicken on a tortilla, layer with shredded cheese, and fold it in half. Cook on a hot skillet until crispy and golden brown. Pair these quesadillas with salsa, sour cream, or guacamole for a fun and flavorful meal. Perfect for lunch, dinner, or even a snack!

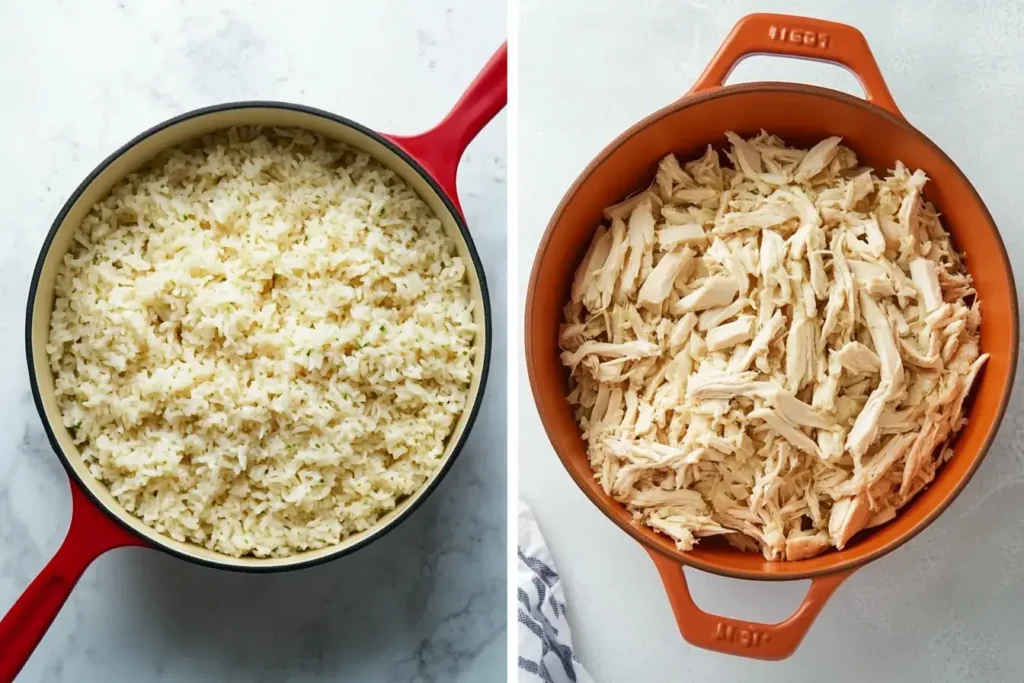
Homemade Chicken Fried Rice

Say goodbye to takeout and hello to homemade chicken fried rice! Start by stir-frying your vegetables—carrots, peas, and onions—in a bit of sesame oil. Add day-old rice, soy sauce, and your leftover rotisserie chicken. For an extra kick, toss in some sriracha or chili flakes. It’s quick, healthy, and irresistibly good.

Soups and Stews Using Rotisserie Chicken

Classic Chicken Noodle Soup with a Twist

Nothing beats chicken noodle soup for comfort. Use your rotisserie chicken to make this classic even easier. Add chicken, egg noodles, carrots, celery, and a rich broth. For a twist, throw in fresh dill or lemon juice for brightness. This cozy dish is perfect for chilly nights or when you’re feeling under the weather.

Creamy Chicken and Wild Rice Soup

Turn leftover rotisserie chicken into a creamy wild rice soup that’s both hearty and elegant. Combine chicken, wild rice, mushrooms, and a creamy base made with chicken stock and heavy cream. A sprinkle of thyme adds a fragrant, earthy touch.

Find more ways to elevate your soups with ideas from this savory soup guide.

Spicy Chicken Tortilla Soup

Bring some spice to your table with chicken tortilla soup. Use your leftover rotisserie chicken, diced tomatoes, black beans, and corn. Simmer everything with chicken stock and season with cumin, chili powder, and smoked paprika. Top with crispy tortilla strips, avocado, and a dollop of sour cream for a truly satisfying bowl.

Rotisserie Chicken Salads and Wraps

Chicken Caesar salad with croutons and parmesan. Leftover Rotisserie Chicken Recipes
A fresh and vibrant Caesar salad with shredded rotisserie chicken and parmesan.

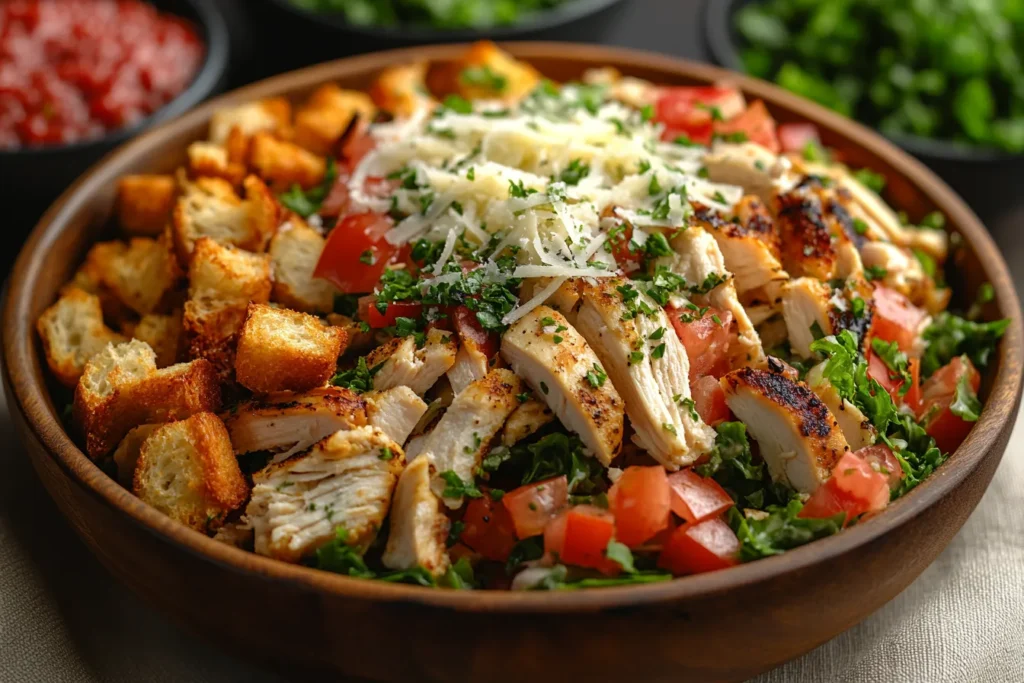
Refreshing Rotisserie Chicken Caesar Salad

For a quick yet satisfying meal, try a chicken Caesar salad. Toss romaine lettuce with Caesar dressing, shredded leftover rotisserie chicken, croutons, and a sprinkle of parmesan cheese. To make it extra hearty, add hard-boiled eggs or avocado slices. This salad is a perfect option for a healthy lunch or light dinner.

Mediterranean Chicken Wraps with Tzatziki Sauce

Bring Mediterranean flavors to your table with these easy wraps. Fill a soft pita or tortilla with leftover rotisserie chicken, cherry tomatoes, cucumber, red onion, and a generous dollop of tzatziki sauce. For an extra crunch, add a handful of spinach or romaine lettuce. These wraps are ideal for meals on the go!

Asian-Inspired Chicken Salad with Sesame Dressing

Switch up your salad game with an Asian-inspired dish. Combine shredded chicken with shredded cabbage, carrots, edamame, and green onions. Drizzle with sesame dressing and top with crunchy wontons or toasted sesame seeds. It’s light, flavorful, and packed with vibrant textures.

For more delicious salad ideas, check out this savory recipe collection.

Comfort Food Dishes with Leftover Rotisserie Chicken

Golden and flaky chicken pot pie fresh from the oven. Leftover Rotisserie Chicken Recipes
A warm and comforting chicken pot pie made with leftover rotisserie chicken.

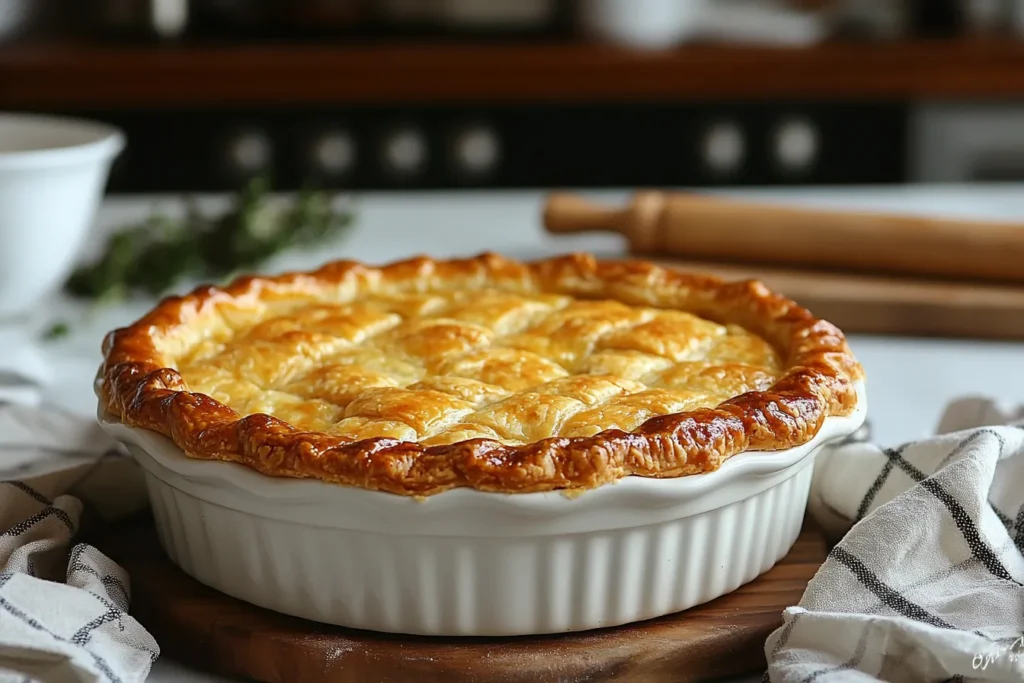
Classic Chicken Pot Pie

When it comes to comfort food, chicken pot pie is a winner. Use your leftover rotisserie chicken to create a creamy filling with peas, carrots, and potatoes in a savory gravy. Cover it with a flaky pie crust or puff pastry and bake until golden brown. This dish is the ultimate crowd-pleaser.

Cheesy Chicken and Broccoli Casserole

Turn leftover rotisserie chicken into a family-friendly casserole. Mix cooked broccoli, chicken, rice, and a cheesy sauce made from cream of mushroom soup and shredded cheddar. Bake until bubbly and top with breadcrumbs for extra crunch. It’s a one-dish meal that everyone will love!

Savory Rotisserie Chicken Enchiladas

Bring a little spice to the table with chicken enchiladas. Fill tortillas with leftover rotisserie chicken and cheese, roll them up, and place them in a baking dish. Cover with enchilada sauce and more cheese before baking. Serve with sour cream, guacamole, or salsa for a flavor-packed dinner.

For more comfort food recipes, explore the best cheesy chicken ideas.

Breakfast and Brunch Ideas with Rotisserie Chicken

Chicken and Spinach Breakfast Frittata

Start your morning right with a flavorful frittata. Whisk together eggs, milk, and a pinch of salt. Add leftover rotisserie chicken, sautéed spinach, and shredded cheese to the mix. Pour it into a greased skillet, cook on the stove until the edges set, then finish it in the oven. It’s a simple, protein-packed breakfast that’s ready in no time.

Rotisserie Chicken and Waffle Sandwiches

Bring brunch to the next level with chicken and waffle sandwiches. Layer leftover rotisserie chicken between two waffles and drizzle with maple syrup or honey mustard. For a savory twist, add a slice of cheese or crispy bacon. This dish balances sweet and savory for a crowd-pleasing brunch idea.

Chicken and Sweet Potato Hash

Looking for a hearty breakfast? Combine diced sweet potatoes, bell peppers, onions, and shredded chicken in a skillet. Season with smoked paprika and garlic powder, and sauté until the veggies are tender. Top with fried or poached eggs for a satisfying meal that’s as nutritious as it is delicious.

Using Leftover Rotisserie Chicken for Meal Prep

Prepping Lunch Bowls with Rotisserie Chicken

Meal prep just got easier! Use leftover rotisserie chicken as the star of your lunch bowls. Pair shredded chicken with quinoa or rice, roasted veggies, and a dollop of hummus or tzatziki sauce. Prepare several containers at once, and you’ll have healthy, grab-and-go meals for the week.

Batch-Freezing Chicken for Easy Weeknight Meals

Don’t let your chicken go to waste! Divide your leftover rotisserie chicken into portions and freeze them in airtight containers. These prepped portions are perfect for soups, stir-fries, or casseroles when you’re short on time. Plus, it ensures your chicken stays fresh for longer.

Tips for Efficient Rotisserie Chicken Meal Planning

Plan ahead with leftover rotisserie chicken recipes to save time and reduce stress. Keep a list of go-to recipes and stock your pantry with staples like pasta, rice, and canned goods. With these essentials on hand, you can whip up quick and delicious meals with minimal effort.

FAQs About Leftover Rotisserie Chicken

How Long is Leftover Rotisserie Chicken recipes Good in the Fridge?

Wondering how long your chicken stays fresh? Typically, leftover rotisserie chicken lasts 3 to 4 days in the fridge if stored in an airtight container. To extend its life, freeze it for up to 3 months. Always check for signs of spoilage, like an off smell or slimy texture.

How to Best Use a Rotisserie Chicken?

Rotisserie chicken is a versatile hero in the kitchen! Use it in salads, soups, sandwiches, and casseroles. It’s also a great protein addition to pasta dishes or meal prep bowls. This flexibility makes it the ideal base for leftover rotisserie chicken recipes.

Is Rotisserie Chicken Just as Healthy as Chicken Breast?

Yes, it can be! While rotisserie chicken is often seasoned, the meat itself provides lean protein, similar to chicken breast. However, keep an eye on sodium content, especially in the skin.

What Does Costco Do with Unsold Rotisserie Chicken?

Stores like Costco often repurpose unsold rotisserie chickens in ready-made meals like soups, salads, or pot pies. This reduces waste and gives shoppers more options for easy meals.

Tips for Maximizing Flavor and Reducing Waste

How to Properly Store Rotisserie Chicken for Freshness

Store leftover rotisserie chicken in an airtight container to maintain freshness. Refrigerate within two hours of cooking to prevent bacterial growth. If freezing, separate it into smaller portions to make reheating easier.

Creative Ways to Use Chicken Bones for Stock

Don’t throw away the bones! Simmer them with water, onions, carrots, celery, and spices to create a rich chicken stock. Use it as a base for soups, stews, or risotto. Homemade stock elevates any leftover rotisserie chicken recipe.

Spices and Add-ons to Enhance Leftover Rotisserie Chicken Recipes

Amp up the flavor of your leftovers with spices like paprika, cumin, or garlic powder. Fresh herbs like cilantro or parsley add brightness, while sauces like teriyaki, buffalo, or BBQ can transform your dishes entirely.

Quick Guide: How do you keep rice from expanding in soup?

Ever wondered How do you keep rice from expanding in soup? It’s a common problem, but the good news is, there are simple ways to avoid it! This guide will teach you how to keep rice from expanding in soup while ensuring it stays flavorful and firm. We’ll explore the science behind rice absorption, share practical tips for cooking rice in soup, and even tackle some common fixes for soupy mishaps. Whether you’re a seasoned cook or a kitchen newbie, these tips will help you nail your rice soup recipes every time.

Ladle of soup with perfectly cooked rice and vegetables ansewring the question : How do you keep rice from expanding in soup?

Why Rice Expands in Soup

The Science Behind Rice Absorption

Rice expands because it’s a natural sponge. Its starch-rich structure allows it to soak up liquid as it cooks. When rice sits in a hot, broth-filled environment, like soup, it continues to absorb the liquid long after it’s done cooking. This process, called osmosis, makes the rice plump and soft—but also prone to over-expanding.

The type of rice you use plays a big role here. Short-grain rice tends to release more starch, leading to a creamier, thicker soup. Long-grain varieties, like basmati or jasmine, absorb less liquid, which can help maintain the balance in your dish.

Factors That Cause Over-Absorption in Soup

Several factors can cause rice to over-expand in soup. First, leaving rice in the soup for extended periods is a surefire way to end up with mush. The cooking temperature also matters—higher heat speeds up absorption, which can quickly alter the soup’s texture.

Another culprit? The ratio of rice to broth. Using too much rice relative to your liquid will leave you with less broth and more of a stew-like consistency. Choosing the wrong rice, such as one with high starch content, exacerbates the problem.

Preventive Measures Before Cooking

Choosing the Right Type of Rice for Soup

The key to avoiding mushy soup lies in the rice you choose. Long-grain rice, like basmati or jasmine, absorbs less liquid and holds its shape better than short-grain varieties. These types of rice are perfect for soups that need a lighter texture. Brown rice is another great option; it’s chewy, nutty, and less prone to over-expanding.

Short-grain rice, on the other hand, tends to release more starch, creating a thicker consistency that might not work for all soups. If you’re aiming for a creamy texture, short-grain Arborio rice is ideal. However, if you want to keep the broth clear and balanced, stick to low-starch rice varieties.

Looking for a hearty soup with the perfect rice texture? Check out this Chopt Spicy Chicken Soup Recipe with Rice for inspiration!

Pre-Cooking or Par-Cooking Rice

One foolproof way to control rice expansion is to cook it separately. Pre-cooked or par-cooked rice can be added to your soup just before serving, ensuring it stays firm and doesn’t absorb too much broth. This method is particularly helpful if you’re making a large batch of soup to store for later.

Alternatively, rinse the rice thoroughly before cooking to remove excess starch. This simple step reduces the rice’s ability to thicken the soup while keeping the grains from clumping together.

Using Rice Alternatives for Soup Recipes

If managing rice seems tricky, consider substitutes like quinoa, barley, or wild rice. These grains maintain their texture better in soups and add a unique twist to traditional recipes. Cauliflower rice is another option for those looking to reduce carbs while keeping the soup hearty.

By planning ahead and choosing the right rice or alternatives, you can avoid the dreaded mush and enjoy soups with balanced textures.

Best Practices for Cooking Rice in Soup

Ingredients for cooking soup with rice on a wooden board

Timing Is Key: When to Add Rice to Soup

The simplest way to answer how do you keep rice from expanding in soup is by timing it perfectly. Always add uncooked rice toward the end of the cooking process, about 15–20 minutes before serving. This approach ensures the rice absorbs just enough liquid without turning your soup into a stew.

If you’re using pre-cooked rice, stir it in during the last 5 minutes of cooking to warm it up. This method works especially well for recipes that you plan to reheat, as the rice won’t soak up all the broth over time.

Separating Rice from Soup During Storage

To maintain a soup’s texture, store the rice and soup separately. This strategy prevents the rice from absorbing extra liquid and keeps both elements tasting fresh. When you’re ready to serve, simply combine them and heat through.

If you’re pressed for time, portion out the rice in small bags or containers to make reheating easy. This step not only preserves the soup’s consistency but also saves time when preparing leftovers.

Balancing Broth and Rice Ratios

Getting the rice-to-broth ratio right can make or break a soup. As a general rule, use less rice than you think you’ll need—about 1/4 cup of uncooked rice per 4 cups of broth is a good starting point. This ratio leaves enough liquid for the soup to remain brothy, even as the rice cooks.

For a creamier soup, slightly increase the rice quantity, but keep an eye on its texture as it simmers. Adding extra broth midway through cooking can help balance things out if the rice starts to absorb too much liquid.

Common Fixes for Over-Expanded Rice

How to Fix Soupy Rice Issues

When rice expands too much in soup, it can turn your dish into a mushy mess. Don’t worry—there are quick fixes to save it! One easy solution is to dilute the soup with more broth or water. Adding a cup of warm liquid restores the balance and thins the overly thickened consistency.

If the rice has absorbed too much liquid, try scooping some out. Replace it with freshly cooked or par-cooked rice to maintain a better texture. Another option is to puree a portion of the soup (without the rice) and stir it back in. This trick creates a smooth, creamy texture without additional starch from the rice.

For more delicious soups and recipes, check out the Chopt Spicy Chicken Soup Recipe with Rice for a flavorful twist on a classic dish.

Using Thickening Agents to Restore Texture

If your soup feels too watery after adding more broth, consider using thickening agents like cornstarch or a roux. A slurry made with equal parts cornstarch and water works wonders—just stir it in gradually while simmering the soup. Flour-based roux adds a rich flavor and is especially effective for cream-based soups.

For a natural thickener, mash or puree cooked vegetables (like potatoes or carrots) from the soup itself. This method improves consistency without overwhelming the flavors.

Creative Uses for Leftover Soup with Expanded Rice

If the rice in your soup has gone too far, turn the situation into an opportunity! Transform your soup into a casserole by adding cheese, breadcrumbs, and baking it until golden brown. Alternatively, blend the soup into a hearty rice porridge or risotto-style dish.

Leftovers can also serve as a base for stuffed peppers or a filling for wraps and burritos. By getting creative, you’ll never have to throw out over-expanded rice soup again.

Variations and Tips for Perfect Rice Soups

Cozy bowl of soup with perfectly cooked rice and fresh herbs

Adding Flavors to Rice While Preventing Overcooking

One way to elevate your soup is by infusing the rice with flavor before it’s added to the broth. Cook the rice in a mixture of water and chicken or vegetable stock. This method enhances its taste without relying solely on the soup. For a bold twist, add aromatic spices like turmeric, cumin, or bay leaves to the cooking liquid.

To ensure the rice doesn’t overcook, always monitor the timing. If you’re wondering how do you keep rice from expanding in soup, par-cooking the rice and finishing it in the soup allows the grains to absorb just the right amount of liquid without becoming mushy.

Rice soup is versatile and works beautifully with various cuisines. From Mexican-inspired caldo de pollo to Italian minestra, these dishes highlight the diversity of rice-based soups. Asian recipes like Thai coconut rice soup or congee also bring exciting flavors to the table.

For a hearty option, try a chicken and rice soup with fresh herbs, or experiment with vegetarian versions featuring lentils and wild rice. These recipes let you explore creative ways to make rice a star ingredient without overpowering the soup’s consistency.

For more recipe inspiration, check out the Chopt Spicy Chicken Soup Recipe with Rice, a dish packed with bold flavors and perfect rice textures.

Conclusion and Final Tips

Recap of Key Points

Keeping rice from expanding in soup can feel like a challenge, but with the right techniques, it’s easy to master. We’ve explored ways to choose the best rice, manage cooking times, and adjust broth-to-rice ratios. The key takeaway? Pay attention to how and when you add rice to your soup, and don’t forget to experiment with variations that suit your taste.

By using these tips, you can confidently answer how do you keep rice from expanding in soup and create perfectly textured dishes every time.

Encouragement to Experiment and Customize

Rice soups are wonderfully flexible, so don’t hesitate to customize them. Try swapping rice for other grains like quinoa or barley, or play around with flavors by adding fresh herbs and spices. Cooking is all about making a recipe your own, so explore, tweak, and enjoy the process.

When you’re ready to serve, remember that separating rice for storage and reheating soup thoughtfully are game-changing steps. These simple practices ensure that your soup remains delicious from the first bowl to the last.

Benefits of Properly Managing Rice in Soup

Improved Texture and Flavor Balance

Understanding how do you keep rice from expanding in soup is not just about avoiding mush—it’s about achieving the perfect harmony of texture and flavor. When rice absorbs too much liquid, it can overshadow the other ingredients, making the soup overly thick and one-dimensional. By controlling rice expansion, you maintain the broth’s integrity, ensuring that every bite is balanced and delicious.

Proper rice management also enhances the eating experience. Firm, well-cooked grains add a satisfying bite, complementing tender vegetables and savory broth. Whether you’re making a light soup or a hearty stew, keeping rice in check ensures the dish remains enjoyable and visually appealing.

Reducing Food Waste and Maximizing Leftovers

A poorly managed soup can leave you with leftovers that are unappetizing the next day. By controlling rice expansion, you can store your soup without worrying about it becoming too thick. Separating rice before refrigerating or freezing the soup is a great way to prevent waste and keep your meals tasting fresh.

By applying these techniques, you’ll save time and money while enjoying soups that taste just as good on day three as they did on day one. For a great example, try the Chopt Spicy Chicken Soup Recipe with Rice for a dish that balances rice and broth beautifully.

FAQs About Managing Rice in Soup

How Do You Keep Rice from Expanding in Soup?

The most effective way to keep rice from expanding in soup is to cook it separately. This method allows you to add the rice right before serving, maintaining its texture and preventing it from absorbing too much broth. Alternatively, you can par-cook the rice and let it finish cooking in the soup for a more integrated flavor.

Another trick is to use less rice than you think you’ll need. A small amount can go a long way, especially in brothy soups.

Can You Cook Rice Directly in the Soup?

Yes, you can cook rice directly in soup, but timing is crucial. Add the rice in the final 15–20 minutes of cooking to prevent overcooking. Be mindful of the broth-to-rice ratio and stir occasionally to ensure even cooking.

If you want to infuse your rice with extra flavor, cooking it in the soup can be a great option. However, remember that this method might result in thicker soup over time if stored.

What’s the Best Rice to Use in Soups?

Low-starch varieties like jasmine and basmati are ideal for soups because they absorb less liquid and hold their shape well. Wild rice and brown rice are excellent alternatives for a chewy texture and nutty flavor. Avoid short-grain rice unless you’re making a creamy dish like risotto or congee.

Can You Freeze Soup with Rice?

Freezing soup with rice is possible, but for the best results, store the rice and soup separately. When reheating, combine the two for a fresh taste and texture. If the rice was cooked directly in the soup, expect a thicker consistency after thawing. You can thin it out with extra broth or water.

Cheesy Chicken Sloppy Joe Recipes: How to Make the Best at Home

Sloppy Joes are a timeless classic, loved for their messy deliciousness and comforting flavor. But what if you could elevate this dish with a twist? Enter cheesy chicken sloppy joe recipes. the ultimate fusion of gooey cheese, tender ground chicken, and bold seasonings that make this a meal your family will beg for over and over again. Whether you’re looking for an easy weeknight dinner or a party favorite, this blog will walk you through everything you need to know about making the best cheesy chicken sloppy joes at home.

cheesy chicken sloppy joe recipes

Let’s dive into the ingredients, step-by-step instructions, variations, and tips that will make your dish unforgettable.

What Are Cheesy Chicken Sloppy Joe Recipes?

Sloppy Joes are an American favorite, traditionally made with ground beef in a tangy tomato sauce and served on a soft bun. Cheesy chicken sloppy joes offer a lighter yet equally indulgent twist, swapping beef for ground chicken and adding gooey, melted cheese for an extra layer of comfort.

Why Chicken Over Beef?

  • Healthier Alternative: Chicken is leaner and lower in fat than beef, making it a guilt-free choice.
  • Versatile Flavor: Chicken acts as a blank canvas, soaking up flavors like BBQ sauce, spices, and cheese effortlessly.

Why Add Cheese?

The melted cheese not only adds creaminess but also binds the filling together, ensuring every bite is packed with savory goodness.

Perfect for Any Occasion

Whether it’s a cozy family dinner, a crowd-pleaser for game day, or a quick meal for busy weeknights, cheesy chicken sloppy joes fit the bill perfectly.

Ingredients You’ll Need for the Perfect Cheesy Chicken Sloppy Joe Recipes

Here’s what you’ll need to create the best Cheesy Chicken Sloppy Joe Recipes from scratch:

Main Ingredients

  • Ground chicken: Lean and flavorful, this is the star of the dish.
  • Cheese: Shredded cheddar, mozzarella, or pepper jack for that irresistible melt.
  • Buns: Choose soft, sturdy buns like brioche or potato buns that hold up to the saucy filling.
  • Tomato sauce or ketchup: For a classic tangy base.
  • Worcestershire sauce: Adds depth and a savory kick.
  • Garlic and onion: Essential for building flavor.

Optional Add-Ins

  • Bell peppers or diced jalapeños: For a touch of sweetness or spice.
  • BBQ sauce: Add smokiness and tang for a BBQ twist.
  • Fresh herbs: A sprinkle of parsley or cilantro can brighten the dish.

Choosing the Best Cheese

For maximum flavor, opt for cheeses that melt well:

  • Cheddar: Bold and sharp.
  • Mozzarella: Mild and stretchy.
  • Pepper jack: Adds a hint of spice.

Enhance the dish with:

  • Pickles or jalapeños for crunch.
  • Crispy fried onions for texture.
  • Toasted buns to keep the sandwich from getting soggy.

Step-by-Step Instructions to Make Cheesy Chicken Sloppy Joe Recipes

Now that you have your ingredients ready, here’s a foolproof guide to making cheesy chicken sloppy joes:

Step 1: Prepare the Ingredients

Start by dicing onions, garlic, and any optional vegetables you’d like to include in your dish.
Next, shred your cheese of choice and set it aside for later use.
To ensure your buns stay firm, lightly toast them before assembling the sloppy joes.

Step 2: Cook the Chicken Filling

In a large skillet, heat a tablespoon of oil over medium heat.
Sauté the onions and garlic until their aroma fills the kitchen.
Break up the ground chicken with a spatula as you cook it, letting it brown evenly for 5-7 minutes.

Step 3: Add Seasonings and Sauce

Mix in ketchup, Worcestershire sauce, and your preferred spices like paprika or chili powder to boost the flavor.
Let the mixture simmer for about 5 minutes so the flavors can meld together.
If you’re using vegetables, add them now and cook until they soften.

Step 4: Melt the Cheese

Turn the heat to low and sprinkle shredded cheese over the chicken mixture.
Cover the skillet briefly, allowing the cheese to melt perfectly in 2-3 minutes.
Stir everything together to create a creamy, cheesy filling that’s irresistibly delicious.

Step 5: Assemble Your Sloppy Joes

Place generous scoops of the cheesy chicken mixture onto each toasted bun.
For added flavor and texture, consider toppings like pickles, jalapeños, or crispy fried onions.
Serve immediately and savor the savory, cheesy goodness in every bite.

If you’re looking for a delicious twist on chicken recipes, don’t miss our Cheesy Garlic Chicken Wraps a perfect blend of flavor and convenience!

Variations of Cheesy Chicken Sloppy Joe Recipes to Try

Sloppy joes are incredibly versatile. Here are some mouthwatering variations to experiment with:

BBQ Cheesy Chicken Sloppy Joes

  • Replace tomato sauce with your favorite BBQ sauce for a smoky, tangy flavor.
  • Use smoked cheddar or gouda for a deeper cheese profile.

Spicy Jalapeño Cheesy Sloppy Joes

  • Add diced jalapeños and use pepper jack cheese for a spicy kick.
  • Sprinkle with red chili flakes for extra heat.

Crockpot Cheesy Chicken Sloppy Joes

  • Combine all ingredients in a slow cooker and cook on low for 4-6 hours.
  • Add the cheese 30 minutes before serving for a hassle-free dinner.

Vegetable-Loaded Sloppy Joes

  • Incorporate shredded carrots, zucchini, or spinach into the filling for a nutrient boost.
  • Top with fresh avocado slices for a creamy finish.

Tips, Tricks, and FAQs for the Best Cheesy Chicken Sloppy Joes

Tips for Perfecting the Recipe

  • Prevent Soggy Buns: Toast the buns and serve immediately.
  • Scale the Recipe: Double the ingredients for meal prepping or feeding a crowd.
  • Adjust the Spice: Add hot sauce or omit chili powder based on your heat preference.

Storing and Reheating Leftovers

  • Store leftover filling in an airtight container in the refrigerator for up to 3 days.
  • Reheat in a skillet over low heat and add a splash of water if needed to restore moisture.

Common Mistakes to Avoid

  • Overcooking Chicken: Keep it tender by not overcooking.
  • Using the Wrong Cheese: Avoid cheeses that don’t melt well, like feta or parmesan.
  • Skipping the Toasted Buns: They’re key to a balanced texture.

FAQs

  1. Can I use shredded chicken instead of ground chicken?
    Yes, shredded chicken works beautifully, especially for crockpot versions.
  2. Which cheese melts best for sloppy joes?
    Cheddar, mozzarella, and pepper jack are top choices.
  3. Are these recipes kid-friendly?
    Absolutely! Adjust spice levels to suit your family’s tastes.
  4. Can I make them gluten-free?
    Use gluten-free buns or lettuce wraps as a substitute.
  5. What sides pair well with sloppy joes?
    Serve with coleslaw, sweet potato fries, or a fresh salad.

Conclusion

Cheesy Chicken Sloppy Joe Recipes are the ultimate combination of comfort, flavor, and simplicity. With this guide, you’ll master the art of creating a dish that’s perfect for any occasion, from busy weeknights to fun family dinners.

Spinalis Steak: The Ultimate Guide to the Ribeye Cap

When it comes to premium beef cuts, one name reigns supreme among steak aficionados—the Spinalis Steak​, also known as the ribeye cap. Praised for its unparalleled tenderness, rich marbling, and intense flavor, this steak is often referred to as the crown jewel of beef. But what exactly is it? How does it compare to other cuts, and most importantly, how can you cook it to perfection?

grilled spinalis steak

In this ultimate guide, we’ll explore everything you need to know about the Spinalis Steak​, from its origins and unique qualities to the best cooking techniques. By the end, you’ll be ready to impress your friends and family with this exceptional cut of beef.

What Is a Spinalis Steak?

Anatomy of the Ribeye Cap (Spinalis Dorsi)

The spinalis steak comes from the ribeye primal cut, specifically the spinalis dorsi muscle, which lies on the outer edge of the ribeye. This muscle, often trimmed from the main ribeye during butchering, is celebrated for its incredible tenderness and rich, beefy flavor. Its marbled fat content melts into the meat during cooking, creating a buttery texture that’s hard to rival.

Why It’s Called the Ribeye Cap

The name “ribeye cap” perfectly describes its position: it caps the top of the ribeye steak. Unlike the center portion of the ribeye, which is firmer and leaner, the cap is incredibly tender and marbled, making it the most prized part of the cut.

How It Compares to Other Premium Cuts

The ribeye cap is often compared to other high-end cuts such as filet mignon, ribeye, and New York strip. Here’s how it stacks up:

  • Filet Mignon: More tender but lacks the bold flavor of the ribeye cap.
  • Ribeye: Rich in flavor, but the cap offers a softer texture.
  • New York Strip: Leaner and firmer, with a milder taste compared to the ribeye cap.

What Makes Spinalis Steak​ Special?

Tenderness and Marbling

The spinalis steak is among the most tender cuts of beef, second only to filet mignon. Its natural marbling contributes to its juiciness and deep flavor, making it a cut that doesn’t require heavy seasoning or complicated cooking techniques.

Unique Flavor Profile

The ribeye cap delivers an intense beefy flavor, thanks to its fat content and marbling. When cooked, the fat melts into the meat, enhancing its natural taste and giving it a melt-in-your-mouth quality.

Rarity of the Cut

Unlike other cuts, the spinalis steak is rare. Only a small portion of the cow yields this delicacy, making it a prized find for steak enthusiasts. Its exclusivity also adds to its appeal, making it a luxurious choice for special occasions.

How to Cook Spinalis Steak​ to Perfection

Best Cooking Methods

The ribeye cap’s tenderness and marbling make it incredibly versatile. Here are the best ways to cook it:

  • Grilling: The high heat of the grill brings out its robust flavor and creates a beautiful crust.
  • Pan-Searing: A cast-iron skillet is perfect for locking in flavor and achieving an even sear.
  • Sous-Vide: Ideal for precision cooking, this method ensures the steak is perfectly tender before a quick sear for added texture.
ribeye cap cooking process

Step-by-Step Directions: Grilling Spinalis Steak​

Follow these steps to grill your spinalis steak to perfection:

  1. Prepare the Steak:
    • Take the steak out of the fridge 30-40 minutes before cooking to bring it to room temperature.
    • Pat the steak dry with paper towels to remove excess moisture.
    • Season generously with kosher salt, freshly ground black pepper, and optional spices like garlic powder or smoked paprika.
  2. Preheat the Grill:
    • Heat your grill to high (450°F to 500°F).
    • If using charcoal, ensure the coals are evenly distributed and glowing red.
  3. Sear the Steak:
    • Place the steak directly on the hottest part of the grill.
    • Sear for 2-3 minutes per side, flipping only once, to create a golden-brown crust.
  4. Move to Indirect Heat:
    • Transfer the steak to a cooler part of the grill to finish cooking.
    • Close the lid and monitor the internal temperature with a meat thermometer:
      • Rare: 120°F
      • Medium-Rare: 125°F
      • Medium: 135°F
  5. Rest the Steak:
    • Remove the steak from the grill and let it rest for 5-10 minutes.
    • Resting allows the juices to redistribute, ensuring every bite is flavorful.
  6. Slice and Serve:
    • Slice the steak against the grain for maximum tenderness.
    • Serve with your favorite sides and sauces.

Pairing Spinalis Steak​ with Sides and Sauces

For a complete meal, pair your ribeye cap steak with:

  • Sides: Roasted vegetables, garlic mashed potatoes, or a crisp Caesar salad.
  • Sauces: Herb butter, chimichurri, or a tangy balsamic reduction.

Where to Buy Spinalis Steak and What to Look For

Choosing the Best Cut

When shopping for ribeye cap steaks, look for:

  • Bright Red Color: Indicates freshness.
  • Even Marbling: Ensures consistent flavor and tenderness.
  • Vacuum-Sealed Packaging: Helps preserve quality and prevents freezer burn.

Online vs. Local Butchers

Both online and local sources can provide high-quality spinalis steaks.

  • Local Butchers: Offer fresher cuts and expert recommendations.
  • Online Retailers: Provide access to specialty cuts like grass-fed or dry-aged ribeye cap.

Questions to Ask Your Butcher

Don’t hesitate to ask your butcher:

  • “Is this ribeye cap USDA Prime or Choice?”
  • “How fresh is this cut?”
  • “What’s the best cooking method for this steak?”
 raw spinalis steak

Ribeye Steak vs Ribeye Cap

When it comes to flavor, both cuts are incredibly rich. However, the ribeye cap is more tender due to its concentrated marbling, which melts during cooking. In terms of texture, the ribeye tends to be firmer, while the cap delivers a buttery, melt-in-your-mouth experience that’s hard to beat.

Ribeye Cap vs Filet Mignon

Filet mignon is renowned for its tenderness, often considered the most tender cut of beef. Despite this, the ribeye cap holds its own by offering a bolder, beefier flavor. While filet mignon is prized for its soft texture, the ribeye cap provides an unrivaled combination of tenderness and robust taste.

Spinalis Steak vs Baseball Steak

When comparing the spinalis steak and the baseball steak, both are exceptional cuts with unique characteristics that cater to different preferences. Here’s how they stack up:

Flavor

The spinalis steak offers a bold, beefy flavor thanks to its rich marbling, which melts during cooking and enhances its natural taste. On the other hand, the baseball steak, cut from the center of the top sirloin, delivers a slightly milder flavor. While still robust, it lacks the concentrated fat content of the ribeye cap.

Texture

Spinalis steak is known for its buttery, melt-in-your-mouth texture due to its high fat content and delicate muscle fibers. In contrast, the baseball steak is leaner and firmer, offering a satisfying chew. It’s a great choice for those who prefer less fat in their steak.

Cooking Methods

  • Spinalis Steak: Best suited for high-heat methods like grilling or pan-searing to achieve a crispy crust while preserving its tender interior.
  • Baseball Steak: Its uniform thickness makes it ideal for grilling, pan-searing, or even roasting. It holds up well to marinades, making it a versatile option for various recipes.

Availability

The spinalis steak is a rarer, more premium cut, often sourced from specialty butchers or online retailers. Baseball steak, being a portion of the sirloin, is more commonly found in grocery stores and butcher shops.

Ribeye Cap vs New York Strip

Compared to the New York strip, the ribeye cap offers a completely different texture. The strip steak is firmer and leaner, making it ideal for those who prefer less fat. On the other hand, the ribeye cap is indulgent, with a melt-in-your-mouth quality that steak lovers crave.

Conclusion

The spinalis steak, or ribeye cap, is the epitome of steak perfection. With its tender texture, intense flavor, and rarity, it’s a must-try for anyone passionate about high-quality beef. Whether you’re grilling, pan-searing, or exploring sous-vide techniques, this cut delivers unmatched results.