how long to bake salmon at 350

Ever tried baking salmon and ended up with a dry, flavorless fillet? It’s frustrating, isn’t it? The secret to success lies in knowing exactly how long to bake salmon at 350. This sweet spot ensures your salmon turns out tender, moist, and absolutely delicious. In this blog, we’ll dive into everything you need to know from timing based on fillet thickness to foolproof tips for keeping your salmon juicy. Plus, we’ll share easy seasoning ideas that’ll have you craving seconds. Whether you’re a beginner or a seasoned home chef, this guide is your ultimate ticket to baked salmon perfection. So, let’s get started—because great meals begin with just a little know-how!

How Long to Bake Salmon at 350: Mastering the Basics

Factors That Affect Baking Time

A chef placing a seasoned salmon fillet in a preheated oven.
A salmon fillet going into a preheated oven for even cooking.

The question how long to bake salmon at 350 depends on a few key factors. First, the thickness of the fillet plays a crucial role. Thinner fillets (about 1 inch thick) bake in 12-15 minutes, while thicker cuts (over 1 inch) may require 15-20 minutes. Additionally, whether your salmon is fresh or frozen matters. Frozen salmon typically takes a few minutes longer unless it’s thawed beforehand.

Another factor is how you prepare the fish. Wrapping the salmon in foil or parchment paper not only locks in moisture but can also slightly reduce baking time. On the other hand, unwrapped salmon bakes evenly but may dry out faster. By understanding these factors, you can adjust your timing for perfect results every time.

To achieve perfectly baked salmon, it’s essential to match the baking time to the thickness of your fillet. Here’s a quick guide:

  • Thin fillets (1 inch or less): Bake for 12-15 minutes at 350°F.
  • Thick fillets (over 1 inch): Bake for 15-20 minutes at the same temperature.

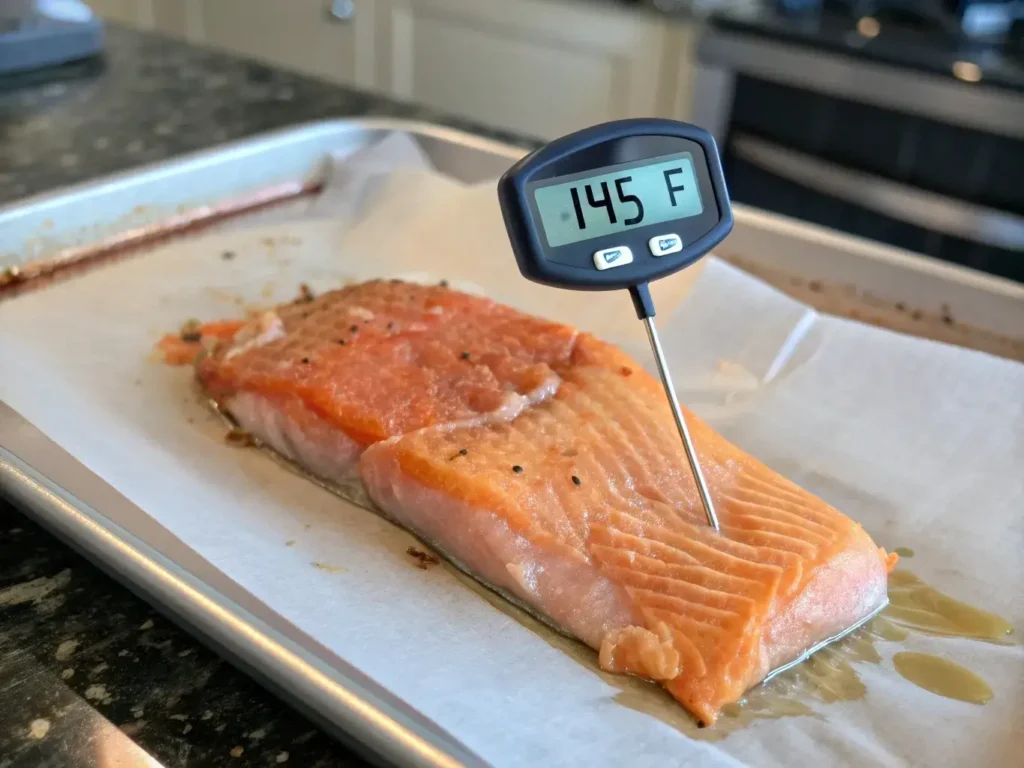
For best results, check the internal temperature at the thickest part of the fillet. When the salmon reaches 145°F (63°C), it’s ready to enjoy. If you don’t have a thermometer, look for the flesh to flake easily with a fork—a sure sign it’s done.

Need more guidance? This detailed salmon baking guide offers additional tips for achieving a flawless bake.

The Benefits of Using Foil or Parchment Paper

Wrapping your salmon in foil or parchment paper can make a world of difference. This method traps steam as the fish cooks, which keeps it moist and tender. Additionally, using foil eliminates the need for oiling the baking sheet and makes cleanup effortless.

Foil-baked salmon also cooks more evenly, especially when paired with seasoning or marinade. Simply wrap the fish with lemon slices, garlic, and your favorite herbs for a flavorful, no-fuss meal. While foil is excellent for retaining moisture, leaving the salmon uncovered in the oven can create a slightly crispier texture on top. Therefore, choose your method based on your preference for tenderness or crispiness.

How to Check for Doneness

Knowing how long to bake salmon at 350 is important, but ensuring it’s cooked perfectly is just as crucial. To avoid overcooking, use a digital meat thermometer to check the internal temperature. When it hits 145°F, the salmon is safe to eat and beautifully flaky.

If you don’t have a thermometer, rely on visual and textural cues. The salmon should appear opaque throughout and separate easily into flakes with a fork. Additionally, the edges may have a slightly golden hue, while the center remains moist and vibrant in color. Keeping an eye on these signs ensures your salmon isn’t undercooked or dry.

Tips for Keeping Salmon Juicy While Baking at 350°F

Choosing High-Quality, Fresh Salmon

When baking salmon, freshness is crucial. High-quality salmon not only enhances the flavor but also helps keep it juicy. Look for salmon fillets that are bright in color, firm to the touch, and have no fishy odor. Wild-caught salmon, such as sockeye or coho, is a great choice for its rich flavor. If fresh salmon isn’t available, frozen fillets can be just as delicious just ensure they’re thawed completely before cooking to achieve even results.

Marinating to Lock in Moisture and Flavor

Salmon fillets marinating in olive oil, lemon, garlic, and herbs.
Salmon fillets soaking in a flavorful marinade of olive oil, lemon, and herbs.

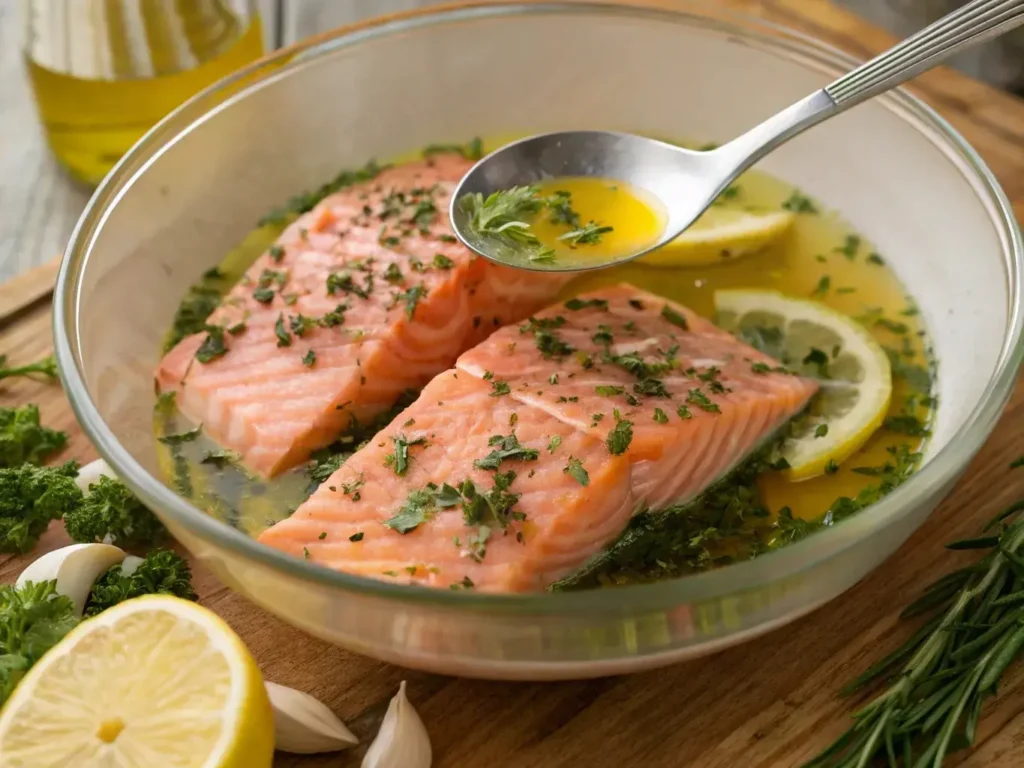
A good marinade can take your baked salmon to the next level. A mix of olive oil, lemon juice, garlic, and herbs adds flavor while keeping the fish tender. Coat the fillets and let them sit for at least 30 minutes before baking. Marinades not only enhance taste but also help retain moisture as the salmon cooks. For more inspiration, check out this guide to marinades that pairs well with seafood.

Using the Right Baking Method

The baking method you choose can make all the difference in maintaining moisture. Wrapping the salmon in foil or parchment paper creates a steam pocket, locking in juices as it bakes. On the other hand, baking without a cover results in a slightly crispier texture but requires careful monitoring to avoid drying out. Whichever method you prefer, always preheat the oven to ensure even cooking.

Avoiding Common Mistakes

To keep your salmon juicy, avoid overcooking. Since the answer to how long to bake salmon at 350 depends on the thickness, use a meat thermometer to check the internal temperature. Aim for 145°F at the thickest part. Another mistake to avoid is skipping the resting step—letting the salmon rest for a few minutes before serving allows the juices to redistribute, enhancing its tenderness.

Enhancing the Flavor of Salmon When Baking at 350°F

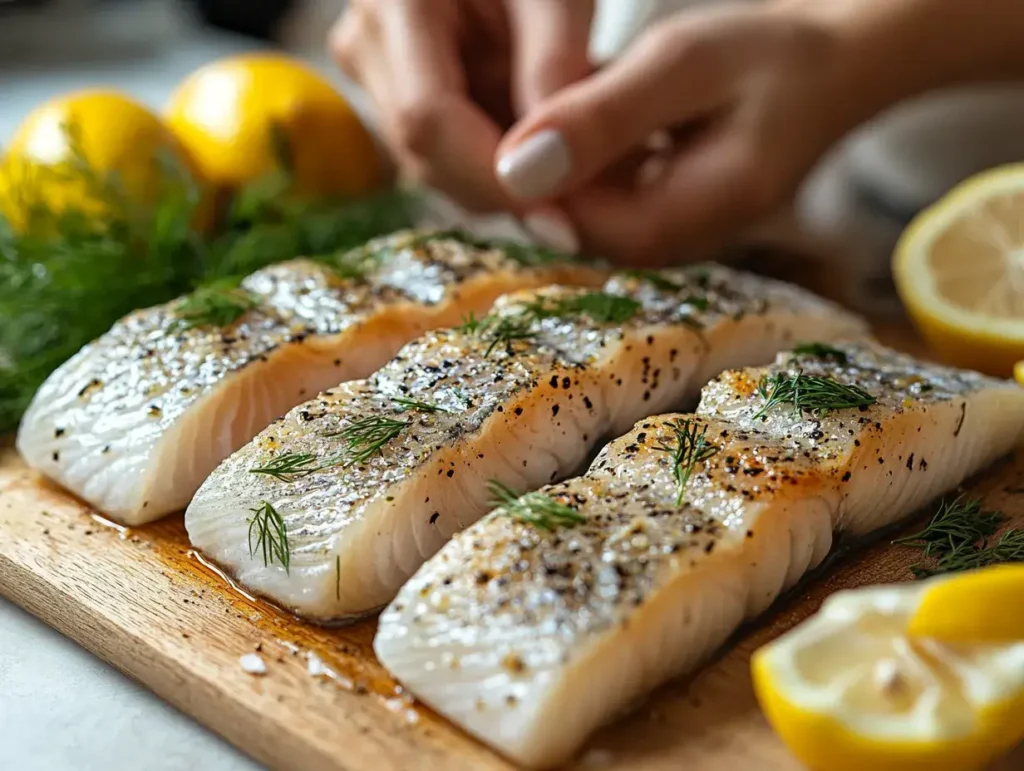
Using Simple Seasonings to Elevate Taste

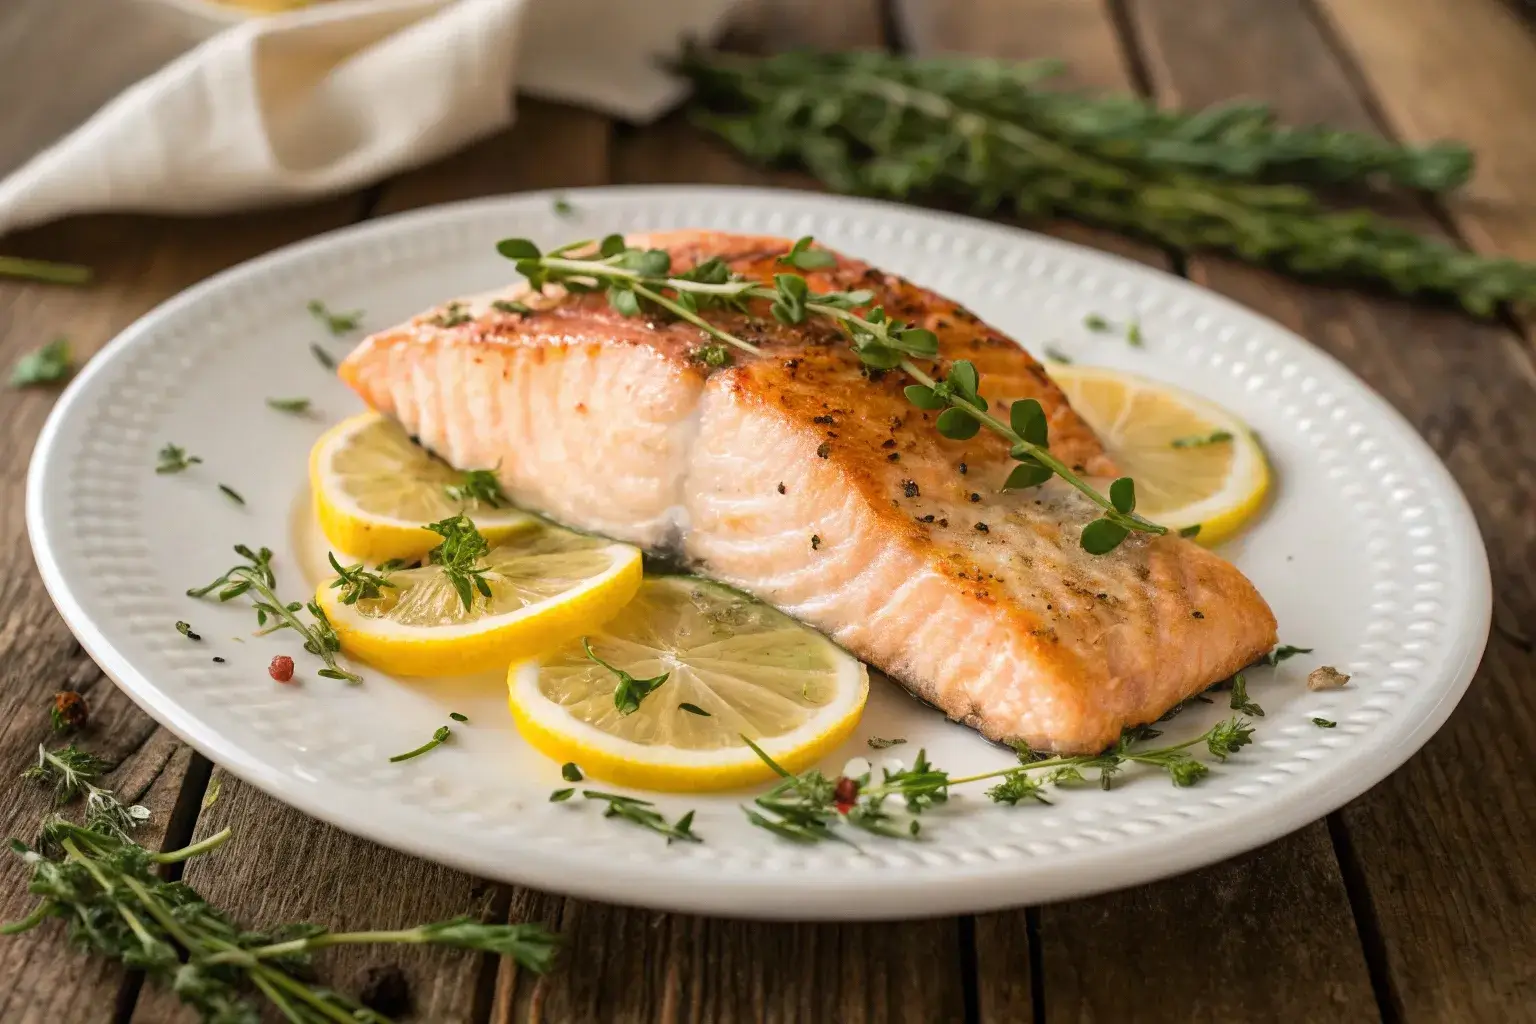
Sometimes, simplicity is key when baking salmon. A sprinkle of salt, freshly cracked black pepper, and a drizzle of olive oil can enhance the fish’s natural flavor. If you’re wondering how long to bake salmon at 350 with minimal seasoning, rest assured the time doesn’t change. Just ensure you evenly coat the fillets to lock in moisture and flavor. Add a squeeze of lemon juice before serving for a refreshing finish.

For those who enjoy experimenting, garlic powder, paprika, and dill are excellent additions to bring out the salmon’s rich taste. These pantry staples are both flavorful and budget-friendly, making them ideal for quick, everyday meals.

Experimenting with Marinades and Glazes

To take your baked salmon up a notch, consider marinades or glazes. For example, a honey and soy glaze combines sweetness and umami, creating a caramelized finish as the salmon bakes. The baking time remains the same—how long to bake salmon at 350 depends on the thickness of the fish, not the seasoning method. Brush the glaze onto the fillets about halfway through baking for best results.

Want something zesty? A marinade of lime juice, olive oil, minced garlic, and chili flakes adds a spicy twist to your salmon. Let the fillets soak for 30 minutes before baking to maximize the flavor infusion.

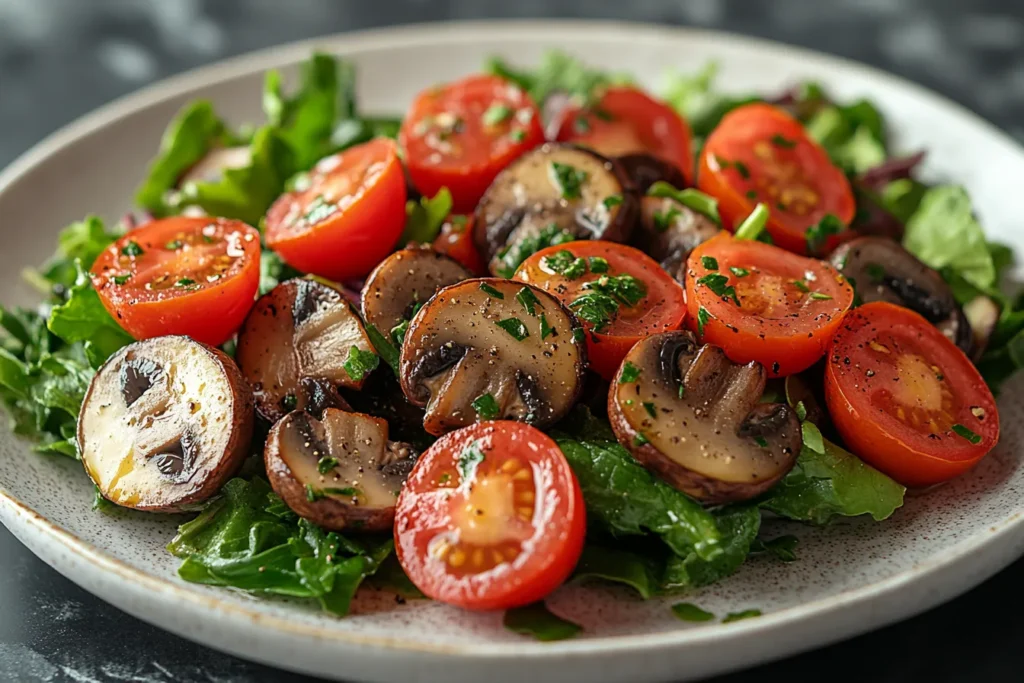
Adding Vegetables and Herbs for a Full Meal

A one-pan salmon dinner with roasted vegetables.
A complete salmon dinner baked with roasted vegetables for a healthy, easy meal.

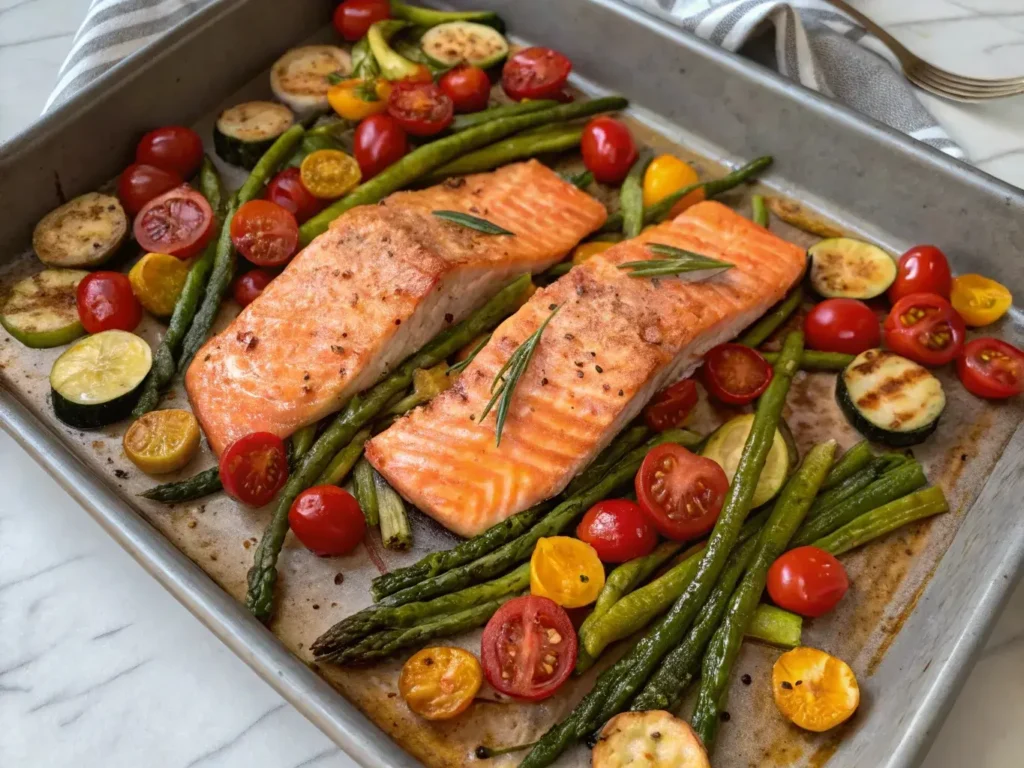
Pairing salmon with vegetables and herbs on the same baking sheet creates a convenient, one-pan meal. Vegetables like asparagus, zucchini, or cherry tomatoes cook beautifully alongside salmon. However, it’s important to cut the vegetables into smaller pieces so they cook evenly within the same timeframe as the fish. Adding rosemary or thyme sprigs enhances the aroma while complementing the salmon’s taste.

If you’re curious about how long to bake salmon at 350 when paired with veggies, stick to the standard 15-20 minutes for thicker fillets. The vegetables will roast to tender perfection by the time your salmon is done.

Incorporating Global Flavors into Your Baked Salmon

Baking salmon at 350°F doesn’t mean sticking to traditional seasonings. For a Mediterranean flair, season your fillets with oregano, lemon zest, and a drizzle of olive oil. Alternatively, an Asian-inspired soy-ginger marinade can deliver bold flavors with minimal effort.

Curious about unique spice blends? Try using Cajun seasoning for a smoky kick or a mix of cumin and turmeric for an earthy, aromatic profile. The baking time remains consistent, so how long to bake salmon at 350 won’t change even as you explore new culinary horizons.

Pro Tip: For more creative ways to cook with fish, check out our shrimp garlic recipe without butter for a delightful seafood variation.

Avoiding Common Mistakes When Baking Salmon at 350°F

A meat thermometer checking the temperature of baked salmon.
A meat thermometer reading 145°F, ensuring the salmon is perfectly cooked.

Overcooking the Salmon

One of the most common errors when baking salmon is overcooking it. This mistake can turn a moist, flavorful dish into a dry and tough disappointment. To prevent this, always stick to the recommended baking times. If you’re wondering how long to bake salmon at 350, remember that thinner fillets (1 inch or less) need only 12-15 minutes, while thicker cuts require 15-20 minutes.

Using a digital thermometer helps you monitor the internal temperature, which should reach 145°F at the thickest part of the fillet. Checking the salmon a few minutes before the estimated cooking time ensures you don’t accidentally overdo it.

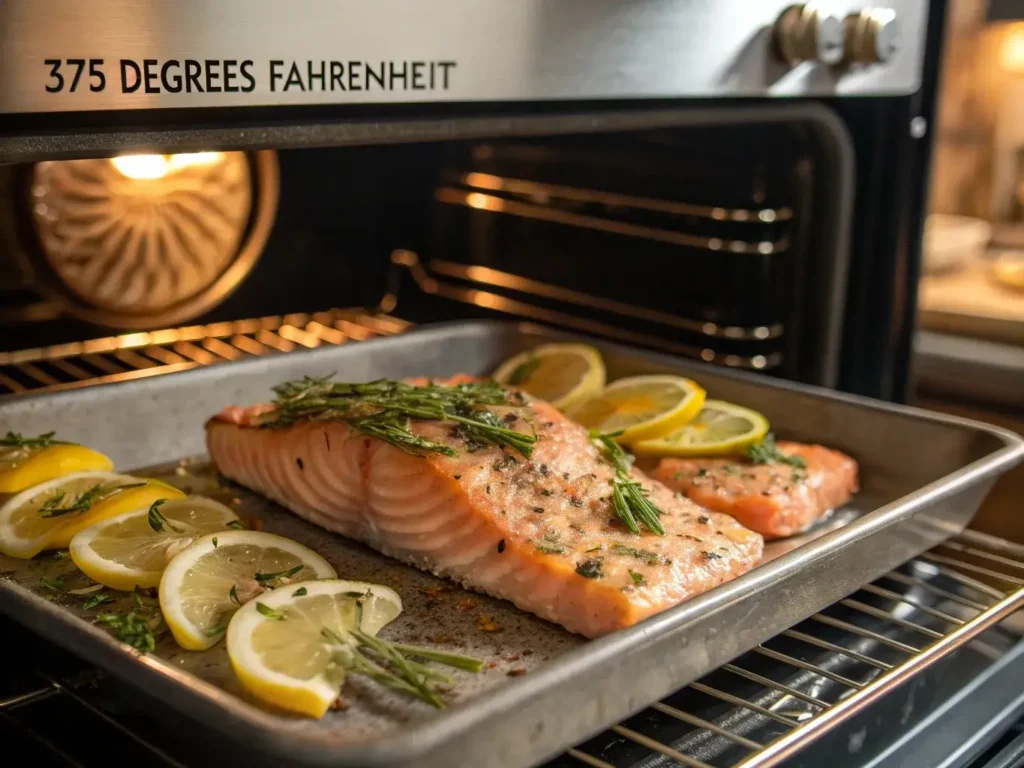
Forgetting to Preheat the Oven

Skipping the preheating step is another mistake that can affect your salmon’s texture. Baking salmon in a cold oven leads to uneven cooking, with some areas potentially overcooked while others remain underdone. Always preheat your oven to 350°F before placing the salmon inside. This ensures consistent heat and reliable results every time.

In addition, using a preheated oven reduces the risk of the salmon drying out since it minimizes the time the fish spends in the oven.

Neglecting to Rest the Salmon After Baking

Resting salmon after it’s baked might seem unnecessary, but it’s a critical step for retaining juices. When salmon is pulled straight out of the oven, the juices are still in motion. Allowing the fish to rest for 3-5 minutes helps redistribute these juices, resulting in a more tender and flavorful bite.

This step is especially important if you’ve seasoned or marinated the salmon, as the resting period helps those flavors settle into the fish.

Using the Wrong Baking Dish

The type of dish you use can also impact how your salmon turns out. Baking salmon on a flat, rimmed baking sheet allows for even air circulation, ensuring uniform cooking. On the other hand, a deep dish can trap steam, which might make the salmon overly soft rather than flaky.

For foil or parchment-wrapped salmon, any baking tray works, but for uncovered fillets, a shallow pan is best to achieve a balance of moisture and slight crispiness. Adjust the cooking time slightly based on the type of dish, but the general guideline of how long to bake salmon at 350 still applies.

By avoiding these common mistakes, you can ensure that your baked salmon turns out perfectly every time. For additional inspiration and foolproof recipes, visit our Grilled Chicken Thigh Recipes Guide. This guide is packed with practical cooking tips you can use across a variety of dishes.

Frequently Asked Questions About Baking Salmon at 350°F

Is It Better to Bake Salmon at 375°F or 400°F?

Both 375°F and 400°F are popular choices for baking salmon, and each has its benefits. Baking at 375°F allows for slightly longer cooking times, usually around 10-12 minutes, which helps prevent overcooking while still achieving a tender texture. On the other hand, 400°F is ideal for those who prefer a crispier finish, as the salmon cooks faster, typically in 8-10 minutes.

However, if you’re looking for consistent results with juicy, evenly cooked fillets, baking at 350°F is a fantastic option. While it takes longer—12-20 minutes depending on the fillet’s thickness—it’s more forgiving and perfect for retaining moisture.

How Long Does It Take to Grill Salmon at 350 Degrees?

Grilling salmon at 350°F is a great way to infuse a smoky flavor while still cooking the fish evenly. On the grill, salmon fillets usually take 8-12 minutes, depending on their thickness. Be sure to flip the fillets halfway through to ensure both sides cook evenly.

Using a meat thermometer is highly recommended, as grilled salmon should reach an internal temperature of 145°F. While grilling is faster than baking, learning how long to bake salmon at 350 is essential if you prefer a more controlled and consistent cooking method.

What Is the Best Temperature and Time to Cook Salmon?

The best temperature and time for cooking salmon depend on your desired outcome. For tender, flaky salmon, baking at 350°F for 12-20 minutes is ideal. If you prefer a crispier texture, 375°F or 400°F can be used, but the baking time will be shorter—8-12 minutes depending on the fillet’s thickness.

Regardless of the temperature, always ensure the salmon’s internal temperature reaches 145°F for safe consumption. This allows for perfectly cooked fish that retains its natural juices and flavors. Mastering how long to bake salmon at 350 gives you a reliable method for consistently delicious results.

Is 15 Minutes Long Enough to Cook Salmon?

Yes, 15 minutes is often enough to cook salmon, especially thinner fillets. At 350°F, fillets less than 1 inch thick typically bake perfectly within 12-15 minutes. Thicker cuts may require closer to 20 minutes to ensure the fish is fully cooked.

To avoid undercooking or overcooking, always check the internal temperature of the salmon. When it reaches 145°F, the salmon is ready to serve. This ensures it’s both safe to eat and deliciously flaky.

Conclusion: Mastering How to Bake Salmon at 350°F

Learning how long to bake salmon at 350 is the key to creating perfectly cooked, juicy salmon every time. From understanding factors like fillet thickness to experimenting with marinades and seasonings, you now have the tools to elevate your salmon dishes. Baking at 350°F provides a balance of tender texture and even cooking, making it an excellent choice for both beginners and seasoned home cooks.

Whether you’re keeping it simple with salt and pepper or exploring bold global flavors, baking salmon is a versatile and foolproof method. Remember to preheat your oven, use a meat thermometer to check for doneness, and let the fish rest for a few minutes after baking to lock in moisture.

Now it’s your turn to put these tips into action! Gather your favorite seasonings, preheat to 350°F, and enjoy the satisfaction of serving perfectly baked salmon. For more inspiration, check out our quick and easy recipes to round out your meal.

How To Make The Perfect Ensalada De Pollo At Home

Have you ever tried making ensalada de pollo? Oh, you’re in for a treat! This crowd-pleasing recipe is more than just a salad—it’s a delightful mix of juicy chicken, crisp vegetables, and a creamy dressing that feels like a hug in every bite. What’s great about ensalada de pollo is its sheer versatility. It can be a quick lunch, a light dinner, or the star of your next potluck. And don’t worry—it’s super simple to make, even if you’re not a kitchen pro. Plus, you can jazz it up with fun extras like avocado, lime, or even crunchy tortilla strips. Let’s roll up our sleeves and create a dish that’s as comforting as it is delicious!

Ingredients for the Perfect Ensalada de Pollo

Ingredients for ensalada de pollo arranged on a wooden countertop.
Fresh ingredients to prepare the perfect ensalada de pollo

Key Ingredients for Flavor

When it comes to crafting the perfect ensalada de pollo, the ingredients you choose can make or break the dish. At its heart, this flavorful salad starts with tender, shredded chicken. You can prepare it by boiling, roasting, or even grilling, depending on the flavor you prefer. Pair this with fresh, crisp vegetables like lettuce, tomatoes, cucumbers, and onions to create a vibrant and healthy base.

Optional Add-Ins for Texture and Taste

What sets ensalada de pollo apart from other salads is its versatility. While the core ingredients are essential, optional add-ins can elevate your dish. For instance, creamy avocado and tangy lime juice add a refreshing twist, making the salad perfect for a summer lunch. On the other hand, crunchy tortilla strips or almonds bring a satisfying crunch to every bite.

For those who love bold flavors, consider incorporating cilantro for a fresh herbal note. You might also want to experiment with some diced jalapeños or a hint of chili powder to spice things up. To learn more about ingredient options, visit this guide on spices enhancement for some extra inspiration.

Choosing the Right Dressing

The dressing plays a key role in tying together the flavors of your ensalada de pollo. Traditional versions often call for a creamy base made with mayonnaise or Greek yogurt. These options not only add richness but also complement the fresh vegetables beautifully.

If you’re looking for a lighter option, consider a lime vinaigrette. A simple mix of olive oil, lime juice, garlic, and a touch of honey creates a tangy, refreshing alternative. Remember to taste as you go adjusting the seasoning ensures your dressing perfectly balances the ingredients in your salad.

Pro Tips for Ingredient Prep

Prepping ingredients for ensalada de pollo doesn’t have to be overwhelming. Start by boiling or grilling chicken until it’s juicy and tender. Shred it using two forks or, for a quicker option, use a hand mixer on low speed. As for the vegetables, rinse them thoroughly under cold water to remove any dirt, then pat them dry to maintain their crispness.

Another pro tip: prepare the dressing separately and toss it with the salad just before serving. This prevents the greens from wilting and ensures every bite is evenly coated. Taking the time to prep your ingredients well can turn a good ensalada de pollo into an unforgettable one.

Step-by-Step Guide: How to Make it

Shredded chicken being added to a bowl of fresh vegetables for ensalada de pollo.
Adding shredded chicken to a bowl of fresh vegetables for ensalada de pollo.

1. Prepping the Chicken

To create it perfect, the first step is preparing the chicken. Start by selecting fresh, boneless, skinless chicken breasts or thighs, as they shred easily after cooking. Boil the chicken in lightly salted water with a bay leaf or garlic clove for added flavor. For a smokier taste, you could also roast or grill it—this method caramelizes the exterior and adds depth to your salad.

Once cooked, let the chicken cool slightly before shredding it. You can use two forks or a hand mixer for a quicker process. This technique creates tender, even pieces that blend seamlessly with the other ingredients. Properly prepared chicken is the foundation of a flavorful ensalada de pollo.

2. Preparing the Vegetables

Vegetables are the heart of any good ensalada de pollo. Begin by thoroughly washing your lettuce, tomatoes, cucumbers, and onions under cold water. This step ensures freshness and removes any lingering dirt or debris. For a more vibrant flavor, consider adding seasonal vegetables like bell peppers or radishes.

When chopping your veggies, aim for uniform sizes to ensure each bite is well-balanced. Lettuce should be torn into bite-sized pieces, while tomatoes and cucumbers can be diced. Red onions add a slightly sharp taste, but if you prefer milder flavors, soak them in water for 10 minutes before adding them to your salad. Preparing your vegetables with care ensures a crisp and colorful base.

3. Crafting the Dressing

The dressing is what brings your ensalada de pollo to life, blending all the ingredients into one harmonious dish. For a creamy version, mix mayonnaise with a dollop of Greek yogurt, a squeeze of lime juice, and a pinch of garlic powder. This combination creates a rich, tangy flavor that pairs beautifully with the shredded chicken.

Alternatively, for a lighter option, try a simple vinaigrette made with olive oil, lime juice, Dijon mustard, and a touch of honey. This dressing is zesty and refreshing, ideal for those seeking a healthier twist. As a rule of thumb, always taste your dressing before tossing it with the salad. Adjust the seasoning until it complements the ingredients perfectly.

4. Assembling Your Salad

Now comes the fun part—assembling your ensalada de pollo! Start by layering your crisp vegetables on a large platter or in a mixing bowl. Add the shredded chicken on top, ensuring it’s evenly distributed for consistent flavor in every bite.

Drizzle your chosen dressing over the salad, but don’t go overboard a little goes a long way. Gently toss everything together to coat the ingredients evenly. If you’re serving the salad for a party or gathering, consider garnishing it with fresh herbs like cilantro or parsley for an extra pop of color and flavor.

Pro Tips for the Best Ensalada de Pollo

Avoiding Common Mistakes

Creating a delicious ensalada de pollo may seem simple, but a few common mistakes can compromise its flavor and texture. One of the biggest pitfalls is overcooking the chicken. Overcooked chicken becomes dry and tough, making it less enjoyable in the salad. To avoid this, cook the chicken until it reaches an internal temperature of 165°F, then let it rest before shredding.

Another frequent mistake is adding too much dressing too soon. This can make the salad soggy, especially if you’re not serving it right away. Instead, dress the salad just before serving to preserve the crispness of the vegetables.

How to Adapt the Recipe for Different Diets

One of the best things about ensalada de pollo is its versatility. Whether you’re following a specific diet or catering to guests with unique preferences, this recipe can be easily adapted. For a keto-friendly version, replace high-carb ingredients like tortilla strips with avocado or cheese. The healthy fats from these additions enhance both flavor and nutrition.

For a dairy-free alternative, swap mayonnaise or Greek yogurt with a plant-based option like tahini or avocado puree. You can even make a vegan version by replacing chicken with chickpeas or grilled tofu, which provide a satisfying protein source. With so many options, it can be tailored to fit nearly any dietary preference.

Elevating the Presentation

Sometimes, it’s not just about taste—presentation can make your ensalada de pollo even more appealing. Use a large, colorful serving bowl or a rustic wooden platter to display the salad. Layer the ingredients thoughtfully, starting with the greens and ending with vibrant toppings like diced tomatoes, sliced avocado, or a sprinkle of fresh cilantro.

For an added touch, serve individual portions in glass jars for a picnic or outdoor gathering. This not only looks beautiful but also keeps the salad fresh. Small details like these can elevate your dish and make it a true centerpiece at any meal.

Enhancing the Flavor Profil

If you’re looking to take your ensalada de pollo to the next level, don’t shy away from bold flavors. Adding a dash of smoked paprika or cumin to the shredded chicken can create a smoky depth that complements the freshness of the vegetables. For a tangy twist, try mixing a spoonful of Dijon mustard into your dressing.

Another way to enhance the flavor is by incorporating a touch of sweetness. Diced mango, raisins, or a drizzle of honey can add a surprising yet delightful contrast to the savory elements. By experimenting with these enhancements, you can transform a simple ensalada de pollo into a dish that’s bursting with complexity and excitement.

For more recipes packed with flavor and simplicity, check out our guide to quick and healthy meal ideas.

Serving and Pairing Suggestions Ensalada de pollo

Ensalada de pollo served with avocado, lime, and tortilla chips
Plated ensalada de pollo with avocado and lime, paired with tortilla chips

Perfect Pairings for Ensalada de Pollo

One of the joys of ensalada de pollo is its versatility—it pairs beautifully with a variety of sides. For a classic combination, serve it with warm corn tortillas or crispy tortilla chips to scoop up every flavorful bite. If you’re aiming for something heartier, consider pairing it with a side of black beans and rice. This combination adds a satisfying, wholesome element to the meal.

On the lighter side, fresh fruit like sliced mango or pineapple can provide a refreshing contrast to the savory flavors of the salad. For drinks, try serving it with a zesty agua fresca or a chilled glass of iced tea. These thoughtful pairings enhance the dining experience and make your ensalada de pollo feel like a complete meal.

Occasions to Serve Ensalada de Pollo

Ensalada de pollo is a dish that works for almost any occasion. It’s perfect for family picnics, as it’s easy to transport and can be served cold. Similarly, it shines at potlucks and gatherings, where its vibrant colors and flavors always make it a crowd favorite.

If you’re hosting a weeknight dinner, this dish is a lifesaver because it’s quick to prepare and packed with nutrients. On the other hand, it’s also a great option for meal prep, as it stays fresh in the refrigerator for a few days and can be portioned into individual containers.

Storage Tips for Leftovers

Leftovers of ensalada de pollo can be just as delicious as the first serving—if stored properly. To keep it fresh, transfer the salad to an airtight container and refrigerate it immediately. It’s best to store the dressing separately if you anticipate leftovers, as this helps prevent the vegetables from becoming soggy.

Most ensalada de pollo can last up to 3–4 days in the fridge, but always check for freshness before serving. If you’ve used creamy dressing, consider giving it a quick stir to ensure the flavors are well-mixed. By following these simple tips, you can enjoy your ensalada de pollo for days without losing its flavor or texture.

Safe Reheating and Reuse Tips for Chicken

If you have leftover chicken from your ensalada de pollo, it’s essential to reheat it safely to maintain both its flavor and safety. Remove the chicken from the salad (if already mixed) and reheat it in a pan over medium heat or in the microwave until it’s hot throughout. However, reheating isn’t always necessary cold shredded chicken works wonderfully in wraps or sandwiches.

To reuse leftover chicken creatively, consider adding it to soups, tacos, or even another salad with a different flavor profile. These ideas not only prevent food waste but also give your meal prep a fun, new twist while keeping things simple and delicious.

FAQs About Ensalada de Pollo

What Does Chicken Contribute in a Salad?

Chicken is the star of ensalada de pollo because it provides a rich source of protein that makes the dish satisfying and nutritious. Its mild flavor pairs beautifully with fresh vegetables and creamy dressings, acting as a canvas for other ingredients to shine. Additionally, chicken adds a hearty texture, ensuring the salad feels more like a meal than just a side dish. Whether shredded, grilled, or roasted, the chicken in ensalada de pollo makes every bite both flavorful and filling.

How Long Does Refrigerated Chicken Salad Last?

Properly stored, ensalada de pollo can last 3 to 4 days in the refrigerator. To maintain freshness, place it in an airtight container and refrigerate it immediately after preparation. If the dressing has already been mixed with the salad, the vegetables may lose some of their crispness over time. However, storing the dressing separately can help extend the salad’s quality. Always check for signs of spoilage, such as off smells or a change in texture, before serving your leftover ensalada de pollo.

What Are Chicken Splashes?

In the context of preparing ensalada de pollo, “chicken splashes” often refer to the juices or drippings that result from cooking or cutting chicken. While they can add flavor to certain dishes, it’s essential to handle them safely to avoid cross-contamination. Always clean your cutting boards, knives, and countertops thoroughly after handling raw chicken. Additionally, discard excess liquid to prevent sogginess in your salad. Proper handling ensures that your ensalada de pollo is both delicious and safe to eat.

How Many Components Does the Salad Have?

Typically, ensalada de pollo consists of four main components: protein, vegetables, dressing, and optional toppings. The protein is usually shredded chicken, while the vegetables include fresh options like lettuce, tomatoes, cucumbers, and onions. The dressing, whether creamy or vinaigrette-style, ties everything together. Finally, toppings such as avocado, tortilla strips, or nuts can add an extra layer of flavor and texture. These components work together to create the balanced and versatile dish we know as ensalada de pollo.

How To Make Authentic Pollo Loco Recipe: Easy Step-by-Step Guide

Craving something bold, flavorful, and irresistibly juicy? Look no further than this pollo loco recipe! This classic Mexican grilled chicken is famous for its zesty marinade infused with citrus, garlic, and vibrant spices. But here’s the best part you don’t need to visit a restaurant to enjoy it. You can create this mouthwatering dish right in your kitchen with just a few simple ingredients. Whether you’re planning a family dinner, hosting a barbecue, or just spicing up your weekly meal prep, pollo loco is sure to impress. So, grab your apron, fire up the grill, and let’s turn up the heat!

What is Pollo Loco?

The Origins of Pollo Loco

The story of pollo loco begins in Mexico, where this beloved grilled chicken recipe first became a staple of street food and family kitchens alike. Its name, which translates to “crazy chicken,” reflects the bold flavors and vibrant preparation that set it apart from other dishes. Traditionally, the recipe involves marinating chicken in a citrus-based blend, grilling it to perfection, and serving it with simple, flavorful sides. Over time, pollo loco recipe variations have spread across borders, becoming a favorite in many households worldwide. Whether you’ve tried it before or are new to the dish, its rich history adds even more flavor to this already irresistible meal.

What Makes Pollo Loco Special?

What truly makes pollo loco stand out is its marinade. A combination of fresh lime juice, garlic, cumin, and oregano creates a tangy, aromatic base that penetrates deep into the chicken. This marinade not only tenderizes the meat but also infuses it with layers of bold flavors. Moreover, grilling the marinated chicken over high heat creates a smoky char that’s impossible to replicate with other cooking methods. Another unique aspect of the pollo loco recipe is its versatility—you can serve it with rice, beans, or tortillas, making it suitable for both casual meals and festive gatherings. Its balance of simplicity and sophistication is what keeps people coming back for more.

Why is Homemade Pollo Loco Better?

While restaurant versions of pollo loco can be tempting, making it at home has undeniable advantages. First, you have complete control over the ingredients, allowing you to use fresh, high-quality chicken and adjust the spices to suit your taste. Additionally, homemade pollo loco recipes are often healthier, as you can avoid overly processed marinades or preservatives. Furthermore, the joy of grilling chicken in your own backyard (or even on a stovetop grill) adds an element of fun to the cooking process. If you’re looking for a budget-friendly, delicious meal that doesn’t compromise on quality, homemade pollo loco is the way to go.

Common Variations of Pollo Loco

Although the traditional pollo loco recipe remains iconic, many people enjoy experimenting with different variations. For instance, some recipes swap out lime for orange juice, creating a sweeter, citrus-forward flavor profile. Others might use chipotle or ancho chili in the marinade to add a smoky, spicy kick. If grilling isn’t an option, baking or broiling the chicken can still deliver excellent results, though it may lack the signature char. Additionally, vegetarian adaptations using tofu or jackfruit marinated in the same blend are becoming increasingly popular. For more inspiration on making variations of pollo loco, check out this guide to Mexican marinades.

Ingredients for the Perfect Pollo Loco Recipe

Ingredients for pollo loco marinade on a cutting board.
Fresh ingredients for crafting an authentic pollo loco marinade.

Essential Ingredients for Authentic Flavor

Creating the best pollo loco recipe starts with the right ingredients. The key component is, of course, bone-in chicken thighs or drumsticks, as they hold more flavor and stay juicy during grilling. A zesty marinade is essential, combining lime juice, orange juice, garlic, and a touch of olive oil. Additionally, spices like cumin, paprika, oregano, and a pinch of chili powder provide the bold, smoky notes that make pollo loco unique. Don’t forget a little salt and black pepper to bring it all together! By using fresh and vibrant ingredients, you’ll ensure every bite is bursting with authentic flavor.

Substitutions and Adjustments for Dietary Needs

If you have dietary restrictions, you can still enjoy a flavorful pollo loco recipe. For example, if you’re following a low-sodium diet, reduce or omit added salt and let the citrus marinade shine. Similarly, those avoiding oil can substitute olive oil with an equal amount of water or low-fat yogurt for a creamy alternative. For vegetarians, marinated tofu or jackfruit can serve as an excellent substitute for chicken. Remember, the beauty of pollo loco lies in its flexibility—adjust the recipe to suit your needs while keeping the flavors vibrant and delicious.

Where to Buy Authentic Ingredients

For the most authentic pollo loco recipe, sourcing high-quality ingredients is crucial. Look for organic, free-range chicken at your local butcher or supermarket for the best results. When it comes to spices, try to purchase from reputable brands or specialty stores that offer freshly ground seasonings. Citrus fruits like lime and orange are best bought fresh, but bottled juice can work in a pinch if time is tight. For more tips on sourcing authentic Mexican spices, check out this trusted resource on Mexican ingredients.

Prepping Your Ingredients

Proper preparation can make all the difference in achieving restaurant-quality pollo loco. Begin by trimming any excess fat from the chicken pieces and patting them dry with paper towels. This helps the marinade stick better. Next, mix the marinade ingredients in a large bowl or resealable plastic bag, ensuring the chicken is fully coated. Let it sit for at least two hours in the refrigerator or, for best results, overnight. During this time, the acidic lime and orange juice will tenderize the meat while infusing it with incredible flavor. Before cooking, remove the chicken from the fridge and let it come to room temperature for even grilling.

Step-by-Step Instructions to Make Pollo Loco

Preparing the Marinade

The first step in creating an unforgettable pollo loco recipe is preparing the marinade. In a large mixing bowl, combine freshly squeezed lime and orange juice with minced garlic, olive oil, and your chosen spices, such as cumin, paprika, oregano, and chili powder. Whisk the mixture until it’s well blended. This citrus-based marinade is what gives the chicken its signature tangy and smoky flavor. For an extra layer of aroma, you can also add a handful of chopped cilantro. Once your marinade is ready, you’ll immediately notice how the bold scents of lime and garlic bring life to this dish.

Properly Marinating the Chicken

To ensure every bite of your pollo loco bursts with flavor, marinating is crucial. Place the chicken pieces in a large resealable plastic bag or shallow dish, then pour the marinade over them. Turn the chicken several times to coat it evenly. Seal the bag tightly or cover the dish with plastic wrap, then refrigerate for at least two hours. However, letting it sit overnight will amplify the flavors even more. Remember, the citrus juice in the marinade tenderizes the chicken, while the spices seep deep into the meat. Before cooking, remove the chicken from the fridge and allow it to reach room temperature for even cooking.

Grilling Techniques for Smoky Perfection

Pollo loco chicken grilling on an open flame with smoky char.
Master the art of grilling pollo loco chicken with smoky perfection.

Grilling is the heart of any pollo loco recipe. Preheat your grill to medium-high heat and lightly oil the grates to prevent sticking. Place the marinated chicken on the grill, skin-side down, to get that beautiful char. Cook for about 6–8 minutes on each side, flipping only once to lock in the juices. Keep an eye on the chicken, as the marinade’s sugars can caramelize quickly, creating a smoky crust. If you prefer an alternative, you can use a stovetop grill pan, although it may lack the authentic smoky flavor of an outdoor grill.

For more grilling tips, check out our article on Grilled Chicken Thigh Recipes, which shares techniques for achieving tender, juicy results every time.

Alternative Cooking Methods

Don’t have access to a grill? Don’t worry—this pollo loco recipe can be adapted for other cooking methods. For baking, preheat your oven to 400°F (200°C), arrange the chicken on a baking sheet, and cook for 25–30 minutes or until the internal temperature reaches 165°F (74°C). To add a slight char, broil the chicken for an additional 2–3 minutes. If you’re short on time, pan-frying works as well. Heat a tablespoon of oil in a large skillet, then cook the chicken over medium heat for about 5–7 minutes per side. While these methods may differ slightly in taste, they still deliver a juicy and flavorful chicken dish.

Best Side Dishes to Pair with Pollo Loco

Traditional Accompaniments

A classic pollo loco recipe is often paired with traditional Mexican sides that enhance its bold, zesty flavors. Mexican rice is a top choice, as its mild and slightly tangy tomato base complements the citrusy marinade of the chicken. Refried beans or black beans are also excellent options, adding creaminess and depth to the meal. Don’t forget freshly made tortillas, which can be used to wrap the juicy grilled chicken and create a taco-like experience. These staples ensure your meal is well-rounded and authentically inspired.

Creative Serving Ideas

While the traditional route is always satisfying, why not think outside the box? For a fresh twist, serve your pollo loco recipe over a crisp salad with avocado slices, cherry tomatoes, and a drizzle of cilantro-lime dressing. Alternatively, you could shred the chicken and use it as a filling for burritos or quesadillas. For a lighter option, try pairing it with roasted vegetables such as zucchini and bell peppers, which bring out the smoky flavors of the chicken. These creative pairings allow you to enjoy pollo loco in a variety of delicious ways.

Drinks That Complement Pollo Loco

Choosing the right drink can elevate your dining experience when enjoying a pollo loco recipe. Traditional beverages like horchata, tamarind agua fresca, or even a simple lime soda bring a refreshing balance to the chicken’s rich flavors. If you’re hosting a festive dinner, a classic margarita or a cold Mexican lager pairs wonderfully with the smoky, citrusy chicken. On the other hand, a tall glass of iced tea with a hint of lemon can provide a non-alcoholic yet flavorful option. The right drink doesn’t just quench your thirst—it completes the meal.

How to Store and Reheat Leftovers

If you have leftover pollo loco, you’re in luck—it stores and reheats beautifully. Place the chicken in an airtight container and refrigerate for up to three days. For longer storage, you can freeze it for up to three months. To reheat, use an oven preheated to 350°F (175°C) to warm the chicken slowly, which helps retain its juiciness. If you’re in a hurry, a microwave works, but consider adding a splash of water or broth to keep the meat moist. Leftovers can also be repurposed into tacos, wraps, or salads, making this pollo loco recipe as versatile as it is tasty.

Tips for Perfecting Your Pollo Loco Recipe

Common Mistakes to Avoid

Even the best cooks can stumble when making a pollo loco recipe. One common mistake is over-marinating the chicken. While it might seem like a good idea to leave it soaking for more than 24 hours, the citrus juices can break down the meat too much, resulting in a mushy texture. Another pitfall is cooking the chicken on high heat the entire time. This can lead to burning the marinade’s sugars before the meat is fully cooked. To avoid this, start with medium-high heat to achieve a smoky char, then lower the heat to finish cooking evenly. Finally, skipping the step of letting the chicken rest after grilling can cause the juices to escape, leaving it dry. Taking just five minutes to rest ensures every bite is juicy and tender.

Expert Grilling Tips

Grilling is the heart of any pollo loco recipe, and a few expert techniques can make a big difference. First, always preheat your grill to medium-high and oil the grates to prevent sticking. When placing the chicken on the grill, start with the skin-side down to lock in moisture and develop a flavorful crust. Flipping the chicken only once ensures that it cooks evenly without falling apart. Another tip is to use a meat thermometer to check the internal temperature—it should reach 165°F (74°C) for perfectly cooked chicken. Lastly, basting the chicken with extra marinade during the first few minutes of grilling enhances the smoky flavor without overcooking it.

How to Customize the Recipe for Your Taste

One of the best things about a pollo loco recipe is how easy it is to customize. If you prefer a spicier kick, add chipotle peppers or cayenne to the marinade. For a sweeter touch, include a tablespoon of honey or brown sugar. You can also experiment with different herbs, such as thyme or rosemary, for a unique twist. If you’re cooking for kids, you might want to tone down the chili powder while keeping the bright citrus notes intact. The versatility of this dish makes it perfect for adapting to your family’s preferences.

Tools and Equipment for the Best Results

To master a pollo loco recipe, the right tools can make all the difference. A charcoal grill is ideal for achieving that authentic smoky flavor, but a gas grill or stovetop grill pan works well too. A pair of long-handled tongs will make flipping the chicken easier while keeping your hands safe from the heat. Additionally, a meat thermometer is a must-have to ensure the chicken is cooked through without drying out. If you plan to bake or broil the chicken instead of grilling, a sturdy baking sheet and oven-safe rack will help achieve even cooking. These tools not only simplify the process but also guarantee professional-level results.

Frequently Asked Questions (FAQs)

What are the ingredients of El Pollo Loco?

El Pollo Loco’s signature chicken is marinated using a combination of fresh citrus juices, garlic, salt, black pepper, oregano, and spices like paprika and cumin. This blend gives the chicken its distinct tangy and smoky flavor. While the exact recipe remains a closely guarded secret, many pollo loco recipe variations replicate these flavors by combining lime juice, orange juice, and a touch of chili powder. The simplicity of these fresh ingredients is what makes the dish so delicious and authentic.

What makes El Pollo Loco chicken so good?

The secret behind El Pollo Loco chicken lies in its marinade and cooking process. The citrus-based marinade tenderizes the meat while infusing it with zesty flavors. In addition, the grilling method used gives the chicken a smoky, charred exterior while keeping the inside juicy and flavorful. Recreating a pollo loco recipe at home captures much of this magic, especially if you use a charcoal grill and high-quality ingredients.

What cooking oil does El Pollo Loco use?

El Pollo Loco typically uses canola or vegetable oil for cooking, particularly for greasing grill grates and preparing side dishes. When making your own pollo loco recipe, you can use olive oil as part of the marinade to enhance the flavor and ensure the chicken doesn’t stick during grilling. Olive oil also adds a rich, smooth texture to the marinade, making it a versatile choice for home cooks.

Is Pollo Loco a California thing?

While El Pollo Loco originated in Mexico, it gained significant fame after expanding into California in the 1980s. Its fresh, bold flavors and authentic preparation resonated with the state’s love for Mexican cuisine. Today, pollo loco recipes are enjoyed across the United States, but its popularity in California remains unmatched, with many considering it a local favorite.

Conclusion

Mastering the art of making a delicious pollo loco recipe at home is not only achievable but also incredibly rewarding. By using fresh ingredients, a zesty citrus marinade, and a smoky grilling technique, you can recreate the bold, authentic flavors that make this dish a household favorite. Throughout this guide, you’ve learned the origins of pollo loco, essential ingredients, step-by-step cooking instructions, and creative serving ideas. You’ve also explored tips for avoiding common mistakes and customizing the recipe to suit your taste.

How to Make Hot Pepper with Mustard Recipe: Easy & Tasty

If you’ve ever wondered how to add that “wow” factor to your meals, look no further. This hot pepper with mustard recipe is bursting with bold, zesty flavors that can turn any dish into a standout. It’s the perfect blend of fiery heat and tangy mustard, with just a touch of sweetness to keep things interesting.

What’s so great about it? Well, for starters, it’s incredibly versatile. You can slather it on sandwiches, drizzle it over roasted veggies, or use it as a marinade for grilled chicken. Plus, it’s super easy to make at home, using simple, fresh ingredients like hot peppers, mustard seeds, and vinegar.

So, whether you’re a seasoned spice enthusiast or just dipping your toes into the world of bold flavors, this hot pepper with mustard recipe is bound to become a favorite in your kitchen.

Ingredients Needed for Hot Pepper with Mustard Recipe

Making a hot pepper with mustard recipe is all about balancing simple, fresh ingredients to create a flavorful condiment. Each ingredient plays a key role, from delivering heat to adding tanginess. Below, we’ll break down everything you need, including helpful tips to ensure success.

Essential Fresh Ingredients

The heart of this recipe lies in the freshness of its components. Start with hot peppers jalapeños, habaneros, or cayenne peppers all work beautifully. Their natural heat is the star of the show, so choose peppers based on your desired spice level.

You’ll also need mustard seeds or mustard powder to provide the tangy base that ties everything together. Vinegar, ideally white or apple cider, adds acidity and helps preserve the condiment. Lastly, sugar balances the heat with a touch of sweetness, creating a harmonious flavor profile.

Pro Tip: When choosing peppers, remember that red peppers often have a slightly sweeter note, while green ones bring a sharper kick.

Pantry Staples for Hot Pepper with Mustard Recipe

Don’t overlook the importance of pantry staples they’re the backbone of this hot pepper with mustard recipe. You’ll need salt to enhance all the flavors, and spices like garlic powder or turmeric to add depth. For an extra twist, consider smoked paprika for a subtle smoky flavor.

In addition to these basics, keep some water on hand to adjust the consistency of your mustard. While these items are simple, they make all the difference in perfecting your recipe.

Choosing the Best Peppers for Your Taste

Peppers come in a wide range of heat levels, so it’s essential to pick the right ones for your recipe. Jalapeños are a great choice for a mild kick, while habaneros bring fiery heat for spice enthusiasts. Cayenne peppers fall somewhere in between, offering a balanced punch of spice.

Helpful Tip: Check the Scoville heat scale for a better idea of each pepper’s spiciness. If you’d like more information on pepper varieties, this guide to chili peppers can help you decide.

For beginners, start with fewer peppers and gradually add more as you adjust the recipe to your liking. This way, you avoid accidentally making your mustard too spicy.

Mustard Types to Experiment With

One of the joys of making a hot pepper with mustard recipe is experimenting with different types of mustard. Yellow mustard is classic and mild, while Dijon mustard offers a sophisticated tang. Whole-grain mustard adds texture and rustic charm, making it a delightful option for gourmet enthusiasts.

Did You Know? Mustard seeds come in white, brown, and black varieties. White seeds are the mildest, while black seeds pack the most heat. Mixing these varieties can give your recipe a complex, nuanced flavor.

If you’re new to making mustard, start with a mild variety and work your way up to bolder flavors. The flexibility of this ingredient allows you to create a condiment that perfectly suits your taste.

By carefully selecting these ingredients, you’ll lay the foundation for a truly delicious hot pepper with mustard recipe. Each choice, from the peppers to the type of mustard, impacts the final result, so take your time experimenting and finding the perfect combination for your preferences. Let’s move on to the step-by-step process to bring your creation to life!

Step-by-Step Guide to Making Hot Pepper with Mustard Recipe

Sealed jars of hot pepper mustard being processed in a water bath.
Jars of hot pepper mustard being sealed for freshness and longevity.

The hot pepper with mustard recipe comes together with a few simple steps, ensuring bold and vibrant flavors. With proper preparation and a little patience, you can create a versatile condiment that enhances any meal. Let’s break it down step by step.

Assembling Your Ingredients

Before starting, gather all your items to keep the process smooth and stress-free. You’ll need hot peppers, your preferred type of mustard (yellow, Dijon, or whole-grain), vinegar, sugar, and essential pantry staples like salt and spices.

Preparation is key, so make sure to wash your peppers thoroughly and measure your ingredients in advance. This ensures a balanced flavor, especially in recipes like this hot pepper with mustard recipe where proportions matter.

Preparing the Peppers and Mustard Base

Start by prepping your hot peppers. Slice them lengthwise, remove the seeds for a milder taste, or leave them in if you prefer extra heat. Always use gloves to protect your hands from the pepper’s oils, which can irritate the skin.

Next, combine the peppers with mustard seeds, vinegar, and sugar in a saucepan. Stir until the sugar dissolves, creating the base for your recipe. If you’re looking for additional inspiration, this guide to making homemade mustard offers helpful tips to perfect your condiment.

Cooking the Hot Pepper with Mustard Recipe to Perfection

Heat the mixture on medium heat, stirring occasionally to prevent sticking. Allow it to simmer until the peppers soften and the liquid thickens. This step brings out the flavors, ensuring every bite is rich and bold.

Taste the mixture as it cooks to adjust the spice level, sweetness, or tanginess. If the mustard seems too thick, add a splash of water. On the other hand, if it’s too runny, let it cook a little longer to reduce.

Storing Your Hot Pepper with Mustard Recipe Safely

Once the mixture has cooled slightly, transfer it to sterilized jars for storage. This step not only preserves freshness but also makes your hot pepper with mustard recipe a great gift idea. Seal the jars tightly and store them in the refrigerator for up to three weeks.

To serve, pair the mustard with grilled meats, roasted vegetables, or even as a spread for sandwiches. Its versatility is unmatched, making it a staple in any kitchen.

Creative Ways to Use Hot Pepper with Mustard Recipe

The hot pepper with mustard recipe isn’t just for spicing up your pantry; it’s also a versatile addition to a wide range of dishes. Whether you’re looking to elevate your everyday meals or impress at a gathering, this condiment has you covered. Here are some creative and delicious ways to make the most of it.

As a Condiment for Everyday Meals

One of the simplest ways to enjoy your hot pepper with mustard recipe is as a condiment. Spread it on sandwiches, wraps, or burgers to add a kick of heat and tang. It pairs especially well with smoked turkey or roast beef, offering a bold contrast to these rich flavors.

For even more everyday inspiration, you can drizzle it over grilled sausages, hot dogs, or veggie burgers. The tangy mustard balances out the spice, creating a mouthwatering flavor in every bite.

In Sandwiches and Wraps

Transform your lunchtime routine by adding a dollop of hot pepper mustard to your wraps and sandwiches. For example, use it as a spread on a turkey and avocado wrap or mix it into chicken salad for a spicy twist.

This mustard also shines in breakfast sandwiches, blending beautifully with eggs, cheese, and crispy bacon. By incorporating this recipe into your sandwiches, you’ll elevate simple meals into something special.

Transforming Sauces and Marinades

A beautifully grilled chicken dish glazed with hot pepper mustard.
Juicy grilled chicken thighs glazed with homemade hot pepper mustard.

Your hot pepper with mustard recipe isn’t limited to a spread; it can also act as the base for flavorful sauces and marinades. Mix it with honey and olive oil for a tangy-sweet salad dressing, or blend it with soy sauce and garlic for a marinade that adds depth to grilled chicken or salmon.

Adding a spoonful to creamy sauces, such as mac and cheese or Alfredo, gives them an unexpected, delicious twist. For more inspiration, consider checking out related ideas on our website to take your cooking to the next level.

Elevating Snacks and Appetizers

When it comes to snacks, the hot pepper with mustard recipe can transform even the simplest treats. Use it as a dip for pretzels, crackers, or fresh vegetables like carrot sticks and celery.

If you’re hosting a gathering, consider serving it alongside a cheese platter. Its spicy tang complements creamy cheeses like brie or sharp cheddar, making it a crowd-pleasing addition to your table.

For more unique ideas, explore recipes like Chopt Spicy Chicken Soup or other creative dishes on Quickmealsrecipes.

The versatility of your hot pepper with mustard recipe ensures that it’ll become a staple in your kitchen. From simple condiments to elevated appetizers, its bold flavors make every meal unforgettable. Up next, we’ll dive into tips for customizing your recipe to suit your taste preferences!

Tips for Customizing the hot Pepper with Mustard Recipe

One of the best aspects of the hot pepper with mustard recipe is how easily you can adapt it to suit your personal taste. Whether you’re aiming for a milder kick, a sweeter finish, or a smoky twist, this guide will show you how to tweak the recipe to perfection. Let’s dive into some simple yet effective ways to make this condiment uniquely yours.

Adjusting the Heat Level

The beauty of a hot pepper with mustard recipe lies in its spice, but not everyone enjoys the same level of heat. To tone it down, use milder peppers like banana peppers or deseed hotter varieties like jalapeños. On the other hand, if you crave extra fire, add habanero or ghost peppers for an intense, fiery flavor.

For a more balanced approach, try combining mild and hot peppers. This way, you’ll get the kick without overwhelming your palate.

Adding Sweetness for a Balanced Flavor

If the heat feels overpowering, adding a hint of sweetness can create a delightful contrast. A tablespoon of honey, brown sugar, or maple syrup works wonders in softening the spice without diminishing the bold flavor.

For those who enjoy a sweet-and-spicy profile, consider blending fruit preserves like apricot or mango into the recipe. These additions not only balance the heat but also give your mustard a unique twist.

Infusing Unique Flavors

Your hot pepper with mustard recipe can be a blank canvas for experimentation. Infuse it with fresh herbs like dill, cilantro, or thyme for a garden-fresh aroma. Alternatively, add spices like smoked paprika, cumin, or turmeric for depth and complexity.

For a citrusy kick, zest some lemon or lime and mix it in. This simple step brightens the flavor and makes the mustard especially refreshing, ideal for summer dishes.

Scaling the Recipe for Different Quantities

Sometimes you need just a small jar for personal use, while other times you might want enough to gift to friends and family. Scaling the hot pepper with mustard recipe is straightforward just double or halve the ingredients as needed.

However, keep in mind that cooking times may vary. Larger batches might take longer to thicken, while smaller ones can finish faster. Adjust accordingly to ensure you achieve the perfect consistency every time.

With these customization tips, your hot pepper with mustard recipe will feel like it was made just for you. Whether you’re toning down the spice, sweetening the flavor, or experimenting with new ingredients, there’s no limit to how creative you can get. Let’s move on to pairing ideas that make this condiment shine!

Pairing Hot Pepper Mustard with Meals

A spoonful of homemade hot pepper mustard being lifted from a jar.
A creamy, golden jar of hot pepper mustard, ready for spreading or dipping.

The hot pepper with mustard recipe is not just a condiment; it’s a culinary companion that elevates a variety of dishes. Its bold flavors make it a versatile choice for enhancing everything from grilled meats to snacks. Here are some delicious ideas to inspire you.

Perfect Matches for Grilled Meats

Grilled meats and the hot pepper with mustard recipe are a match made in heaven. Spread it on steaks, ribs, or pork chops right before serving to add a layer of tangy heat. For an even more flavorful result, use the mustard as a marinade mix it with garlic, olive oil, and soy sauce, and let the meat soak in the flavors for a few hours.

Pair it with grilled chicken for a zesty twist, or drizzle it over sausages to bring out their smoky flavors. No matter the choice, this condiment shines at every barbecue.

Adding a Kick to Vegetables

Vegetables can often benefit from a flavor boost, and the hot pepper with mustard recipe delivers just that. Toss roasted potatoes, carrots, or Brussels sprouts with a dollop of mustard for a spicy, tangy glaze. It also works wonderfully as a dipping sauce for grilled asparagus or zucchini.

For a quick and nutritious snack, serve the mustard with raw veggies like celery sticks, bell peppers, or cucumber slices. Its versatility ensures that even the simplest vegetable dish becomes a standout.

Matching with Cheeses and Crackers

If you’re creating a cheese board, don’t forget to include your hot pepper with mustard recipe. It pairs beautifully with creamy cheeses like brie or goat cheese, as well as sharp varieties like cheddar or gouda. Spread it on crackers or rustic bread slices for a flavorful bite that’s perfect for entertaining.

For added flair, combine the mustard with honey and drizzle it over a wedge of baked brie. This sweet and spicy combination is sure to impress guests at your next gathering.

Seasonal Favorites for Holidays and Events

During the holiday season or special events, the hot pepper with mustard recipe becomes an essential ingredient for festive dishes. Use it to glaze holiday hams or as a tangy addition to turkey sandwiches. It’s also a great topping for hors d’oeuvres, such as mini meatballs or stuffed mushrooms.

At summer picnics, serve it alongside grilled corn or slather it on burgers and hot dogs for an easy crowd-pleaser. The recipe’s ability to adapt to any occasion makes it a year-round favorite.

The hot pepper with mustard recipe proves its worth with these diverse pairings, bringing bold and exciting flavors to every meal.

FAQs

What is in mustard that makes it hot?

The heat in mustard comes from compounds called glucosinolates found in mustard seeds. When the seeds are crushed and mixed with water, an enzyme called myrosinase activates, creating a chemical reaction that produces a sharp, spicy flavor. This process is what gives your hot pepper with mustard recipe its signature tangy heat.

What is hot mustard good with?

Hot mustard is a versatile condiment that pairs well with a variety of foods. Use it as a topping for sandwiches, burgers, and wraps to add bold flavor. It’s also excellent as a dipping sauce for pretzels, fresh vegetables, or grilled meats. For something unique, try incorporating it into salad dressings, marinades, or as a glaze for roasted vegetables. The hot pepper with mustard recipe brings a zesty kick to everyday dishes and special meals alike.

What are the ingredients in habanero mustard?

Habanero mustard typically includes habanero peppers for intense heat, mustard seeds or powder for tanginess, vinegar for acidity, and sugar to balance the flavors. Spices like garlic powder or turmeric may also be added for depth. If you want to experiment, the hot pepper with mustard recipe can easily be adapted to include habanero peppers for those who love extra spice.

How to use hot English mustard in cooking?

Hot English mustard can elevate many dishes with its sharp and robust flavor. Spread it on sandwiches, use it as a marinade for meats, or stir it into sauces for an extra punch of heat. It’s also perfect for glazing roasted vegetables or enhancing the flavor of dips. Adding a spoonful of English mustard to your hot pepper with mustard recipe is an excellent way to intensify its heat and complexity.

Conclusion

The hot pepper with mustard recipe is more than just a condiment it’s a flavor-packed addition to your kitchen that can transform everyday meals into extraordinary experiences. Throughout this article, we’ve explored its key ingredients, the step-by-step process for making it, creative ways to use it, and tips for customization. Whether you prefer a mild kick, a sweet balance, or a fiery punch, this recipe offers endless possibilities to suit your taste.

From pairing it with grilled meats and fresh vegetables to using it in marinades and as a dip, the versatility of this condiment makes it a must-have for any home cook.

So, why wait? Grab your favorite peppers and mustard seeds, and get started on crafting your own hot pepper with mustard recipe. With its bold flavors and endless uses, this condiment is bound to become a staple in your kitchen. Enjoy the journey of making and sharing this flavorful delight with friends and family!

10-Minute Guide to the Ultimate Boulders Enchilada Recipe

If you’re ready to spice up your dinner routine, the Boulders Enchilada Recipe is calling your name! This dish takes the classic enchilada you know and love and elevates it with bold Southwest flavors, a velvety sauce, and a filling that’s as customizable as your imagination.

Whether you’re cooking for family, hosting friends, or just treating yourself, this recipe is a guaranteed hit. The best part? It’s both quick to prepare and packed with flavor, making it a weeknight favorite. From smoky spices to fresh toppings like cilantro and lime, every detail comes together to create a meal that’s as visually stunning as it is delicious. Therefore, get ready to impress with a recipe that’s simple, versatile, and absolutely irresistible.

Why the Boulders Enchilada Recipe is a Must-Try

The Unique History and Inspiration Behind the Boulders Enchilada Recipe

The Boulders Enchilada Recipe is more than just a meal it’s a taste of rich history and cultural inspiration. Rooted in traditional Mexican cuisine, enchiladas have evolved over time, blending authentic techniques with modern twists. This recipe captures the essence of those bold, zesty flavors while adding a Southwest-inspired touch that makes it truly special.

Interestingly, the “Boulders” variation is named for its hearty, substantial fillings and robust flavors that remind you of the rugged landscapes of the Southwest. Therefore, it’s a dish that celebrates both tradition and innovation. When you recreate this recipe at home, you’re not just preparing dinner; you’re indulging in a culinary experience that bridges the gap between old-world charm and modern-day convenience.

What Sets This Recipe Apart?

There’s no shortage of enchilada recipes, but the Boulders Enchilada Recipe stands out in more ways than one. Unlike standard versions, this recipe offers an irresistible balance of smoky spices, creamy fillings, and a sauce that perfectly ties it all together.

What’s more, the recipe is designed to be versatile, allowing you to customize it with your favorite ingredients. Love chicken? Add shredded, seasoned chicken for a hearty protein. Prefer a vegetarian twist? Opt for black beans, sautéed vegetables, or even sweet potatoes. You can also adjust the spice level to match your preferences, making this recipe suitable for all palates.

For tips on customizing enchiladas, check out this comprehensive guide for inspiration. This way, you can explore endless variations while staying true to the essence of the dish.

Benefits of Making Boulders Enchilada Recipe at Home

A single enchilada served on a white plate, garnished with cilantro and accompanied by a napkin.
A serving of enchiladas plated beautifully, showcasing the dish’s rich sauce and melted cheese.

Making the Boulders Enchilada Recipe at home isn’t just about saving money it’s about creating something truly special in your kitchen. When you prepare enchiladas from scratch, you have complete control over the ingredients, which means you can prioritize freshness and flavor.

In addition, homemade enchiladas are healthier since you can avoid processed additives often found in store-bought meals. By using fresh tortillas, high-quality cheese, and your choice of protein or vegetables, you ensure every bite is both delicious and nutritious. Plus, the process of preparing enchiladas can be a fun, family-friendly activity that everyone can enjoy together.

A Quick Snapshot of Prep and Cook Time

One of the reasons the Boulders Enchilada Recipe is so popular is because it’s surprisingly quick and easy to make. In just about 10 minutes of prep time and 20-25 minutes of baking, you can whip up a meal that tastes like it took hours to create.

The preparation involves a few simple steps: assembling the filling, rolling the tortillas, layering them in a baking dish, and topping it all with sauce and cheese. Thus, this recipe is ideal for busy weeknights or when you need a stress-free option for entertaining guests. You’ll find that the effort-to-reward ratio here is unmatched, making it a go-to dish for countless occasions.

Ingredients for the Perfect Boulders Enchilada Recipe

Core Ingredients for the Boulders Enchilada Recipe

Rolled tortillas filled with ingredients neatly arranged in a baking dish.
Tortillas filled with flavorful ingredients, carefully rolled and arranged in a baking dish, ready for the oven.

Creating the Boulders Enchilada Recipe starts with assembling the right core ingredients. You’ll need soft tortillas, which form the base for rolling up the delicious fillings. For the filling, choose a protein that suits your taste—shredded chicken, seasoned ground beef, or even black beans work beautifully.

Next, you’ll need shredded cheese, ideally a blend like cheddar and Monterey Jack, for that irresistible gooey texture. In addition, consider incorporating sautéed vegetables like onions and bell peppers to enhance the flavor. These staples come together to form the heart of your enchiladas, making each bite rich and satisfying.

Key Ingredients for the Sauce

The enchilada sauce is what makes this dish shine, and in the Boulders Enchilada Recipe, it’s all about bold, smoky flavors. You’ll need a tomato base, chili powder, cumin, garlic powder, and a touch of smoked paprika for depth.

For a creamy variation, you can add a splash of heavy cream or sour cream to the sauce. However, if you prefer a spicier kick, include a pinch of cayenne or diced jalapeños. This sauce ties the dish together, creating a rich, zesty layer that coats the enchiladas perfectly.

Enchiladas being topped with homemade enchilada sauce poured from a jar.
Homemade enchilada sauce being poured over rolled tortillas in a baking dish.

Optional Add-Ons and Toppings

What makes the Boulders Enchilada Recipe so versatile is its ability to be customized. Optional add-ons like avocado slices, fresh cilantro, or a squeeze of lime can elevate the dish to new heights.

Other great toppings include sour cream, diced tomatoes, or even a sprinkle of queso fresco for a traditional touch. On the other hand, if you’re looking for something heartier, consider adding cooked rice or refried beans to the filling. These simple additions make the recipe flexible enough for any palate.

Substitutes for Dietary Preferences

One of the best aspects of the Boulders Enchilada Recipe is its adaptability for different dietary needs. For gluten-free enchiladas, opt for corn tortillas instead of flour ones. If you’re aiming for a vegetarian dish, load up on black beans, sweet potatoes, or mushrooms.

Additionally, you can make the recipe vegan by using plant-based cheese and a non-dairy sour cream alternative. With these easy swaps, this dish becomes inclusive while still delivering on flavor and texture.

For more ideas on healthy sides and creative meal inspiration, check out this article on Leftover Rotisserie Chicken Recipes, where you’ll find versatile ways to create flavorful dishes.

Step-by-Step Preparation of the Boulders Enchilada Recipe

Preparing the Filling

The filling is the heart of the Boulders Enchilada Recipe, so getting it just right is essential. Start by selecting your protein—shredded chicken, ground beef, or even black beans are excellent choices. Season the protein with classic spices like cumin, chili powder, and garlic powder to infuse it with bold flavor.

For a vegetarian option, sauté onions, bell peppers, and diced zucchini until tender. Add cooked sweet potatoes or black beans for a hearty twist. Be sure to taste the mixture as you go, adjusting the seasoning to match your preference. Once prepared, set the filling aside and move on to the next step.

Crafting the Perfect Enchilada Sauce

A delicious sauce is what transforms this dish into the ultimate comfort food. For the Boulders Enchilada Recipe, start with a tomato base, then whisk in chili powder, cumin, smoked paprika, and garlic powder. Simmer the mixture for 10–15 minutes to let the flavors meld.

If you prefer a creamy version, stir in a dollop of sour cream or a splash of heavy cream. On the other hand, for extra spice, add diced jalapeños or a pinch of cayenne pepper. Remember to let the sauce cool slightly before using it to coat the tortillas, as this helps the flavors absorb more effectively.

Assembling Your Enchiladas

Freshly baked enchiladas topped with melted cheese and garnished with cilantro in a rustic baking dish.
A beautifully baked dish of enchiladas topped with cheese and fresh cilantro, showcasing their irresistible appeal.

The assembly process is both fun and easy. Lay out a tortilla, spoon a generous portion of filling down the center, and roll it up tightly. Place each rolled tortilla seam-side down in a greased baking dish. Repeat until all the filling is used.

Once the tortillas are arranged, pour the enchilada sauce evenly over them, ensuring every tortilla is well-coated. Sprinkle shredded cheese generously on top, covering the entire surface. At this point, your dish is ready to bake, creating a bubbling, cheesy masterpiece.

Baking for the Perfect Texture

Preheat your oven to 375°F (190°C) and bake the enchiladas for 20–25 minutes. The key is to allow the cheese to melt completely and develop a golden, bubbly top layer. Therefore, keep an eye on it in the final few minutes to avoid overbrowning.

For an extra crispy finish, switch the oven to broil for the last 2–3 minutes. However, be cautious not to leave it unattended during this step, as the cheese can quickly burn. Once done, let the enchiladas cool for a few minutes before serving. This step ensures they hold together when plated.

For more tips on preparing sauces and fillings, explore our guide on Cheesy Chicken Sloppy Joe Recipes, which provides excellent insights into achieving rich, flavorful dishes.

Tips and Tricks for Making the Best Enchiladas

Common Mistakes to Avoid

When preparing the Boulders Enchilada Recipe, a few common mistakes can hinder your success. One frequent misstep is overfilling the tortillas. While it might be tempting to pack in as much filling as possible, doing so can cause them to tear or unravel during baking. Instead, stick to a modest amount that rolls easily without breaking.

Another pitfall is skipping the step of lightly warming the tortillas. Cold tortillas are prone to cracking, so briefly heating them in a skillet or microwave makes them more pliable. Lastly, be cautious not to drown the dish in sauce. While sauce is key to the enchiladas’ flavor, using too much can result in soggy tortillas.

Enhancing Flavor with Garnishes

Baked enchiladas garnished with fresh cilantro in a white ceramic dish.
Golden enchiladas topped with fresh cilantro, baked to perfection in a white ceramic dish.

A great enchilada doesn’t stop with sauce and cheese—garnishes can elevate your dish to the next level. Fresh toppings like chopped cilantro, sliced avocado, or a dollop of sour cream add brightness and balance to the richness of the Boulders Enchilada Recipe.

For a touch of tang, squeeze fresh lime juice over the enchiladas just before serving. On the other hand, if you want to add a spicy kick, sprinkle on sliced jalapeños or drizzle hot sauce over the top. These simple garnishes not only enhance the flavor but also make your dish more visually appealing.

Making Enchiladas for a Crowd

The Boulders Enchilada Recipe is perfect for feeding a crowd, whether for a family dinner or a festive gathering. To streamline the process, prepare the filling and sauce ahead of time and store them in the refrigerator. Then, assemble and bake the enchiladas just before serving.

For large groups, consider doubling the recipe and using a bigger baking dish. Additionally, you can offer a variety of fillings such as chicken, beef, and vegetarian options to cater to different preferences. Therefore, with a little planning, you can create a meal that satisfies everyone at the table.

Storing and Reheating Leftovers

Leftovers are one of the best parts of the Boulders Enchilada Recipe! To store them, transfer the enchiladas to an airtight container and refrigerate them for up to three days. If you plan to keep them longer, consider freezing them instead.

When reheating, the oven is your best bet for maintaining texture. Cover the dish with foil to prevent drying out and heat at 350°F (175°C) until warmed through. Alternatively, for a quick option, use the microwave, but keep in mind the tortillas may become softer than when baked.

For additional tips on meal prepping and storage, check out our guide on How Long Leftover Rotisserie Chicken is Good, which includes advice on keeping your meals fresh and delicious.

Pairing Ideas for Your Boulders Enchilada Recipe

Classic Side Dishes

No meal featuring the Boulders Enchilada Recipe is complete without the perfect sides to complement its bold flavors. Traditional options like Mexican rice and refried beans are always crowd-pleasers. These sides balance the rich, cheesy enchiladas with their hearty textures and subtle flavors.

For something lighter, a crisp Mexican slaw with shredded cabbage, lime juice, and a touch of chili powder provides a refreshing contrast. Additionally, a warm batch of cornbread pairs beautifully, adding a sweet and savory touch to your meal.

Beverages to Complement Enchiladas

A well-chosen beverage can elevate the entire dining experience when enjoying the Boulders Enchilada Recipe. For a classic pairing, serve a chilled margarita the tangy lime and tequila blend perfectly with the enchiladas’ smoky sauce.

Non-alcoholic options like horchata, a sweet and creamy rice milk drink, or agua fresca, made with fresh fruit, are excellent choices for a family-friendly meal. On the other hand, a crisp lager beer can provide a refreshing counterpoint to the dish’s spice and cheese.

Desserts to Complete Your Meal

Every great meal deserves a sweet ending, and the Boulders Enchilada Recipe is no exception. A light and airy tres leches cake is a fantastic way to round off the meal, offering a creamy texture and delicate sweetness.

If you prefer something simpler, consider churros with a side of chocolate dipping sauce. For a fruity finish, a platter of fresh-cut mangoes or pineapple lightly sprinkled with chili powder can provide a refreshing and slightly spicy contrast.

Creative Serving Suggestions

Get creative with how you serve the Boulders Enchilada Recipe to make it suitable for various occasions. For a casual party, transform it into an enchilada casserole by layering the ingredients instead of rolling them. This approach not only saves time but also makes it easier to serve.

Another option is to repurpose leftovers into an enchilada bowl, layering shredded enchiladas over rice or greens and topping with salsa and sour cream. Thus, you can enjoy the dish in a whole new way. Finally, for an outdoor meal, consider pairing the enchiladas with grilled vegetables or a tangy salsa verde.

FAQs

What ingredients are needed for the Boulders Enchilada Recipe?

To prepare the Boulders Enchilada Recipe, you’ll need the following core ingredients:

  • Tortillas: Flour or corn, depending on your preference.
  • Filling: Shredded chicken, ground beef, black beans, or sautéed vegetables.
  • Cheese: A blend of cheddar and Monterey Jack works best.
  • Enchilada Sauce: A rich tomato-based sauce spiced with chili powder, cumin, smoked paprika, and garlic.
  • Optional garnishes: Fresh cilantro, avocado slices, lime wedges, and sour cream to enhance the flavor.

These simple yet flavorful components come together to create a satisfying and versatile dish.

How do I prepare the enchilada sauce for the Boulders Enchilada Recipe?

Making the sauce is quick and easy. Start by heating a bit of oil in a pan, then stir in chili powder, cumin, garlic powder, and smoked paprika. Add a tomato base (such as tomato paste or puree) and whisk everything together.

Next, gradually add broth (chicken or vegetable) to achieve your desired consistency. Simmer the sauce for 10–15 minutes, allowing the flavors to meld. For a creamy variation, stir in a splash of sour cream. Let the sauce cool slightly before using it to coat your tortillas for the perfect finishing touch.

Can I make the Boulders Enchiladas ahead of time?

Yes, you can absolutely make the Boulders Enchilada Recipe ahead of time! Prepare the filling and sauce in advance, then store them separately in airtight containers in the refrigerator for up to 3 days.

When ready to bake, assemble the enchiladas, pour the sauce over them, and top with cheese. This way, they stay fresh and flavorful without becoming soggy. Alternatively, you can assemble the entire dish, cover it tightly with foil, and refrigerate until you’re ready to bake. It’s a great option for meal prepping or entertaining guests.

What are some variations of the Boulders Enchilada Recipe for different dietary preferences?

The Boulders Enchilada Recipe is highly adaptable for various diets:

  • Vegetarian: Swap out meat for black beans, sweet potatoes, or a mix of sautéed vegetables like zucchini and bell peppers.
  • Vegan: Use plant-based cheese and a dairy-free sour cream alternative for the sauce.
  • Gluten-Free: Replace flour tortillas with corn tortillas.
  • Low-Carb: Opt for thinly sliced zucchini or eggplant as a tortilla substitute.

These variations ensure that everyone at your table can enjoy this delicious dish, regardless of dietary preferences.

Conclusion

The Boulders Enchilada Recipe is a delightful blend of bold flavors, rich textures, and versatile options, making it a go-to dish for any occasion. You’ve learned how to select the perfect ingredients, prepare a flavorful sauce, and assemble enchiladas that are both hearty and satisfying.

With helpful tips to avoid common mistakes, ideas for creative serving suggestions, and guidance on making the dish ahead of time, you now have everything you need to master this recipe. Whether you’re cooking for a crowd or treating yourself to a comforting dinner, the Boulders Enchilada Recipe is sure to impress.

How to Make the Perfect Matjesbrötchen Recipe at Home

Ever heard of matjesbrötchen? It’s the iconic German fish sandwich that’s as comforting as it is delicious. This matjesbrötchen recipe combines the melt-in-your-mouth tenderness of pickled matjes herring with the zesty crunch of fresh onions and pickles—all wrapped in a warm, crusty brötchen. The result? A taste explosion that’s equal parts fresh and savory! Whether you’re a seafood lover or just curious about Northern German cuisine, this recipe is an absolute must-try. And guess what? It’s easier than you think to whip up this restaurant-quality sandwich at home. Ready to impress your family, friends, or just treat yourself to something special? Let’s dive in and make your kitchen the tastiest spot in town.

What Is a matjesbrötchen recipe?

The History and Origin of Matjesbrötchen recipe

The matjesbrötchen recipe has deep roots in Northern Germany, where it’s been a beloved street food for decades. Originating in bustling harbor towns like Hamburg and Bremen, this sandwich was a quick, satisfying meal for fishermen and sailors. Over time, its popularity spread, becoming a staple at markets, festivals, and roadside eateries across the region. What sets the matjesbrötchen apart is its simplicity—made with just a few high-quality ingredients that highlight the natural flavor of the fish. This culinary tradition is more than just a sandwich; it’s a celebration of regional culture and the sea’s bounty.

What Makes Matjes Herring Special?

The star of any matjesbrötchen recipe is, of course, the matjes herring. But what makes it so unique? Unlike regular salted herring, matjes is young, lightly salted, and pickled, creating a buttery texture and delicate flavor. The fish is typically cured with a mix of salt, sugar, and spices, which helps preserve its natural oils while enhancing its mild taste. This process not only makes matjes tender but also easier to digest compared to other types of preserved fish. If you’re new to matjes, its subtle, savory flavor is sure to surprise and delight.

Traditional Ingredients of a Matjesbrötchen recipe

At its core, a matjesbrötchen recipe uses just a handful of ingredients, but each plays an essential role. The foundation is a crusty yet soft brötchen a German bread roll, which serves as the perfect vessel for the fillings. Next comes the matjes herring, complemented by thinly sliced onions, tangy pickles, and sometimes a dollop of creamy dill sauce. These toppings strike the perfect balance of salty, sweet, and tangy flavors. Optional extras like fresh herbs or a squeeze of lemon juice can elevate the dish even further, making it both refreshing and satisfying.

Why Matjesbrötchen Is a Must-Try

Why should you try a matjesbrötchen recipe? Because it’s a one-of-a-kind combination of flavors and textures that’s hard to resist. The soft roll contrasts beautifully with the tender fish, while the onions and pickles add crunch and a zingy finish. It’s the kind of dish that feels indulgent yet light, making it perfect for any occasion—whether as a hearty lunch or a quick snack on the go. Plus, it’s steeped in history and tradition, offering a taste of Northern Germany right in your own kitchen.

How to Make the Perfect Matjesbrötchen Recipe

Fresh matjes herring fillets with dill, lemon slices, and seasoning on a wooden board
Fresh matjes herring fillets seasoned with herbs and lemon, ready for creating the perfect Matjesbrötchen

Ingredients You’ll Need

To craft the ultimate matjesbrötchen recipe, you’ll need a short list of fresh and flavorful ingredients. Start with high-quality matjes herring, the star of this dish, known for its buttery texture and mild, savory flavor. You’ll also need soft yet crusty brötchen (bread rolls), thinly sliced onions, tangy pickles, and optional garnishes like fresh dill or creamy dill sauce. Don’t forget a touch of lemon juice for a hint of brightness! These simple ingredients, when combined, create a sandwich that’s both satisfying and elegant.

Step-by-Step Instructions

Making a matjesbrötchen recipe is straightforward and quick, perfect for any level of cook. Begin by slicing your brötchen horizontally and lightly toasting it for a bit of crunch. Next, layer a generous portion of matjes herring on the bottom half. Add thinly sliced onions and pickles for texture and flavor. If you like, spread a dollop of dill sauce on the top half of the roll. Finally, close your sandwich, press lightly, and enjoy this delicious German classic.

Common Mistakes to Avoid

Even though the matjesbrötchen recipe is simple, a few common pitfalls can affect the final result. Avoid using stale bread, as it won’t provide the right balance of texture. Similarly, overloading the sandwich with too many toppings can overwhelm the delicate flavor of the matjes herring. When assembling, be sure to drain excess brine from the herring to prevent the bread from becoming soggy. These small adjustments make all the difference!

Tips for Making It Faster

Short on time? Try pre-slicing your onions and pickles and storing them in the fridge for quick assembly. You can also prepare a batch of dill sauce in advance, ensuring it’s ready whenever you need it. Opt for pre-sliced matjes herring from a trusted source, as it saves you the step of filleting. By prepping these elements ahead of time, you can enjoy a freshly made matjesbrötchen recipe in minutes.

Toppings and Variations for Matjesbrötchen recipe

Classic Toppings

A great matjesbrötchen recipe often features classic toppings that perfectly complement the delicate flavor of the matjes herring. Traditional choices include thinly sliced onions for their crisp bite, tangy pickles to balance the richness, and a sprinkle of fresh dill for a herbal note. Adding a drizzle of creamy dill sauce can elevate the sandwich’s flavor profile while keeping it authentic. These toppings are simple yet essential, as they create the perfect balance of texture and taste.

Creative Variations

If you’re feeling adventurous, there are countless ways to put a twist on the traditional matjesbrötchen recipe. Swap out the pickles for capers to add a briny punch, or try a spicy aioli instead of dill sauce for a modern kick. Adding sliced radishes or a handful of arugula can introduce a refreshing crunch and peppery flavor. For those who enjoy experimenting, pairing the sandwich with specialty bread, like sourdough or ciabatta, creates a unique spin while still honoring the dish’s origins.

Vegan and Vegetarian Alternatives

It’s possible to enjoy the essence of a matjesbrötchen recipe even if you follow a plant-based diet. Several vegan alternatives to matjes herring are available, often made from marinated eggplant or hearts of palm to mimic the texture and flavor of the fish. Pair these with the traditional toppings, such as onions, pickles, and dill, and you’ll have a satisfying sandwich. Vegan mayonnaise or plant-based yogurt can also serve as the base for a creamy dill sauce, ensuring you don’t miss out on the dish’s signature creaminess.

Pairing Matjesbrötchen recipe with Drinks

Pairing your matjesbrötchen recipe with the right drink enhances the overall experience. For a traditional touch, serve it with a crisp German pilsner or wheat beer, which complements the salty and tangy flavors of the sandwich. If you prefer non-alcoholic options, sparkling water with a slice of lemon or a cold herbal tea pairs beautifully. These choices cleanse the palate and highlight the freshness of the ingredients, making every bite even more enjoyable.

For more creative recipes, check out our Gipfeli recipe guide for a sweet and savory treat to complement your meal.

Serving and Storing Your Matjesbrötchen recipe

Matjesbrötchen with red onions, pickles, and sesame seed buns
Delicious Matjesbrötchen topped with red onions, pickles, and fresh parsley, served on sesame seed buns.

Best Ways to Serve Matjesbrötchen

Serving your matjesbrötchen recipe with thoughtful presentation can make it even more enjoyable. For an authentic experience, pair the sandwich with a side of crispy fries or a fresh green salad. Arrange the brötchen neatly on a wooden board, garnish with a sprig of dill, and add a wedge of lemon for a pop of color and extra zest. If you’re hosting a gathering, consider serving smaller, slider-sized portions for a fun and shareable appetizer. These little touches not only elevate the visual appeal but also enhance the overall dining experience.

How to Store Leftovers

While the matjesbrötchen recipe is best enjoyed fresh, leftovers can be stored with care to maintain their flavor. Remove any toppings like onions or pickles that might make the bread soggy. Wrap the sandwich tightly in plastic wrap or aluminum foil and place it in an airtight container in the refrigerator. Stored this way, it will stay fresh for up to 24 hours. When ready to enjoy, reassemble with fresh toppings for the best results.

Can You Freeze Matjesbrötchen?

Freezing a fully assembled matjesbrötchen isn’t recommended, as the bread and toppings might lose their texture. However, you can freeze the matjes herring separately in an airtight container for up to three months. To thaw, simply transfer it to the refrigerator overnight. Once thawed, you can quickly recreate the sandwich with fresh bread and garnishes, ensuring it tastes almost as good as when it was freshly made.

How Long Does It Stay Fresh?

The matjesbrötchen recipe relies on fresh ingredients, so it’s important to consume it quickly. As a rule of thumb, it’s best eaten within a few hours of preparation to preserve the bread’s softness and the fish’s delicate flavor. If stored properly in the fridge, as described earlier, it can be enjoyed the next day, though the texture of the bread might change slightly. Always check the freshness of the herring and other ingredients before consuming leftovers.

Tips for Exploring German Cuisine

Germany is renowned for its rich street food culture, and the matjesbrötchen recipe is just the beginning. Classics like bratwurst, currywurst, and pretzels are staples at festivals and food stalls across the country. Bratwurst, a flavorful sausage often served in a crusty roll, pairs beautifully with tangy mustard. Similarly, currywurst, a unique blend of sausage and curry ketchup, has its own cult following. Exploring these dishes alongside the matjesbrötchen allows you to fully appreciate the diversity of German street food.

Regional Variations of Brötchen Sandwiches

While the matjesbrötchen recipe is iconic in Northern Germany, other regions offer their own interpretations of brötchen sandwiches. In Bavaria, for example, leberkäse brötchen, made with thick slices of meatloaf-like sausage, is a popular choice. Meanwhile, in Berlin, you might find fish sandwiches featuring smoked salmon or pickled sprats. These regional twists highlight the versatility of brötchen as a base for delicious meals.

Where to Find Authentic German Ingredients

Finding authentic ingredients for your matjesbrötchen recipe doesn’t have to be challenging. Local European specialty stores often carry matjes herring, fresh bread rolls, and dill sauce. Online retailers are another great option, providing convenient access to high-quality ingredients. Some websites even offer pre-assembled kits, perfect for those new to German cooking. If you’re in Germany, visit a local market to experience the freshest offerings and pick up tips from the vendors.

Cooking with Matjes Beyond Brötchen

The matjes herring used in the matjesbrötchen recipe is incredibly versatile and can be used in various other dishes. Consider adding it to salads with boiled potatoes, fresh greens, and a light vinaigrette for a refreshing meal. It also works well in canapés, paired with rye bread and a dollop of sour cream for a simple yet elegant appetizer. With a little creativity, you can enjoy matjes in countless ways beyond the classic sandwich.

FAQs about Matjesbrötchen recipe

Can I use any type of herring for Matjesbrötchen?

While other types of herring can be used, authentic matjes herring is essential for capturing the true flavor of the matjesbrötchen recipe. Matjes herring is young, lightly salted, and pickled, giving it a tender texture and a delicate, slightly sweet flavor. Regular salted or smoked herring may work as substitutes, but they lack the signature mildness of matjes. If possible, stick to traditional matjes for an authentic experience.

Can I make Matjesbrötchen Recipe without pickles?

Yes, you can make a matjesbrötchen recipe without pickles, but it’s worth noting that pickles add an essential tangy contrast to the creamy and savory flavors of the sandwich. If you’re not a fan of pickles, consider substituting them with fresh cucumber slices or a mild pickle alternative, like sweet gherkins. These swaps can preserve the sandwich’s balance of textures and flavors.

What type of bread should I use for Matjesbrötchen Recipe?

The best bread for a matjesbrötchen recipe is a German brötchen—a crusty yet soft roll that complements the tender fish and flavorful toppings. If you can’t find authentic brötchen, Kaiser rolls or freshly baked ciabatta are great alternatives. The key is to choose a bread with a sturdy exterior and a soft interior to soak up the juices without falling apart.

Can Matjesbrötchen be made ahead of time?

Although it’s best to assemble and enjoy your matjesbrötchen recipe fresh, you can prepare some elements in advance to save time. Slice the onions and pickles, and store them in airtight containers. The matjes herring can also be kept chilled until needed. However, avoid assembling the sandwich too early, as the bread may become soggy. Instead, prepare the components and put everything together right before serving for optimal flavor and texture.

Conclusion

The matjesbrötchen recipe is a delightful way to explore the rich flavors of Northern German cuisine. By combining buttery matjes herring with crunchy onions, tangy pickles, and soft bread, you’ll create a sandwich that’s both simple and unforgettable. Throughout this guide, you’ve learned about its history, the importance of using authentic ingredients, and creative ways to customize and serve this iconic dish.

Whether you’re making it for a quick lunch, a dinner party, or to satisfy a craving for authentic German food, the matjesbrötchen recipe is sure to impress. With these tips, variations, and storage solutions, you’re equipped to enjoy this versatile dish in all its delicious forms. So, why not give it a try today and bring a taste of Germany into your home? Let us know how your matjesbrötchen turned out—we’d love to hear your thoughts and see your creations!

Button Mushrooms: Nutritional Facts You Need To Know

Have you ever wondered what makes a dish go from “good” to “amazing”? Button mushrooms might just be the secret you’ve been missing. These little wonders are full of earthy flavors that add a rich, savory taste to every meal, whether it’s a creamy soup, a hearty stew, or a fresh salad. But there’s more to these gems than just flavor—they’re also packed with nutrients like Vitamin D, potassium, and antioxidants that can improve your health in surprising ways.

What’s truly amazing about mushrooms is their versatility. You can sauté them with garlic for a quick side dish, toss them raw into a salad for a crunchy texture, or let them simmer in a stew to add depth to your flavors. No matter how you use them, they’re a must-have in your kitchen arsenal. So grab your apron, and let’s uncover why button mushrooms deserve the spotlight in your next meal!

What Are Button Mushrooms?

The Origins of Button Mushrooms

Button mushrooms have a rich history that dates back thousands of years. Known scientifically as Agaricus bisporus, these versatile fungi were first cultivated in France in the 17th century. Over time, their mild flavor and adaptability made them a culinary staple worldwide. Today, they’re grown in controlled environments, ensuring consistent quality and availability year-round.

Interestingly, these mushrooms are the same species as Portobello and cremini mushrooms. The difference lies in their growth stage button mushrooms are harvested young, giving them their smooth, white caps and delicate texture. Their popularity has surged over the years, making them one of the most widely consumed mushrooms globally.

Characteristics of Button Mushrooms

At first glance, it may seem unremarkable, but their simplicity is what makes them so special. They’re small, typically 1 to 3 inches in diameter, with firm, smooth caps and short stems. Their flavor is mild and slightly earthy, making them incredibly versatile in both raw and cooked dishes.

Because of their neutral taste, button mushrooms easily absorb the flavors of herbs, spices, and marinades. This adaptability makes them a favorite ingredient in everything from stir-fries to soups. Plus, they’re low in calories and fat, which means they fit seamlessly into a variety of diets.

Nutritional Profile

One of the standout qualities of these mushrooms is their impressive nutritional profile. These little fungi are packed with essential vitamins and minerals, including Vitamin D, potassium, and selenium. They’re also a good source of fiber, which supports digestion and promotes gut health.

What’s more, button mushrooms are incredibly low in calories—just 15 calories per 100 grams! This makes them a great choice for those looking to maintain or lose weight. For more detailed information on their nutritional value, check out this trusted resource on mushroom nutrition.

In addition, these mushrooms are naturally gluten-free, vegan, and keto-friendly, making them suitable for almost any dietary preference.

Button Mushrooms vs. Other Mushrooms

How do button mushrooms compare to other varieties like shiitake, Portobello, and cremini? While they all belong to the same family, each type has its unique characteristics. for instance, are milder in taste compared to the rich, umami flavor of shiitake or the meatier texture of Portobello mushrooms.

In terms of nutrition, these mushrooms hold their own. Although they may contain slightly less fiber or antioxidants than shiitake mushrooms, they still provide a significant amount of Vitamin D and potassium. Their affordability and availability also make them a convenient choice for everyday cooking, while their mild flavor ensures they complement a wide variety of dishes.

Health Benefits of Button Mushrooms

Rich in Antioxidants

One of the standout qualities of button mushrooms is their high antioxidant content. These compounds, such as ergothioneine and selenium, help protect your cells from damage caused by free radicals. By reducing oxidative stress, these mushrooms can play a role in preventing chronic diseases like heart disease and certain cancers.

Adding these mushrooms to your meals is an easy way to boost your antioxidant intake. Whether you enjoy them raw in salads or sautéed in a stir-fry, they’re an effortless addition to a healthy diet.

Boosts Immune Health

Did you know that button mushrooms can strengthen your immune system? Thanks to bioactive compounds like beta-glucans, they can enhance your body’s ability to fight off infections. Beta-glucans stimulate the production of immune cells, giving your body a natural defense boost.

For those seeking a natural way to support their immune health, incorporating these mushrooms into your diet is a smart choice. For an immune-boosting meal idea, check out this spicy chicken soup recipe with rice that pairs beautifully with mushrooms.

Supports Weight Loss

If you’re aiming to shed a few pounds, these mushrooms are a fantastic addition to your meal plan. They’re low in calories, contain no fat, and are packed with fiber, which keeps you feeling full longer. A 100-gram serving of button mushrooms has just 15 calories, making them a guilt-free way to add volume to your meals.

Replace high-calorie ingredients with these mushrooms in your favorite dishes for a lighter, healthier option. They work wonderfully as a substitute for meat in pasta, stews, or stir-fries, helping you enjoy your meals without compromising on flavor.

Promotes Heart Health

Heart health is another area where button mushrooms shine. Their potassium content helps regulate blood pressure, while their low sodium levels make them heart-friendly. Additionally, antioxidants in these little wonders reduce inflammation, a key factor in cardiovascular health.

Regularly including these little wonders in your diet can contribute to better heart health. Try them grilled as a side dish or incorporated into a hearty mushroom and barley soup for a meal that’s both delicious and nutritious.

How to Cook Button Mushrooms

Sautéed Button Mushrooms with Garlic and Herbs
Button mushrooms being sautéed with garlic and fresh herbs for a flavorful side dish.

Prepping Button Mushrooms for Cooking

Before cooking button mushrooms, it’s essential to prepare them properly to retain their flavor and texture. Start by gently brushing off any dirt with a damp cloth or soft brush avoid soaking them in water as they can absorb moisture and become soggy. Trim the stems if they’re dry or tough, but don’t discard them—they’re great for stocks or soups.

Once cleaned, slice, dice, or leave them whole, depending on your recipe. Prepped these mushrooms are incredibly versatile and ready to shine in everything from quick stir-fries to slow-cooked stews.

Sautéed Button Mushrooms Recipe

Sautéing is one of the simplest and most delicious ways to cook these mushrooms. Heat a pan over medium heat, add a splash of olive oil or butter, and toss in the mushrooms. Cook for 5–7 minutes, stirring occasionally, until they’re golden and tender.

For extra flavor, add minced garlic, a sprinkle of thyme, or a dash of balsamic vinegar. These sautéed button mushrooms make a perfect side dish or topping for pasta, steaks, or even burgers. Want to experiment more? Check out our guide to pairing mushrooms with hearty meals for inspiration.

Using Button Mushrooms in Salads

Fresh Salad with Button Mushrooms and Greens
A refreshing salad with button mushrooms, leafy greens, and cherry tomatoes.

Raw button mushrooms add a delightful crunch and subtle earthiness to fresh salads. Thinly slice them and toss with greens like spinach or arugula, cherry tomatoes, and a tangy vinaigrette.

For a protein-packed option, pair raw button mushrooms with boiled eggs, grilled chicken, or roasted nuts. Their mild flavor balances well with zesty dressings and savory toppings, making them a versatile ingredient for your next salad creation.

Adding Button Mushrooms to Soups and Stews

Button mushrooms bring depth and richness to soups and stews, enhancing the overall flavor of the dish. Their texture holds up well during slow cooking, making them an excellent addition to hearty recipes like beef stew or creamy mushroom soup.

To use them in soups, slice or chop the mushrooms and sauté them briefly before adding to the pot. This step enhances their flavor and ensures they don’t become rubbery. Whether you’re preparing a classic chicken and mushroom soup or a vegan lentil stew, button mushrooms are sure to elevate the taste.

Button Mushrooms in Different Diets

Are Button Mushrooms Keto-Friendly?

Yes, button mushrooms are an excellent choice for those following a keto diet. These mushrooms are low in carbohydrates and rich in nutrients, making them perfect for keto meal plans. With only 2 grams of net carbs per 100 grams, these mushrooms fit seamlessly into low-carb recipes.

They also add much-needed fiber to a keto diet, helping improve digestion. Whether you use them in creamy keto soups or as a substitute for pasta in a mushroom alfredo, button mushrooms make keto-friendly eating flavorful and satisfying.

Vegan Recipes with Button Mushrooms

For vegans, these mushrooms are a nutritional powerhouse. Their meaty texture makes them a fantastic substitute for animal protein in plant-based dishes. You can sauté them and serve as a topping for avocado toast, or blend them into a hearty mushroom pâté.

They’re also a great addition to vegan burgers and stews, providing a rich umami flavor without the need for meat. For a creative vegan dish, consider pairing button mushrooms with grilled vegetables and a drizzle of tahini sauce for a filling, nutrient-packed meal.

Gluten-Free Benefits

Naturally gluten-free, button mushrooms are a versatile ingredient for anyone avoiding gluten. They’re safe for those with celiac disease or gluten intolerance and can replace wheat-based ingredients in many recipes.

Try using these mushrooms as a pizza crust substitute or dicing them finely to create a gluten-free stuffing. Their mild flavor works wonderfully as a base for sauces, too, allowing you to enjoy creamy textures without relying on flour-based thickeners.

Button Mushrooms in Mediterranean Cuisine

Mediterranean dishes often emphasize fresh, wholesome ingredients, and button mushrooms fit perfectly into this cuisine. Their mild, earthy flavor pairs well with olive oil, garlic, and fresh herbs like oregano and thyme.

Use them in dishes like stuffed mushrooms with feta cheese, or toss them into a vibrant Greek salad for added texture. They’re also ideal in Mediterranean-inspired soups or stews, where their delicate flavor enhances the taste of seasonal vegetables and legumes.

For more inspiration, explore recipes like this grilled chicken thigh guide.

Buying and Storing Button Mushrooms

How to Select Fresh Button Mushrooms

When shopping for these mushrooms, choosing the freshest ones ensures the best flavor and texture for your recipes. Look for mushrooms with firm, smooth caps that are white or slightly off-white. Avoid mushrooms with dark spots, slimy surfaces, or broken caps, as these are signs of age or poor storage.

A gentle sniff can also help fresh button mushrooms should have a mild, earthy aroma. If you’re buying pre-packaged mushrooms, check for condensation or discoloration in the container, as this can indicate spoilage.

Proper Storage Techniques

To keep button mushrooms fresh, store them correctly. Place them in a paper bag or a container lined with a paper towel to absorb excess moisture. Store them in the refrigerator, preferably in the crisper drawer, where the temperature is consistent.

Avoid storing these mushrooms in sealed plastic bags, as trapped moisture can lead to faster spoilage. Properly stored, they can last for up to a week. If you notice slight drying, use them quickly in cooked dishes to avoid waste.

Can You Freeze Button Mushrooms?

Yes, you can freeze these mushrooms for longer storage, but it’s best to blanch or sauté them first to preserve their texture and flavor. Clean the mushrooms thoroughly, then slice or leave them whole before briefly boiling or sautéing. Allow them to cool, then pack into airtight freezer bags.

Frozen button mushrooms work well in cooked dishes like soups and stews, but they may lose their firmness when thawed. Use them within three months for the best taste and texture.

Seasonal Availability

One of the best things about button mushrooms is that they’re available year-round. Thanks to advanced cultivation techniques, these mushrooms are consistently grown in controlled environments, ensuring steady supply regardless of the season.

While they’re widely available, peak seasons can vary depending on your location. During these times, you might find these mushrooms with an even fresher taste and better prices. Visiting local farmers’ markets can be a great way to find high-quality, freshly harvested mushrooms.

For more ideas on incorporating fresh produce into your meals, check out our article on cottage cheese recipes, which pairs wonderfully with the versatility of these mushrooms.

FAQs

Do Button Mushrooms Have a Nucleus?

Yes, button mushrooms do have a nucleus in their cells. Like all fungi, they are eukaryotic organisms, meaning their cells contain a defined nucleus enclosed within a membrane. This distinguishes them from prokaryotic organisms like bacteria, which lack such a structure. The nucleus in these little wonders cells plays a vital role in controlling their growth and reproduction, making them a fascinating part of the fungi kingdom.

What Are Button Mushrooms?

These mushrooms are one of the most popular and widely cultivated types of mushrooms. Scientifically known as Agaricus bisporus, they are the immature form of the same species that includes cremini and Portobello mushrooms. Characterized by their small, round, white caps and mild, earthy flavor, they’re incredibly versatile and are used in cuisines around the world. Whether eaten raw or cooked, button mushrooms add texture and nutrients to a wide variety of dishes.

Can You Eat Button Mushrooms Raw?

Absolutely! Button mushrooms are safe to eat raw and make a crunchy, nutritious addition to salads, sandwiches, and vegetable platters. Their mild flavor blends well with a variety of dressings and dips. However, it’s important to clean them thoroughly before eating to remove any dirt or debris. For those with sensitive stomachs, lightly cooking these little wonders may make them easier to digest while still retaining most of their nutritional benefits.

How to Cook White Button Mushrooms?

Cooking white button mushrooms is quick and easy, making them a staple in many kitchens. Start by cleaning them with a damp cloth or brush to remove dirt. Then, decide on your preferred cooking method—sautéing, roasting, grilling, or adding them to soups and stews. For a simple and delicious sauté, heat a bit of olive oil or butter in a pan, add the mushrooms, and cook over medium heat for 5–7 minutes until they’re golden and tender. Enhance their flavor with garlic, herbs, or a splash of soy sauce. The possibilities are endless with these versatile mushrooms!

Conclusion

These mushrooms are more than just a tasty ingredient—they’re a powerhouse of nutrition and versatility that can elevate any meal. Throughout this guide, you’ve learned about their rich history, unique characteristics, and impressive health benefits, from boosting your immune system to supporting weight loss and heart health.

We’ve also explored how to prepare and cook button mushrooms, whether you prefer them raw in salads or sautéed for a flavorful side dish. Their adaptability makes them a perfect fit for a variety of diets, from keto to gluten-free, and their year-round availability means you can enjoy their benefits anytime.

How To Make Beef Bottom Round Steak Tender And Juicy Every Time

You know the moment: you’re standing in the kitchen, eyeing that beef bottom round steak with both anticipation and a hint of uncertainty. In your heart, you imagine a melt-in-your-mouth bite, rich with flavor and succulent juices—the kind of steak that inspires nods of approval and requests for seconds. Yet, at the same time, you may wonder if this lean cut is destined to emerge tough and chewy. If you’ve been there—caught between your culinary vision and practical concerns—rest assured, you’re not alone. Plenty of individuals have approached the challenge of preparing this particular piece of beef, only to wonder where to begin.

The wonderful news is that you hold all the power to transform it into a mouthwatering dish. Armed with the right techniques and a little patience, you can coax out incredible taste and tenderness from the often-overlooked bottom round steak. This comprehensive guide will lead you step-by-step, ensuring you’re fully equipped to make a memorable meal that brings everyone around the table with satisfied smiles.

Why Beef Bottom Round Steak Deserves Your Attention

You might ask: Why should you focus on beef bottom round steak in the first place? After all, the meat counter offers so many attractive choices, from pricey ribeyes to marbled strip steaks. Yet the bottom round steak stands out for several key reasons that may surprise you:

  1. Budget-Conscious Option
    • Beef bottom round steak costs less than some of the more famous cuts. If you’re being mindful of your grocery budget, this lean slice offers solid value. It allows you to serve a hearty meal without straining your resources.
  2. Nutrient Powerhouse
    • Lean cuts often carry a lower fat profile, which can be ideal if you’re balancing your meal plan. Bottom round steak is still rich in protein, iron, zinc, and other vital vitamins, making it a healthy centerpiece for your dinner table.
  3. Adaptability in Cooking
    • Despite its reputation for being a tougher cut, the bottom round steak can be crafted into numerous delicious dishes. You can marinate it, slow-cook it, or even treat it with a quick sear if you use the correct technique. That versatility makes it a smart staple to keep on hand for various cooking adventures.
  4. Satisfying Flavor
    • Though it’s less marbled than other cuts, you’ll discover that bottom round steak retains a bold, beefy taste. When you allow it to cook properly and break down the connective tissues, you’ll experience a dish that surprises you with its robust flavor.

In essence, beef bottom round steak offers a perfect combination of affordability, flavor, and health benefits. It’s a cut that lets you dive into gourmet-level cooking without spending lavishly. By giving it a bit of special care, you can enjoy a mouthful of savory delight.

Selecting the Perfect Beef Bottom Round Steak

Before you start seasoning or tenderizing, it’s crucial to choose the right piece of beef bottom round steak. It’s easy to overlook a few simple cues when you’re in a hurry at the store, but paying attention at this stage sets you up for success in the kitchen.

A close-up of a fresh beef bottom round steak being inspected by a hand, placed on a wooden cutting board with soft natural lighting. The steak has a deep red color and faint marbling, surrounded by kitchen essentials like a knife, salt, and pepper grinder
Inspecting the marbling and freshness of a beef bottom round steak—an essential step for a successful recipe.

Look for Good Marbling

You often hear “marbling” referenced in steak descriptions—those thin veins of white fat that thread through the lean portion. While beef bottom round is generally leaner, you might spot slight marbling. These delicate lines of fat can enhance moisture retention, especially when you’re cooking on lower heat for longer stretches. The key is to look for a balanced ratio: You don’t want a piece so fatty that it loses its “lean” status, but you also don’t want something entirely devoid of these little flecks that add flavor.

Inspect Thickness

It’s also wise to check the thickness of the steak. A cut that’s too thin might dry out quickly, especially if you plan to sear or grill it. On the other hand, an overly thick piece needs longer cooking and might intimidate you if you’re short on time. Ideally, you’ll aim for steaks that measure around one inch thick, giving you a nice balance between cooking time and consistency of results.

Freshness Matters

You can spot freshness by observing the coloration—rich, bright red typically indicates a fresher cut. Steaks that appear more brownish might have been sitting for a while. Use your nose as well. Any sharp or off-putting scent should be an immediate red flag. When you have a choice, purchase steaks that are packaged on the same day or check the “best by” date to ensure you’re getting a top-quality piece.

Essential Tools and Techniques for Tenderizing

The difference between a tough, dry steak and one that is tender and juicy can come down to the steps you take prior to cooking. Let’s delve deeper into proven methods that soften the meat fibers so you end up with an exquisite dining experience.

Mechanical Tenderizing with a Meat Mallet

Using a meat mallet or tenderizer is one of the oldest yet most efficient ways to improve the texture of a tough cut. Certified Angus Beef explains various tenderizing methods and best practices you can follow at home. Moreover, if you’re interested in safety and proper handling, check out USDA guidelines on mechanical tenderization to ensure you’re preparing your beef responsibly.

  • Wrap or Cover the Steak: Place the beef in plastic wrap or a sealed bag. This prevents juice splatters and keeps your workspace clean.
  • Even Pressure: Apply consistent force across the surface, focusing on thicker segments.
  • Moderation: Avoid over-flattening. You want the fibers softened, not pulverized.

Using a mallet may seem old-fashioned, but there’s a reason this technique has stuck around for generations.

Marination Methods

Beef bottom round steak soaking in a glass dish filled with a citrus-based marinade, including lime slices, garlic, cilantro, and olive oil, surrounded by fresh herbs and a wooden spoon on a rustic countertop.
Transform your beef bottom round steak with flavorful marinades. This image highlights a vibrant citrus-based blend that tenderizes and infuses rich flavors

Marinating is another go-to approach that both tenderizes and infuses flavor. You’ll want to choose a balanced blend of acid, oil, and aromatics. For acid, options include vinegar, citrus juices, or wine. These ingredients break down tougher fibers. The oil adds moisture, while herbs and spices layer on the flavor dimension. A few recommendations to consider:

  • Citrus-Based Marinades: Perfect if you want a tangy zing. Lime, lemon, or even pineapple juice can work wonders.
  • Vinegar Infusions: Red or balsamic vinegar offers a deeper flavor.
  • Wine-Soaked Blends: Red wine or even certain white wines can introduce subtle complexities.

Allow your steak to soak for at least 2 hours, but you’ll often get better results if you can marinate overnight. Just be sure not to overdo it—too much acidity for too long can compromise the meat’s texture, making it mushy rather than beautifully tender.

Slow Cooking or Braising

For those who prefer a one-pot approach that practically guarantees tenderness, slow cooking or braising is the way to go. This method uses low heat and extended cooking times to break down connective tissues. Braising involves searing the steak first to lock in flavor, then partially submerging it in a flavorful liquid (like beef stock or a savory sauce), and allowing it to simmer gently. Alternatively, using a slow cooker with ample liquid, vegetables, and spices can yield an equally delicious result. The extended heat exposure transforms the fibrous meat into a succulent centerpiece. If you favor a set-it-and-forget-it approach, you’ll find slow cooking to be your best friend when working with tougher cuts like beef bottom round.

Step-by-Step Method to Make Beef Bottom Round Steak Tender and Juicy

Let’s walk through a general method that combines a few of the best practices described above. Feel free to tweak these steps based on personal preferences or the ingredients you have on hand. The goal here is to simplify your approach, ensuring consistent success every time.

Step 1 – Tenderize the Steak

In this crucial first step, you can use a meat mallet if you want to physically break down tougher fibers. If you don’t have a mallet, a rolling pin or the back of a sturdy skillet can also do the trick. Start gently and then gradually build pressure until the steak looks uniformly flat.

Step 2 – Season Generously

Seasoning isn’t just about flavor. Salt helps draw moisture into the proteins, so you’ll want to apply it evenly across both sides of the steak. Pepper, garlic powder, onion powder, and your favorite herbs can also add depth. The idea is to enhance the steak’s natural qualities without overwhelming its inherent flavor.

Step 3 – High-Heat Searing

Begin cooking by searing the steak over high heat. You can do this in a skillet with a bit of oil or on a grill. Two to three minutes on each side often achieves a lovely crust that locks in essential juices. Keep a close eye to avoid scorching. This step sets the foundation for a steak that remains moist and savory.

Step 4 – Lower Heat and Cook Slowly

Once you’ve locked in those initial juices, transition to a slower cooking method. That could mean placing the steak in your oven at a moderate temperature (around 325°F/160°C) or transferring it to a slow cooker with some broth or sauce. The prolonged exposure to gentle heat works magic on the connective tissues, leaving you with a fork-tender result.

Step 5 – Rest Before Serving

As tempting as it may be to slice in the second it’s done, giving the steak a rest of about 5 to 10 minutes is essential. When you let it sit, the juices that have migrated to the center during cooking redistribute through the meat, ensuring each bite is succulent.

Following these five steps can bring about a beautiful transformation, taking a humble piece of bottom round steak and turning it into a dish that wows both you and your dinner companions.

Mouthwatering Recipes to Try

Now that you’ve got a solid understanding of how to pick, tenderize, and cook beef bottom round steak, let’s move on to some recipes that highlight its versatility. Each option below demonstrates a slightly different approach, so pick the one that aligns best with your mood and schedule.

Recipe #1: Classic Marinade for Beef Bottom Round Steak

Perhaps you want a quick method that you can prepare in the morning and then have ready by evening. A well-structured marinade can do most of the work while you go about your day. Here’s an example that relies on a handful of common pantry items yet delivers a powerful flavor punch.

Ingredients Table

IngredientQuantityNotes
Olive Oil2 tbspHelps keep the steak moist and adds richness
Soy Sauce2 tbspContributes savory depth, pairing well with beef
Worcestershire Sauce1 tbspBalances savory and tangy notes
Lemon Juice1 tbspAdds acidity to tenderize, brightens overall taste
Garlic (minced)2 clovesInfuses a pungent aroma
Black Pepper1 tspA traditional seasoning element

Instructions:

  1. In a medium bowl, whisk together the olive oil, soy sauce, Worcestershire sauce, lemon juice, minced garlic, and black pepper. You’re creating a liquid that blends tanginess, umami, and subtle aromatic undertones.
  2. Place your beef bottom round steak in a sealable bag or airtight container. Pour the marinade on top, making sure to coat all sides evenly.
  3. Seal the bag or container. Let it chill in the refrigerator for at least 2 hours. For maximum infusion, aim for about 8 hours or overnight.
  4. When you’re ready to cook, remove the steak from the marinade. Pat it dry slightly with paper towels (excess marinade might burn if you plan to sear).
  5. Sear each side over medium-high heat for a couple of minutes to lock in flavor. Then, reduce the heat or move the steak to indirect heat until it reaches your desired internal doneness. A medium-rare to medium range often suits this cut particularly well.

Flavor Tip: Adding a dash of onion powder or paprika can lend more depth to your marinade if you appreciate an extra kick. Feel free to customize the balance of citrus, soy, and herbs according to your taste preferences.

Recipe #2: Slow Cooker Comfort Beef Bottom Round Steak

Slow Cooker Comfort Beef Bottom Round Steak"

Alt Text:
"A slow cooker filled with tender beef bottom round steak, carrots, potatoes, and onions, simmering in a rich broth, with steam rising in a cozy kitchen setting.
Effortless and delicious, this slow cooker beef bottom round steak recipe delivers tender, flavorful results for your busy days.

If you’ve got a day packed with errands or personal commitments, the slow cooker method can be your best friend. It frees up your time while delivering a mouthwatering payoff, as slow heat tenderizes the meat to a delightful texture.

Ingredients Table

IngredientQuantityNotes
Beef Broth1 cupKeeps the steak moist and adds a savory base
Onion (sliced)1 mediumContributes sweet, aromatic depth
Carrots (sliced)2Adds natural sweetness and color
Garlic Powder1 tspSimplifies seasoning, pairs well with onion
Thyme (dried)1 tspA subtle herbal component
Salt & PepperTo tasteAdjust seasoning at the end if needed

Instructions:

  1. Start by searing your bottom round steak in a hot skillet. Two to three minutes per side sets a caramelized crust that locks in the steak’s juices.
  2. Transfer the steak to your slow cooker. Pour in the beef broth, then layer the onions and carrots around the meat. Sprinkle garlic powder, thyme, and a dash of salt and pepper.
  3. Cover the slow cooker and set it to low heat. Let it cook for about 6 to 8 hours. This gentle method gradually coaxes out the connective tissues, leaving you with a steak so tender it practically falls apart.
  4. Before serving, sample the broth and adjust seasonings if needed. Some prefer additional salt, a splash of soy sauce, or a sprinkle of fresh herbs to brighten the final dish.
  5. Plate your steak with the carrots and onions, drizzling a bit of the cooking juices on top for extra flavor. This is one of those comfort meals that pairs nicely with mashed potatoes or crusty bread to sop up the sauce.

Time-Saving Tip: If your mornings are too hectic to handle the searing step, you can still place all ingredients in the slow cooker without it. While you’ll miss out on some browning effects, the steak will still be incredibly succulent after a full day’s simmer.

Pro Tips for Serving and Storage

Once your steak is cooked to perfection, you don’t want to lose any of that tenderness or flavor due to improper handling. Consider these final touches that ensure your meal goes from good to absolutely unforgettable.

Slice Against the Grain

When you carve your steak, pay attention to the muscle fibers. You’ll notice they typically run in one direction. Cutting across those fibers shortens them, making each mouthful far easier to chew. This small step can make a huge difference in texture.

Properly Store Leftovers

Any steak that remains unused can be stored in airtight containers or wrapped in heavy-duty foil. Keep it in the fridge for up to three days. The key is to seal out as much air as possible, preventing excess drying and preserving the steak’s succulence.

Reheat Gently

You’ve put in all this effort to achieve tenderness, so the last thing you want is to overcook it when reheating. Warm your steak slowly using low heat—either in a covered skillet with a splash of broth or in a low-temperature oven. By using this approach, you lock in moisture instead of evaporating it.

Get Creative with Leftovers

Leftover beef bottom round steak can reinvent itself in numerous ways. Slice it thinly for sandwiches, chop it into cubes for stews, or even cut it into strips for tacos. This ensures you get the most mileage out of your meal without feeling like you’re eating the same thing repeatedly.

Experiment with Sauces

Maybe you want a peppercorn sauce, a mushroom gravy, or even a tangy chimichurri. Sauces can transform the same base dish into something entirely different. Feel free to play around with different flavors to find what resonates with your palate.

Final Serving Thoughts

By considering these serving and storage tips, you extend the life and enjoyment of your delicious creation. Whether you’re dishing up steak for a special occasion or planning for flavorful leftovers, these steps will keep your meal tasting fresh, tender, and unforgettable.thoughtfulness.

Conclusion

Indeed, you’ve journeyed through every crucial phase of handling beef bottom round steak—selecting, tenderizing, cooking, and even storing it properly. What once appeared as a potentially tough, underappreciated cut can now become a star attraction at your dining table. In fact, all it takes is a thoughtful approach: tenderizing techniques, flavorful seasoning, and the patience to cook it low and slow when needed. By focusing on these simple but powerful concepts, you empower yourself to create meals that satisfy your cravings and delight your loved ones.

Moreover, imagine the compliments you’ll hear when you serve up slices of tender, juicy steak for a weeknight dinner or a cozy weekend gathering. Simultaneously, picture the aroma that fills your kitchen, the sizzling sear in your pan, and the satisfying first bite that reminds you why you chose beef bottom round in the first place. In that moment, you’ll discover that culinary success doesn’t need to hinge on pricey cuts. Therefore, your skill and care are more than enough to transform a modest piece of beef into a restaurant-caliber feast.

So, are you ready to get cooking? Consequently, it’s time to put your newfound knowledge into practice. Whether you prefer a bright marinade or the simplicity of a slow cooker meal, you now have an arsenal of strategies to ensure your steak is mouthwateringly tender every time. Similarly, you know precisely which steps to follow, which pitfalls to avoid, and which finishing touches can elevate the dish from ordinary to extraordinary. Finally, take that next step: gather your ingredients, heat your pan, and let the luscious fragrance of perfectly cooked steak fill your home.

FAQ: Beef Bottom Round Steak

What is the best way to tenderize beef bottom round steak?

You can choose from multiple approaches, but a classic marinade with acidic elements (like lemon juice or vinegar) is a great option. You might also find success using a meat mallet to break up tough fibers before cooking. Each strategy loosens the muscle structure, boosting tenderness.

How long should I marinate my beef bottom round steak?

Aim for at least 2 hours, although letting it rest in the marinade overnight usually provides even deeper flavor. Ensure you don’t exceed 24 hours, as an overly acidic soak can degrade the texture.

Can I cook beef bottom round steak quickly on high heat?

While a high-heat sear is helpful to lock in juices initially, this cut usually benefits from a follow-up of lower, slower cooking. If you rely solely on intense heat, you might wind up with a tough final product.

What’s the best internal temperature for beef bottom round steak?

Medium-rare to medium (approximately 130°F–140°F or 54°C–60°C) often delivers the ideal level of tenderness. That said, personal taste can dictate how cooked you prefer your steak. Use a reliable meat thermometer to avoid guesswork.

Are there any alternative cuts similar to beef bottom round steak?

Yes. You might explore top round or eye of round, which offer comparable lean profiles. Just remember that each cut has its own subtle differences in flavor and texture. But if you’ve got your tenderizing methods down, you’ll likely enjoy good results with those cuts as well.

When you feel the excitement building about finally tackling that beef bottom round steak, trust yourself. You’ve got the knowledge to make it work, the tools to ensure success, and the passion to create a memorable meal. So why not turn today into the day you step into your kitchen and give it a go?

How Many Calories in a Pound of Ground Beef Healthy?

Ever wonder how many calories in a pound of ground beef healthy? Well, you’re not alone. Ground beef is a staple in many U.S. households, but figuring out its calorie count and how it fits into a healthy eating plan can be puzzling. In this article, we’ll dive deep into the calorie count in ground beef, explore different fat percentages (like 80/20 ground beef nutrition and 90/10 ground beef), and discover ways to make the most of this protein-packed favorite without piling on unnecessary calories. We’ll also talk about cooking tips, recipe ideas, and debunk a few myths surrounding the nutritional value of ground beef. Ready to dig in and learn more? Let’s get started!

Understanding Ground Beef Calories: An Overview

Defining Ground Beef Varieties

Ground beef is typically made by grinding up cuts of beef, often including trimmings from more marbled cuts. The lean-to-fat ratio commonly seen as 80/20, 85/15, or 90/10 tells you how much fat vs. lean muscle is present. For instance, 80/20 ground beef nutrition means it’s 80% lean and 20% fat by weight. This ratio directly affects the fat content, and yes, the more fat, the higher the calorie count. But hold on—fattier isn’t always worse. Sometimes, a bit of fat helps boost flavor and tenderness when cooking. Yet if you’re focusing on a balanced diet, you’ll want to keep track of that number on the label.

You might also see extra-lean ground beef or grass-fed ground beef at the grocery store. These variations can have different nutrition facts and even slightly different tastes. Grass-fed beef, for instance, tends to have less overall fat while providing a good amount of protein content. By understanding these labels, you’ll be better able to match your health goals with the type of beef in your cart.

Why Calorie Content Matters

So, how many calories in a pound of ground beef healthy? The short answer is: it depends. Different lean percentages will alter the calorie-conscious meals you create. Let’s face it, piling on calories without noticing can lead to weight gain or other health issues, so being mindful of your calorie reduction tips is key. When you look at the label, the calorie counts reflect both the saturated fat and protein content in the ground beef. Too much saturated fat can impact cholesterol levels, while the protein helps build and maintain muscle.

But don’t worry—ground beef can still be part of healthy eating. With proper meal planning, portion control, and smart cooking methods (like draining away excess grease), ground beef can comfortably fit into your daily intake. This is especially true when you pair it with other nutrient-dense ingredients like veggies, whole grains, and legumes to ensure a thorough macronutrient balance. By keeping an eye on portion sizes and using leaner cuts, you’re already on the path to making low-calorie beef dishes that satisfy your taste buds.

Key Factors That Affect Calorie Count in a Pound of Ground Beef

Lean Percentage (80/20 vs 90/10) and Calorie Differences

Lean percentage is one of the biggest contributors to how many calories in a pound of ground beef healthy? In fact, the ratio of lean meat to fat commonly shown as 80/20 or 90/10—can change the overall calorie count in ground beef. For instance, 80/20 ground beef nutrition indicates that 80% of the product is lean muscle while the remaining 20% is fat. Because fat carries more calories per gram than protein, higher-fat ground beef usually packs more total calories.

However, not everyone needs the same amount of dietary fat, so be sure to pick the ratio that aligns with your goals. Meanwhile, if you plan to cook your ground beef thoroughly, keep in mind that some of the fat will drain off, lowering the final calorie content. But don’t let that mislead you initially, 80/20 ground beef still contains more calories than a leaner option. Therefore, checking labels before purchasing can be a real game-changer for your healthy eating routine.

Moreover, portion control is key. Consuming moderate amounts of 80/20 or 90/10 ground beef can help balance your overall macronutrient intake. Plus, pairing leaner ground beef with wholesome sides like vegetables and whole grains can boost your meal’s nutritional value while keeping calories in check.

Cooking Methods and Their Impact on Calorie Content

Cooking methods play a vital role in determining how many calories in a pound of ground beef healthy? Although raw ground beef can have a predictable calorie count, how you cook it can shift the overall nutritional profile. For example, grilling or broiling allows excess fat to drip away, reducing both the fat content and the final calorie total. Meanwhile, pan-frying in oil might add extra calories, so try using cooking sprays or minimal oil for a lighter meal.

Additionally, draining the grease after cooking is another easy way to cut back on calories and saturated fat. If you want to go further, rinsing cooked ground beef under hot water can remove even more fat, although you’ll lose some flavor. However, adding herbs, spices, or low-calorie sauces can help bring back taste without significantly boosting calories. Furthermore, try combining ground beef with lower-calorie ingredients like mushrooms, onions, or bell peppers for extra volume and nutrient density.

If you’re hungry for more smart cooking tips, you might explore The Ultimate Guide to Grilled Chicken Thigh Recipes to discover easy ways to lighten up traditional meals. After all, it’s not just about the raw product it’s about how you cook and serve it that can make a big difference in the final calorie outcome.

How Many Calories in a Pound of Ground Beef (Healthy) with Different Fat Contents

Lean ground beef browning in a pan with veggies how many calories in a pound of ground beef
Cooking lean ground beef with vegetables to balance nutrients.

80/20 Ground Beef Calorie Analysis

People often wonder “how many calories in a pound of ground beef healthy?” especially when dealing with 80/20 varieties. One pound of 80/20 ground beef can contain upwards of 1,150 to 1,200 calories before cooking. However, this number can shift once you brown or grill the meat, draining away a fair portion of the fat. While cooking helps reduce the total calorie count, you still need to stay aware of added fats during preparation. For example, if you sauté the beef in extra oil or butter, you’ll add more calories than if you opted for nonstick cooking spray or water sautéing.

Still, 80/20 ground beef has its perks. It can deliver a juicy texture and deep flavor that leaner cuts might lack. To keep health goals in focus, accompany it with whole grain pasta or brown rice and add colorful vegetables on the side. That way, you can enjoy the flavor of ground beef while creating a balanced plate packed with protein and essential micronutrients.

90/10 and Other Lean Options: Calorie Comparisons

On the flip side, 90/10 ground beef (or even 93/7) is a popular choice for those looking to keep saturated fat to a minimum. One pound of 90/10 ground beef typically ranges from 800 to 900 calories. While that’s still significant, it’s considerably fewer than higher-fat options. Moreover, leaner ground beef is often easier to fit into a calorie-conscious meal plan, especially if you’re watching your daily fat intake.

However, some folks fear leaner ground beef might be dry or less flavorful. The good news is, you can easily boost moisture by adding low-calorie liquids like broth or tomato sauce. Another option is to mix in diced veggies for extra taste and texture. In this way, you’ll enjoy a hearty meal without straining your calorie budget. Indeed, finding how many calories in a pound of ground beef healthy? doesn’t mean sacrificing taste—it simply requires mindful choices and smarter cooking hacks.

Cooking Methods to Reduce Ground Beef Calories

Draining and Rinsing Strategies to Lower Fat

Cooking methods can have a major impact on how many calories in a pound of ground beef healthy? After all, not every preparation method leaves the same fat content behind. First, consider browning your ground beef in a nonstick skillet and draining the grease thoroughly. This simple step helps remove excess fat, thereby cutting down on total calories. Furthermore, rinsing your beef under warm water after cooking eliminates even more fat though it may also wash away some flavor. For that reason, many cooks prefer to skip rinsing, but if you’re striving for the lightest option possible, it’s a viable strategy.

Moreover, keep in mind that moisture can be lost when draining or rinsing ground beef. To add flavor back, sprinkle in your favorite herbs and a splash of low-sodium beef broth. This tactic lets you keep the savory taste while still enjoying fewer calories. In addition, try pairing your drained ground beef with nutrient-dense vegetables, such as onions and bell peppers. These veggies not only boost taste but also add fiber, which helps you feel full longer.

Healthy Seasoning and Preparation Tips

While salt and pepper are classic for seasoning ground beef, it’s always fun to mix things up. Consider blending in dried basil, oregano, or cumin for a Mediterranean twist. Likewise, add a hint of chili powder or smoked paprika if you’re craving a smoky bite. These spices work wonders without piling on extra saturated fat or calories, helping you keep that calorie-conscious meal plan on track.

Additionally, don’t overlook how cooking temperatures affect the final outcome. Lower-heat methods, like simmering or braising, lock in moisture, offering a tender texture even when you’re using lean ground beef. Meanwhile, higher-heat methods like grilling or broiling allow fat to drip off. Above all, remember that moderation counts: keep portion sizes reasonable and balance each serving of ground beef with other nutritional foods, such as whole grains and leafy greens. By doing so, you’ll savor every bite without overloading on calories.

Part 5: How Ground Beef Fits Into a Balanced Diet

Including ground beef in your diet can be part of a balanced eating plan, but portion control is key. In general, many people aim for around 2,000 calories a day, though your specific needs may vary based on age, activity level, and health goals. Paying attention to how many calories in a pound of ground beef healthy? can keep you from consuming more fat than your body needs. Thus, splitting a pound of ground beef into several meals—rather than having it all at once helps you stay within your daily calorie target.

Likewise, choosing leaner ground beef can be beneficial if you’re watching your fat intake or seeking to maintain a certain weight. Yet don’t forget that a balanced plate usually includes multiple food groups. For instance, if you make a ground beef dish for dinner, incorporate side items like quinoa, beans, or steamed veggies to enrich your meal. The goal is to balance proteins, carbohydrates, and healthy fats while keeping calories in check.

Balancing Macronutrients for Overall Health

Although protein plays a vital role in muscle repair and hormone production, focusing on macronutrient balance is just as important. Rather than obsessing over calorie counts alone, aim to include quality carbs (like whole grains), healthy fats (such as avocado or olive oil), and plenty of vitamins and minerals. When ground beef is part of your diet, select cooking methods and portion sizes that support your overall health goals.

By carefully balancing your meal components, you’ll boost the nutritional value of your dishes without losing flavor. For example, consider using lean ground beef in a stir-fry with crunchy vegetables and a savory sauce. This kind of meal highlights proteins, fiber, and micronutrients, which keep you energized and satisfied. Also, try different combinations to see what you enjoy most—food should be both nourishing and delicious. Above all, remember that ground beef can be a healthy choice if you remain mindful of portion sizes and serving methods.

Healthy Recipes Using Ground Beef

Homemade ground beef tacos demonstrating how many calories in a pound of ground beef healthy
A flavorful taco meal prepared with lean ground beef.

Low-Calorie Ground Beef Dishes

Coming up with low-calorie beef dishes is easier than you might think. For instance, you can swap traditional burger buns for lettuce wraps to cut carbs and boost overall nutritional value. Additionally, you can prepare a simple ground beef stir-fry with plenty of vegetables, like bell peppers, mushrooms, and onions, served over cauliflower rice. This approach keeps calories low while still offering a satisfying, protein-packed meal.

Moreover, it helps to use lean ground beef varieties whenever possible. However, if you prefer the taste of 80/20, go ahead and drain off any extra fat after cooking. Meanwhile, keep sodium in check by choosing low-salt sauces and seasonings. This way, you can enjoy your meal without worrying about hidden calories. If you’d like even more ground beef ideas, try mixing in beans or lentils for a hearty, fiber-rich chili that doesn’t feel heavy.

Nutrient-Dense Ingredients to Pair With Ground Beef

Choosing ingredients that naturally complement ground beef is key to maintaining a balanced diet. For example, pair ground beef with spinach or kale to load up on vitamins A and C. Furthermore, stir in quinoa or brown rice for extra fiber and slow-digesting carbs. These additions help turn a simple dinner into a nutrient-dense meal brimming with flavor.

Still wondering how many calories in a pound of ground beef healthy? The trick is to build each dish around colorful produce and modest amounts of high-quality fat. For a fresh twist, toss diced tomatoes and chopped zucchini into your pan while the ground beef cooks. Then, season with herbs like oregano, basil, or thyme. With each bite, you’ll get protein, vitamins, and minerals minus any major guilt. Indeed, finding that perfect balance between taste and nutrition is a snap when you pick the right ingredients.

Frequently Asked Questions

How Many Calories in a Pound of 80/20 Ground Beef?

One pound of 80/20 ground beef often contains around 1,150 to 1,200 calories before cooking. However, draining the beef after browning can reduce the total fat content, lowering the final calorie count. Indeed, cooking methods like grilling or broiling also help, as they allow fat to drip away. Because of this, the answer to how many calories in a pound of ground beef healthy? varies based on both fat percentage and how you choose to cook it.

How Many Calories in a Half Pound of Ground Beef?

A half pound of ground beef typically holds about half the calories of a full pound. In other words, half a pound of 80/20 ground beef ranges from 575 to 600 calories. On the other hand, leaner ground beef will show a smaller calorie total for the same serving size. Consequently, if you’re watching your fat or calorie intake, splitting your servings is a simple strategy for keeping portion sizes in check.

How Many Calories in a Quarter Pound of Ground Beef?

In many burgers and recipes, a quarter pound of beef is a common serving. Depending on the fat ratio, a quarter-pound patty might have anywhere from 200 to 300 calories. But remember, cooking techniques change these numbers slightly. Additionally, adding cheese, sauces, or toppings can easily raise the calorie count, so watch the extras if you’re aiming for calorie-conscious meals.

How Many Calories Are in 1 lb of 90 Lean Ground Beef?

When you opt for 90/10 ground beef, you’re selecting a leaner cut, which naturally means fewer calories. As a rule of thumb, a pound of 90/10 ground beef tends to range from 800 to 900 calories before cooking. Nonetheless, you can reduce that total even further by draining or blotting excess fat during the cooking process. Thus, if you’re trying to stay within a certain daily calorie limit, lean ground beef can help you meet your goals without sacrificing protein.

Common Myths and Misconceptions About Ground Beef Calories

Myth 1: All Ground Beef Is High in Calories

Some people think all ground beef choices are automatically loaded with calories. However, that’s not always true. In fact, the calorie count in ground beef varies based on fat percentage and cooking methods. For example, if you’re curious how many calories in a pound of ground beef healthy?, remember that leaner types like 90/10 start out with fewer calories than 80/20. Furthermore, draining or blotting the meat after cooking can decrease the final fat content. Consequently, choosing leaner cuts or using smart cooking hacks can help you keep calories in check while still enjoying the savory taste of beef.

Additionally, many assume you have to stop eating ground beef to stay healthy. Yet portion control, balanced meals, and wiser cooking techniques can allow you to fit ground beef into your weekly routine. Moreover, pairing ground beef with vegetables or whole grains leads to a plate that’s both flavorful and full of essential nutrients.

Myth 2: Lean Ground Beef Lacks Flavor and Nutrients

Another widespread misconception is that lean ground beef tastes dull and offers fewer nutrients. However, lean cuts still boast plenty of protein and vital vitamins. Indeed, you can amplify their flavor with herbs like basil, cilantro, or cumin. Meanwhile, adding low-sodium broth or fresh diced tomatoes helps maintain moisture and enhances the taste. Because of these simple tips, you’ll be able to enjoy lean ground beef without sacrificing satisfaction.

It’s also true that lean beef contains important minerals such as iron and zinc. By cooking it with other nutrient-dense foods, you’ll create meals that are not only lower in fat but also high in vitamins. Consequently, don’t dismiss lean ground beef simply because of a rumor that it’s dry or bland. In reality, the right prep techniques make lean ground beef both delicious and beneficial.

Conclusion: Making Informed Choices for Healthy Ground Beef Meals

Summary of Key Points on Calorie Counts

In conclusion, understanding how many calories in a pound of ground beef healthy? depends on several factors, including fat ratio, cooking style, and portion control. By selecting lean varieties like 90/10 and draining any excess grease, you can cut down on calories while keeping protein high. On the other hand, if you prefer 80/20 for flavor, simply be mindful of serving sizes and cook in a way that allows fat to drip off or be discarded. Furthermore, combining ground beef with fiber-rich veggies and whole grains adds balance and helps you stay on track nutritionally.

Final Takeaway for Optimal Ground Beef Consumption

Ultimately, ground beef can be a valuable part of a nutritious diet when prepared mindfully. Keep an eye on cooking methods like grilling, boiling, or sautéing with little added fat to avoid raising the calorie count. Moreover, try adding spices and low-cal sauces to boost flavor without piling on extra calories. Above all, portion control is critical: measuring servings and pairing them with nutritious sides ensures a wholesome meal.

By paying attention to the calorie content in ground beef, you can still enjoy hearty, satisfying dishes that align with your health goals. So go ahead, choose the cut that suits you best, whip up a creative recipe, and indulge in the comforting taste of ground beef—guilt-free!

How to tell if chicken has gone bad?Your Ultimate Guide

Ever wondered how to tell if chicken has gone bad? It’s a question many home cooks grapple with, and for good reason. After all, fresh vs. spoiled chicken can sometimes be tough to identify at first glance. However, there are several telltale signs like color changes, off smells, and even slimy surfaces that reveal when poultry has crossed into risky territory. In this article, we’ll cover everything from spotting rotten chicken signs in raw meat to detecting subtle spoilage in cooked leftovers. Plus, we’ll discuss safe chicken storage and foodborne illness prevention tips, so you’ll feel more confident that your next meal is both tasty and safe.

Understanding Chicken Food Safety

Why Proper Handling of Poultry Is Crucial

Chicken is a protein powerhouse, but it’s also a prime target for bacteria like Salmonella in poultry and Campylobacter. These nasty pathogens thrive in moist, protein-rich environments, and once they make themselves at home, they can cause serious illnesses. Consequently, you’ve got to handle chicken with care—keeping it chilled, sealed, and separate from other foods. By doing so, you drastically cut down on cross-contamination and keep your kitchen a safer place.

Moreover, the risk of rancid chicken odor or spoilage skyrockets when storage practices aren’t up to par. For instance, leaving raw chicken in a warm environment accelerates bacterial growth, making it easier for meat to develop that bad poultry smell and slimy texture. Thus, always store poultry under 40°F (4°C) in your fridge and follow proper thawing methods if you’re taking it from freezer to plate. Not only will this preserve flavor, but it also keeps potentially harmful microbes at bay.

Common Misconceptions About Fresh Chicken

Many people assume that buying organic or free-range guarantees perfect quality. But it’s important to realize that expiration dates on chicken and sell-by labels aren’t foolproof. Yes, the label may offer a rough guide, yet checking raw chicken freshness goes beyond simply reading a date. Inspect its color, feel its texture, and pay attention to any unusual scents. Even “high-end” poultry is susceptible to spoilage if mishandled during transport or storage.

Additionally, cooking “bad” chicken at a high heat doesn’t always neutralize every risk. Some toxins and bacteria can survive if they’ve had enough time to multiply. Consequently, knowing how to tell if chicken has gone bad? before you toss it into the pan is key. Ultimately, fresh chicken should have a light pink hue, a clean or subtle meaty scent, and a non-sticky surface—signs that you’re in the clear to prepare a delicious and safe meal.

Visual Signs of Spoiled Chicken

Changes in Color and Texture

Fresh chicken should typically appear pale pink or slightly translucent. However, one crucial spoiled chicken indicator is a grayish or greenish hue that stands out as abnormal. Moreover, you might spot blotchy discolorations indicating possible bacterial growth or mold on chicken. These color shifts usually point to deeper problems within the meat. Therefore, it’s important to discard any chicken that displays such odd hues, as no amount of cooking will reverse advanced spoilage.

Meanwhile, texture offers another clue. Indeed, fresh vs. spoiled chicken can feel quite different. Ideally, raw poultry should be somewhat moist yet firm to the touch. However, if you run your fingers across the surface and notice an unmistakably slimy film, that’s a telltale sign of bacterial activity. Consequently, the meat’s protective qualities are compromised, making it more susceptible to foodborne illness prevention failures. Additionally, chicken that feels sticky or tacky suggests that the proteins have started to degrade, and it’s often best to err on the side of caution by tossing it out.

Properly marinated and stored chicken can stay fresher longer, yet it’s still essential to confirm its color and texture before cooking. After all, knowing how to tell if chicken has gone bad? saves you from the risk of ingesting harmful microbes and preserves the taste you desire.

Identifying Slime or Fuzz

Checking raw chicken for slime and discoloration
Feeling for sticky or slimy film on raw chicken

Slime on chicken is almost always an instant red flag. Although raw chicken may sometimes have a slight moisture layer, an excessively gooey residue indicates bacterial build-up. Hence, trust your instincts: if the meat feels unpleasantly slimy, your best move is to discard it without question. Additionally, watch for fuzzy patches, which might look white, bluish, or grayish. These fuzzy growths often occur when chicken has been left in the fridge beyond recommended refrigeration guidelines, and they signal mold or other microorganisms.

Furthermore, slime or fuzz can lead to that awful rancid chicken odor when cooked. Because bacterial and fungal growth accelerates exponentially once it gains a foothold, you’re likely to end up with a meal that smells terrible—and potentially makes you ill. Ultimately, prioritizing visual and tactile checks can keep you one step ahead in the quest for fresh chicken. Thus, whenever you encounter a slimy film or fuzzy spots, do not gamble with your health; instead, get rid of the questionable poultry and protect yourself from possible contamination.

Odor Clues: How to Tell If Chicken Has Gone Bad by Smell

Distinguishing Foul Odors from Normal Chicken Smell

Many cooks focus primarily on color, yet smell is equally telling. In fact, how to tell if chicken has gone bad? hinges heavily on your nose. When poultry is fresh, it should possess a mild, almost neutral, meaty scent. However, a bad poultry smell often has strong sulfur or ammonia-like notes that are quite unpleasant and impossible to miss. Consequently, any whiff that makes you recoil should be taken seriously.

Moreover, a sour or “rotten egg” smell suggests that spoilage bacteria have been feasting on the chicken’s proteins. These microorganisms break down amino acids, producing foul-smelling compounds that warn you something is amiss. Therefore, if you open the package and immediately wrinkle your nose, don’t hesitate to toss that chicken. Holding on to it, hoping the smell will go away, could compromise not only your meal but also your entire kitchen environment.

When a Slight Smell Might Still Be Dangerous

It’s tempting to write off a faint stink as “not that bad,” especially if you’re rushing or trying to avoid waste. Nevertheless, even a hint of sourness is worth a second thought. Certain bacteria can multiply quickly, and they may not always emit a powerful odor at first. In addition, cooking temperatures for chicken can kill some pathogens, yet it won’t always neutralize the toxins produced by bacteria if the meat was spoiled beforehand.

In other words, that slightly musty scent might be a precursor to more serious decay lurking within the muscle fibers. Also, relying on smell alone could cause you to miss other critical signals. For instance, if the chicken smells a bit off and also feels slimy, you have multiple reasons to steer clear. Meanwhile, if you detect a mild but persistent odor, take extra caution. Err on the side of safety because poultry gone bad is never worth the risk. Indeed, food safety guidelines for chicken underscore the importance of trusting your senses and discarding any questionable product.

Checking Packaging and Sell-By Dates

Decoding Sell-By, Use-By, and Expiration Labels

You may think labels on chicken are straightforward, yet these dates can confuse even seasoned shoppers. Typically, sell-by focuses on how long a store should keep a product on the shelf, while use-by points to the last date for optimal quality. Meanwhile, an expiration date often means the product’s safety could diminish past that day. Nevertheless, the packaging alone won’t always reveal how to tell if chicken has gone bad? Instead, use these labels as an initial guide, then inspect the chicken’s appearance, smell, and texture to confirm its freshness.

Furthermore, it’s vital to distinguish the difference between a chicken that has just passed its sell-by date and one that’s genuinely rotten. If you store chicken below 40°F (4°C) and cook it within a day or two of purchase, it often remains safe despite being near or slightly beyond that printed date. On the other hand, if the bird looks off-color or emits a rancid chicken odor, no label can save it. Trust your senses, but also pay attention to the packaging. If the wrap is torn or overly inflated, air and bacteria might have slipped in, speeding up spoilage.

Proper Storage Practices for Poultry

Proper storage is your best defense against ruined chicken. First off, keep raw poultry cold at all times. That means going straight from the grocery store to your fridge or freezer. For longer storage, freezing is ideal, but ensure you wrap the meat tightly in freezer-safe materials. Reducing exposure to air helps prevent freezer burn and preserves both taste and quality.

Moreover, never place raw chicken where its juices can drip onto other foods. Cross-contamination is a real threat, so consider storing your chicken on the lowest shelf in the fridge. Additionally, thawing your poultry in the fridge—rather than on a countertop helps maintain consistent temperatures. If your fridge lacks adequate space or you have leftover cooked chicken, follow official food safety guidelines for chicken by keeping it in sealed containers. For an easy way to transform leftover meat, check out our Best Leftover Rotisserie Chicken Recipes. Adding flavor while ensuring proper storage practices can help you enjoy every bite without risking your health.

Cooked Chicken Considerations: Identifying Spoilage

Visual and Olfactory Checks on Leftovers

When dealing with cooked chicken, one might think the risk of contamination disappears. However, bacteria can still multiply if you leave prepared poultry at room temperature for too long. Watch closely for dull or grayish color, along with odd spots or visible mold. A bad poultry smell can still develop in leftovers, so open your containers and sniff before reheating. If anything triggers your alarm—like sour or foul aromas—toss it immediately.

Additionally, a sticky or slimy coating on cooked chicken indicates probable bacterial growth, which could make it unsafe. Keep an eye on refrigeration guidelines, as cooked poultry generally stays good for about three to four days in the fridge. If you plan to enjoy those leftovers beyond that window, freezing them is usually the smarter option. Just remember to label everything with dates, so you know exactly when to use them.

Safe Reheating and Storage Guidelines

Leftover cooked chicken in labeled containersto answer How to tell if chicken has gone bad?
Storing leftover chicken with date labels ensures food safety

Safe reheating goes beyond simply popping your chicken in the microwave. Aim for a core temperature of at least 165°F (74°C), which kills lingering bacteria. Also, stir or flip the meat partway through to ensure even cooking. If you’re warming your leftovers on the stovetop or in the oven, add a bit of broth or sauce to keep the meat from drying out.

Furthermore, avoid reheating chicken more than once, because repeated warming and cooling cycles create ideal conditions for microbial growth. Store each portion in small, airtight containers to help them chill faster and remain fresh longer. By following these tips, you’ll lower the risk of spoiled chicken and maintain better flavor. In short, how to tell if chicken has gone bad? remains a critical question even with cooked poultry, so trust your instincts, observe the signs, and always practice good kitchen habits.

How to Tell If Chicken Has Gone Bad During Meal Prep

Spotting Bad Chicken Before Cooking

Preparing a tasty meal often starts with checking the quality of your ingredients. Indeed, how to tell if chicken has gone bad? becomes crucial before any seasoning or marinating. First, examine the color and texture. If the chicken looks grayish or oddly discolored, it might already be risky. In addition, run your fingers over the surface. Should you feel a slimy film, that’s a major warning sign. Meanwhile, give it a quick sniff. A bad poultry smell—sour, sulfur-like, or generally unpleasant—signals potential spoilage. Thus, if your senses pick up something off, discard the chicken outright rather than hoping to “cook away” any problems.

Moreover, don’t overlook the packaging details. Even if the sell-by date indicates the chicken is still fine, damage to the wrapping can let in microbes and hasten spoilage. Thus, when you’re rushing through meal prep, take a moment to double-check that the poultry is still safe. Indeed, proper food safety guidelines for chicken stress the importance of visual and olfactory checks prior to cooking. You can prevent a ruined dinner and protect your health by acting swiftly at the first sign of trouble.

Mid-Cooking Checks for Spoiled Poultry

Sometimes, you may only notice concerns after you’ve begun cooking. For instance, if the chicken changes to a strange color during heating, or if a pungent odor suddenly wafts from the pan, you should stop and reassess. Although heat can eliminate some bacteria, it won’t always neutralize the toxins left behind by extensive bacterial growth. Therefore, trust your senses. If the chicken continues to smell foul or appears oddly textured, it’s safer to abandon that batch.

Likewise, if you slice into the chicken and see an unusual interior color or slimy patches even as it cooks, proceed with caution. While discovering how to tell if chicken has gone bad? mid-cooking isn’t ideal, recognizing these red flags early is vital to avoid severe foodborne illnesses. Ultimately, you can always replace questionable poultry, but you can’t undo a spoiled meal—or the sickness that might follow.

Frequently Asked Questions (FAQ)

1. Is It Okay to Eat Chicken That Smells a Little?

Short answer: No. Even a slight, foul odor can point to bacterial activity. In truth, fresh chicken carries a mild scent that is not offensive. Therefore, any sour, sulfur-like, or otherwise off-putting odor is a strong indicator that the meat could be spoiled. Discard questionable chicken to avoid potential foodborne illness prevention failures.

2. How Can You Tell If Chickens Are Spoiled?

You can spot spoiled chicken by checking for a bad poultry smell, slimy texture, or discolored flesh. If you’re still unsure how to tell if chicken has gone bad? after doing a quick scan, trust your instincts. It’s best to reject meat that shows two or more signals of spoilage. Furthermore, pay attention to the expiration dates and ensure proper storage temperatures to reduce the odds of contamination.

3. How Long Can Raw Chicken Last 5 Days in the Fridge? / A Costco Rotisserie Chicken Last in the Refrigerator?

Generally, raw chicken should be used or frozen within one to two days. While some folks push it to three days, the risk of mold on chicken or a rancid chicken odor increases with each passing day. On the other hand, a Costco rotisserie or any store-bought cooked chicken can keep safely in the fridge for about three to four days. After that, bacteria may grow, so consider freezing leftovers if you don’t plan to eat them soon.

4. Can You Taste If Chicken Is Bad?

Although a sour or bitter flavor might be a clue, tasting spoiled meat is risky. By the time you notice the unpleasant taste, harmful bacteria may already be present. Thus, it’s better to rely on visual, smell, and texture checks before ever cooking—much less tasting—chicken that might be bad. Trust your senses early and avoid putting your health on the line.

Preventing Future Spoilage and Final Tips

Best Practices from Purchase to Plate

Preventing spoiled chicken starts at the grocery store. To begin with, always check the packaging for any tears or leaks, since even small openings can invite bacteria inside. Then, place raw poultry in a separate bag to avoid cross-contamination with other items in your cart. Next, rush home and store your chicken in the fridge or freezer right away. Keeping your chicken cold slows down bacterial growth and preserves freshness. Above all, remember how to tell if chicken has gone bad? by relying on those simple checks—sight, smell, and texture.

Once you’re in the kitchen, wash your hands and utensils often. Indeed, raw chicken juice can quickly spread bacteria onto cutting boards, knives, or countertops. Also, cook chicken to an internal temperature of 165°F (74°C) to destroy most harmful microbes. However, cooking won’t remove toxins formed by advanced spoilage, so never try to salvage questionable poultry. When storing leftovers, wrap them tightly or keep them in sealed containers. That way, air can’t circulate and speed up decay.

Smart Meal Planning

Smart planning helps you avoid letting chicken languish in your fridge for days. For instance, purchase only what you need for the week. If your schedule changes, consider freezing unused chicken rather than leaving it to sit. Freezing halts bacterial growth, though it’s still wise to inspect the meat upon thawing. In addition, meal prep can save time while reducing the chance of spoilage. For instance, cooking larger batches and freezing them in individual portions keeps your meals fresh and cuts down on waste.