5 Irresistible Cheesy Garlic Chicken Wraps for Busy Days

Life’s too short for boring meals, don’t you think? That’s why these cheesy garlic chicken wraps are about to become your new favorite recipe. Picture this: tender, juicy chicken infused with savory garlic, melted cheese oozing from every bite, all wrapped up in a warm tortilla. Whether you need a quick lunch, a family-friendly dinner, or a grab-and-go snack, these wraps have you covered.

The best part? They’re ridiculously easy to make, perfect for those hectic days when you want something fast but flavorful. Add your favorite toppings, pair with a dipping sauce, and you’ve got a meal that feels fancy but takes just minutes to whip up. Ready to give your taste buds a treat? Let’s dive in!

What Are Cheesy Garlic Chicken Wraps?

A Quick Introduction to Cheesy Garlic Chicken Wraps

Cheesy garlic chicken wraps are the perfect solution for anyone craving a quick and satisfying meal. These wraps combine tender, juicy chicken, melted cheese, and bold garlic flavors, all wrapped up in a soft tortilla. Whether you’re looking for a grab-and-go lunch, an easy dinner, or a dish to impress at a casual get-together, these wraps deliver every time.

What makes them so special? They’re versatile, delicious, and customizable. You can keep it simple with just the core ingredients or load them up with veggies, sauces, and extra cheese. No matter how you make them, these wraps are guaranteed to hit the spot!

Why Cheesy Garlic Chicken Wraps Are a Crowd-Pleaser

It’s no surprise that cheesy garlic chicken wraps are loved by everyone. They strike the perfect balance between indulgence and practicality. The rich, creamy cheese pairs perfectly with the savory garlic and tender chicken, making them a hit with kids and adults alike.

But what really sets them apart is their versatility. You can enjoy them hot or cold, as a full meal or a snack. Plus, they’re super easy to adapt for different preferences—add buffalo sauce for spice lovers, or swap in whole-grain tortillas for a healthier twist.

The Essential Ingredients Behind Their Flavor

The magic of cheesy garlic chicken wraps lies in their simple yet flavorful ingredients. Here’s what you’ll need to create them:
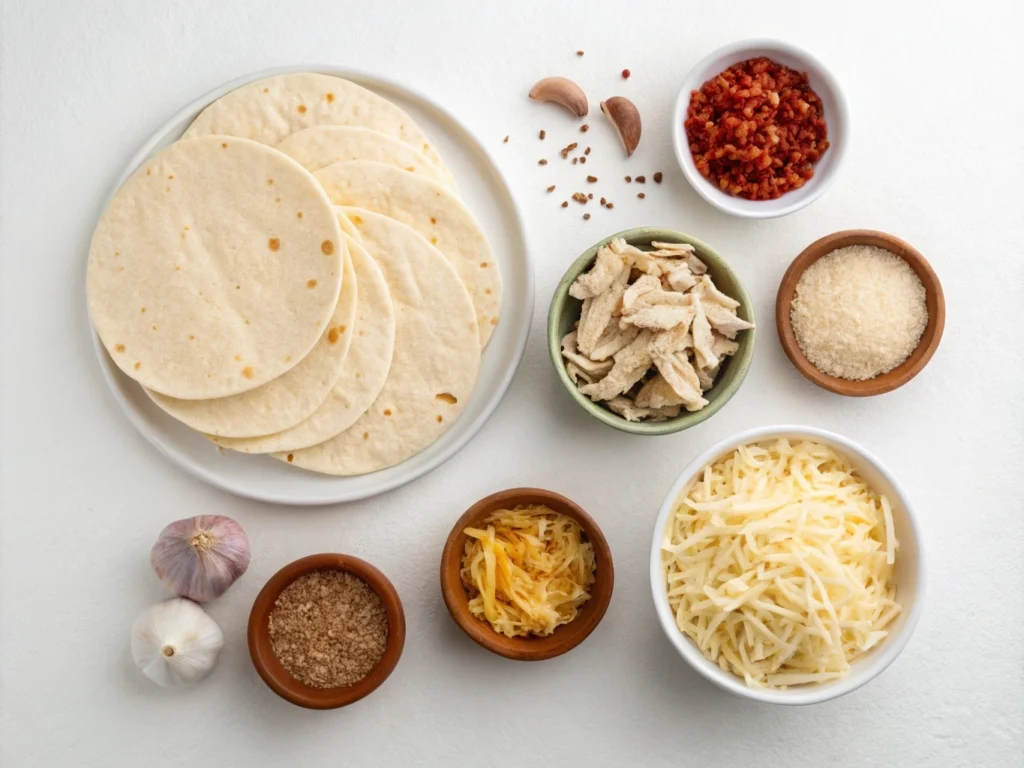
 Ingredients for Cheesy Garlic Chicken Wraps on White Surface
All ingredients ready to make cheesy garlic chicken wraps
  • Chicken: Grilled, shredded, or even leftover chicken works beautifully.
  • Cheese: Opt for gooey varieties like mozzarella or sharp cheddar for bold flavor.
  • Garlic: Fresh minced garlic or garlic powder enhances the dish’s savory profile.
  • Tortillas: Flour tortillas are soft and pliable, but whole wheat or low-carb options are great too.
  • Optional Add-Ins: Diced tomatoes, spinach, or even a drizzle of ranch dressing for an extra kick.

These ingredients come together to create a wrap that’s both comforting and satisfying.

How Cheesy Garlic Chicken Wraps Save Time in the Kitchen

When you’re short on time, cheesy garlic chicken wraps are a lifesaver. With just a handful of ingredients and minimal prep, you can have a delicious meal on the table in under 30 minutes.

Compared to more complicated dishes, these wraps require only basic cooking skills, making them ideal for busy families or beginner cooks. Plus, they’re a great way to use up leftovers, like rotisserie chicken or extra veggies from the fridge.

For a full guide on quick meals, check out this helpful article on time-saving cooking tips from Food Network.

How to Make Cheesy Garlic Chicken Wraps at Home

Step 1: Gather the Ingredients

The first step to creating the perfect cheesy garlic chicken wraps is gathering your ingredients. Here’s what you’ll need:

  • Chicken: Grilled, shredded, or rotisserie chicken works best.
  • Cheese: Use mozzarella, cheddar, or even a blend for that gooey texture.
  • Garlic: Fresh minced garlic or garlic powder adds bold flavor.
  • Tortillas: Soft flour tortillas are a classic choice, but whole wheat or gluten-free options work too.
  • Seasonings: Salt, pepper, and a pinch of paprika or Italian herbs.
  • Optional Add-Ins: Diced tomatoes, baby spinach, or a drizzle of ranch dressing.

Having everything ready before you start cooking makes the process smooth and stress-free.

Step 2: Prepare the Garlic Chicken Filling

To create a flavorful filling for your cheesy garlic chicken wraps, follow these simple steps:

  1. Heat a skillet over medium heat and add a tablespoon of olive oil.
  2. Sauté minced garlic until fragrant, being careful not to burn it.
  3. Add the chicken and season with salt, pepper, and your chosen spices (paprika or Italian herbs).
  4. Stir in a handful of shredded cheese and mix until the chicken is evenly coated and the cheese is melted.

This step creates a savory, cheesy filling that’s bursting with garlic flavor—perfect for wraps!

Step 3: Assemble the Wraps

Now it’s time to bring your cheesy garlic chicken wraps to life. Here’s how to assemble them:

  1. Lay a tortilla flat on a clean surface.
  2. Spoon the garlic chicken mixture onto the center of the tortilla.
  3. Add any optional toppings, such as spinach, tomatoes, or a drizzle of ranch dressing.
  4. Fold the sides of the tortilla inward, then roll it tightly from one end to the other.

For extra flair, you can sprinkle a little cheese on the outside of the wrap before toasting.

Step 4: Toast and Serve

To take your wraps to the next level, toast them until they’re golden and crispy. You can do this in a skillet, a sandwich press, or even the oven. Here’s how:

  1. Heat a dry skillet over medium heat.
  2. Place the wrap seam-side down and toast for 2–3 minutes per side, or until the tortilla is crispy and the cheese inside is fully melted.
  3. Slice the wrap diagonally for easier handling and a professional look.

Serve your wraps immediately with a side of your favorite dipping sauce, such as garlic aioli, ranch, or sriracha mayo.

Delicious Variations of Cheesy Garlic Chicken Wraps
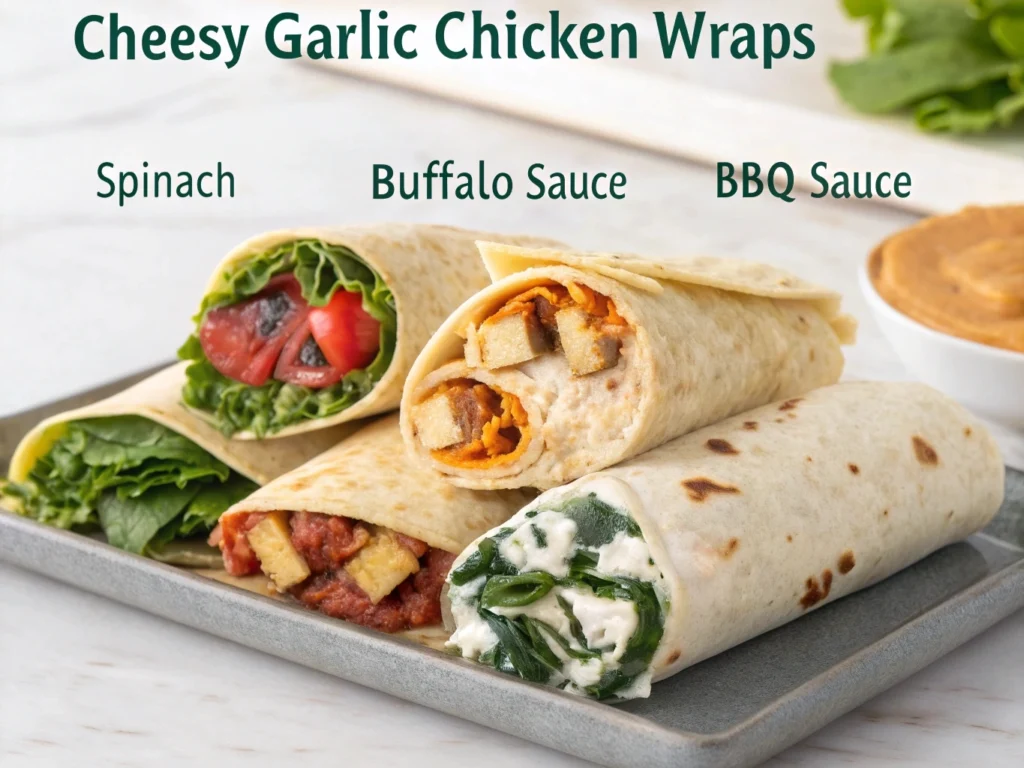
Four Cheesy Garlic Chicken Wrap Variations on a Platter
platter showcasing four creative ways to enjoy cheesy garlic chicken wraps

Cheesy Garlic Chicken Wraps with Spinach and Mushrooms

For a healthier twist, add fresh spinach and sautéed mushrooms to your cheesy garlic chicken wraps. The earthy flavor of mushrooms pairs beautifully with the savory garlic and creamy cheese, while spinach adds a pop of color and extra nutrients.

To prepare, sauté mushrooms with garlic in a splash of olive oil until tender. Layer the spinach and mushrooms over the garlic chicken mixture before wrapping. This variation is perfect for those who want a balanced yet indulgent meal.

Buffalo-Style Cheesy Garlic Chicken Wraps

Craving something spicy? Transform your cheesy garlic chicken wraps into a bold buffalo-style version. Toss the cooked chicken in your favorite buffalo sauce before assembling the wraps.

For an extra creamy touch, add ranch or blue cheese dressing inside the tortilla. The combination of tangy buffalo sauce, melted cheese, and garlic creates a flavor explosion that’s hard to resist. This variation is ideal for game nights or casual gatherings.

Cheesy Garlic BBQ Chicken Wraps

If you love sweet and smoky flavors, this variation is a must-try. Mix barbecue sauce into the chicken filling before adding it to the wraps. The smoky sweetness of the BBQ sauce perfectly complements the rich garlic and cheese.

For extra crunch, include a handful of coleslaw or crispy fried onions as a topping. These cheesy garlic chicken wraps are sure to impress at picnics, potlucks, or family dinners.

Vegetarian Cheesy Garlic Wraps with Roasted Veggies

Who says cheesy garlic chicken wraps can’t be vegetarian? Swap the chicken for roasted veggies like bell peppers, zucchini, and eggplant. The roasted veggies bring a smoky flavor and hearty texture that pairs beautifully with garlic and cheese.

Simply roast your veggies with olive oil, garlic, salt, and pepper until tender. Layer them in the tortilla with cheese and any additional toppings you like. This version is perfect for vegetarians or anyone looking to cut back on meat without sacrificing flavor.

Best Pairings and Serving Ideas for Cheesy Garlic Chicken Wraps
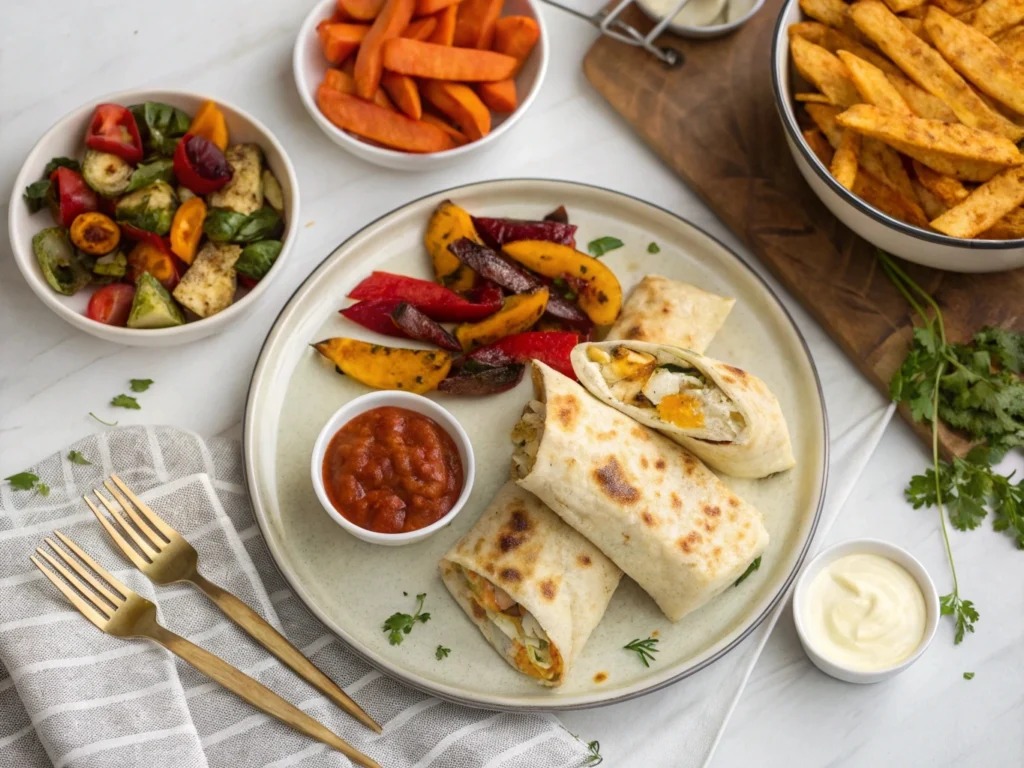
Cheesy Garlic Chicken Wraps with Sides on a Dinner Table
A dinner spread featuring cheesy garlic chicken wraps and side dishes

Side Dishes to Complete the Meal

Pairing your cheesy garlic chicken wraps with the right sides can turn a simple meal into a feast. Crispy sweet potato fries or a light Caesar salad are classic choices that balance the rich, garlicky flavors of the wraps.

For a healthier option, try roasted vegetables like broccoli or asparagus. Their natural sweetness and slight crunch perfectly complement the creamy cheese and tender chicken. If you’re feeling indulgent, serve with a side of mac and cheese or creamy mashed potatoes for an extra comforting meal.

Dipping Sauces to Elevate Flavor

Adding a flavorful dipping sauce takes your cheesy garlic chicken wraps to the next level. Garlic aioli or ranch dressing enhances the wraps’ savory profile, while sriracha mayo adds a spicy kick.

For a tangy contrast, consider marinara or a zesty lemon-herb yogurt dip. These sauces not only boost flavor but also make the wraps even more enjoyable for dipping enthusiasts.

Beverage Pairings for Every Occasion

Beverages can make or break a meal, and cheesy garlic chicken wraps are no exception. For a casual lunch, pair your wraps with iced tea or sparkling water infused with fresh citrus.

If you’re serving them for dinner, light white wines like Sauvignon Blanc or crisp beers such as lagers work wonderfully. Prefer non-alcoholic options? Freshly squeezed lemonade or a cucumber-mint cooler offers refreshing flavors that balance the wraps’ richness.

Tips for Storing and Reheating Leftovers

If you have leftover cheesy garlic chicken wraps, don’t worry—they’re easy to store and reheat. Wrap each one tightly in aluminum foil or place them in an airtight container. Store them in the refrigerator for up to three days.

To reheat, use an oven or skillet to maintain their crispy texture. Avoid microwaving, as it can make the tortillas soggy. For added freshness, consider adding a sprinkle of cheese or a few fresh veggies before serving.

FAQs

How do you make chicken wraps not soggy?

To prevent your cheesy garlic chicken wraps from becoming soggy, it’s essential to avoid excess moisture. Pat the chicken dry before cooking and don’t overdo it with wet ingredients like sauces or dressings. Instead, use small amounts of creamy elements like garlic aioli or ranch.

Additionally, layer the ingredients strategically—start with cheese or leafy greens as a base to create a barrier between the tortilla and moist fillings. Toasting the wraps in a skillet or oven also helps maintain a crispy texture, even if they sit for a while.

What goes well with chicken wraps?

Cheesy garlic chicken wraps pair beautifully with a variety of sides and sauces. For a lighter option, serve them with a fresh salad, roasted veggies, or a fruit bowl. If you’re craving something hearty, try pairing the wraps with sweet potato fries, creamy coleslaw, or even a small bowl of soup.

For dipping sauces, garlic aioli, spicy sriracha mayo, or tangy marinara are excellent choices that elevate the flavor profile of the wraps. These combinations create a balanced and satisfying meal.

Are chicken wraps healthy?

Yes, chicken wraps, including cheesy garlic chicken wraps, can be healthy depending on how they’re prepared. By using grilled or baked chicken, whole-grain tortillas, and fresh vegetables, you can create a nutritious and well-rounded meal.

To reduce calories and fat, opt for low-fat cheese and lighter dressings. Additionally, incorporating nutrient-rich add-ins like spinach, avocado, or bell peppers boosts the wrap’s health benefits. The beauty of chicken wraps lies in their flexibility, allowing you to tailor them to your dietary needs without sacrificing flavor.

How to assemble a chicken wrap?

Assembling cheesy garlic chicken wraps is simple and ensures a mess-free meal:

  1. Lay the tortilla flat on a clean surface.
  2. Spread a thin layer of sauce or dressing evenly across the center of the tortilla.
  3. Add a portion of the cheesy garlic chicken filling, followed by your choice of toppings like shredded lettuce, diced tomatoes, or avocado slices.
  4. Fold in the sides of the tortilla, then roll it tightly from one end to the other to secure the filling.

For an extra touch, toast the wrap in a skillet or grill press to seal the edges and add crispiness.

Conclusion

Cheesy garlic chicken wraps are a game-changer when it comes to quick, flavorful meals. Whether you’re looking for a fast lunch, a satisfying dinner, or a crowd-pleasing snack, these wraps have something for everyone. They’re easy to make, endlessly customizable, and pair perfectly with your favorite sides and sauces.

Now it’s your turn to bring this versatile dish to life in your kitchen. Experiment with flavors, customize the ingredients, and create your own spin on these irresistible wraps. Don’t forget to share your success and check out more quick and delicious recipes on our site.

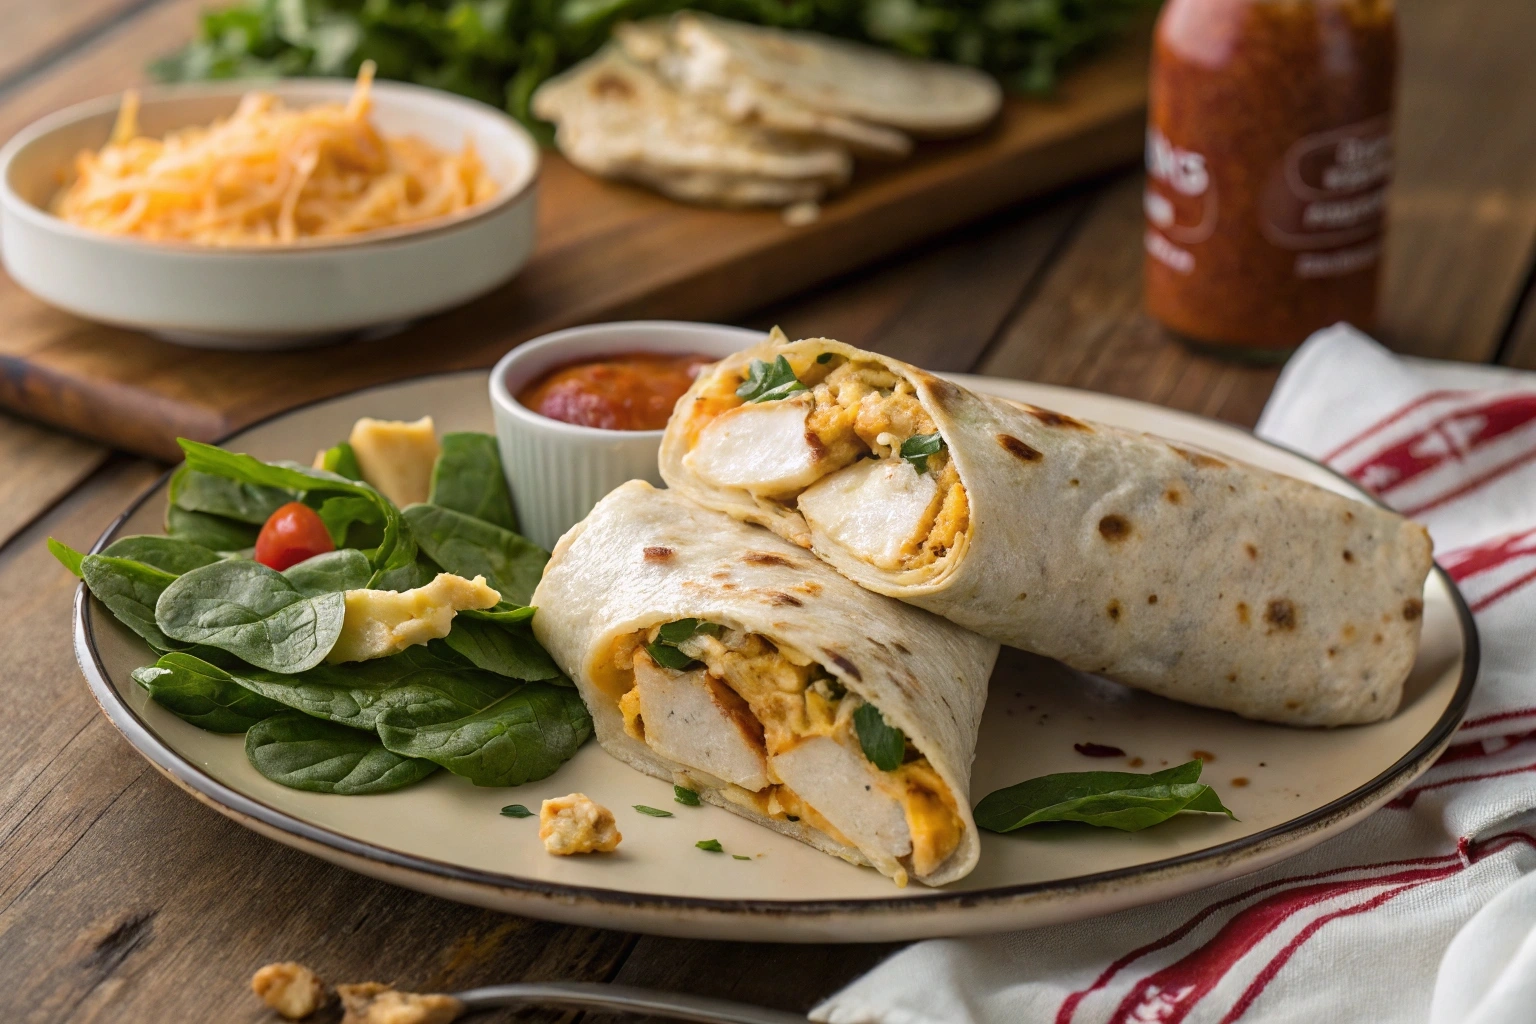
Garlic Parmesan Chicken and Potatoes: A 25-Minute Feast

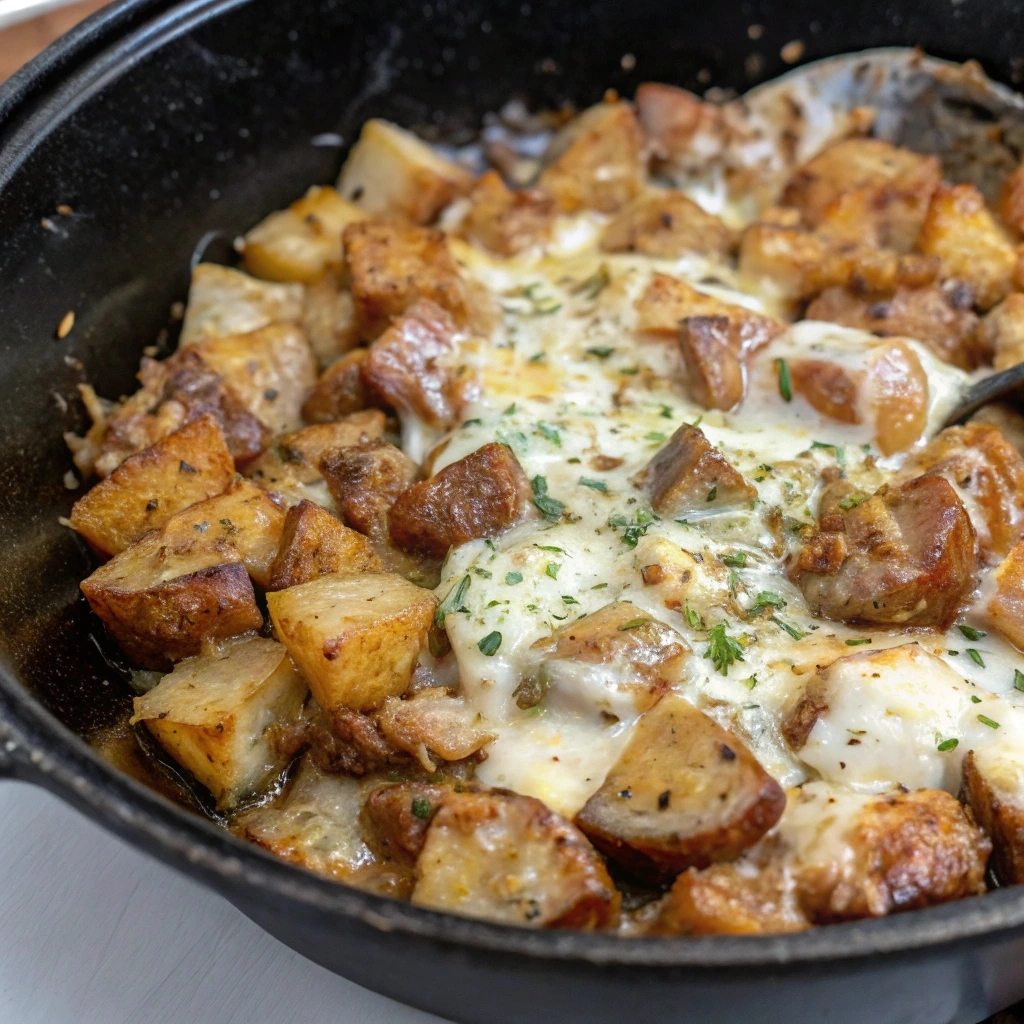
Some recipes just hit the spot, and Garlic Parmesan Chicken and Potatoes is definitely one of them. Whether you’re hosting friends or simply looking for a hearty family meal, this dish delivers. What’s not to love? It’s quick, uses one pan, and combines creamy Parmesan, fresh garlic, and golden potatoes for a mouthwatering experience. Plus, the chicken stays wonderfully juicy, creating a flavor-packed bite every time. As the Parmesan melts over the hot skillet, it forms a delicious crust that’ll make you want seconds (or thirds!). Stick around, and I’ll show you how to whip this up in just 25 minutes you’ll wonder why you ever ordered takeout!

Ingredients for Garlic Parmesan Chicken and Potatoes

To create the ultimate Garlic Parmesan Chicken and Potatoes, you need simple, fresh ingredients that come together to deliver unbeatable flavor. Here’s everything you’ll need for this quick, one-pan recipe:

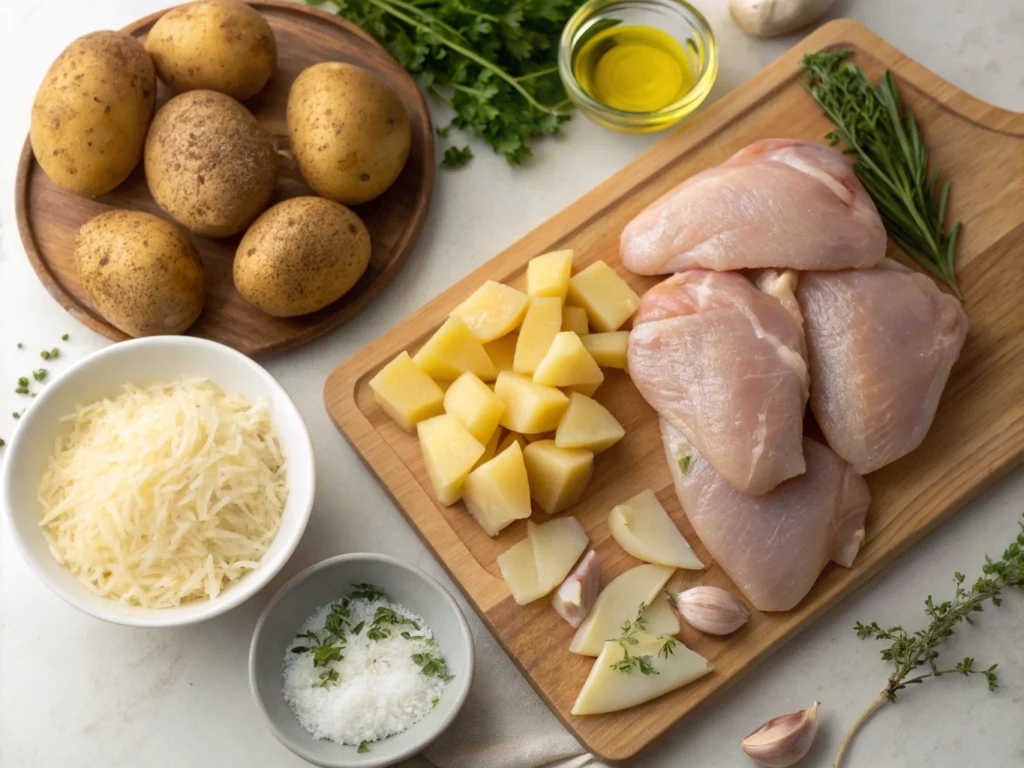
Ingredients for Garlic Parmesan Chicken and Potatoes on a cutting board.
Everything you need to make Garlic Parmesan Chicken and Potatoes.

Essential Ingredients

The success of this dish starts with a few pantry staples and fresh ingredients that enhance both taste and texture:

  • Chicken: Choose boneless, skinless chicken thighs for a juicy, tender bite. Chicken breasts also work well but may cook slightly faster.
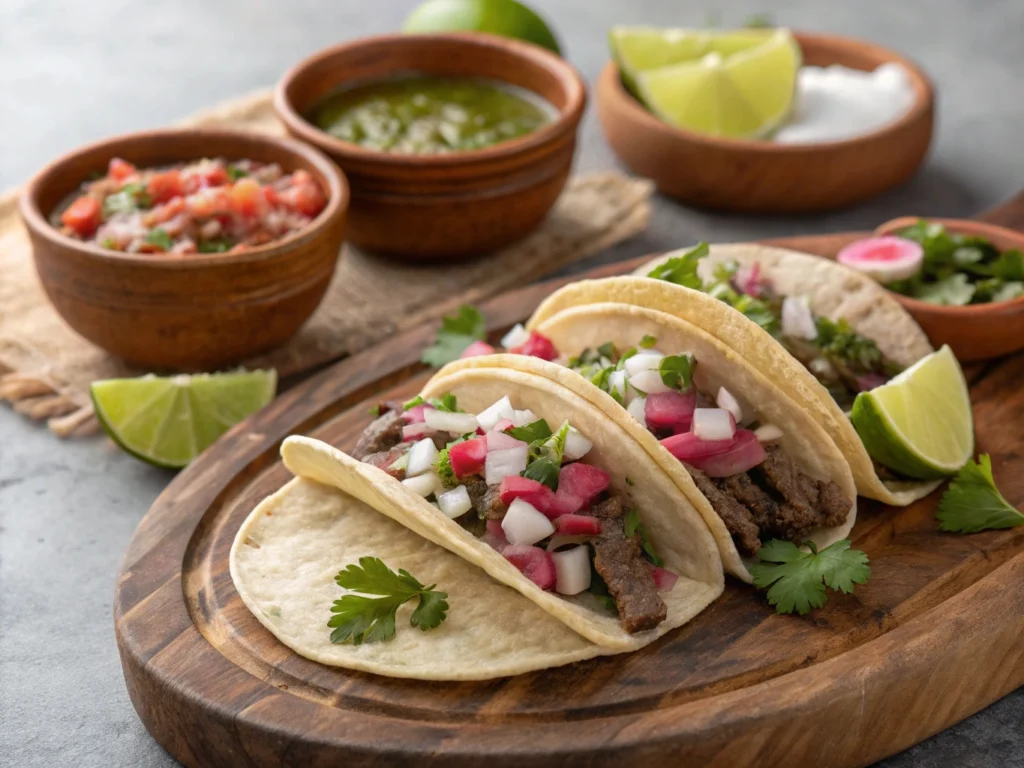
  • Potatoes: Yukon Gold or baby red potatoes are ideal for their creamy interior and crispy exterior when roasted.
  • Garlic: Freshly minced garlic is a must—it infuses the dish with its rich, aromatic flavor.
  • Parmesan Cheese: Opt for grated Parmesan to create a smooth, even coating. Avoid pre-shredded cheese as it may not melt as well.
  • Olive Oil: A generous drizzle of high-quality olive oil ensures everything cooks evenly while adding depth to the flavor.
  • Seasonings: A combination of salt, pepper, paprika, and dried Italian herbs rounds out the dish with savory goodness.

Optional Additions to Elevate Flavor

Want to take your Garlic Parmesan Chicken and Potatoes to the next level? Try these optional ingredients:

  • Lemon Juice: A squeeze of fresh lemon adds brightness and balances the richness of the Parmesan.
  • Fresh Herbs: Garnish with chopped parsley, thyme, or rosemary for an elegant finish.
  • Crushed Red Pepper Flakes: Add a pinch for a subtle heat that complements the garlic.

Substitutions and Variations

Cooking should be adaptable to your pantry, so don’t worry if you need to swap a few ingredients. Here are some great alternatives:

  • Potatoes: Swap Yukon Golds for sweet potatoes or russet potatoes for a slightly different flavor profile.
  • Cheese: Pecorino Romano or Asiago can replace Parmesan for a sharper, saltier twist.
  • Garlic Powder: If you’re out of fresh garlic, garlic powder works in a pinch—just use a little less for balance.

How to Choose the Best Ingredients

Chicken thighs searing in a skillet with garlic and potatoes.
Golden chicken and crispy potatoes sizzling in the skillet

Selecting quality ingredients ensures your dish shines. Here’s what to look for:

  • Chicken: Look for fresh, hormone-free chicken with a pale pink color. Avoid meat with a strong odor.
  • Potatoes: Choose firm, unblemished potatoes without sprouts.
  • Parmesan: Authentic Parmigiano-Reggiano delivers the best flavor; check for the stamp on the rind.
  • Garlic: Fresh, firm bulbs with tight skins offer the most robust flavor.

When you prioritize quality, your Garlic Parmesan Chicken and Potatoes will taste even better, delivering a dish that’s sure to impress!

How to Make Garlic Parmesan Chicken and Potatoes

Creating Garlic Parmesan Chicken and Potatoes is easier than you think! With a few simple steps, you’ll have a delicious one-pan dinner ready in no time. Let’s break it down.

Step 1: Gather Your Ingredients

Before starting, ensure you have everything on hand. The key ingredients include chicken thighs or breasts, Yukon Gold potatoes, fresh garlic, grated Parmesan, and a mix of seasonings like paprika and Italian herbs. Don’t forget the olive oil—it’s essential for achieving a golden, crispy texture.

Step 2: Prep Your Ingredients

  1. Prepare the Chicken: Pat the chicken dry with a paper towel to help it sear properly. Season generously with salt, pepper, and paprika.
  2. Cut the Potatoes: Wash and slice potatoes into bite-sized pieces for even cooking.
  3. Mince Garlic: Use fresh garlic cloves for the best flavor—avoid jarred alternatives if possible.

Step 3: Cook the Chicken

Heat a large skillet over medium heat and add a drizzle of olive oil. Place the seasoned chicken in the skillet and sear for 3-4 minutes per side until golden brown. Remove the chicken and set it aside while keeping the juices in the pan.

Step 4: Roast the Potatoes and Combine

In the same skillet, add the potatoes and cook for about 8-10 minutes, stirring occasionally. Once they’re tender and crispy, return the chicken to the pan. Sprinkle the entire dish with minced garlic and grated Parmesan, then cover and cook for an additional 5 minutes.

To explore another comforting chicken dish, check out Chicken Scampi with Garlic Parmesan Rice. This recipe shares a similar flavor profile and is equally quick to prepare.

Tips for Perfect Garlic Parmesan Chicken and Potatoes

Making Garlic Parmesan Chicken and Potatoes shine is all about the details. These simple yet effective tips will help you create a dish that’s not only flavorful but also cooked to perfection.

Tip 1: Use Fresh Ingredients

Freshness makes all the difference when it comes to this dish. For instance:

  • Garlic: Fresh garlic cloves have a stronger, more aromatic flavor than pre-minced or jarred options.
  • Chicken: Boneless, skinless chicken thighs are ideal for their juiciness, but chicken breasts work if cooked carefully to avoid drying out.
  • Potatoes: Yukon Gold or baby red potatoes provide the best texture and flavor for roasting.

By using fresh, high-quality ingredients, you’ll enhance the dish’s natural flavors and ensure it tastes its best.

Tip 2: Don’t Overcrowd the Pan

Cooking everything in a single pan saves time, but be mindful not to overcrowd. When the chicken and potatoes are too close together, they’ll steam instead of sear, leading to a soggy texture. Instead:

  • Cook in batches if needed, especially if your skillet is smaller.
  • Leave enough space between pieces to allow for proper browning.

This step ensures you achieve the crispy, golden texture that makes Garlic Parmesan Chicken and Potatoes so irresistible.

Tip 3: Add Parmesan Towards the End

Parmesan is a highlight of this recipe, but it can burn easily if added too early. To prevent this:

  • Sprinkle the cheese over the chicken and potatoes in the last few minutes of cooking.
  • Cover the skillet to allow the cheese to melt evenly.

This approach creates a perfectly cheesy coating without any bitterness from burned Parmesan.

Tip 4: Enhance Flavor with Fresh Herbs and Lemon

To take your Garlic Parmesan Chicken and Potatoes to the next level, consider these finishing touches:

  • Fresh Herbs: Garnish with chopped parsley or thyme for a fresh, aromatic boost.
  • Lemon Juice: A squeeze of lemon brightens the dish, cutting through the richness of the Parmesan and garlic.

These small additions add complexity and make the dish feel restaurant-quality.

For more flavorful chicken recipes, check out Grilled Chicken Thigh Recipes Guide. It’s packed with tips for creating juicy, perfectly seasoned chicken.

Variations of Garlic Parmesan Chicken and Potatoes

One of the best things about Garlic Parmesan Chicken and Potatoes is how versatile it can be. With a few tweaks, you can create variations to suit different tastes, dietary preferences, or even use what’s already in your kitchen. Let’s explore some exciting alternatives!

Mediterranean-Inspired Twist

Give your dish a vibrant Mediterranean flair with these additions:

  • Cherry Tomatoes: Toss in a handful of halved cherry tomatoes for a burst of sweetness.
  • Kalamata Olives: Add a salty, briny touch by mixing in chopped olives.
  • Fresh Basil: Finish the dish with a sprinkle of fresh basil leaves for an aromatic boost.

This variation transforms Garlic Parmesan Chicken and Potatoes into a colorful, flavor-packed meal that feels light yet satisfying.

Creamy Garlic Parmesan Sauce

For those who love rich, indulgent flavors, a creamy garlic Parmesan sauce is a game-changer. Here’s how to make it:

  1. After cooking the chicken and potatoes, deglaze the pan with a splash of chicken broth.
  2. Stir in heavy cream and grated Parmesan, letting it simmer until thickened.
  3. Pour the sauce over the chicken and potatoes, ensuring every bite is coated.

This variation adds a luxurious, restaurant-quality feel to your dish, perfect for impressing guests or treating yourself.

Sheet Pan Version

If you prefer a hands-off approach, the sheet pan version is your best friend:

  • Arrange the chicken, potatoes, and garlic on a baking sheet.
  • Drizzle with olive oil and season as usual.
  • Roast in the oven at 400°F for about 25-30 minutes, flipping halfway through.

The sheet pan method makes cleanup even easier while still delivering the signature crispy texture and bold flavors of Garlic Parmesan Chicken and Potatoes.

Keto-Friendly Alternative

For those following a low-carb or keto diet, try swapping out the potatoes for a keto-friendly option:

  • Cauliflower Florets: Roast cauliflower alongside the chicken for a similar texture with fewer carbs.
  • Zucchini: Slice zucchini into thick rounds and season with garlic and Parmesan.

These alternatives keep the dish satisfying and delicious while fitting seamlessly into a low-carb lifestyle.

For another comforting, family-friendly dinner idea, check out Chicken and Dressing Recipe. It’s a classic that pairs perfectly with your favorite sides.

Serving and Pairing Garlic Parmesan Chicken and Potatoes

Plated Garlic Parmesan Chicken and Potatoes with a side salad.
A complete meal: Garlic Parmesan Chicken and Potatoes with a side salad.

Serving Garlic Parmesan Chicken and Potatoes is as enjoyable as making it. With the right accompaniments, you can elevate this dish into a memorable meal perfect for any occasion. Let’s explore how to plate, serve, and pair this crowd-pleaser.

Presentation Tips for Maximum Appeal

A visually appealing dish makes it even more enticing. Here’s how to plate your Garlic Parmesan Chicken and Potatoes like a pro:

  • Layer Strategically: Arrange the crispy potatoes as a base, then place the juicy chicken on top.
  • Garnish for Freshness: Sprinkle chopped parsley or thyme for a pop of color and a fresh aroma.
  • Serve Family-Style: If you’re hosting, present the dish in a large, rustic skillet to highlight its homestyle charm.

These small touches can make a big difference, turning a simple dish into a stunning centerpiece.

Perfect Side Dishes

While Garlic Parmesan Chicken and Potatoes is satisfying on its own, adding complementary sides can round out the meal. Consider these options:

  • Vegetables: Roasted asparagus or steamed green beans add a fresh, healthy contrast to the rich flavors.
  • Salads: A crisp Caesar salad or mixed greens with a tangy vinaigrette pairs beautifully with the garlic and Parmesan.
  • Bread: Serve with warm garlic bread to soak up any extra juices or sauce.

These sides not only enhance the dish but also create a well-balanced meal that everyone will love.

Beverage Pairings

The right drink can elevate the flavors of Garlic Parmesan Chicken and Potatoes. Here are some excellent options:

  • Wine: A light white wine like Sauvignon Blanc or a buttery Chardonnay complements the garlic and Parmesan perfectly.
  • Beer: A crisp lager or a pale ale balances the richness of the dish without overpowering it.
  • Non-Alcoholic: Lemon-infused sparkling water or a refreshing iced tea works wonderfully for those avoiding alcohol.

By choosing the right beverage, you’ll create a harmonious dining experience that leaves a lasting impression.

Ideas for Leftovers

Got leftovers? Transform them into exciting new meals with these creative ideas:

  • Chicken Wraps: Slice the chicken and potatoes, then wrap them in a tortilla with fresh greens and a drizzle of garlic sauce.
  • Breakfast Hash: Sauté the leftover potatoes with diced chicken and top with a fried egg for a hearty morning meal.
  • Pasta Toss: Mix the chicken and potatoes with cooked pasta and a bit of cream for a quick, flavorful pasta dish.

These suggestions make sure nothing goes to waste while adding variety to your meals.

For another dish with versatile flavors, check out Instant Pot Marry Me Chicken Pasta. It’s a creamy, satisfying recipe that’s quick to prepare and just as delicious.

FAQs

What wine goes well with potatoes?

When serving Garlic Parmesan Chicken and Potatoes, the right wine can truly elevate the meal. Potatoes, especially when roasted with garlic and Parmesan, pair wonderfully with light white wines. A Sauvignon Blanc brings crispness that complements the savory garlic and cheese, while a Chardonnay adds buttery notes that enhance the richness of the dish. If you prefer red, a Pinot Noir offers a subtle earthiness that balances the flavors.

What’s the grocery list for garlic Parmesan potatoes?

To make the potatoes in Garlic Parmesan Chicken and Potatoes, you’ll need the following ingredients:

  • Yukon Gold or baby red potatoes
  • Fresh garlic cloves
  • Grated Parmesan cheese
  • Olive oil
  • Salt and pepper
  • Optional: paprika, dried Italian herbs, and parsley for garnish

This simple list ensures you’ll have everything to create crispy, flavorful potatoes.

How do you not burn garlic when roasting potatoes?

To avoid burning garlic when roasting potatoes, timing is everything. Add minced garlic toward the end of the cooking process—about 5 minutes before the potatoes are done. This allows the garlic to cook and release its flavor without turning bitter. Additionally, coating the garlic in olive oil helps protect it from direct heat, ensuring it turns golden instead of burning.

How many carbs are in Parmesan potatoes?

The carbohydrate content of Parmesan potatoes depends on the type of potatoes used. On average, a serving of roasted potatoes (about 1 cup) contains approximately 20-25 grams of carbs. Adding Parmesan cheese doesn’t significantly impact the carb count, making this a hearty yet reasonable side dish for most diets.

Conclusion

Garlic Parmesan Chicken and Potatoes is the ultimate one-pan wonder. It combines crispy, golden potatoes and juicy, flavorful chicken in a savory blend of garlic and Parmesan. This dish isn’t just easy to make—it’s versatile, customizable, and perfect for weeknights or special occasions.

You’ve learned how to prepare this recipe step-by-step, explored creative variations, and discovered tips to ensure your dish is flawless every time. Whether you’re hosting a dinner party or cooking for your family, this meal delivers bold flavors with minimal effort.

Ready to try it for yourself? Grab your ingredients, follow the recipe, and enjoy a delicious dinner that’s sure to impress. Don’t forget to check out our other comforting recipes for even more inspiration!

How to Make Perfect Buffalo Chicken Sliders with Cream Cheese in 5 Steps

Imagine biting into a warm, fluffy slider bursting with creamy, tangy, and spicy goodness sounds irresistible, doesn’t it? These Buffalo Chicken Sliders with Cream Cheese take your favorite game-day snack to a whole new level. With the bold heat of buffalo sauce balanced by velvety cream cheese and melty cheddar, each bite is a flavor explosion. Whether you’re hosting a party or just treating yourself, this recipe promises to wow your taste buds in just five easy steps. Ready to discover the secret behind these drool-worthy sliders? Let’s dive in!

Why You’ll Love These Buffalo Chicken Sliders

 Buffalo chicken sliders with cream cheese served on a plate with celery sticks.
Perfectly baked buffalo chicken sliders served with fresh celery sticks.

Perfect for Parties, Game Days, or Quick Dinners

There’s nothing quite like buffalo chicken sliders with cream cheese to steal the show at any gathering. These bite-sized beauties are a game-day favorite, whether you’re hosting a Super Bowl party or just a casual weekend get-together with friends. Thanks to their manageable size and bold flavor, they’re perfect for mingling or munching on the go. Even better, they’re quick and easy to make, making them a lifesaver when you need a last-minute dinner or snack. If you’ve been searching for a recipe that strikes the perfect balance between convenience and wow factor, this is it!

Balanced Creaminess with a Kick of Spice

The beauty of buffalo chicken sliders with cream cheese lies in their flavor harmony. The heat from the buffalo sauce is perfectly offset by the creamy, velvety texture of cream cheese, creating an irresistible combination in every bite. This contrast elevates the sliders beyond your average spicy dish. For an extra layer of indulgence, melted cheddar or Monterey Jack adds a gooey richness that ties everything together. The result? Sliders that are bold, creamy, and absolutely unforgettable.
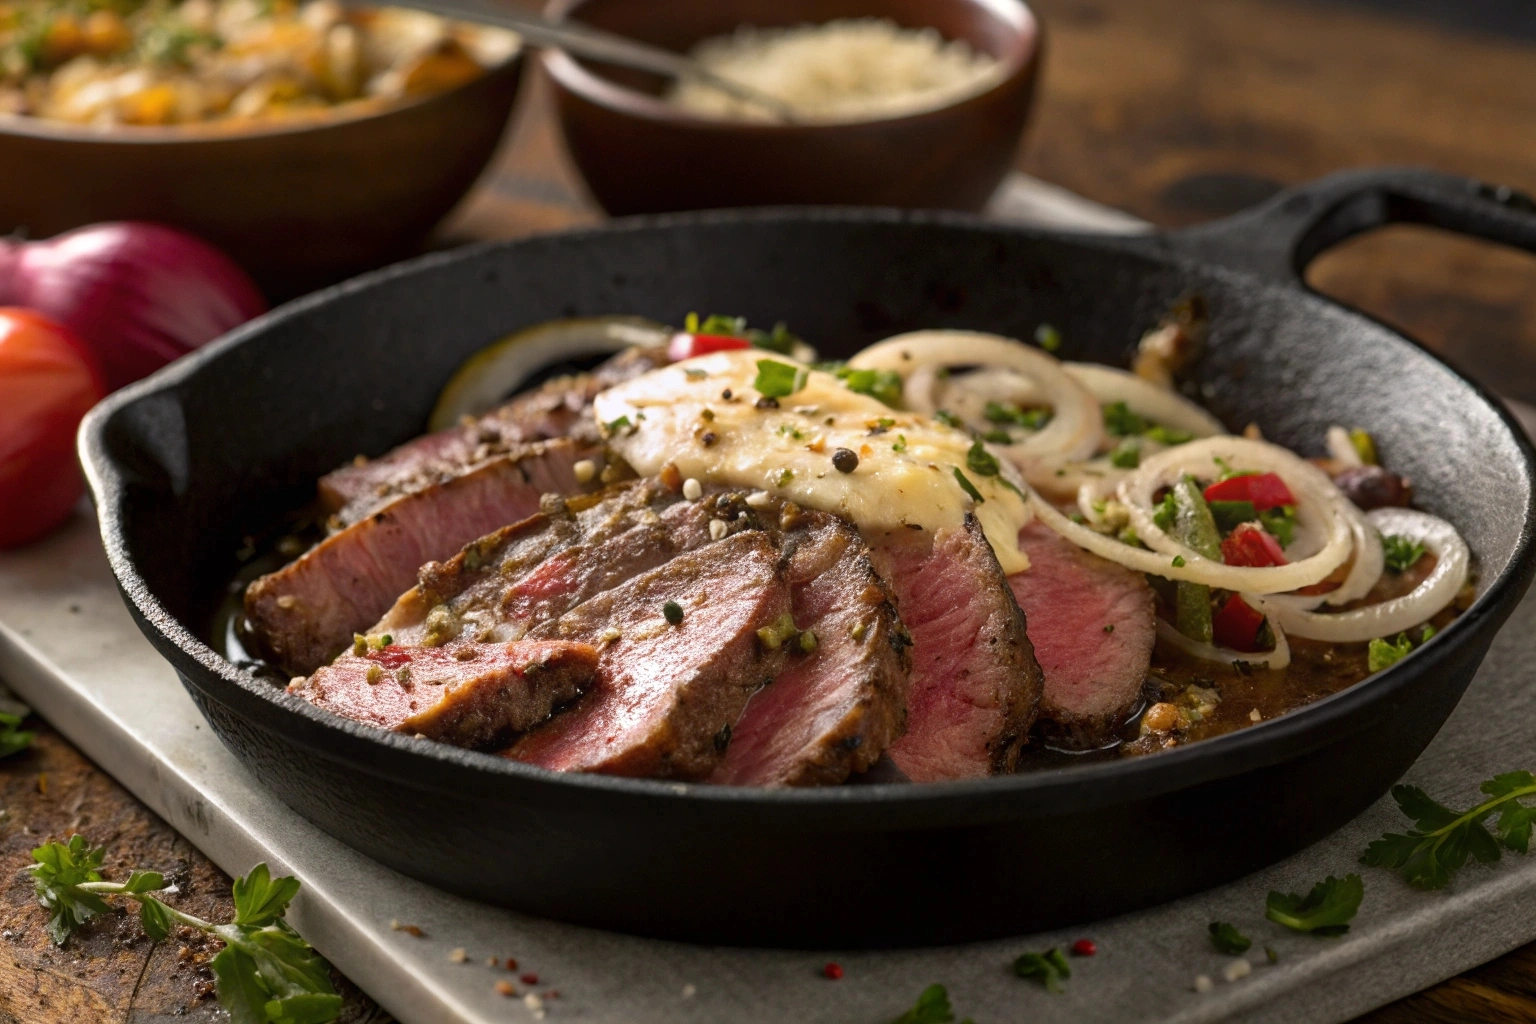
Made with Simple, Everyday Ingredients

One of the best things about buffalo chicken sliders with cream cheese is that they’re made with ingredients you probably already have in your kitchen. Shredded chicken, a staple for weeknight meals, forms the base of the recipe. Add in a generous helping of cream cheese and a few dashes of buffalo sauce like Frank’s RedHot for that signature tangy heat. All you need are some Hawaiian rolls and cheese to complete the sliders. If you don’t have a favorite buffalo sauce yet, Food Network’s Buffalo Sauce Recipe is an easy homemade option that pairs beautifully with these sliders.
Versatility to Suit Any Occasion

Whether you’re preparing a platter for a potluck or just whipping up a quick dinner, these sliders adapt to your needs. Hosting a party? Serve them alongside celery sticks and ranch dressing for the ultimate snack spread. Craving something lighter? Swap out the rolls for lettuce wraps and turn them into a low-carb treat. You can even make them ahead of time, storing the filling in the fridge until you’re ready to assemble. Their versatility ensures they’ll fit seamlessly into any meal plan or event.

Ingredients You’ll Need for Buffalo Chicken Sliders

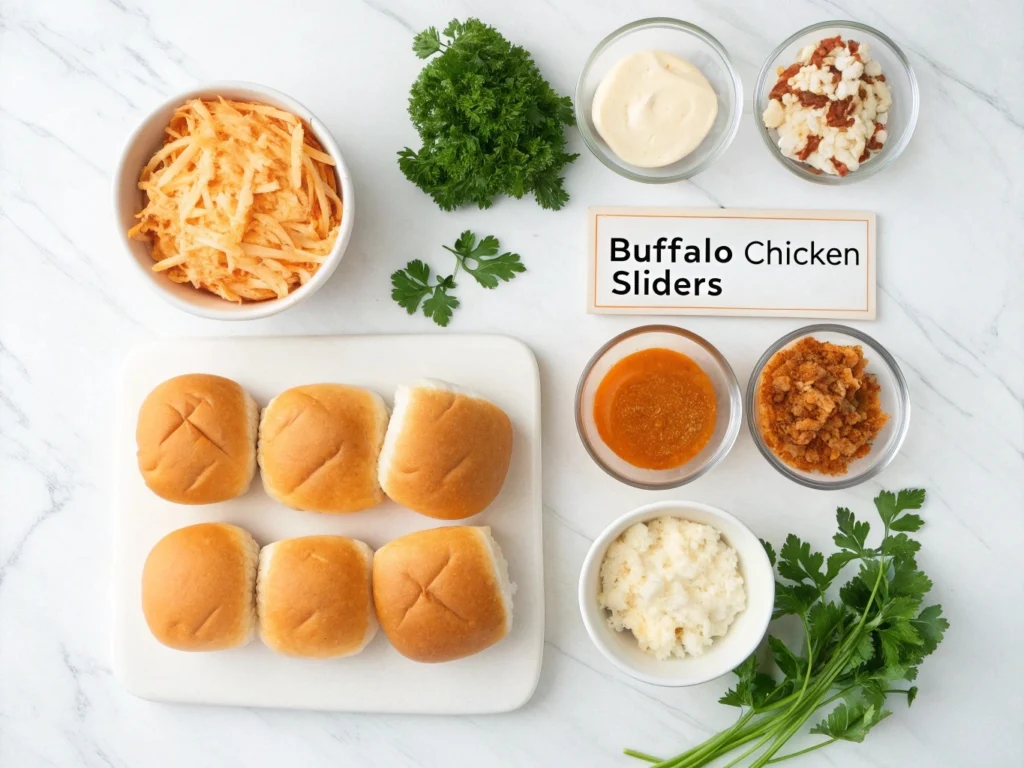
Ingredients for buffalo chicken sliders with cream cheese on a marble surface.
All the ingredients needed to make delicious buffalo chicken sliders with cream cheese.

The Main Ingredients

To make buffalo chicken sliders with cream cheese, you’ll need just a handful of everyday ingredients that pack a punch of flavor. The main stars of this dish are:

  • Shredded Chicken: This forms the base of the sliders. Rotisserie chicken is an excellent shortcut, but you can also cook and shred your own.
  • Buffalo Sauce: For that signature spicy kick, Frank’s RedHot sauce is a popular choice, but feel free to use your favorite brand.
  • Cream Cheese: The creamy element that balances the heat, giving these sliders their irresistible texture.

This trio creates a flavor foundation that’s bold, creamy, and unforgettable.

Slider-Specific Items

To bring everything together, you’ll also need a few slider essentials:

  • Hawaiian Rolls: Their soft, slightly sweet texture pairs perfectly with the spicy chicken filling.
  • Cheese: Cheddar, Monterey Jack, or even mozzarella work wonderfully to add gooey richness.
  • Butter: Brushed over the top for a golden, glossy finish when baked.

These simple additions take your buffalo chicken sliders with cream cheese to the next level, creating a complete flavor-packed bite.

Optional Add-Ons for Extra Flavor

If you want to elevate your sliders, consider adding:

  • Blue Cheese Crumbles: A tangy topping that enhances the buffalo flavor.
  • Celery and Carrots: For crunch and a fresh contrast.
  • Dipping Sauces: Ranch or blue cheese dressing on the side is a must for many fans of buffalo chicken.

These optional ingredients give you the flexibility to customize the dish to your taste.

Ingredient Substitutions

If you’re missing any ingredients or want to tweak the recipe, here are some easy swaps:

  • Use ground chicken or turkey instead of shredded chicken for a slightly different texture.
  • Swap cream cheese with Greek yogurt for a lighter option while maintaining creaminess.
  • Replace Hawaiian rolls with slider buns, potato rolls, or even lettuce wraps for a low-carb variation.

For more creative chicken-based recipes, check out this Chicken Fajita Marinade Recipe on Quick Meals Recipes!

Step-by-Step Instructions to Make Buffalo Chicken Sliders

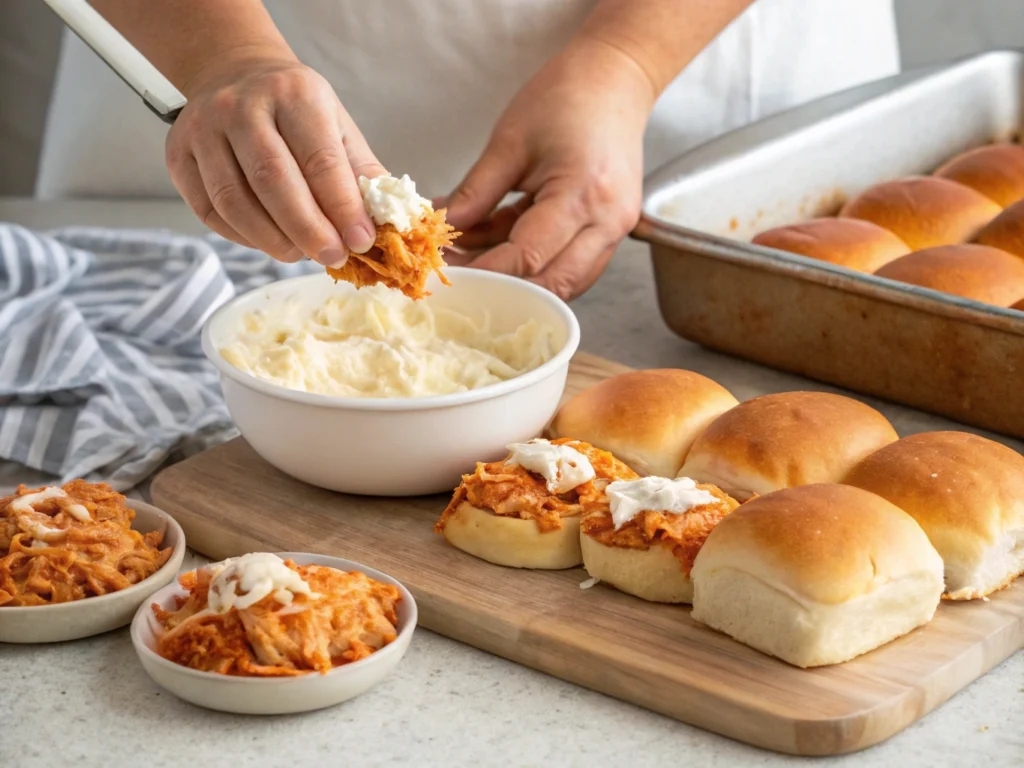
Assembling buffalo chicken sliders with cream cheese in a baking dish.
Layering buffalo chicken and cream cheese filling on slider buns, topped with cheese.

Step 1 – Prepare the Chicken Filling

The first step in making buffalo chicken sliders with cream cheese is creating the delicious chicken filling. Start by shredding cooked chicken—rotisserie chicken works best for ease and flavor. In a mixing bowl, combine the shredded chicken with softened cream cheese and buffalo sauce. Use a spoon or spatula to ensure the ingredients are evenly mixed.

For an extra kick, you can add a sprinkle of garlic powder or onion powder. If you prefer a milder version, simply reduce the buffalo sauce and add more cream cheese. The result should be a creamy, spicy, and perfectly seasoned filling.

Step 2 – Assemble the Sliders

Next, it’s time to assemble your buffalo chicken sliders with cream cheese. Begin by slicing your Hawaiian rolls in half horizontally, keeping the rolls intact as a single sheet for easier assembly. Place the bottom halves on a lined baking sheet or in a casserole dish.

Spread the chicken mixture evenly over the rolls, ensuring each roll gets a generous amount. Top the chicken with shredded cheese, such as cheddar or Monterey Jack, to create a gooey layer of melted goodness. Then, place the top halves of the rolls back on, sandwiching the filling inside.

Step 3 – Bake to Perfection

The key to perfect buffalo chicken sliders with cream cheese is baking them until the cheese is melted and the rolls are golden. Preheat your oven to 350°F (175°C). Before placing the sliders in the oven, brush the tops of the rolls with melted butter for an extra glossy finish.

For added flavor, mix some garlic powder and parsley into the butter before brushing. Bake the sliders for 15–20 minutes, or until the tops are lightly toasted and the cheese is bubbling. This step not only enhances the flavors but also ensures the sliders are warm and satisfying.

Step 4 – Add Garnishes and Serve

Once out of the oven, let the sliders cool for a minute or two before serving. To elevate their presentation and taste, consider adding garnishes. A sprinkle of fresh parsley or green onions can brighten the dish, while a few crumbles of blue cheese give it an extra tangy twist.

For dipping, serve the sliders with ranch or blue cheese dressing on the side. These dressings perfectly complement the spicy buffalo flavor and make the dish even more crowd-pleasing. Whether it’s a party appetizer or a casual dinner, these sliders are sure to impress.

For more chicken-inspired recipes, check out our guide on Chicken and Dressing Recipe for a comforting classic!

Tips and Tricks for the Best Buffalo Chicken Sliders

Make-Ahead Options for Busy Days

One of the best things about buffalo chicken sliders with cream cheese is how easily you can prepare parts of the recipe ahead of time. If you know you’ll be short on time, prepare the chicken filling a day or two in advance. Store it in an airtight container in the fridge, then assemble and bake the sliders when you’re ready to serve.

Another time-saving tip is to shred your chicken in bulk and freeze it in portions. This way, you’ll always have shredded chicken on hand for quick meals. When hosting a party, assembling the sliders ahead of time and refrigerating them (unbaked) can save you last-minute stress. Just pop them in the oven before guests arrive!

Ingredient Substitutions to Customize the Recipe

It’s easy to make buffalo chicken sliders with cream cheese your own by tweaking the ingredients. For a healthier option, try swapping cream cheese with Greek yogurt or a light cream cheese alternative. If you’re avoiding bread, use lettuce wraps instead of Hawaiian rolls for a low-carb version.

For those who love experimenting, try using smoked chicken or turkey instead of plain shredded chicken for a new flavor profile. Cheese lovers can substitute mozzarella or pepper jack for a slightly different twist. These adjustments keep the recipe flexible and fun.

How to Avoid Soggy Sliders

One common issue with sliders is soggy rolls, but there are easy ways to prevent this. First, consider lightly toasting the bottom halves of your rolls before adding the filling. This creates a barrier that helps keep the bread from soaking up too much moisture.

Second, don’t overdo the buffalo sauce in the chicken mixture. While the sauce is essential for flavor, too much can make the filling watery. If you want extra sauce on the side, serve it as a dip instead of adding it directly to the sliders.

Lastly, baking the sliders uncovered for the last 5 minutes allows the tops to crisp up without drying out the filling. This small step can make a big difference in texture and presentation.

Serving Suggestions to Elevate Your Sliders

 Served buffalo chicken sliders with cream cheese, ranch, and celery sticks.
Plated buffalo chicken sliders served with ranch, celery sticks, and a cold drink.

To make your buffalo chicken sliders with cream cheese even more memorable, serve them with complementary sides and garnishes. A tray of celery sticks and carrot sticks is a classic pairing that adds crunch and freshness.

For dipping, ranch dressing or blue cheese dressing is a must-have. If you’re looking to balance the heat of the buffalo sauce, offer a side of coleslaw for a cool and creamy contrast.

For drinks, serve with iced tea, soda, or even a cold beer to complete the meal. And if you’re hosting a crowd, consider making a variety platter with sliders, wings, and other party favorites. This turns a simple dish into the star of any gathering!

Variations of Buffalo Chicken Sliders to Try

Slow Cooker Buffalo Chicken Sliders

For a hands-off approach, try making buffalo chicken sliders with cream cheese in a slow cooker. Combine the shredded chicken, buffalo sauce, and cream cheese in your slow cooker and cook on low for 4–6 hours or high for 2–3 hours. The result is an extra tender and flavorful filling that practically melts in your mouth.

To assemble, simply spread the slow-cooked mixture onto the rolls, top with cheese, and bake until warm and gooey. This method is ideal for busy days when you want maximum flavor with minimal effort.

Spicy Ranch Buffalo Sliders

For those who love a zesty twist, add ranch seasoning to the chicken filling. Mix a packet of ranch dressing mix into the cream cheese before combining it with the shredded chicken and buffalo sauce. This addition not only boosts the flavor but also adds a cool, tangy element that complements the spicy sauce.

For an extra kick, drizzle a little spicy ranch dressing over the top before serving. These sliders are perfect for fans of bold and tangy flavors!

Low-Carb Buffalo Sliders

If you’re following a low-carb or keto diet, you don’t have to miss out on the deliciousness of buffalo chicken sliders with cream cheese. Swap the Hawaiian rolls for crisp lettuce wraps or use keto-friendly bread alternatives.

Another great option is to serve the chicken mixture as a dip with celery sticks and carrot sticks for dipping. This variation is both healthy and satisfying, making it perfect for anyone who wants to cut carbs without sacrificing flavor.

BBQ Buffalo Chicken Sliders

For a smoky twist, mix a tablespoon or two of BBQ sauce into the buffalo sauce before combining it with the chicken and cream cheese. This combination adds a layer of sweetness and depth that pairs beautifully with the spicy heat.

Top the sliders with sliced pickles or coleslaw for a Southern-inspired take on the classic recipe. These BBQ buffalo sliders are guaranteed to be a hit at summer cookouts or tailgating parties.

FAQs About Buffalo Chicken Sliders

Q1: How to cook buffalo in the oven?

Cooking buffalo-flavored dishes, like buffalo chicken sliders with cream cheese, in the oven is simple and ensures a perfectly baked finish. To prepare the sliders, assemble them by layering shredded buffalo chicken, cream cheese, and shredded cheese between soft slider buns. Then, place them in a preheated oven at 350°F (175°C) and bake for 15–20 minutes. For a crispy top, brush the rolls with melted butter before baking. This method keeps the chicken warm, the cheese melted, and the bread toasted to perfection.

If you’re cooking a buffalo chicken casserole or dip, follow similar steps—combine all ingredients, spread them in an oven-safe dish, and bake until bubbly.

Q2: What is buffalo chicken dip made of?

Buffalo chicken dip is made from a creamy, spicy blend of shredded chicken, cream cheese, buffalo sauce, ranch or blue cheese dressing, and shredded cheese (usually cheddar or Monterey Jack). These ingredients are mixed together and baked until hot and gooey.

This dip’s rich, tangy flavor profile is what inspired recipes like buffalo chicken sliders with cream cheese. The sliders take the same irresistible flavors of the dip and layer them into bite-sized sandwiches, perfect for parties or family dinners.

Q3: Slider bun vs burger bun?

Slider buns and burger buns serve different purposes but can sometimes be interchangeable. Slider buns are smaller, softer, and designed for handheld, bite-sized sandwiches like buffalo chicken sliders with cream cheese. Their petite size makes them perfect for party platters or appetizers.

Burger buns, on the other hand, are larger and sturdier, ideal for full-sized sandwiches. If you don’t have slider buns, you can cut burger buns into smaller portions or use Hawaiian rolls as an excellent substitute.

The most popular dipping sauces for buffalo wings—and dishes like buffalo chicken sliders with cream cheese—are ranch dressing and blue cheese dressing. Ranch dressing is the top choice for its cool, creamy, and slightly tangy flavor that balances the spicy heat of buffalo sauce.

Blue cheese dressing, while not as universally loved, has a sharp and tangy flavor that complements the bold taste of buffalo sauce perfectly. Both options work equally well as dipping sauces or drizzled over sliders for an extra burst of flavor.

Conclusion

If you’re craving a crowd-pleasing recipe that’s easy to make and bursting with bold flavor, buffalo chicken sliders with cream cheese are the perfect solution. These sliders combine the spicy kick of buffalo sauce with the creamy richness of cream cheese, all nestled between soft, golden slider buns.

From versatile variations like low-carb lettuce wraps to time-saving tips for make-ahead preparation, these sliders are as flexible as they are delicious. Whether you’re serving them for game day, a party, or a family dinner, they’re guaranteed to be a hit.

So, gather your ingredients, follow the simple steps outlined in this guide, and get ready to impress your family and friends. Don’t forget to experiment with fun variations and dipping sauces to make this recipe truly your own.

10 Power-Packed Secrets to the Perfect Beef Bourguignon

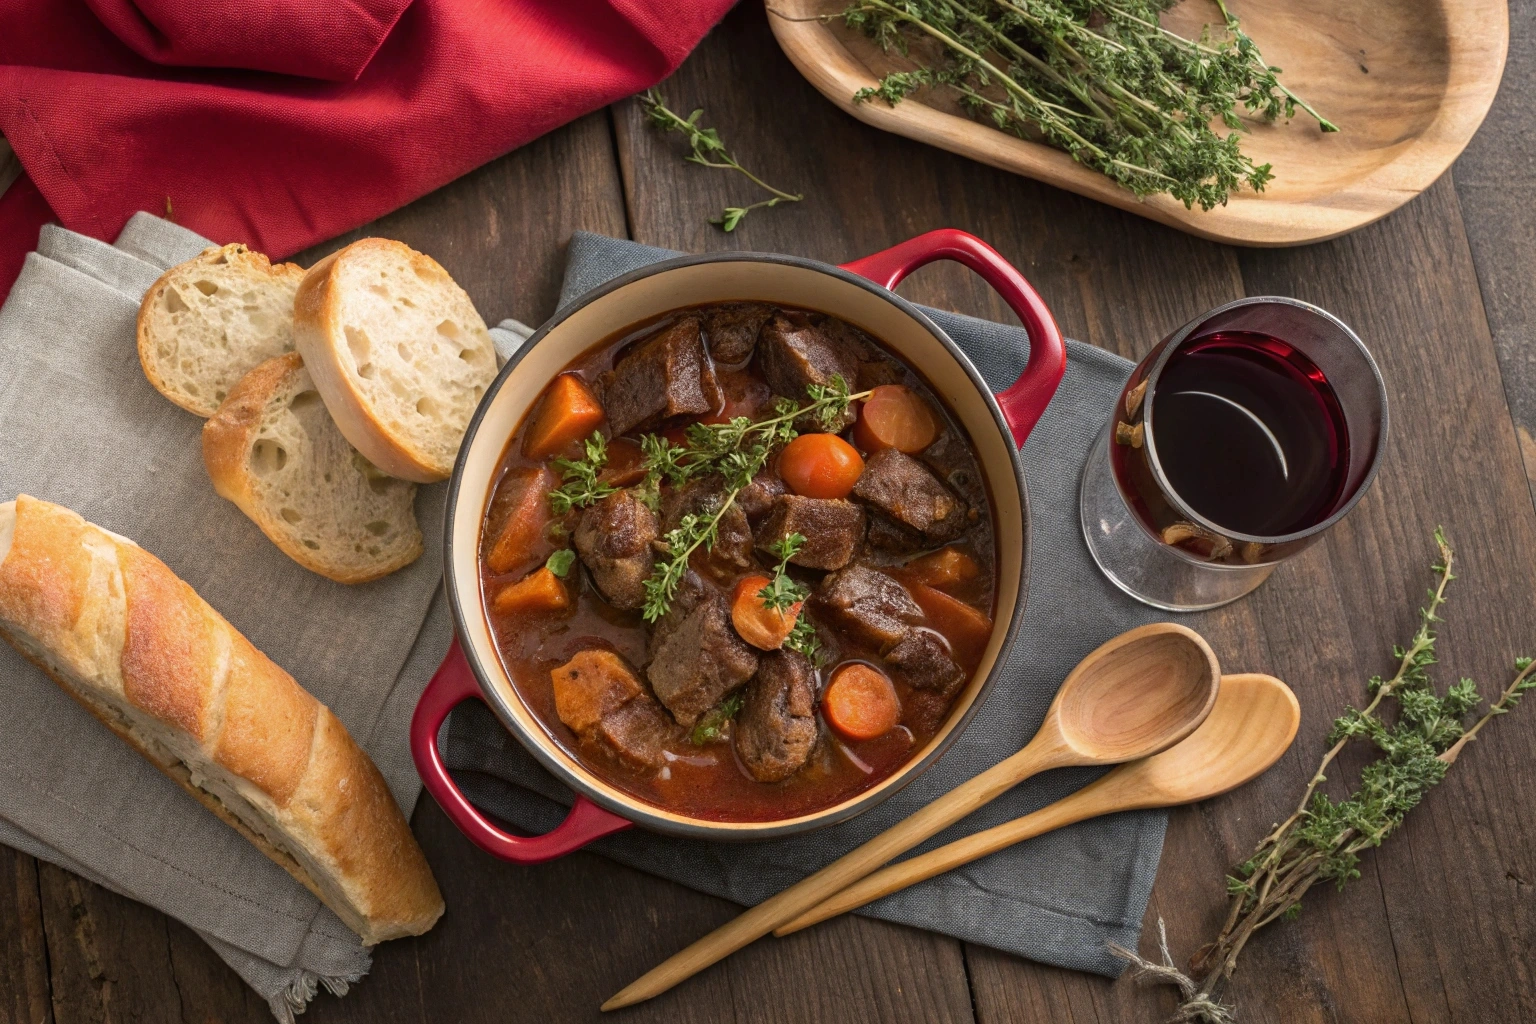
Imagine the aroma of tender beef simmering in a rich red wine sauce, mingled with hints of garlic, fresh thyme, and caramelized onions wafting through your kitchen. Beef bourguignon isn’t just a dish it’s an experience, a love letter to French cuisine that transforms simple ingredients into pure magic. But here’s the twist: with a few power-packed secrets, you don’t need to be a gourmet chef to make it unforgettable. Ready to unlock the mystery behind this culinary masterpiece? Let’s dive into the delicious details!

1. Selecting the Right Cut of Beef

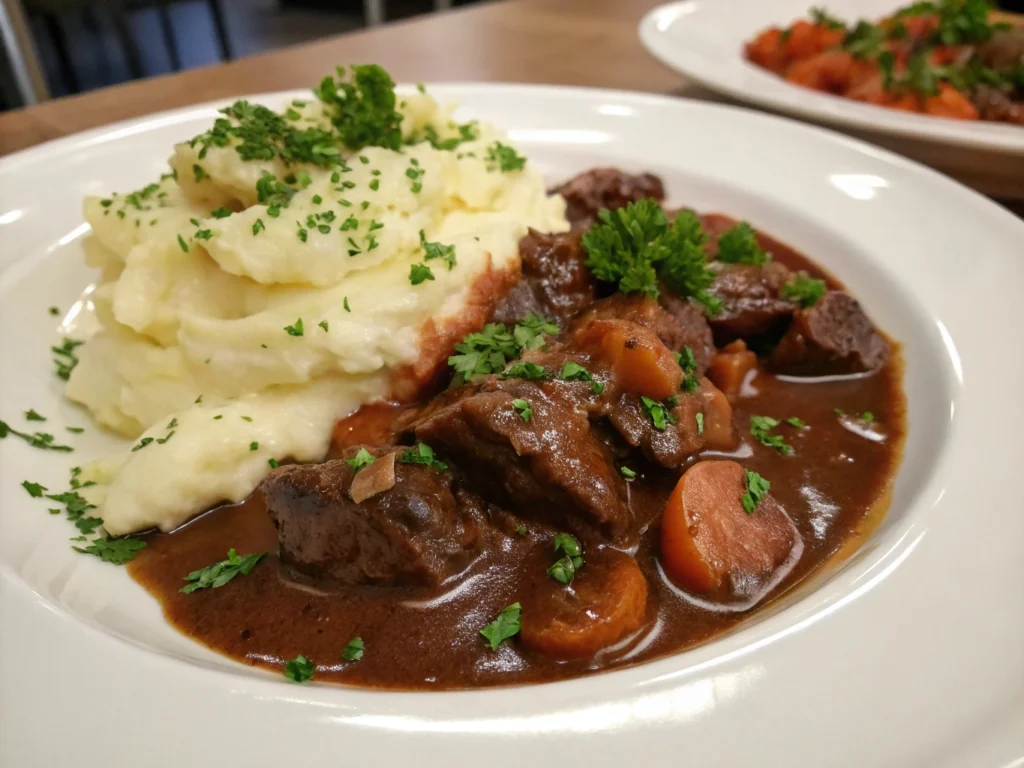
Plated beef bourguignon with mashed potatoes and parsley garnish.
Beef bourguignon served with creamy mashed potatoes.

Why Chuck Roast Is the Star Ingredient

When it comes to crafting the perfect beef bourguignon, choosing the right cut of beef is essential. Chuck roast stands out as the ideal choice due to its rich marbling and ability to break down into tender, juicy bites when slow-cooked. Unlike leaner cuts, chuck retains its moisture, giving your dish a melt-in-your-mouth texture that’s hard to beat.

On the other hand, cuts like sirloin or tenderloin may seem tempting but often result in dry, chewy meat after hours of simmering. Instead, embrace the hearty flavor of chuck roast it’s a game-changer for achieving that authentic beef bourguignon experience.

Tips for Preparing the Beef

The way you prepare your beef can make or break your dish. Start by patting the meat dry with paper towels. This step ensures that the beef browns properly when seared, creating a flavorful crust that adds depth to the final dish.

Cut the beef into uniform, 2-inch cubes to guarantee even cooking. Uneven pieces can overcook or stay tough, disrupting the smooth texture of your beef bourguignon. Additionally, lightly season the beef with salt and pepper before searing to enhance its natural flavors.

Common Mistakes to Avoid

To make your beef bourguignon a success, steer clear of these common pitfalls:

  1. Using the wrong cut of beef: Avoid lean cuts, as they lack the fat needed for rich, tender results.
  2. Overcrowding the pan: When browning, work in small batches to allow proper caramelization. Crowded pans steam the meat instead of searing it.
  3. Skipping the sear: Never skip the step of browning the meat; it’s essential for that signature depth of flavor.

Exploring Alternative Cuts of Beef

While chuck roast is the classic choice, other cuts can work in a pinch. Brisket, with its slightly firmer texture, or beef shank, known for its richness, are excellent alternatives. Each offers a unique twist on the traditional beef bourguignon.

For more guidance on selecting beef cuts, refer to Allrecipes, This can help you find the perfect cut for your dish while understanding the benefits of each option.

2. The Role of Burgundy Wine

Choosing the Best Wine for Authentic Flavor

The wine you choose for your beef bourguignon is just as crucial as the beef itself. Burgundy wine, typically made from Pinot Noir grapes, is the traditional choice due to its deep, earthy flavor and ability to meld perfectly with the dish. However, if Burgundy isn’t available, a dry red wine like Côtes du Rhône or Merlot can be excellent substitutes.

For an elevated taste, select a wine you would enjoy drinking. This is important because, as the dish simmers, the wine reduces and its flavors concentrate, becoming a key component of your beef bourguignon.

How Much Wine to Use

Balance is key when incorporating wine into your beef bourguignon. Typically, you’ll need about two cups of wine for a standard recipe. This amount ensures the beef absorbs the flavors while leaving enough liquid for a rich sauce. Avoid using too much wine, as it can overwhelm the other ingredients, making the dish too sharp.

When in doubt, follow the French adage: “Cook with the wine you’ll pair with the meal.”

Fun Fact: The Origin of Beef Bourguignon

Beef bourguignon originated in Burgundy, France, a region renowned for its wine and hearty cuisine. Historically, this dish was considered peasant food, crafted to make the most of inexpensive cuts of beef and local Burgundy wine. Over time, it became a celebrated staple of French gastronomy, even earning a place in Julia Child’s Mastering the Art of French Cooking.

Pairing Wine with Beef Bourguignon

To enhance the dining experience, serve beef bourguignon with the same wine used in cooking. A medium-bodied red like Pinot Noir complements the dish’s richness without overpowering it. For more options, consult resources like Wine Folly for pairing suggestions that will bring out the best in your dish.

3. Building Layers of Flavor with Aromatics

Essential Ingredients in Beef Bourguignon

The magic of beef bourguignon lies in its layers of flavors, starting with classic aromatics. A traditional mirepoix onions, carrots, and celery—serves as the foundation. These vegetables infuse the dish with natural sweetness and depth, creating the perfect balance for the savory beef and bold wine.

Additionally, fresh herbs like thyme, bay leaves, and parsley are must-haves. These aromatics add complexity to the dish while keeping it rooted in its French origins. Don’t forget a few cloves of garlic for an extra touch of earthiness.

Cooking Tips for Aromatics

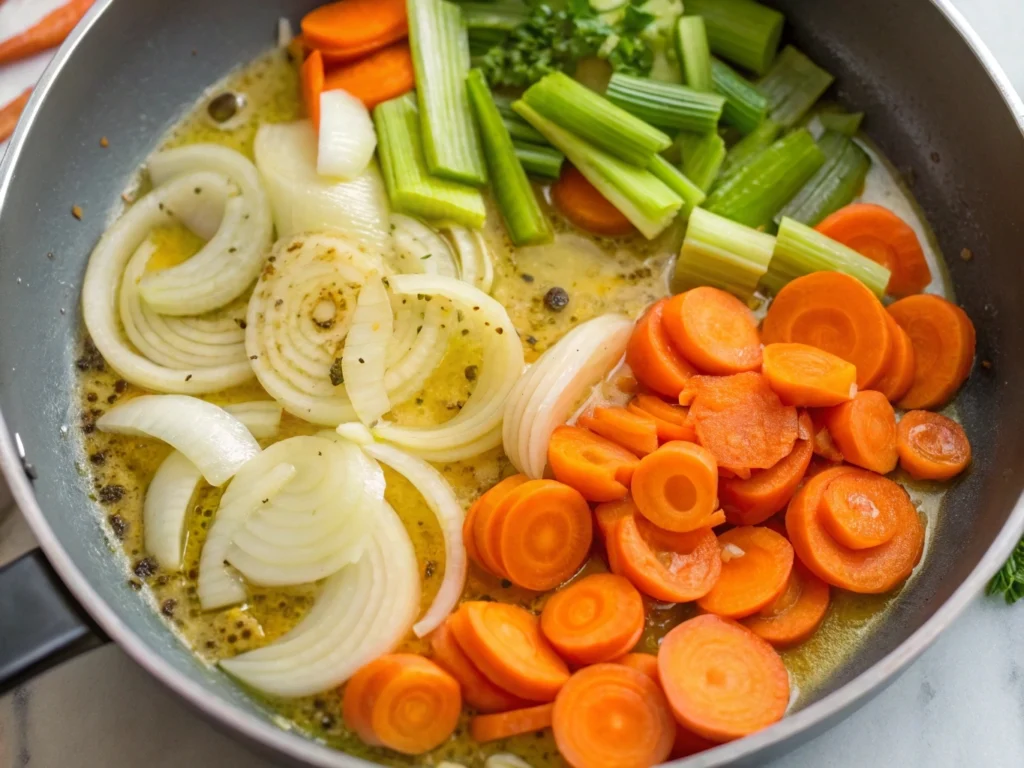
Mirepoix of onions, carrots, and celery sautéing for beef bourguignon.
Sautéing aromatics is a key step in building flavor.

Cooking aromatics correctly is a crucial step that sets the stage for the rich flavors of beef bourguignon. Begin by sautéing the mirepoix in olive oil or butter until the vegetables soften and take on a slight golden hue. This process releases their natural sugars, enhancing the overall flavor profile of the dish.

For best results, add garlic toward the end of the sauté process. Garlic burns easily, so cooking it briefly ensures it enhances the dish without becoming bitter. Remember, every layer contributes to the final masterpiece.

Using Garlic and Shallots for Depth

To elevate your beef bourguignon, consider including shallots alongside garlic. Shallots have a mild, sweet flavor that complements the heartiness of the dish. Dice them finely and add them to the sautéed aromatics for a subtle yet noticeable enhancement.

In addition, crushed garlic cloves can be added directly to the braising liquid for a deeper, slow-infused flavor. This small adjustment transforms the sauce into something truly special, delivering the unmistakable aroma and taste of authentic French cuisine.

Balancing Aromatics for the Perfect Blend

The key to perfectly balancing aromatics in beef bourguignon is moderation. Too many herbs can overpower the other ingredients, while too little leaves the dish flat. A sprig or two of thyme, a single bay leaf, and a small handful of chopped parsley are just enough to enhance without overwhelming.

For a unique twist, consider tying the herbs into a bouquet garni, which can be easily removed before serving. This approach keeps the flavors consistent and prevents any herb fragments from lingering in the sauce.

For more inspiration on incorporating aromatics into French dishes, check out our article on How to Cook Beef Cheek Meat. Many of the techniques overlap, making it a valuable resource for mastering slow-cooked recipes.

4. Mastering the Art of Browning

Why Browning Matters

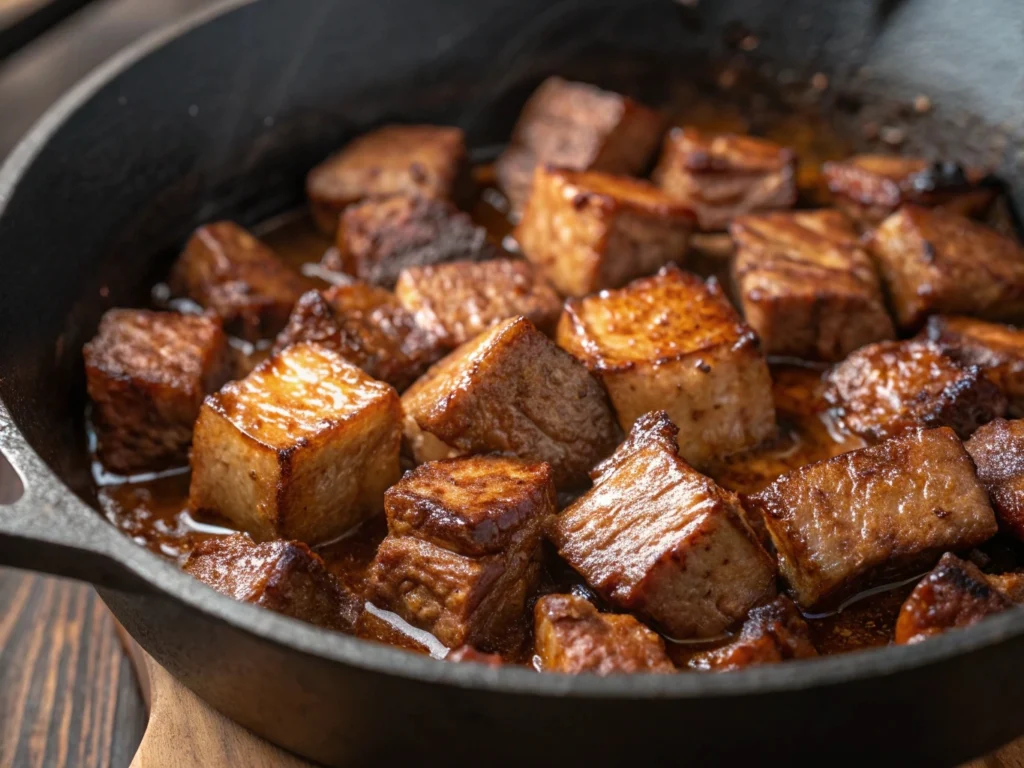
Close-up of beef searing in a Dutch oven for beef bourguignon.
Searing beef creates the rich flavors essential to this dish.

Browning the beef is one of the most critical steps in preparing beef bourguignon. This process develops a rich, caramelized crust on the meat, creating layers of flavor that will elevate the entire dish. Known as the Maillard reaction, browning gives the beef a deep, savory taste that pairs beautifully with the wine-based sauce.

However, rushing this step can compromise the final result. For the best flavor, ensure the beef is browned in small batches, allowing each piece to develop a proper sear.

Step-by-Step Guide to Browning Beef

  1. Dry the Beef: Pat the beef dry with paper towels to remove excess moisture. Wet surfaces prevent proper browning and lead to steaming instead.
  2. Season Generously: Sprinkle salt and pepper evenly on all sides of the beef before cooking. This enhances the flavor and promotes a delicious crust.
  3. Heat the Pan: Use a heavy-bottomed pot, such as a Dutch oven, and heat a small amount of oil until it shimmers.
  4. Work in Batches: Add a single layer of beef to the pan without overcrowding. Let the pieces sear for 2-3 minutes per side until golden brown.

By following these steps, your beef will have the ideal texture and flavor to build a superior beef bourguignon.

Common Pitfalls to Avoid

To achieve perfect browning, it’s important to avoid common mistakes:

  • Overcrowding the Pan: Adding too much beef at once lowers the pan’s temperature, leading to steaming instead of searing.
  • Using Low Heat: Insufficient heat prevents the Maillard reaction, resulting in bland, pale beef.
  • Skipping the Sear: Failing to brown the beef means missing out on the deep flavors essential to authentic beef bourguignon.

For best results, always take your time with this step it’s worth the extra effort.

The Secret to Deglazing

After browning, don’t skip the deglazing process. Deglazing involves adding liquid to the hot pan to loosen the caramelized bits, or “fond,” stuck to the bottom. These browned bits are packed with flavor and become the backbone of the sauce.

Pour a splash of Burgundy wine into the pan and scrape the bottom with a wooden spoon. This step not only enhances the sauce but also ensures no flavor goes to waste.

5. Simmering to Perfection

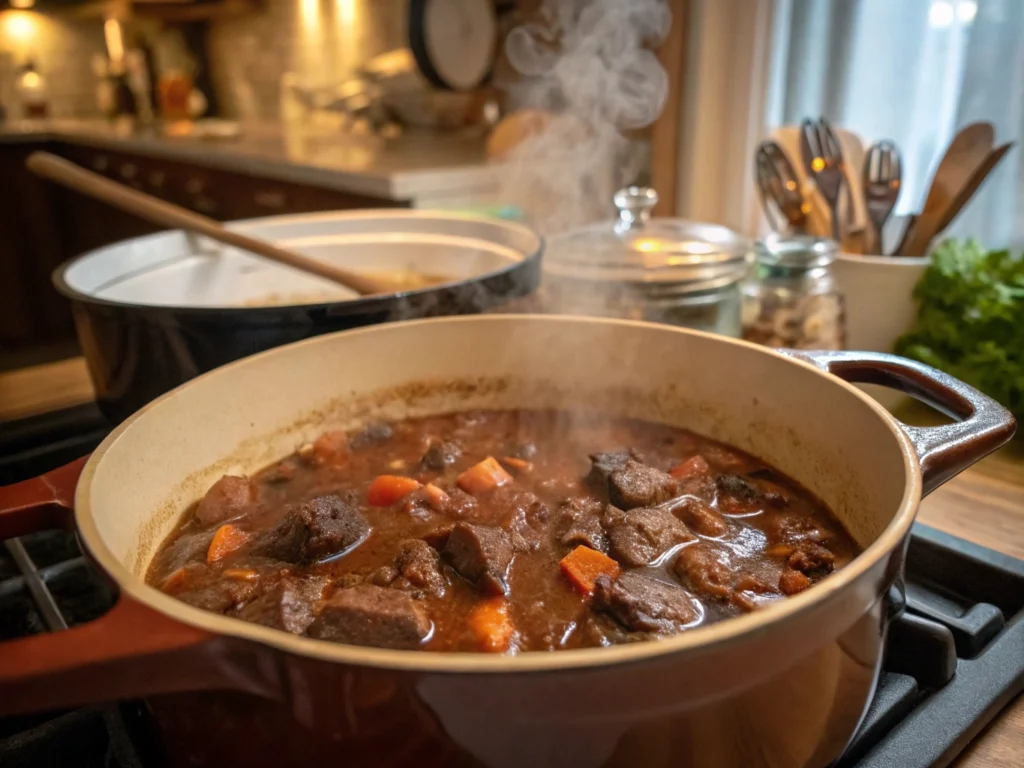
Beef bourguignon simmering in a pot with steam rising.
Slow cooking brings out the deep flavors of beef bourguignon.

The Importance of Slow Cooking

The secret to achieving the tender, melt-in-your-mouth texture that defines beef bourguignon lies in slow cooking. Allowing the beef to braise gently over low heat for hours breaks down the connective tissue, resulting in a rich and velvety texture.

This method not only tenderizes the beef but also allows the flavors of the wine, aromatics, and herbs to meld beautifully. Whether you use a stovetop, oven, or slow cooker, the key is to maintain a consistent temperature to avoid overcooking or drying out the meat.

Adjusting Consistency

The sauce in beef bourguignon should be thick and luxurious, clinging perfectly to each piece of beef. To achieve this, monitor the sauce’s consistency as it cooks. If it becomes too thin, simmer the dish uncovered for the last 30 minutes to reduce the liquid.

Alternatively, you can create a beurre manié (a paste of softened butter and flour) and whisk it into the sauce to thicken it without altering the flavor.

Avoid Overcooking Vegetables

One common mistake is overcooking the vegetables, particularly the mushrooms and pearl onions that are added toward the end. These ingredients should retain some texture to provide contrast to the tender beef.

Add mushrooms and pearl onions in the last hour of cooking. This ensures they soak up the flavorful sauce without becoming mushy. For an extra layer of flavor, sauté them in butter before adding them to the pot.

Alternative Cooking Methods

While the oven is the traditional method for preparing beef bourguignon, you can adapt this dish to a slow cooker or pressure cooker for convenience.

  • Slow Cooker: After browning the beef and preparing the sauce, transfer everything to the slow cooker. Cook on low for 7-8 hours for the best results.
  • Pressure Cooker: Use a pressure cooker to cut the cooking time dramatically. Cook for about 40 minutes on high pressure, then allow for a natural release before thickening the sauce.

For more time-saving ideas, check out our Ground Beef Stroganoff Recipe, which offers tips for simplifying hearty, flavorful dishes.

FAQs

What is the difference between beef bourguignon and beef stew?

Beef bourguignon and beef stew may seem similar at first glance, but the two dishes have distinct differences. Beef stew is typically made with a broth or stock base and can include a variety of vegetables and seasonings, making it versatile and adaptable to many cuisines.

On the other hand, beef bourguignon is a French dish that stands out for its use of red wine—usually Burgundy wine—as a key ingredient in the sauce. This addition creates a rich, deep flavor that’s characteristic of French cuisine. Additionally, the aromatics and herbs in beef bourguignon are carefully selected to complement the wine, giving the dish a more refined and sophisticated taste.

What is special about beef bourguignon?

What sets beef bourguignon apart is its transformation of simple, humble ingredients into an elegant and flavorful dish. The slow braising process melds the rich flavors of tender beef, wine, and aromatics into a hearty, deeply satisfying meal.

This dish also carries a sense of tradition and sophistication, rooted in French culinary history. Whether served at a dinner party or enjoyed as comfort food, beef bourguignon offers a luxurious dining experience that feels both rustic and gourmet.

What cut of meat is best for beef bourguignon?

The best cut of meat for beef bourguignon is chuck roast, prized for its marbling and ability to become tender through slow cooking. Other excellent options include brisket or beef shank, both of which offer rich flavor and a melt-in-your-mouth texture when braised.

Avoid lean cuts like sirloin, as they lack the fat and connective tissue necessary for slow cooking. Using the right cut ensures your beef bourguignon will be flavorful and succulent.

What do the French eat with boeuf bourguignon?

In France, beef bourguignon is traditionally served with simple yet delicious accompaniments. Popular options include creamy mashed potatoes, buttered noodles, or crusty French bread to soak up the rich sauce.

For a lighter pairing, the French sometimes serve it alongside a crisp green salad or roasted vegetables. No matter the side dish, the focus remains on highlighting the robust flavors of the beef bourguignon.

Conclusion

Mastering beef bourguignon may seem like a culinary challenge, but with the right techniques, you can create a dish that’s as rewarding to cook as it is to eat. From choosing the perfect cut of beef to layering flavors with wine, aromatics, and careful browning, each step contributes to the dish’s signature depth and richness.

Slow cooking ensures the beef becomes melt-in-your-mouth tender, while thoughtful seasoning and proper preparation bring the recipe to life. Whether you’re hosting a dinner party or preparing a cozy family meal, beef bourguignon offers a timeless taste of French cuisine that’s sure to impress.

Now it’s your turn to bring this classic dish to your table. Follow these steps, experiment with flavors, and make it your own. Share your experience in the comments or explore more recipes to expand your cooking repertoire. Bon appétit!

7 Secrets to Making the Perfect Beef Barley Soup

Is there anything more comforting than a steaming bowl of beef barley soup on a chilly day? This isn’t just any soup it’s a symphony of tender beef, nutty barley, and vibrant vegetables, simmered to perfection in a rich, flavorful broth. But here’s the secret: with just a few unexpected tips, you can transform this classic dish into a culinary masterpiece that will have everyone asking for seconds. Whether you’re a seasoned cook or a kitchen newbie, these seven secrets will change the way you think about soup forever. Ready to unlock the magic? Let’s dive in!

1. Choosing the Best Ingredients for Beef Barley Soup

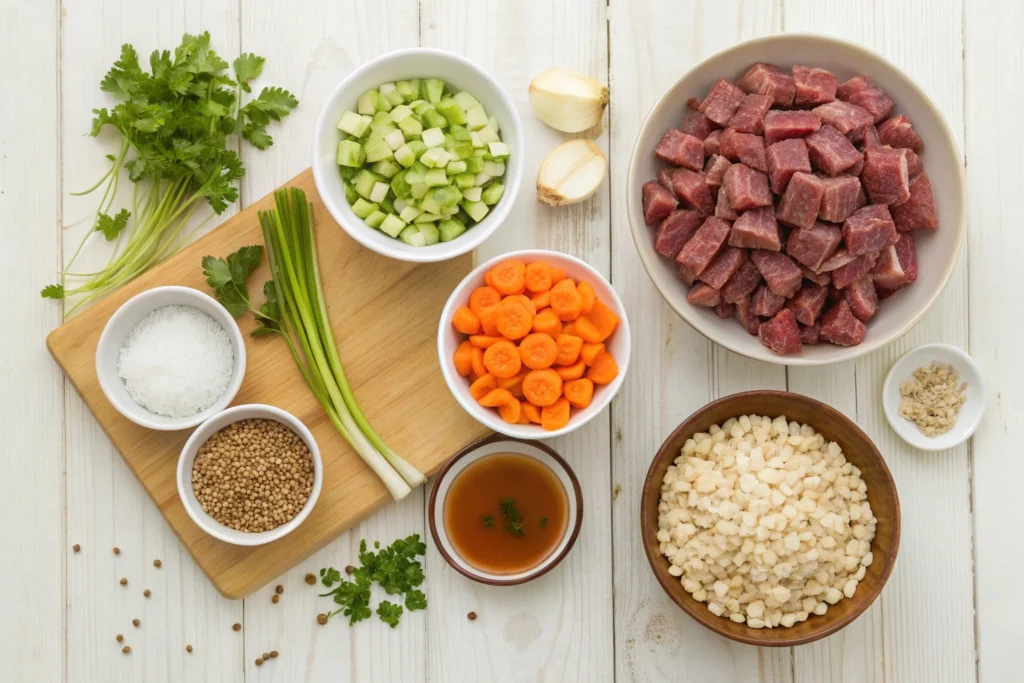
Ingredients for beef barley soup including beef, barley, carrots, celery, and broth.
Fresh ingredients ready to make the perfect beef barley soup.

The secret to creating the perfect beef barley soup lies in starting with the best ingredients. Each element adds a layer of flavor, texture, and nutrition that transforms a simple soup into a memorable meal. Let’s explore how to select the stars of this dish.

1.1. Selecting the Right Cut of Beef

Not all beef is created equal when it comes to making beef barley soup. To achieve that melt-in-your-mouth tenderness, opt for cuts like chuck roast or stew beef. These cuts are rich in collagen, which breaks down during slow cooking, giving your soup a luxurious texture.

On the other hand, leaner cuts like sirloin or tenderloin may cook faster but lack the depth of flavor and hearty chew that makes beef barley soup so satisfying. If possible, buy fresh, grass-fed beef for a richer taste and healthier option.

1.2. Picking the Perfect Barley

Barley is the heart of this dish, and choosing the right type makes all the difference. For a creamy, velvety texture, go with pearl barley, which cooks faster and absorbs flavors beautifully. If you prefer a nuttier, more robust bite, hulled barley is the way to go.

Be sure to rinse the barley under cold water before cooking to remove any excess starch or dust. If you’re short on time, pre-soaked barley can reduce cooking time significantly. For a deeper dive into the different types of barley, check out this barley preparation guide.

1.3. Fresh and Flavorful Vegetables

The vegetables in beef barley soup don’t just add color; they provide a medley of textures and flavors that elevate the dish. Classic options like carrots, celery, and onions form the base of the soup, while extras like parsnips or mushrooms can introduce an earthy richness.

For the best results, choose fresh, seasonal produce. Organic vegetables, although not essential, are a fantastic way to ensure a natural, vibrant flavor. Don’t forget fresh herbs like thyme, parsley, or bay leaves to infuse aromatic notes throughout the dish.

1.4. Broth and Seasonings Matter

A good broth is the soul of any great soup, and beef barley soup is no exception. Homemade beef broth offers unparalleled depth and authenticity. If time is tight, a low-sodium store-bought option works well just make sure to season thoughtfully to avoid an overly salty result.

Add layers of flavor by incorporating Worcestershire sauce, minced garlic, and a touch of smoked paprika. For an umami boost, a splash of soy sauce or a spoonful of tomato paste can work wonders.

With these ingredient tips in mind, you’re well on your way to crafting a beef barley soup that’s packed with flavor and texture. In the next section, we’ll cover how to prepare and cook your soup to perfection. Stay tuned!

2. Preparing Beef Barley Soup Step by Step

Crafting the perfect beef barley soup is about balancing techniques that bring out rich flavors while keeping the process simple. This section will guide you through every step to ensure your soup is hearty and delicious.

2.1. Searing the Beef for Maximum Flavor

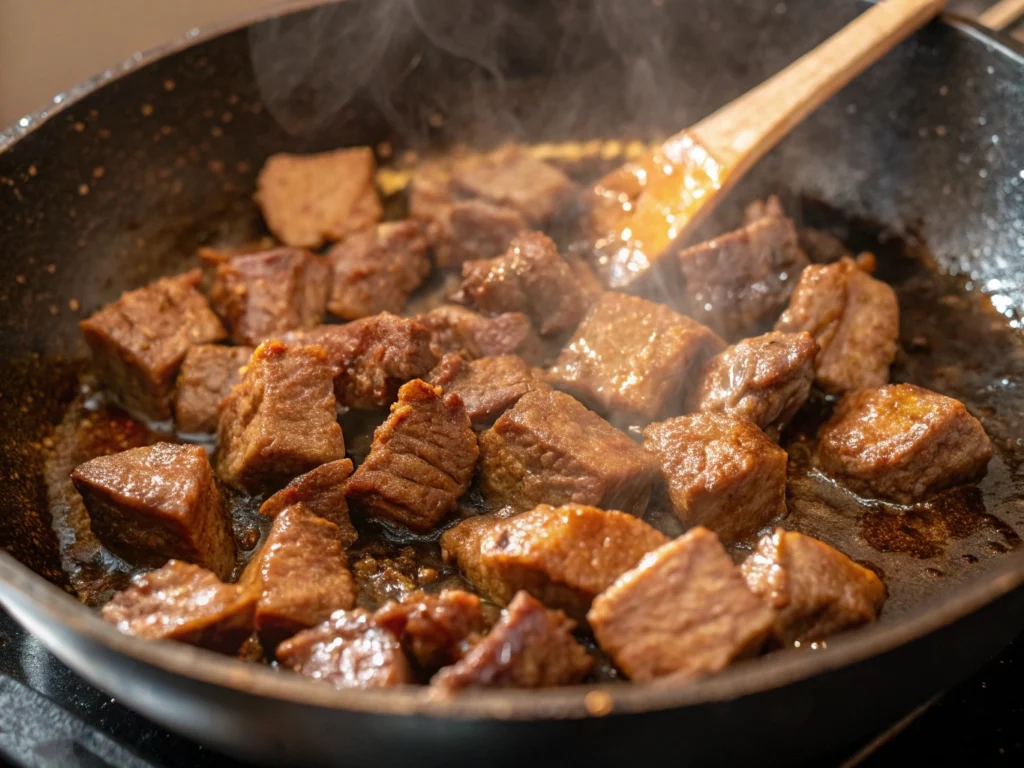
Diced beef being seared in a cast iron pan for beef barley soup.
Browning beef in a pan to add rich flavor to beef barley soup.

Searing the beef is a crucial step that adds a deep, caramelized flavor to your beef barley soup. Heat a large pot over medium-high heat and add a drizzle of oil. Working in batches, brown the beef cubes on all sides.

This step not only locks in juices but also leaves behind flavorful bits on the bottom of the pan. These browned bits, or fond, are the foundation of a rich broth when deglazed later.

Tip: Avoid overcrowding the pan, as it will cause the beef to steam rather than brown.

2.2. Sautéing the Aromatics

Once the beef is seared, it’s time to sauté the aromatics onions, celery, and garlic. These ingredients release their flavors when cooked, creating a fragrant base for your beef barley soup.

  • Add chopped onions to the pot and cook until translucent.
  • Stir in minced garlic and celery, allowing them to soften and release their aroma.

Use a wooden spoon to scrape up the fond left behind from the beef. This step ensures no flavor is wasted.

2.3. Simmering the Soup to Perfection

Beef barley soup simmering in a pot on a stove.
A pot of beef barley soup simmering gently, filled with beef, barley, and vegetables.

Now it’s time to bring everything together. Add the seared beef back to the pot, followed by the barley, vegetables, and broth. Season with bay leaves, thyme, and a pinch of salt.

  • Bring the soup to a gentle boil, then reduce the heat to low.
  • Let it simmer uncovered for 1-2 hours, stirring occasionally to prevent sticking.

During this time, the barley absorbs the rich broth, and the beef becomes fork-tender. If the soup starts to thicken too much, add a splash of water or broth to adjust the consistency.

2.4. Adjusting Seasonings and Consistency

The final step is all about balance. Taste your soup and adjust the seasonings as needed. A splash of Worcestershire sauce can add depth, while a dash of pepper enhances the overall flavor.

If you prefer a thicker soup, let it simmer a little longer. On the other hand, if you like a lighter consistency, add extra broth. Don’t forget to remove the bay leaves before serving!

3. Time-Saving Hacks for Beef Barley Soup

Life can get busy, but that doesn’t mean you have to compromise on a comforting bowl of beef barley soup. With these time-saving tips, you’ll be able to enjoy this hearty meal without spending hours in the kitchen.

3.1. Using a Slow Cooker or Instant Pot

One of the easiest ways to save time is by using a slow cooker or Instant Pot. These appliances allow you to prepare beef barley soup with minimal effort while still achieving that rich, slow-cooked flavor.

  • Slow Cooker: Combine all the ingredients—beef, barley, vegetables, broth, and seasonings—into the cooker. Set it to low for 6-8 hours or high for 3-4 hours. This method ensures the beef is tender and the flavors are fully developed.
  • Instant Pot: Use the sauté function to brown the beef and sauté the aromatics. Then, add the remaining ingredients and cook on high pressure for 30-40 minutes, followed by a natural release.

The beauty of these methods is that they’re hands-free, giving you time to focus on other tasks.

3.2. Prepping Ingredients in Advance

If you know you’ll have a busy day, consider prepping your ingredients ahead of time.

  • Chop vegetables like carrots, celery, and onions the night before and store them in airtight containers in the fridge.
  • Cube the beef and season it with salt and pepper. This small step lets the seasoning penetrate the meat overnight, enhancing its flavor.
  • Measure out the barley and store it in a dry container to save time during assembly.

Prepping ahead not only speeds up the cooking process but also makes assembling your beef barley soup a breeze.

3.3. Make It a Freezer-Friendly Meal

One of the best things about beef barley soup is that it freezes beautifully. You can double the recipe and save portions for later.

  • After the soup cools, divide it into freezer-safe containers or resealable freezer bags.
  • Label each container with the date and contents. Soups can typically be frozen for up to three months without losing their flavor or texture.
  • To reheat, thaw in the refrigerator overnight and warm on the stovetop or in the microwave.

This trick ensures you always have a hearty meal ready, even on the busiest days.

3.4. Quick Flavor Boosters

If you’re short on time but still want a flavorful soup, consider these quick hacks:

  • Add a teaspoon of bouillon paste or cubes to intensify the broth.
  • Stir in a splash of balsamic vinegar or lemon juice right before serving to brighten the flavors.
  • Use pre-made beef broth or stock to save time without sacrificing taste.

For more delicious soup recipes, check out our collection of hearty meals. These ideas will keep your menu exciting and easy to prepare.

4. Variations on the Classic Recipe

The beauty of beef barley soup lies in its versatility. While the classic recipe is timeless, there are many ways to adapt it to suit different preferences, dietary needs, or flavor profiles. Here are some creative and easy variations to try.

4.1. Vegetarian and Vegan Options

If you’re looking for a meat-free alternative, beef barley soup can be transformed into a hearty vegetarian or vegan dish without losing its satisfying qualities.

  • Replace the beef with mushrooms, such as cremini or portobello, for an earthy, umami flavor.
  • Use vegetable broth instead of beef broth. Opt for a low-sodium version to control the salt content.
  • Add extra veggies like zucchini, bell peppers, or spinach to increase the nutritional value.

For a protein boost, include lentils or chickpeas. They complement the barley’s texture and create a filling meal perfect for plant-based eaters.

4.2. Adding Unique Flavors

Elevate your beef barley soup with unexpected ingredients that add depth and complexity to the dish.

  • Spices: Add a pinch of smoked paprika, cumin, or red pepper flakes for a subtle kick.
  • Tomatoes: Stir in a can of crushed or diced tomatoes to create a tangy, robust base.
  • Herbs: Experiment with rosemary, oregano, or dill to give your soup a unique twist.

A splash of red wine during the deglazing step can also enhance the overall flavor, making your soup feel extra indulgent.

4.3. International Twists

Take your beef barley soup on a culinary adventure by incorporating flavors inspired by global cuisines.

  • Mediterranean: Add a handful of kale, sun-dried tomatoes, and a squeeze of lemon juice for a fresh, vibrant version.
  • Asian-Inspired: Use soy sauce, ginger, and sesame oil to give the soup an umami-rich depth. Toss in bok choy or water chestnuts for texture.
  • Mexican-Inspired: Add black beans, corn, and a touch of chili powder to create a zesty, hearty meal with a south-of-the-border flair.

4.4. Adjusting for Dietary Preferences

Whether you’re cooking for someone with dietary restrictions or simply want a lighter version, beef barley soup is easy to adapt.

  • Low-Carb: Swap barley for cauliflower rice or diced turnips to cut down on carbs.
  • Gluten-Free: Use quinoa or brown rice instead of barley, as traditional barley contains gluten.
  • Low-Sodium: Opt for homemade broth or low-sodium store-bought versions to better control the salt levels.

5. Serving Suggestions for Beef Barley Soup

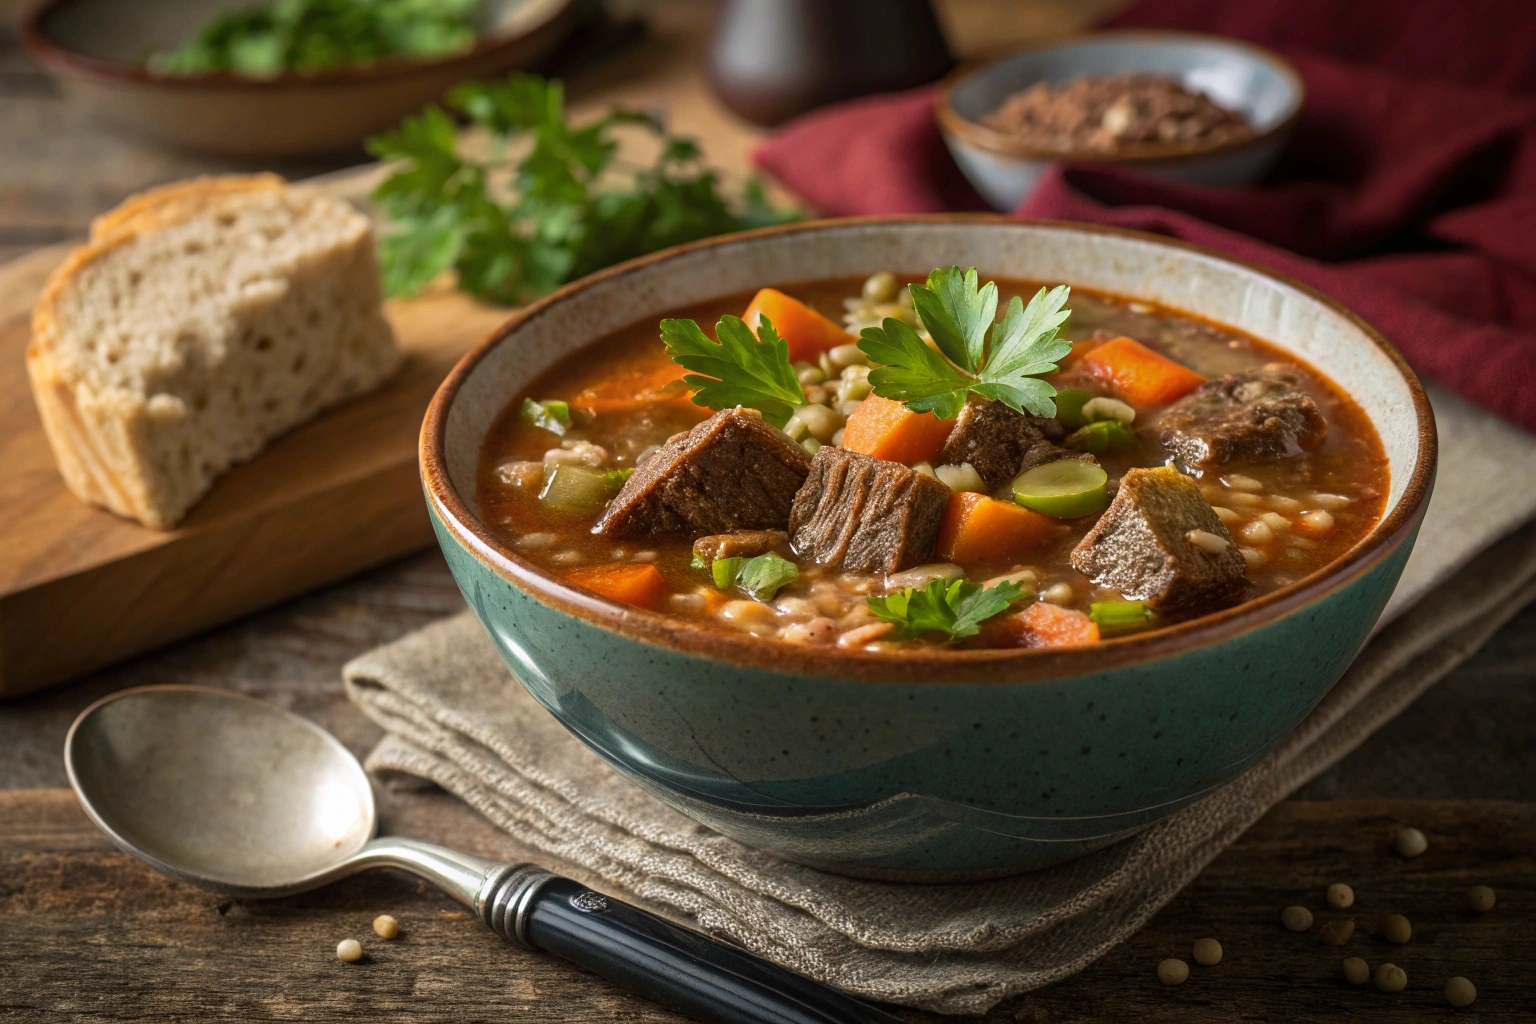
A bowl of beef barley soup garnished with parsley and Parmesan.
A cozy serving of beef barley soup topped with parsley and grated Parmesan.

How you serve your beef barley soup can elevate it from a simple dish to a memorable dining experience. From thoughtful garnishes to the perfect side dishes, these tips will help you create a complete and satisfying meal.

5.1. The Perfect Accompaniments

Pairing your beef barley soup with the right side dishes enhances its comforting flavors and makes for a balanced meal.

  • Bread: Serve with warm crusty bread, garlic toast, or homemade rolls to soak up the rich broth.
  • Salads: A crisp green salad with a light vinaigrette adds a refreshing contrast to the hearty soup.
  • Cheese Platter: For a touch of indulgence, offer a small cheese platter with aged cheddar or gruyere alongside your soup.

These sides create a cozy, well-rounded dining experience, perfect for a family dinner or a gathering with friends.

5.2. Garnishing Your Soup

Garnishes may seem simple, but they can completely transform the look and flavor of your beef barley soup.

  • Sprinkle chopped fresh parsley or thyme on top for a burst of color and freshness.
  • Add a dollop of sour cream or Greek yogurt for creaminess and tang.
  • For a cheesy twist, grate a bit of Parmesan or sharp cheddar over the hot soup.

These small additions not only enhance the taste but also make the dish visually appealing.

5.3. Making It a Crowd-Pleasing Dish

If you’re hosting a dinner party or feeding a crowd, serving beef barley soup can be both easy and impressive.

  • Use rustic bowls and serve the soup family-style with a ladle, allowing guests to help themselves.
  • Offer a variety of toppings and sides on the table so everyone can customize their bowl.
  • Pair the soup with a light red wine, such as Pinot Noir, or a hearty beer to complement its rich flavors.

This setup encourages a casual, welcoming atmosphere where everyone feels at home.

5.4. Storing and Reheating Leftovers

Leftover beef barley soup tastes even better the next day as the flavors continue to meld. Here’s how to store and reheat it properly:

  • Refrigeration: Store the soup in an airtight container in the fridge for up to three days.
  • Freezing: For longer storage, freeze the soup in portion-sized containers or resealable freezer bags for up to three months.
  • Reheating: Gently warm the soup on the stovetop over low heat, stirring occasionally. Add a splash of water or broth if it thickened too much during storage.

FAQs

What are some great slow cooker soup recipes?

Slow cooker soups are perfect for busy days when you want a warm, hearty meal without much effort. Alongside beef barley soup, popular slow cooker options include:

  • Chicken noodle soup: Tender chicken with hearty noodles in a flavorful broth.
  • Lentil soup: Packed with protein, lentils make a filling and nutritious dish.
  • Vegetable soup: A medley of fresh veggies cooked low and slow for deep flavor.

For beef barley soup, combine all the ingredients in your slow cooker, set it on low for 6-8 hours, and enjoy the rich, slow-cooked flavor that’s worth the wait.

How should you serve beef barley soup?

Beef barley soup is best served hot in deep bowls to retain its warmth and allow the rich broth to shine. Pair it with crusty bread or a side salad for a balanced meal. Add garnishes like chopped parsley, a dollop of sour cream, or a sprinkle of Parmesan cheese for a touch of freshness and flavor.

For a family gathering or party, serve the soup in a large pot with a ladle, letting guests customize their bowls with toppings and sides.

What are the best side dishes for beef barley soup?

Pairing the right sides with beef barley soup enhances its hearty, comforting qualities. Some excellent choices include:

  • Garlic bread or homemade rolls: Perfect for soaking up the flavorful broth.
  • Green salad: A light, crisp contrast to the rich soup.
  • Roasted vegetables: Seasonal favorites like carrots, squash, or Brussels sprouts.
  • Mashed potatoes: For an even heartier meal, serve alongside creamy potatoes.

These side dishes ensure your meal feels complete and satisfying.

What are some variations on beef barley soup recipes?

There are endless ways to customize beef barley soup to suit your taste or dietary needs. Some popular variations include:

  • Vegetarian version: Replace beef with mushrooms and use vegetable broth for a plant-based option.
  • Gluten-free alternative: Swap barley for quinoa or rice to make it gluten-free.
  • International twists: Add Mediterranean flavors like lemon and oregano, or give it an Asian flair with ginger and soy sauce.
  • Low-carb version: Replace barley with cauliflower rice or diced turnips to lower the carb content.

These creative tweaks make it easy to enjoy beef barley soup in new and exciting ways.

Conclusion

Beef barley soup is more than just a comforting classic it’s a versatile, hearty meal that brings people together. From choosing the best ingredients to perfecting the cooking process, you now have all the tools to make this dish truly shine. Whether you’re serving it with crusty bread, experimenting with international flavors, or using it as a freezer-friendly meal, the possibilities are endless.

So, why wait? Gather your ingredients, embrace these secrets, and start cooking. Your next bowl of beef barley soup is sure to be a hit! Don’t forget to share your experience in the comments or try more hearty recipes on our blog.

Can you freeze refried beans: 5 Expert Tips

Love the taste and versatility of refried beans, but often have too many leftovers? You’re not alone! Instead of letting them go to waste, the answer is to freeze them. But can you freeze refried beans without sacrificing their taste and texture? Absolutely yes! This comprehensive guide will show you exactly how to freeze refried beans safely, helping you preserve their quality and make mealtime much more convenient.

How to Freeze Refried Beans Safely: The Ultimate Guide for Delicious Results

Freezing refried beans is a total game-changer for busy weeknights and those spontaneous taco cravings! But to keep that perfect creamy texture and mouthwatering flavor, a little prep work is essential. This guide will walk you through the best ways to prepare your beans for the freezer without sacrificing quality because we all deserve refried beans that taste amazing every time. Learn how to freeze refried beans like a pro!

Cool it Down: Why It’s Key Before Freezing

Before you even think about putting those delicious refried beans in the freezer, they need to be completely cool. Freezing hot refried beans leads to condensation, creating ice crystals and dreaded freezer burn. Freezer burn is a big no-no; it ruins the appearance, taste, and texture, making your beans less enjoyable.

  • Quick Tip: After cooking or purchasing, let them sit uncovered on the counter for about 20-30 minutes. A shallow dish helps them cool faster. Think of it as giving your beans a little time to relax before their icy adventure. This step is crucial for maintaining that restaurant-quality creamy texture everyone loves.

Portion Control: The Secret to Quick Meals

While you could freeze refried beans in one big block, it’s not practical for most people. Freezing in individual portions is the way to go, ensuring super-easy reheating and no food waste.

Portioning refried beans into Ziploc bags with labels and date markers on a kitchen counter.
Divide refried beans into labeled portions for easy freezing and reheating.
  • How to Portion: Use a ½ cup or 1 cup measuring cup or an ice cream scoop. Create single-serving sizes to simplify future meals.
  • Container Prep: Place each portion in separate, freezer-safe bags or containers. Now you’re ready to grab just what you need for a quick taco Tuesday, a dollop on your favorite nachos, or a side dish for your next Tex-Mex meal.

The goal is simple: save time and prevent thawing an entire batch when you only need a little. By portioning, you make your future self very happy.

Choosing the Right Freezer Containers: The Key to Success

Selecting the right storage containers is crucial for freezing refried beans successfully. Here are your top choices:

  1. Freezer-Safe Ziploc Bags: These are perfect for saving space in your freezer. After filling, flatten the bags for easy stacking. Imagine them as your personal refried bean storage Tetris. They’re also fantastic for freezing refried beans in bulk.
  2. Airtight Containers: These reusable containers are an excellent, eco-friendly option. Ensure they’re specifically labeled “freezer-safe” to prevent cracking in low temperatures.
  • Pro Tip Alert: Always leave about ½ inch of headspace at the top of your containers. This space allows for expansion as the beans freeze, preventing the lid from popping off or the bag from bursting. It’s like an insurance policy for your frozen food.
  • Bonus Tip: Use silicone muffin tins to create individual “bean pucks.” Freeze these before transferring to a freezer bag to use them one at a time!

Food Safety First: For detailed information on safely freezing food, check out this guide from the USDA.

Air: The Enemy of Delicious Frozen Food – Remove It!

Air exposure is the leading cause of freezer burn and those unwanted off-flavors. After placing your refried beans in a Ziploc bag or container:

  • Squeeze It Out: Gently press out as much air as possible before sealing the bag. Think of it as giving your beans a mini massage to remove all that extra air. This helps maintain the best flavor and quality.
  • Vacuum Sealer Advantage: If you have a vacuum sealer, now’s the time to use it! It provides the ultimate protection against air, ensuring your beans will taste fantastic for months.

These steps are essential for keeping your refried beans fresh and flavorful for up to three months in the freezer. This ensures you are preserving the quality of frozen refried beans.

Freezing refried beans properly isn’t hard, but attention to detail is essential. By following these easy tips, you’ll enjoy beans that taste just as great as the day they were made. Next, we’ll cover packaging, common mistakes to avoid and how to defrost your frozen refried beans perfectly so that you know how to use your frozen leftover refried beans.

Packaging Methods: The Key to Fresh and Flavorful Frozen Refried Beans

Proper packaging is essential when freezing refried beans – it’s the secret weapon for maintaining their delicious flavor, creamy texture, and overall quality. The right approach helps prevent freezer burn, keeps your beans fresh, and makes reheating a breeze. Follow these packaging tips to get the best results and enjoy perfectly frozen leftover refried beans.

Flat Ziploc bags of refried beans neatly stacked in a white freezer drawer.
Flat Ziploc bags of refried beans stacked for easy access and space-saving storage.

Freezer-Safe Ziploc Bags: A Space-Saving Solution

Freezer-safe Ziploc bags are a popular choice for freezing refried beans, especially when you need to save space. These bags create a strong barrier against air, which is key for preventing freezer burn. Here’s how to package your beans in Ziploc bags:

  • Scoop and Fill: Spoon your cooled refried beans into the bag, leaving a little room at the top.
  • Flatten and Squeeze: Gently flatten the bag as much as possible to remove excess air. Use your hands or a rolling pin for this.
  • Seal and Label: Seal the bag tightly, and don’t forget to label it with the date and contents.
  • Space Savers: Flattening the bags makes them easy to stack in your freezer, saving precious space and allowing them to freeze evenly. This also helps you quickly grab the portion you need without thawing everything.

This method is fantastic for freezing refried beans in bulk.

Airtight Containers: Reusable and Reliable

If you’re looking for reusable options, airtight containers are an ideal choice for freezing refried beans. They offer robust protection against moisture and freezer burn. Keep in mind they will take up more space than bags, so you will need to consider how you organize your freezer.

  • Choose the Right Size: Select a container that matches your portion of beans.
  • Leave Room for Expansion: Make sure to leave a small gap at the top (about ½ inch) to allow for expansion during freezing.
  • Seal Securely: Snap the lid on tightly to lock out air, creating an airtight seal.
  • Microwave-Safe Bonus: For extra convenience, choose containers that are also microwave-safe for easy reheating of your frozen refried beans.

Double Wrapping: Extra Protection for Long-Term Storage

For long-term storage or extra protection, double wrapping is the way to go when freezing refried beans. This involves wrapping your filled Ziploc bag or container in aluminum foil.

  • Insulation Boost: The extra layer of foil insulates the beans from temperature fluctuations.
  • Long-Term Preservation: Double wrapping is especially useful if you plan to store the beans for more than two months, offering even better protection against freezer burn.

Double wrapping is the secret weapon to ensure that your frozen refried beans maintain their original flavor and creamy consistency, even after weeks in the freezer.

Labeling and Organization: Keeping Your Freezer in Order

To avoid confusion and maintain a well-organized freezer, always label your refried beans packages with key details, such as:

  • Contents: (e.g., “Refried Beans,” “Spicy Refried Beans”).
  • Date Frozen: This is crucial to track their freshness.
  • Portion Size: (e.g., “1 cup,” “2 servings”).
  • Bonus tip: Use colored labels to categorize beans with different spices and flavors.

Make sure to follow the FIFO rule by placing newer packages at the back of the freezer and older ones at the front. This simple trick ensures that you use the older batches first, reducing waste and keeping your freezer organized. It is best if you place them in a visible and easy-to-access place.

Proper packaging methods make all the difference in answering the question, “Can you freeze refried beans and still enjoy them later?” By following these practical tips, you can be confident that your beans will be as delicious and satisfying as the day you made them. Up next, we’ll explore the differences between freezing homemade and store-bought beans.

Freezing Homemade vs. Store-Bought Refried Beans: Which is Best?

When it comes to freezing refried beans, there are notable differences between homemade and store-bought varieties. While both can be frozen successfully, understanding their unique characteristics can help you decide which approach is best for your needs and preferences. This guide will help you make the right choice when freezing leftover refried beans.

Freezing Homemade Refried Beans: Freshness and Control

Homemade refried beans are typically fresher and free from preservatives, making them a fantastic choice for freezing. These beans tend to freeze and reheat beautifully when prepared and stored correctly. Freezing homemade refried beans is a great way to have delicious and versatile food ready for quick meals.

Here’s what makes homemade beans an excellent choice for freezing:

  • Customizable Ingredients: You have full control over the seasonings, oil, or fat content, tailoring them to your specific taste.
  • Flavorful Add-Ins: Ingredients like onions, garlic, or jalapeños blend perfectly and retain their flavors after freezing and reheating.
  • Example: If you’ve made a batch of delicious vegetarian refried beans from scratch, you’ll find they maintain their creamy texture after freezing and reheating if you follow the proper freezing and packaging steps we mentioned earlier. This way you avoid flavor loss.

If you’re planning to freeze leftover refried beans, it’s essential to follow proper storage practices to maintain their quality and safety. Similarly, learn the best ways to store and extend the shelf life of other leftovers like rotisserie chicken.

Freezing Store-Bought Refried Beans: Convenience is Key

The common question, “Can you freeze refried beans from a can?”, is often asked. The answer is yes! Freezing store-bought refried beans is very convenient, although it may require a little extra care. Since canned refried beans are pre-cooked and may contain preservatives, their texture may be slightly different after freezing. However, with some simple steps, you can make them delicious even after being frozen.

Here are the steps to successfully freeze store-bought beans:

  1. Transfer to Freezer-Safe Container: Immediately transfer the beans from the can to a freezer-safe container or bag.
  2. Stir for Even Texture: Stir the beans thoroughly to ensure an even texture before freezing.
  3. Add a Splash of Liquid: Add a small splash of water or broth to help them retain their moisture during the reheating process.

While freezing store-bought refried beans is a quick and easy option, it’s good to know that homemade refried beans generally offer more flexibility and flavor control.

Taste and Texture Comparison After Freezing

A key difference between the two options lies in their taste and texture after being frozen and thawed:

Comparison of fresh and frozen refried beans in two labeled bowls on a white background.
Side-by-side comparison of fresh and frozen refried beans, both showcasing a creamy, appetizing texture.
  • Homemade Refried Beans: These beans often retain a smoother, richer flavor and a more creamy texture because of the fresh ingredients. They are less likely to suffer from flavor loss since you have control over what goes in them.
  • Store-Bought Refried Beans: These might develop a slightly more grainy texture after freezing due to stabilizers used in canned products. However, this can be easily remedied by adding a little extra liquid when reheating, which will bring back their desired creaminess.

Regardless of these slight differences, both options are still delicious and serve as a convenient meal or side dish.

Which Refried Beans Should You Freeze?

Ultimately, the choice depends on your needs and priorities. If you prioritize maximum control over taste and ingredients, homemade refried beans are the way to go for freezing leftover refried beans. However, if convenience is your priority, store-bought refried beans freeze well with minimal effort.

  • Pro Tip: If you have leftover canned beans, it’s best to freeze them immediately after opening to keep them as fresh as possible.
  • Ready to make your own? Check out our other posts for delicious refried bean recipes and more freezer-friendly kitchen tips!

Defrosting and Reheating Frozen Refried Beans: The Secret to Delicious Results

Properly defrosting and reheating frozen refried beans is essential to preserving their delicious flavor, creamy texture, and overall consistency. When done right, your refried beans will taste just as amazing as the day you made or bought them. Let’s explore the best methods to ensure you get the most out of your frozen leftover refried beans.

Defrosted refried beans being reheated in a saucepan with a wooden spoon and a bowl of broth nearby.
Use a stovetop to gently reheat defrosted refried beans with added moisture for a fresh taste.

Thawing in the Refrigerator: The Safest Approach

The safest and most reliable method to defrost your frozen refried beans is by transferring them from the freezer to the refrigerator. This process allows the beans to thaw gradually, maintaining their original quality and preventing any potential safety issues.

  • Timeframe: Plan for about 8-12 hours of defrosting in the fridge, depending on your portion size.
  • Step-by-Step: Place the sealed container or bag on a plate to catch any condensation or leaks.

This method is ideal for meal prep because you can simply move the beans into the fridge the night before you need them. While it takes longer, it ensures even thawing and significantly reduces any risk of food safety concerns, keeping your frozen refried beans tasting fresh.

Microwave Defrosting: A Quick Solution

If you’re pressed for time, a microwave can be used to defrost your frozen refried beans quickly. However, it’s important to proceed carefully to prevent overheating or an uneven texture.

  • Instructions: Place the beans in a microwave-safe container with the lid slightly ajar. Use the microwave’s defrost setting or heat in 30-second intervals, stirring between each interval.
  • Moisture Boost: Add a splash of water or broth to help restore the beans’ smooth texture during reheating. This is particularly helpful for maintaining the creamy consistency you love.

While this method is fast and convenient, be mindful not to overheat the beans, as this can alter their taste and texture. Check frequently and add liquid if needed.

Stovetop Reheating: For the Best Creamy Texture

Reheating frozen refried beans on the stovetop is often the most effective way to bring back their creamy, smooth consistency. This method allows for even heat distribution and lets you control the moisture level.

  1. Transfer to a Pan: Move the defrosted beans to a saucepan.
  2. Heat Slowly: Heat over low to medium heat, stirring frequently to prevent burning.
  3. Adjust Consistency: Add a small amount of water, broth, or oil to adjust the consistency as needed, bringing them back to their desired texture.
  • Example: If the beans seem too thick after thawing, a tablespoon of broth will work wonders to loosen them up. This method is perfect for larger portions because it ensures even heating throughout.

Common Reheating Mistakes to Avoid

While reheating is generally straightforward, a few common mistakes can negatively impact the final result of your frozen refried beans:

  • Skipping Stirring: Always stir the beans frequently to prevent them from sticking to the pan or drying out, which can ruin their texture.
  • Reheating at High Heat: Use low to medium heat when using the microwave or stovetop to avoid scorching the beans. This is crucial for keeping their flavor intact.
  • Not Adding Moisture: Frozen refried beans may lose some liquid during freezing, so adding a little water or broth is essential for bringing back their desired texture.

Avoiding Common Mistakes When Freezing Refried Beans: A Guide to Success

While freezing refried beans is a relatively simple process, certain missteps can negatively affect their flavor, texture, and how long they last. By understanding and avoiding these common mistakes, you’ll ensure that your frozen refried beans remain delicious and ready to enjoy whenever you need a quick and satisfying meal. This guide will help you achieve perfect results every time.

Freezing Large Batches Without Portioning: A Recipe for Waste

One of the most common mistakes when freezing refried beans is freezing them in large, unmanageable blocks. While it may seem convenient in the moment, thawing an entire batch when you only need a small amount often leads to food waste.

  • Why Portioning Matters: Smaller, individual portions are much easier to thaw and reheat, allowing you to use just what you need for a specific meal or side dish.
  • The Solution: Use freezer-safe Ziploc bags or containers to divide your refried beans into single-serving sizes. Flatten the bags for quicker defrosting and more efficient storage.

Example: If you often use refried beans for tacos, burritos, or nachos, freezing them in ½ cup or 1-cup portions is a practical and efficient approach. This helps you use only what you need and prevents excess food waste.

Failing to Remove Excess Air: The Enemy of Frozen Food

Air exposure is a leading cause of freezer burn, which can make your frozen refried beans taste bland, grainy, or just plain off. Luckily, this is entirely avoidable with proper packaging techniques.

  • Impact of Freezer Burn: Freezer burn dries out the beans and drastically alters their desirable creamy texture, making them far less appealing.
  • The Fix: Squeeze out as much air as possible from your freezer-safe Ziploc bags before sealing. For optimal results, use a vacuum sealer if you have one, as it provides superior protection.

Example: If you’re using reusable containers, pressing a sheet of plastic wrap directly onto the surface of the beans before sealing the lid will help minimize air contact. This extra step can make a huge difference.

Skipping Proper Labeling: A Recipe for Freezer Chaos

Another easily overlooked mistake when freezing refried beans is forgetting to label your packages. Without clear labels, it’s easy to forget when they were frozen and you won’t know how long they are good for.

  • Why It’s Important: Labeling helps you track how long your beans have been in the freezer. Refried beans generally stay fresh for up to three months when frozen correctly.
  • Pro Tip: Include the freezing date, portion size, and any special seasoning notes on the label. This will also help you quickly grab the right batch for your recipe.

This simple, yet crucial step, not only saves you time but also prevents perfectly good food from being discarded prematurely.

Not Adding Moisture During Reheating: The Key to Creaminess

Once frozen refried beans are defrosted, they may often appear thicker or drier than when they were fresh. This is simply because some of the moisture is lost during the freezing process.

  • Common Mistake: Reheating the beans without adding extra liquid can result in a dense, and unappetizing texture, losing the creaminess you desire.
  • The Solution: Stir in a small amount of water, broth, or even a splash of olive oil while reheating. This will help them regain their original smooth consistency.

Example: A tablespoon or two of vegetable broth can work wonders to bring your beans back to their silky smooth texture, ensuring they taste just as delicious as when they were freshly made.

FAQs: Your Burning Questions About Freezing Refried Beans Answered

This section addresses the most frequently asked questions about freezing refried beans, providing clear and concise answers to help you confidently navigate the process. From storage to thawing, we’ve got you covered so that you always have delicious frozen refried beans on hand.

Will Refried Beans Freeze Well?

Yes, refried beans freeze very well when stored properly. Their creamy texture and rich flavor will remain intact as long as you follow the correct freezing techniques outlined in this guide. To achieve the best results when freezing leftover refried beans, always portion them, use airtight containers or freezer-safe bags, and remove as much air as possible before sealing. This way, your frozen refried beans can stay fresh and delicious for up to three months.

Can You Freeze Refried Beans in Ziploc Bags?

Absolutely! Freezer-safe Ziploc bags are one of the best and most convenient options for freezing refried beans. They save valuable freezer space, are easy to label, and make defrosting a breeze. To successfully freeze refried beans in Ziploc bags:

  1. Let the beans cool completely to room temperature.
  2. Portion them into convenient serving sizes.
  3. Place the portions into the bags, flatten them to remove excess air, and seal tightly.

By flattening the bags, you not only optimize freezer space, but you also ensure that the frozen refried beans thaw evenly when you’re ready to use them. This is one of the best methods for freezing refried beans in bulk.

How Do You Defrost Frozen Refried Beans?

Defrosting frozen refried beans is quite simple and can be done in a few different ways, depending on your timeline and preferences:

  • In the Refrigerator: Transfer the frozen refried beans to the refrigerator and let them thaw overnight. This method is best for preserving their delicate flavor and creamy texture.
  • Using a Microwave: For a faster option, use the defrost setting on your microwave, heating in short intervals and stirring in between. Add a little liquid if needed.
  • On the Stovetop: If you’re short on time, gently heat the frozen refried beans in a pan over low heat with a splash of water or broth to restore their smooth texture.

Whichever method you choose, avoid refreezing defrosted refried beans to maintain their quality and prevent any food safety issues.

Can You Freeze Canned Beans After They Are Opened?

Yes, you can absolutely freeze canned refried beans after opening the can. However, it’s important to transfer the canned refried beans to a freezer-safe container or Ziploc bag before freezing. Leaving the beans in the can is not recommended, as the can may warp, crack, or corrode in the freezer, altering the quality of the beans.

For the best results when freezing leftover refried beans:

  1. Stir the beans gently to evenly distribute any oils or seasonings.
  2. Portion them into freezer-safe containers or bags.
  3. Label each batch and freeze for up to three months.

Freezing leftover canned refried beans is an easy and practical way to extend their shelf life and reduce food waste, keeping your kitchen organized and efficient.

Conclusion: Enjoy Delicious Refried Beans Anytime!

Can you freeze refried beans? Absolutely! It’s a fantastic way to save time, money, and minimize waste, while always having your favorite side dish readily available. By following the comprehensive tips outlined in this guide, you can rest assured that your refried beans will retain their delicious taste and creamy texture even after being frozen.

From portioning your beans to selecting the right storage method, each step plays a vital role in maintaining their quality and flavor. Whether you prefer homemade refried beans for their fresh, customizable taste or store-bought refried beans for convenience, freezing them properly ensures they’re always ready to be enjoyed whenever you need a quick and delicious meal.

Remember, defrosting and reheating require just a little extra care to bring your beans back to life, making them taste as good as the day you made or opened them. By avoiding the common mistakes, and following the best practices shared here, you’ll be able to enjoy perfectly frozen refried beans every time.

Try freezing your refried beans today, and let us know how it worked for you in the comments below! For more helpful kitchen tips, tricks, and recipes, explore our blog and discover new ways to make mealtime even easier and more enjoyable.

Cheeseburger Pie Without Bisquick: A Delicious Twist

Sometimes, you want comfort food that’s simple yet satisfying. This cheeseburger pie without bisquick is just the thing. It skips the usual biscuit mix for a crust. Instead, we create a flavorful base that complements the ground beef and cheese. It’s a flexible recipe, too. You can change up the cheeses or add your favorite toppings. Let’s dive in!

Golden cheeseburger pie without bisquick topped with pickles and cherry tomatoes.
A delicious, golden cheeseburger pie fresh out of the oven.

Why This cheeseburger pie without bisquick is a Winner

This recipe stands out for a few key reasons. First, it’s incredibly easy to make. Second, you likely have most of the items in your kitchen already. Third, it’s a crowd-pleaser. Everyone loves a good cheeseburger, and this pie gives you those flavors in a new way. No biscuit mix is needed. That makes it perfect for those who want to avoid those additivesAdditionally, the base is simple yet hearty. This creates a filling and flavorful meal. This version of a cheeseburger pie without bisquick offers a great alternative. It’s tasty and satisfying.

The No-Bisquick Base Difference

Many cheeseburger pie recipes rely on biscuit mix for a quick crust. This one is different. We use a simple blend of flour, milk, and eggs. This results in a lighter yet substantial base. The base bakes up beautifully. It provides a lovely platform for the cheesy beef mixture. This alternative makes the recipe compatible with various dietary preferences. It is also easy to prepareTherefore, this approach sets this recipe apart.

Creating Your cheeseburger pie without bisquick From Scratch

Making this cheeseburger pie without bisquick is straightforward. The process is divided into three main parts: the base, the beef filling, and assembly. Afterward, you’ll bake it to perfection. Each step is simple to follow.

Making the Simple Base

  1. Combine Dry Items: In a large bowl, mix together flour, baking powder, and salt. This is your dry base.
  2. Mix Wet Items: In a separate bowl, whisk together eggs, milk, and melted butter. Make sure it is well combined.
  3. Combine Everything: Slowly pour the wet items into the dry ones. Stir until just combined. Be careful not to overmix it.
  4. Prepare the Pan: Grease your pie plate. Then, pour the base into the plate.

Preparing the Savory Beef Filling

Sizzling ground beef in a nonstick skillet.
Ground beef cooked to perfection, ready for layering in the pie.
  1. Brown the Beef: In a skillet, brown the ground beef. Drain off any extra fat.
  2. Sauté: Add diced onions to the same skillet. Cook until softened.
  3. Season: Mix in the garlic powder, salt, and pepper.
  4. Add Tomato: Pour in the tomato sauce. Let it simmer for a few minutes.
  5. Cheese: Remove from heat. Mix in half of the shredded cheese.

Assembling and Baking Your Cheeseburger Pie

Homemade batter for the cheeseburger pie crust in a glass bowl.
The secret to a fluffy crust begins with a perfectly mixed batter.
  1. Layer: Pour the beef mixture over the base in the pie plate.
  2. TopSprinkle the remaining shredded cheese over the top.
  3. Bake: Bake in a preheated oven until golden brown. The base should be set and the cheese melted.
  4. Rest: Let the pie rest for a few minutes before serving. This allows it to set.
Whole cheeseburger pie freshly baked and ready to serve.
The entire pie, golden brown and ready to be sliced.

Key Items and Variations

You’ll need some basic items to make this recipe. You likely already have them in your kitchen. You can also try some tasty variations.

Must-Have Items

  • Ground beef
  • Flour
  • Baking powder
  • Eggs
  • Milk
  • Butter
  • Onion
  • Garlic powder
  • Salt and pepper
  • Tomato sauce
  • Shredded cheese (cheddar or your choice)

Delicious Variations for Your Cheeseburger Pie

  • Cheese Choices: Try a mix of cheeses such as Monterey Jack or pepper jack.
  • Veggie Boost: Add diced vegetables such as bell peppers or mushrooms to the beef mixture.
  • Spicy Kick: Mix in some chopped jalapenos or a dash of hot sauce.
  • Toppings: Top with sprinkled sesame seeds before baking. This adds a nice taste.
  • Special Sauce: Serve each slice with a dollop of your favorite burger sauce.

Serving Suggestions and Compliments

This cheeseburger pie is great on its own. However, some simple sides can elevate the meal.

Sides That Work Well

  • A fresh green salad provides a nice contrast.
  • Crispy potato wedges are always a great choice.
  • Coleslaw adds a refreshing and tangy element.
  • A simple fruit salad is a good lighter option.

How to Make it a Complete Meal

Consider adding some pickles on the side. This gives it that true cheeseburger taste. Additionally, some ketchup and mustard can compliment the flavors.

Tips for the Best Cheeseburger Pie

Following these tips will help you make a perfect cheeseburger pie every time.

Plated slice of cheeseburger pie without bisquick with pickles, cherry tomatoes, and beans.
A hearty meal featuring cheeseburger pie, beans, and fresh toppings.

Important Tips for Success

  • Don’t overmix the base batter. Overmixing can make the base tough.
  • Make sure you fully drain the beef fat. This makes sure the pie is not greasy.
  • Preheat your oven fully before baking. This helps the pie cook evenly.
  • Check for doneness using a toothpick. Insert it in the center. It should come out clean.
  • Let the pie rest before you cut it. This keeps it from falling apart.

Troubleshooting Common Issues

  • Soggy base: Make sure you do not add too many wet items. Always measure carefully.
  • Dry Filling: Add a touch more tomato sauce when cooking the filling.
  • Uneven cooking: Make sure your oven is fully preheated.
  • Cheese not melting: Bake long enough or increase the oven temperature a bit. Watch closely.

Cheeseburger Pie for Various Needs

This recipe is flexible. It can meet various dietary needs and preferences.

Adapting for Preferences

  • Gluten-free: Use a gluten-free flour blend for the base. Make sure to check your baking powder. Some contain gluten.
  • Lower Carbohydrates: Use almond flour or coconut flour. You will also want to avoid regular tomato sauce. Alternatively, use tomato paste and broth.
  • Vegetarians: Substitute the beef with a plant-based ground alternative.

Making it Family-Friendly

  • Let the kids choose their toppings. This can make it even more appealing.
  • Serve small portions for younger kids.
  • Pair it with their favorite sides.

If you loved how easy and delicious this cheeseburger pie recipe is, you’re in luck! We have many more simple and satisfying meals that are perfect for busy weeknights. Looking for more easy dinners? You’ll find plenty of inspiration there.

Storing and Reheating

You may want to make this dish ahead of time. You may have leftovers. Here’s how to store and reheat it.

A slice of cheeseburger pie without bisquick served with fresh cherry tomatoes and pickles.
A hearty slice of cheeseburger pie ready to enjoy, served with fresh toppings.

Storing Leftovers

  • Let the pie cool fully before you store it.
  • Place it in an airtight container. Then, store it in the refrigerator for up to three days.
  • For longer storage, you can freeze it. Make sure it is wrapped tightly before freezing.

Reheating Instructions

  • You can reheat individual slices in the microwave.
  • For a larger portion, reheat it in the oven. The oven helps to maintain the texture.
  • Add a bit of cheese for added taste and moisture while reheating.

The Joy of Home Cooking

This cheeseburger pie without bisquick is a perfect example of how simple cooking can bring joy.

Why this Recipe is Special

  • It’s a twist on a classic favorite.
  • It uses basic items.
  • It is easy to customize.
  • It’s a great way to bring everyone together.

Creating Memorable Meals

Home-cooked meals often create the best memories. This cheeseburger pie can be part of that. Enjoy the cooking process. More importantly, enjoy the meal with your loved ones. It will be a meal to remember.

Recipe Summary: Cheeseburger Pie Without Bisquick

This cheeseburger pie without bisquick is an easy, delicious meal. It is a perfect main course for family meals. It is versatile, too. You can easily change it up to meet your taste. Accordingly, it is a must-try for anyone looking for a fun and satisfying dish.

Recipe Ingredients

For the Base:

  • 1 1/2 cups all-purpose flour
  • 1 1/2 teaspoons baking powder
  • 1/2 teaspoon salt
  • 2 large eggs
  • 1 1/4 cups milk
  • 1/4 cup melted butter

For the Filling:

  • 1 pound ground beef
  • 1 small onion, diced
  • 1 teaspoon garlic powder
  • 1/2 teaspoon salt
  • 1/4 teaspoon black pepper
  • 1 (8 ounce) can tomato sauce
  • 2 cups shredded cheddar cheese

Recipe Steps

  1. Preheat oven to 375°F (190°C). Grease a 9-inch pie plate.
  2. Make the Base: Mix flour, baking powder, and salt in a bowl. In another bowl, whisk eggs, milk, and melted butter. Combine wet and dry items. Pour into the prepared pan.
  3. Prepare the Filling: Brown ground beef in a skillet. Drain fat. Add onion and cook until soft. Add garlic powder, salt, and pepper. Stir in tomato sauce. Remove from heat and mix in half of the cheese.
  4. Assemble and Bake: Pour beef mixture over base. Top with remaining cheese. Bake for 25-30 minutes, or until golden and set. Let rest before serving.

Try our Beef Petite Sirloin Steak for a Similar, Simple Meal

Frequently Asked Questions (FAQs)

  • Can I make this cheeseburger pie ahead of time? 
  • Yes, you can prepare the pie ahead of time and store it in the fridge or freezer. Reheat as needed.
  • What can I use instead of ground beef?
  •  You can use ground turkey, chicken, or a plant-based ground substitute.
  • Can I add vegetables to the pie? 
  • Yes, you can add diced bell peppers, mushrooms, or other vegetables. Sauté them with the beef.
  • How do I know when the pie is fully cooked? 
  • The crust should be golden and set, and the filling should be bubbling. A toothpick inserted in the center should come out clean.

Enjoy your homemade cheeseburger pie without bisquick!

5 Secrets for the Best Tacos de Lengua You’ll Ever Taste

When it comes to authentic Mexican cuisine, nothing beats the bold flavors and rich history of tacos de lengua. This isn’t just a taco; it’s a culinary tradition passed down through generations. Slow-cooked beef tongue, infused with fragrant spices, is the star here delicately tender and full of savory goodness.

The beauty of tacos de lengua lies in their simplicity. It’s not about flashy ingredients; it’s about letting the natural flavors shine. Serve them with warm tortillas, fresh lime, and your favorite toppings, and you’ve got a meal that feels both humble and indulgent. Whether you’re hosting a fiesta or craving something unique for dinner, these tacos are sure to wow your taste buds. Let’s get cooking you’re going to love this!

Secret 1: Choosing the Best Beef Tongue

Selecting the right beef tongue is the foundation of crafting unforgettable tacos de lengua. The quality of the meat directly impacts its flavor, tenderness, and overall success in your recipe. Let’s break it down step by step.

What to Look for When Buying Beef Tongue

When shopping for beef tongue, look for one that’s fresh and firm, with no discoloration or unpleasant odors. A good beef tongue should have a smooth surface, a consistent pinkish-brown color, and feel slightly moist to the touch. If possible, source your tongue from a butcher or a market specializing in fresh meat, as they often carry higher-quality cuts.

While packaged beef tongue is convenient, fresh options from trusted sources tend to yield better results. For those new to cooking beef tongue, don’t hesitate to ask your butcher for tips on preparation. This ensures you’re starting with the best possible base for your tacos de lengua.

Why Quality Matters

High-quality beef tongue isn’t just about taste it’s also about texture. A fresh, well-chosen tongue will cook evenly, resulting in a tender, melt-in-your-mouth experience. On the other hand, a subpar cut may have tough sections or an off-putting flavor, which could ruin your tacos.

Moreover, premium-quality meat absorbs seasonings better, giving your tacos de lengua a rich depth of flavor. Choosing wisely at this stage ensures the rest of your cooking process is smooth and stress-free.

Storage Tips

If you’re not cooking the tongue immediately, proper storage is key to maintaining its quality. Keep it in the coldest part of your refrigerator, ideally in a sealed container or vacuum-sealed bag. Beef tongue can stay fresh for up to three days in the fridge.

For longer storage, freezing is a great option. Wrap the tongue tightly in plastic wrap and then place it in a freezer-safe bag. Be sure to label it with the date, as frozen beef tongue is best used within three months. Thaw it slowly in the refrigerator when you’re ready to cook.

Trusted Sources for Beef Tongue

For the freshest beef tongue, consider shopping at local Mexican markets or specialty butcher shops. Some online retailers, such as Heritage Foods, also offer high-quality beef tongue that can be delivered straight to your door. These sources often prioritize sustainable practices and provide detailed information about their products, ensuring you know exactly what you’re getting.

When sourcing your ingredients, remember that the extra effort to find a premium cut will elevate your tacos de lengua from good to unforgettable.

Secret 2: Preparing the Beef Tongue

Stockpot with beef tongue and aromatics for tacos de lengua.
Beef tongue simmering with garlic, onions, and spices for flavorful tacos.

To make truly exceptional tacos de lengua, preparation is key. From cleaning to brining, the way you handle the tongue sets the stage for a flavorful and tender dish. Let’s walk through the essential steps.

Cleaning the Beef Tongue Properly

Before cooking, the beef tongue needs to be thoroughly cleaned. Rinse it under cold water, scrubbing away any surface debris. Pay close attention to the nooks and crannies, as this ensures your tacos de lengua have a clean, fresh taste. If your tongue has been frozen, let it thaw completely in the refrigerator before cleaning.

For an extra step, soak the tongue in cold water with a splash of vinegar for 30 minutes to remove any lingering odors. This quick trick can make a big difference in the final flavor!

Optional Pre-Brining

Brining the tongue is a fantastic way to infuse flavor and ensure tenderness. Combine water, salt, garlic, bay leaves, and a handful of peppercorns in a large container to create a simple brine. Submerge the tongue in the mixture and refrigerate it for 4–12 hours.

Although this step isn’t essential, it enhances the meat’s ability to absorb seasonings during cooking, resulting in unforgettable tacos de lengua.

Tools You’ll Need

A few basic tools make preparing beef tongue much easier. Here’s what you’ll need:

  • Stockpot: Large enough to accommodate the tongue and aromatics.
  • Sharp Knife: Crucial for peeling and slicing the cooked tongue.
  • Cutting Board: A sturdy surface for preparation.
  • Tongs: To handle the tongue while it’s hot.

Having these tools on hand simplifies the preparation process and ensures that your cooking experience is hassle-free.

Ready for the Next Step

Now that your beef tongue is cleaned and prepped, you’re ready to move on to cooking it to tender perfection. In the next section, we’ll explore how to achieve that ideal texture and flavor through slow cooking and pressure cooking techniques. Stay tuned for more!

Secret 3: Cooking the Beef Tongue to Perfection

Cooking beef tongue may seem intimidating, but with the right techniques, you can achieve tender, flavorful results perfect for tacos de lengua. Here’s how to do it step by step.

The Slow Cooking Method

Slow cooking is one of the best ways to make beef tongue tender and packed with flavor. Start by placing the cleaned tongue in a large stockpot. Add aromatics like garlic cloves, onion, bay leaves, and peppercorns. Cover it with water, bring it to a boil, and then reduce to a simmer.

Let the tongue cook gently for about 3–4 hours, or until a knife easily pierces the thickest part. The slow cooking process allows the collagen in the tongue to break down, resulting in the melt-in-your-mouth texture that makes tacos de lengua so delicious.

Pressure Cooking for Quick Results

If you’re short on time, a pressure cooker is your best friend. It delivers tender beef tongue in a fraction of the time. Place the tongue and aromatics in the pressure cooker, add enough water to cover, and cook at high pressure for 60–75 minutes.

Once the cooking is complete, allow the pressure to release naturally before opening the lid. The result is just as flavorful as slow cooking but much faster—perfect for busy weeknights when you’re craving authentic tacos de lengua.

Aromatics and Seasonings

The beauty of beef tongue lies in how well it absorbs flavors. To enhance your tacos de lengua, include aromatic ingredients like garlic, onion, and fresh herbs during cooking. For extra depth, consider adding a teaspoon of cumin or a dried chili for subtle heat.

These seasonings infuse the meat with rich, complex flavors, ensuring every bite of your tacos is bursting with authenticity. Keep the seasonings simple to let the natural flavor of the tongue shine.

For additional inspiration, explore our guide to seasoning essentials for meats. It’s packed with tips for taking your dishes to the next level.

Secret 4: Peeling and Slicing the Beef Tongue

Peeling cooked beef tongue for tacos de lengua.
Removing the outer layer of cooked beef tongue to reveal tender meat.

Once your beef tongue is perfectly cooked, the next step is preparing it for your tacos de lengua. Peeling and slicing may sound tricky, but with these tips, it’s straightforward and stress-free.

How to Peel the Beef Tongue Easily

Peeling the beef tongue is much easier while it’s still warm. After removing it from the pot or pressure cooker, let it cool slightly—just enough so you can handle it without burning your hands.

Using a sharp knife, make a small slit in the thick outer skin. From there, the skin should peel away easily, much like removing a jacket. Be sure to discard all the tough, leathery outer layer to reveal the tender meat underneath. This step is crucial to ensure your tacos de lengua have the perfect texture.

Slicing for Tacos

Once peeled, it’s time to slice the tongue. For traditional tacos de lengua, thin slices are ideal. Aim for slices about ¼ inch thick, as these are easy to layer into tortillas and hold toppings well.

If you prefer diced meat, you can cut the slices into small cubes after slicing. This option works especially well if you want your tacos to have a more uniform texture with each bite.

Pro Tips for Dicing

For those who enjoy tacos with a chunkier filling, dicing the tongue is an excellent choice. Once you’ve sliced the tongue into manageable pieces, dice it into small, bite-sized cubes. A sharp knife will help you achieve clean, even cuts.

Lightly sautéing the diced tongue in a hot skillet with a splash of oil can add a touch of crispness and amplify the flavors. This step is optional but highly recommended if you want to take your tacos de lengua to the next level.

To elevate your taco night further, try pairing your tacos de lengua with a fresh homemade salsa.

Secret 5: Perfecting the Toppings and Tortillas

To truly elevate your tacos de lengua, the toppings and tortillas must be just as delicious as the meat itself. These finishing touches bring everything together and add layers of flavor and texture.

Essential Toppings for Authentic Tacos

The beauty of tacos de lengua lies in their simplicity. The traditional toppings—fresh cilantro, diced onion, and a squeeze of lime enhance the flavor of the tender beef tongue without overpowering it.

For an extra burst of flavor, try adding salsa verde or a smoky chipotle sauce. Both options pair beautifully with the savory meat. If you like a bit of crunch, thinly sliced radishes make an excellent addition.

Homemade vs. Store-Bought Tortillas

While store-bought tortillas are convenient, homemade corn tortillas make a world of difference in flavor and texture. They’re softer, fresher, and have a subtle sweetness that perfectly complements the rich beef tongue.

If you’re using store-bought tortillas, warm them up on a hot skillet or over an open flame to bring out their natural flavors.

How to Warm Your Tortillas

Warming your tortillas is a crucial step that’s often overlooked. A warm tortilla is pliable, enhances the toppings, and prevents tearing.

  • Stove-Top Method: Heat a skillet over medium-high heat and toast each tortilla for about 30 seconds on each side until warm and slightly charred.
  • Microwave Method: Wrap tortillas in a damp paper towel and microwave for 20–30 seconds.
  • Oven Method: Stack tortillas, wrap them in foil, and warm them in a 350°F oven for 10 minutes.

These methods ensure your tacos de lengua have the perfect base to hold all those delicious toppings.

Pairing Toppings for Maximum Flavor

To add variety, consider mixing traditional and modern toppings. For instance, pair the classic cilantro and onions with creamy guacamole or crumbled queso fresco. If you love spicy food, pickled jalapeños or a drizzle of hot sauce can take your tacos to the next level.

Experimenting with combinations allows you to create your own signature version of tacos de lengua. Don’t be afraid to get creative you might just discover your new favorite taco topping!

Bringing It All Together

Assembled tacos de lengua with toppings and salsa verde.
Ready-to-serve tacos de lengua topped with cilantro, onions, and radishes.

With tender beef tongue, freshly prepared tortillas, and a medley of toppings, your tacos de lengua are ready to shine. Assemble your tacos with care, layering each component thoughtfully, and enjoy every bite of this authentic Mexican classic.

FAQs

What kind of meat is lengua?

Lengua is the Spanish word for beef tongue, a flavorful and tender cut of meat. It’s highly prized in many cuisines, especially in Mexican cooking, for its rich texture and ability to absorb seasonings. When cooked correctly, beef tongue becomes incredibly tender and is perfect for making tacos de lengua, where the meat is sliced or diced and served in tortillas with traditional toppings like cilantro, onion, and lime.

What is the meaning of tacos de lengua?

Tacos de lengua translates to “tongue tacos” in English. These tacos feature beef tongue as the main ingredient, prepared by slow-cooking or pressure-cooking the tongue until it’s tender and flavorful. The meat is then peeled, sliced, and served in corn tortillas with classic toppings. This dish is a staple in Mexican cuisine and is beloved for its melt-in-your-mouth texture and savory taste.

How do you make a taco tongue?

To make beef tongue for tacos de lengua, start by cleaning the tongue thoroughly. Then, cook it either by simmering it in a pot with water, garlic, onion, bay leaves, and peppercorns for 3–4 hours or by using a pressure cooker for faster results. Once cooked, peel off the tough outer skin, slice or dice the meat, and season it to your liking. Serve the tongue in warm tortillas, topped with cilantro, onion, lime, and salsa for an authentic and delicious taco experience.

Are lengua tacos good for you?

Yes, lengua tacos can be a nutritious option when enjoyed as part of a balanced diet. Beef tongue is rich in protein, B vitamins, and minerals like zinc and iron, which are essential for energy and immune function. However, it’s also higher in fat, so portion control is important if you’re watching your calorie intake. When paired with fresh toppings like cilantro and onions and served in moderate portions, tacos de lengua can be both satisfying and nourishing.

Conclusion

Tacos de lengua aren’t just a meal they’re a journey into the heart of authentic Mexican cuisine. From selecting the freshest beef tongue to preparing it with care and serving it in warm tortillas with flavorful toppings, every step is an opportunity to create something truly special.

So, roll up your sleeves and dive into making your own tacos de lengua. With this guide, you’ll be able to create a dish that’s not only rich in flavor but also steeped in tradition. Share your culinary adventure with friends and family, and don’t forget to enjoy every bite of this classic taco masterpiece!

The Best Philly Cheesesteak Seasoning Recipe At Home

Are you craving the rich, savory flavor of a classic Philly cheesesteak but live far from the city of brotherly love? If so, you are not alone. Many people across the country yearn for that perfect balance of steak, cheese, and aromatic spices. Therefore, creating your own Philly cheesesteak seasoning at home can be a wonderful way to capture that taste without booking a plane ticket. Personally, I remember the first time I bit into a Philly cheesesteak while visiting Philadelphia. The sizzling meat, gooey cheese, and perfectly seasoned onions left a lasting impression on my taste buds. However, finding a reliable seasoning blend outside of the region seemed tricky, so I decided to make my own.

In this guide, we will explore a homemade Philly cheesesteak seasoning recipe that brings bold flavor right to your kitchen. In addition, we will discuss how proper seasoning transforms the sandwich into a memorable meal rather than just a pile of meat and cheese. Thus, the real secret lies in the perfect blend of fragrant herbs, heat from pepper, and other everyday spices that amplify all the elements of a Philly cheesesteak.

By the end of this article, you will have a clear road map to creating your own seasoning, plus plenty of tips to customize it to your liking. Moreover, you will learn various ways to use it for not only cheesesteaks but also veggies, soups, snacks, and so much more. Ultimately, the goal here is simple: empower you to create a homemade seasoning that tastes amazing, remains free from unwanted additives, and stays fresh longer than many store-bought blends.

The Importance of Seasoning for a Philly Cheesesteak

The Flavor Profile

A Philly cheesesteak is more than just slices of beef and melted cheese piled into a roll. Indeed, the taste depends greatly on the seasonings used to highlight each component. Therefore, a well-balanced seasoning ensures the steak has depth, the cheese maintains its creamy richness, and the onions complement both instead of clashing. On the other hand, neglecting this aspect will leave your sandwich bland and one-dimensional. The carefully selected spices work together to create a savory, slightly herby flavor that merges seamlessly with the sweetness of caramelized onions.

Beyond the Meat

Although the steak is the star of the show, the seasoning also enhances the other parts of the sandwich. When applied to the onions and peppers, it intensifies their natural sweetness and adds just enough zing. In addition, when combined with melted cheese, the aromatic herbal notes create a balanced bite each time. If you choose to toast your bread, sprinkling a light layer of seasoning on the roll before placing it on a hot griddle can elevate the entire eating experience.

Why Homemade Is Better

Many store-bought spice blends contain additives like anti-caking agents or artificial flavors. Consequently, making your own seasoning blend allows you to avoid these unnecessary ingredients. Moreover, you gain the freedom to adjust levels of salt, heat, or herbs to satisfy your unique cravings. If you prefer milder flavors, reduce the red pepper flakes. If you love intense, savory notes, add more onion or garlic powder. Therefore, you can experiment at will and develop a seasoning that best suits your taste buds.

Flavor Development

The savory backbone of this seasoning comes from garlic and onion powders, which provide pungent, sweet notes. Meanwhile, thyme and parsley introduce gentle earthiness, rounding out the flavors. Black pepper and red pepper flakes add warmth and a bit of spice. Consequently, these layers create a satisfying harmony that tastes hearty without becoming overwhelmingly spicy. Furthermore, when you apply this blend during cooking, the heat of the pan activates fragrant compounds in the herbs, thus enhancing the overall aroma.

The Science of Spices

Spices release their oils and aromatic molecules when exposed to heat or moisture. Consequently, when you sprinkle this seasoning onto your steak and vegetables while they cook, you help these chemical compounds intermingle and bloom. In addition, the small granules adhere well to the surface of the meat, penetrating slightly deeper as the steam rises. Thus, each component of your sandwich receives an even layer of flavor.

Ingredients: The Heart of the Seasoning

Overhead view of spices for Philly Cheesesteak Seasoning in small bowls.
Salt, herbs, and spices ready to become the perfect Philly cheesesteak blend.

Detailed List of Ingredients for Philly Cheesesteak Seasoning

To create this Philly cheesesteak seasoning blend, you will need the following:

  • Salt (1 tablespoon)
  • Garlic powder (2 teaspoons)
  • Onion powder (2 teaspoons)
  • Dried thyme (2 teaspoons)
  • Dried parsley (2 teaspoons)
  • Ground black pepper (1 teaspoon)
  • Red pepper flakes (1 teaspoon)

Though these spices may seem ordinary, they form a powerful mix when combined in the right amounts. Moreover, these ingredients are typically found in most pantries, ensuring that you can whip up this blend at a moment’s notice.

Each Spice’s Role

  1. Salt: Salt is foundational because it helps bring out the natural flavors of the meat and other ingredients. Therefore, start with this essential base.
  2. Garlic Powder: This adds savory depth and a pungent kick. In addition, it complements onion powder by giving the seasoning a rounder, more robust taste.
  3. Onion Powder: Onion powder supplies a sweet and earthy element that underscores the sandwich’s iconic caramelized onions.
  4. Dried Thyme: Thyme adds a subtle, earthy, and slightly minty note. Consequently, it helps balance heavier flavors like beef and cheese.
  5. Dried Parsley: Parsley contributes a mild, fresh aroma, brightening the seasoning.
  6. Ground Black Pepper: Black pepper adds gentle heat and a comforting warmth. Thus, it works well alongside the sharper kick of red pepper flakes.
  7. Red Pepper Flakes: These supply an extra pop of spice and color. Nevertheless, you can reduce them or omit them if you want less heat.

Quality of Ingredients for the best Philly Cheesesteak Seasoning

Quality matters when it comes to spices. Therefore, choose vibrant, aromatic spices that are as fresh as possible. If your garlic powder or thyme smells faint or looks dull, it might be time to replace it. In addition, to save money and ensure freshness, you can buy spices in bulk from reputable sources. Many home cooks recommend shopping at Asian or Mexican markets, because prices often are lower and turnover is higher, meaning you are more likely to find fresher items. For more detailed insights on storing spices, you can check out spice storage tips.

Variations and Substitutions

On occasion, you might run out of one herb or decide you prefer a slightly different flavor. In such cases, feel free to substitute dried oregano for thyme if that suits your tastes. Or, you might swap paprika for red pepper flakes if you want a different kind of warmth. Moreover, you can experiment with coarsely ground black pepper for a bolder presence. The goal is to adapt this base recipe to your own liking.

Where to Buy

Your local supermarket likely carries the spices needed. However, if you want to explore a broader range of spice options, visit international markets or buy online from reliable brands with positive reviews. Many cooking enthusiasts also rely on well-known sites such as Serious Eats for advice on which spices pair well with specific types of meat. Regardless of where you purchase, remember that freshness is key to a standout seasoning blend.

Step-by-Step Guide to Making the Philly Cheesesteak Seasoning

Mixed herbs and spices in a bowl being whisked
Blending the spices evenly ensures consistent flavor in every bite.

Tools and Equipment

Before diving in, gather these items:

  • A medium bowl
  • Measuring spoons
  • A whisk or spoon
  • An airtight container (preferably glass or ceramic)

Detailed Instructions to make Philly Cheesesteak Seasoning

  1. Measure the Spices: First, collect each spice in its correct amount. As you measure, be sure to use level teaspoons or tablespoons for accuracy.
  2. Combine in a Bowl: Then, transfer all spices into a medium bowl.
  3. Whisk Gently: Next, whisk everything until it is evenly distributed. In addition, visually check to make sure the red pepper flakes and herbs are scattered throughout.
  4. Transfer to Storage: Carefully pour or spoon the mixture into an airtight container. Glass jars work best because they do not retain odors, and they protect the seasoning from light and moisture.

Visual Aids

If you like step-by-step visuals, you might find it helpful to take photos at each stage or watch a short demonstration. On the other hand, if you prefer a quick overview, the instructions above might suffice. Having a clear, concise approach usually helps keep your kitchen counters neat and tidy.

How to store Philly Cheesesteak Seasoning

Proper storage can extend the life of your seasoning. Therefore, place the jar in a cool, dark area such as a pantry or cupboard away from your stove. Heat and sunlight can degrade the quality of your spices over time. Moreover, be aware that some metal containers can react with certain spices and alter their flavor. Thus, a glass or ceramic container is often the best choice.

Labeling

Attach a small sticker or write on a label indicating the name of the blend and the date you made it. Consequently, this will help you keep track of freshness. While many ground spices remain usable for up to a year, they gradually lose flavor over time.

Tips for Maintaining Freshness

  • Check Expiration Dates: Before you begin, confirm the expiration dates of individual spices.
  • Shake the Container: Give the jar a gentle shake before each use to prevent clumping and keep the spices evenly mixed.
  • Use Clean Spoons: Always use clean, dry measuring spoons to avoid introducing moisture into the container.

How to Use This Philly Cheesesteak Seasoning

Sliced steak marinating with Philly Cheesesteak Seasoning.
Infusing sliced beef with a flavorful homemade blend.

On Steak

If you are crafting a classic Philly cheesesteak, this seasoning is a must. To begin, slice your steak thinly—many experts recommend ribeye for the most authentic taste, although sirloin also works well. Then, sprinkle about 2 to 3 tablespoons of seasoning per pound of meat. On the other hand, you can adjust the amount based on how intense you want the flavor to be. Rub it evenly over the slices, and let it sit for a few minutes before cooking. Consequently, the flavor will soak into the meat, resulting in a delicious end product.

Making a Marinade

For an even deeper infusion of flavor, consider turning your dry seasoning into a marinade. To do this, mix a few tablespoons of the spice blend with olive oil, then add a splash of lemon juice or a bit of vinegar if you like an extra tang. Therefore, the marinade will penetrate the beef more thoroughly. Place the seasoned steaks in a resealable plastic bag or a covered dish, then refrigerate. According to guidelines found on the National Chicken Council’s marinade tips, you can marinate meat anywhere from 30 minutes to overnight, depending on your schedule and the cut of meat. Similarly, these same guidelines apply to beef, though you might consider marinating it for at least an hour to build flavor.

Seasoning Other Meats

Although this blend is tailored for beef, it also works on other proteins. If you plan to grill pork chops, rub some seasoning on both sides before placing them on the grill. Furthermore, for chicken breasts, marinate them in this blend combined with olive oil and perhaps a little lime juice. Consequently, you get a robust flavor that pairs nicely with rice, potatoes, or grilled vegetables.

Enhancing Vegetables

Do not limit this seasoning to just meat. In fact, it can turn ordinary vegetables into savory delights. For instance, toss bell peppers and sliced onions in a tablespoon of the blend alongside a drizzle of oil before roasting. Thus, you can create a flavorful topping for sandwiches or a simple side dish. Another option is to sprinkle it on potatoes before baking or air-frying them, resulting in a crisp, seasoned crust.

Perfect for Soups and Stews

Adding a teaspoon or two of this seasoning to soups, stews, or chili can boost complexity. In addition, if you love one-pot meals, try making a Philly Cheesesteak Stew by combining tender beef chunks, onions, bell peppers, and a little cream cheese for richness. As it cooks, the seasoning will meld with the broth and vegetables, creating layers of comforting flavor. You can also adapt the seasoning to chicken-based soups for a satisfying twist.

Snacks and Sides

Besides main dishes, consider sprinkling this seasoning on snacks like popcorn or roasted nuts. The aromatic notes of thyme and parsley will surprise your taste buds in the best way possible. Furthermore, you can shake it over french fries or tater tots for an instant upgrade. On the other hand, if you want something more sophisticated, try blending a spoonful into softened butter. Then, spread that butter on crusty bread for a quick gourmet treat.

International Twists

Although Philly cheesesteaks are an American staple, the flavors in this seasoning pair well with other cuisines. For example, add it to fajita filling for a tasty Mexican-inspired dish, or sprinkle some on top of a pizza to give it a subtle herb-and-spice layer. Meanwhile, you could also experiment by mixing it into Italian-style sauces or meatballs for a fusion spin. Ultimately, the possibilities are endless.

Encouraging Experimentation

Remember, you are in control of the flavor. If you want more heat, add extra red pepper flakes or even a pinch of cayenne. If you prefer savory notes, increase the garlic and onion powders. Therefore, do not hesitate to tweak the seasoning until it suits your palate perfectly. Over time, you may discover new ways to integrate it into your favorite recipes.

Customizing Your Philly Cheesesteak Seasoning

Adjusting the Heat

If you love your Philly cheesesteaks fiery, increase the red pepper flakes or include a bit of cayenne pepper. Conversely, if you want a milder taste, reduce or omit the red pepper flakes entirely. Therefore, controlling the heat is simple with homemade blends.

Controlling Salt

Salt can be a contentious ingredient in any dish. Thus, if you are watching your sodium intake, you can cut the salt in half or use a salt-free alternative. Additionally, consider using kosher salt or sea salt for a slightly different taste and texture. On the other hand, if you find that you need more salt after cooking, you can add it gradually to avoid oversalting.

Adding Herbs

While thyme and parsley are mainstays, you can always incorporate oregano, basil, or rosemary for an herbal variation. Consequently, these additional herbs can shift the flavor profile and make the blend more versatile. For instance, rosemary might pair exceptionally well if you are using this seasoning for roasted potatoes or lamb.

Introducing Aromatics

Another idea is to bring in smoked paprika or dried chives for added complexity. Therefore, if you love smoky undertones, paprika is your friend. Meanwhile, dried chives can amplify onion flavors without being overpowering. Always keep in mind that a little goes a long way with these additions.

Exploring Different Flavor Profiles

Think about your favorite global cuisines. Then, pick the aspects you enjoy and see if you can weave them into your Philly cheesesteak blend. Whether it is a hint of cumin for some Middle Eastern flair or a sprinkle of coriander for a bright, citrusy note, you can elevate the seasoning into something truly unique.

Personal Preference Reigns Supreme

Ultimately, the beauty of a homemade blend lies in its adaptability. If you make a small batch first, you can test it out and fine-tune the proportions. Therefore, never hesitate to experiment until you find the exact flavor balance that keeps you coming back for more.

Recipes Using the Philly Cheesesteak Seasoning

Various meals prepared with Philly Cheesesteak Seasoning on a table
From classic sandwiches to flavorful meats, this seasoning does it all.

Classic Crockpot Philly Cheesesteaks

One of the easiest ways to enjoy a hearty meal is by making a crockpot Philly cheesesteak. First, slice your steak and onions, then place them in the crockpot. Next, sprinkle in a few tablespoons of your homemade seasoning. Add beef broth or water to help distribute the flavors. Then, let everything simmer on low for several hours until the meat becomes tender. Finally, assemble your sandwich with melty cheese and sautéed peppers on a soft roll.

Grilled Herb-Rubbed Pork Chops

For a lighter alternative to beef, rub pork chops with a few teaspoons of your Philly cheesesteak seasoning. Then, grill them over medium-high heat for about 4 to 5 minutes per side, depending on thickness. Meanwhile, you can prepare a side of roasted vegetables to round out the meal. Consequently, you will be amazed at how the herbs and spices elevate the flavor of everyday pork.

Easy Oven-Baked Chicken Bites

Cut boneless chicken breasts or thighs into bite-size pieces, then toss them in a bowl with olive oil and a generous sprinkle of your seasoning. Spread them out on a baking sheet lined with parchment paper and cook at 400°F (200°C) for about 15 to 20 minutes, or until the chicken reaches an internal temperature of 165°F (74°C). Therefore, you end up with succulent chicken bites perfect for dipping or adding to salads and wraps.

Philly Cheesesteak Stew

If you love hearty soups, this stew is a must-try. Brown pieces of beef in a large pot, then add onions, bell peppers, and a couple of tablespoons of your spice blend. Pour in beef broth or stock and let it simmer until the meat is tender. Toward the end of cooking, stir in a little cream cheese for an extra creamy texture that echoes the cheesesteak’s signature flavor. Consequently, you will have a comforting dish perfect for cold nights.

Sheet-Pan Cheesesteaks

For a simple, hands-off approach, slice your steak, onions, and bell peppers, then spread them on a sheet pan. Drizzle with oil, sprinkle the Philly cheesesteak seasoning over everything, and toss gently. Bake at 400°F (200°C) for roughly 15 minutes, checking to make sure the steak is cooked to your preferred doneness. Top with slices of provolone cheese for the last few minutes to let it melt. Finally, spoon the mixture onto toasted rolls and enjoy.

Marinade-Based Chicken Dish with Roasted Veggies

In a shallow dish, mix 2 tablespoons of your seasoning blend with ¼ cup olive oil. Then, add boneless chicken breasts or thighs, coating them evenly. Allow them to marinate for at least 30 minutes. Meanwhile, prepare a tray of chopped zucchini, bell peppers, and onions. Place the veggies on one side of a baking sheet. On the other side, arrange the marinated chicken. Roast at 375°F (190°C) for about 25 minutes or until the chicken is fully cooked. Consequently, this one-pan meal is both convenient and packed with flavor.

Conclusion

In summary, mastering a homemade Philly cheesesteak seasoning can transform your sandwiches, soups, and everyday meals. By combining fundamental pantry staples salt, garlic powder, onion powder, thyme, parsley, black pepper, and red pepper flakes you create a balanced mix that highlights the delicious essence of the classic sandwich. Moreover, you can adjust the salt, heat, and herbs to suit your personal taste. Therefore, I encourage you to try this seasoning in your own kitchen and discover new recipes that benefit from its savory goodness.

Have fun experimenting, and feel free to share photos or feedback. After all, cooking is a journey that becomes more enjoyable when you can tailor each recipe to your exact preference.

How To Make Old Fashioned Baked Macaroni And Cheese

Ah, old fashioned baked macaroni and cheese it’s like a warm hug on a plate. This beloved classic has been bringing families together for generations, and for good reason. With its rich, gooey cheese sauce and irresistibly crisp topping, it’s a dish that never goes out of style.

What Is Old Fashioned Baked Macaroni and Cheese?

Old fashioned baked macaroni and cheese is more than just a recipe—it’s a culinary tradition. This dish, beloved for generations, combines simple ingredients like pasta, cheese, and breadcrumbs to create a rich and satisfying meal. It’s not just about the creamy, cheesy texture but also the crispy baked topping that adds depth and flavor to every bite. Let’s dive deeper into what makes this dish so special.

A Timeless Comfort Classic

At its core, old fashioned baked macaroni and cheese is the ultimate comfort food. Its creamy interior and golden crust create a perfect balance of textures that’s hard to resist. Unlike stovetop versions, this baked classic allows the cheese sauce to fully infuse the pasta while the breadcrumbs form a crunchy, flavorful layer on top.

What makes it truly timeless is its versatility. Whether served as a main dish or a hearty side, this recipe fits seamlessly into any meal. Families love it for its nostalgic appeal, and cooks adore it for its simplicity and reliable results.

The History Behind the Dish

The origins of old fashioned baked macaroni and cheese can be traced back to Europe, where pasta dishes were often baked with cheese for special occasions. When this idea made its way to America, it quickly became a household staple, celebrated for its affordability and satisfying taste.

Thomas Jefferson is credited with popularizing macaroni and cheese in the U.S. after discovering it during a trip to Europe. Over time, the dish evolved into the baked version we know and love today, particularly in Southern cooking, where it’s often enriched with eggs or unique spice blends.

For an in-depth history of macaroni and cheese, check out this Smithsonian Magazine article.

Why Choose Baked Over Stovetop?

While stovetop macaroni and cheese has its charm, the baked version offers distinct advantages. Baking creates a crispy topping that provides a satisfying crunch with every bite. It also allows the dish to set, giving it a casserole-like texture that makes it easy to serve at gatherings or special occasions.

Moreover, baking enhances the flavor of the cheese, creating a deeper, more complex taste. The gentle heat of the oven caramelizes the cheese slightly, adding an extra layer of richness that stovetop versions can’t replicate.

Ingredients That Make It Special

What sets old fashioned baked macaroni and cheese apart is its use of fresh, high-quality ingredients. A few essentials include:

  • Cheese: Sharp cheddar is the classic choice, but combining it with gouda or gruyere can elevate the flavor.
  • Milk and Cream: These form the base of the cheese sauce, adding a silky smooth texture.
  • Breadcrumbs: Panko or seasoned breadcrumbs create a crispy, golden topping that contrasts beautifully with the creamy pasta.

By focusing on fresh, wholesome ingredients, you ensure that every bite is packed with flavor and satisfaction.

Ingredients for Old Fashioned Baked Macaroni and Cheese

Ingredients for old fashioned baked macaroni and cheese on a countertop.
All the ingredients needed to make classic baked macaroni and cheese.

The key to perfect old fashioned baked macaroni and cheese is using fresh, high-quality ingredients. Each component plays a crucial role in creating the creamy texture and rich flavor that make this dish a timeless classic.

The Pasta: Choosing the Right Shape

To start, select pasta that holds sauce well. Elbow macaroni is the traditional choice because its curved shape allows the cheese sauce to coat every nook and cranny. However, you can also try shells, cavatappi, or penne for a fun twist. Cooking the pasta to al dente is essential, as it will finish cooking in the oven without becoming mushy.

Cheese: Mixing for Maximum Flavor

Cheese is the heart of old fashioned baked macaroni and cheese. Sharp cheddar provides a bold, tangy base, but blending it with milder options like Monterey Jack or gruyere adds depth. For a smoky touch, consider smoked gouda. Always shred the cheese yourself pre-shredded varieties often contain anti-caking agents that can affect the sauce’s creaminess.

Breadcrumbs: The Crispy Topping

A crunchy topping is what sets baked macaroni and cheese apart. Panko breadcrumbs are a popular choice because they create a light, crispy layer. For extra flavor, mix them with melted butter and a sprinkle of parmesan before sprinkling them over the pasta. This step ensures your topping browns beautifully in the oven.

Optional Add-Ins for Extra Flavor

For those who like to experiment, adding a pinch of mustard powder, cayenne pepper, or smoked paprika can enhance the cheese sauce. Crumbled bacon or caramelized onions can also bring a savory, gourmet touch to this classic dish. These small tweaks make your old fashioned baked macaroni and cheese stand out without overpowering its traditional appeal.

How to Make Old Fashioned Baked Macaroni and Cheese

Crafting the perfect old fashioned baked macaroni and cheese is easier than you think, especially with a step-by-step approach. This guide ensures that every bite is creamy, cheesy, and irresistibly delicious. Let’s walk through the process, breaking it down into simple, actionable steps.

Step 1: Preparing the Pasta

The first step in making old fashioned baked macaroni and cheese is to cook the pasta just right. Bring a pot of salted water to a boil, and add your chosen pasta—elbow macaroni is a classic choice. Cook it until it’s al dente, or slightly firm to the bite. This is important because the pasta will continue cooking in the oven.

Once cooked, drain the pasta and rinse it with cold water. This helps stop the cooking process and prevents the pasta from sticking together. Set it aside while you prepare the cheese sauce.

Step 2: Making the Cheese Sauce

 Cheese sauce being prepared for baked macaroni and cheese.
A creamy cheese sauce being whisked to perfection on the stovetop.

The cheese sauce is the heart of any old fashioned baked macaroni and cheese. Start by creating a roux, a thickening base made from butter and flour:

  1. Melt butter in a saucepan over medium heat.
  2. Whisk in the flour and cook for 1-2 minutes, stirring constantly to remove any raw flour taste.

Gradually add milk and cream, whisking to ensure a smooth, lump-free sauce. Let it simmer until slightly thickened. Then, stir in your shredded cheeses, a little at a time, until they’re fully melted and the sauce is creamy. A mix of sharp cheddar, gouda, and Monterey Jack creates an ideal balance of tangy and smooth flavors.

Step 3: Assembling the Dish

Mixing pasta with cheese sauce for baked macaroni and cheese.
Pasta is mixed with rich cheese sauce, ready for baking.

With the pasta and cheese sauce ready, it’s time to assemble your old fashioned baked macaroni and cheese:

  1. Preheat your oven to 375°F (190°C).
  2. Combine the cooked pasta and cheese sauce in a large mixing bowl, ensuring every piece is coated.
  3. Transfer the mixture to a greased baking dish, spreading it out evenly.

For a golden, crispy top, sprinkle breadcrumbs mixed with melted butter over the pasta. You can also add a little extra shredded cheese for a gooey layer beneath the crust.

Step 4: Baking to Perfection

The final step is baking your masterpiece. Place the dish in the preheated oven and bake uncovered for 20-25 minutes. You’ll know it’s ready when the top is golden brown and the cheese is bubbling around the edges. Let the dish rest for 5-10 minutes before serving to allow the flavors to settle.

For more cheesy and comforting recipes, check out our Cheesy Chicken Sloppy Joe Recipes for another family favorite that’s perfect for weeknight dinners.

Tips for Perfect Old Fashioned Baked Macaroni and Cheese

Creating old fashioned baked macaroni and cheese is an art, and a few thoughtful techniques can take your dish from good to outstanding. These tips ensure the best texture, flavor, and presentation every time.

Choosing the Right Cheese

The cheese you select directly impacts the flavor and creaminess of your old fashioned baked macaroni and cheese. Sharp cheddar is a must-have for its bold, tangy profile. However, mixing in cheeses like gruyere, which melts beautifully, or Monterey Jack for a milder finish, adds depth. Avoid processed cheeses, as they may lack the rich taste you’re aiming for. For a gourmet twist, try smoked gouda or a touch of parmesan in the sauce or topping.

Achieving the Perfect Texture

The texture of your dish can make or break the experience. For a creamy base, use equal parts milk and heavy cream. This combination prevents the sauce from becoming too runny or overly thick. When combining the sauce with the pasta, make sure each piece is fully coated. On the other hand, the topping should be crunchy and golden, providing a delightful contrast to the creamy pasta. Mixing breadcrumbs with melted butter before sprinkling them ensures even browning.

Preventing Dryness

A common issue with baked mac and cheese is dryness. To avoid this, ensure you have enough sauce to coat the pasta generously. Remember, the pasta absorbs moisture while baking, so a slightly looser sauce at the start is ideal. Covering the dish with foil for the first 10 minutes of baking can also lock in moisture, while removing the foil later allows the topping to crisp up.

Adding Unique Flavors

While traditional old fashioned baked macaroni and cheese is a classic for a reason, adding subtle extras can enhance its appeal. A pinch of mustard powder or nutmeg adds complexity to the cheese sauce. If you prefer a spicy kick, sprinkle cayenne pepper or crushed red pepper flakes. For a heartier dish, mix in cooked bacon, caramelized onions, or sautéed mushrooms.

Serving and Storing Old Fashioned Baked Macaroni and Cheese

A plate of old fashioned baked macaroni and cheese with sides.
A perfect serving of baked macaroni and cheese with fresh parsley.

After you’ve created your delicious old fashioned baked macaroni and cheese, it’s time to serve it and, if needed, store the leftovers properly. These tips will help you enjoy the dish at its best while ensuring no bite goes to waste.

How to Serve It Perfectly

Serve old fashioned baked macaroni and cheese immediately after letting it cool for about 5-10 minutes. This resting time allows the sauce to set slightly, making it easier to scoop and serve. Use a wide spatula to lift portions without breaking the crispy topping.

Pair this comforting dish with sides like roasted vegetables, a crisp green salad, or garlic bread. If you’re serving it as a main course, consider adding protein-rich sides like baked chicken or grilled sausages to balance the meal.

Making It Ahead of Time

If you’re preparing this dish for a gathering, you can make old fashioned baked macaroni and cheese ahead of time. Assemble the dish completely but don’t bake it. Cover it tightly with foil and refrigerate for up to 24 hours. When you’re ready to bake, let the dish sit at room temperature for about 20 minutes, then bake as directed, adding an extra 5-10 minutes to the baking time.

This method is especially handy for holidays or large gatherings, allowing you to focus on other tasks while ensuring your dish is freshly baked and perfectly warm when served.

Storing Leftovers

Leftovers of old fashioned baked macaroni and cheese can be just as delicious. To store, let the dish cool completely before transferring it to an airtight container. Refrigerate for up to 3-4 days. When reheating, add a splash of milk or cream to the dish to restore its creamy texture, as the pasta may absorb the sauce during storage. Cover with foil and reheat in the oven at 350°F (175°C) until warmed through, or use a microwave for smaller portions.

Can You Freeze It?

Yes, you can freeze old fashioned baked macaroni and cheese, but there are a few considerations to keep in mind. For best results, freeze the dish before baking. Assemble the pasta and sauce in a freezer-safe dish, cover it tightly with plastic wrap and foil, and freeze for up to 2 months.

When ready to bake, let it thaw in the refrigerator overnight, then bake as directed. While freezing is convenient, the texture of the pasta may change slightly upon reheating. To minimize this, slightly undercook the pasta before assembling the dish.

FAQs About Old Fashioned Baked Macaroni and Cheese

Why do you put egg in mac and cheese?

Adding an egg to old fashioned baked macaroni and cheese helps create a custard-like texture. The egg acts as a binding agent, giving the dish a firmer structure while still keeping it creamy. This is especially common in Southern-style recipes, where the egg contributes to the rich, velvety consistency of the cheese sauce. However, if you prefer a softer, more fluid sauce, you can skip the egg without compromising flavor.

What to add to macaroni and cheese to make it taste better?

To enhance the flavor of old fashioned baked macaroni and cheese, consider adding a few simple ingredients:

  • Spices: A pinch of garlic powder, onion powder, or smoked paprika can add depth.
  • Mustard Powder: This brings out the sharpness of the cheese.
  • Hot Sauce: A few dashes can add a subtle kick without overwhelming the dish.
  • Herbs: Fresh thyme or parsley can provide a hint of freshness. If you’re feeling adventurous, mix in caramelized onions, crispy bacon, or even sautéed mushrooms for added texture and taste.

What are the three best cheeses for mac and cheese?

The best cheese combinations for old fashioned baked macaroni and cheese balance flavor and meltability. Here are the top three choices:

  1. Sharp Cheddar: Provides a bold, tangy base.
  2. Gruyere: Adds creaminess and a slightly nutty flavor.
  3. Monterey Jack: Offers a mild, smooth texture that complements other cheeses. Blending these cheeses ensures your mac and cheese is rich, creamy, and bursting with flavor.

Why do people put mayo in mac and cheese?

Some people add mayo to old fashioned baked macaroni and cheese for extra creaminess and a slight tang. Mayonnaise, made from eggs and oil, enhances the sauce’s texture, making it thicker and silkier. While not a traditional ingredient, it’s a creative way to make the dish even more indulgent. If you’re open to experimenting, try adding a small amount and adjust to your taste.

Conclusion: Perfecting Old Fashioned Baked Macaroni and Cheese

Old fashioned baked macaroni and cheese is a dish that never goes out of style. With its creamy cheese sauce, perfectly cooked pasta, and golden breadcrumb topping, it’s the epitome of comfort food. From choosing the right cheeses to mastering the baking process, every step contributes to its irresistible charm.

Now it’s your turn to bring this iconic dish to life. Gather your ingredients, preheat the oven, and enjoy the process of creating a meal that’s as satisfying to make as it is to eat. Don’t forget to share your experience and explore more recipes for delicious inspiration.