Pellet Grill Mastery: 4 Recipes for Perfect BBQ (2025 Guide)

Let’s cut to the chase: pellet grills recipes are the Swiss Army knives of BBQ. Why? They smoke, grill, bake, and roast all while you sip a cold drink. Forget dry burgers or uneven heat; these recipes deliver restaurant-quality results in your backyard. From peppery beef ribs to herb-crusted salmon, we’re sharing secrets to elevate your grill game. Ready to ditch the guesswork and embrace pellet grill mastery? Let’s get smokin’!

Why Pellet grill recipes Are a Game-Changer for BBQ

If you’ve ever struggled with erratic temperatures or babysitting a smoky fire, pellet grill recipes might just become your new best friend. These versatile cookers blend the rich flavors of traditional smoking with the convenience of modern tech. Let’s dive into why they’re revolutionizing backyard BBQs and how you can harness their power.

How Pellet grill recipes Work: Smoke, Sear, and Simplicity

Think of a Pellet grill recipes as your BBQ sous chef. Instead of charcoal, it burns wood pellets compressed sawdust infused with flavors like hickory or cherry. An electric auger feeds pellets into a firepot, while a digital controller keeps temperatures steady. Translation? Set it, forget it, and let low-and-slow BBQ magic happen. Whether you’re smoking brisket overnight or searing steaks at 500°F, this gadget adapts.

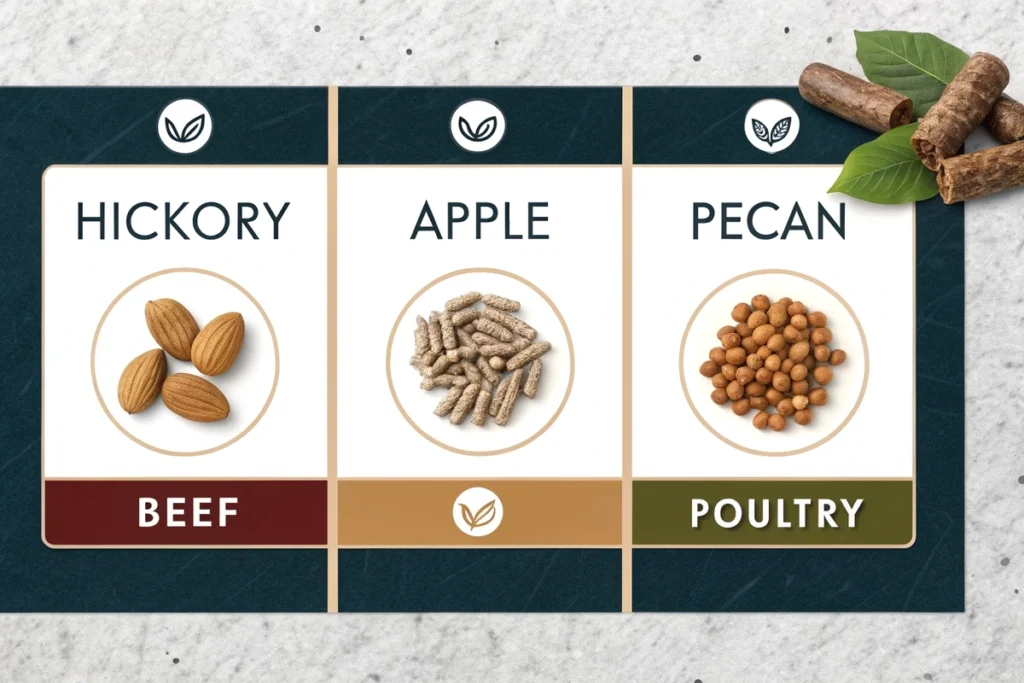
Flavor Boost: Choosing the Right Wood Pellets

Here’s the secret: pellet grill recipes live or die by your wood choice. Hickory adds bold, bacon-like depth to beef, while applewood gives poultry a sweet, mellow kiss. For pork ribs, try pecan its nutty notes balance spicy rubs perfectly. But wait don’t mix too many flavors! Stick to one or two woods per cook to avoid muddying the taste.

Pellet grill recipes vs. Traditional Smokers: Key Differences

Sure, charcoal purists swear by their offset smokers, but let’s face it: pellet grills are the lazy genius of BBQ. Unlike traditional setups, they automate temperature control, so you won’t sweat over fluctuating heat. On the other hand, charcoal smokers deliver heavier smoke flavor ideal for competition-style ribs. But for weeknight dinners? Pellet grills save time without skimping on taste. Bottom line: If you crave set-and-forget convenience with solid smoke infusion, pellets win.

Pro Tips for Your First Pellet Grill Cook

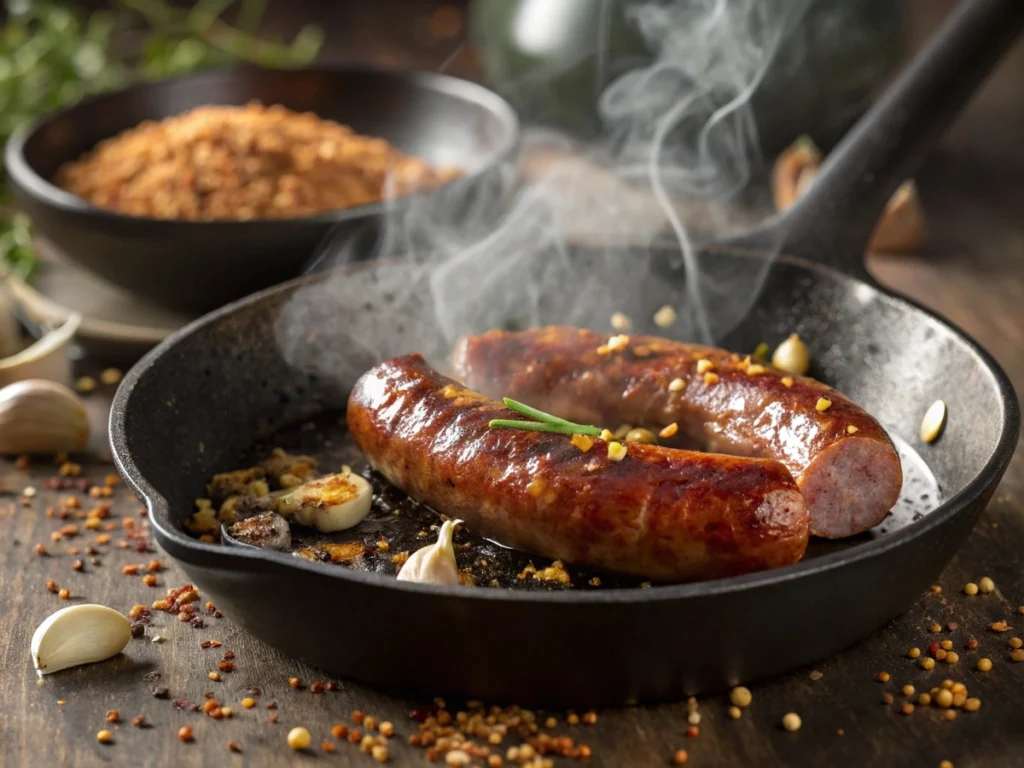
Ready to dive into pellet grill recipes? Start simple: beer-can chicken or smoked sausages. Preheat your grill for 15 minutes to avoid temperature swings, and always use a meat probe. Wait don’t peek! Every lid lift adds 10 minutes to your cook time. For crispy skin on poultry, crank the heat to 375°F for the last 20 minutes. Remember: Even if you’re new, these grills forgive mistakes. Just keep pellets dry, and you’ll nail that smoky flavor every time.

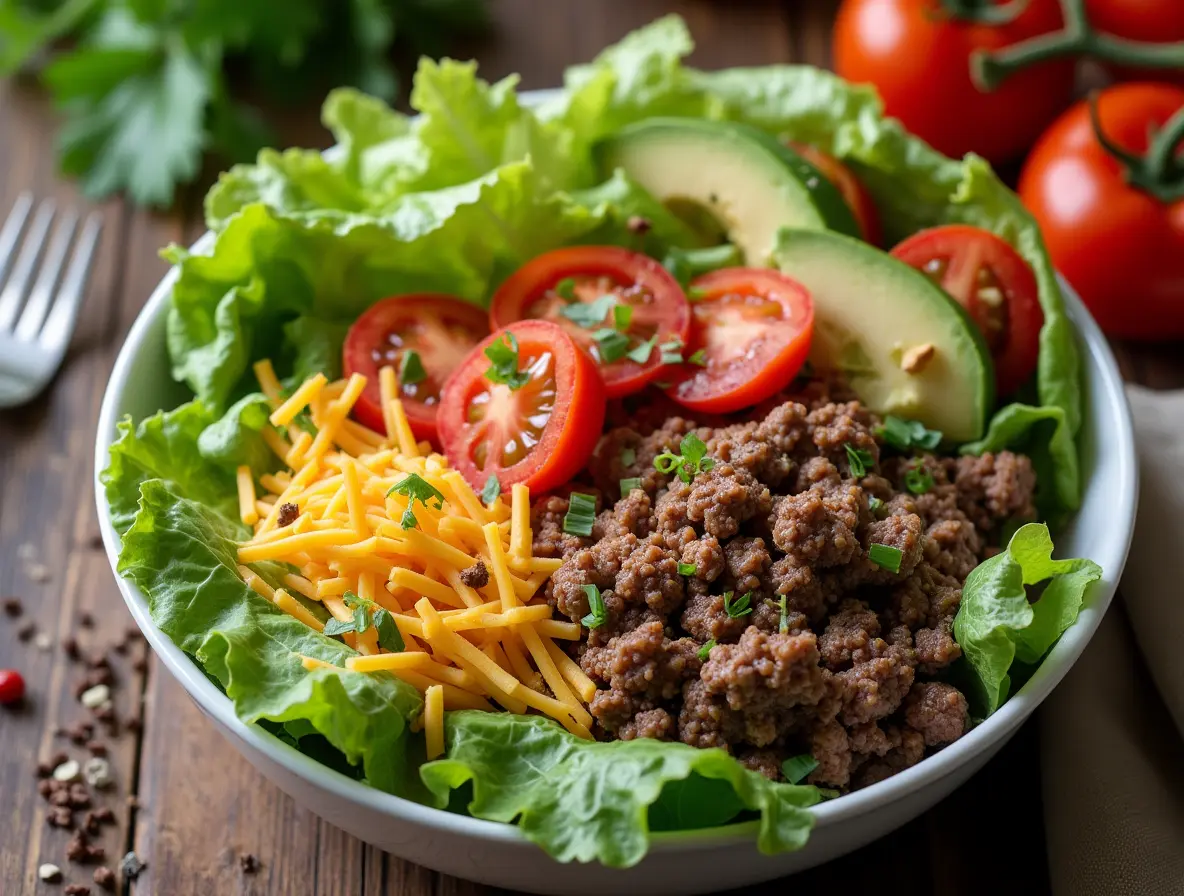
4 Must-Try Recipes for Your Pellet Grill

Ready to turn your Pellet grill recipes into a flavor factory? From smoky classics to surprises like wood-fired desserts, these pellet grill recipes are guaranteed to wow. Whether you’re feeding a crowd or just craving BBQ therapy, let’s fire up 4 dishes that’ll make your taste buds sing.

Smoked Brisket: The Ultimate Crowd-Pleaser

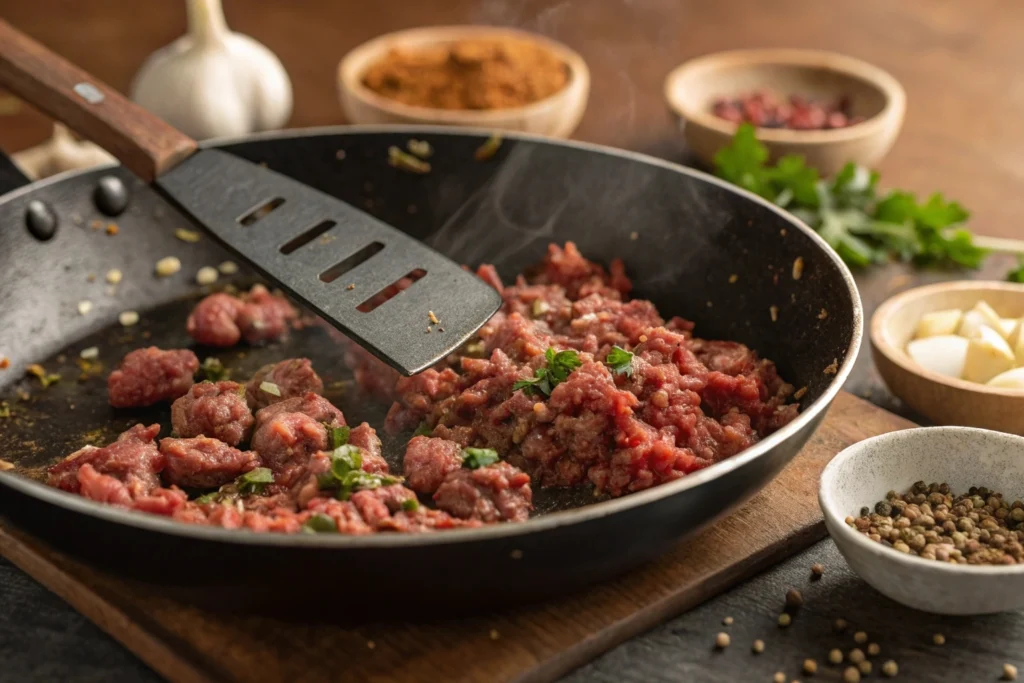
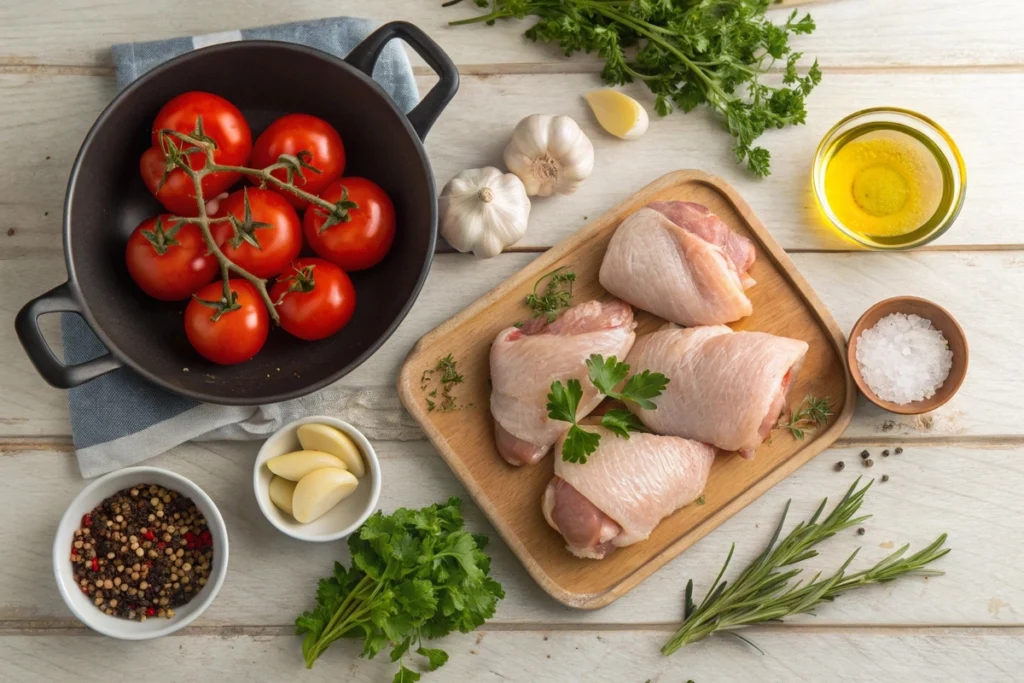
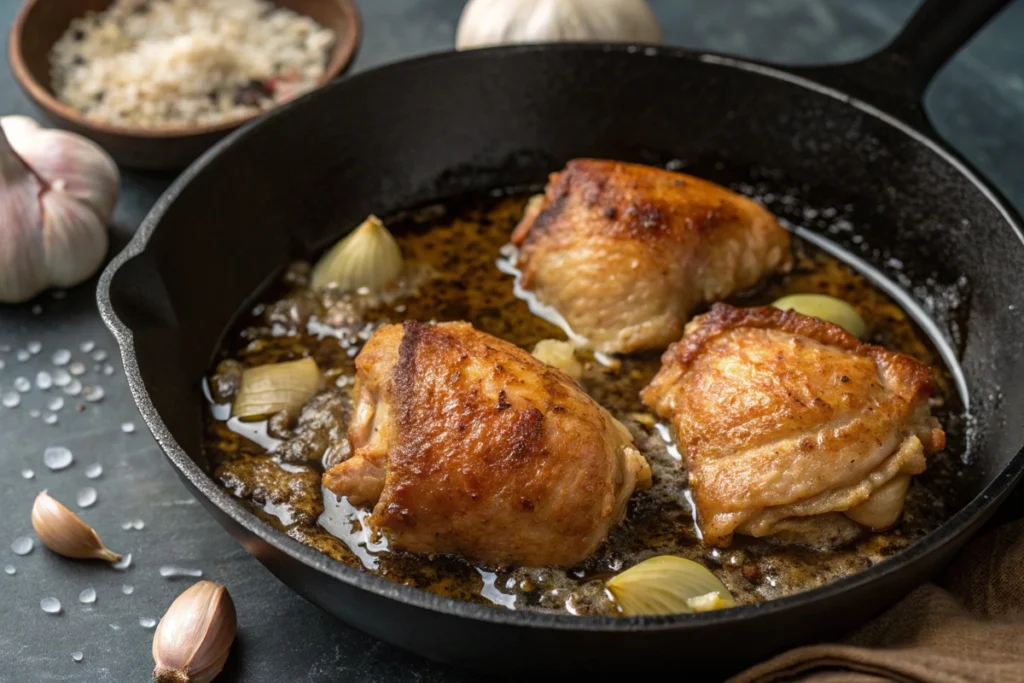
Nothing says low-and-slow mastery like a melt-in-your-mouth brisket. Start with a 12-pound cut, slather it with mustard, and coat it in a bold coffee-chili rub. Smoke at 225°F for 14 hours using hickory pellets, spritzing with apple juice every hour.

Seasoning beef brisket with coffee rub for pellet grilling.
Pro tip: Use hickory pellets for bold brisket flavor.

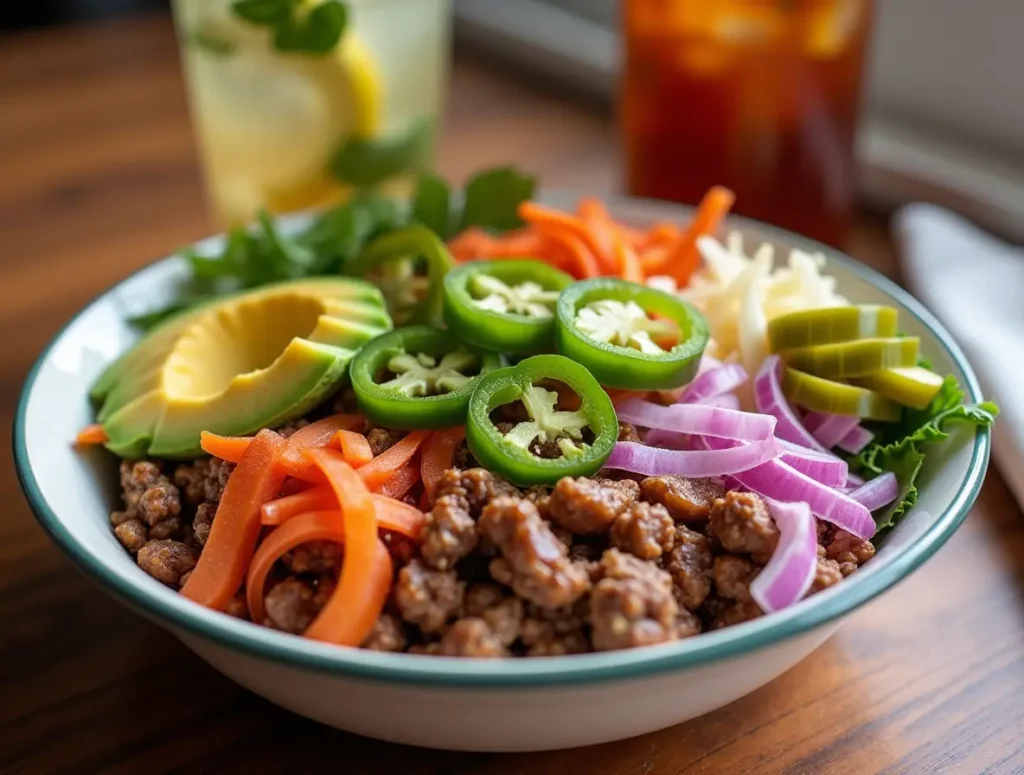
Juicy Pulled Pork with Carolina-Inspired Slaw

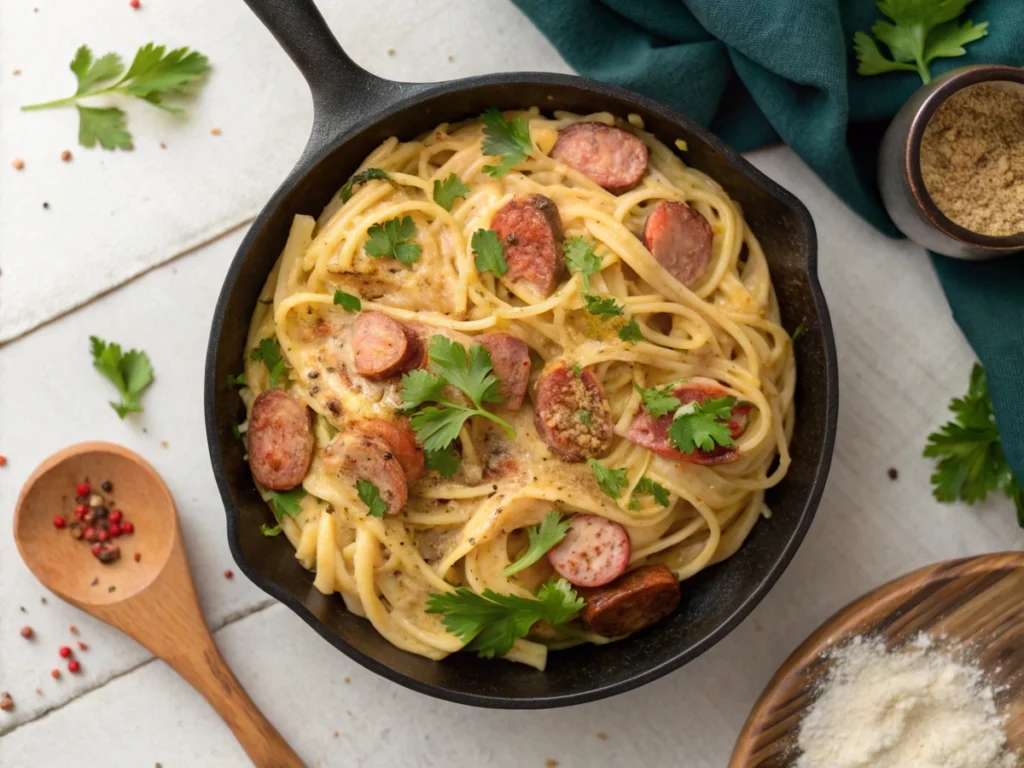
Pork shoulder is the MVP of pellet grill recipes forgiving, affordable, and oh-so-tender. Rub it with paprika and brown sugar, then smoke at 250°F with applewood pellets for 10 hours. Shred it, then pile it on buns with a vinegar-based slaw.

Crispy Beer-Can Chicken in 90 Minutes

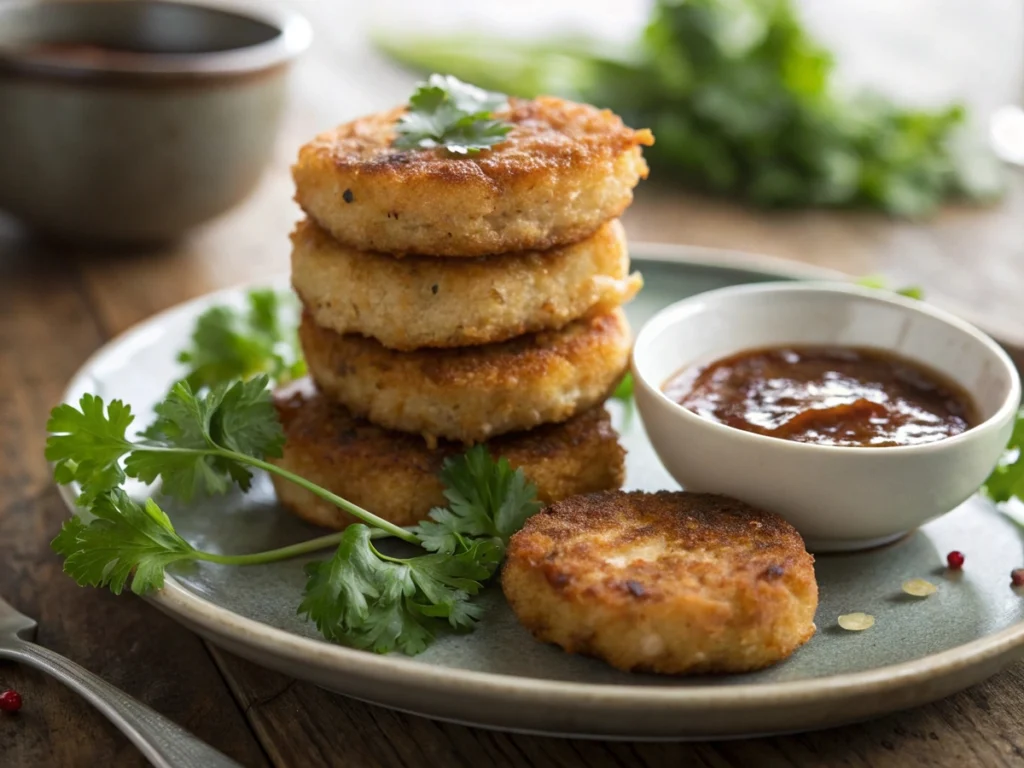
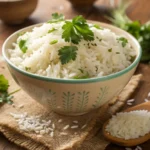
Who says pellet grills can’t handle weeknights? Season a whole chicken with garlic powder and thyme, then balance it on a half-full beer can. Smoke at 325°F with cherry pellets for 1.5 hours. Result: Crispy skin, juicy meat, and zero fuss. Serve with grilled corn or our Ensalada De Pollo for a full feast.

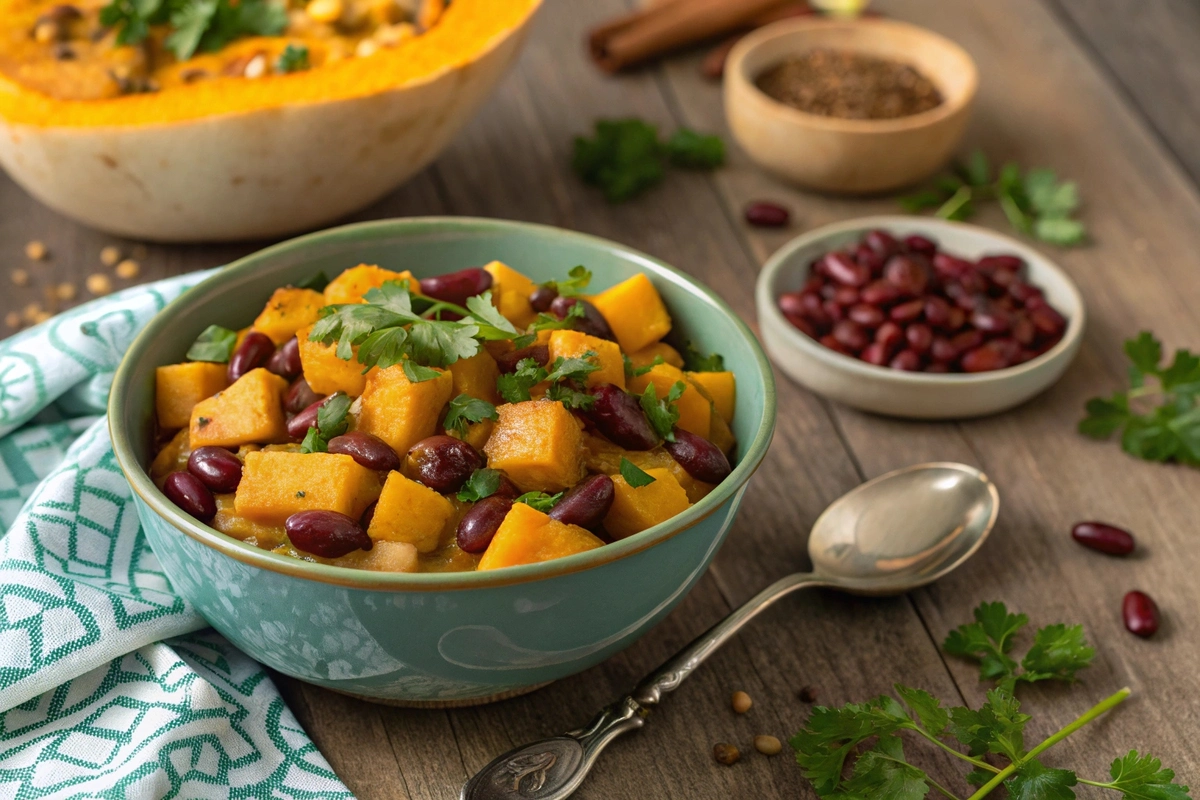
Vegetarian Delights: Smoked Portobello Burgers

Pellet grill recipes aren’t just for meat lovers. Marinate portobello caps in balsamic, olive oil, and rosemary, then smoke at 180°F for 45 minutes. Pile them on ciabatta with goat cheese and arugula. Craving more veggies? Try smoking cauliflower steaks or halloumi perfect for Meatless Mondays!

Mastering Techniques for Flawless Results

Think you’ve nailed pellet grill recipes? Wait until you unlock these pro tricks. Whether you’re chasing bark-covered brisket or crispy-skinned chicken, mastering a few techniques can turn “good enough” into “restaurant-quality BBQ.” Let’s break down the secrets to smoke, sizzle, and success.

Low-and-Slow vs. High Heat: When to Use Each

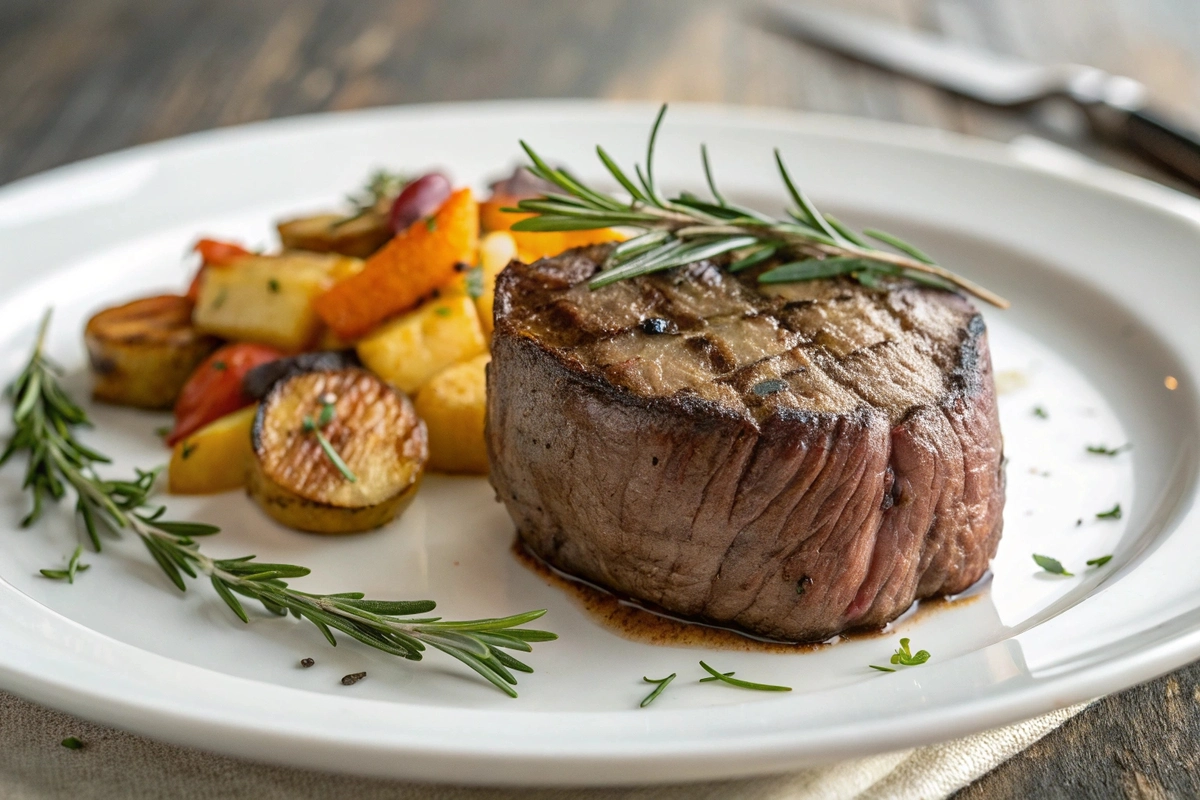
Pellet grills shine because they handle both patience and speed. Low-and-slow (225–250°F) is perfect for tough cuts like pork shoulder or ribs—think 8+ hours of smoky tenderness. On the flip side, crank it to 450°F for searing steaks or grilling veggies in minutes. Pro move: Use reverse searing for thick cuts. Smoke first, then blast with high heat to finish.

Avoiding Common Mistakes: Pellet Grill Pitfalls

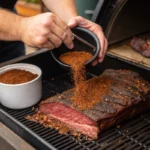
Even the best pellet grill recipes can flop if you skip these fixes. First, never let pellets sit in a damp hopper they’ll clump and jam the auger. Second, resist peeking! Every lid lift drops the temp, adding 10+ minutes to your cook. Lastly, don’t drown meat in sauce too early. Brush it on during the last 30 minutes to prevent burning. Remember: A meat thermometer is your best friend.

Pro Tips for Intense Smoke Flavor

Want that deep, campfire-like smoke? Start with dry pellets (store them in airtight containers). Next, try a smoke tube for extra flavor during shorter cooks perfect for cheeses or nuts. Finally, brine poultry overnight. A simple mix of salt, sugar, and herbs keeps chicken juicy and helps smoke penetrate. Bonus: Cold-smoke cream cheese for a killer appetizer.

Maintenance Tips for Long-Lasting Performance

Treat your grill right, and it’ll return the favor. After each cook, vacuum ash from the firepot to prevent flare-ups. Every 20 hours, clean grease from the drip tray (trust us, future-you will thank present-you). Seasonally, inspect seals and lubricate hinges.

Beyond Meat: Unexpected Pellet Grill Creations

Who says pellet grill recipes are just for ribs and brisket? Think outside the smoker! From sweet treats to global feasts, your grill can handle it all. Let’s explore four creative ways to surprise your guests and maybe even yourself.

Smoked Desserts: Bourbon-Pecan Peach Cobbler

Smoked peach cobbler in cast iron skillet on pellet grill.
Yes, you can smoke dessert on a pellet grill!

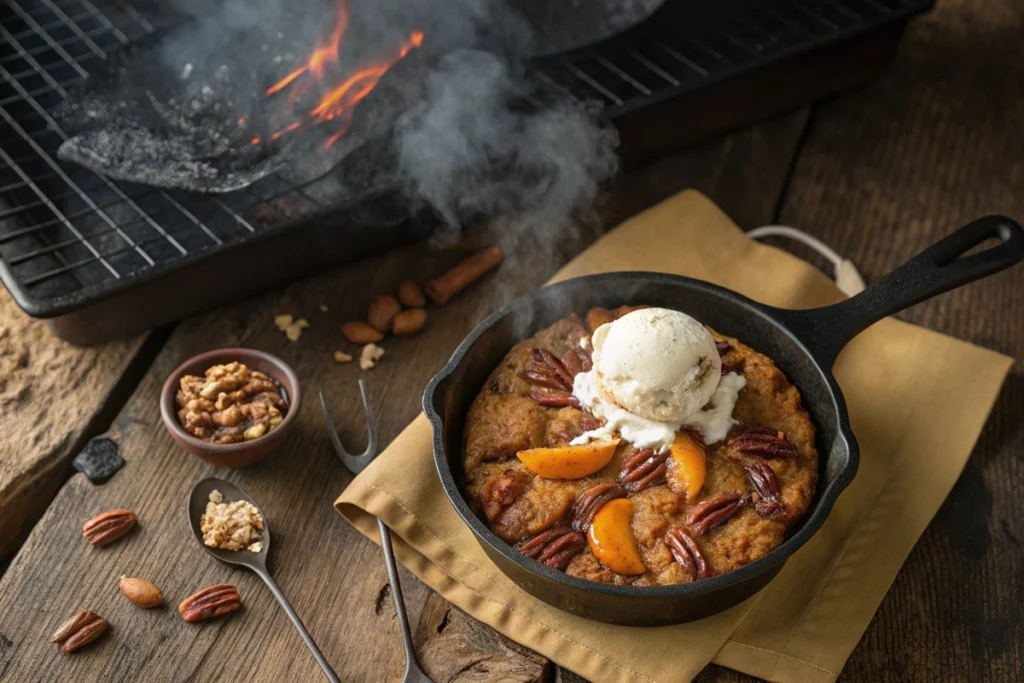
Yes, you read that right dessert on a pellet grill! Toss peaches, brown sugar, and a splash of bourbon in a cast-iron skillet. Top with pecan streusel, then smoke at 275°F for 45 minutes using applewood pellets. Result? A caramelized, smoky-sweet masterpiece. Serve with vanilla ice cream, and thank me later.

Breakfast on the Grill: Smoked Bacon & Eggs

Why let the oven have all the fun? Lay bacon strips on a grill mat, cold-smoke at 180°F for 30 minutes, then crank the heat to 350°F to crisp them up. Crack eggs into a cast-iron pan and let the grill work its magic. Pro tip: Add smoked paprika to your scrambled eggs for extra flair.

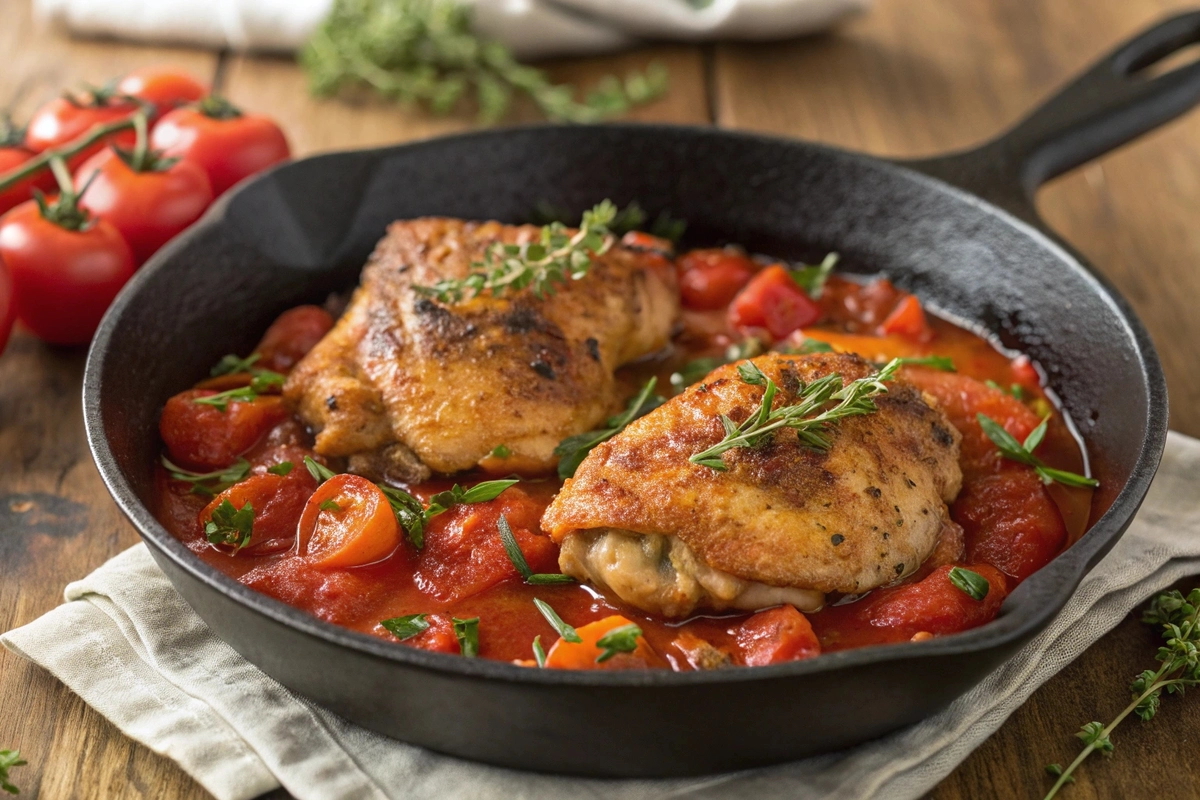
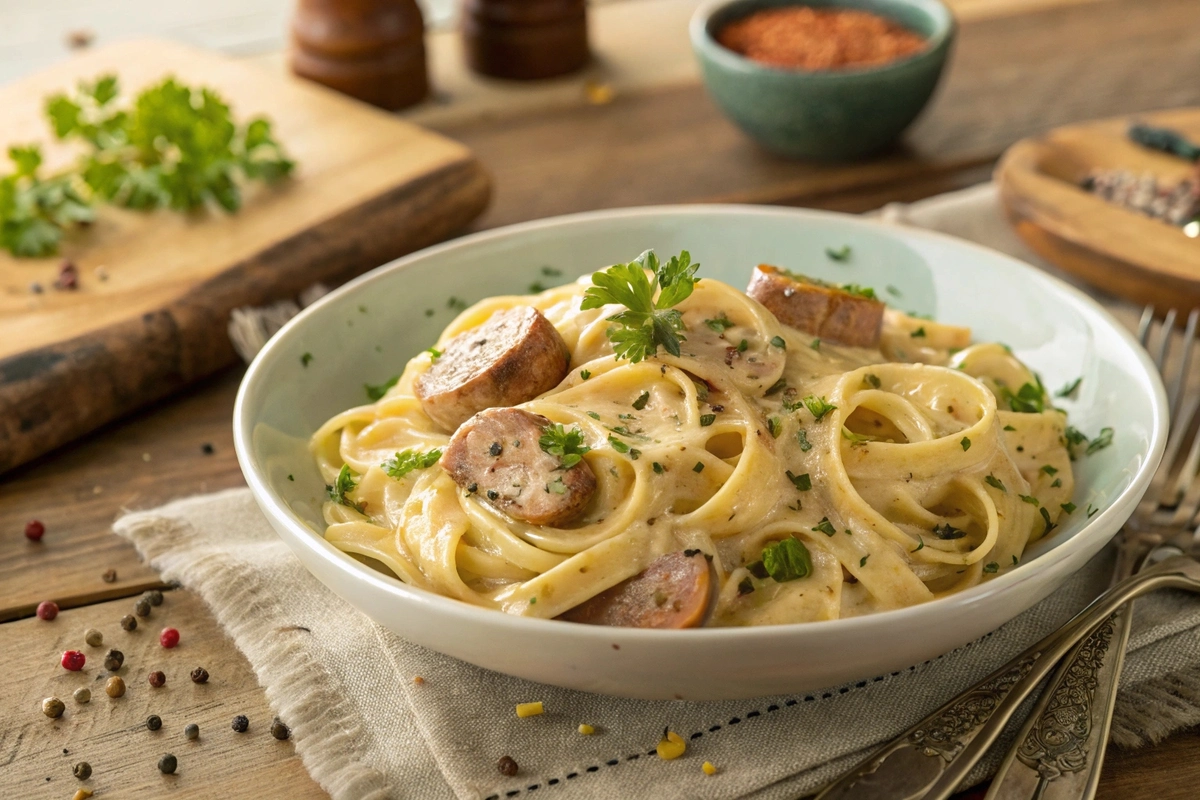
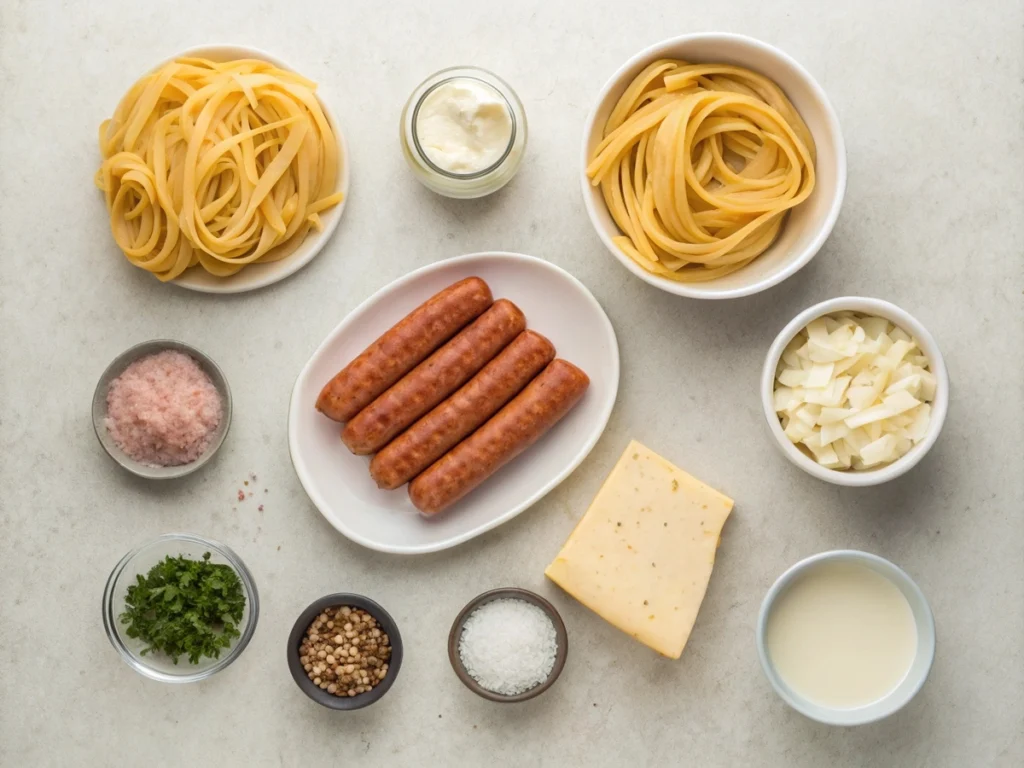
Global Flavors: Korean BBQ Short Ribs (Galbi)

Wood pellet flavor guide for pellet grill recipes.
Pair hickory, apple, or pecan with your proteins.

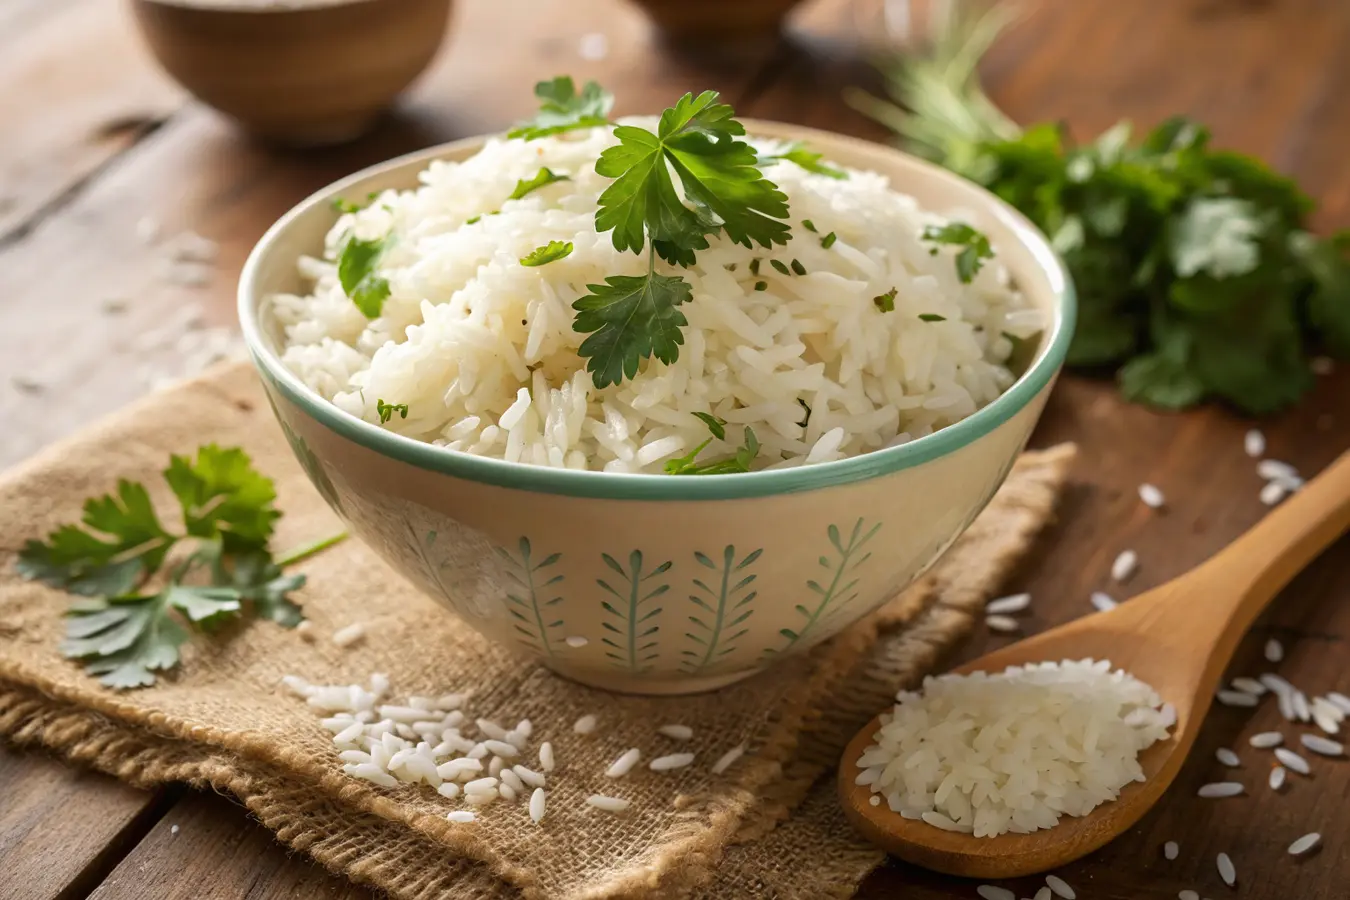
Take your pellet grill recipes on a world tour with Korean galbi. Marinate beef short ribs in soy sauce, pear puree, and gochujang (Korean chili paste) overnight. Smoke with oak pellets at 225°F for 3 hours, then glaze with honey. Serve with kimchi and steamed rice for a fusion feast.

Smoked Appetizers: Goat Cheese-Stuffed Peppers

Impress your crowd with smoky starters. Halve mini sweet peppers, stuff them with herbed goat cheese, and smoke at 200°F for 1 hour. The low heat lets the cheese soften without melting, while cherry pellets add a fruity whisper. Pair with a drizzle of balsamic reduction easy, elegant, and utterly addictive.

FAQs About Pellet Grill Recipes

What’s good to cook on a pellet grill?

Pellet grills excel at low-and-slow BBQ classics like brisket, ribs, and pulled pork, but they’re also fantastic for crispy chicken, smoked salmon, and even desserts like cobblers. For veggies, try smoked portobello mushrooms or grilled corn. Essentially, if it can be smoked, baked, or grilled, your pellet grill can handle it!

What are the downsides of a pellet grill?

While pellet grill recipes are wildly convenient, these cookers require electricity, so they’re not ideal for off-grid adventures. Pellets can also cost more than charcoal over time, and some purists argue traditional smokers deliver a heavier smoke flavor. However, the set-and-forget ease often outweighs these trade-offs for most home cooks.

What should I make first on my pellet grill?

Start with beer-can chicken or smoked sausages—they’re forgiving and quick. These recipes let you practice temperature control without risking a pricey cut of meat. Once you nail the basics, graduate to low-and-slow staples like pork shoulder or baby back ribs.

What is the easiest thing to smoke on a pellet grill?

Pork shoulder (for pulled pork) is the ultimate beginner-friendly smoke. Rub it with salt and paprika, set your grill to 225°F, and let it cook undisturbed for 8–10 hours. No wrapping, no spritzing just juicy, smoky meat ready for sandwiches or tacos.

Conclusion: Elevate Your BBQ Game with Confidence

By now, you’ve seen how pellet grill recipes can transform your backyard cooking from smoky brisket to unexpected hits like bourbon-peach cobbler. Whether you’re a weekend warrior or a seasoned grill master, these versatile cookers offer precision, flavor, and endless creativity. Remember: Start simple, experiment boldly, and let the grill do the heavy lifting. Ready to fire it up? Your next BBQ masterpiece is just a pellet hopper away.

Print
clock clock iconcutlery cutlery iconflag flag iconfolder folder iconinstagram instagram iconpinterest pinterest iconfacebook facebook iconprint print iconsquares squares iconheart heart iconheart solid heart solid icon
Seasoning beef brisket with coffee rub for pellet grilling.

Pellet Grill Mastery: 4 Recipes for Perfect BBQ (2025 Guide)


  • Author: Emily
  • Yield: Serves 1215 1x

Description

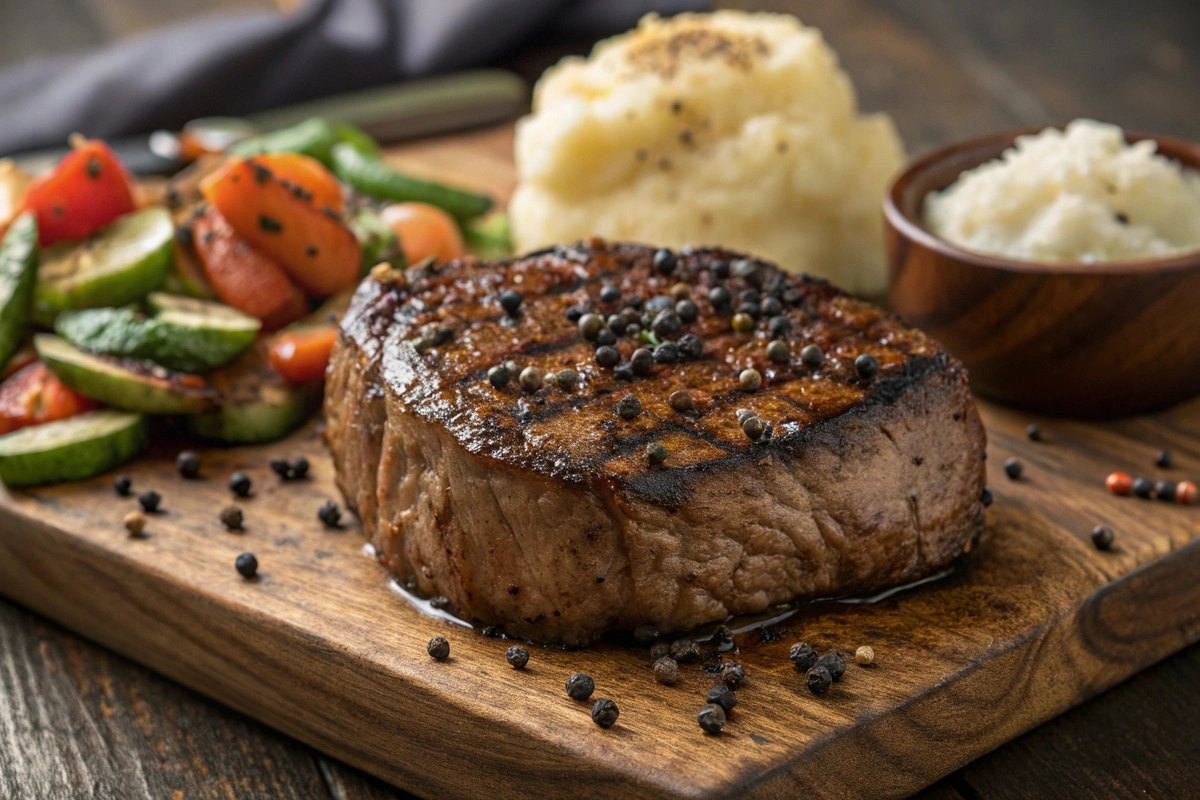
Master the art of low-and-slow BBQ with this melt-in-your-mouth smoked brisket. Infused with a bold coffee-chili rub and hickory smoke, this recipe delivers a tender, juicy center and a caramelized bark that’ll make you the hero of any cookout.
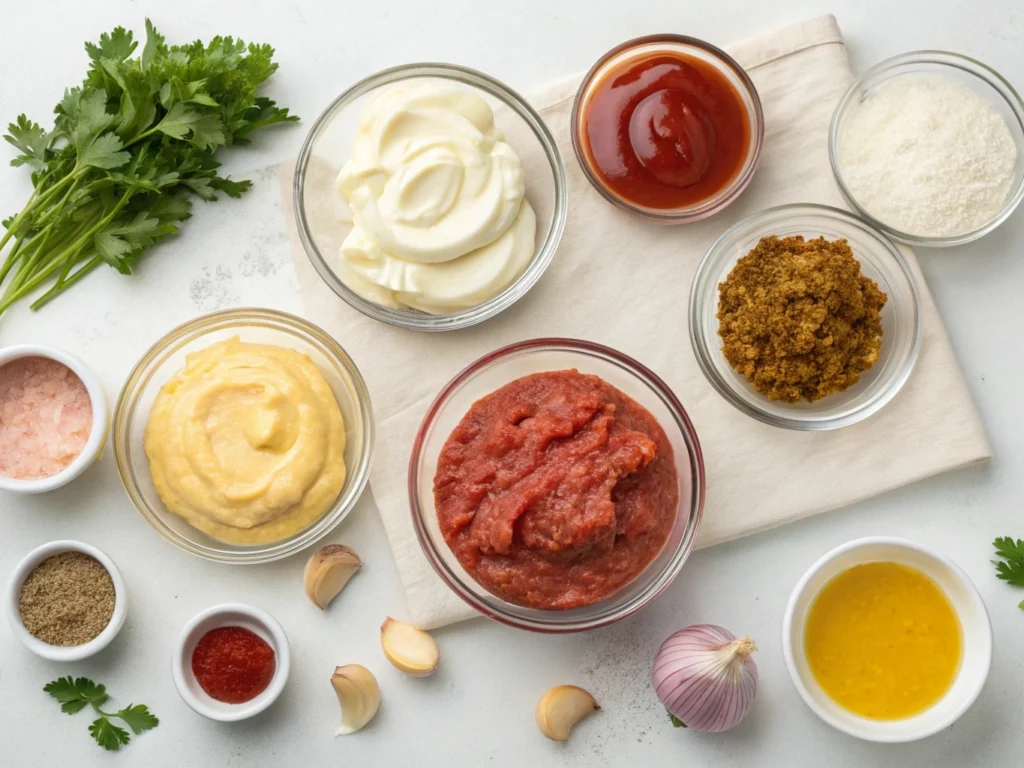

Ingredients

Scale
  • 1 whole beef brisket (1214 lbs, untrimmed)
  • ¼ cup yellow mustard (binder)
  • ½ cup coarse kosher salt
  • ½ cup freshly ground black pepper
  • ¼ cup chili powder
  • ¼ cup dark brown sugar
  • 2 tbsp finely ground coffee
  • 1 tbsp garlic powder
  • 1 tbsp onion powder
  • 1 tsp cayenne pepper (optional, for heat)
  • 2 cups apple juice (for spritzing)

Instructions

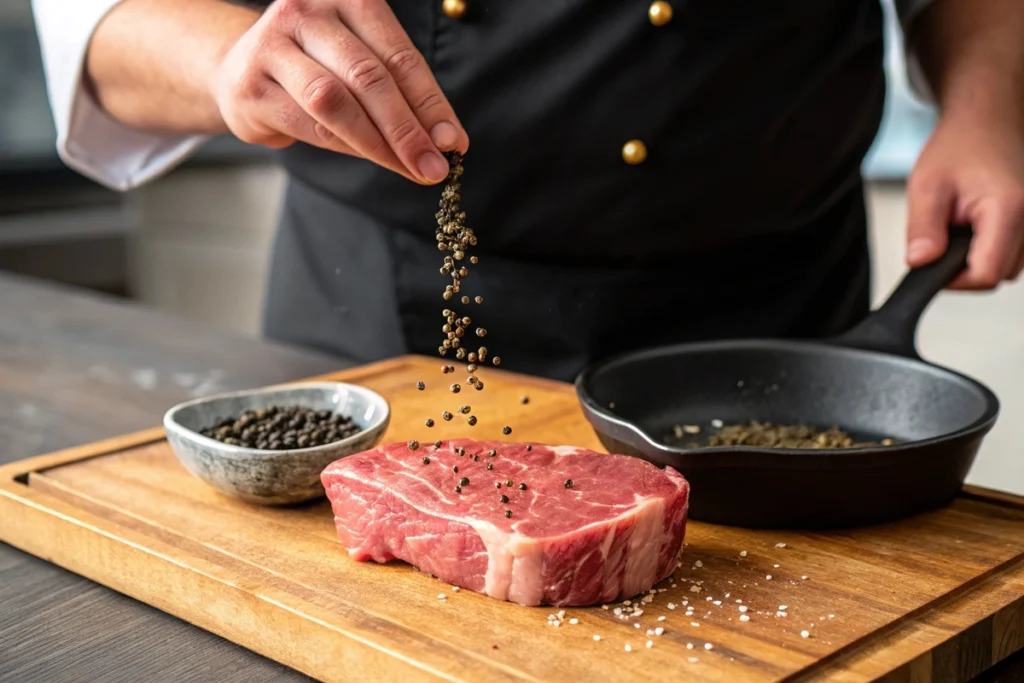
  • Trim the brisket: Remove excess fat, leaving a ¼-inch layer on the fat cap.
  • Apply binder: Coat all sides of the brisket with yellow mustard.
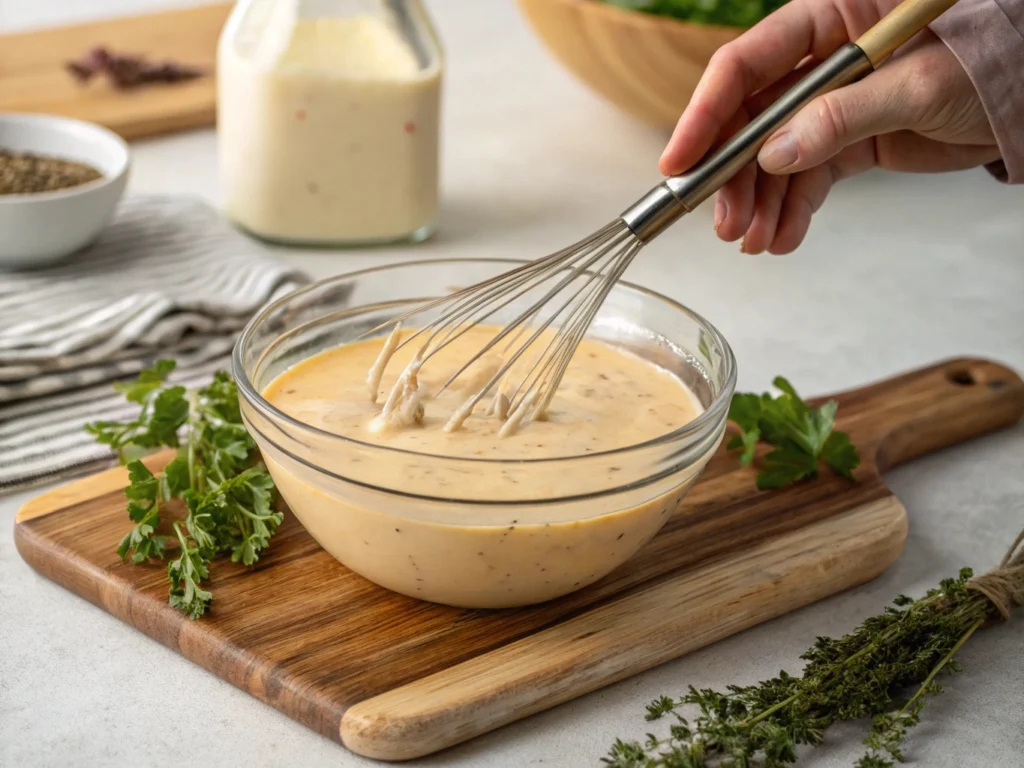
  • Make the rub: Mix salt, pepper, chili powder, brown sugar, coffee, garlic powder, onion powder, and cayenne.
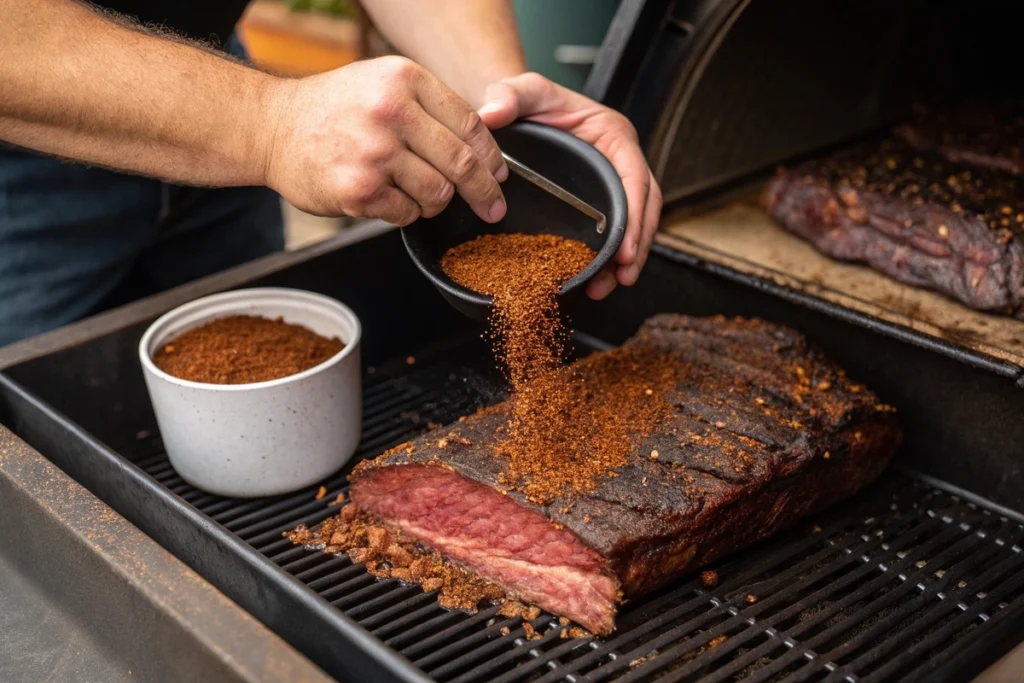
  • Season generously: Sprinkle the rub evenly over the brisket, pressing it into the meat.
  • Preheat pellet grill: Set to 225°F using hickory pellets. Add a water pan to the grill for moisture.
  • Smoke the brisket: Place brisket fat-side up on the grill. Insert a meat probe into the thickest part.
  • Spritz hourly: After 3 hours, spritz with apple juice every 60 minutes to keep the surface moist.
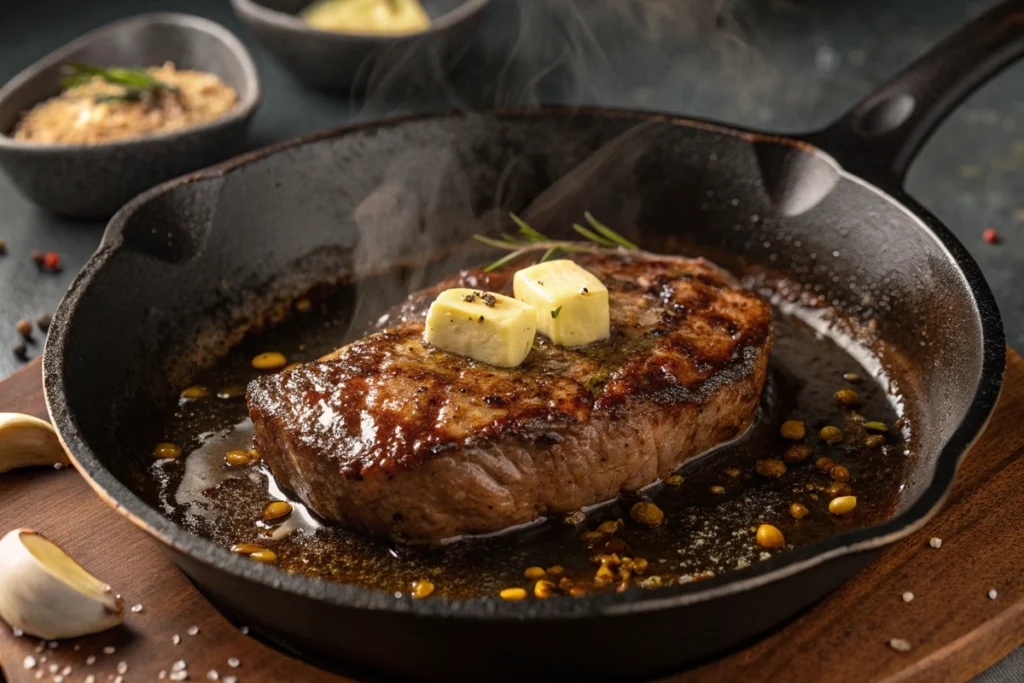
  • Wrap at 165°F: Once the internal temp hits 165°F, wrap the brisket tightly in butcher paper.
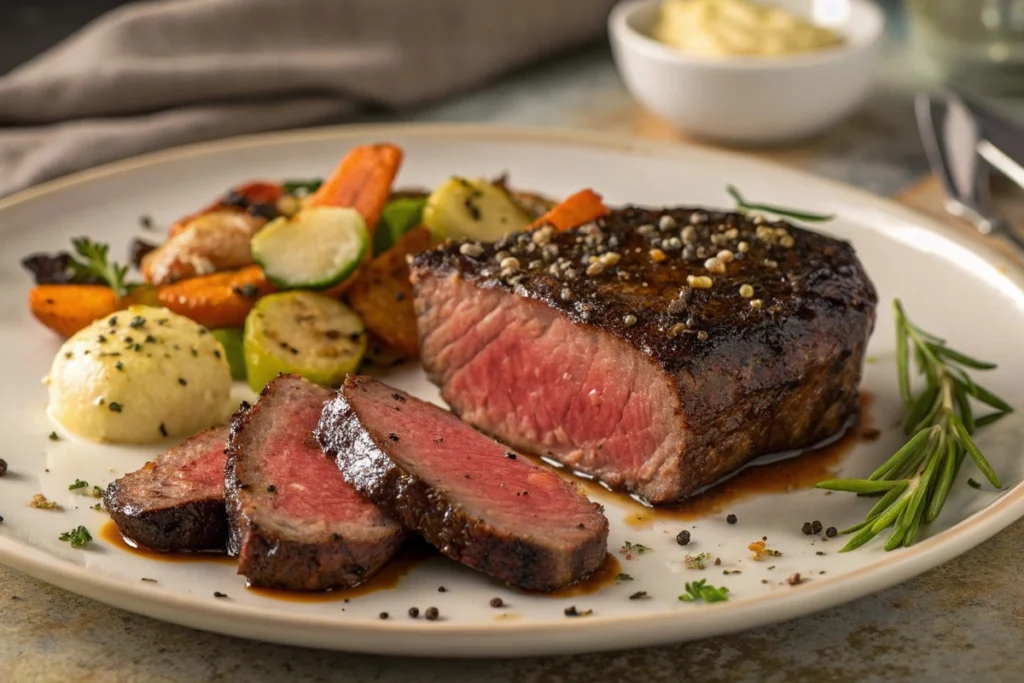
  • Finish cooking: Return to the grill until the internal temp reaches 203°F (about 12–14 hours total).
  • Rest and slice: Let rest in a cooler for 2 hours, then slice against the grain.

Notes

  1. Bark tip: Avoid wrapping too early—wait until the bark is deep mahogany.
  2. Pellet choice: Hickory adds boldness, but oak works for a milder flavor

Recipe squash and kidney beans

This recipe squash and kidney beans will warm your heart and fill your belly. Sweet, tender squash meets rich, earthy kidney beans in a dish that’s brimming with flavor and nutrition. Whether you’re meal-prepping or cooking for the family, this one-pot wonder is as comforting as it is versatile.

Why You’ll Love This Recipe Squash and Kidney Beans

This recipe squash and kidney beans is a wholesome and delicious way to enjoy a hearty, plant-based meal. Whether you’re looking for something cozy on a chilly evening or a nutritious weeknight dinner, this dish checks all the boxes. Let’s explore what makes it a must-try!

A Nutritious One-Pot Wonder

When it comes to nutrition, this recipe squash and kidney beans is a powerhouse! Squash is packed with vitamins A and C, offering a boost to your immune system while providing natural sweetness. On the other hand, kidney beans are a rich source of protein and fiber, making this dish both satisfying and healthy.

What’s more, combining squash and kidney beans creates a dish that’s ideal for vegetarians, vegans, and anyone aiming to add more plant-based meals to their routine. It’s filling without feeling heavy, and every bite is loaded with flavor.

Perfect for Any Season

Squash is often associated with fall, but this recipe squash and kidney beans can easily be enjoyed year-round. Butternut and acorn squash are perfect choices for cooler months, while zucchini or summer squash can be swapped in during spring and summer for a lighter variation.

Pairing the creamy, tender squash with kidney beans creates a dish that’s warming and hearty during colder seasons, yet adaptable for fresher, brighter flavors when the weather warms up.

Budget-Friendly and Accessible

This recipe squash and kidney beans is as easy on your wallet as it is on your schedule. Squash is affordable when bought in season, and kidney beans—whether dried or canned—are one of the most cost-effective sources of plant-based protein.

Canned beans are a great time-saver, but if you’re working with dried kidney beans, you can cook them in bulk for an even more budget-friendly option. Plus, the recipe doesn’t require any fancy or hard-to-find ingredients, making it accessible for home cooks everywhere.

Customizable for Your Tastes

One of the best parts of this recipe squash and kidney beans is how easily you can make it your own. Want a bit of spice? Add a pinch of chili flakes or cumin. Craving something creamy? Stir in some coconut milk. Need more greens? Toss in kale or spinach toward the end of cooking.

Here are a few ideas to try:

  • Mediterranean-inspired: Add diced tomatoes, oregano, and a sprinkle of feta cheese (or a vegan alternative).
  • Indian flavors: Mix in curry powder, turmeric, and a splash of coconut milk.
  • Hearty stew: Add vegetable broth and simmer until thickened for a rich, soup-like consistency.

Ingredients for Recipe Squash and Kidney Beans

One of the secrets to making a great recipe squash and kidney beans is starting with fresh, wholesome ingredients. In this section, we’ll cover everything you need to create a flavorful, nutritious dish, along with tips to choose and prepare your ingredients.

Ingredients for recipe squash and kidney beans, including diced squash, kidney beans, and spices
A flat lay of fresh and wholesome ingredients for squash and kidney beans

Choosing the Right Squash

Squash is the star of this recipe squash and kidney beans, and picking the right variety makes all the difference. Butternut squash is a fantastic option because of its natural sweetness and creamy texture. Acorn squash and kabocha squash are also great choices if you prefer a nutty flavor.

  • Pro Tip: When selecting squash, look for ones that are firm, heavy for their size, and free of blemishes. A ripe butternut squash, for example, will have a matte finish, not a glossy one.

Prepping Kidney Beans

Whether you use canned or dried kidney beans, they’re a key component of this dish. Canned beans save time, but if you’re working with dried beans, follow these steps for best results:

  1. Soak the beans: Soak dried kidney beans in water overnight to reduce cooking time.
  2. Cook until tender: Boil the soaked beans for about 45–60 minutes until soft.
  3. Drain and rinse: Whether canned or cooked from dried, rinse kidney beans thoroughly to remove excess sodium and improve their flavor.

Seasonings and Spices

The flavor of your recipe squash and kidney beans will depend heavily on the seasonings you use. Here’s a simple spice blend to enhance the natural taste of the ingredients:

  • Spices: Cumin, paprika, and turmeric create a warm, earthy base.
  • Herbs: Fresh thyme, parsley, or a bay leaf can add layers of aroma and flavor.
  • Heat: If you enjoy a spicy kick, consider adding chili powder or a pinch of red pepper flakes.

Optional Ingredients for Added Depth

Want to make your recipe squash and kidney beans even more exciting? Try adding some of these optional ingredients:

  • Coconut milk: For a creamy, slightly sweet variation.
  • Tomatoes: Fresh or canned tomatoes add a tangy balance to the dish.
  • Leafy greens: Kale, spinach, or Swiss chard can be stirred in toward the end for extra nutrition.

Step-by-Step Instructions for Recipe Squash and Kidney Beans

Making this recipe squash and kidney beans is a straightforward process, and the result is a comforting, flavorful dish that’s perfect for any occasion. Follow these step-by-step instructions to create a one-pot wonder that’s both hearty and healthy.

Pot of simmering recipe squash and kidney beans being stirred with a wooden spoon.
A simmering pot of squash and kidney beans, brimming with flavor and texture.

Step 1: Prepare Your Ingredients

Proper preparation is the key to a seamless cooking experience. Start by gathering all your ingredients and prepping them in advance:

  1. Dice the squash: Peel and cut the squash into evenly sized cubes to ensure they cook at the same rate. Butternut squash is a great option for this step because it’s easy to peel and has a smooth texture.
  2. Rinse and drain the kidney beans: If you’re using canned beans, rinse them thoroughly to remove excess sodium. If using dried beans, make sure they’re fully cooked and tender.
  3. Chop aromatics: Dice the onion and mince the garlic to build the flavor base for your recipe squash and kidney beans.

Step 2: Sauté the Aromatics

Building flavor begins with cooking the aromatics. This step lays the foundation for a rich, savory dish.

  1. Heat 2 tablespoons of olive oil in a large pot or Dutch oven over medium heat.
  2. Add the chopped onion and cook for 3–4 minutes until it turns translucent. Stir frequently to prevent burning.
  3. Toss in the minced garlic, followed by your chosen spices (e.g., cumin, paprika, and turmeric). Stir for 30 seconds to toast the spices and release their aroma.

Pro tip: If you enjoy spicy food, add a pinch of red chili flakes or cayenne pepper at this stage.

Step 3: Cook the Squash

Once your aromatics are fragrant, it’s time to cook the squash, which is the heart of this recipe squash and kidney beans.

  1. Add the diced squash to the pot and stir it into the sautéed aromatics, coating it with the flavorful oil and spices.
  2. Pour in 2 cups of vegetable broth or water, ensuring the squash is partially submerged.
  3. Bring the mixture to a gentle boil, then reduce the heat to low. Cover the pot and let it simmer for 15–20 minutes, or until the squash is tender enough to pierce with a fork.

For a stew-like texture, allow some of the broth to reduce. If you prefer a creamier consistency, mash a few squash pieces with the back of your spoon.

Step 4: Add the Kidney Beans and Simmer

The final step in this recipe squash and kidney beans is to incorporate the kidney beans and let the flavors meld together.

  1. Stir in 2 cups of cooked or canned kidney beans, ensuring they’re evenly distributed throughout the dish.
  2. Let the mixture simmer for another 10–15 minutes, allowing the beans to absorb the rich flavors of the squash and spices.
  3. Taste and adjust the seasoning with salt, black pepper, or additional spices as needed.

If you’re looking for a creamier texture, consider stirring in ½ cup of coconut milk during the last few minutes of cooking.

Tips and Tricks for the Perfect Recipe Squash and Kidney Beans

Mastering the art of cooking recipe squash and kidney beans comes down to a few key tips and techniques. These will help you bring out the best flavors and textures, ensuring your dish is as satisfying as possible.

Choose the Right Squash for Your Recipe

When it comes to this recipe squash and kidney beans, the type of squash you choose can make a big difference. Butternut squash is a favorite because it becomes creamy and slightly sweet when cooked, pairing beautifully with the earthy flavor of kidney beans.

  • For sweeter flavors: Use butternut or kabocha squash.
  • For a nutty taste: Acorn squash or delicata squash are great options.
  • For convenience: Pre-cubed butternut squash is an excellent time-saver, especially for busy weeknights.

No matter which type you use, make sure to cut the squash into even pieces for uniform cooking.

Season and Layer Flavors Properly

The key to a flavorful recipe squash and kidney beans is building layers of seasoning. Start with a base of sautéed onions and garlic, then add spices like cumin, paprika, and turmeric to infuse the dish with warmth and depth.

  • Don’t skip the toasting step: Cooking the spices in oil for a few seconds releases their full aroma.
  • Adjust spice levels to suit your taste: If you prefer a kick of heat, add cayenne or red pepper flakes.
  • Add a touch of acidity: A squeeze of lemon or a splash of vinegar at the end can brighten the flavors and balance the richness of the squash and beans.

Make It Creamy or Chunky to Suit Your Preference

This recipe squash and kidney beans is incredibly versatile when it comes to texture. You can keep it chunky or make it creamy based on your preferences:

  • For a chunky stew, let the squash soften naturally and leave it whole.
  • For a creamy consistency, mash a portion of the cooked squash or blend a cup of the mixture, then stir it back into the pot.
  • Want a richer dish? Add coconut milk or a dollop of plain yogurt just before serving.

No matter the texture, the dish is sure to be satisfying and hearty.

Serving Suggestions for Every Occasion

This recipe squash and kidney beans is a one-pot wonder, but how you serve it can transform the dining experience:

A bowl of squash and kidney beans garnished with parsley and served with crusty bread
A delicious serving of squash and kidney beans with crusty bread on the side.
  • As a main dish: Serve it in bowls, garnished with fresh parsley or cilantro, alongside a slice of crusty bread for dipping.
  • Over grains: Spoon it over rice, quinoa, or couscous for a more filling meal.
  • With sides: Pair it with a green salad or roasted vegetables for a balanced dinner.
  • For meal prep: Divide the dish into airtight containers for an easy, reheatable lunch throughout the week.

For more creative dinner recipes that bring both flavor and convenience to your table, check out our Burger Bowl Recipe.

FAQs

How do you know when kidney beans are cooked enough?

You can tell kidney beans are fully cooked when they’re soft and tender but still hold their shape. To test, gently press one bean between your fingers or use a fork it should mash easily without feeling tough or grainy. Properly cooked beans will enhance the texture and flavor of your recipe squash and kidney beans.

How long do kidney beans take to cook?

If you’re using dried kidney beans, they usually take 45–60 minutes to cook after soaking them overnight. The cooking time can vary depending on the bean’s size and age. For canned kidney beans, they are already cooked and only need to be rinsed and reheated for about 5–10 minutes, making them perfect for quick meals like recipe squash and kidney beans.

Can canned kidney beans be eaten cold?

Yes, canned kidney beans are safe to eat cold straight out of the can. They are pre-cooked during the canning process, so you can enjoy them in salads, dips, or even as a topping for your recipe squash and kidney beans. Be sure to rinse canned beans thoroughly to remove excess sodium or preservatives before eating.

What happens if you don’t cook kidney beans properly?

If kidney beans aren’t cooked properly, they can cause stomach discomfort due to a natural toxin called phytohaemagglutinin (lectin). Undercooked beans, especially those that have been boiled for less than 10 minutes, can cause nausea or other digestive issues. Always ensure dried kidney beans are soaked, boiled for at least 10 minutes, and fully cooked to make your recipe squash and kidney beans safe and enjoyable.

Conclusion

This recipe squash and kidney beans brings together wholesome ingredients, rich flavors, and a comforting texture in a dish that’s both versatile and nutritious. Whether you’re preparing it for a cozy dinner, meal prep, or a family gathering, this recipe is sure to satisfy. By following the simple tips and techniques shared throughout this guide, you’ll create a flavorful, hearty dish that’s perfect for any occasion.

Print
clock clock iconcutlery cutlery iconflag flag iconfolder folder iconinstagram instagram iconpinterest pinterest iconfacebook facebook iconprint print iconsquares squares iconheart heart iconheart solid heart solid icon
Pot of simmering recipe squash and kidney beans being stirred with a wooden spoon.

Recipe squash and kidney beans


  • Author: Emily
  • Total Time: 40 minutes
  • Yield: 4 servings 1x

Description

This hearty and healthy recipe squash and kidney beans combines creamy squash, protein-packed kidney beans, and flavorful spices in one comforting dish. It’s perfect for a quick dinner, meal prep, or a cozy night in.


Ingredients

Scale

For the Base:

  • 2 cups diced butternut squash (or acorn squash)
  • 1 cup cooked kidney beans (or 1 can, drained and rinsed)
  • 1 medium onion, diced
  • 3 garlic cloves, minced
  • 2 cups vegetable broth (or water)
  • 1 tablespoon olive oil

Spices and Seasonings:

  • 1 teaspoon cumin
  • 1 teaspoon paprika
  • ½ teaspoon turmeric
  • ½ teaspoon salt (adjust to taste)
  • ¼ teaspoon black pepper
  • 1 bay leaf

Optional Add-ins:

  • ½ cup canned tomatoes or diced fresh tomatoes
  • ¼ cup coconut milk for creaminess
  • 2 cups fresh spinach or kale

Garnish:

  • Fresh parsley or cilantro (chopped)


Instructions

  1. Prepare Ingredients: Peel and dice the squash into bite-sized cubes. Rinse canned kidney beans or prepare dried beans by soaking and boiling them until tender.

  2. Cook Aromatics: Heat olive oil in a large pot or Dutch oven over medium heat. Sauté the diced onion for 3–4 minutes until softened. Add the minced garlic and cook for another minute.

  3. Toast Spices: Stir in cumin, paprika, turmeric, and black pepper. Toast the spices in the oil for 30 seconds to release their flavors.

  4. Add Squash and Broth: Add the diced squash to the pot and stir to coat it in the spices. Pour in the vegetable broth and add the bay leaf. Bring to a gentle boil, then reduce heat to low. Cover and simmer for 15–20 minutes, or until the squash is tender.

  5. Add Kidney Beans and Simmer: Stir in the kidney beans and optional ingredients like tomatoes or spinach. Simmer for another 10–15 minutes to let the flavors meld. If using coconut milk, stir it in during the last 5 minutes of cooking.

  6. Adjust Seasoning: Taste and adjust salt or spices as needed. Remove the bay leaf before serving.

  7. Serve: Ladle the squash and kidney beans into bowls. Garnish with fresh parsley or cilantro and serve with crusty bread, rice, or quinoa.

Notes

  • Make It Spicy: Add chili flakes or cayenne pepper for extra heat.
  • Texture Tip: Mash some of the squash to thicken the broth naturally.
  • Storage: Store leftovers in an airtight container in the fridge for up to 3 days. Reheat on the stovetop or in the microwave.

Burger Bowl Recipe: A Healthy Twist on a Classic Dish

If you love burgers but want a healthier twist, you’re in for a treat! This burger bowl recipe combines all the savory goodness of a burger juicy protein, crisp veggies, and tangy dressings in a fresh, gluten-free bowl. It’s quick, easy, and bursting with flavor, perfect for weeknight dinners or meal prep!

What Is a Burger Bowl?

When you think of a classic burger, what comes to mind? Juicy patties, fresh toppings, and bold flavors but usually with a bun. A burger bowl recipe takes all those delicious elements and serves them in a healthier, bun-free way. It’s a creative twist that combines everything you love about burgers with the convenience of a fresh, customizable salad bowl. Whether you’re looking for a low-carb meal, something gluten-free, or just a fun way to mix up dinner, burger bowls are here to save the day!

Why Choose a Burger Bowl Over a Traditional Burger?

While burgers are undeniably tasty, they often come with a hefty calorie count thanks to the bun and fries. With a burger bowl recipe, you get all the same savory flavors without the extra carbs. This makes it perfect for keto dieters or anyone looking for a lighter option.

Plus, burger bowls are endlessly versatile. Want a spicy kick? Add jalapeños or hot sauce. Craving something creamy? Toss in avocado or drizzle ranch dressing on top. Unlike a traditional burger, which is often pre-assembled, you can completely customize every bite of your bowl. It’s a no-brainer for picky eaters and foodies alike!

The Origins of the Burger Bowl Trend

The idea of ditching the bun isn’t entirely new, but the burger bowl recipe has gained traction thanks to the growing popularity of low-carb and keto diets. Restaurants and home cooks alike have embraced this concept, finding innovative ways to reimagine the burger experience.

In fact, burger bowls are part of a broader movement toward “bowl meals,” where classic dishes are deconstructed and served in a bowl format for easier eating and more flexibility. From burrito bowls to smoothie bowls, this trend is all about combining convenience with bold flavors.

Who Will Love This Burger Bowl Recipe?

Step-by-step collage of assembling a burger bowl with lettuce, beef, cheese, and dressing
From greens to toppings, the process of creating a perfect burger bowl step by step.

Short answer? Everyone! This burger bowl recipe is designed to suit a wide range of tastes and dietary preferences.

  • Keto and low-carb enthusiasts will love that it skips the bun while keeping the flavor intact.
  • Vegetarians can swap the beef for plant-based protein options like black bean patties or tofu.
  • Busy families will appreciate how quick and easy it is to prepare perfect for those chaotic weeknights.
  • Meal preppers will enjoy how well the ingredients keep when stored separately, making it a great choice for a healthy lunch all week.

The Perfect Burger Bowl: A Balance of Flavors and Textures

What makes a burger bowl recipe truly shine? It’s all about finding the right balance between flavors and textures. Think about it every bite should have something crunchy, something creamy, and that juicy, savory protein that ties it all together.

To start, the fresh greens act as the base, providing a crisp, refreshing element. Then, the protein—whether it’s classic ground beef, lean ground turkey, or a plant-based option—adds heartiness and bold flavor. Finally, the toppings bring everything together. Imagine the crunch of diced onions, the tang of pickles, and the smoothness of sliced avocado, all topped off with a drizzle of your favorite dressing.

Ingredients for Your Perfect Burger Bowl

When it comes to creating the ultimate burger bowl recipe, the ingredients are key. By carefully choosing fresh, high-quality components, you can elevate a simple meal into something extraordinary. Let’s break down the essentials you’ll need to build your burger bowl masterpiece!

Fresh and Flavorful Base Ingredients

Every great burger bowl recipe starts with a solid base. While lettuce is the most common choice, you can get creative by experimenting with different greens or substitutes:

  • Romaine lettuce: Crisp and sturdy, perfect for holding all your toppings.
  • Iceberg lettuce: Light and refreshing, offering a classic crunch.
  • Spinach or arugula: For those who prefer a more peppery flavor.
  • Cauliflower rice or zucchini noodles: A great low-carb alternative to greens!

Pro tip: Always dry your greens thoroughly before assembling your bowl. Excess moisture can make your toppings soggy, which no one wants!

Protein Choices for Your Burger Bowl

The protein is the heart of your burger bowl recipe, and the possibilities are endless! Whether you prefer beef, turkey, or a plant-based option, there’s something for everyone:

  • Ground beef: Stick with 80/20 for the perfect balance of flavor and moisture.
  • Ground turkey or chicken: Leaner options that pair beautifully with bold toppings.
  • Plant-based patties: From black bean burgers to Beyond Meat, vegetarians can enjoy this dish too.

Season your protein with salt, pepper, garlic powder, or even a dash of Worcestershire sauce to mimic that classic burger flavor. Check out this ground beef stroganoff recipe for more inspiration on how to use beef in creative ways!

Topping Ideas for Extra Flavor

Here’s where your burger bowl recipe really shines—customizing your toppings to suit your cravings! A balance of textures and flavors is the goal:

  • Classic burger toppings: Sliced tomatoes, onions (raw or caramelized), pickles, and shredded cheese.
  • Creamy additions: Sliced avocado, sour cream, or a dollop of guacamole.
  • Crunchy options: Croutons, crispy bacon bits, or fried onions for a satisfying crunch.
  • Bold extras: Jalapeños, sautéed mushrooms, or roasted red peppers to spice things up.

Dressings That Bring It All Together

No burger bowl recipe is complete without a delicious dressing to tie all the flavors together! Here are some options to consider:

  • Special sauce: A mix of mayo, ketchup, and pickle relish for that iconic burger taste.
  • Ranch dressing: Creamy and tangy, a family favorite.
  • Vinaigrette: For a lighter, fresher touch, especially with greens-based bowls.
  • Keto-friendly options: Avocado or olive oil-based dressings for low-carb eaters.

For a deeper dive into dressings and sauces, check out this patty melt sauce recipe. It’s easy to adapt for your burger bowl needs!

How to Make a Burger Bowl

Creating the perfect burger bowl recipe is easier than you think! With just a few simple steps, you can whip up a meal that’s not only healthy but also packed with flavor. Whether you’re a beginner or a seasoned home cook, these instructions will help you prepare a delicious burger bowl in no time.

Ground beef cooking in a skillet with spices for a burger bowl recipe
Seasoned ground beef sizzling in a skillet, the foundation of a delicious burger bowl.

Step 1: Prepare Your Protein

The first step in your burger bowl recipe is cooking the protein. Whether you’re using ground beef, turkey, or a plant-based option, properly seasoning and cooking it will make all the difference.

  1. Start with seasoning: Sprinkle salt, pepper, garlic powder, and onion powder on your protein. For an extra punch, add smoked paprika or Worcestershire sauce.
  2. Cook to perfection: Heat a skillet over medium heat, add a drizzle of olive oil, and cook the protein until it’s browned and fully cooked. For ground beef or turkey, break it into small, crumbled pieces as it cooks.
  3. Drain any excess grease: This keeps your burger bowl fresh and not overly oily.

Pro tip: For more protein inspiration, check out our black pepper Angus steak recipe and adapt it for a steak-based burger bowl.

Step 2: Assemble the Fresh Base

Next, it’s time to prepare the base of your burger bowl recipe. This step is all about adding freshness and a bit of crunch to complement the warm protein.

  • Wash and dry your greens: Use a salad spinner or paper towels to ensure your lettuce is completely dry. A mix of romaine and spinach works well for added texture and flavor.
  • Chop veggies for easy eating: Dice tomatoes, cucumbers, and red onions into bite-sized pieces. Thinly slice radishes or bell peppers for extra color and crunch.
  • Layer strategically: Start with the greens, then add your chopped vegetables to create a colorful and inviting base.

Step 3: Add Your Toppings

Here’s where the fun begins! Toppings are what turn a good burger bowl recipe into a great one. The key is balancing different textures and flavors for an unforgettable bite.

  • Classic choices: Add shredded cheddar cheese, dill pickles, and caramelized onions for a true burger feel.
  • Creamy additions: Avocado slices or a dollop of sour cream can add richness to your bowl.
  • Crunchy elements: Sprinkle on crispy bacon bits, fried onions, or even toasted sunflower seeds for an extra layer of texture.

Don’t forget to customize your bowl! Love spice? Toss in some jalapeños. Prefer something smoky? Add barbecue sauce or smoked paprika to your protein.

Step 4: Drizzle with Dressing and Serve

Finally, pull it all together with a flavorful dressing. A good dressing is the cherry on top of your burger bowl recipe, bringing out the best in every ingredient.

  1. Choose your dressing: Go for classic burger sauces like Thousand Island or ranch. For lighter options, vinaigrettes with mustard or lemon juice work wonderfully.
  2. Add just enough: Drizzle your dressing lightly over the bowl or serve it on the side for dipping. This ensures every bite has the right amount of flavor.
  3. Serve immediately: Burger bowls taste best when served fresh, as the crispness of the greens and warmth of the protein create a perfect contrast.

Tips and Tricks for the Perfect Burger Bowl

Creating a flawless burger bowl recipe isn’t just about following steps—it’s about mastering small details that elevate your dish. These tips and tricks will help you refine your technique, avoid common pitfalls, and make your burger bowl absolutely irresistible.

How to Customize for Dietary Preferences

One of the best parts about a burger bowl recipe is how easy it is to customize. Whether you’re cooking for yourself or your family, there’s always a way to tweak the ingredients to fit specific dietary needs.

  • Keto-friendly bowls: Stick with low-carb toppings like avocado, cheese, and a creamy garlic dressing. Swap sugary dressings for olive oil-based vinaigrettes.
  • Vegetarian options: Substitute the beef with black bean patties, grilled portobello mushrooms, or crispy tofu. Add roasted veggies like zucchini or eggplant for a heartier feel.
  • Gluten-free bowls: Avoid croutons and double-check labels on dressings to ensure they’re free of hidden gluten. Stick to fresh, whole ingredients for peace of mind.

Time-Saving Hacks for Busy Weeknights

When you’re short on time but still want a delicious meal, these shortcuts will help you prepare your burger bowl recipe quickly without sacrificing flavor:

  1. Pre-cook your protein: Cook a large batch of ground beef, turkey, or chicken at the start of the week and store it in an airtight container in the fridge.
  2. Buy pre-washed greens: Bagged salads or pre-washed lettuce can save you several minutes during prep.
  3. Use store-bought dressings: While homemade dressings are ideal, there are plenty of low-sugar, keto-friendly options available that pair perfectly with burger bowls.
  4. Chop in advance: Dice your veggies and store them in sealed containers, so assembling your bowl is as easy as grabbing and layering.

Troubleshooting Common Issues

Even the best cooks run into snags from time to time, but don’t worry—these quick fixes will keep your burger bowl recipe on track:

  • Soggy greens: Always dry your lettuce thoroughly with a salad spinner or paper towels. Wet greens can make your toppings slide and lose their crunch.
  • Overcooked protein: To keep your meat juicy, cook it over medium heat and avoid over-stirring. A food thermometer is a great way to ensure your protein is perfectly done.
  • Bland flavors: Don’t skimp on seasoning! Be generous with salt, pepper, and spices to bring out the rich flavors of your protein and veggies.

Presentation Tips for Instagram-Worthy Burger Bowls

Colorful burger bowl with jalapeños, avocado, and pickles styled for Instagram
A vibrant burger bowl with fresh toppings styled for a perfect Instagram shot

They say we eat with our eyes first, so why not make your burger bowl recipe as stunning as it is delicious? Here are a few tricks to elevate your presentation:

  • Layer ingredients thoughtfully: Place your greens first, followed by veggies, then protein, and top it all off with a sprinkle of cheese or a drizzle of dressing.
  • Use vibrant colors: Incorporate colorful veggies like cherry tomatoes, shredded carrots, or bell peppers to make your bowl visually appealing.
  • Choose the right bowl: Use a wide, shallow bowl to give your toppings room to shine.
  • Add finishing touches: Sprinkle chopped herbs, freshly cracked black pepper, or sesame seeds over the top for extra flair.

FAQs

How many calories are in a burger bowl?

The calorie count for a burger bowl recipe depends on the ingredients you choose. A typical burger bowl with ground beef, lettuce, tomatoes, cheese, and dressing can range between 400 to 600 calories. If you add avocado, bacon, or higher-fat dressings, the number may increase. For a lighter option, use lean protein like ground turkey and opt for low-calorie dressings.

How are burgers healthy?

Burgers, including a burger bowl recipe, can be healthy when prepared with fresh, whole ingredients. By removing the bun, you cut down on refined carbs, and using lean proteins or plant-based patties can reduce fat content. Adding fresh vegetables like lettuce, tomatoes, and cucumbers increases fiber, vitamins, and minerals, making your meal both balanced and nutritious.

What type of dish is hamburger?

Hamburgers are a classic comfort food traditionally served as a sandwich with a beef patty, bun, and toppings. However, a burger bowl recipe transforms this dish into a modern, low-carb alternative by deconstructing the burger and serving the components in a bowl. This allows for endless customization and is perfect for those seeking a gluten-free or keto-friendly version of the beloved hamburger.

How many calories in a bowl of burger rings?

A bowl of burger rings, which are typically processed snack foods, contains about 150–200 calories per serving (approximately 30g). These calories largely come from refined carbs and fats, making them less nutritious compared to a fresh burger bowl recipe. If you’re looking for a healthier alternative, homemade burger bowls are a better choice, as they provide fresh ingredients and higher nutritional value.

Conclusion

With its fresh, customizable ingredients and endless flavor combinations, a burger bowl recipe is the perfect way to enjoy all the deliciousness of a classic burger without the bun. Whether you’re looking for a low-carb dinner, a gluten-free option, or just a fun way to mix up your meals, burger bowls deliver on taste and nutrition. Now it’s your turn to create your own masterpiece don’t forget to share your favorite variations!

Print
clock clock iconcutlery cutlery iconflag flag iconfolder folder iconinstagram instagram iconpinterest pinterest iconfacebook facebook iconprint print iconsquares squares iconheart heart iconheart solid heart solid icon
Perfectly assembled burger bowl with fresh ingredients and creamy dressing

Burger Bowl Recipe


  • Author: Emily
  • Total Time: 20 minutes
  • Yield: 4 servings 1x

Description

This delicious and customizable burger bowl recipe is packed with fresh greens, juicy protein, and your favorite toppings. It’s the perfect low-carb, gluten-free alternative to a traditional burger and works great for meal prep or a quick dinner.


Ingredients

Scale

For the Base:

  • 4 cups romaine lettuce (chopped)
  • 2 cups spinach or arugula

For the Protein:

  • 1 pound ground beef (80/20 or lean ground turkey)
  • 1 teaspoon salt
  • ½ teaspoon black pepper
  • ½ teaspoon garlic powder
  • ½ teaspoon onion powder
  • 1 teaspoon Worcestershire sauce (optional)

For the Toppings:

  • 1 cup cherry tomatoes (halved)
  • ½ cup diced red onions
  • ½ avocado (sliced)
  • ½ cup shredded cheddar cheese (or dairy-free alternative)
  • ¼ cup dill pickles (sliced)
  • ¼ cup cooked, crumbled bacon (optional)

For the Dressing:

  • ⅓ cup ranch dressing or Thousand Island dressing
  • 1 tablespoon olive oil (for lighter option)


Instructions

  1. Prepare the Protein:
    • In a skillet, heat 1 tablespoon olive oil over medium heat.
    • Add ground beef or turkey to the skillet and season with salt, black pepper, garlic powder, onion powder, and Worcestershire sauce (if using).
    • Cook for 8-10 minutes, stirring occasionally, until fully browned and cooked through. Drain any excess grease.
  2. Prepare the Base:
    • Wash and thoroughly dry the romaine lettuce and spinach. Chop them into bite-sized pieces and divide evenly into 4 serving bowls.
  3. Add Toppings:
    • Layer the bowls with cherry tomatoes, diced red onions, shredded cheese, sliced avocado, pickles, and crumbled bacon (if desired).
  4. Assemble the Burger Bowl:
    • Divide the cooked protein evenly among the bowls, placing it on top of the greens and toppings.
  5. Drizzle with Dressing:
    • Add a drizzle of ranch dressing, Thousand Island, or olive oil over each bowl. Adjust the amount based on personal preference.
  6. Serve and Enjoy:
    • Serve immediately for a fresh and satisfying meal.

Notes

  • Meal Prep Tip: Store ingredients separately to keep the greens crisp. Assemble the bowl just before eating.
  • Customize: Add jalapeños, roasted veggies, or swap the protein with grilled chicken or plant-based alternatives.
  • Dressing Tip: For a keto-friendly option, use olive oil-based dressings or make a homemade avocado dressing.

Irresistible Gluten Free Mozzarella Sticks in 30 Minutes

Print
clock clock iconcutlery cutlery iconflag flag iconfolder folder iconinstagram instagram iconpinterest pinterest iconfacebook facebook iconprint print iconsquares squares iconheart heart iconheart solid heart solid icon
Plated gluten free mozzarella sticks with marinara sauce.

Irresistible Gluten Free Mozzarella Sticks in 30 Minutes


  • Author: Emily
  • Total Time: 30 minutes
  • Yield: 20 mozzarella sticks (serves 4-6) 1x

Description

Crispy on the outside and gooey on the inside, these gluten free mozzarella sticks are the ultimate appetizer or snack! Quick, easy, and made with simple ingredients, this recipe ensures everyone, even those avoiding gluten, can enjoy these cheesy bites of deliciousness.


Ingredients

Scale
  • 10 mozzarella cheese sticks (halved, if needed)
  • 1/2 cup gluten-free flour
  • 1/4 teaspoon garlic powder
  • 1/4 teaspoon onion powder
  • 1/4 teaspoon salt
  • 2 large eggs (beaten)
  • 1 cup gluten-free breadcrumbs (panko-style preferred)
  • Cooking spray or vegetable oil (for frying or air frying)
  • Marinara sauce (for dipping, optional)

Instructions

  1. Slice the mozzarella sticks in half if necessary, then freeze them for at least 20 minutes to firm up.
  2. Prepare a dredging station with three shallow bowls: one for gluten-free flour mixed with garlic powder, onion powder, and salt; one for beaten eggs; and one for gluten-free breadcrumbs.
  3. Roll each cheese stick in the seasoned flour, ensuring it’s fully coated. Next, dip it into the egg wash, and finally, roll it in breadcrumbs. For an extra crispy coating, repeat the egg wash and breadcrumb steps.
  4. Place the breaded sticks on a parchment-lined tray and freeze for another 20 minutes to set the coating.
  5. For Air Fryer: Preheat to 375°F (190°C). Spray the basket lightly with oil and arrange the sticks in a single layer. Air fry for 6-8 minutes, flipping halfway through.
  6. For Oven: Preheat to 400°F (200°C). Arrange the sticks on a wire rack placed over a baking sheet. Bake for 10-12 minutes or until golden brown.
  7. For Frying: Heat 1 inch of oil in a skillet over medium heat. Fry the sticks in small batches for 1-2 minutes per side, then drain on paper towels.
  8. Serve hot with marinara sauce or your favorite dipping sauce.

Notes

  • Double-Coating Tip: Double-coating the sticks with egg wash and breadcrumbs ensures a crispier crust and prevents the cheese from oozing out.
  • Make Ahead: Breaded sticks can be frozen for up to 3 months. Cook directly from frozen when needed.
  • Dipping Sauces: Experiment with ranch, garlic aioli, or buffalo sauce for variety.

Who says gluten free mozzarella sticks can’t be as good ! if not better than the traditional ones? With a perfectly crispy coating and a melty, cheesy center, this quick and easy recipe is bound to become your favorite. Whether you’re hosting a party or snacking solo, these sticks deliver big flavor without the gluten!

Why You’ll Love These Gluten Free Mozzarella Sticks

Perfect for Parties, Snacks, or Game Nights

There’s something magical about a plate of gluten free mozzarella sticks—golden and crispy on the outside, gooey and cheesy on the inside. These sticks are the ultimate crowd-pleaser, whether you’re hosting a party, serving appetizers for game night, or enjoying a casual snack at home. They’re so versatile that they’ll quickly become your go-to recipe for any occasion.

What makes them even better? They’re gluten-free, meaning everyone, including those with dietary restrictions, can indulge without worry. Pair them with your favorite dipping sauces like marinara or ranch, and you’ve got a dish that’ll have your guests asking for seconds or thirds!

Quick, Easy, and Beginner-Friendly

Gluten free mozzarella sticks may sound like a fancy recipe, but don’t let that fool you it’s surprisingly simple to make. With just a few ingredients and steps, you’ll have a plate of crispy, cheesy perfection in no time.

The process is straightforward: coat mozzarella sticks in gluten-free flour, dip them in an egg wash, and roll them in gluten-free breadcrumbs. Fry or bake them to golden perfection, and you’re done! Even if you’re a beginner in the kitchen, this recipe ensures success.

For added convenience, this dish comes together in just 30 minutes, making it ideal for when you’re short on time but still want something delicious.

Family-Approved Gluten-Free Goodness

If you’ve got picky eaters at home, you’ll be happy to know that these gluten free mozzarella sticks are a hit with both kids and adults. The crispy coating and gooey cheese inside make them irresistible, while their bite-sized shape makes them fun to eat.

This recipe is also an excellent way to introduce gluten-free snacks to your family. They won’t even notice the difference because the taste and texture are just as good—if not better—than traditional mozzarella sticks. For a fun twist, let the kids help with breading the sticks. It’s a mess, but it’s also a memory-maker!

Made with Pantry Staple

The best part about making gluten free mozzarella sticks? You probably already have most of the ingredients in your kitchen! Common pantry staples like gluten-free breadcrumbs, gluten-free flour, and mozzarella cheese are all you need to get started.

When choosing breadcrumbs, opt for trusted brands like Ian’s Gluten Free Breadcrumbs, which deliver a perfect crunch without compromising on flavor. Mozzarella sticks from the store or freshly cut mozzarella blocks will both work for this recipe.

Additionally, you can customize the recipe to suit your preferences. Don’t have breadcrumbs? Swap them for almond flour or crushed gluten-free crackers. This flexibility ensures you can always whip up a batch of these delicious sticks whenever the craving hits!

Ingredients and Substitutions for Gluten Free Mozzarella Sticks

The Key Ingredients for Success

To make gluten free mozzarella sticks at home, you’ll need a few simple ingredients that ensure the perfect crispy crust and gooey cheese filling. Here’s what you’ll need:

Ingredients for gluten free mozzarella sticks on a wooden cutting board.
An overhead shot of the essential ingredients for gluten free mozzarella sticks.
  • Mozzarella cheese sticks: Pre-packaged cheese sticks are convenient and melt perfectly, but you can also cut a block of mozzarella into stick shapes.
  • Gluten-free flour: Helps the breading stick to the cheese. Almond flour can be used for a grain-free option.
  • Gluten-free breadcrumbs: These create that signature crispy coating. Opt for seasoned breadcrumbs or panko-style crumbs for extra crunch.
  • Eggs: Essential for binding the breadcrumbs to the cheese.
  • Seasonings: Garlic powder, onion powder, and a pinch of salt enhance the flavor of the breading.

Each ingredient serves a specific role in creating the ideal texture and flavor, so don’t skip any!

Ingredient Substitutions and Alternatives

If you don’t have all the ingredients on hand, don’t worry! This recipe is flexible. Here are some handy substitutions:

  • Breadcrumbs: Swap gluten-free breadcrumbs for crushed gluten-free crackers or cornflakes for added texture.
  • Flour: Use cornstarch or tapioca flour as a replacement if you don’t have gluten-free flour.
  • Cheese: Experiment with different types of cheese sticks, like Colby Jack or pepper jack, for a flavorful twist.

The recipe works beautifully with these alternatives, ensuring that everyone can enjoy gluten free mozzarella sticks regardless of what’s in their pantry.

Choosing the Best Gluten-Free Breadcrumbs

Not all gluten-free breadcrumbs are created equal, so choosing the right one is key to achieving a crispy texture. Some popular options include:

  • Ian’s Gluten Free Breadcrumbs: A trusted brand known for its panko-style crumbs.
  • 4C Gluten Free Crumbs: Light and airy, perfect for frying or baking.

Tools You’ll Need

Making gluten free mozzarella sticks requires basic kitchen tools, most of which you probably already own:

  • Shallow bowls: Perfect for dredging the cheese sticks in flour, egg, and breadcrumbs.
  • Baking tray: Essential for chilling the breaded sticks before cooking.
  • Air fryer or deep fryer: An air fryer is great for a healthier option, while a deep fryer delivers ultimate crispiness.
  • Tongs: Handy for flipping or removing the sticks while frying.

Step-by-Step Guide to Making Gluten Free Mozzarella Sticks

Step-by-step breading process for gluten free mozzarella sticks.
Close-up of the breading process: mozzarella stick being dipped in egg wash and breadcrumbs.

Preparing the Ingredients

The secret to perfect gluten free mozzarella sticks lies in the preparation. Start by cutting mozzarella cheese sticks into halves (if needed) to make them easier to handle. If you’re using a block of mozzarella, slice it into uniform stick shapes about 3-4 inches long.

Next, set up your dredging station. You’ll need three shallow bowls: one for gluten-free flour, one for beaten eggs, and one for gluten-free breadcrumbs. Season the flour and breadcrumbs with garlic powder, onion powder, salt, and pepper for an extra burst of flavor.

Finally, line a baking tray with parchment paper to prevent sticking and make cleanup easier. Trust me, these little steps save time and effort!

The Bread-Crumbing Process

Creating a crispy coating is all about layering. To start, roll each cheese stick in the seasoned flour, ensuring it’s evenly coated. This step helps the egg mixture stick better.

Then, dip the floured stick into the egg wash, letting any excess drip off. Finally, roll it in gluten-free breadcrumbs until completely covered. For extra crunch, repeat the egg and breadcrumb steps once more.

Place the breaded sticks on your prepared tray and refrigerate for at least 20 minutes. This chilling step is crucial—it firms up the coating and prevents the cheese from oozing out during cooking.

Cooking Methods: Air Fryer, Oven, or Frying Pan

Once your gluten free mozzarella sticks are prepped, it’s time to cook them! Here are three popular methods to choose from:

  • Air Fryer: Preheat the air fryer to 375°F (190°C). Lightly spray the basket with oil to prevent sticking. Arrange the sticks in a single layer, ensuring they don’t touch. Cook for 6-8 minutes, flipping halfway through, until golden and crispy.
  • Oven: Preheat your oven to 400°F (200°C). Place the sticks on a wire rack over a baking sheet for even cooking. Bake for 10-12 minutes or until golden brown.
  • Frying Pan: Heat about 1 inch of oil in a frying pan over medium heat. Test the oil by dropping in a breadcrumb—if it sizzles, it’s ready. Fry the sticks in small batches for 1-2 minutes per side, then drain on paper towels.

Each method has its perks: the air fryer is healthier, the oven is hands-off, and frying delivers the ultimate crispiness. Choose what works best for you!

Troubleshooting Common Issues

Making gluten free mozzarella sticks isn’t without its challenges, but don’t worry—most issues are easy to fix.

  • Cheese Leaking Out: If the cheese starts to ooze while cooking, it usually means the breading wasn’t thick enough or the sticks weren’t chilled long enough. Double-coat the sticks and chill them for at least 20 minutes before cooking.
  • Breading Falling Off: This happens when the coating doesn’t stick properly. Make sure each layer (flour, egg, and breadcrumbs) is applied evenly.
  • Not Crispy Enough: If your sticks aren’t as crispy as you’d like, try using panko-style gluten-free breadcrumbs or cooking them a bit longer in the air fryer or oven.

Serving Suggestions and Storage Tips

Plated gluten free mozzarella sticks with marinara sauce.
Freshly baked gluten free mozzarella sticks served with marinara sauce and garnished with parsley.

The Best Dipping Sauces

Gluten free mozzarella sticks are fantastic on their own, but pairing them with the right dipping sauce elevates them to the next level. Classic marinara sauce is always a hit, with its tangy and savory flavor complementing the cheesy goodness. If you prefer something creamy, ranch dressing or garlic aioli are excellent choices.

For a spicier kick, serve them with buffalo sauce or a sriracha mayo blend. Want something a little different? Try a homemade pesto or a sweet-and-spicy chili sauce to surprise your taste buds. Offering a variety of dipping options ensures there’s something for everyone to enjoy!

How to Keep Mozzarella Sticks Warm and Crispy

Serving gluten free mozzarella sticks fresh out of the fryer or oven ensures they stay crispy, but what if you need to keep them warm for a gathering?

The best solution is to place the cooked sticks on a wire rack set over a baking sheet and keep them in an oven preheated to 200°F (93°C). This prevents them from becoming soggy while staying perfectly warm. Avoid covering them with foil, as this traps steam and softens the crust.

If you’re using an air fryer, you can reheat the sticks at 350°F (175°C) for a couple of minutes to restore their crunch before serving.

Storing and Freezing Tips

If you have leftovers (unlikely, but it happens!), gluten free mozzarella sticks can be stored and reheated easily. Place any cooled leftovers in an airtight container and refrigerate for up to three days. To reheat, use an air fryer or oven at 375°F (190°C) until crispy again.

Want to prepare them in advance? You can freeze breaded but uncooked mozzarella sticks for up to three months. Arrange them in a single layer on a baking sheet, freeze until solid, and then transfer them to a freezer-safe bag or container. This way, you’ll always have a quick snack ready to cook.

Creative Ways to Use Leftovers

Leftover gluten free mozzarella sticks don’t have to go to waste—they can be repurposed into other tasty dishes! For instance:

  • Chop them up and toss them into a fresh salad for a crispy, cheesy topping.
  • Add them to a sandwich or wrap for extra texture and flavor.
  • Use them as a unique pizza topping by slicing them into rounds and placing them on a gluten-free crust.
  • Create a fun mozzarella stick casserole by layering them with marinara sauce, pasta, and shredded cheese, then baking until bubbly.

FAQs About Gluten Free Mozzarella Sticks

Are the mozzarella sticks gluten-free?

Yes, this recipe for gluten free mozzarella sticks is completely gluten-free! By using gluten-free breadcrumbs and gluten-free flour, these mozzarella sticks are safe for anyone following a gluten-free diet. Always double-check your ingredient labels to ensure they are certified gluten-free, as cross-contamination can occur during manufacturing.

How do you keep mozzarella sticks from falling apart?

To prevent your gluten free mozzarella sticks from falling apart, it’s important to follow a few simple steps:

  1. Double-coat the cheese sticks: Dipping them twice in egg wash and breadcrumbs creates a sturdy coating that stays intact during cooking.
  2. Chill before cooking: Refrigerating the breaded sticks for at least 20 minutes helps the coating set, minimizing the chances of it falling off.
  3. Handle carefully: Use tongs to gently flip or remove the sticks during cooking to keep the coating intact.

With these tips, your mozzarella sticks will turn out perfectly crispy every time!

Are mozzarella cheese sticks low FODMAP?

Yes, mozzarella cheese sticks are generally considered low FODMAP because mozzarella is low in lactose, which makes it easier to digest for those with FODMAP sensitivities. However, you should always monitor portion sizes, as individual tolerance levels vary. To keep your gluten free mozzarella sticks low FODMAP, ensure that your breadcrumbs and other ingredients are also FODMAP-friendly.

Is Happy Farms mozzarella cheese gluten-free?

Yes, Happy Farms mozzarella cheese is gluten-free, making it an excellent option for your gluten free mozzarella sticks. However, it’s always a good idea to read the label and check for any potential changes to ingredients or manufacturing processes. When in doubt, look for a gluten-free certification on the packaging to ensure it meets your dietary needs.

Conclusion

These gluten free mozzarella sticks are the perfect combination of crispy and gooey, offering a classic snack that everyone can enjoy. From choosing the best gluten-free breadcrumbs to mastering the double-coating process, you now have all the tips and tricks to create mozzarella sticks that rival any restaurant’s version. Whether you’re serving them as an appetizer, snack, or party dish, these cheesy bites are sure to be a hit.

7 Secrets to Perfect Skillet Chicken Thighs with Schmaltzy Tomatoes

Sometimes, the simplest recipes are the most satisfying. Skillet chicken thighs with schmaltzy tomatoes is proof of that! Juicy, flavorful chicken thighs meet slow-cooked tomatoes that melt into a rich, velvety sauce, all made in a single pan. The secret weapon? Schmaltz a touch of rendered chicken fat that takes the flavor to a whole new level.

Why Skillet Chicken Thighs with Schmaltzy Tomatoes Are a Game-Changer

What Makes This Recipe Special?

Skillet chicken thighs with schmaltzy tomatoes isn’t just a meal it’s a flavor-packed experience that strikes the perfect balance between simplicity and sophistication. The rich, golden crust on the chicken thighs pairs beautifully with the buttery, jam-like texture of the tomatoes. This dish is all about elevating humble ingredients into something unforgettable.

What’s more, it’s a one-skillet recipe, which means fewer dishes to wash and more time to savor your meal. Whether you’re cooking for your family or impressing guests, this recipe delivers bold flavors with minimal effort. It’s comfort food with a gourmet twist, proving that good cooking doesn’t have to be complicated.

The Role of Schmaltz in Cooking

If you’ve never cooked with schmaltz before, you’re in for a treat. Schmaltz, or rendered chicken fat, is the secret ingredient that gives skillet chicken thighs with schmaltzy tomatoes its luxurious, deep flavor. As the chicken thighs sear in the skillet, their fat renders, transforming into a golden liquid that infuses the tomatoes with richness.

Not only does schmaltz enhance the sauce’s texture, but it also locks in the chicken’s natural juices, keeping every bite moist and flavorful. For those new to using schmaltz, it’s a versatile ingredient that can be used in everything from roasting vegetables to frying eggs.

The Appeal of One-Skillet Recipes

Who doesn’t love a recipe that’s as practical as it is delicious? With skillet chicken thighs with schmaltzy tomatoes, you’ll cook everything in one pan, making it perfect for busy weeknights. From browning the chicken thighs to simmering the tomatoes, every step builds flavor in the same skillet.

One-skillet meals also save time on cleanup and help retain all the delicious juices and caramelized bits. The result? A dish that’s rich, cohesive, and bursting with layers of flavor. Plus, fewer dishes mean more time to enjoy the meal with your loved ones.

Why Chicken Thighs Are the Star

When it comes to chicken, thighs reign supreme in this recipe. Unlike leaner cuts like chicken breasts, thighs stay tender and juicy even after cooking. The bone-in, skin-on variety is especially ideal for skillet chicken thighs with schmaltzy tomatoes because the skin crisps up beautifully while the bone helps the meat cook evenly.

Chicken thighs also have a natural richness that pairs perfectly with the tartness of the tomatoes and the indulgence of schmaltz. So, if you’re looking for a cut of meat that’s forgiving, flavorful, and easy to cook, chicken thighs are the way to go.

Ingredients You’ll Need for Skillet Chicken Thighs with Schmaltzy Tomatoes

Ingredients for skillet chicken thighs with schmaltzy tomatoes, including chicken thighs, fresh tomatoes, garlic, and herbs.
Everything you need to make skillet chicken thighs with schmaltzy tomatoes, from fresh produce to juicy chicken thighs.

The Role of Chicken Thighs

Chicken thighs are the star of this dish, bringing a perfect balance of flavor and texture to skillet chicken thighs with schmaltzy tomatoes. Bone-in, skin-on thighs create the crispy skin you crave while ensuring the meat remains juicy during cooking. Unlike chicken breasts, thighs are forgiving and retain moisture even if slightly overcooked.

Pro tip: Look for high-quality chicken thighs with minimal added moisture or sodium to let the natural flavors shine. For more chicken recipe inspiration, check out this guide on garlic parmesan chicken.

Tomatoes: Schmaltzy and Sweet

The tomatoes in this dish serve as the flavorful backbone, transforming into a luscious, jammy sauce. Ripe, fresh varieties like cherry or Roma tomatoes work best for their sweetness and vibrant color. When paired with rendered chicken fat, or schmaltz, they develop a rich, buttery flavor that elevates the entire dish.

Don’t have fresh tomatoes? No problem! Use high-quality canned diced tomatoes as a substitute, but drain them well to prevent a watery sauce.

Seasonings and Aromatics

This dish thrives on simplicity. The aromatics—garlic and onions—meld beautifully with the schmaltz and tomatoes, creating a depth of flavor that’s hard to resist. Seasonings like freshly cracked black pepper, kosher salt, and a pinch of red pepper flakes provide balance, while fresh herbs like thyme or parsley add brightness.

Adjust seasoning to taste as you go; remember, the schmaltz amplifies the flavors, so less is often more!

Optional Add-Ins for Extra Flavor

Take your skillet chicken thighs with schmaltzy tomatoes to the next level with these optional ingredients:

  • White wine or chicken broth: Adds acidity and enhances the sauce’s complexity.
  • Lemon zest or juice: Brings a refreshing brightness to the dish.
  • Red pepper flakes: For those who love a bit of heat, a pinch of flakes adds a spicy kick.

These extras aren’t essential, but they allow you to customize the dish to your taste, making it even more special.

Step-by-Step Guide to Cooking Skillet Chicken Thighs with Schmaltzy Tomatoes

Step 1: Prepping the Chicken Thighs

Preparation is key to nailing skillet chicken thighs with schmaltzy tomatoes. Start by patting the chicken thighs dry with paper towels—this step is essential for achieving that irresistible crispy skin. Next, generously season both sides of the thighs with salt and freshly cracked black pepper. If you like a little heat, a sprinkle of red pepper flakes can add a subtle kick.

Remember, seasoning early helps the flavors penetrate the meat while ensuring a flavorful crust. Meanwhile, let the chicken sit at room temperature for about 20 minutes to ensure even cooking later.

Step 2: Searing the Chicken

Chicken thighs searing in a cast iron skillet with bubbling schmaltz and sautéed garlic.
Golden-brown chicken thighs crisping up in a cast iron skillet with bubbling schmaltz and aromatics.

Heat a large cast iron skillet over medium-high heat and add a small amount of olive oil. Once the skillet is hot and shimmering, place the chicken thighs skin-side down. Resist the urge to move them around—let them cook undisturbed for 6–8 minutes to develop that golden, crispy crust.

You’ll know it’s time to flip when the chicken releases naturally from the skillet. After flipping, sear the other side for 4–5 minutes. By this point, the rendered fat from the chicken creates the schmaltz that gives this dish its signature flavor.

Step 3: Making the Schmaltzy Tomato Sauce

Once the chicken thighs are golden brown, remove them from the skillet and set them aside. In the same skillet, drain excess fat, leaving just enough schmaltz to coat the bottom. Add minced garlic and diced onions, sautéing until fragrant and softened.

Next, toss in the tomatoes. Stir occasionally, letting them cook down into a thick, jammy sauce. If you want to elevate the sauce, consider adding a splash of white wine or chicken broth to deglaze the pan and capture those delicious browned bits. Season with a pinch of salt and pepper, adjusting to taste.

Step 4: Combining and Finishin

Nestle the seared chicken thighs back into the skillet, ensuring the skin stays above the tomato sauce to keep it crispy. Reduce the heat to low, cover the skillet, and let the dish simmer for about 10 minutes. This step ensures the chicken cooks through while soaking up the rich flavors of the schmaltzy tomatoes.

For the finishing touch, garnish with freshly chopped parsley or thyme for a pop of color and added flavor. Serve the skillet chicken thighs with schmaltzy tomatoes straight from the pan for a rustic, family-style presentation.

Tips for Perfect Skillet Chicken Thighs with Schmaltzy Tomatoes

The Secret to Crispy Chicken Thighs

Achieving perfectly crispy chicken thighs is all about technique. To make your skillet chicken thighs with schmaltzy tomatoes stand out, start by ensuring the skin is as dry as possible before cooking. Patting it dry with paper towels helps the skin crisp up rather than steam.

Next, use medium-high heat when searing the thighs in a cast iron skillet. This allows the skin to render its fat slowly, creating the golden, crackling crust we all love. Remember, patience is key—don’t move the chicken until the skin releases naturally from the pan.

Balancing the Flavors of Schmaltzy Tomatoes

The sauce is the heart of skillet chicken thighs with schmaltzy tomatoes. To create a balanced flavor, it’s essential to start with ripe, sweet tomatoes. If your tomatoes taste too acidic, a small pinch of sugar can work wonders.

Adding aromatics like garlic and onions enhances the sauce’s depth, while a splash of white wine or chicken broth adds brightness. Herbs such as thyme or parsley bring freshness, creating a well-rounded sauce that complements the richness of the chicken.

Troubleshooting Common Mistakes

Even the best recipes can go sideways if you’re not careful. Avoid these common pitfalls when preparing skillet chicken thighs with schmaltzy tomatoes:

  • Overcrowding the skillet: This traps moisture and prevents the chicken from crisping. Use a large skillet or cook in batches if necessary.
  • Skipping the rest period: After removing the chicken from the skillet, let it rest for a few minutes. This helps retain its juices and prevents it from drying out.
  • Using low-quality tomatoes: Bland or underripe tomatoes can result in a lackluster sauce. Opt for fresh, ripe tomatoes or high-quality canned options for the best results.

Serving Suggestions for Schmaltzy Chicken Thighs

Skillet chicken thighs with schmaltzy tomatoes pairs beautifully with a variety of sides. Here are a few ideas:

Skillet chicken thighs with schmaltzy tomatoes garnished with parsley and served with crusty bread.
A rustic serving of skillet chicken thighs with schmaltzy tomatoes, complete with fresh herbs and bread.
  • Crusty bread: Perfect for soaking up the rich, tomatoey sauce.
  • Garlic mashed potatoes: A creamy complement to the bold flavors of the dish.
  • Steamed rice or quinoa: A simple, neutral base that lets the chicken and sauce shine.
  • Roasted vegetables: For a complete, balanced meal, serve the chicken with roasted carrots, asparagus, or zucchini.

FAQs

How does Gordon Ramsay cook chicken thighs?

Gordon Ramsay emphasizes achieving crispy skin and juicy meat when cooking chicken thighs. He begins by seasoning the thighs generously with salt and freshly cracked black pepper. Using a hot, oven-safe skillet, he sears the chicken skin-side down in a small amount of olive oil until golden and crispy.

After flipping the chicken, he adds aromatics like garlic, fresh thyme, and butter to the pan. To finish, he places the skillet in a preheated oven at 375°F, allowing the chicken to cook evenly while soaking up the flavors of the aromatics. This method creates a dish similar to skillet chicken thighs with schmaltzy tomatoes, focusing on crispy skin and bold flavors.

What cooking method is best for chicken thighs?

The best method for cooking chicken thighs depends on your goal. For maximum flavor and crispy skin, pan-searing in a skillet is ideal. This technique locks in juices while creating a golden crust. For even cooking with minimal effort, oven-roasting is a great option. It’s particularly effective when you’re cooking larger batches.

For skillet chicken thighs with schmaltzy tomatoes, combining searing and simmering in one pan is the best approach. It ensures the chicken thighs are flavorful and tender while infusing the schmaltzy tomato sauce with richness.

How to get more flavor in chicken thighs?

To make chicken thighs even more flavorful, focus on seasoning, cooking techniques, and additional ingredients:

  • Season generously: Salt, pepper, and spices like smoked paprika or garlic powder enhance the natural flavor of chicken.
  • Marinate: A simple marinade with olive oil, lemon juice, garlic, and herbs adds depth.
  • Cook with schmaltz: Using rendered chicken fat, as in skillet chicken thighs with schmaltzy tomatoes, amplifies the dish’s richness.
  • Use aromatics and herbs: Ingredients like garlic, onions, thyme, and parsley infuse the chicken and sauce with savory, herbaceous notes.

The key is to layer flavors throughout the cooking process for the most satisfying result.

Is it better to bake or pan-sear chicken thighs?

Both methods have their advantages, but the choice depends on the dish you’re preparing. Pan-searing is ideal for creating crispy skin and caramelized flavors, making it perfect for recipes like skillet chicken thighs with schmaltzy tomatoes. Baking, on the other hand, is a hands-off method that ensures even cooking and works well for larger quantities.

For this recipe, pan-searing the chicken thighs first helps render the fat, creating the schmaltz that enhances the tomato sauce. Simmering the chicken in the skillet afterward locks in moisture and melds all the flavors together.

Conclusion

Skillet chicken thighs with schmaltzy tomatoes is a dish that checks all the boxes—rich, flavorful, and incredibly easy to make. The crispy, golden chicken thighs combined with a luscious tomato sauce infused with schmaltz create a meal that feels indulgent yet approachable.

Now it’s your turn! Grab your skillet, gather your ingredients, and bring this recipe to life. And don’t forget to pair it with a side of crusty bread or creamy mashed potatoes for a complete and satisfying meal. If you’re looking for more inspiration, check out our other delicious one-skillet recipes to keep the creativity flowing in your kitchen!

Easy Black Pepper Angus Steak Recipe in 30 Minutes

There’s something magical about a perfectly cooked steak. Add freshly cracked black pepper, a touch of garlic, and buttery richness, and you’ve got yourself a winner black pepper Angus steak. This dish brings out the best in Angus beef, known for its exceptional marbling and tenderness, making every bite a savory delight.

What Makes Black Pepper Angus Steak Special?

A Flavorful Twist on Classic Steak

Black pepper Angus steak cooking in a cast iron skillet with butter
A sizzling black pepper Angus steak cooking in a cast iron skillet with butter and garlic.

Steak is already a favorite for its rich, savory flavor, but black pepper Angus steak takes it to another level. The boldness of freshly cracked black pepper complements the natural tenderness of premium Angus beef, creating a flavor profile that’s both simple and sophisticated. Unlike heavily marinated steaks, this dish highlights the steak’s quality, letting the natural juices and buttery finish shine.

The secret lies in the contrast of textures the slightly crisp, peppery crust giving way to a juicy, melt-in-your-mouth center. This perfect balance makes black pepper Angus steak a go-to choice for steak lovers who crave something bold yet refined. Whether it’s for a special occasion or just a regular weeknight treat, this dish never fails to impress.

Ingredients That Bring It All Together

Every great dish starts with the right ingredients, and black pepper Angus steak is no exception. At its core, this recipe is all about simplicity using a handful of quality items to create unforgettable flavors. Here’s what you’ll need:

  • Angus beef steak: Known for its marbling and tenderness, Angus beef ensures a juicy and flavorful bite. Ribeye or sirloin cuts work perfectly.
  • Freshly cracked black pepper: The bold, slightly spicy kick of fresh black pepper elevates the dish and creates a beautiful crust.
  • Garlic and soy sauce: These pantry staples add depth and a touch of umami to the steak.
  • Unsalted butter: Melts into a rich sauce, enhancing the natural flavor of the beef.

A tip: Always use fresh ingredients, especially the black pepper, for maximum flavor. If you’re curious about why fresh pepper is so important, this article on how to choose quality black pepper dives deeper into the subject.

The Key to Tender Angus Steak

When it comes to black pepper Angus steak, the secret to its tenderness is the cut and preparation of the beef. Angus beef is prized for its marbling, which helps retain moisture during cooking, resulting in a juicy, flavorful steak. But even the best steak can turn tough if overcooked or mishandled!

To keep your steak tender:

  • Always let it come to room temperature before cooking. Cold steaks can cook unevenly, leaving the center underdone and the outside overcooked.
  • Use a meat thermometer to ensure you hit the perfect doneness (130°F for medium-rare).
  • Let the steak rest for at least 5 minutes after cooking. This allows the juices to redistribute, ensuring every bite is succulent.

By paying attention to these details, you’ll ensure that your black pepper Angus steak is as tender and delicious as it looks.

Quick and Simple Prep for Busy Cooks

One of the best things about black pepper Angus steak is how quick and easy it is to prepare. You don’t need any fancy tools or hours of prep time just a skillet, a few pantry staples, and a love for bold flavors.

Here’s how to make the prep process as smooth as possible:

  1. Pat your steak dry: Removing excess moisture ensures the pepper and seasoning stick to the surface, creating that signature crust.
  2. Season generously: Don’t skimp on the black pepper! A good coating creates the steak’s rich, flavorful exterior.
  3. Preheat your skillet: Use a cast iron skillet if possible. Its even heat distribution is perfect for getting that golden-brown sear.

Step-by-Step Black Pepper Angus Steak Recipe

Ingredients

Every successful dish begins with the right ingredients, and the black pepper Angus steak is no exception. Here’s what you’ll need:

  • Angus beef steaks (8 oz each) – Known for their marbling and tenderness, Angus beef is the perfect choice for this recipe.
  • Freshly cracked black pepper – Adds bold flavor and a crunchy crust to the steak.
  • Olive oil – Helps create a golden-brown sear.
  • Garlic (minced) – Infuses the dish with aromatic depth.
  • Soy sauce and Worcestershire sauce – Provide a touch of umami and balance to the bold flavors.
  • Unsalted butter – Elevates the steak with a luxurious, buttery finish.

For an even more detailed breakdown of how to select high-quality steak, check out this guide to choosing the perfect beef cut.

Preparation: Getting Ready for Success

Before cooking, setting up properly ensures your black pepper Angus steak is as flawless as it can be:

Seasoning Angus steak with freshly cracked black pepper
Freshly cracked black pepper adds bold flavor to the Angus steak during preparation.
  1. Pat your steak dry: This simple step helps the seasoning stick and creates a beautiful crust.
  2. Generously season with salt and black pepper: Don’t hold back—the more evenly you coat the steak, the better the flavor.
  3. Preheat your skillet or grill: A hot surface is key to achieving that perfect sear.
  4. Mise en place: Gather all your ingredients to avoid scrambling mid-cooking.

Tip: If time allows, let the steak sit at room temperature for 20–30 minutes before cooking. This step ensures even cooking from edge to center.

Cooking Instructions

  1. Heat the skillet: Place a cast iron skillet over high heat and add olive oil. Wait until the oil shimmers, signaling it’s hot enough.
  2. Sear the steak: Lay the steak in the pan, pressing it gently for maximum contact. Sear for 2–3 minutes per side to form a golden-brown crust.
  3. Add aromatics: Toss in minced garlic, soy sauce, and Worcestershire sauce. Swirl them around to create a flavorful glaze.
  4. Butter baste: Lower the heat slightly and add butter to the pan. Use a spoon to continually baste the steak with the melted butter for added richness.
  5. Check for doneness: Use a meat thermometer 130°F for medium-rare is ideal.
  6. Rest the steak: Transfer it to a cutting board and let it rest for 5 minutes. This step ensures all the juices stay locked in.

Serving Suggestions

  • Pair your black pepper Angus steak with creamy mashed potatoes or roasted vegetables for a classic meal.
  • Feeling adventurous? Serve it over a bed of garlic butter rice. You can explore this one-pot rice hack for an easy pairing.
  • Don’t forget a crisp green salad or a side of crusty bread to soak up the rich, buttery sauce.

Tips for Perfect Black Pepper Angus Steak

The Right Way to Season Steak

Seasoning is the foundation of any great steak, and for black pepper Angus steak, it’s especially crucial. A generous coating of freshly cracked black pepper isn’t just for flavor—it creates a crust that locks in the juices while giving the steak its signature bold kick.

When seasoning:

  • Use coarsely ground black pepper rather than pre-ground pepper for maximum flavor and texture.
  • Don’t add salt too early, as it can draw out moisture from the steak. Instead, salt it just before cooking.
  • Pat the steak dry before seasoning to help the pepper adhere better.

By taking a few extra steps with your seasoning, your black pepper Angus steak will have a perfect balance of spicy crust and juicy interior.

The Perfect Sear: Temperature is Key

Achieving a beautiful sear is what gives your steak that golden-brown crust and smoky, caramelized flavor. The trick? High heat and a steady hand.

  1. Use a cast iron skillet: It retains heat better than most pans and creates an even sear.
  2. Preheat until smoking: Wait for the skillet to lightly smoke before adding the steak. This ensures the surface is hot enough to lock in the juices.
  3. Don’t overcrowd the pan: If you’re cooking multiple steaks, leave space between them. Overcrowding lowers the temperature and can lead to steaming rather than searing.

Transition tip: “Remember, the sizzle when the steak hits the pan is a sign you’re doing it right!”

Common Mistakes to Avoid

Even the most delicious recipes can go wrong with simple missteps. Avoid these pitfalls when preparing your black pepper Angus steak:

  • Overcooking the steak: Use a meat thermometer to hit the perfect doneness (130°F for medium-rare).
  • Skipping the rest period: Always rest your steak for at least 5 minutes after cooking. This prevents the juices from spilling out when you slice it.
  • Using too much oil: A light coating is enough, as too much can interfere with the crust formation.

By steering clear of these common mistakes, you’ll get a tender, flavorful steak every time.

Variations for Dietary Preferences

One of the best things about black pepper Angus steak is its versatility. With a few tweaks, you can adapt this dish to suit different diets or flavor preferences:

Plated black pepper Angus steak with roasted vegetables and garlic butter
A plated black pepper Angus steak with a juicy medium-rare interior, served with roasted vegetables and garlic butter.
  • Dairy-free: Skip the butter and use olive oil or ghee for basting.
  • Low-sodium: Substitute regular soy sauce with a low-sodium option or tamari.
  • Gluten-free: Tamari is also a great gluten-free alternative to soy sauce.
  • Add a spicy kick: Sprinkle a pinch of cayenne or red pepper flakes with the black pepper for an extra layer of heat.

For more ideas on customizing recipes, check out our Garlic Parmesan Chicken and Potatoes for inspiration.

FAQs

What is black pepper Angus steak?

Black pepper Angus steak is a savory, flavorful dish featuring premium Angus beef seasoned with freshly cracked black pepper. The black pepper creates a spicy crust that enhances the natural richness of the steak, while the tender Angus beef provides a juicy, melt-in-your-mouth texture. Often paired with simple ingredients like garlic, soy sauce, and butter, this steak is a restaurant-quality dish you can easily make at home. It’s perfect for anyone who loves bold, peppery flavors with a gourmet twist.

What is in the black pepper Angus steak at Panda Express?

The black pepper Angus steak at Panda Express is a signature stir-fry dish that combines tender Angus beef slices with crisp vegetables like bell peppers and onions. It’s coated in a savory black pepper sauce that has a slightly sweet and tangy kick, making it a favorite on their menu. If you’re looking to recreate the dish at home, you can use similar ingredients and add a splash of soy sauce for an extra umami punch.

What is the best way to cook Angus steak?

The best way to cook Angus steak is to sear it in a hot cast iron skillet. Here’s a simple step-by-step:

  1. Bring the steak to room temperature: This ensures even cooking.
  2. Season generously: Use freshly cracked black pepper and salt for a flavorful crust.
  3. Preheat your skillet: Heat it until it’s smoking slightly for a perfect sear.
  4. Sear each side for 2–3 minutes: This creates a golden-brown crust.
  5. Check for doneness: Use a meat thermometer (130°F for medium-rare).
  6. Rest the steak: Let it sit for 5 minutes to lock in the juices.

For added richness, you can baste the steak with butter during the last minute of cooking

Is Black Angus good for steak?

Yes, Black Angus beef is an excellent choice for steak. It’s prized for its superior marbling, which makes the meat tender, juicy, and full of flavor. The marbling ensures that the steak stays moist during cooking, making it ideal for dishes like black pepper Angus steak. Whether you prefer ribeye, sirloin, or tenderloin cuts, Black Angus delivers a premium steak experience every time.

Conclusion

Black pepper Angus steak is more than just a recipe—it’s a celebration of bold flavors and quality ingredients. From the peppery crust to the juicy, tender Angus beef, every bite is a testament to how simple ingredients can create a gourmet dish. You’ve learned what makes this steak special, the secrets to achieving the perfect sear, and tips for customizing it to suit your tastes.

Whether you’re making this dish for a weeknight dinner or a special occasion, it’s a guaranteed hit. Remember, the key lies in using freshly cracked black pepper, a hot skillet, and high-quality Angus beef. By following these steps, you’ll create a steak that rivals any steakhouse meal.

So, why wait? Grab your skillet, season your Angus steak, and experience the magic of black pepper Angus steak right in your own kitchen. Don’t forget to explore more delicious recipes on our site for inspiration and ideas to elevate your cooking!

The Best Rice Hack Recipe You’ll Try This Week!

Rice hack recipe can make cooking rice perfectly so much easier! This ultimate guide shares simple tips to transform your meals with minimal effort. Whether you’re new to cooking or a seasoned pro, these hacks are time-saving, useful, and absolutely delicious.

The Secret to Perfectly Fluffy Rice Every Time

Cooking rice doesn’t have to be tricky or intimidating it’s simpler than you think with a few go-to techniques. This Rice Hack Recipe will help you get perfectly fluffy rice, whether you’re using the classic stovetop method, a rice cooker, or even your oven. From easy tips like the finger method to avoiding sticky rice disasters, you’ll learn how to save time and improve every meal. Ready to elevate your rice game? Let’s dive in!

How to Cook Rice with the Finger Method

If you’re not into fiddling with measuring cups, the finger method is your new best friend. It’s an incredibly easy and reliable way to cook rice, especially for jasmine or basmati varieties. Here’s how it works:

Using the finger method to measure water for cooking rice.
The finger method is an easy way to measure water for perfect rice.
  1. Rinse your rice thoroughly. This washes off extra starch that can make your rice clumpy or sticky. Just give it a few rinses until the water runs clear.
  2. Measure water with your finger. Place your fingertip on the surface of the rice, then add water until it reaches the first knuckle of your index finger.
  3. Cook and steam. Bring the rice to a boil, cover it, and lower the heat. Once it’s done, let it steam for about 10 minutes to finish cooking.

Pro Tip: The finger method works best with long-grain rice, but for short-grain or sticky rice, you might need to stick with exact measurements for the perfect texture.

How to Avoid Sticky Rice

Nobody likes clumpy, mushy rice—unless you’re making sticky rice on purpose! Thankfully, a few simple steps can help you avoid this common cooking mishap:

  • Rinse it well. Washing your rice thoroughly is key. It removes the excess starch that makes rice clump together.
  • Get the water ratio right. For most rice types, a 1:1.5 ratio (1 cup of rice to 1.5 cups of water) works like a charm.
  • Fluff it up. After steaming, fluff the rice gently with a fork instead of stirring, which can crush the grains.

If you accidentally overdo it and end up with sticky rice, don’t worry! Spread it out on a plate or baking sheet to cool and dry a bit. It might not be perfect, but it’s a quick save for most dishes.

Rice Cooker Hacks for Effortless Cooking

A rice cooker is a game-changer if you’re looking for consistency and ease. With just a little creativity, you can take your rice from basic to bold:

  • Infuse flavor as it cooks. Swap water for chicken or veggie broth, or toss in garlic cloves, a bay leaf, or even a dash of soy sauce for added depth.
  • Use the delay timer. Most rice cookers let you set a start time, so you can have fresh, hot rice ready exactly when you need it.
  • Get creative with rice blends. Mix jasmine rice with wild rice or quinoa for interesting textures and flavors.

If you’re new to rice cookers, experiment with these tips and discover how versatile this appliance can be!

Alternative Ways to Cook Rice

No rice cooker? No problem! Here are a few other methods that work just as well:

  1. Oven-Baked Rice:
    • Combine your rice, boiling water, and a pinch of salt in an oven-safe dish. Cover tightly with foil and bake at 350°F for 30 minutes. This method is super low-maintenance and always delivers evenly cooked rice.
  2. Instant Pot Rice:
    • Use the “Rice” setting, or go with a 1:1 ratio of rice to water. Cook for 5 minutes, then let the pressure release naturally for 5 minutes before fluffing.
  3. Microwave Rice:
    • Mix rice and water in a microwave-safe bowl, cover loosely, and microwave on high for about 10 minutes. Stir halfway through for even cooking.

Each method has its perks, so try them out to see which one fits your cooking style best!

Flavorful Rice Hacks to Elevate Any Meal

Rice doesn’t have to play second fiddle on your plate it can be so much more than a bland side dish. With a few clever tweaks, you can transform this humble grain into something vibrant, delicious, and even the star of the meal.

Infuse Bold Flavors Right from the Start

The easiest way to upgrade plain rice is to replace water with something more flavorful. Broth, coconut milk, or even tomato juice can work wonders.

  • Broth: Use chicken, beef, or veggie broth instead of water. For example, jasmine rice cooked in chicken broth becomes rich and savory, perfect for pairing with roasted meats or stir-fries.
  • Coconut Milk: If you’re making a tropical-inspired dish, swap out water for coconut milk. A pinch of sugar and a squeeze of lime can bring out its creamy, slightly sweet flavor.
  • Tomato Juice: For a Spanish-style rice, cook it in tomato juice with a sprinkle of cumin and paprika. It’s vibrant, smoky, and pairs beautifully with tacos or grilled veggies.

One-Pot Wonders: Easy Dinners, Big Flavor

If you’re short on time but still want a flavorful dinner, one-pot rice recipes are a lifesaver. The best part? The rice soaks up all the seasonings, so every bite is packed with flavor.

Rice Hack Recipe: One-pot rice dish with chicken and vegetables.
A vibrant one-pot rice dish with vegetables and chicken, ready to serve.

Quick Recipe: Chicken and Rice Casserole

  1. Sauté onions, peppers, and garlic in a large pot or Dutch oven.
  2. Add diced chicken, uncooked rice, broth, and seasonings like paprika, thyme, or turmeric.
  3. Cover and let it simmer until the rice is tender. Finish with a sprinkle of fresh herbs for a pop of color and flavor.

For something with a little spice, check out Cajun Sausage and Rice Tips. This smoky, zesty dish shows how rice can easily carry bold flavors while still being comforting and hearty.

Give Leftover Rice a Makeover

Don’t toss your leftover rice! It’s a blank canvas for creating quick, delicious dishes. Here are a few ideas to breathe new life into yesterday’s grains:

  • Fried Rice: Heat up your rice with soy sauce, sesame oil, scrambled eggs, and your favorite veggies or protein. Add pineapple chunks and shrimp for a sweet-and-savory tropical twist.
  • Rice Pancakes: Combine cooked rice with an egg, breadcrumbs, and shredded cheese to make a batter. Fry in a pan until golden for a crispy, satisfying snack.
  • Stuffed Peppers: Mix leftover rice with ground beef, beans, and spices, then stuff it into bell peppers. Bake until tender for a cozy, flavorful dinner.

Boost Nutrition Without Losing Flavor

Rice is great on its own, but why not use it as a base to sneak in extra nutrients? Here are a few ways to make your rice dishes healthier and heartier:

  • Mix in Quinoa or Lentils: Combining rice with quinoa or lentils adds protein, fiber, and a nice textural contrast. It’s perfect for grain bowls or hearty salads.
  • Incorporate Veggies: Toss in finely chopped spinach, kale, or grated carrots while the rice cooks. They’ll blend right in, giving you a nutrient boost without extra work.
  • Try Brown or Wild Rice: Switch things up by using brown or wild rice instead of white. They’re higher in fiber and have a nutty flavor that pairs beautifully with roasted vegetables or savory stews.

Quick and Creative Rice Hacks for Leftovers

Leftover rice doesn’t have to sit in your fridge feeling forgotten—it’s actually a goldmine for quick, creative dishes! Whether you’re looking for snacks, desserts, or easy lunches, this Rice Hack Recipe will inspire you to transform yesterday’s rice into something fresh, exciting, and delicious. Let’s get started!

Turn Leftover Rice into Delicious Snacks

Leftover rice is the perfect base for quick, satisfying snacks that are as versatile as they are delicious. Whether you’re hosting friends or just need a midday bite, these ideas come together in no time:

Rice Hack Recipe: Crispy rice fritters with dipping sauce.
Golden-brown rice fritters served with a dipping sauce for a quick snack.
  • Rice Balls (Onigiri): Mix your rice with a splash of soy sauce or furikake (a Japanese seasoning blend). Shape it into balls or triangles and fill them with goodies like tuna, avocado, or pickled veggies. These are perfect for lunchboxes or snacks on the go!
  • Crispy Rice Fritters: Combine your rice with shredded cheese, breadcrumbs, and an egg to form a batter. Shape into small patties, then fry until golden and crispy. Serve with a dipping sauce like garlic aioli or sweet chili for a flavor-packed treat.

These snacks are so easy to make that you might find yourself cooking extra rice just to have leftovers!

Turn Leftover Rice into Sweet Treats

If you’ve never tried using rice for desserts, you’re in for a treat! With a little creativity, you can transform plain rice into indulgent sweets that feel like a total upgrade:

  • Rice Pudding: Simmer leftover rice with milk, sugar, and a splash of vanilla. Top with cinnamon, nutmeg, or even a handful of raisins for a cozy, creamy dessert that’s a total classic.
  • Mango Sticky Rice: Take your rice on a tropical vacation! Simmer it with coconut milk and sugar, then pair it with fresh mango slices for a Thai-inspired dessert that’s sweet, creamy, and refreshing.

Make Quick Lunches with Leftover Rice

Leftover rice makes an ideal base for quick and satisfying lunches that are both light and filling. These ideas are perfect for busy days when you need something delicious but easy:

  • Lettuce Wraps: Mix your rice with chopped veggies, soy sauce, and your favorite protein (like tofu or grilled chicken). Spoon it into crisp lettuce leaves and drizzle with hoisin or peanut sauce for a flavorful, handheld meal.
  • Buddha Bowls: Start with a base of rice and top with roasted vegetables, a boiled egg, and a dollop of hummus or tahini dressing. Sprinkle on some seeds or nuts for a bit of crunch, and you’ve got a colorful, nutrient-packed lunch in minutes.

With these ideas, lunch doesn’t have to be boring and leftover rice will always have a purpose.

Save Leftover Rice for Later

If you’re not ready to use your rice right away, don’t worry it’s easy to save it for future meals. Proper storage and reheating are key to making sure your rice tastes as good as when you first cooked it:

  • Freezing Leftover Rice: Spread the rice out on a baking sheet to cool completely, then transfer it to an airtight container or freezer bag. Frozen rice reheats beautifully in the microwave—just add a splash of water to bring back its moisture.
  • Make-Ahead Portions: Divide leftover rice into individual portions and store them in the fridge. These pre-measured servings are perfect for meal prepping or quick dinners during the week.

Budget-Friendly Rice Hacks for Every Pantry

Rice isn’t just a pantry staple it’s a budget-friendly hero in the kitchen. Affordable, versatile, and endlessly adaptable, rice can stretch meals, add variety, and help you whip up flavorful dishes without spending a fortune. With this Rice Hack Recipe, you’ll learn how to make the most of this humble ingredient while keeping your meals both delicious and cost-effective.

Stretch Your Meals with Rice

When you need to feed a crowd (or stretch your grocery budget), rice is the perfect solution. It makes dishes more filling and helps you get the most out of every ingredient.

  • Add Rice to Soups and Stews: Toss cooked rice into soups, stews, or even chili. It thickens the dish, makes it heartier, and helps stretch your ingredients further without sacrificing flavor.
  • Bulk Up Meat Dishes: Mix cooked rice with ground beef, turkey, or even beans to create meatloaf, meatballs, or stuffed peppers. It reduces the amount of meat you need while keeping the dish satisfying and flavorful.

Make Your Own Rice Mixes

Forget the boxed rice mixes from the store—they’re expensive and often loaded with sodium and preservatives. Making your own at home is not only cheaper but also healthier.

  • DIY Flavored Rice Mixes: Combine uncooked rice with dried herbs, bouillon powder, and spices like garlic powder, paprika, or turmeric. Store your mix in an airtight container, and cook it with water or broth whenever you need a quick, flavorful side dish.
  • Add Texture with Other Grains: Mix rice with grains like quinoa, barley, or bulgur for a more interesting texture and extra nutrients. This combo works especially well in grain bowls or as a hearty base for salads.

Stock Up for Emergency Meals

Rice’s long shelf life makes it a pantry essential for emergency meals or last-minute dinners. With just a few other staples, you can turn rice into something quick, comforting, and nutritious.

  • Store It Right: Keep uncooked rice in an airtight container in a cool, dry spot. White rice can last for years, while brown rice (which has more natural oils) should be used within six months or stored in the freezer to keep it fresh longer.
  • Pair It with Pantry Staples: Combine rice with canned beans, frozen veggies, or jarred sauces for an easy meal when you’re running low on fresh ingredients. For example, black beans, rice, and salsa make a quick, flavorful dish with almost no effort.

Use Rice for Budget-Friendly Meal Prep

Rice is a meal prep MVP, helping you save money and time throughout the week. It’s flexible enough to pair with just about anything, so your meals never get boring.

  • Cook in Bulk: Make a big batch of rice at the start of the week and portion it out into containers. Pair it with different proteins, veggies, and sauces to keep things fresh and interesting.
  • Mix Up the Flavors: Start with a plain base and change up the seasonings or toppings for each meal. Add soy sauce and sesame oil for an Asian-inspired bowl, or mix in tomato paste, garlic, and oregano for a Mediterranean twist.

FAQs About Rice Hacks

What is the Rice Hack Recipe method?

The Rice Hack Recipe method is all about simple, clever tricks that make cooking rice foolproof and more enjoyable whether you’re a kitchen newbie or a seasoned pro. Think techniques like the finger method to measure water without tools, pre-cooking and freezing rice for busy days, or swapping water for broth to instantly boost flavor. These rice hacks save time, reduce waste, and help you make consistently delicious rice every time.

What is the 5-5-5 rule for rice?

The 5-5-5 rule is a game-changing technique for cooking rice in an Instant Pot:

  1. Cook the rice on high pressure for 5 minutes.
  2. Let it naturally release pressure for another 5 minutes.
  3. Do a quick pressure release for the remaining time.

This method guarantees perfectly fluffy, evenly cooked rice without any guesswork, making it a favorite for those who love efficiency and great results.

What is the 123 rice rule?

The 123 rice rule is an easy guideline for cooking rice on the stovetop:

  • 1 cup of rice
  • 2 cups of water
  • 3 teaspoons of salt or seasoning (optional, based on your taste)

It’s perfect for beginners and works well with most long-grain rice varieties. If you’re diving into rice hack recipes, this rule is a handy go-to for achieving that perfect balance of moisture and texture.

Does the rice finger trick always work?

The rice finger trick—measuring water by placing your finger on top of the rice and filling the pot up to your first knuckle—is a tried-and-true hack, but it’s not foolproof for every type of rice. It works best with long-grain or medium-grain rice, like jasmine or basmati, where water absorption is consistent.

For short-grain rice, sticky rice, or recipes that need precise ratios, you might want to pair the finger trick with a more exact method, like the 123 rice rule, to get the best results.

Conclusion

Cooking perfect rice doesn’t have to be complicated. With the tips and tricks from this rice hack recipe guide, you’ll turn this pantry staple into the star of your meals. Whether you’re using the finger method, making flavorful one-pot dishes, or transforming leftovers into creative snacks and desserts, rice will become your go-to ingredient for versatile and budget-friendly cooking.

Print
clock clock iconcutlery cutlery iconflag flag iconfolder folder iconinstagram instagram iconpinterest pinterest iconfacebook facebook iconprint print iconsquares squares iconheart heart iconheart solid heart solid icon
Bowl of perfectly fluffy rice garnished with fresh herbs.

Perfectly Fluffy Rice Hack Recipe


  • Author: Emily
  • Total Time: 23 minutes
  • Yield: 4 servings 1x

Description

Learn how to cook perfectly fluffy rice every time with this foolproof rice hack recipe. Using simple methods and tips, you’ll achieve delicious, evenly cooked rice that’s ready to pair with any meal.


Ingredients

Scale
  • 1 cup jasmine or basmati rice (or any long-grain rice)
  • 1 ½ cups water or broth (for added flavor)
  • ½ teaspoon salt (optional, depending on the broth used)
  • 1 teaspoon butter or oil (optional for richer flavor)

Instructions

  1. Rinse the rice thoroughly: Place the rice in a fine-mesh strainer and rinse under cold water until the water runs clear. This removes excess starch, preventing stickiness.
  2. Measure the water: Use the 123 rice rule (1 cup of rice, 2 cups of water for short-grain, or 1 ½ cups water for long-grain rice). You can also use the finger method: place your fingertip on top of the rice, and the water level should reach the first knuckle.
  3. Combine ingredients: In a medium pot, add the rinsed rice, water or broth, salt, and butter or oil (if using). Stir gently to combine.
  4. Bring to a boil: Place the pot over medium heat and bring the mixture to a rolling boil.
  5. Simmer and cover: Reduce the heat to low, cover the pot with a tight-fitting lid, and let it simmer for 15–18 minutes (depending on rice type). Avoid lifting the lid during this time.
  6. Rest the rice: Once the rice has absorbed all the liquid, remove the pot from the heat and let it sit, covered, for 5 minutes.
  7. Fluff and serve: Use a fork to gently fluff the rice, separating the grains. Serve hot as a side dish or use it as a base for other recipes.

Notes

  • For added flavor, replace water with chicken, vegetable, or beef broth.
  • To prevent rice from sticking, add a splash of oil before cooking.
  • This recipe works best for jasmine or basmati rice but can be adjusted for brown rice (increase cooking time to 40 minutes and water to 2 cups).
  • Leftover rice can be frozen for up to 2 months and reheated with a splash of water in the microwave.

5 Secrets to the Best Smoked Sausage Cajun Alfredo

Looking for a quick, comforting dinner that doesn’t skimp on flavor? Look no further! This smoked sausage Cajun Alfredo is the perfect mix of smoky, spicy, and creamy goodness.

What Makes Smoked Sausage Cajun Alfredo Irresistible?

When it comes to smoked sausage Cajun Alfredo, what truly sets it apart is its rich blend of creamy textures and bold, zesty flavors. This dish isn’t just another pasta recipe it’s an explosion of smoky, spicy, and savory goodness that feels like a warm Southern embrace on your plate. Below, we’ll dive into the key elements that make this dish a favorite for so many, from the ingredients you choose to the way the flavors come together.

The Perfect Balance of Flavors

What makes smoked sausage Cajun Alfredo so special is its ability to combine different flavor profiles into one harmonious dish. The smoky richness of the sausage pairs beautifully with the creamy Alfredo sauce, while the Cajun seasoning adds a bold, spicy kick. These layers of flavor keep every bite exciting!

If you’re worried about it being too spicy, don’t fret. The creaminess of the Alfredo sauce helps balance the heat, making this dish versatile for all palates. Want a deeper smoky taste? Opt for Andouille sausage, which is a traditional Cajun favorite. On the other hand, if you’re looking for something milder, kielbasa works just as well. The result is a dish that’s bold but still comforting—a true win for your dinner table.

Choosing the Right Smoked Sausage

The sausage you pick for your smoked sausage Cajun Alfredo plays a huge role in the overall flavor of the dish. A high-quality smoked sausage brings that deep, smoky taste that pairs perfectly with the creamy sauce. Traditional Cajun recipes often use Andouille sausage, known for its bold spice and authentic Louisiana roots.

If you’re not a fan of too much heat, consider milder smoked sausages or even turkey sausage for a lighter option. To ensure you’re choosing the best product, look for sausages with natural casings and minimal fillers. For those curious about trusted brands.

Cajun Seasoning Secrets

No smoked sausage Cajun Alfredo is complete without the perfect Cajun seasoning. This blend of spices—usually a mix of paprika, garlic powder, onion powder, cayenne pepper, and oregano—is what gives the dish its signature kick. The beauty of Cajun seasoning is its flexibility; you can make it as spicy or mild as you like.

For a more personalized flavor, try making your own Cajun seasoning at home. Combine equal parts paprika and garlic powder, then adjust the cayenne for your preferred level of heat. Store-bought blends like Tony Chachere’s are also fantastic options for convenience and authenticity.

One essential tip? Add the seasoning gradually while cooking the sauce, tasting as you go. This ensures you don’t overpower the dish while keeping that rich, flavorful punch intact.

Why Alfredo Sauce is the Star

At the heart of this dish lies its creamy Alfredo sauce, which acts as the perfect canvas for the bold Cajun flavors and smoky sausage. Made with heavy cream, butter, parmesan cheese, and garlic, Alfredo sauce is rich, velvety, and utterly irresistible.

What makes homemade Alfredo sauce superior to store-bought versions is its freshness and simplicity. Freshly grated parmesan melts beautifully into the sauce, creating a smooth texture that coats every piece of pasta. Plus, making the sauce from scratch allows you to control the flavor—add a hint of extra garlic, adjust the thickness, or even toss in a touch of lemon juice for brightness.

How to Make Smoked Sausage Cajun Alfredo

Creating a perfect smoked sausage Cajun Alfredo is simpler than you think! With just a few ingredients and a little preparation, you’ll be serving up a restaurant-quality dish that’s creamy, smoky, and bursting with bold Cajun flavors. Let’s break it down step by step.

Ingredients You’ll Need

The success of this recipe starts with gathering the right ingredients. Here’s a quick rundown of what you’ll need for a delicious smoked sausage Cajun Alfredo:

Ingredients for smoked sausage Cajun Alfredo displayed on a countertop
Essential ingredients for making smoked sausage Cajun Alfredo.
  • 12 oz smoked sausage, sliced into rounds
  • 8 oz pasta, such as fettuccine or penne
  • 2 cups heavy cream
  • 1 cup freshly grated parmesan cheese
  • 2 tsp Cajun seasoning (adjust to your taste)
  • 2 cloves garlic, minced
  • 2 tbsp butter
  • Optional: fresh parsley for garnish

Step 1: Prep the Ingredients

Start by prepping all your ingredients to make the cooking process smoother. Slice the smoked sausage into bite-sized rounds, mince the garlic, and measure out the cream and parmesan cheese.

If you’re using dried pasta, cook it according to the package instructions. Be sure to cook it al dente, as it will continue to cook slightly when mixed with the sauce. Reserve about ½ cup of pasta water before draining—it’s a handy trick for adjusting the sauce’s consistency later.

Step 2: Cook the Smoked Sausage

 Smoked sausage cooking in a skillet with garlic and Cajun seasoning
Smoked sausage cooking to perfection with garlic and Cajun seasoning

In a large skillet, melt the butter over medium heat. Once it’s sizzling, add the sliced smoked sausage. Let it cook for about 4-5 minutes, stirring occasionally, until it’s browned and slightly crispy around the edges.

Why this step matters: Browning the sausage not only enhances its smoky flavor but also adds a slight caramelization that makes the dish extra flavorful.

Remove the sausage from the skillet and set it aside, leaving any rendered fat in the pan. This fat will infuse even more flavor into your Cajun Alfredo sauce.

Step 3: Make the Cajun Alfredo Sauce

Using the same skillet, sauté the minced garlic in the sausage drippings for about 30 seconds, or until fragrant. Be careful not to burn it.

Slowly pour in the heavy cream, stirring constantly to deglaze the pan and pick up all those flavorful bits from the sausage. Let the cream simmer gently over low heat for 2-3 minutes.

Gradually whisk in the parmesan cheese, allowing it to melt into the sauce and create a velvety texture. Sprinkle in the Cajun seasoning, adjusting the amount to suit your spice preference. Stir until everything is well combined.

Variations and Substitutions for Smoked Sausage Cajun Alfredo

One of the best things about smoked sausage Cajun Alfredo is how adaptable it is to suit your tastes and dietary needs. Whether you’re looking to swap out ingredients, adjust the spice level, or create a lighter version, this dish offers endless possibilities. Let’s explore some creative variations and substitutions to make it truly your own.

Protein Alternatives

If smoked sausage isn’t your favorite or you’re looking to try something new, there are plenty of protein options that work beautifully in this recipe:

  • Chicken: Grilled or sautéed chicken breast adds a lean yet flavorful twist. Simply season the chicken with Cajun spices before cooking to keep the dish cohesive.
  • Shrimp: Want to elevate your smoked sausage Cajun Alfredo? Toss in plump, juicy shrimp for a seafood-forward variation. Sauté the shrimp in butter and Cajun seasoning for maximum flavor.
  • Vegetarian Option: Skip the meat altogether and use hearty vegetables like mushrooms or zucchini. They’ll soak up the Cajun-spiced sauce while adding texture and freshness.

Pasta Options

While fettuccine is a classic choice, experimenting with different types of pasta can give this dish a whole new personality:

  • Gluten-Free Pasta: For those with dietary restrictions, there are plenty of great gluten-free options like brown rice or chickpea pasta. They hold up well in creamy sauces.
  • Short Pasta: Penne, rigatoni, or farfalle (bowtie pasta) are fun alternatives that work well for soaking up the Alfredo sauce.
  • Whole Wheat Pasta: If you’re aiming for a slightly healthier option, whole wheat pasta adds a nutty flavor and extra fiber to your smoked sausage Cajun Alfredo.

Spice Level Adjustments

Cajun dishes are known for their bold, spicy flavors, but not everyone enjoys the same heat level. Luckily, you can easily tweak the spice to match your preference:

  • Turn Down the Heat: Reduce the amount of Cajun seasoning and omit cayenne pepper if you’re cooking for kids or those with milder palates. A splash of milk can also mellow out the spices.
  • Crank It Up: For heat lovers, double the Cajun seasoning or sprinkle in red pepper flakes. You can even drizzle some hot sauce over the finished dish for an extra kick.
  • Add Flavor, Not Spice: If you want the rich, smoky flavors without too much heat, smoked paprika is an excellent addition.

Lighter Substitutions

If you’re looking to enjoy smoked sausage Cajun Alfredo while keeping it a bit lighter, these substitutions can help reduce calories and fat without compromising taste:

  • Half-and-Half Instead of Cream: Use half-and-half in place of heavy cream for a slightly less rich sauce. Add a touch of cornstarch to thicken it, if needed.
  • Turkey Sausage: Swap regular smoked sausage for turkey sausage to cut down on fat while still enjoying that smoky flavor.
  • Olive Oil Over Butter: Replace butter with olive oil to create a healthier base for the sauce.

For more meal ideas that celebrate bold flavors, check out our recipe for Cajun Sausage and Rice Tips. It’s another quick and hearty option you’re bound to love!

Tips for Perfecting Your Smoked Sausage Cajun Alfredo

Creating the ultimate smoked sausage Cajun Alfredo comes down to mastering a few simple techniques. From crafting the smoothest sauce to nailing the perfect pasta texture, these tips will ensure your dish turns out flawless every time. Let’s dive into the best practices that elevate this recipe to restaurant-quality.

Finished smoked sausage Cajun Alfredo in a skillet with parsley garnish
Serve smoked sausage Cajun Alfredo straight from the skillet for ultimate flavor.

Avoiding a Gritty Sauce

One of the most important aspects of smoked sausage Cajun Alfredo is achieving a silky, creamy sauce. Nobody wants a gritty or clumpy Alfredo, so here are some essential tips:

  • Use Freshly Grated Parmesan: Pre-shredded cheese often contains anti-caking agents that prevent smooth melting. Opt for freshly grated parmesan to ensure a velvety sauce.
  • Cook on Low Heat: Alfredo sauce can curdle if cooked too quickly or over high heat. Keep the heat low and stir constantly to maintain its creamy texture.
  • Incorporate Cheese Gradually: Add parmesan slowly while whisking to prevent it from clumping. This method also helps the cheese blend seamlessly into the sauce.

Balancing the Spice Level

The beauty of smoked sausage Cajun Alfredo lies in its ability to please a variety of palates, whether you love a fiery kick or prefer milder flavors. Balancing the spice level ensures everyone at the table enjoys the dish:

  • Start Small: When adding Cajun seasoning, begin with 1 teaspoon and taste as you go. You can always add more but can’t take it out once it’s in!
  • Counteract Heat: If the dish becomes too spicy, add a splash of heavy cream or milk to tone down the heat. A sprinkle of sugar can also help balance overly intense flavors.
  • Layer the Spices: Instead of adding all the seasoning at once, sprinkle a little while cooking the sausage and then more in the sauce. This builds a richer, more complex flavor.

Achieving the Perfect Pasta Texture

The pasta is just as crucial as the sauce in creating a standout smoked sausage Cajun Alfredo. Perfectly cooked pasta enhances the dish’s overall texture and flavor:

  • Cook Pasta Al Dente: Follow the package instructions and cook the pasta until it’s firm to the bite. Remember, it will absorb some of the sauce and soften slightly when combined.
  • Salt the Water Generously: Adding salt to the boiling water ensures the pasta is well-seasoned from the start, which enhances the final dish.
  • Don’t Overcrowd the Pot: Use plenty of water to give the pasta room to cook evenly. Crowding the pot can lead to sticky, unevenly cooked noodles.

Enhancing the Flavor Profile

If you’re looking to add extra depth and richness to your smoked sausage Cajun Alfredo, consider these flavor-boosting tips:

  • Add Garlic: While the recipe includes garlic, you can double it or roast it beforehand for a sweeter, more robust flavor.
  • Include a Splash of Lemon Juice: A squeeze of lemon brightens the dish and balances the richness of the Alfredo sauce.
  • Top with Fresh Herbs: Sprinkle chopped parsley or chives over the finished dish for a pop of color and a fresh, herby note.
  • Incorporate Smoked Paprika: Adding smoked paprika alongside the Cajun seasoning enhances the smoky elements of the sausage.

FAQs

What wine pairs with Cajun sausage pasta?

When pairing wine with Cajun sausage pasta like smoked sausage Cajun Alfredo, balance is key. The creamy Alfredo sauce pairs beautifully with a crisp white wine like Sauvignon Blanc, which cuts through the richness. If you prefer red wine, go for a light-bodied option such as Pinot Noir to complement the smoky sausage and Cajun spices without overpowering the dish. For something bubbly, a dry Prosecco or sparkling wine adds a refreshing contrast to the creamy and spicy flavors.

What can I do with leftover Cajun sausage pasta?

Transform your leftover smoked sausage Cajun Alfredo into delicious new dishes! Here are a few ideas:

  • Cajun Pasta Bake: Toss the leftovers in a baking dish, top with shredded cheese, and bake until bubbly.
  • Stuffed Bell Peppers: Use the pasta as a filling for halved bell peppers, bake, and enjoy a creative twist.
  • Soup Base: Add chicken broth to leftover pasta to create a creamy Cajun-inspired soup.
  • Reheat with Care: When reheating, add a splash of cream or milk to keep the sauce smooth and prevent it from drying out.

Cajun cuisine is known for its bold, hearty flavors and dishes packed with spices. Here are some iconic Cajun favorites:

  • Jambalaya: A one-pot dish with rice, sausage, seafood, and vegetables.
  • Gumbo: A flavorful stew made with a roux, sausage, shrimp, or chicken.
  • Étouffée: A thick seafood or meat dish served over rice, often featuring crawfish.
  • Red Beans and Rice: A comforting dish made with slow-cooked beans, sausage, and Cajun seasoning.
  • Boudin: A unique Cajun sausage stuffed with rice, pork, and spices.
    These dishes share the same bold, flavorful roots that make smoked sausage Cajun Alfredo such a beloved meal.

What is Alfredo sauce made of?

Traditional Alfredo sauce is made from a simple combination of butter, heavy cream, and freshly grated parmesan cheese. Garlic is often added for extra flavor, and some recipes include a pinch of nutmeg for warmth. The sauce is cooked slowly over low heat to achieve its creamy, velvety texture. In dishes like smoked sausage Cajun Alfredo, Cajun seasoning is added to the Alfredo sauce to give it a bold and spicy twist, making it even more flavorful.

Conclusion

Smoked sausage Cajun Alfredo is the ultimate fusion of creamy, smoky, and spicy flavors, offering a dish that’s both comforting and bold. By mastering the balance of flavors, choosing the right smoked sausage, and following our tips for perfecting your Alfredo sauce, you can create a restaurant-quality meal right in your kitchen.

This recipe is versatile and customizable, whether you want to add shrimp, experiment with pasta options, or adjust the spice level to suit your taste. Pair it with a crisp salad, buttery garlic bread, or even a glass of Sauvignon Blanc to elevate the experience. And if you have leftovers, don’t worry there are plenty of creative ways to enjoy them again!

Print
clock clock iconcutlery cutlery iconflag flag iconfolder folder iconinstagram instagram iconpinterest pinterest iconfacebook facebook iconprint print iconsquares squares iconheart heart iconheart solid heart solid icon
Plate of smoked sausage Cajun Alfredo with creamy pasta and parsley

Smoked Sausage Cajun Alfredo


  • Author: Emily
  • Total Time: 30 minutes
  • Yield: 4 servings 1x

Description

A rich and creamy pasta dish bursting with bold Cajun flavors, smoky sausage, and velvety Alfredo sauce. Perfect for a quick, comforting dinner that’s sure to impress your family and friends!


Ingredients

Scale
  • 12 oz smoked sausage, sliced into rounds
  • 8 oz fettuccine or penne pasta
  • 2 tbsp butter
  • 2 cloves garlic, minced
  • 2 cups heavy cream
  • 1 cup freshly grated parmesan cheese
  • 2 tsp Cajun seasoning (adjust to taste)
  • ½ tsp smoked paprika (optional)
  • Salt and black pepper to taste
  • 2 tbsp fresh parsley, chopped (for garnish)

Instructions

  1. Cook the pasta according to package instructions until al dente. Reserve ½ cup of pasta water, then drain and set aside.
  2. In a large skillet, melt the butter over medium heat. Add the smoked sausage slices and cook for 4–5 minutes, stirring occasionally, until browned and slightly crispy. Remove the sausage and set aside.
  3. In the same skillet, sauté the minced garlic for about 30 seconds, until fragrant. Be careful not to burn it.
  4. Lower the heat to medium-low and slowly pour in the heavy cream, stirring to deglaze the pan and incorporate the sausage drippings.
  5. Gradually whisk in the parmesan cheese, stirring constantly until the sauce is smooth and creamy.
  6. Add the Cajun seasoning, smoked paprika (if using), and a pinch of salt and pepper. Stir to combine, then taste and adjust the seasoning as needed.
  7. Return the cooked sausage to the skillet, stirring to coat it in the sauce.
  8. Toss the cooked pasta into the skillet, combining it thoroughly with the sauce and sausage. If the sauce is too thick, add a splash of the reserved pasta water until the desired consistency is reached.
  9. Serve immediately, garnished with fresh parsley.

Notes

  • For added protein, consider mixing in cooked shrimp or grilled chicken.
  • To reduce the spice level, start with 1 tsp of Cajun seasoning and taste before adding more.
  • Leftovers can be reheated in a skillet with a splash of milk or cream to restore the sauce’s creamy texture.

Master Filet Mignon in Air Fryer with These 6 Expert Tricks

Filet mignon in air fryer is the easiest way to enjoy a tender, juicy steak with a perfectly seared crust all in just minutes at home!

Why Air Frying Is Perfect for Filet Mignon

Cooking filet mignon in air fryer is a fantastic way to enjoy a luxurious steak without the hassle of grilling or pan-searing. The air fryer’s unique ability to circulate hot air ensures quick, consistent cooking with a beautifully seared crust. Let’s explore why this method works so well and why it’s becoming the go-to choice for home cooks.

How Air Fryers Enhance Steak Cooking

Air fryers are more than just trendy kitchen gadgets—they’re a steak lover’s dream. Unlike traditional stovetop methods, where heat can be uneven, an air fryer evenly cooks your steak from all sides. The circulating hot air ensures that your filet mignon gets a perfectly golden-brown crust while locking in the juices.

Another major perk is speed. While grilling or oven-roasting can take up to 20-30 minutes, filet mignon in air fryer cooks in as little as 8-10 minutes. Plus, cleanup is a breeze—no greasy pans or smoky kitchen!

Why Filet Mignon Stands Out

When it comes to steak, filet mignon is in a league of its own. This premium cut, taken from the beef tenderloin, is prized for its buttery texture and mild flavor. It’s the perfect choice for air frying because it doesn’t require heavy seasoning or marinades to shine.

Compared to cuts like ribeye or strip steak, filet mignon is leaner with very little fat marbling. This makes it ideal for those who prefer a tender, melt-in-your-mouth steak without the chewiness of fattier cuts.

Fun Fact: The name “filet mignon” is French for “dainty fillet,” which reflects its small, elegant size and premium quality.

Health Benefits of Cooking Filet Mignon in Air Fryer

One of the best things about making filet mignon in air fryer is how much healthier it is. Unlike pan-frying, which often requires a generous amount of butter or oil, air frying only needs a light coating to achieve that perfect sear.

This method allows you to enjoy the natural flavors of the steak without the extra grease, making it a great choice for those watching their fat intake. According to the USDA’s guidelines, lean cuts like filet mignon are an excellent source of high-quality protein without being too heavy on calories.

Convenience and Versatility

Cooking filet mignon in air fryer isn’t just easy—it’s versatile too. Whether you like your steak rare, medium, or well-done, an air fryer gives you complete control over the doneness. By adjusting the temperature and cooking time, you can customize your steak to your exact preference.

Beyond that, air fryers work great for preparing sides like roasted vegetables or crispy potatoes alongside your steak. With one handy appliance, you can create an entire meal without juggling multiple pans.

Preparing Filet Mignon for the Air Fryer

A perfectly cooked filet mignon in air fryer starts with proper preparation. From choosing the right cut to seasoning like a pro, these steps set the foundation for success. Let’s break it down so you can achieve that mouthwatering result every time.

Selecting the Best Filet Mignon for Air Frying

The quality of your steak is the first step to success. Choose USDA Prime or Choice grade filet mignon for the best flavor and tenderness. These cuts are typically well-trimmed, with minimal fat and no connective tissue, which is ideal for air frying.

For air frying, look for steaks that are 1.5 to 2 inches thick. Thinner cuts may overcook too quickly, while thicker ones can cook unevenly. Your local butcher or grocery store can usually provide filet mignon cut to this thickness.

Pro Tip: If you’re unsure about the grade, ask your butcher for recommendations or check labels carefully for USDA classifications.

Seasoning Like a Pro

Raw filet mignon being seasoned on a wooden cutting board
Filet mignon being seasoned with salt, pepper, and olive oil for air frying.

A well-seasoned filet mignon doesn’t need much to shine. Keep it simple with:

  • Kosher salt and freshly cracked black pepper for a classic flavor.
  • Optional: Add a sprinkle of garlic powder or brush the steak lightly with melted butter for extra richness.

Make sure to season your steak generously on both sides and let it sit at room temperature for 20-30 minutes. This allows the flavors to penetrate and ensures even cooking.

Preheating the Air Fryer

One of the keys to a perfect filet mignon in air fryer is starting with a hot basket. Preheat your air fryer to 400°F (200°C) for at least 3-5 minutes. This ensures your steak begins cooking immediately, giving it that gorgeous crust we all love.

Unlike ovens, air fryers heat up quickly, so preheating won’t take long. While waiting, you can finish prepping your steak or prepare side dishes like roasted potatoes or steamed vegetables.

Tips for Prepping Filet Mignon in Air Fryer

Before placing your filet mignon in the air fryer, take these quick steps:

  1. Pat the steak dry with paper towels to remove excess moisture, which helps the surface crisp up.
  2. Brush with a thin layer of olive oil or avocado oil to prevent sticking and enhance browning.
  3. Double-check that the air fryer basket is clean and dry to avoid unwanted flavors from previous use.

Cooking Filet Mignon in Air Fryer

The moment of truth—cooking your filet mignon in air fryer. With the preparation steps complete, it’s time to let the air fryer work its magic. This section provides a clear, step-by-step guide, ensuring your steak is cooked to perfection every time.

Filet mignon steaks cooking in an air fryer with a meat thermometer
Filet mignon steaks halfway through cooking in an air fryer, temperature being checked.

Step-by-Step Cooking Instructions

Cooking filet mignon in air fryer is simple, but following each step carefully makes all the difference. Here’s how to do it:

  1. Preheat the air fryer to 400°F (200°C). Preheating ensures even cooking and creates that beautifully seared crust.
  2. Place the seasoned filet mignon in the air fryer basket. Be sure to leave space between the steaks for proper air circulation.
  3. Cook the steaks for 4-5 minutes per side for medium-rare. Use tongs to flip the steak halfway through.
  4. Check the internal temperature with a meat thermometer:
    • Rare: 125°F
    • Medium-Rare: 130°F
    • Medium: 140°F
    • Well-Done: 160°F
  5. Remove the steaks and let them rest for at least 5 minutes before serving. Resting locks in the juices, making each bite tender and flavorful.

Cooking Times for Different Doneness Levels

One of the great advantages of using an air fryer is its precision. With a little adjustment, you can cook your filet mignon in air fryer to match anyone’s preferred doneness.

  • Rare: 3-4 minutes per side (125°F)
  • Medium-Rare: 4-5 minutes per side (130°F)
  • Medium: 5-6 minutes per side (140°F)
  • Medium-Well: 6-7 minutes per side (150°F)
  • Well-Done: 7-8 minutes per side (160°F)

These times are based on a 1.5-inch thick filet. For thinner steaks, reduce the time by 1-2 minutes per side.

Why Flipping the Steak Matters

Flipping your steak halfway through cooking may seem unnecessary, but it’s crucial when cooking filet mignon in air fryer. The hot air circulates throughout the basket, but flipping ensures both sides get an even sear.

Additionally, flipping minimizes the risk of overcooking one side while the other side stays underdone. Use tongs for flipping—never a fork—as puncturing the steak lets precious juices escape.

Using a Meat Thermometer for Accuracy

A meat thermometer is your best friend when cooking filet mignon in air fryer. Without one, it’s easy to overcook or undercook this premium cut. Insert the thermometer into the thickest part of the steak, avoiding the edges, for the most accurate reading.

If you don’t own a meat thermometer, consider investing in one. It’s an essential tool for all types of cooking, not just steak. Many affordable options are available online or at your local kitchen store.

For more tips on cooking other types of beef dishes, check out our guide on beef chuck eye steak. It’s packed with insights to help you explore more mouthwatering recipes.

Troubleshooting Common Issues

Even with a straightforward method like cooking filet mignon in air fryer, a few hiccups might occur. Whether it’s an overcooked steak or a less-than-crispy crust, these troubleshooting tips will help you fix common problems and ensure every steak turns out perfect.

Why Is My Filet Mignon Overcooked

Overcooking filet mignon in air fryer happens when the steak is left in too long or the temperature is too high. Air fryers work quickly, so even an extra minute can push your steak past your desired doneness.

How to Fix It:

  • Always use a meat thermometer to check the internal temperature and remove the steak as soon as it hits your target (e.g., 130°F for medium-rare).
  • For future cooks, reduce the cooking time by 1-2 minutes and test the doneness halfway through.

Why Is the Crust Not Crispy Enough?

A crisp crust is one of the hallmarks of a well-cooked filet mignon, but it’s not always guaranteed in an air fryer. If your steak’s surface isn’t as crispy as you’d like, the issue might be moisture or improper preheating.

How to Fix It:

  • Pat the steak dry with paper towels before seasoning to remove excess moisture, which can prevent browning.
  • Make sure to preheat the air fryer to 400°F for at least 3-5 minutes. This helps the steak sear quickly when it hits the hot basket.
  • Lightly brush the steak with olive oil or butter before cooking to encourage browning.

What If My Steak Cooks Unevenly?

Uneven cooking can occur if the steak isn’t placed correctly in the air fryer basket or if it’s too thick. Without proper airflow, one side might cook faster than the other.

How to Fix It:

  • Always flip the steak halfway through cooking to ensure both sides are evenly exposed to circulating hot air.
  • Place the steak in the center of the basket, leaving enough space around it for air to flow freely.
  • For thicker cuts, consider cutting the filet in half to ensure even doneness.

The Steak Is Too Dry—What Went Wrong?

Dry steaks are a common issue when the cooking time is too long or the filet mignon isn’t allowed to rest. This can result in juices escaping, leaving the steak less tender.

How to Fix It:

  • Stick to the recommended cooking times for filet mignon in air fryer based on thickness and doneness preferences.
  • Let the steak rest for at least 5 minutes after removing it from the air fryer. This allows the juices to redistribute and prevents them from spilling out when you cut into the steak.

Serving and Pairing Suggestions

Cooking filet mignon in air fryer is just the beginning. The right sides, sauces, and plating elevate this dish from ordinary to extraordinary. Whether you’re hosting a dinner party or enjoying a cozy night in, these serving and pairing ideas will enhance the experience.

Plated filet mignon with garlic mashed potatoes and asparagus
Filet mignon served with garlic mashed potatoes, asparagus, and a red wine reduction.

Classic Side Dishes

Pairing filet mignon with the right sides brings balance to your meal. Here are a few timeless options:

  • Garlic Mashed Potatoes: The creamy texture and rich garlic flavor complement the tenderness of the steak perfectly.
  • Roasted Vegetables: Air fryer Brussels sprouts, carrots, or asparagus add a touch of crispiness and a pop of color to your plate.
  • Buttery Dinner Rolls: Soft, warm rolls are perfect for soaking up any juices or sauces from the steak.

If you’re looking for recipes, check out our guide on garlic bread rolls for a delicious accompaniment.

Elevate with Sauces

A flavorful sauce can transform your filet mignon in air fryer into a gourmet masterpiece. Here are a few tried-and-true options:

  • Garlic Herb Butter: A simple mixture of melted butter, minced garlic, and fresh herbs like parsley or thyme.
  • Red Wine Reduction: A savory sauce made by simmering red wine, shallots, and beef stock until it thickens.
  • Peppercorn Sauce: Creamy and slightly spicy, this classic steak sauce adds depth to every bite.

Plating Your Filet Mignon

Presentation matters, even for a casual meal. A beautifully plated steak not only looks appetizing but also enhances the overall dining experience. Here’s how to plate like a pro:

  1. Start with a clean, white plate to make the steak the star of the dish.
  2. Place the filet slightly off-center and arrange sides like mashed potatoes or roasted veggies around it.
  3. Drizzle a bit of sauce over the steak and garnish with fresh herbs like parsley or rosemary for a polished look.

Wine and Beverage Pairings

The right beverage pairing can enhance the flavors of your filet mignon in air fryer. Here are some recommendations:

  • Red Wine: A full-bodied red like Cabernet Sauvignon or Merlot pairs beautifully with the richness of filet mignon.
  • Whiskey or Bourbon: For something bolder, a glass of whiskey on the rocks complements the smoky, caramelized flavors of the steak.
  • Sparkling Water with Lemon: If you’re keeping things alcohol-free, sparkling water with a hint of lemon cleanses the palate between bites.

Storing and Reheating Filet Mignon

Cooking filet mignon in air fryer isn’t just about the initial experience—it’s also important to know how to store and reheat your leftovers properly. By following these tips, you can maintain the steak’s flavor and texture for future enjoyment.

How to Store Leftover Filet Mignon

Proper storage ensures that your filet mignon stays fresh and safe to eat for several days.

  1. Cool It First: Allow your steak to cool to room temperature before storing it. Placing a hot steak directly in the fridge can create excess moisture, which affects its texture.
  2. Wrap It Well: Use aluminum foil, plastic wrap, or an airtight container to keep air out. This prevents your steak from drying out or absorbing other food odors.
  3. Refrigerate Promptly: Store the wrapped filet mignon in the fridge for up to 3-4 days.

For longer storage, freezing is an excellent option. Place your wrapped steak in a freezer-safe bag, label it with the date, and store it for up to 3 months.

How to Reheat Filet Mignon in an Air Fryer

Reheating filet mignon in air fryer is the best way to retain its tenderness and crisp crust. Unlike microwaving, which can make the steak rubbery, the air fryer evenly reheats without sacrificing quality.

Steps to Reheat in an Air Fryer:

  1. Preheat the air fryer to 350°F (175°C).
  2. Place the steak in the basket and heat for 2-3 minutes. Check for warmth using a meat thermometer or by cutting into the center.
  3. If needed, flip the steak halfway through reheating to ensure even heating.

Can You Freeze Filet Mignon?

Yes, you can freeze filet mignon in air fryer without compromising its quality—as long as it’s stored properly. Freezing is a great way to enjoy your steak later, whether it’s raw or cooked.

Steps to Freeze Cooked Filet Mignon:

  1. Wrap the steak tightly in plastic wrap or aluminum foil.
  2. Place the wrapped steak in a freezer-safe bag, squeezing out as much air as possible.
  3. Label the bag with the date and freeze for up to 3 months.

When ready to eat, thaw the steak overnight in the fridge, then reheat it in the air fryer following the steps above.

Tips to Avoid Overcooking When Reheating

Reheating steak can be tricky—too much heat and you’ll lose the tenderness that makes filet mignon so special. Follow these tips to avoid overcooking:

  • Use a Meat Thermometer: Reheat until the steak reaches an internal temperature of 120-130°F (for medium-rare).
  • Don’t Overheat: Keep the air fryer temperature between 300°F and 350°F to gently warm the steak without drying it out.
  • Add Moisture: A small pat of butter or a light drizzle of oil prevents the steak from becoming dry during reheating.

FAQs

1. How to cook filet mignon in air fryer?

Cooking filet mignon in air fryer is simple and quick, yet it delivers steakhouse-quality results. Start by preheating your air fryer to 400°F (200°C). Season your filet mignon generously with salt, pepper, and optional spices like garlic powder. Place the steak in the air fryer basket, ensuring there’s space around it for proper airflow. Cook for 4-5 minutes per side for medium-rare, flipping halfway through. Use a meat thermometer to check the internal temperature and let the steak rest for 5 minutes before serving for maximum juiciness.

2. How long to cook filet mignon in air fryer?

The cooking time for filet mignon in air fryer depends on the steak’s thickness and your preferred doneness:

  • Rare (125°F): 3-4 minutes per side
  • Medium-Rare (130°F): 4-5 minutes per side
  • Medium (140°F): 5-6 minutes per side
  • Well-Done (160°F): 6-7 minutes per side

Always use a meat thermometer to ensure accuracy and adjust cooking times for steaks thicker than 1.5 inches.

3. Can you cook filet mignon in air fryer?

Absolutely! Cooking filet mignon in an air fryer is one of the easiest ways to achieve a juicy, tender steak with a crispy crust. The air fryer’s circulating hot air ensures even cooking, while the high heat creates a seared exterior without the need for a grill or stovetop. It’s perfect for beginners and experienced cooks alike, as the method is fast, efficient, and delivers consistent results.

4. How to reheat filet mignon in air fryer?

To reheat filet mignon in an air fryer while maintaining its tenderness, start by preheating the air fryer to 350°F (175°C). Place the steak in the basket and heat for 2-3 minutes, flipping halfway through. To prevent the steak from drying out, brush it lightly with melted butter or olive oil before reheating. Use a meat thermometer to ensure the steak reaches an internal temperature of 120-130°F for the best results.

Conclusion

Now that you’re armed with all the knowledge you need, it’s time to fire up your air fryer and create a steak dinner that will wow your taste buds. Don’t forget to pair it with your favorite sides, sauces, or even a bold glass of red wine. Let us know how your filet mignon turns out in the comments below, and explore more recipes to elevate your cooking game!

Print
clock clock iconcutlery cutlery iconflag flag iconfolder folder iconinstagram instagram iconpinterest pinterest iconfacebook facebook iconprint print iconsquares squares iconheart heart iconheart solid heart solid icon
Perfectly seared filet mignon with roasted vegetables on a plate

Perfect Filet Mignon in Air Fryer


  • Author: Emily
  • Total Time: 15
  • Yield: 2 servings 1x
  • Diet: Gluten Free

Description

Enjoy a tender, juicy, and perfectly seared filet mignon cooked in air fryer. This foolproof recipe delivers steakhouse-quality results at home with minimal effort and time.


Ingredients

Scale
  • 2 filet mignon steaks (1.52 inches thick)
  • 1 tablespoon olive oil or melted butter
  • 1 teaspoon kosher salt
  • 1/2 teaspoon freshly cracked black pepper
  • 1/4 teaspoon garlic powder (optional)
  • Fresh rosemary or thyme (for garnish)


Instructions

  1. Preheat your air fryer to 400°F (200°C) for 3-5 minutes.
  2. Pat the filet mignon steaks dry with paper towels to remove excess moisture.
  3. Brush the steaks lightly with olive oil or melted butter on all sides.
  4. Season both sides of the filet mignon generously with kosher salt, black pepper, and garlic powder if desired.
  5. Place the steaks in the air fryer basket, ensuring there is space around them for proper air circulation.
  6. Cook the steaks for 4-5 minutes per side for medium-rare, flipping halfway through.
  7. Use a meat thermometer to check doneness:
    • Rare: 125°F
    • Medium-Rare: 130°F
    • Medium: 140°F
  8. Once done, remove the steaks from the air fryer and let them rest on a plate for 5 minutes to allow the juices to redistribute.
  9. Garnish with fresh rosemary or thyme before serving, if desired.

Notes

  • For even cooking, let the steaks come to room temperature (about 30 minutes) before air frying.
  • If you prefer a crispier crust, preheat the air fryer for an additional 1-2 minutes.
  • Always use a meat thermometer for accuracy, as overcooking can dry out the filet mignon.
  • Serve with sides like garlic mashed potatoes, roasted asparagus, or a simple salad for a complete meal.

How to Make the Best Patty Melt Sauce in 3 Simple Steps

Who doesn’t love a warm, melty patty melt? But let’s be honest the real star of the show isn’t just the perfectly cooked patty or the golden, toasty bread. It’s the patty melt sauce that ties it all together, delivering that irresistible combination of creamy, savory, and tangy goodness. Imagine dipping into a sauce that’s rich enough to satisfy but balanced enough to let every ingredient shine. Whether you’re a seasoned cook or a kitchen newbie, this easy recipe will make your taste buds do a happy dance. Plus, with endless variations to explore, you’ll never run out of ways to enjoy it. So, grab your whisk, and let’s get saucy!

Why Patty Melt Sauce is the Star of the Show

What Makes a Great Patty Melt Sauce?

A patty melt sauce isn’t just a condiment it’s the glue that brings the flavors of this classic sandwich together. To make it truly great, the sauce needs to hit the perfect balance between creamy, tangy, and savory. Think about it: the richness of the beef patty and melted cheese needs a sauce that cuts through without overpowering. For example, a touch of Dijon mustard adds a sharp zing, while Worcestershire sauce deepens the umami.

But here’s the magic: a good patty melt sauce doesn’t stop at flavor. Its smooth, velvety texture ensures every bite is satisfying, coating the bread and patty without making things soggy. Whether you prefer it mild or bold, the right sauce is what transforms a simple sandwich into something unforgettable.

A Quick History of the Patty Melt

Before we dive deeper into the sauce, let’s take a quick detour into the history of the patty melt itself. This iconic sandwich is believed to have originated in mid-20th-century diners, combining two American favorites: the hamburger and grilled cheese. Rye bread, caramelized onions, and Swiss cheese became staples, but the secret to its growing popularity? A sauce that tied everything together.

Over the years, variations of the patty melt sauce have popped up, with each version reflecting regional flavors and personal twists. For example, some cooks added smoky chipotle for a Southwestern flair, while others preferred sweeter, ketchup-heavy blends. No matter the tweaks, one thing remains clear: a good patty melt depends on its sauce.

Why This Recipe is Perfect for Any Occasion

You don’t need a special event to enjoy this patty melt sauce. Its versatility makes it a star in any kitchen, whether you’re hosting a game night, whipping up a quick dinner, or prepping for a family picnic. It pairs beautifully with patty melts, of course, but it’s also fantastic as a dipping sauce for fries or onion rings.

One of the best things about this recipe is how beginner-friendly it is. With just a handful of ingredients and three simple steps, you can create a sauce that feels gourmet without breaking a sweat. And if you’re feeling adventurous, you can tweak it to suit your taste buds. Craving a spicy kick? Add a dash of cayenne. Prefer a hint of sweetness? Stir in a bit of honey.

What Sets This Patty Melt Sauce Recipe Apart

Unlike many store-bought options, this patty melt sauce recipe is made entirely from scratch, allowing you to control every ingredient. That means no artificial flavors or preservatives—just pure, fresh taste.

Moreover, the recipe emphasizes balance. You’ll combine pantry staples like mayonnaise, mustard, and Worcestershire sauce in just the right proportions to create a harmonious blend of flavors. And the best part? It’s adaptable. You can experiment with herbs, spices, or even plant-based alternatives to suit your preferences.

For a deeper dive into seasoning options, check out this comprehensive guide to pantry essentials from Allrecipes. It’s packed with tips to help you stock up on ingredients that elevate any dish, including this one.

The 3 Simple Steps to Make the Best Patty Melt Sauce

Step 1: Gather Your Ingredients

Ingredients for making homemade patty melt sauce
All the ingredients you need for the perfect patty melt sauce

Creating the perfect patty melt sauce starts with the right ingredients. The beauty of this recipe lies in its simplicity—most of what you need is probably already in your kitchen. Gather these essentials:

  • Mayonnaise: Provides the creamy base.
  • Dijon Mustard: Adds a subtle tangy kick.
  • Ketchup: Balances the flavors with sweetness.
  • Worcestershire Sauce: Enhances the umami depth.
  • Paprika: Offers a smoky edge.
  • Garlic Powder: For a hint of aromatic flavor.
  • Salt and Pepper: Adjusts the seasoning to your liking.

Pro tip: Use high-quality mayonnaise and freshly ground black pepper to elevate the taste of your patty melt sauce.

Step 2: Mix the Sauce to Perfection

Whisking patty melt sauce in a glass bowl
Whisking ingredients to create a smooth, tangy patty melt sauce

Now comes the fun part—bringing everything together! In a medium bowl, combine all your ingredients: mayonnaise, Dijon mustard, ketchup, Worcestershire sauce, paprika, garlic powder, and a pinch of salt and pepper. Use a whisk to blend the mixture until it’s silky smooth and evenly colored.

For best results, let the sauce sit in the refrigerator for 15–20 minutes. This resting time allows the flavors to meld, creating a richer, more cohesive taste. Trust us, patience pays off when making this patty melt sauce!

Step 3: Pair, Serve, and Enjoy

Once your patty melt sauce is ready, the possibilities are endless. Slather it generously on your patty melt for a flavorful upgrade. For an extra touch of indulgence, serve the sauce on the side as a dip for fries, onion rings, or even veggie sticks.

Need some inspiration? Check out this cheesy chicken sloppy joe recipe for another comfort food idea that pairs wonderfully with sauces.

Pro Tips for Success

  • Taste as You Go: Adjust the seasoning—maybe a bit more Worcestershire for depth or a touch of honey for sweetness.
  • Make Ahead: Prepare the sauce a day in advance to save time and boost flavor.
  • Storage Tips: Store leftover sauce in an airtight container in the refrigerator for up to a week.

5 Delicious Variations of Patty Melt Sauce

Patty melt with a side of fries and creamy dipping sauce
A classic patty melt served with a side of golden fries and creamy sauce

Smoky Chipotle Patty Melt Sauce

If you love bold, smoky flavors, this variation is perfect for you. By adding finely chopped chipotle peppers in adobo sauce to the classic patty melt sauce recipe, you’ll create a smoky, spicy kick that pairs beautifully with grilled patties. Mix the chipotle into the sauce base and adjust the heat level by controlling the amount of pepper you use.

For a balanced flavor, include a squeeze of fresh lime juice—it adds a bright, zesty contrast to the smokiness. This sauce isn’t just for patty melts; it’s also a great companion for sweet potato fries or roasted veggies.

Sweet and Spicy Sauce

For those who crave the perfect blend of sweetness and heat, this variation hits all the right notes. Start with the base patty melt sauce and add honey for natural sweetness. Then, kick up the heat with a dash of cayenne pepper or a dollop of your favorite hot sauce.

The result? A complex flavor profile that complements the savory richness of a patty melt. This sauce is especially popular at summer cookouts—try it as a spread for chicken sandwiches or a dip for crispy fried pickles.

Herb-Infused Patty Melt Sauce

Fresh herbs can take your patty melt sauce to a whole new level. Chop up parsley, chives, and dill, then stir them into the base sauce for a light, aromatic twist. The herbs add a fresh, vibrant flavor that pairs wonderfully with classic rye bread and melted Swiss cheese.

For a Mediterranean-inspired variation, mix in a touch of lemon zest along with the herbs. This version works beautifully with turkey patties or veggie-based melts, giving them an extra layer of complexity.

Vegan Patty Melt Sauce

Good news for plant-based eaters: you can make a vegan version of this beloved sauce without compromising on taste. Simply substitute the mayonnaise with vegan mayo and ensure that your Worcestershire sauce is also plant-based (many brands offer vegan options).

To enhance the creaminess, consider adding a splash of unsweetened almond milk or a dollop of tahini. The result is a smooth, tangy patty melt sauce that’s perfect for pairing with plant-based patties and dairy-free cheeses.

For more unique variations and sauce pairings, explore our Buffalo Chicken Sliders Recipe. It’s packed with ideas for adding exciting twists to your sauces and sandwiches!

Tips and Tricks for Making the Perfect Patty Melt Sauce

Ingredient Substitutions and Alternatives

Making patty melt sauce is flexible, so don’t worry if you’re missing an ingredient or need to adjust for dietary needs. For a healthier twist, try swapping regular mayonnaise with Greek yogurt. It adds creaminess while cutting down on calories and fat.

If you’re out of Worcestershire sauce, a mix of soy sauce and a dash of lemon juice can mimic its savory depth. Want to add a punch of flavor? Stir in a touch of sriracha or hot mustard. With these substitutions, you can tweak the sauce to suit your taste without compromising its signature creamy tang.

Storage and Shelf Life

To ensure your patty melt sauce stays fresh and flavorful, store it properly. Place the sauce in an airtight container and refrigerate it immediately after making it. It will stay delicious for up to a week.

Pro tip: Label your container with the date it was made to avoid confusion. Always give the sauce a quick stir before using it to redistribute the ingredients, especially after it’s been sitting for a few days.

Common Mistakes to Avoid

Even though patty melt sauce is simple to make, a few common missteps can impact the final flavor. First, avoid over-salting—since Worcestershire sauce and mustard are naturally salty, it’s better to taste as you go.

Another mistake is skipping the whisking step. Uneven mixing can lead to clumps of mustard or garlic powder, which might overpower the sauce. Finally, don’t rush the process; letting the sauce chill allows the flavors to blend and intensify, making a noticeable difference.

Pairing Suggestions

While this sauce is obviously the perfect match for patty melts, it’s incredibly versatile. Try spreading it on sandwiches, burgers, or wraps for an instant flavor upgrade. For an extra treat, serve it as a dip for crispy onion rings or sweet potato fries.

Looking for a hearty side dish to accompany your patty melt? Check out our Spinalis Steak Recipe for a protein-packed addition to your meal. This sauce is also a delicious complement to grilled meats or roasted veggies, making it a true kitchen multitasker.

FAQs

What is Hardee’s Special Sauce?

Hardee’s special sauce is a creamy, tangy condiment that perfectly complements burgers and sandwiches. It typically combines mayonnaise, ketchup, mustard, and a few secret seasonings to create a balanced, flavorful spread. While it’s not the same as a homemade patty melt sauce, it shares the same role of enhancing the overall flavor profile with a touch of sweetness and tang.

What is a Classic Patty Melt Made Of?

A classic patty melt is a delightful twist on a traditional burger. It features a juicy beef patty, melted Swiss or American cheese, and caramelized onions, all sandwiched between slices of buttery grilled rye bread. The finishing touch? A rich, creamy patty melt sauce that ties all the components together. Unlike a standard burger, the patty melt’s bread and caramelized onions give it a unique, diner-style charm.

What is a Patty Melt vs. Burger?

The main difference between a patty melt and a burger lies in the bread and toppings. While a burger is typically served on a bun with lettuce, tomato, and other fresh toppings, a patty melt is made with toasted bread, usually rye, and includes caramelized onions and cheese. The addition of a flavorful patty melt sauce further sets the patty melt apart by adding a creamy, tangy layer of deliciousness.

Is There Egg in Patties?

Traditionally, there’s no egg in beef patties for a patty melt. However, if you’re making homemade patties, you can add an egg as a binder, especially when mixing in breadcrumbs or additional ingredients. This helps the patty hold its shape during cooking. Rest assured, whether you include egg or not, a generous dollop of patty melt sauce will make your sandwich irresistible!

Conclusion

A great patty melt sauce isn’t just a condiment—it’s the secret to transforming a good sandwich into an extraordinary one. Throughout this guide, you’ve learned how to craft the best sauce in just three simple steps, explored variations to suit every taste, and picked up tips to avoid common mistakes. Whether you stick to the classic recipe or experiment with smoky, spicy, or vegan options, this sauce is the key to taking your patty melts to the next level.

By mastering the art of this sauce, you’ve unlocked endless possibilities for your kitchen. Use it on sandwiches, burgers, or as a dip to add a burst of flavor to any meal. So, what are you waiting for? Head to the kitchen, whip up your own patty melt sauce, and enjoy the magic it brings to every bite. Let us know how you liked it, and don’t forget to check out more delicious recipes on our blog for your next culinary adventure!