The Ultimate Guide to Grilled Chicken Thigh Recipes

Grilled chicken thighs are a crowd-pleaser, combining crispy, flavorful exteriors with juicy, tender meat inside. Whether you’re hosting a backyard BBQ or prepping for a weeknight dinner, grilled chicken thigh recipes are versatile and easy to customize. This guide walks you through every step—from choosing the right cut to mastering grilling techniques. We’ll also explore delicious marinades, popular variations, and tips for serving up the perfect meal. Let’s fire up the grill and get started!

Why Grilled Chicken Thighs are a Perfect Choice

Benefits of Chicken Thighs: Flavor and Versatility

Chicken thighs have a natural advantage—they’re rich, flavorful, and forgiving to cook. Their higher fat content keeps them moist and tender, even when grilled at high heat. Unlike chicken breasts, thighs are less likely to dry out, making them a fantastic choice for grilling newbies and pros alike. Plus, their bold flavor pairs beautifully with countless marinades and rubs, from tangy citrus to spicy BBQ.

Another perk? Chicken thighs are incredibly versatile. Whether you’re cooking for a casual meal or a fancy gathering, grilled chicken thigh recipes adapt to any occasion. Bone-in thighs deliver extra flavor, while boneless options cook faster and are easier to eat. With so many options, it’s no wonder chicken thighs are a grilling favorite.

Grilling vs. Other Cooking Methods for Chicken Thighs

While baking and pan-frying have their merits, grilling adds a smoky, charred flavor that’s hard to beat. The direct heat caramelizes marinades and renders fat, creating a crispy, golden-brown skin. Grilling also locks in juices, ensuring the meat stays tender and mouthwatering.

For outdoor enthusiasts, grilling is as much about the experience as the food. The sizzle of meat, the aroma of smoky spices, and the joy of cooking under the open sky make grilled chicken thigh recipes a go-to for anyone looking to elevate their meals.

Preparing Chicken Thighs for the Grill

Choosing the Right Cut: Bone-In vs. Boneless

The first step to perfecting any grilled chicken thigh recipe is choosing the right cut. Bone-in chicken thighs are a top pick for those who love bold flavors. The bone helps retain moisture during grilling, making the meat tender and juicy. On the flip side, boneless thighs are all about convenience. They cook faster, are easier to handle, and work wonders for recipes requiring marinades to penetrate fully.

Ultimately, your choice depends on your time and taste preferences. Bone-in thighs are perfect for leisurely BBQs, while boneless thighs shine in quick weeknight dinners. Either way, chicken thighs remain a reliable, flavorful choice.

Prepping the Chicken: Cleaning, Trimming, and Marinating

Preparation is key to a successful grilled chicken thigh recipe. Start by cleaning the chicken under cold water and patting it dry with paper towels. Trim any excess fat to prevent flare-ups on the grill, but don’t remove all of it—a little fat adds flavor!

Next, marinating is your best friend. A good marinade enhances the flavor and tenderness of the meat. Allow at least 30 minutes for quick meals or up to 24 hours for deeper flavor. For a no-fuss approach, check out this guide on chicken marinades to complement your grilling.

Essential Equipment for Grilling Chicken Thighs

Investing in the right tools can make or break your grilling experience. A reliable grill thermometer ensures you hit the ideal internal temperature of 165°F. Long-handled tongs help you flip the chicken without losing juices, while a clean grill grate prevents sticking. For bone-in thighs, consider a grill basket to keep everything secure as you cook.

The Best Marinades for Grilled Chicken Thighs

Classic Marinades: Soy, Citrus, and Herb-Based Blends

Marinade Ingredients for Grilled Chicken Thighs
Soy, citrus, and herb-based marinades for enhancing grilled chicken thighs

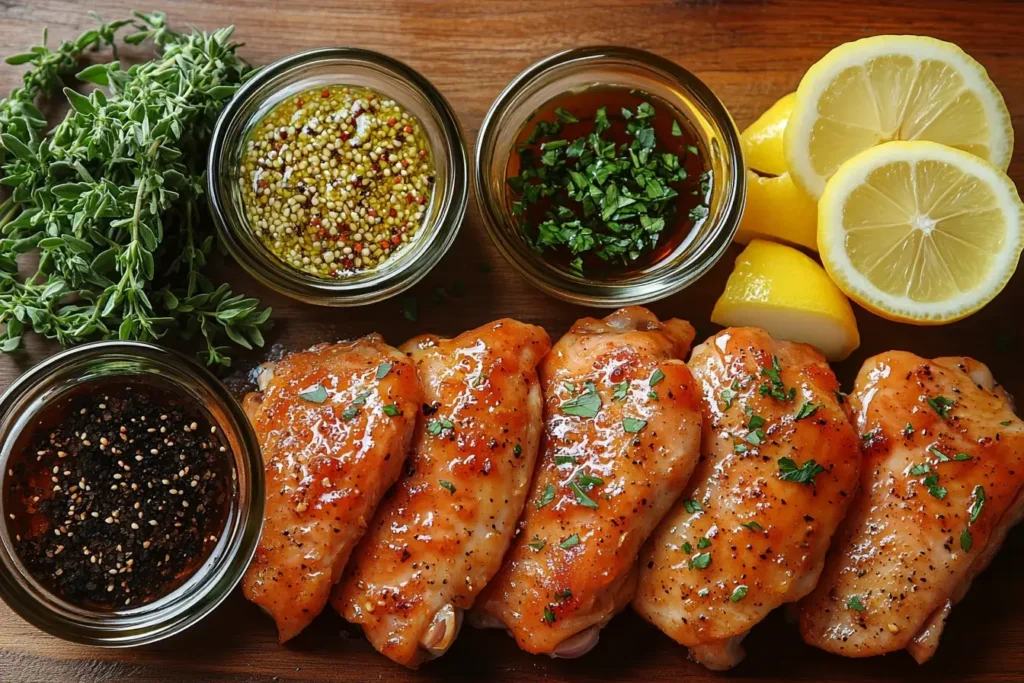
Classic marinades bring timeless flavors to your grilled chicken thigh recipes. A blend of soy sauce, garlic, and citrus juice creates a tangy, savory punch that pairs perfectly with smoky grill marks. Add rosemary or thyme for a herbaceous kick. This style of marinade complements bone-in thighs beautifully, infusing the meat with deep, robust flavor.

Sweet and Spicy Marinades: Honey, Sriracha, and Brown Sugar

If you crave something bold, sweet and spicy marinades are your go-to. Combining honey, brown sugar, and a dash of Sriracha creates a glaze that caramelizes on the grill. The result? Chicken thighs with a crispy, sticky coating and a sweet heat that keeps you coming back for more.

Quick No-Marinate Rubs for Grilled Chicken Thighs

Short on time? No worries! A quick dry rub with paprika, garlic powder, and cayenne can transform your chicken thighs in minutes. Simply coat the meat evenly, let it sit while your grill heats up, and cook as usual. Dry rubs are perfect for achieving bold flavors without the extra time marinating.

Grilling Techniques for Perfect Chicken Thighs

Direct vs. Indirect Heat: When to Use Each Method

Grilling Chicken Thighs with Direct and Indirect Heat
Master the art of grilling chicken thighs with direct and indirect heat.

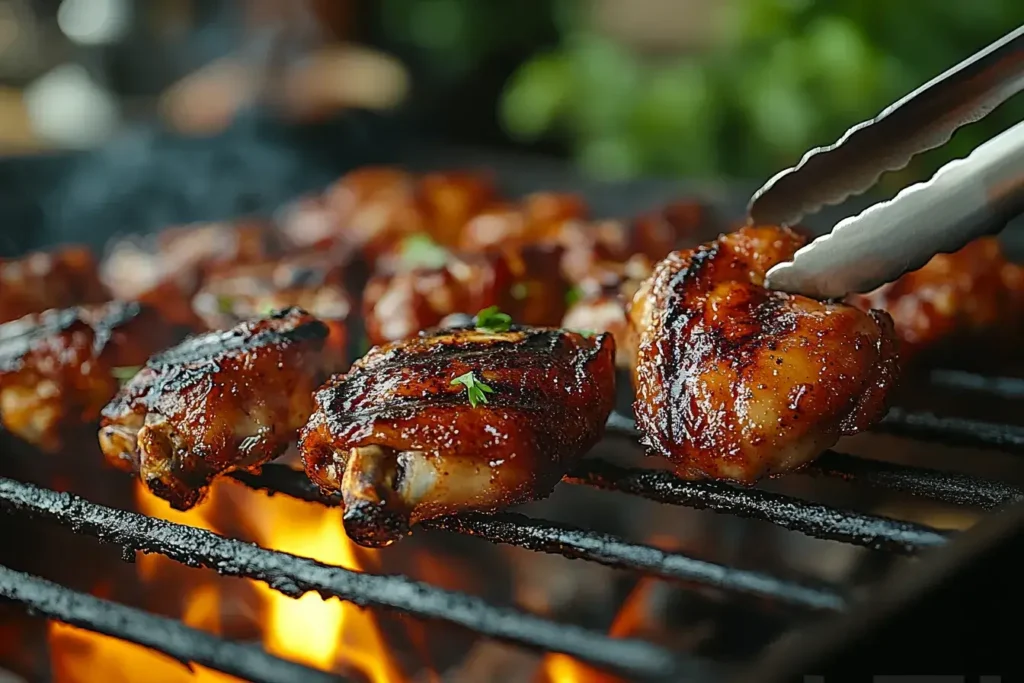
Mastering the grill means understanding when to use direct or indirect heat. Direct heat involves cooking chicken thighs over the flame or heat source, perfect for creating that crispy, charred exterior. However, for thicker cuts like bone-in thighs, indirect heat is key. It ensures the inside cooks evenly without burning the outside.

For the best grilled chicken thigh recipes, start with direct heat to sear the thighs and lock in juices. Then, move them to indirect heat to finish cooking to perfection. Using a two-zone grilling method on a gas or charcoal grill makes this technique a breeze.

How Long to Grill Chicken Thighs: Timing and Temperatures

Cooking time varies based on the thickness of the meat and the grill’s temperature. Boneless thighs typically take about 6-8 minutes per side over medium-high heat. Bone-in thighs need 10-12 minutes per side for thorough cooking. Always use a meat thermometer to ensure the internal temperature reaches 165°F for safe, juicy chicken.

Tips for Preventing Dryness and Achieving a Juicy Result

Dry chicken thighs are a grilling disaster, but there are simple ways to avoid it. First, always marinate or apply a dry rub before grilling to keep moisture locked in. Use medium to medium-high heat instead of high heat, which can dry out the meat. Finally, let the chicken rest for 5 minutes after grilling. This allows juices to redistribute for a tender bite every time.

Classic BBQ Grilled Chicken Thighs

Nothing beats the smoky, tangy flavor of classic BBQ chicken thighs. This variation involves a simple marinade of ketchup, vinegar, brown sugar, and Worcestershire sauce. Baste the chicken thighs with the sauce while grilling for a caramelized, sticky finish. Serve with coleslaw or cornbread for the ultimate comfort meal.

Asian-Inspired Grilled Chicken Thighs

For a bold twist, try Asian-inspired grilled chicken thigh recipes. A marinade of soy sauce, sesame oil, garlic, and ginger delivers savory, umami-rich flavors. Add a sprinkle of sesame seeds or chopped scallions before serving to elevate the dish. These thighs pair well with steamed rice or stir-fried veggies.

Mediterranean-Style Grilled Chicken Thighs

Mediterranean-style grilled chicken thighs use a zesty blend of olive oil, lemon juice, oregano, and garlic. The flavors are bright and refreshing, perfect for summer grilling. Serve these thighs with a side of tzatziki sauce, pita bread, and a fresh Greek salad for a complete meal.

Healthy Grilled Chicken Thigh Recipes: Low-Calorie Options

If you’re looking for a lighter option, opt for low-fat marinades like citrus and herbs. Skip the sugary sauces and use spices like paprika, cumin, and coriander for bold, calorie-conscious flavor. Grilling boneless thighs with minimal oil can keep the dish healthy while still satisfying.

Serving Suggestions and Side Dishes

Best Side Dishes to Pair with Grilled Chicken Thighs

A great grilled chicken thigh recipe deserves equally amazing sides. Classic BBQ pairings like coleslaw, baked beans, and cornbread are always a hit. Their hearty, flavorful nature complements the smoky, tender chicken thighs. For something lighter, opt for grilled veggies like zucchini, asparagus, or bell peppers to maintain the grill theme.

Potato-based dishes also pair beautifully. Creamy mashed potatoes or a tangy potato salad can balance the bold flavors of grilled chicken thighs. If you want something quick and fresh, whip up a simple garden salad with a vinaigrette dressing. These options add variety while enhancing the meal’s overall appeal.

Meal Ideas for Different Occasions: Weeknight Dinners to BBQs

Grilled chicken thighs are versatile enough for casual weeknight dinners or festive weekend barbecues. For weeknights, serve them with steamed rice and sautéed greens for a quick and healthy option. Hosting a BBQ? Set up a build-your-own sandwich bar with grilled chicken thighs, buns, and toppings like pickles, lettuce, and sauces.

For a themed meal, pair Mediterranean-style grilled chicken thighs with tabbouleh and hummus. If you’re going for an Asian-inspired vibe, serve the thighs with jasmine rice and a side of cucumber salad. No matter the occasion, grilled chicken thigh recipes can adapt to suit your menu.

FAQs About Grilled Chicken Thigh Recipes

How Long Does It Take to Grill Chicken Thighs?

Timing depends on the type of chicken thigh and grill setup. Boneless thighs cook faster, taking about 6-8 minutes per side on medium-high heat. Bone-in thighs need around 10-12 minutes per side. Always use a thermometer to confirm the internal temperature reaches 165°F for safe and juicy chicken.

How Do You Keep Chicken Thighs From Drying Out on the Grill?

To keep chicken thighs moist, marinate them beforehand to lock in flavor and juices. Grill over medium heat to avoid drying them out. Flipping them just once during cooking ensures even grilling without losing too much moisture. Letting them rest for a few minutes after grilling also redistributes the juices.

What Cooking Method is Best for Chicken Thighs?

While baking and pan-frying are good options, grilling is the best method for chicken thighs when you want a smoky, charred flavor. The direct heat of the grill crisps the outside while keeping the inside tender and juicy. This is why grilled chicken thigh recipes are a go-to for many.

What Makes a Good Grilled Chicken Thigh Marinade?

A great marinade balances acidity, oil, and seasonings. Ingredients like citrus juice, soy sauce, olive oil, and garlic create bold flavors while tenderizing the meat. Adding a hint of sweetness, like honey or brown sugar, helps the marinade caramelize beautifully on the grill.

Conclusion

Recap of Tips and Techniques for the Best Grilled Chicken Thighs

Perfecting grilled chicken thigh recipes is all about combining the right techniques, flavors, and preparation. Whether you prefer bone-in thighs for their rich, juicy texture or boneless cuts for convenience, grilling adds that irresistible smoky flavor that makes this dish a standout. From choosing marinades to mastering direct and indirect heat, each step builds toward creating a meal that’s both flavorful and tender.

Don’t forget the little details like letting the meat rest after cooking or using a thermometer to ensure it’s cooked just right. These small but essential steps make all the difference between a good meal and a great one. With endless variations and serving ideas, grilled chicken thighs can easily become a staple in your cooking repertoire.

Encouragement to Experiment with Flavors and Styles

The beauty of grilled chicken thigh recipes lies in their versatility. You can stick with traditional BBQ marinades, explore global flavors, or even create your own signature blend. The grill is your playground, so don’t be afraid to experiment! Pair your creations with complementary sides, and you’ve got a dish that’s sure to impress every time. Now, grab those tongs and get grilling!

Chicken Bone Broth Recipe: How to Make It Extra Nutritious

Chicken bone broth has become a go-to recipe for those who cherish good health and crave rich, comforting flavors. This simple yet versatile elixir is loaded with nutrients and is often hailed as a superfood. In this guide, we’ll cover everything from the basics of making chicken bone broth at home to creative ways to use it in your meals. Whether you’re a seasoned cook or just starting, you’ll learn the ins and outs of crafting the perfect chicken bone broth recipe. Let’s dive right in!

Introduction to Chicken Bone Broth

What is Chicken Bone Broth?

Chicken bone broth is a healthy, rich liquid made by cooking chicken bones, joints, and tasty ingredients for a long time. Unlike regular stock, bone broth is cooked longer to get all the nutrients from the bones. The result? A thick, flavorful liquid full of collagen, protein, and important minerals.

Health Benefits of Chicken Bone Broth

Why is everyone talking about chicken bone broth? It’s because this wholesome brew supports gut health, strengthens joints, and boosts immunity. Thanks to its high collagen content, it promotes glowing skin and healthy hair. Moreover, sipping warm bone broth is an excellent way to stay hydrated and nourished.

Why Make Bone Broth at Home?

Store-bought broths may be convenient, but they often fall short in flavor and nutrients. By making homemade chicken bone broth, you control what goes into the pot—ensuring no preservatives, additives, or excess sodium. Plus, you can tweak the recipe to suit your palate. It’s fresher, tastier, and more economical than any carton you’ll find on a store shelf.

Essential Ingredients for Chicken Bone Broth

 Ingredients for making chicken bone broth, including chicken bones, carrots, celery, and fresh herbs.
Preparing the essential ingredients for a perfect chicken bone broth.

Key Ingredients Explained

The foundation of any great chicken bone broth recipe is high-quality ingredients. Start with chicken bones, which can include the carcass, wings, necks, or even feet for added gelatin. Fresh or leftover roasted chicken bones work equally well. Beyond the bones, you’ll need vegetables like carrots, celery, and onions for a robust flavor. Don’t forget garlic and a splash of apple cider vinegar to help extract minerals from the bones.

Herbs and spices add depth. Consider bay leaves, thyme, parsley, and whole black peppercorns. Sea salt or kosher salt enhances taste but use sparingly to adjust later.

Optional Additions for Flavor

Boost the flavor profile with ingredients like ginger for a zesty kick or turmeric for an anti-inflammatory boost. Mushrooms or seaweed can also infuse the broth with extra umami and nutrients. These additions take the broth from simple to sensational.

Choosing the Best Bones for Broth

Quality matters. Opt for organic chicken bones or free-range chickens whenever possible. This ensures a cleaner broth without antibiotics or hormones. Visit local farmers’ markets or butchers to source the best ingredients.

How to Make Chicken Bone Broth

Step-by-Step Instructions for Beginners

Making chicken bone broth is easier than you think. Begin by roasting the chicken bones for 20–30 minutes at 400°F to deepen the flavor. Add the roasted bones to a large stockpot along with chopped vegetables, herbs, and apple cider vinegar. Cover everything with water, leaving room to prevent boiling over. Simmer on low heat for at least 12 hours—longer for richer broth.

Cooking Methods: Stove, Slow Cooker, Instant Pot

There’s more than one way to cook this culinary marvel:

  • Stove Method: Simmer on low heat, skimming foam periodically.
  • Slow Cooker: Let it simmer overnight for hassle-free results.
  • Instant Pot: For quick preparation, cook under high pressure for 2 hours.

Each method delivers a delicious chicken bone broth recipe tailored to your schedule.

Tips for Perfect Broth Consistency and Taste

For a clearer broth, skim impurities regularly. Adding too much water can dilute the flavor, so maintain a balanced water-to-ingredient ratio. For a more gelatinous consistency, include chicken feet or wings. Adjust seasoning after simmering to taste.

Pro tip: Freeze leftover broth in ice cube trays for easy portioning later.

Nutritional Profile of Chicken Bone Broth

Calorie and Nutrient Breakdown

A chicken bone broth recipe isn’t just about flavor; it’s a nutritional powerhouse. A single cup is low in calories, typically around 30–50, making it ideal for those watching their intake. Yet, it’s rich in nutrients like calcium, magnesium, and potassium, essential for bone and muscle health.

What sets bone broth apart is its collagen and gelatin content. These compounds support joint health, improve digestion, and promote radiant skin. Additionally, amino acids like glycine and proline help repair tissues and boost the immune system.

Comparison: Store-Bought vs. Homemade

While store-bought options offer convenience, they often lack the depth and nutritional quality of homemade broth. Many commercial broths contain preservatives and lower levels of gelatin. With a homemade chicken bone broth recipe, you control every ingredient, ensuring maximum health benefits and flavor.

Pro tip: Homemade broth allows you to avoid unnecessary additives and customize the taste with your favorite herbs and vegetables.

Uses for Chicken Bone Broth in Everyday Cooking

Soups and Stews

The most obvious way to use chicken bone broth is as a base for soups and stews. Its rich, savory flavor enhances classics like chicken noodle soup or hearty vegetable stew. By replacing water with bone broth, you’ll boost both the flavor and nutritional value of your dishes.

Healthy Drinks and Smoothies

Sipping warm bone broth is a comforting, healthful alternative to tea or coffee. For a nourishing twist, blend it into savory smoothies with spinach, avocado, or turmeric. These drinks are perfect for post-workout recovery or as a mid-day pick-me-up.

Creative Recipes Using Bone Broth

Think beyond the bowl! Use chicken bone broth in casseroles, risottos, or even as a liquid base for cooking grains like quinoa. It adds depth to sauces and gravies and can be used to deglaze pans for extra flavor in stir-fries.

For more ideas on incorporating chicken into your meals, explore the recipe for Leftover Rotisserie Chicken Recipes, which pairs beautifully with chicken bone broth.

Storing and Reusing Chicken Bone Broth

Proper Storage Techniques

Storing your chicken bone broth recipe properly ensures it stays fresh and flavorful. Once cooled, transfer the broth to airtight containers. Glass jars or BPA-free plastic containers work well for short-term storage. Keep them in the fridge, where the broth will last up to five days. Always label the containers with the date for easy tracking.

Freezing for Long-Term Use

If you’ve made a big batch, freezing is the best way to preserve it. Pour the broth into freezer-safe bags, leaving some space for expansion, or use silicone ice cube trays for portioned servings. Frozen broth can last up to six months without losing quality. To thaw, transfer it to the fridge overnight or warm it gently on the stove.

Signs of Spoiled Broth

Spoilage can happen if the broth isn’t stored correctly. A sour smell, cloudy appearance, or unusual texture are red flags. When in doubt, throw it out. Proper storage not only preserves the broth’s flavor but also its health benefits.

FAQs About Chicken Bone Broth

How Long Should I Simmer Chicken Bone Broth?

For the best chicken bone broth recipe, simmering times matter. A minimum of 12 hours on the stove or in a slow cooker extracts the most nutrients and flavor. If you’re using an Instant Pot, two hours under pressure works wonders.

Can I Use Cooked Bones for Broth?

Absolutely! Using leftover bones from roasted or rotisserie chicken is a great way to reduce waste while making delicious broth. Simply add raw or roasted vegetables for extra flavor.

What’s the Difference Between Bone Broth and Stock?

The key difference lies in cooking time. Stock is typically simmered for a few hours and lacks the gelatin-rich texture of bone broth, which is simmered much longer. Bone broth is also more nutrient-dense, making it ideal for sipping or as a base in recipes.

Is Chicken Bone Broth Keto-Friendly?

Yes! Chicken bone broth fits perfectly into a keto diet. It’s low in carbs and rich in healthy fats and collagen. For added flavor, mix it with herbs or keto-friendly seasonings.

For even more kitchen inspiration, consider trying this Chopt Spicy Chicken Soup Recipe with Rice, which complements homemade bone broth beautifully.

Conclusion and Final Thoughts

A simmering stockpot of chicken bone broth with visible vegetables and chicken bones.

Recap of Benefits and Steps

Creating a homemade chicken bone broth recipe is more than just a culinary activity it’s an investment in your health. With its rich flavors and high nutritional value, bone broth is a versatile addition to your kitchen. From supporting digestion to boosting joint health, this humble broth is packed with benefits.

The process is simple: gather quality ingredients, simmer them for hours, and store the liquid gold for later use. Whether you’re using it as a soup base, sipping it warm, or adding it to creative recipes, the possibilities are endless.

Encouragement to Experiment with Recipes

Don’t hesitate to personalize your chicken bone broth recipe. Add herbs, spices, or vegetables that suit your taste. Experiment with cooking methods to find what works best for your lifestyle. Remember, each batch is an opportunity to create a flavor that’s uniquely yours.

If you’re inspired to explore more, consider pairing your broth with hearty meals like stews or casseroles. It’s time to grab those chicken bones and start simmering!

Bonus Tips for Perfecting Your Bone Broth

Choosing the Right Tools

Using the right tools can make your chicken bone broth recipe foolproof. A large stockpot or slow cooker ensures even cooking. For an Instant Pot, follow the recommended pressure settings for optimal results.

Enhancing the Flavor

To elevate your broth’s taste, try roasting the bones beforehand or adding a dash of vinegar. Fresh herbs like thyme or rosemary can provide an aromatic boost. For a deeper umami flavor, throw in mushrooms or seaweed.

Adapting for Special Diets

Bone broth is naturally gluten-free, keto-friendly, and paleo-approved. However, you can adjust ingredients to fit vegan or vegetarian diets by substituting chicken bones with nutrient-dense vegetables and seasoning them with savory spices.

Encouragement to Share

Sharing your homemade chicken bone broth recipe with friends or family is a wonderful way to connect over food. Package it as a thoughtful gift or teach someone else how to make their own. Spread the love—and the benefits—of this timeless comfort food.

What Is the Secret Ingredient in Soup with Chicken? 3 Tips for Richer Flavor

What is the secret ingredient in soup with chicken with golden broth and fresh herbs

Chicken soup is the ultimate comfort food, a timeless dish that warms both the heart and soul. But have you ever wondered what is the secret ingredient in soup with chicken that takes it from ordinary to extraordinary? This article dives deep into the essentials of crafting flavorful chicken soup, uncovers the hidden gems that enhance its taste, and offers tips to elevate even the simplest recipes. Whether you’re a seasoned chef or just starting out in the kitchen, these insights will help you create soups that everyone will savor.

The Basics of a Great Chicken Soup

Essential Components of Chicken Soup

At its core, chicken soup is a harmony of a few basic ingredients. Start with a robust broth—homemade or store-bought—and add tender chicken, fresh vegetables, and aromatic herbs. The combination of carrots, celery, and onions, often called the “holy trinity,” forms the foundation of flavor. Together, these ingredients create a balanced and satisfying soup.

Broth plays a starring role here. Homemade chicken stock, simmered for hours with bones and aromatics, provides unmatched depth and richness. However, high-quality store-bought broth can also do the trick if you’re short on time.

Why Chicken Soup Is Loved Across Cultures

Chicken soup has earned its place in kitchens worldwide. From Jewish matzo ball soup to Asian chicken noodle soup and Latin American caldo de pollo, every culture puts its unique spin on this dish. Its universal appeal lies in its simplicity, versatility, and ability to soothe, whether you’re feeling under the weather or just craving something warm.

This timeless dish isn’t just about sustenance—it’s also about tradition. Each spoonful tells a story, reminding us of family gatherings, cold winter nights, and cherished memories. But what makes one chicken soup stand out from another? That’s where the secret ingredient comes into play.

Stay tuned as we explore the building blocks of flavor and reveal the magic touch that transforms your chicken soup into a masterpiece.

Common Ingredients That Build Flavor

Ingredients for chicken soup laid out on a cutting board
A beautiful flat-lay of fresh ingredients ready to make chicken soup with secret flavor enhancers

Aromatic Vegetables: The Holy Trinity of Soup

Every great chicken soup begins with a flavorful base, and that often starts with aromatic vegetables. Known as the “holy trinity” of soup-making, carrots, celery, and onions bring depth and balance to the broth. When sautéed together, these ingredients release their natural sweetness, creating a rich foundation that pairs perfectly with chicken.

Adding garlic to this mix takes the flavor up a notch. Its bold aroma and savory notes complement the mildness of chicken, making every bite more satisfying. Want even more complexity? Try incorporating leeks or shallots for a subtle twist.

Choosing the Right Chicken Cuts for Maximum Flavor

The type of chicken you use can make or break your soup. Bone-in, skin-on cuts like thighs, drumsticks, or whole chickens provide the best flavor. As they simmer, the bones release collagen, enriching the broth with a velvety texture.

If you’re short on time, pre-cooked or rotisserie chicken works well too. Just shred it and add it during the final minutes of cooking to prevent it from drying out. For a lighter option, use boneless, skinless chicken breasts, but be aware they won’t impart the same depth of flavor.

The Role of Herbs and Spices

Herbs and spices are the soul of chicken soup. Classics like thyme, bay leaves, and parsley infuse the broth with earthy, comforting notes. Add a pinch of black pepper and a touch of paprika for a subtle kick.

Experiment with fresh dill or cilantro for a brighter, fresher profile. When you’re pondering what is the secret ingredient in soup with chicken, remember that the right herb combination can transform a simple soup into a gourmet experience.

What Is the Secret Ingredient in Soup with Chicken?

A ladle of chicken soup with vibrant vegetables and golden broth
Serving Chicken Soup with Secret Ingredients” Caption: “A ladle of chicken soup showcasing its rich, golden broth and perfectly cooked ingredients.

Defining the ‘Secret Ingredient’: What Makes It Special?

The “secret ingredient” in chicken soup isn’t just about adding flavor it’s about creating a unique, memorable dish. It’s that one unexpected addition that sets your soup apart, leaving everyone asking for the recipe. While the classics like salt, pepper, and herbs are essential, secret ingredients go beyond the basics, amplifying depth and richness.

Top Contenders for the Best Secret Ingredients

Fish Sauce: An Umami Bomb

Just a few drops of fish sauce can elevate your chicken soup to a whole new level. This ingredient adds umami the savory taste that makes dishes more satisfying without overpowering the soup. It’s a secret used in many Asian kitchens and works wonders in brothy soups.

Miso Paste: A Savory Twist

Miso paste isn’t just for miso soup. Adding a spoonful to chicken soup introduces a subtle nuttiness and umami depth. Its fermented flavor pairs beautifully with both chicken and vegetables.

Lemon or Lime Zest: Brightness and Acidity

Sometimes, a bit of acidity is all your soup needs. Zesting a lemon or lime into the broth before serving brightens the flavors and balances the richness of the chicken and broth.

Parmesan Rind: A Hidden Depth

Ever wondered what to do with leftover Parmesan rinds? Drop one into your soup while it simmers. It melts into the broth, releasing a nutty, cheesy flavor that’s subtle yet unmistakable.

By incorporating one of these secret ingredients, you’ll not only discover what is the secret ingredient in soup with chicken but also learn how to make your recipe truly unforgettable.

Enhancing Store-Bought or Canned Chicken Soups

How to Make Canned Chicken Soup Taste Homemade

Canned chicken soup is a convenient option, but it often lacks the depth and freshness of a homemade version. The easiest way to enhance it is by adding fresh ingredients. Toss in some chopped onions, minced garlic, and a handful of fresh herbs like parsley or thyme while reheating. These simple additions brighten the flavors and add a touch of freshness.

Want to know what is the secret ingredient in soup with chicken when working with canned options? A splash of lemon juice or a dash of soy sauce can work wonders, adding complexity and balancing the saltiness.

The Best Add-Ins to Elevate Flavor Quickly

Adding cooked chicken, leftover vegetables, or a sprinkle of grated Parmesan cheese can instantly make canned soup feel gourmet. For extra richness, stir in a dollop of cream or a pat of butter before serving. Spices like smoked paprika or ground cumin also bring depth to the broth.

If you’re looking for inspiration, check out this Chopt Spicy Chicken Soup Recipe with Rice for creative ways to elevate your soups with minimal effort.

Tips for Depth and Complexity in Homemade Chicken Soup

Layering Flavors: Building a Strong Base

Homemade chicken soup is all about layering flavors. Start by browning the chicken pieces to create a flavorful base. Deglaze the pot with a splash of white wine or apple cider vinegar to lift the caramelized bits and add complexity.

When wondering what is the secret ingredient in soup with chicken, don’t underestimate the power of toasted spices. Toasting cumin seeds or adding a pinch of nutmeg during the cooking process can enhance the soup’s aroma and flavor profile.

Using Uncommon Techniques for Flavor Boosting

For an extra boost, try roasting your vegetables before adding them to the soup. This technique caramelizes their natural sugars, creating a deeper, richer broth. Another tip? Steeping a bundle of fresh herbs in the soup as it simmers can infuse the broth with subtle, earthy notes.

Want to give your soup a unique twist? Add a Parmesan rind while it cooks, then remove it before serving. The melted cheese imparts a nutty, savory flavor that’s hard to replicate with other ingredients. For more tips, explore the How Do You Keep Rice from Expanding in Soup article for ideas on balancing textures and flavors.

FAQs About Chicken Soup and Its Secret Ingredient

What Is Special About Chicken Soup?

Chicken soup is more than just a dish; it’s a comfort food that transcends cultures and generations. Its unique ability to soothe colds, warm hearts, and satisfy cravings makes it a staple in many households. But what makes it so special? The secret lies in its adaptability—chicken soup can be as simple or as elaborate as you want.

When exploring what is the secret ingredient in soup with chicken, you’ll find that each cook has their own twist. From adding fresh herbs to including unexpected ingredients like miso paste, chicken soup’s versatility is its charm.

How to Make Canned Chicken Soup Taste Better?

Revamping canned chicken soup is easier than you think. Start by adding fresh aromatics like garlic, onion, or celery for extra flavor. Herbs such as dill, thyme, or parsley also go a long way in making the soup taste homemade.

For a quick flavor boost, consider soy sauce, Worcestershire sauce, or even a dash of hot sauce. A squeeze of lemon juice can brighten the entire dish, making it feel fresh and vibrant.

Conclusion and Final Tips

Recap of Key Points

Crafting the perfect chicken soup isn’t just about following a recipe—it’s about discovering what is the secret ingredient in soup with chicken that resonates with your taste buds. From adding Parmesan rinds for a nutty depth to brightening the flavors with citrus zest, each addition has the potential to elevate your soup.

Whether you’re enhancing a canned soup or building a homemade broth from scratch, the magic lies in the details. By layering flavors, experimenting with ingredients, and adding a personal touch, you’ll create soups that are both memorable and delicious.

Don’t be afraid to get creative! Try incorporating different herbs, spices, or even a splash of wine to bring new life to your chicken soup. Remember, the best recipes often come from experimentation and a little bit of boldness.

For more inspiration, explore additional tips and recipes on Quick Meals Recipes to expand your soup-making repertoire. Now, grab your ladle and start crafting your masterpiece!

Chopt Spicy Chicken Soup Recipe with Rice: Try This Now

Steaming bowl of Chopt spicy chicken soup with rice

Introduction to Chopt Spicy Chicken Soup Recipe

What is Chopt Spicy Chicken Soup?

Chopt’s spicy chicken soup with rice is a modern take on a classic comfort food, blending robust spices with wholesome ingredients. Unlike traditional chicken soup, this version amps up the heat, delivering a fiery kick that’s balanced by the earthy texture of rice. It’s the kind of soup that transforms a cold day into a warm embrace.

Why Add Rice to Your Soup?

Rice isn’t just a filler in this recipe; it’s a star player. This grain adds a satisfying bite to every spoonful, making the soup heartier and more filling. Plus, it absorbs the spices and broth beautifully, creating little pockets of flavor in every bite. Whether you prefer white, brown, or even wild rice, each brings a unique texture to the dish.

The Cultural Significance of Spicy Chicken Soups

Around the world, spicy chicken soups hold a special place in culinary traditions. From Mexican caldo de pollo to Thai tom kha gai, these soups aren’t just meals; they’re remedies, celebrations, and comfort in a bowl. This recipe takes inspiration from global flavors while staying true to its spicy roots, making it a versatile dish for any occasion.

Key Ingredients for Spicy Chicken Soup with Rice

Key Ingredients for Spicy Chicken Soup with Rice

Essential Spices and Their Benefits

The magic of Chopt spicy chicken soup with rice lies in its bold use of spices. Ingredients like cayenne pepper, smoked paprika, and chili flakes add a fiery kick, while cumin and turmeric bring earthy warmth. Not only do these spices enhance flavor, but they also provide health benefits. For example, turmeric is known for its anti-inflammatory properties, while cayenne pepper can boost metabolism.

Adding a touch of garlic and ginger not only complements the heat but also gives the soup a fragrant depth. Don’t forget a splash of lime juice or vinegar—it brightens the flavor and balances the spice beautifully.

Choosing the Right Chicken Cuts

When making this soup, go for chicken thighs or drumsticks over breasts. Why? Dark meat stays juicy and tender during cooking, unlike leaner cuts that can dry out. Bone-in chicken adds extra flavor to the broth as it simmers, making every spoonful rich and savory.

For a shortcut, use rotisserie chicken. It’s already cooked, making prep faster without sacrificing flavor. Shred the meat and toss it in toward the end for a deliciously hearty soup.

Selecting and Preparing the Best Type of Rice

Rice is the backbone of this recipe. Short-grain rice, like Arborio, makes the soup creamier, while long-grain varieties like Basmati stay separate and fluffy. If you’re aiming for a nutty flavor, brown rice is a fantastic choice. Wild rice offers a unique chewy texture that adds an unexpected twist.

Before cooking, rinse the rice thoroughly to remove excess starch—this ensures the grains don’t clump together. For extra flavor, toast the rice lightly in a dry pan before adding it to the soup.

Step-by-Step Recipe Guide

Preparing Your Ingredients: A Checklist

To make the perfect Chopt spicy chicken soup with rice, start by gathering all your ingredients. You’ll need fresh chicken, rice, a medley of spices, aromatics like onions, garlic, and ginger, and broth or stock. Don’t forget toppings like cilantro, lime wedges, or a dollop of sour cream for garnish!

Chop your veggies finely, measure out your spices, and shred the chicken if you’re using pre-cooked meat. Prepping everything ahead saves time and keeps the cooking process smooth.

Cooking the Chicken: Tips for Perfect Tenderness

Start by searing your chicken pieces in a hot pot with a drizzle of oil. This step locks in the juices and gives the meat a lovely golden crust. Once browned, set the chicken aside and sauté your aromatics in the same pot. The caramelized bits left behind add layers of flavor to your soup.

If using raw chicken, return it to the pot with the broth and let it simmer gently. The key is low and slow cooking—it ensures the chicken stays moist and flavorful.

Spicing It Right: Balancing Heat and Flavor

To get the ideal spice level, add your seasonings in stages. Start with a teaspoon each of smoked paprika and chili powder, then adjust as the soup cooks. Taste frequently—it’s easier to add more spice than to tone it down! For an extra layer of heat, toss in a diced jalapeño or a splash of hot sauce.

Remember, spices can intensify over time, so err on the side of caution if you’re sensitive to heat.

Adding Rice: How to Cook It Just Right

When adding rice, timing is everything. Stir it into the soup during the last 15–20 minutes of cooking to prevent it from becoming mushy. If you prefer your rice on the firmer side, cook it separately and add it to each bowl when serving. This method is also great for leftovers, as it keeps the rice from absorbing too much broth.

Serving Suggestions: Garnishes and Pairings

Presentation matters! Serve your soup with fresh cilantro, a squeeze of lime, and perhaps a sprinkle of crumbled tortilla chips for crunch. Pair it with a simple side salad or warm crusty bread to complete the meal.

Variations of Spicy Chicken Soup with Rice

Mexican-Inspired Variations with Heat

Transform your Chopt spicy chicken soup with rice into a vibrant Mexican inspired dish by incorporating classic flavors. Swap out regular rice for Spanish rice, and add ingredients like black beans, corn, and diced tomatoes for extra texture and nutrition. To elevate the flavor, toss in some chipotle peppers in adobo sauce—they add a smoky heat that pairs beautifully with the soup.

Top it with crumbled queso fresco and chopped avocado for a creamy finish. A handful of tortilla strips adds a delightful crunch, making this variation a crowd-pleaser.

Asian-Style Spicy Chicken and Rice Soups

For an Asian twist, use jasmine rice and replace traditional spices with soy sauce, sesame oil, and a splash of fish sauce. Ginger and garlic remain essential but consider adding lemongrass and a dash of sriracha for an extra kick.

You can also include shiitake mushrooms, bok choy, or snap peas to introduce a variety of textures. Garnish with green onions, fresh cilantro, and sesame seeds for a soup that’s as visually stunning as it is flavorful.

Low-Spice and Kid-Friendly Versions

For a milder take, reduce or skip the chili powder and cayenne pepper. Focus on using flavorful yet gentle spices like paprika and cumin. Substitute white rice with Arborio rice to create a creamy, risotto-like consistency that’s easier for kids to enjoy.

Add diced carrots, peas, and a splash of cream to make it heartier and more appealing to younger palates. A dollop of plain yogurt on top can also help cool down the heat.

For more delicious recipes, check out our recipe collection on Quick Meals Recipes to explore easy and flavorful meal ideas.

Pro Tips for the Perfect Soup

Serving a bowl of Chopt spicy chicken soup with rice

How to Keep Rice from Expanding in Soup?

Rice tends to soak up liquid like a sponge, which can lead to an overly thick soup. To avoid this, cook the rice separately and add it to individual servings rather than letting it sit in the pot. Another option is to use par-cooked rice—its grains are less likely to absorb too much broth.

If you’re storing leftovers, keep the rice and soup in separate containers. This way, you can reheat them together without compromising the texture.

What’s the Secret Ingredient for the Ultimate Flavor?

The secret ingredient to taking your Chopt spicy chicken soup with rice to the next level is a splash of acid. A squeeze of fresh lime juice or a teaspoon of vinegar at the end of cooking balances the heat and deepens the flavors. Don’t skip this step—it makes a world of difference!

Adding a hint of sugar or honey can also enhance the overall taste, especially if your soup has tomatoes or other acidic ingredients.

How to Thicken Chicken and Rice Soup?

If you prefer a thicker soup, there are a few tricks you can use. Adding a slurry of cornstarch and water is the quickest way to achieve a creamy consistency. Alternatively, you can puree a portion of the soup and stir it back in for a natural, hearty texture.

Another option is to use Arborio rice or wild rice, as their starchiness naturally thickens the broth over time.

FAQs About Spicy Chicken Soup with Rice

How Do You Keep Rice from Expanding in Soup?

Rice is notorious for absorbing liquid, which can leave your soup thicker than you’d like. To keep this from happening, cook the rice separately and add it to each bowl when serving. This method ensures the grains remain firm and don’t soak up all the broth. Another clever trick is to use a type of rice with lower starch content, like jasmine or basmati, which holds its shape better over time.

For leftovers, store the rice and soup in separate containers to maintain the ideal texture when reheated. This small adjustment makes a big difference in keeping your Chopt spicy chicken soup with rice fresh and delicious.

What Is the Secret Ingredient in Soup?

The secret ingredient that elevates this soup is a touch of acid. Whether it’s a splash of lime juice, apple cider vinegar, or even a teaspoon of tamarind paste, acid brightens the flavors and balances the spice. Adding a hint of sweetness, like a drizzle of honey, can further enhance the depth of the dish, especially if tomatoes are part of the recipe.

For a bold, unique flavor, consider adding a pinch of smoked salt or a dash of coconut milk for creaminess. These small additions can transform a simple soup into a culinary masterpiece.

What Is a Spicy Mexican Soup Made From?

Mexican-inspired spicy soups like caldo de pollo often feature a combination of hearty vegetables, tender chicken, and bold seasonings like cumin, chili powder, and oregano. Adding rice or hominy creates a filling base, while toppings like fresh cilantro, lime wedges, and diced avocado bring freshness to the dish.

This variation of Chopt spicy chicken soup with rice draws heavily from Mexican culinary traditions, giving it a vibrant, zesty twist.

How to Thicken Up Chicken and Rice Soup?

Thickening your soup can make it even more comforting and hearty. If you prefer a creamy texture, try blending a portion of the soup with an immersion blender and stirring it back in. Alternatively, you can make a slurry by mixing cornstarch or flour with water, then slowly adding it to the simmering soup.

Rice itself is a natural thickener due to its starch content. Cooking Arborio rice directly in the soup releases starch, creating a rich, velvety texture that makes each spoonful irresistible.

Nutritional Benefits of Chopt Spicy Chicken Soup

Why Chicken Soup Is a Nutritional Powerhouse

Chicken soup has long been celebrated for its health benefits. Packed with protein, vitamins, and minerals, it’s a great option for boosting your immune system and aiding recovery from colds. The addition of rice provides energy-sustaining carbohydrates, making this dish both satisfying and nutritious.

Spices like turmeric and ginger, commonly used in Chopt spicy chicken soup with rice, are rich in antioxidants and have anti-inflammatory properties. These ingredients not only enhance flavor but also contribute to overall wellness.

Benefits of Spices: Turmeric, Pepper, and More

Spices are the unsung heroes of this soup. Turmeric’s active compound, curcumin, supports joint health and digestion. Black pepper enhances nutrient absorption, while cayenne pepper can help boost metabolism and circulation. Ginger and garlic, on the other hand, are natural immune boosters that add layers of flavor.

By incorporating these ingredients, you’re not just creating a delicious meal—you’re also nourishing your body with every bowl.

The Role of Rice in a Balanced Diet

Rice is more than a comforting addition to this soup; it’s a staple ingredient that offers essential nutrients. Brown rice is high in fiber, aiding digestion and providing long-lasting energy. Wild rice is rich in protein and antioxidants, making it a healthier choice for those looking to increase their nutrient intake.

Whether you use white, brown, or wild rice, it complements the other ingredients perfectly, turning Chopt spicy chicken soup with rice into a well-rounded, satisfying dish.

Conclusion and Final Tips

Recap of Key Points

The Chopt spicy chicken soup recipe with rice isn’t just another soup—it’s a delicious, comforting dish that’s as versatile as it is flavorful. We’ve covered everything from selecting the perfect chicken cuts and rice to spicing it just right. You’ve learned how to prevent the rice from expanding, explored international variations, and discovered the nutritional benefits of this hearty meal.

Whether you’re cooking for a quiet dinner at home or serving a crowd, this recipe is sure to impress. It’s easy to customize and packed with flavors that will warm your heart and soul.

Encouragement to Experiment and Customize

Don’t be afraid to experiment with this recipe! Try using quinoa instead of rice for a nutty flavor, or add sweet potatoes for a hint of natural sweetness. Swap out chicken for shrimp or tofu if you want a twist, and feel free to play around with spice levels to suit your preference.

Cooking is all about making the dish your own. With a recipe as flexible as Chopt spicy chicken soup with rice, there’s no wrong way to enjoy it.

Final Thoughts on Perfecting the Recipe

The secret to mastering this dish lies in balance. The harmony between spices, rice, and chicken is what makes this soup stand out. Pay attention to your taste preferences, use fresh ingredients, and don’t rush the cooking process.

This recipe isn’t just about food—it’s about creating something memorable. So, gather your ingredients, get cooking, and enjoy the comforting flavors of this incredible soup.

FAQs About Chopt Spicy Chicken Soup Recipe with Rice

What’s the Best Way to Store Leftovers?

To store leftovers, keep the rice and soup separate to maintain the ideal texture. Place the soup in an airtight container in the fridge for up to 3 days. Reheat gently on the stove or microwave, adding the rice just before serving to prevent it from becoming mushy.

Can This Recipe Be Made Gluten-Free?

Absolutely! The Chopt spicy chicken soup recipe with rice is naturally gluten-free when you use plain rice and check your spices for any hidden gluten. For extra caution, ensure your broth or stock is labeled gluten-free.

How Do You Adjust the Spice Level?

To adjust the spice level, reduce or omit cayenne pepper and chili powder for a milder version. Alternatively, add more jalapeños or a splash of hot sauce if you prefer extra heat. Remember, spices can intensify as the soup simmers, so taste frequently and adjust as needed.

Can You Freeze This Soup?

Yes, you can freeze this soup, but it’s best to leave out the rice if you plan to freeze it. Cook the rice fresh when you’re ready to serve, as it maintains a better texture. The soup can be stored in the freezer for up to 3 months. Just thaw overnight in the fridge before reheating.

Chicken Ice Cream Recipe: How to Make This Unique Dessert

Desserts have a way of surprising us, don’t they? From avocado milkshakes to bacon-infused cupcakes, culinary creativity keeps raising the bar. But chicken ice cream? Yep, it’s a real thing. This unexpected treat combines the savory essence of chicken with the sweet, creamy goodness of ice cream, resulting in a dessert that’s as intriguing as it is delicious.

Definition and Origins of Chicken Ice Cream

Chicken ice cream sounds like a dare, doesn’t it? At its core, this dessert combines sweet and savory flavors in a surprisingly harmonious way. It typically incorporates chicken-based ingredients like broth or fat into a creamy, sweet ice cream base, giving it a subtle, savory undertone. While it may sound like a modern invention, the roots of blending savory and sweet in desserts date back centuries. Think of candied bacon or salted caramel; chicken ice cream is just another step in this savory-sweet evolution.

But where did it all begin? Culinary adventurers and experimental chefs first introduced the concept to challenge traditional ideas of what a dessert could be. The goal was simple: to create something that’s not only delicious but also sparks curiosity.

The Inspiration Behind the Unique Dessert

The iconic “Not Fried Chicken Ice Cream” took inspiration from fried chicken itself. Designed to resemble a drumstick, this playful dessert is made with waffle ice cream, a chocolate-covered cookie “bone,” and a coating of caramelized white chocolate and crushed cornflakes. The result? A dessert that not only tastes amazing but also serves as a conversation starter.

It’s no surprise that this dessert gained traction. People are naturally drawn to novelty, and chicken ice cream is nothing if not novel. The blend of textures, from the crispy coating to the smooth ice cream, mirrors the satisfying crunch and juiciness of actual fried chicken. It’s a culinary illusion that’s hard to resist!

Variants and Regional Popularity

While the “Not Fried Chicken Ice Cream” is one of the most famous versions, other variants exist across the globe. Some recipes incorporate smoked chicken for a bolder flavor, while others focus on subtle hints of chicken broth or fat. In certain regions, this dessert has even been adapted with local flavors, like adding honey or spicy seasonings.

Chicken ice cream has become a hit in artisan ice cream parlors worldwide, especially in the U.S. and parts of Asia. It’s not just a dessert; it’s a testament to how adventurous and creative food can get.

What is “Not Fried Chicken Ice Cream”?

The “Not Fried Chicken Ice Cream” is a dessert that defies expectations. Crafted to look exactly like a fried chicken drumstick, it’s a treat that plays with your senses. What appears to be golden-brown crispy chicken skin is actually a coating of caramelized white chocolate mixed with crushed cornflakes. Beneath this crispy exterior lies waffle-flavored ice cream wrapped around a chocolate-covered cookie “bone.” This intricate design makes it both a visual and culinary delight.

Ingredients Used to Mimic Fried Chicken

The magic of this dessert lies in its ingredients, cleverly chosen to mimic the look and feel of fried chicken while offering a sweet, rich flavor. Key components include:

  • Waffle Ice Cream Base: Smooth and creamy, with hints of buttery waffle.
  • Chocolate-Covered Cookie “Bone”: Adds structure and a touch of crunch.
  • Caramelized White Chocolate Coating: Sweet and rich, providing a convincing fried chicken skin appearance.
  • Crushed Cornflakes: Creates the crispy texture reminiscent of fried chicken.

This combination creates a dessert that’s as fun to eat as it is to admire.

Why it Has Gained Popularity on Social Media

Social media loves a good surprise, and the “Not Fried Chicken Ice Cream” delivers. Its lifelike appearance and unique concept have made it a viral sensation on platforms like Instagram and TikTok. Food influencers and adventurous eaters can’t resist sharing their reactions to this creative dessert.

In today’s world of viral food trends, chicken ice cream stands out not only for its visual appeal but also for its craftsmanship. People enjoy the element of surprise when biting into what looks like chicken but tastes like dessert. It’s a culinary paradox that keeps viewers intrigued.

Chicken-themed desserts on a table.

A variety of chicken-inspired desserts, including fried chicken ice cream and chicken waffle cake.

Making Your Own Chicken Ice Cream at Home

Essential Ingredients and Tools

Want to try your hand at making chicken ice cream at home? Here’s what you’ll need:

  • Ice Cream Base: Heavy cream, condensed milk, and vanilla extract.
  • Savory Touch: A hint of chicken fat or broth for flavor depth.
  • Texture Additions: Crushed cornflakes and chocolate-covered cookie sticks for the “bone.”
  • Tools: Ice cream maker, silicone molds shaped like drumsticks, and dipping tools.

Gathering these ingredients ensures your homemade version will look and taste just as impressive as the store-bought kind.

Step-by-Step Guide to Crafting Chicken Ice Cream

  1. Prepare the Base: Combine heavy cream and condensed milk with vanilla extract. For a savory twist, add a small amount of chicken fat or a drop of broth.
  2. Mold the Ice Cream: Pour the mixture into drumstick-shaped molds. Insert cookie sticks into the base to act as the “bone.”
  3. Freeze: Allow the molds to set in the freezer for at least 4-6 hours.
  4. Coat the Drumsticks: Once frozen, dip the ice cream into melted caramelized white chocolate and roll in crushed cornflakes for the crispy effect.
  5. Refreeze: Place the coated drumsticks back in the freezer for 1-2 hours until fully set.

Tips for Getting the Perfect Texture and Flavor

When making chicken ice cream, balance is key. Add savory elements sparingly to ensure they don’t overpower the sweetness. Using high-quality ingredients, like fresh cream and premium chocolate, will elevate the flavor and texture of your dessert. Lastly, experiment with different coatings, such as toasted coconut or graham cracker crumbs, for a unique twist.

Customization Ideas for Personal Flair

Want to make your creation truly one-of-a-kind? Try these ideas:

  • Add a drizzle of honey or maple syrup to the ice cream base for a sweet-savory combo.
  • Incorporate spices like cinnamon or nutmeg for a warm, aromatic flavor.
  • Use dark chocolate for a richer coating, or add a sprinkle of sea salt for contrast.

Other Unconventional Desserts Inspired by Chicken

Desserts inspired by chicken don’t stop at chicken ice cream. Chefs and food creators are constantly exploring new ways to fuse savory elements with sweet treats. For instance, cinnamon and honey fried chicken ice cream—a creation by Salt & Straw—takes the savory-sweet concept to new heights by incorporating chunks of fried chicken skin with a drizzle of honey.

Another innovative dessert is chicken waffle cake, which layers sweet waffle batter with savory chicken mousse and cream. These inventive dishes prove that chicken-inspired desserts can cater to both adventurous eaters and traditionalists seeking something new.

Chicken Desserts in Pop Culture

The quirky concept of chicken ice cream and similar desserts has made its way into pop culture, thanks to their viral appeal on platforms like TikTok and Instagram. Food enthusiasts and influencers love showcasing these unconventional desserts, often with captions like, “It looks like chicken, but it’s ice cream!”

Even TV shows and YouTube channels have featured chicken-inspired treats in their quest to explore unique culinary creations. This cross-over into pop culture has cemented the idea of chicken desserts as both a trend and a creative culinary statement.

Why has there been such a surge in chicken-inspired desserts like chicken ice cream? Part of the reason lies in the growing popularity of savory-sweet combinations, which add depth and intrigue to classic desserts. The rise of artisan ice cream makers and their focus on bold flavors has also contributed to this trend. By experimenting with unexpected ingredients, they’re redefining what dessert can be.

For more culinary innovation, check out Quick Meals Recipes, where you’ll find guides to other creative recipes.

The Science Behind the Flavor

How Savory Ingredients Enhance Ice Cream

The use of savory ingredients, like chicken fat or broth, in ice cream might seem odd, but there’s a scientific explanation behind it. These components add an umami flavor, which balances the sweetness of the ice cream and creates a more complex taste profile. This balance between sweet and savory is why chicken ice cream is so fascinating—it excites multiple taste receptors at once.

Additionally, savory fats help improve the texture of the ice cream, making it richer and creamier. This is why adding a small amount of chicken fat can elevate the overall experience of this unusual treat.

The Role of Texture in the Dessert’s Appeal

Texture plays a big role in the success of chicken ice cream. The crispy coating of crushed cornflakes contrasts beautifully with the smooth, creamy interior, mimicking the crunchiness of fried chicken skin. This multi-textured approach is part of what makes the dessert so enjoyable—it keeps each bite exciting and satisfying.

Moreover, the cookie “bone” adds an extra layer of crunch, making the dessert not only a feast for the taste buds but also a tactile delight. The combination of textures ensures that every bite delivers a unique experience.

Why Chicken Ice Cream is a Sensory Deligh

What makes chicken ice cream truly stand out is its ability to engage all the senses. Its visual appearance—a perfect replica of fried chicken—is a feast for the eyes. The creamy base and savory hints excite the taste buds, while the crunch adds a pleasing contrast. Together, these elements make chicken ice cream more than just a novelty; it’s an immersive sensory experience.

For more ideas on how to experiment with flavor and texture, check out the unique recipes at Quick Meals Recipes. You might find your next culinary inspiration.

If you’re wondering where to get your hands on chicken ice cream, you’re in luck. Life Raft Treats is one of the most famous brands offering this quirky dessert. Their iconic “Not Fried Chicken Ice Cream” has captured the attention of food enthusiasts everywhere. You can find this treat in specialty stores, online platforms, or through their dedicated retailers.

Salt & Straw is another innovative ice cream maker known for its bold flavors. Their cinnamon and honey fried chicken ice cream combines sweet and savory elements, making it a must-try for adventurous foodies. These brands are redefining the frozen dessert experience.

Specialty Stores and Online Retailers

For those without access to local specialty stores, ordering online is a great option. Life Raft Treats delivers their creations straight to your door, ensuring you don’t miss out on the fun. Similarly, online platforms like Goldbelly offer a range of chicken-inspired desserts, making them easily accessible no matter where you are.

Specialty stores in major cities often carry artisan ice cream brands that experiment with unique flavors, including chicken ice cream. Check your local gourmet grocery stores or ice cream parlors for availability.

How to Order Chicken Ice Cream Near You

Finding chicken ice cream near you might seem tricky, but with a little research, it’s easier than you think. Use online store locators on websites like Life Raft Treats or Salt & Straw to find a retailer close by. Alternatively, join foodie groups online to discover pop-up events and festivals featuring these unique desserts.

Frequently Asked Questions

What is Chicken Ice Cream Made Of?

At its core, chicken ice cream combines a creamy base with hints of savory chicken-inspired flavors. Ingredients often include heavy cream, condensed milk, and subtle additions like chicken fat, broth, or fried chicken bits for depth. The goal is to balance savory and sweet without overwhelming either flavor.

How Can I Make Ice Cream for Chickens?

Making ice cream for chickens might sound odd, but it’s a fun way to treat your backyard pets during the summer. Create a simple, safe mix using plain yogurt, mashed fruits, and grains. Freeze the mixture in molds or ice cube trays for a refreshing snack. Keep it simple and ensure no added sugars or harmful ingredients.

What is “Not Fried Chicken Ice Cream” Made Of?

The famous “Not Fried Chicken Ice Cream” is a creative dessert made with waffle ice cream, a chocolate-covered cookie “bone,” and a crispy coating of caramelized white chocolate and crushed cornflakes. It’s a dessert designed to look exactly like fried chicken but tastes like a sweet, creamy treat.

How to Make a Good Ice Cream at Home?

Making delicious ice cream at home starts with a high-quality base of heavy cream and condensed milk. Customize with flavors, mix-ins, or even savory elements like chicken ice cream for a unique twist. Use an ice cream maker for a smoother texture or freeze the mixture in molds for easy homemade treats.

If you’re wondering where to get your hands on chicken ice cream, you’re in luck. Life Raft Treats is one of the most famous brands offering this quirky dessert. Their iconic “Not Fried Chicken Ice Cream” has captured the attention of food enthusiasts everywhere. You can find this treat in specialty stores, online platforms, or through their dedicated retailers.

Salt & Straw is another innovative ice cream maker known for its bold flavors. Their cinnamon and honey fried chicken ice cream combines sweet and savory elements, making it a must-try for adventurous foodies. These brands are redefining the frozen dessert experience.

Specialty Stores and Online Retailers

For those without access to local specialty stores, ordering online is a great option. Life Raft Treats delivers their creations straight to your door, ensuring you don’t miss out on the fun. Similarly, online platforms like Goldbelly offer a range of chicken-inspired desserts, making them easily accessible no matter where you are.

Specialty stores in major cities often carry artisan ice cream brands that experiment with unique flavors, including chicken ice cream. Check your local gourmet grocery stores or ice cream parlors for availability.

How to Order Chicken Ice Cream Near You

Finding chicken ice cream near you might seem tricky, but with a little research, it’s easier than you think. Use online store locators on websites like Life Raft Treats or Salt & Straw to find a retailer close by. Alternatively, join foodie groups online to discover pop-up events and festivals featuring these unique desserts.

Why Chicken Ice Cream is Worth Trying

Breaking Culinary Stereotypes

Chicken ice cream challenges the notion of what a dessert should be, and that’s what makes it so exciting. It flips traditional ideas on their heads, proving that savory and sweet can coexist beautifully in one dish. For anyone looking to explore the edges of culinary creativity, this unique dessert is a must-try. It’s more than just ice cream—it’s an experience that broadens your palate and opens your mind to new possibilities.

Not only does it look like fried chicken, but its flavors and textures combine in ways you wouldn’t expect. This element of surprise makes it a delightful treat to share with friends and family.

Exploring New Flavors

Trying chicken ice cream is all about stepping out of your comfort zone. The subtle hints of chicken paired with the creamy sweetness create a flavor profile that’s anything but ordinary. Each bite offers a blend of familiar tastes and unexpected textures, making it a memorable adventure for your taste buds.

Desserts like these show us how food can be both playful and innovative. If you’ve ever wondered what creativity in a cone tastes like, chicken ice cream has the answer.

Conclusion

A Taste of Creativity

In a world filled with classic dessert choices, chicken ice cream stands out as a testament to culinary innovation. It’s not just about the flavors; it’s about the artistry and thought that go into creating something extraordinary. Whether you buy it from an artisan shop or try making it at home, this unique dessert is worth a place on your foodie bucket list.

Embracing the Unexpected

From its quirky appearance to its surprising flavor, chicken ice cream invites us to embrace the unexpected. So why not give it a try? You might just discover a new favorite that’s as fun as it is delicious.

Beef Chuck Eye Steak: 5 Secrets To Cooking the Best

Beef chuck eye steak is one of the best hidden treasures at the meat counter. While many people rush to buy expensive cuts, beef chuck eye steak offers great marbling and tenderness for much less money. Home cooks have found that this affordable cut turns into something special with the right cooking methods. With a few simple tricks, this budget-friendly option can become the star of your dinner table.

What Is Beef Chuck Eye Steak?

What Makes Chuck Eye Steak Unique?

What makes beef chuck eye steak special is where it comes from on the cow. It sits right where the shoulder meets the rib area. Beef chuck eye steak contains the same muscle as ribeye but extends into the chuck section. This location gives beef chuck eye steak rich flavor from the chuck part with some of the tenderness you’d expect from ribeye, making it a great deal for people who love steak but want to save money

Chuck Eye Steak vs. Ribeye Steak: A Detailed Comparison

CharacteristicChuck Eye SteakRibeye Steak
Cost$7-10 per pound$15-25+ per pound
Flavor ProfileRich, beefy, slightly more intenseRich, buttery, milder
Fat ContentGood marbling with some connective tissueExcellent marbling throughout
TendernessModerately tender with proper cookingVery tender naturally
Best Cooking MethodsPan-searing, grilling, reverse searPan-searing, grilling, broiling
Value Rating★★★★★★★★☆☆

While ribeye might win slightly on tenderness, the chuck eye’s deeper beef flavor and dramatically better value make it the smarter choice for weekly meals and special occasions alike.

While ribeye gets most of the attention, Beef Chuck Eye Steak offers similar marbling patterns to black pepper angus steak but typically costs 40-60% less.

Best Cuts and Grades for Chuck Eye Steak

For the ultimate chuck eye steak experience, look for:

  • USDA Choice or Prime grades: The higher grades ensure better marbling throughout the meat
  • Uniform thickness: Aim for steaks at least 1-1.5 inches thick for even cooking
  • Vibrant color: Fresh chuck eye should display a bright, cherry-red color
  • Even marbling: Look for fine white flecks of intramuscular fat distributed throughout the meat
  • Limited connective tissue: Some is inevitable due to its location, but excessive gristle should be avoided

Pro tip: Develop a relationship with your local butcher and specifically request chuck eye steaks cut from positions closer to the ribeye (sometimes called “chuck eye roll”) for the most tender results.

Secret #1: Choosing and Preparing the Perfect Cut

Raw beef chuck eye steaks showing marbling patterns similar to ribeye but at lower cost
Look for beef chuck eye steaks with visible marbling throughout for the juiciest, most flavorful results

How to Select a Tender Chuck Eye Steak

Finding the perfect chuck eye steak requires a discerning eye:

  1. Know what you’re looking for: Ask your butcher specifically for “chuck eye steak” (not to be confused with chuck roast or regular chuck steak)
  2. Inspect the marbling: Look for fine, web-like intramuscular fat patterns throughout the meat
  3. Check thickness: Select cuts between 1-1.5 inches thick for optimal cooking control
  4. Examine the color: Choose steaks with vibrant red coloring and avoid those with brown edges
  5. Consider the source: When possible, opt for grass-fed or sustainably raised beef for superior flavor

Remember that a quality chuck eye steak should resemble a slightly less marbled ribeye, not a typical chuck steak.

Pre-Cooking Preparation: Critical Steps for Success

Proper preparation is essential for transforming chuck eye steak from good to exceptional:

  1. Temperature acclimation: Remove the steak from refrigeration 30-45 minutes before cooking to allow it to reach room temperature
  2. Moisture management: Pat the steak thoroughly dry with paper towels to ensure proper searing
  3. Trim selectively: Remove excessive external fat if desired, but leave some for flavor
  4. Season strategically: Apply salt at least 40 minutes before cooking (or just before) to avoid drawing out moisture during the critical in-between period

These preparation steps create the foundation for perfect texture and flavor development during cooking.

Marinades and Seasoning Options That Elevate Chuck Eye Steak

While chuck eye steak is naturally flavorful, the right seasoning approach can enhance its inherent qualities:

Homemade herb compound butter for topping beef chuck eye steak after cooking
This simple garlic-herb compound butter is the secret to elevating beef chuck eye steak to steakhouse quality

Classic Steakhouse Seasoning

  • 2 tablespoons kosher salt
  • 1 tablespoon freshly ground black pepper
  • 1 teaspoon garlic powder
  • 1 teaspoon onion powder
  • ½ teaspoon dried rosemary, crushed

Flavor-Boosting Marinade (2-4 hours)

  • ¼ cup olive oil
  • 3 tablespoons Worcestershire sauce
  • 2 tablespoons soy sauce
  • 4 cloves garlic, minced
  • 1 tablespoon fresh rosemary, chopped
  • 1 tablespoon Dijon mustard
  • 1 teaspoon freshly ground black pepper

Tenderizing Marinade (For tougher cuts, 4-6 hours)

  • ½ cup pineapple juice
  • ¼ cup olive oil
  • 3 tablespoons balsamic vinegar
  • 2 tablespoons brown sugar
  • 4 cloves garlic, minced
  • 1 tablespoon kosher salt
  • 2 teaspoons red pepper flakes

Remember: With quality chuck eye steaks, less is often more. Sometimes a generous application of kosher salt and freshly ground black pepper is all you need to let the beef’s natural flavors shine.

Secret #2: Mastering Cooking Techniques

Pan-Searing Perfection: Step-by-Step Guide

Unlike tougher cuts that need hours of cooking, beef chuck eye steak cooks quickly while staying juicy. A 1½-inch thick beef chuck eye steak needs about 4-5 minutes on each side for medium-rare when cooking in a pan. This short cooking time is another reason beef chuck eye steak is perfect for busy weeknight meals when you don’t have much time but still want a tasty dinner.

  1. Preheat properly: Heat a cast-iron skillet over high heat until it just starts to smoke
  2. Add the right oil: Add 1-2 tablespoons of high smoke-point oil like avocado, grapeseed, or clarified butter
  3. Sear with purpose: Place the steak in the pan and press gently to ensure full contact; don’t move it for at least 2-3 minutes
  4. Monitor the crust: Cook until a deep, golden-brown crust forms (about 3-4 minutes for 1.5-inch steaks)
  5. Flip once: Turn the steak over just once and reduce heat to medium-high
  6. Enhance with aromatics: Add 2 tablespoons butter, 2 garlic cloves, and fresh thyme or rosemary to the pan
  7. Baste continuously: Tilt the pan and spoon the melted butter mixture over the steak repeatedly
  8. Check temperature: Cook to desired doneness, using a meat thermometer for precision
  9. Rest properly: Transfer to a cutting board and rest for 5-7 minutes before slicing

This method creates the perfect combination of a flavorful crust and juicy interior that defines a perfect steak.

Grilling Chuck Eye Steak Like a Professional Chef

The grill adds another dimension of flavor to chuck eye steak:

  1. Preheat strategically: Set up a two-zone fire with high direct heat and moderate indirect heat areas
  2. Oil prevention: Oil the steak lightly (not the grates) to prevent sticking and flare-ups
  3. Sear efficiently: Place over direct heat for 2-3 minutes per side to develop grill marks and crust
  4. Manage the cook: Move to indirect heat to finish cooking to desired doneness
  5. Close the lid: Keep the grill lid closed when cooking on indirect heat to maintain temperature
  6. Rest correctly: Rest the steak on a warm plate tented with foil for 5 minutes

For gas grills: Preheat one side to high (450-500°F) and the other to medium (325-350°F). For charcoal: Arrange coals on one side for a natural two-zone setup.

For additional beef grilling techniques, you might enjoy our guide to baseball steak grilling which uses similar principles for perfect doneness

Beef chuck eye steak topped with herb butter served with fresh green beans on wooden board
Elevate your beef chuck eye steak with herb-infused compound butter for restaurant-quality results

The Reverse Sear Method: A Game-Changer for Thick-Cut Chuck Eye

For thicker chuck eye steaks (1.5+ inches), the reverse sear method yields extraordinary results:

  1. Low and slow start: Preheat oven to 275°F and place steak on a wire rack over a baking sheet
  2. Cook gently: Bake until internal temperature reaches 10-15°F below your target doneness (about 20-25 minutes for medium-rare)
  3. Rest briefly: Remove and rest for 10 minutes while heating a cast-iron skillet until smoking hot
  4. Sear rapidly: Sear the steak for 45-60 seconds per side in the hot skillet with high smoke-point oil
  5. Finish with butter: Add butter and aromatics for a final flavor boost in the last 30 seconds
  6. Serve immediately: The beauty of reverse sear is minimal additional resting time is needed

This method provides unparalleled edge-to-edge doneness with a perfect crust, transforming chuck eye into a steak that rivals those from high-end steakhouses.

The reverse sear method works beautifully for both chuck eye steak and beef bottom round steak when you want perfect edge-to-edge doneness

Secret #3: Achieving Perfect Doneness

Getting the right temperature is key when cooking beef chuck eye steak. For the most tender results, cook beef chuck eye steak to medium-rare (130-135°F) or medium (140-145°F). If you cook it more than that, the beef chuck eye steak can get tough as the fat melts away without enough time to soften the small amount of tough tissue in this cut

DonenessTemperatureDescriptionBest For
Rare120-125°FCool red center, very softHighest quality, extremely fresh chuck eye
Medium-Rare130-135°FWarm red center, tenderMost chuck eye steaks (recommended)
Medium140-145°FPink center, slightly firmSteaks with more connective tissue
Medium-Well150-155°FSlight pink, firmer textureNot ideal for chuck eye
Well-Done160°F+No pink, much firmerNot recommended for chuck eye

Since chuck eye contains slightly more connective tissue than ribeye, cooking to medium-rare or medium allows enough heat to melt the fat and collagen while maintaining tenderness.

Tools for Perfect Doneness

  • Instant-read digital thermometer: The most reliable method for precision cooking
  • The touch test: Compare the feel of the steak to different parts of your hand (thumb and palm connection = rare, base of thumb = medium-rare, etc.)
  • Timing method: For 1-inch steaks: 4 minutes per side for medium-rare, 5 minutes for medium (adjust for thickness)

Remember that carryover cooking will raise the temperature by 5-10°F during resting, so remove the steak slightly before it reaches your target temperature.

Secret #4: Avoiding Common Steak Cooking Mistakes

Overcooking: The #1 Enemy of Chuck Eye Steak

Chuck eye’s sweet spot is medium-rare to medium. Beyond that, you risk losing the tenderness that makes this cut special.

Prevention strategy:

  • Use a reliable meat thermometer
  • Remove the steak 5-10°F before target temperature
  • Remember that thinner steaks cook faster
  • When in doubt, undercook slightly – you can always cook more, but never less

The Critical Resting Phase: Why It Matters

Resting allows the meat’s proteins to relax and reabsorb juices, resulting in a significantly more tender and flavorful steak.

Perfect resting technique:

  • Rest for approximately 5 minutes per inch of thickness
  • Place on a warm plate or cutting board
  • Tent loosely with foil (don’t wrap tightly)
  • Resist the urge to cut into the steak prematurely
  • Remember that the steak will continue cooking slightly during this time

Seasoning Mistakes That Ruin Good Chuck Eye Steak

Many home cooks either under-season or season at the wrong time.

Seasoning best practices:

  • Season generously – more than you think you need
  • Use kosher salt rather than table salt for better adhesion and flavor
  • Season either 40+ minutes before cooking OR right before cooking (avoid the in-between period that draws out moisture)
  • Season from a height of 8-12 inches for even distribution
  • Don’t forget to season the sides of the steak, not just the top and bottom

Temperature Management: A Professional Approach

Starting with properly tempered meat ensures even cooking.

Temperature guidelines:

  • Remove steak from refrigerator 30-45 minutes before cooking
  • Never cook straight from the freezer (even if the package says you can)
  • Ensure your cooking surface is properly preheated before the steak touches it
  • Let cooking equipment recover heat between batches if cooking multiple steaks

Secret #5: Creative Recipes and Pairing Ideas

Chuck Eye Steak with Compound Butter Variations

Compound butter is the secret weapon of steakhouses, adding richness and flavor complexity.

Classic Garlic-Herb Butter

  • 8 tablespoons unsalted butter, softened
  • 3 cloves garlic, minced
  • 1 tablespoon fresh parsley, finely chopped
  • 1 teaspoon fresh thyme leaves
  • 1 teaspoon fresh rosemary, finely chopped
  • ½ teaspoon lemon zest
  • ¼ teaspoon sea salt

Blue Cheese Butter

  • 8 tablespoons unsalted butter, softened
  • 3 tablespoons quality blue cheese, crumbled
  • 1 tablespoon chives, finely chopped
  • ½ teaspoon freshly ground black pepper
  • Pinch of kosher salt

Instructions: Mix ingredients, form into a log using plastic wrap, refrigerate until firm, then slice into medallions to top hot steak.

Slow-Cooked Chuck Eye Steak Recipes

Transform tougher chuck eye steaks into fork-tender delights:

Red Wine Braised Chuck Eye

  1. Season 2-3 chuck eye steaks generously with salt and pepper
  2. Sear on high heat until well-browned on both sides
  3. Remove steaks and sauté 1 diced onion, 2 carrots, and 2 celery stalks
  4. Add 4 cloves minced garlic and 2 tablespoons tomato paste, cook 1 minute
  5. Deglaze with 1 cup dry red wine, scraping up browned bits
  6. Add 2 cups beef broth, 2 bay leaves, and 1 sprig rosemary
  7. Return steaks to liquid, cover, and braise at 325°F for 2-3 hours until fork-tender
  8. Remove steaks, strain and reduce sauce if desired, then serve

Balanced Side Dishes That Complete the Meal

Create a restaurant-quality experience with these carefully chosen sides:

Classic Pairings

  • Truffle Parmesan Fries: Hand-cut potatoes, truffle oil, Parmesan, and fresh herbs
  • Creamed Spinach: Traditional steakhouse side with nutmeg and Parmesan
  • Roasted Garlic Mashed Potatoes: Russet potatoes with roasted garlic and cream

Lighter Options

  • Grilled Asparagus with Lemon Zest: Simple, elegant, and palette-cleansing
  • Arugula Salad with Balsamic Reduction: Peppery greens to cut through the richness
  • Roasted Brussels Sprouts with Bacon: Caramelized vegetables with savory notes

Looking for more beef recipes? Try my Incredible Teriyaki Rib Eye Steaks for another fantastic dinner option!

FAQ Section

What is beef chuck eye steak, and why is it called the “poor man’s ribeye”?

Beef chuck eye steak comes from where the shoulder (chuck) meets the rib section. It’s called the “poor man’s ribeye” because it contains the same muscle as ribeye (longissimus dorsi) but costs significantly less since it’s technically from the chuck primal.

How does chuck eye steak compare to other budget steak options like flank or skirt steak?

Unlike flank or skirt steak that require special preparation like marinating and slicing against the grain, chuck eye has marbling similar to premium cuts, making it more forgiving to cook. It offers better tenderness than other budget options when prepared properly.

Is chuck eye steak as tender as ribeye?

Not quite, but properly cooked chuck eye can come remarkably close. The first few chuck eye steaks cut closest to the rib section are much more tender than those further into the shoulder.

How do I make chuck eye steak more tender?

For maximum tenderness: 1) Don’t overcook (medium-rare to medium is ideal); 2) Ensure proper resting time; 3) Slice against the grain; 4) Consider using a marinade with acidic ingredients for tougher cuts; 5) Use the reverse sear method for thicker steaks.

What’s the best way to cook beef chuck eye steak?

For 1-1.5 inch steaks, pan-searing in a cast-iron skillet with the butter-basting technique yields exceptional results. For thicker cuts, the reverse sear method provides the best balance of edge-to-edge doneness and crust development.

For more budget-friendly beef options, check out our guides to beef petite sirloin steak and cube steak in crock pot.

Conclusion

Beef chuck eye steak represents the perfect intersection of value and flavor in the world of beef. By applying these five secrets selecting the right cut, preparing it properly, mastering cooking techniques, achieving perfect doneness, and exploring creative serving options you’ll transform this budget-friendly cut into a meal worthy of the finest steakhouses.

The beauty of chuck eye steak lies in its versatility and forgiving nature. Whether you’re a novice cook or a seasoned chef, this underappreciated cut rewards proper technique with exceptional results that will have friends and family questioning how you achieved such flavor without breaking the bank.

I’d love to hear about your experiences cooking chuck eye steak! Have you tried any of these techniques? Do you have additional tips to share? Let me know in the comments below.

Tagged : / /