Easy Dinner Ideas For Two: 10 Tasty Meals You’ll Truly Adore

Easy Dinner Ideas For Two can transform your weeknights, date nights, or cozy weekends at home. In this article, you’ll discover simple yet mouthwatering recipes designed especially for couples. Therefore, you won’t have to worry about excessive prep work or endless leftovers. By focusing on quick cooking methods, accessible ingredients, and flavorful combinations, you’ll find fresh ways to make dinnertime a delight. On the other hand, if you have dietary preferences, you can easily adapt the tips below to meet your needs. Let’s get started!

1. Quick & Easy Dinner Ideas For Two

In this section, you’ll find two speedy recipes that keep your prep time short but your taste buds satisfied. Thus, you can skip the drive-thru and enjoy homemade goodness without breaking a sweat. However, remember that fresh ingredients make a big difference, so use the best produce you can find.

1.1 Creamy One-Pot Pasta

Creamy one-pot pasta in a skillet with fresh herbs
Experience the simplicity of one-pan cooking at its best.

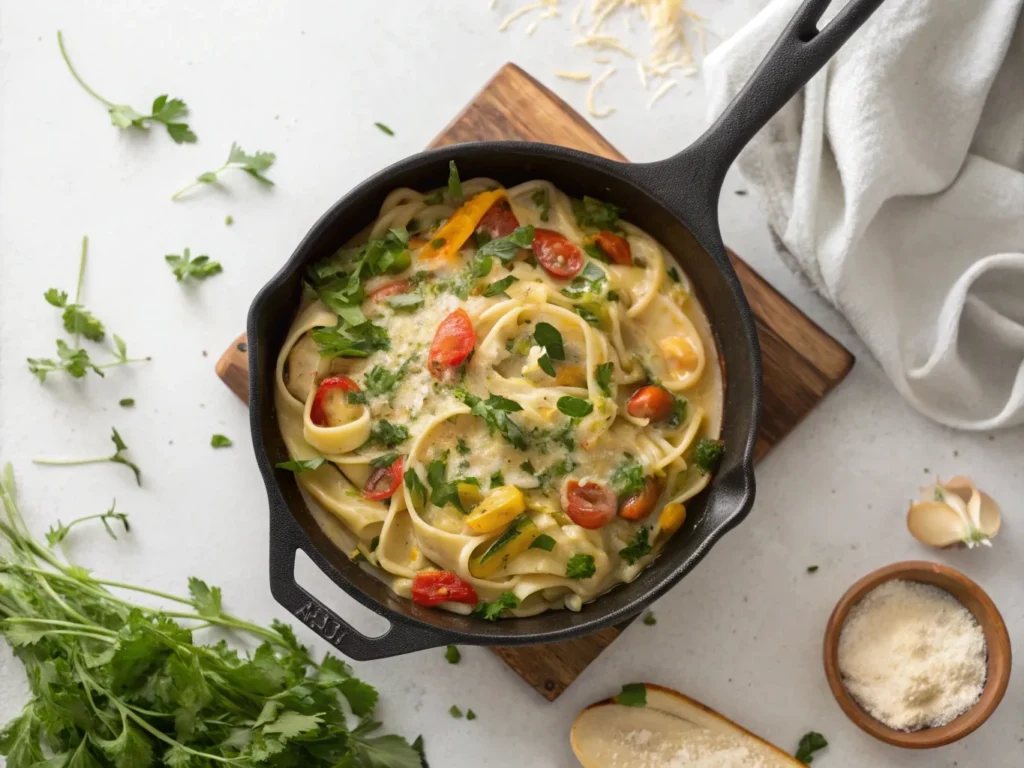
If you love rich and velvety pasta dishes, this Creamy One-Pot Pasta is for you. It requires minimal cleanup because you’ll cook everything in just one pan. Therefore, you’ll save time and effort.

  • Ingredients
    • 6 ounces of your favorite pasta (penne or fusilli)
    • 1 cup heavy cream (or half-and-half for a lighter option)
    • 1 cup vegetable or chicken broth
    • 1 cup sliced mushrooms
    • 1 tablespoon minced garlic
    • 1 tablespoon olive oil
    • Salt and pepper to taste
  • Instructions
    1. Sauté the garlic and mushrooms in olive oil until slightly browned.
    2. Add pasta, broth, and cream into the same pot.
    3. Bring to a gentle boil, then reduce heat. Stir occasionally for 10–12 minutes or until pasta is al dente.
    4. Season with salt, pepper, and optional herbs like basil.
  • Tips & Variations
    • Swap cream with low-fat milk to reduce calories.
    • Add spinach or kale for extra nutrition.
    • Top with Parmesan cheese to enhance flavor.

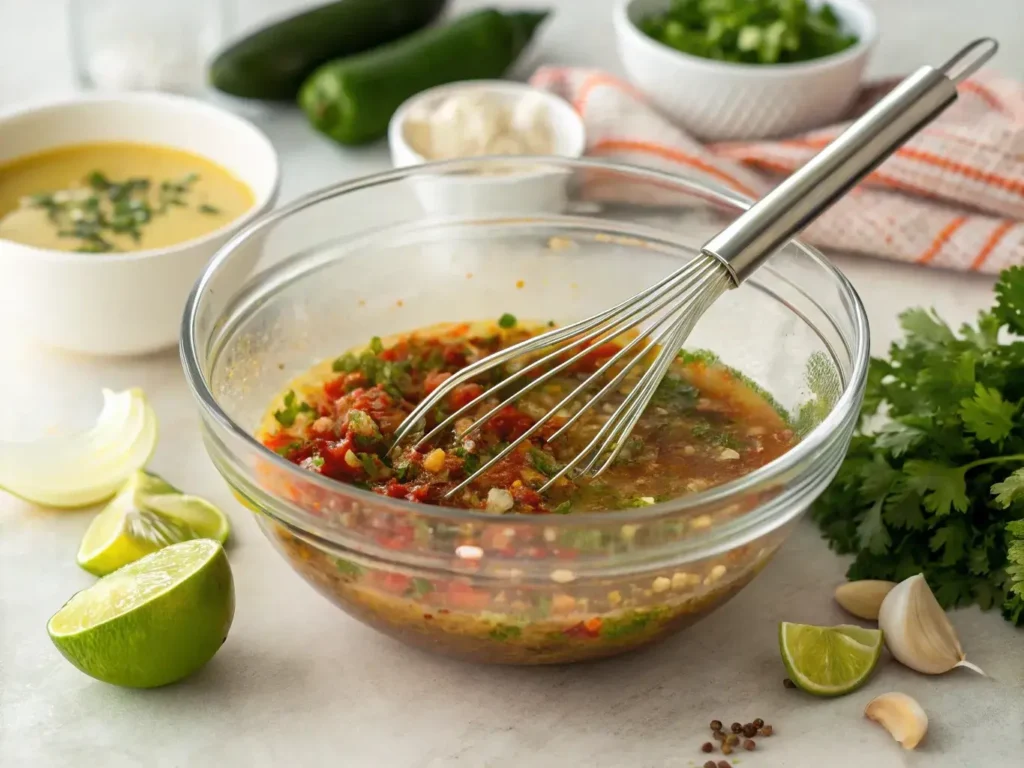
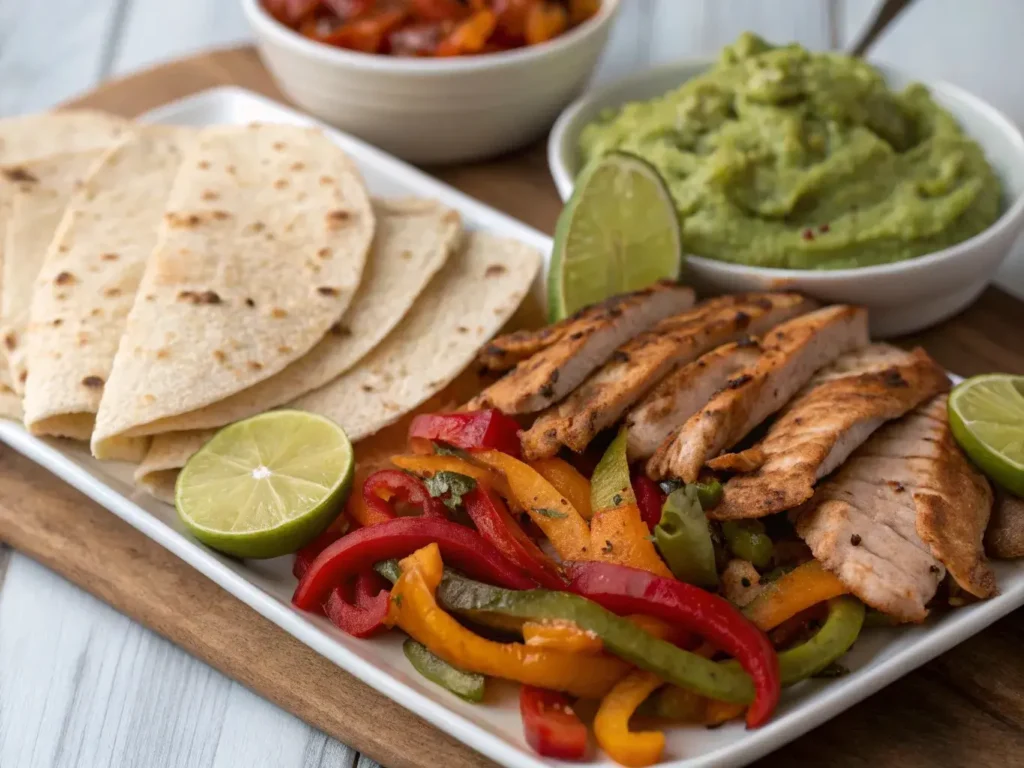
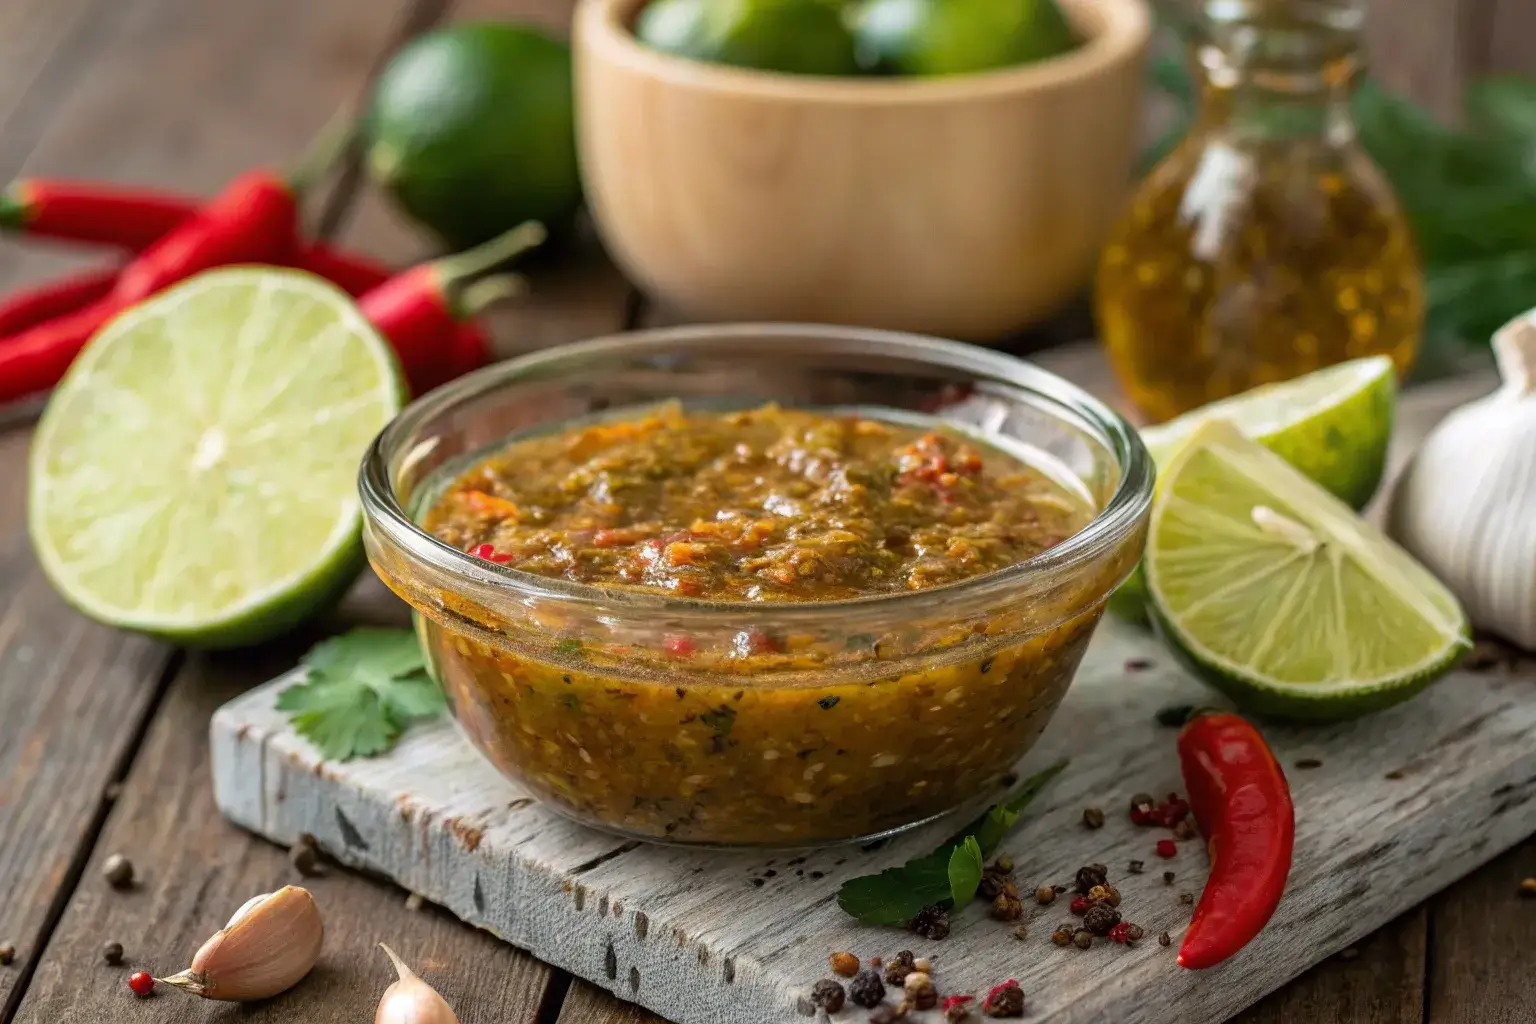
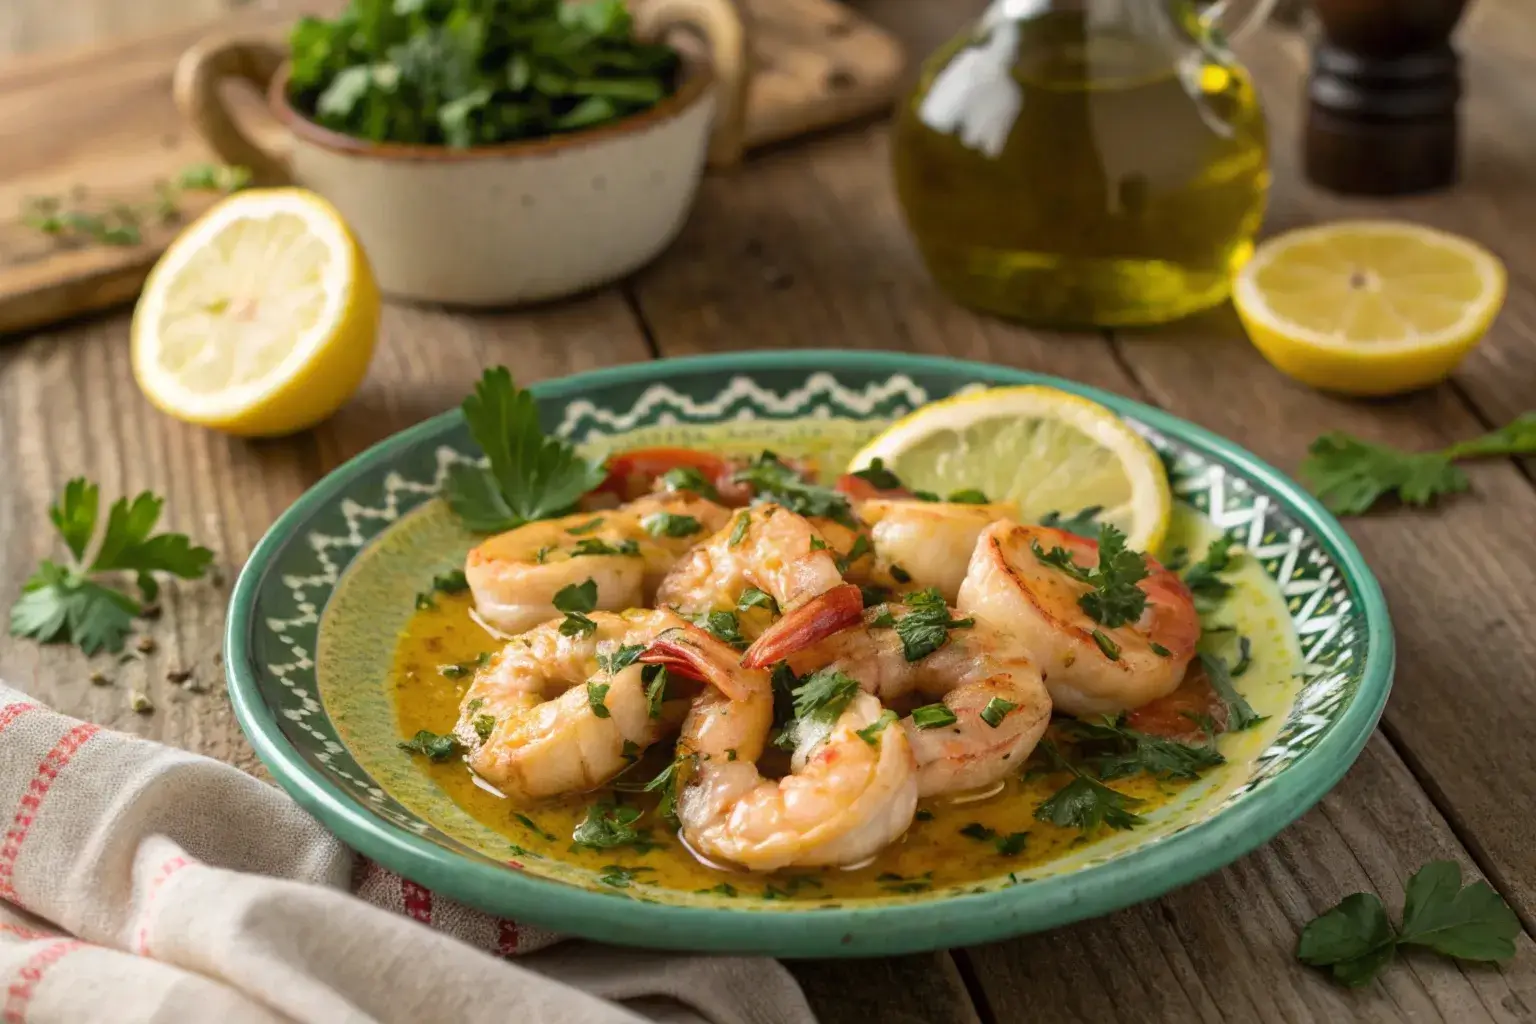
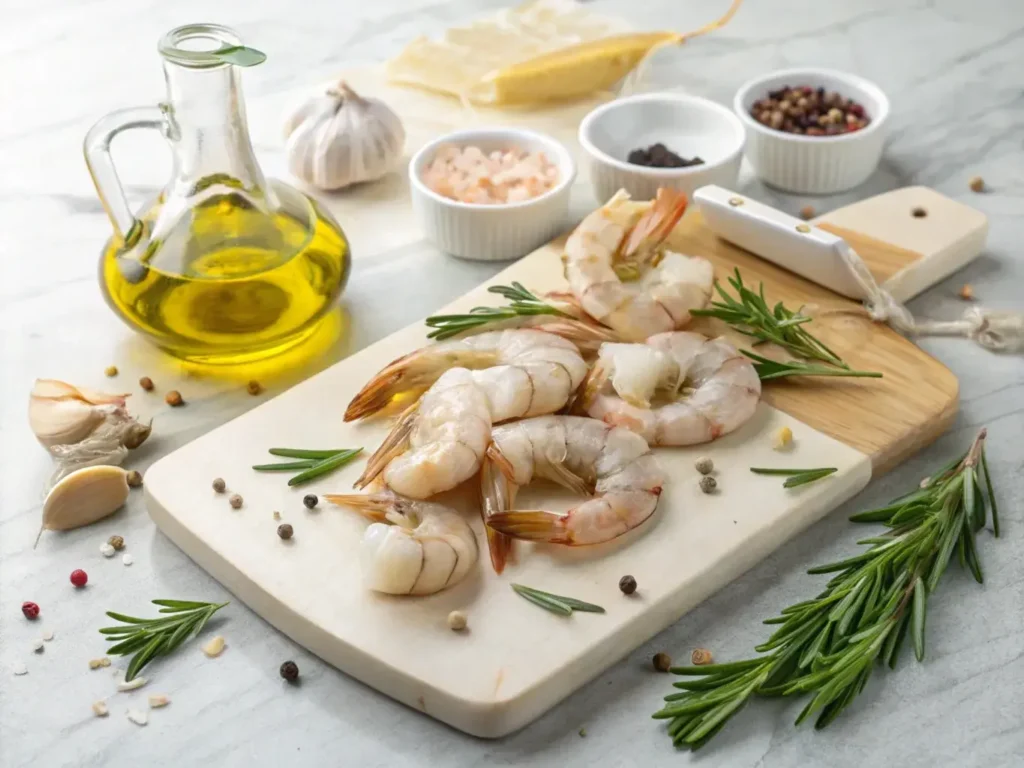
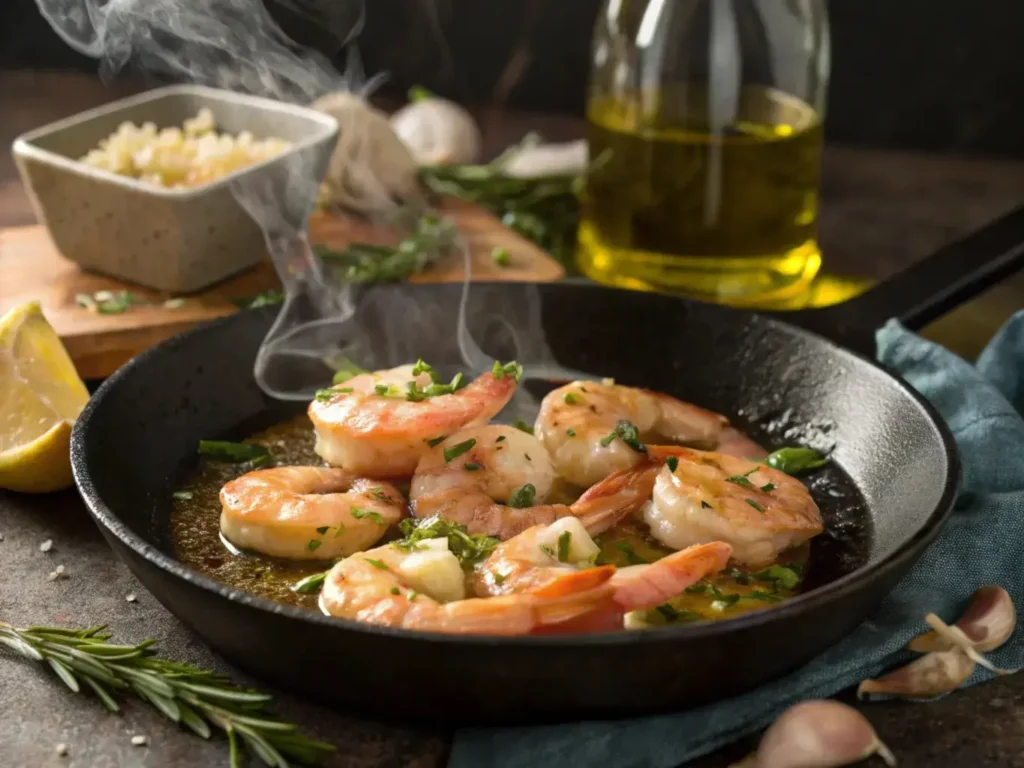
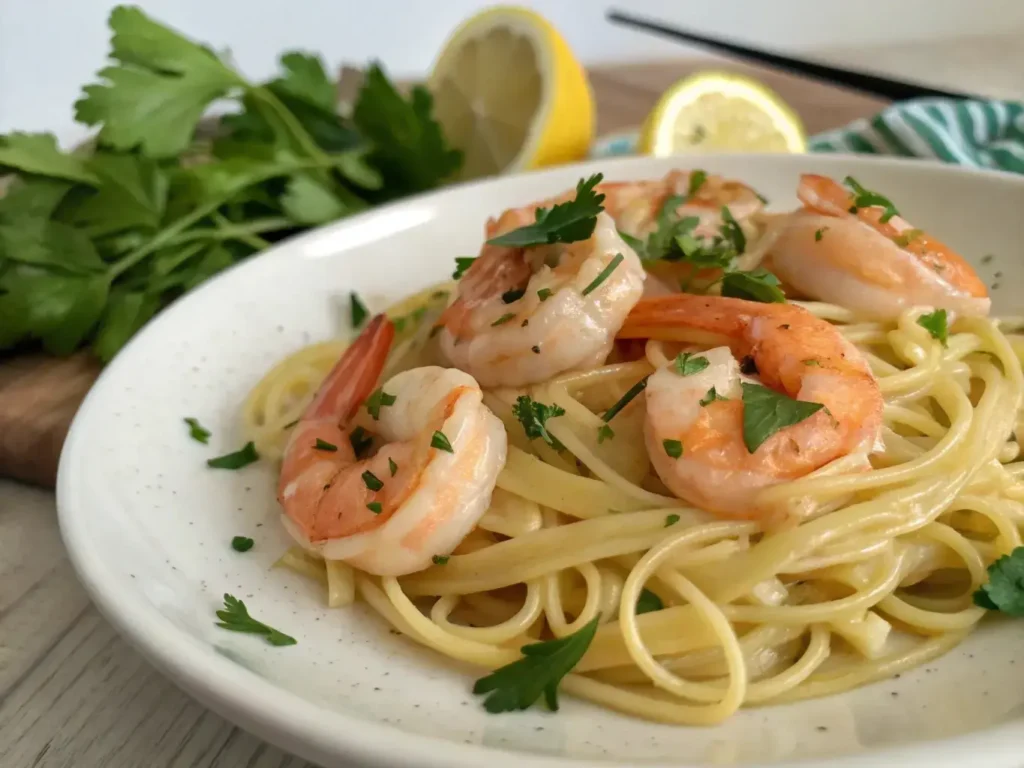
1.2 Speedy Shrimp Tacos

Do you prefer seafood? Speedy Shrimp Tacos are a top choice for couples seeking a fresh, zesty meal. On the other hand, you can replace shrimp with fish or chicken if you like.

  • Ingredients
    • 12 medium shrimp, peeled and deveined
    • 1 tablespoon chili powder
    • 1 teaspoon cumin
    • 2 tablespoons fresh lime juice
    • 1 tablespoon olive oil
    • 4 small tortillas
    • Optional toppings: shredded cabbage, chopped tomatoes, and cilantro
  • Instructions
    1. Toss shrimp in olive oil, chili powder, cumin, and lime juice.
    2. In a heated skillet, cook shrimp for about 2 minutes per side or until pink.
    3. Warm tortillas in a separate pan.
    4. Fill each tortilla with shrimp and your favorite toppings.
  • Tips & Variations
    • Use Greek yogurt or sour cream as a tangy drizzle.
    • Add avocado slices or pico de gallo for extra flair.
    • For spice lovers, toss in a pinch of cayenne pepper.

1.3 Essential Pantry Staples

Before you start cooking these Easy Dinner Ideas For Two, it helps to keep essential staples in your pantry. In addition, well-stocked cabinets minimize last-minute grocery runs.

  • Common pantry items: pasta, rice, canned tomatoes, and spices like paprika or oregano
  • Versatile proteins: canned tuna, dried lentils, or vacuum-sealed tofu
  • Flavor boosters: olive oil, vinegar, low-sodium soy sauce, and lemon juice

1.4 Time-Saving Hacks for Busy Evenings

When you’re short on time, it’s crucial to streamline your process. Thus, planning ahead can save you from stress.

  • Prep Ingredients in Advance: Chop veggies and marinate proteins beforehand.
  • Use Freezer-Friendly Items: Frozen shrimp, peas, or corn defrost quickly.
  • Cook in Batches: Make a double batch and freeze half for another day.

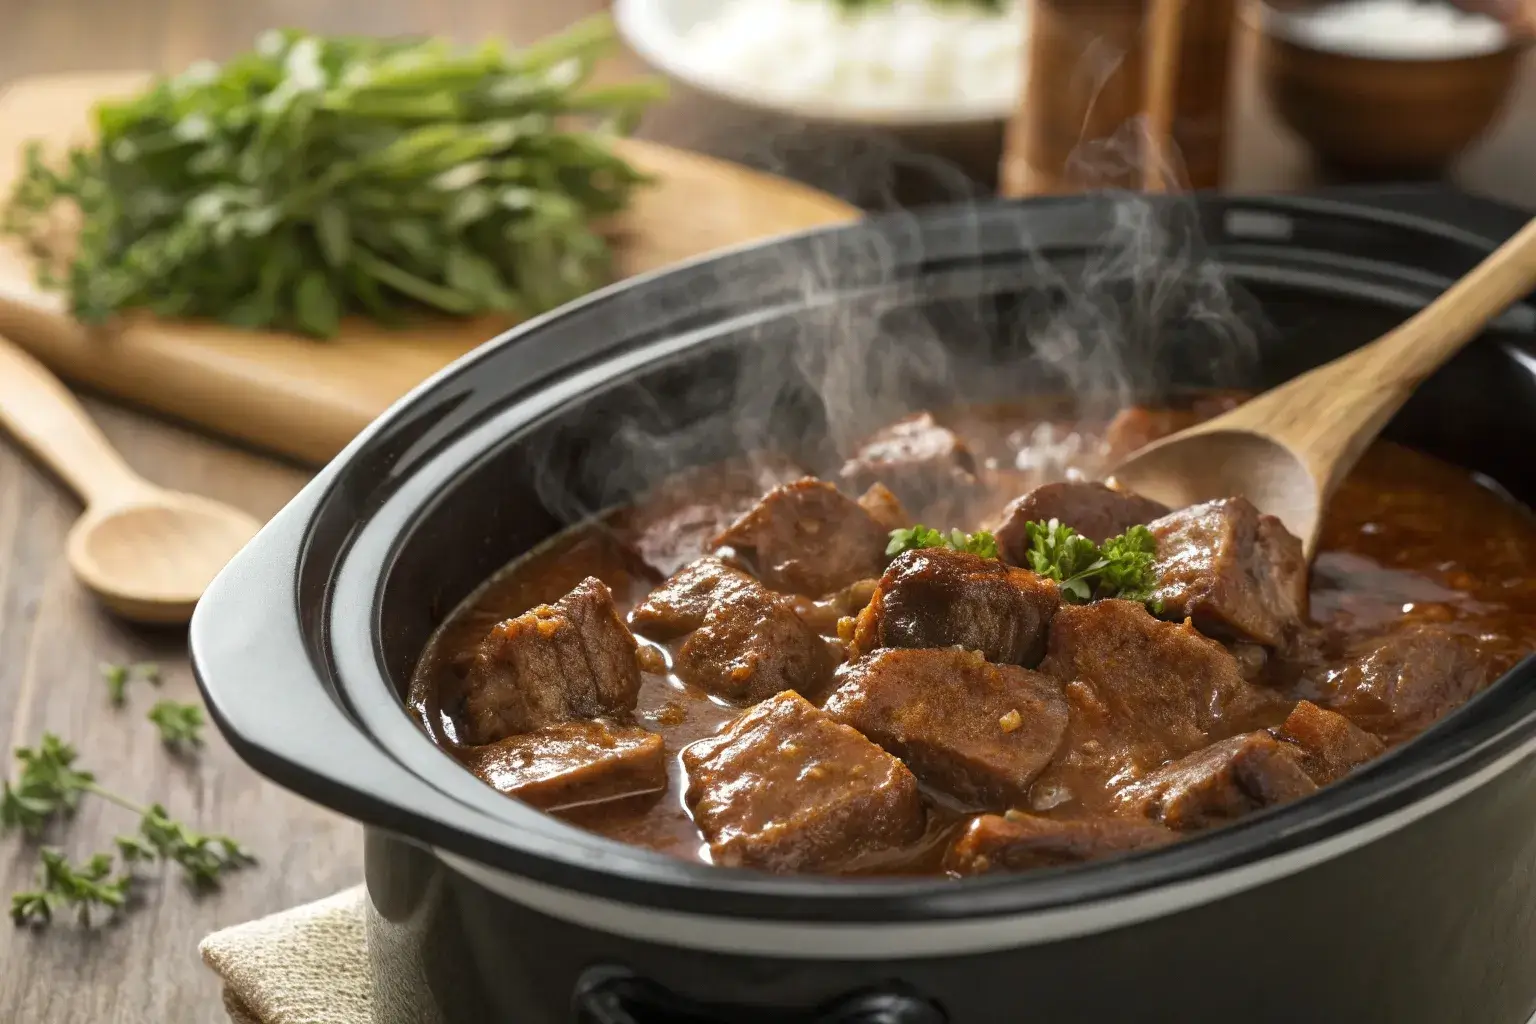
check out our Cube Steak in Crock Pot: Comfort Food Done Right

2. Budget-Friendly Meals for Couples

Cooking Easy Dinner Ideas For Two don’t have to break the bank. In fact, by choosing cost-effective ingredients and portion sizes, you’ll enjoy comforting dishes while staying within your budget. Therefore, you’ll have extra money for dessert or next weekend’s fun activities.

2.1 Simple Tuna and Rice Bake

Tuna and rice casserole freshly baked with melted cheese
Enjoy a hearty meal without breaking the bank.

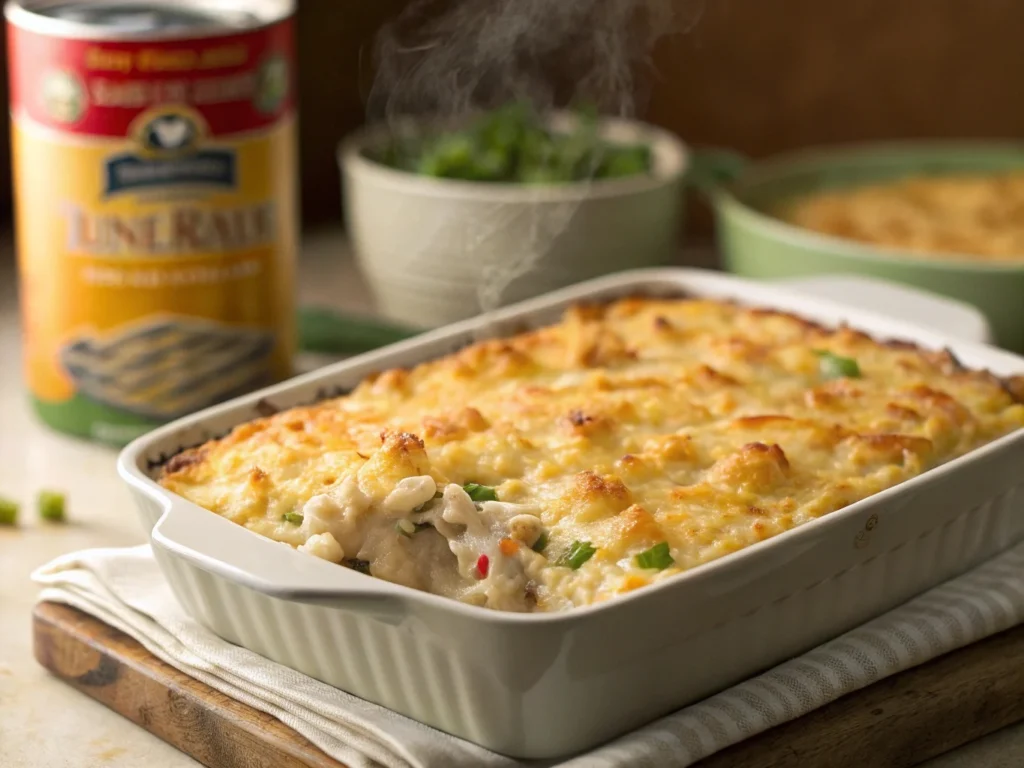
If you’re looking for a hearty meal without expensive cuts of meat, Tuna and Rice Bake is an excellent option. However, you can swap the tuna with canned salmon if it’s on sale.

  • Ingredients
    • 2 cups cooked rice (white or brown)
    • 1 can tuna, drained
    • 1 cup mixed vegetables (frozen or fresh)
    • 1 can cream of mushroom soup (low-sodium)
    • ½ cup shredded cheese (Cheddar or mozzarella)
  • Instructions
    1. Combine rice, tuna, vegetables, and soup in a mixing bowl.
    2. Transfer to a greased baking dish.
    3. Top with shredded cheese and bake at 375°F (190°C) for 15 minutes or until bubbly.
  • Tips & Variations
    • Use leftover rice to speed up the process.
    • Add sautéed onions or mushrooms for extra flavor.
    • Try whole-grain rice for added fiber.

2.2 Veggie-Packed Lentil Soup

Soup can be both filling and economical. Thus, Veggie-Packed Lentil Soup is a top contender for cold evenings or as a lunch leftover.

  • Ingredients
    • 1 cup dried lentils, rinsed
    • 4 cups vegetable broth
    • 1 can diced tomatoes (low-sodium)
    • 1 cup chopped carrots
    • 1 cup chopped celery
    • 1 tablespoon tomato paste
    • Salt, pepper, and herbs (thyme or rosemary)
  • Instructions
    1. Sauté carrots, celery, and any additional veggies in a large pot.
    2. Add lentils, broth, diced tomatoes, and tomato paste.
    3. Simmer for 20–25 minutes or until lentils are tender.
    4. Season with salt, pepper, and herbs.
  • Tips & Variations
    • Substitute broth with water if needed, but adjust seasonings.
    • Blend half the soup for a creamier texture.
    • Serve with whole-grain bread or crackers.

For more nutrition details on lentils, visit EatRight.org to see why they’re considered a powerhouse ingredient.

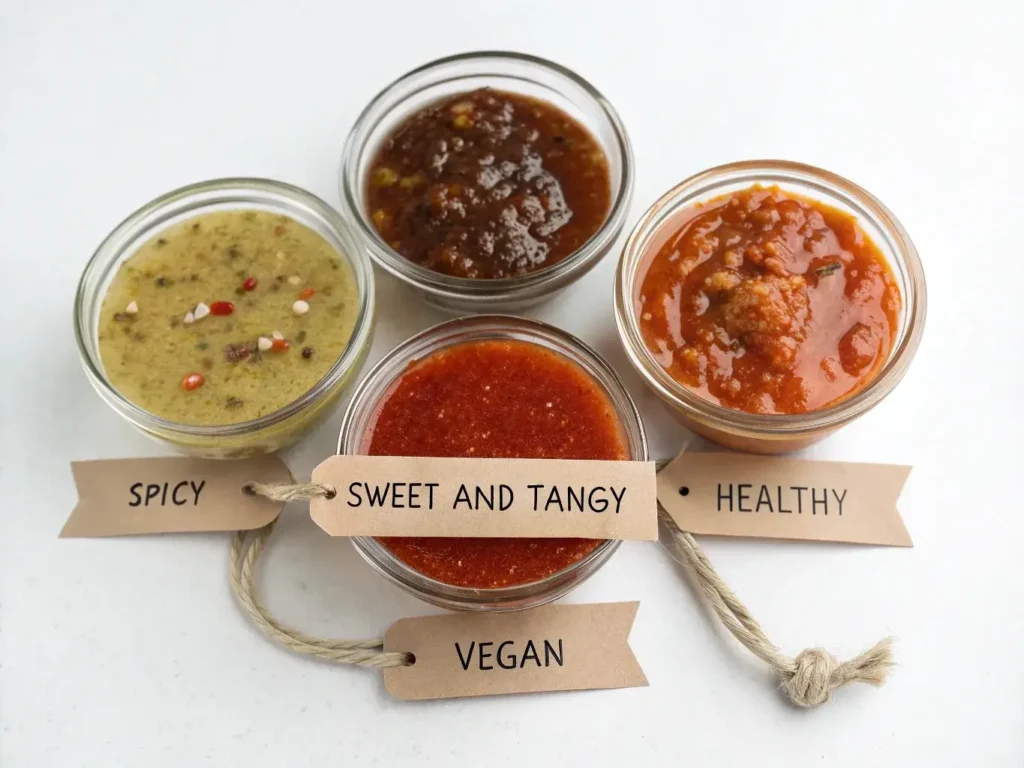
2.3 Smart Ingredient Swaps

Keeping your budget in check often means using what you already have at home. In addition, you can make small ingredient swaps to cut costs without sacrificing taste.

  • Use canned beans instead of fresh meat
  • Opt for seasonal produce for lower prices
  • Choose store-brand spices and sauces

3. Easy Dinner Ideas For Two: Flavor and Ease Combined

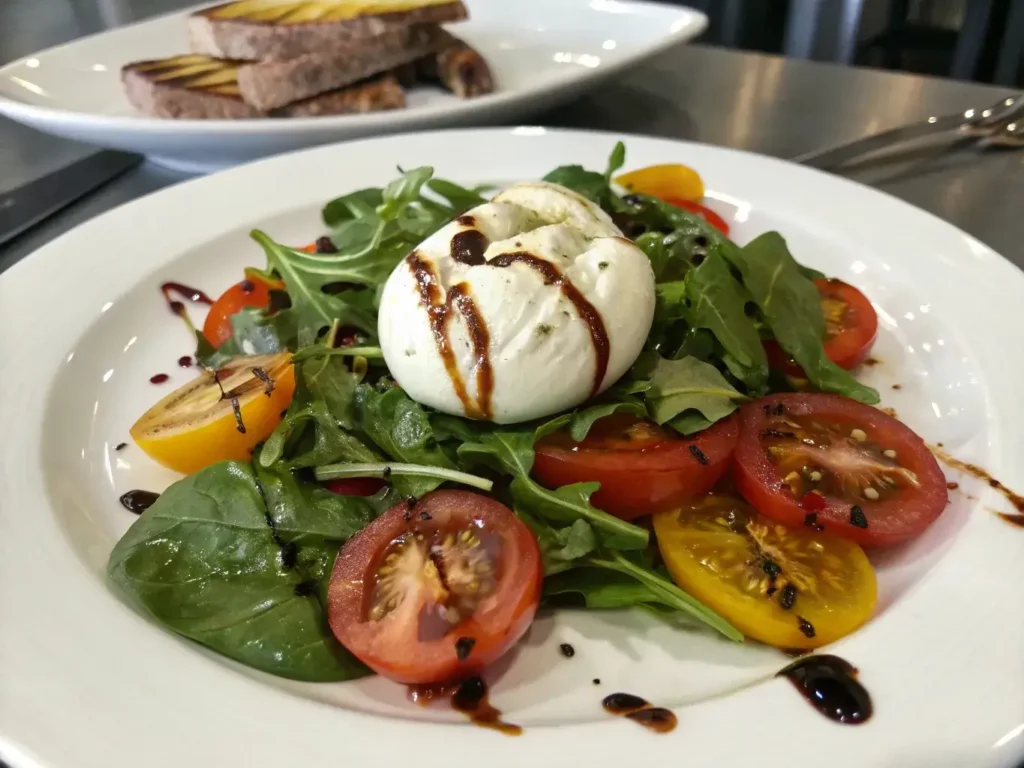
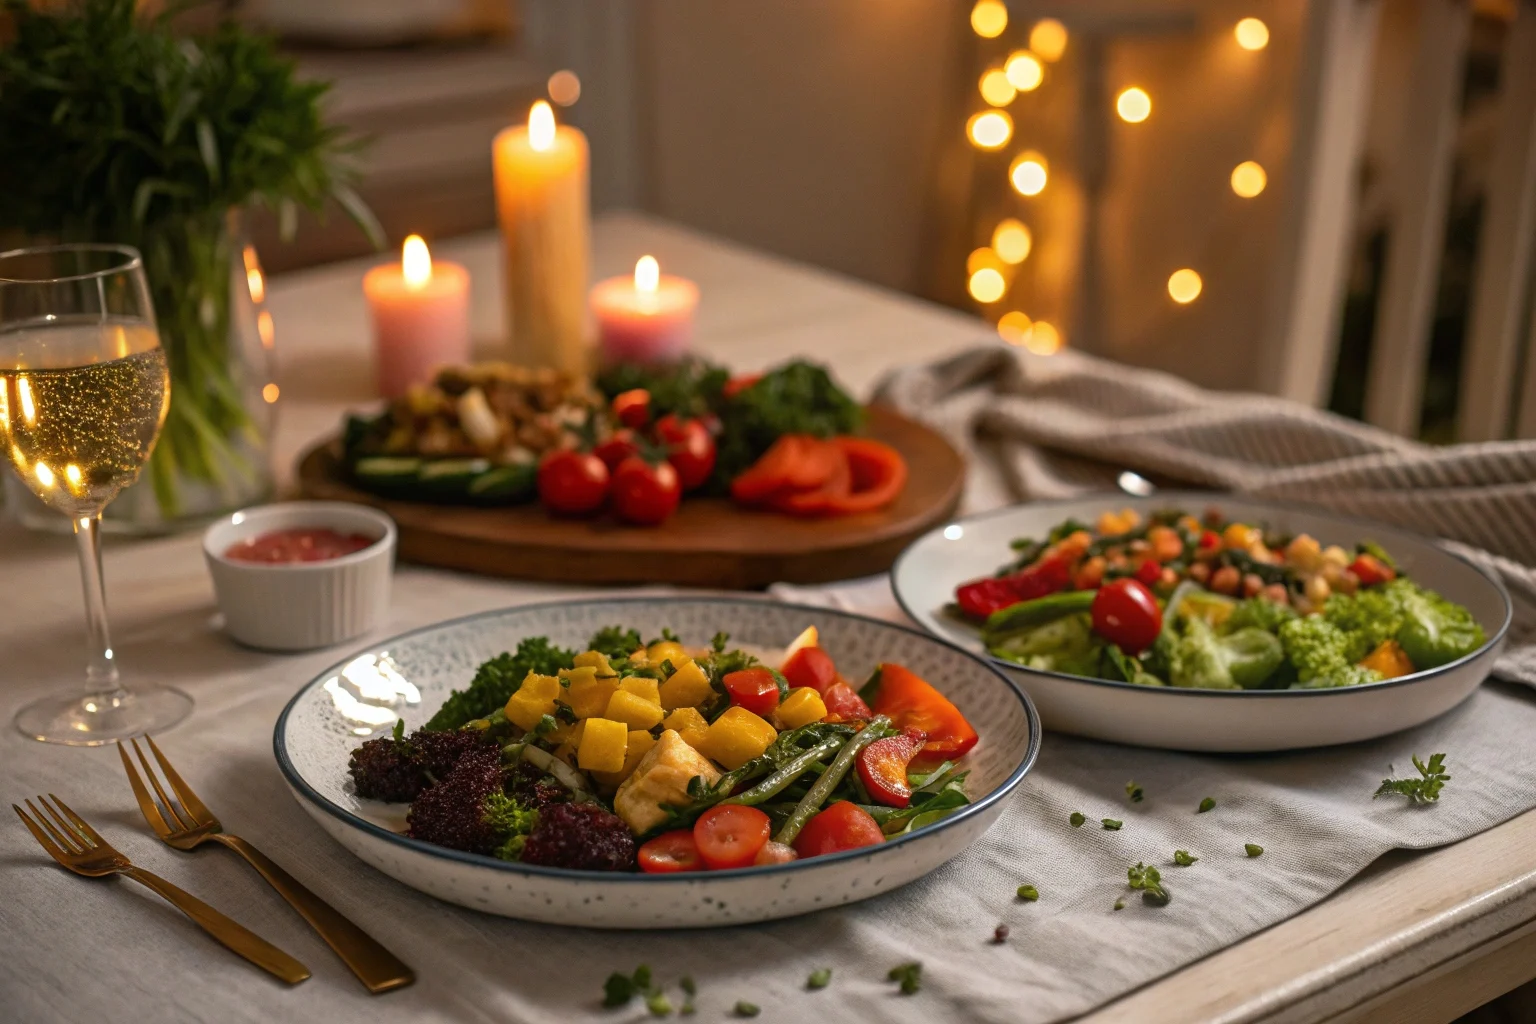
When you crave that special date-night vibe, Easy Dinner Ideas For Two at home can do wonders. Indeed, these Easy Dinner Ideas For Two bring both style and simplicity to your kitchen. However, you don’t need to spend hours cooking to make a meal unforgettable.

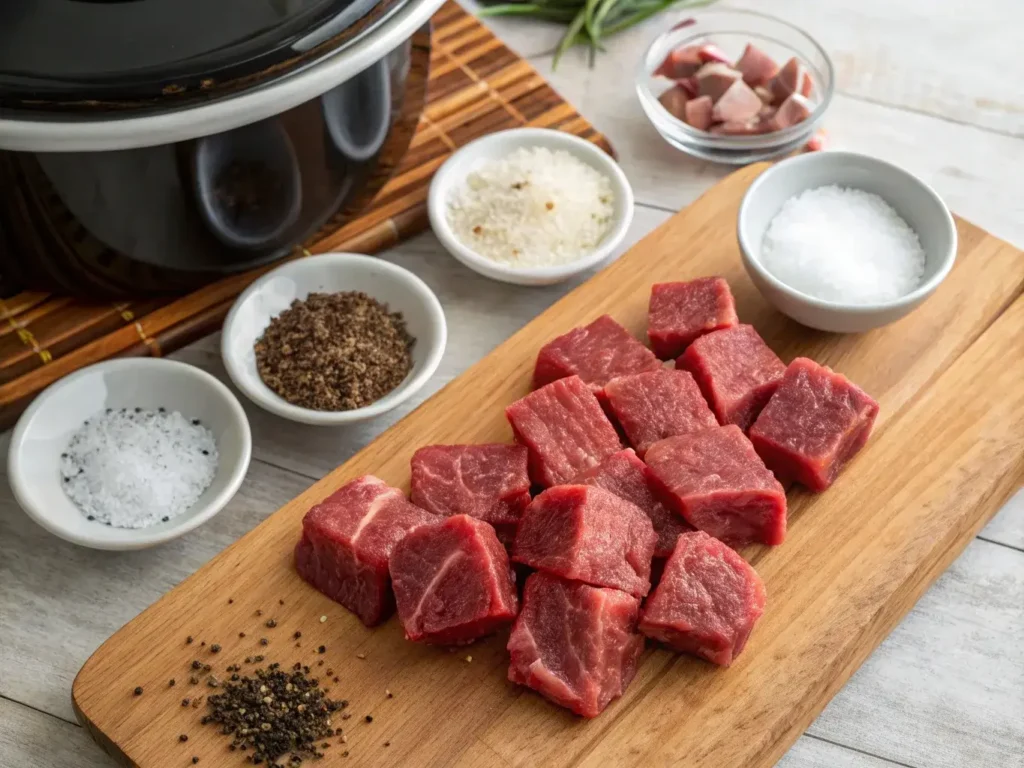
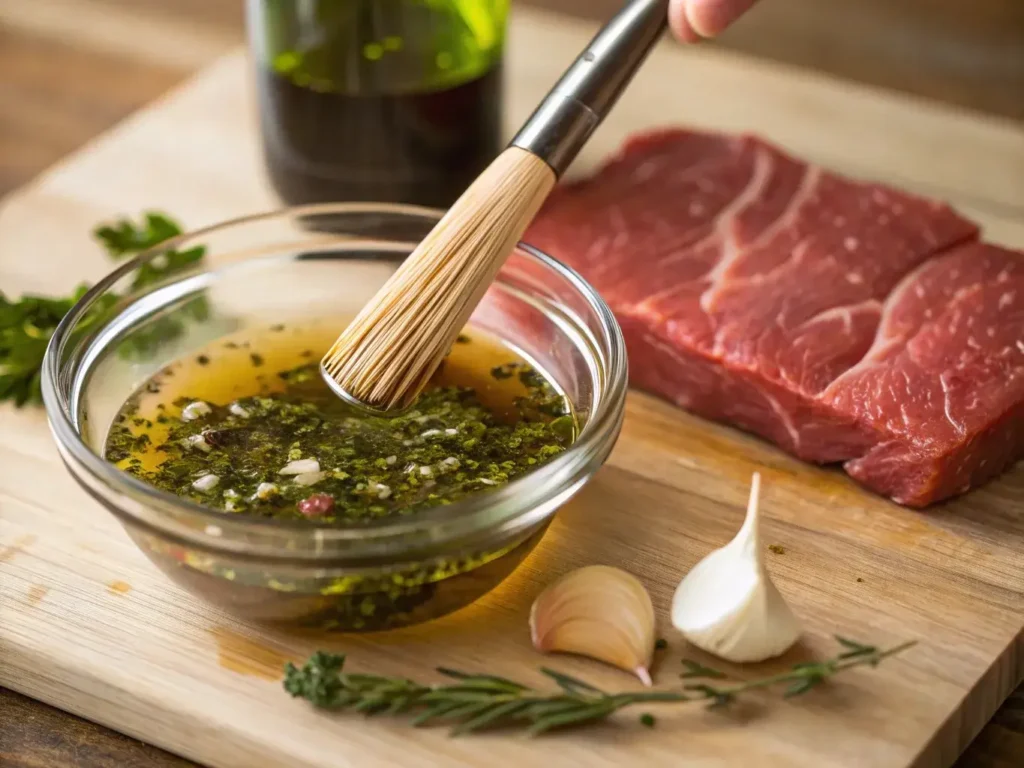
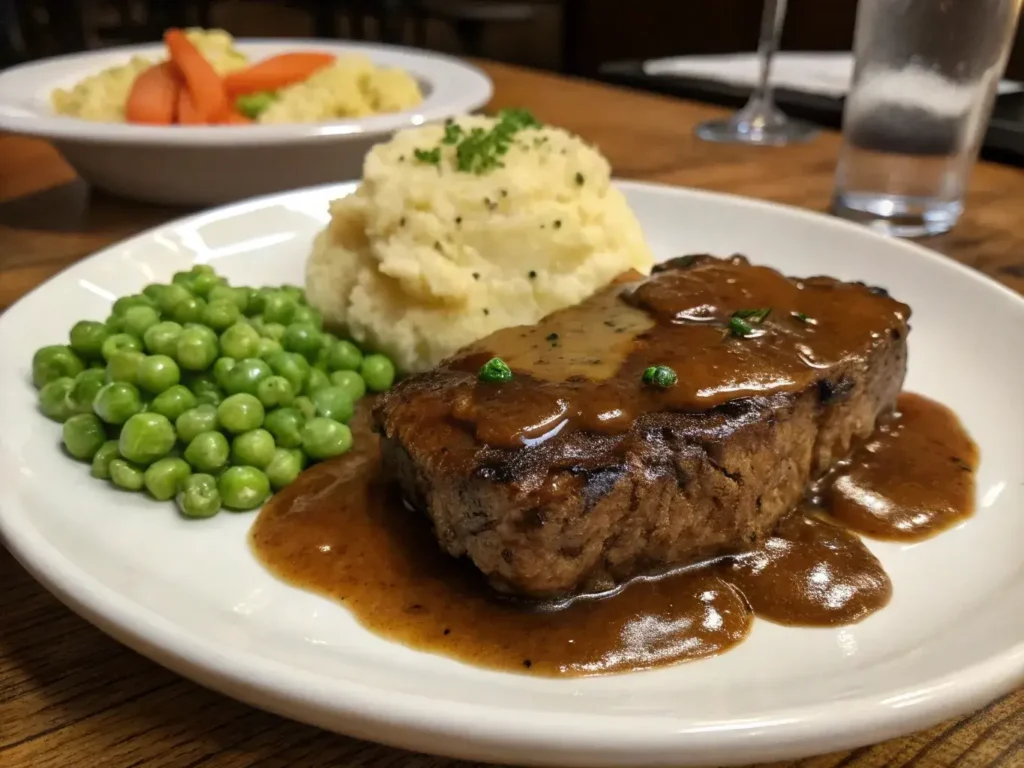
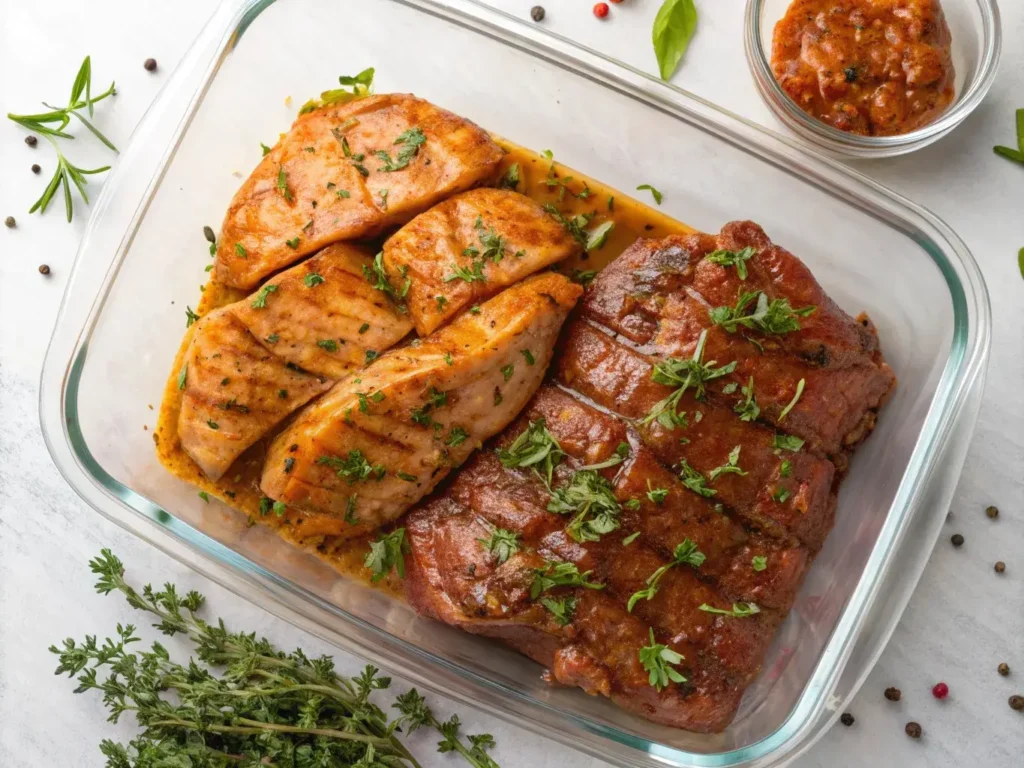
3.1 Garlic Butter Steak Bites

Garlic-butter steak bites served with roasted vegetables
Elevate your date night with flavor-packed steak bites.

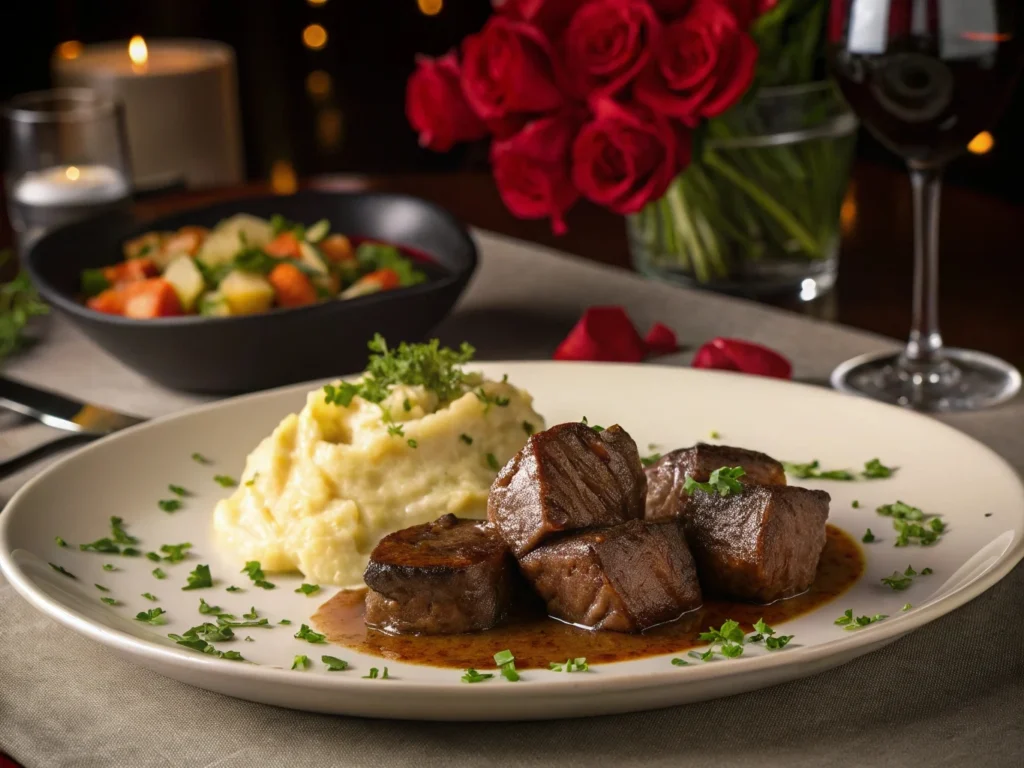
Steak dinners are synonymous with romance. Therefore, Garlic Butter Steak Bites deliver high-end flavors in a fraction of the time.

  • Ingredients
    • ½ pound sirloin steak, cubed
    • 2 tablespoons butter
    • 2 cloves garlic, minced
    • Salt, pepper, and parsley
  • Instructions
    1. Season steak cubes with salt and pepper.
    2. In a hot skillet, melt butter and sauté garlic until fragrant.
    3. Add steak bites, searing each side for about 2 minutes.
    4. Garnish with fresh parsley.
  • Tips & Variations
    • Pair with mashed potatoes or a simple salad.
    • Use a meat thermometer to ensure perfect doneness.
    • Substitute butter with a vegan alternative if needed.

3.2 Creamy Risotto for Two

Risotto may seem fancy, but it’s surprisingly straightforward. Thus, you can impress your partner without unnecessary stress.

  • Ingredients
    • ¾ cup Arborio rice
    • 3 cups warm chicken or vegetable broth
    • ½ cup white wine (optional but recommended)
    • 1 small onion, finely chopped
    • 2 tablespoons butter or olive oil
    • ¼ cup grated Parmesan cheese
  • Instructions
    1. Sauté onion in butter or oil until translucent.
    2. Stir in Arborio rice, coating grains with fat.
    3. Add wine and let it evaporate, stirring often.
    4. Gradually add warm broth, one ladle at a time, until absorbed.
    5. Stir in Parmesan cheese and season with salt and pepper.
  • Tips & Variations
    • Add mushrooms, spinach, or sun-dried tomatoes for extra flair.
    • Use nutritional yeast instead of Parmesan for a dairy-free version.
    • Stir consistently to achieve a creamy texture.

3.3 Setting the Mood

Part of a romantic dinner is the ambiance. In addition, small touches can elevate the overall experience.

  • Dim the lights or use candles
  • Play soft background music
  • Garnish plates with fresh herbs or edible flowers

Wine can enhance flavors, but you don’t have to be a sommelier to choose a good bottle. On the other hand, you can opt for something light and fruity if you’re unsure.

  • White wine (Pinot Grigio) for risotto or fish
  • Red wine (Merlot or Cabernet) for steak or hearty dishes
  • Sparkling rosé for a festive touch

4. Healthy Easy Dinner Ideas For Two: Nutritious and Delicious

Balancing flavor and nutrition can be challenging. However, Easy Dinner Ideas For Two prove it’s entirely possible. You’ll find vibrant veggies, lean proteins, and fiber-rich grains to keep you and your partner feeling great.

4.1 Zucchini Noodle Stir-Fry

Zucchini Noodles are a fantastic way to reduce carbs. Therefore, this dish is light, quick, and full of vegetables.

  • Ingredients
    • 2 medium zucchinis, spiralized
    • 1 cup sliced bell peppers
    • 1 cup sliced carrots
    • 1 tablespoon low-sodium soy sauce
    • 1 clove garlic, minced
    • 1 teaspoon sesame oil
  • Instructions
    1. In a wok or large skillet, sauté bell peppers and carrots until tender.
    2. Add spiralized zucchini, garlic, and soy sauce. Stir-fry for 2–3 minutes.
    3. Drizzle with sesame oil before serving.
  • Tips & Variations
    • Add tofu or chicken for extra protein.
    • Use tamari for a gluten-free option.
    • Mix in a teaspoon of chili paste if you like heat.

4.2 Baked Salmon with Roasted Veggies

Rich in omega-3 fatty acids, salmon is both healthy and delicious. In addition, roasting veggies alongside the fish simplifies cleanup.

  • Ingredients
    • 2 salmon fillets (about 4–6 ounces each)
    • 2 cups mixed veggies (broccoli, zucchini, or asparagus)
    • 1 tablespoon olive oil
    • Salt, pepper, lemon juice
  • Instructions
    1. Preheat oven to 400°F (200°C).
    2. Season salmon with salt, pepper, and a squeeze of lemon juice.
    3. Toss veggies with olive oil, salt, and pepper.
    4. Place salmon and veggies on a baking sheet. Bake for 12–15 minutes or until salmon flakes easily.
  • Tips & Variations
    • Add fresh dill or thyme for extra flavor.
    • Try sweet potatoes or bell peppers for variety.
    • Use parchment paper or foil for easy cleanup.

4.3 Portion Control and Balanced Plates

A healthy meal isn’t just about the ingredients but also the portion sizes. Thus, keep a balanced plate in mind.

  • Aim for half the plate with veggies
  • One-quarter with whole grains
  • One-quarter with lean protein

4.4 Meal Prep for Health-Conscious Couples

If you and your partner want to maintain healthy eating habits, prepping in advance can help. On the other hand, you can store pre-portioned meals in airtight containers for busy nights.

  • Chop salads and store dressings separately
  • Use sealable bags to marinate proteins overnight
  • Label containers with dates for fresh consumption

5. Satisfying One-Pan Wonders for Two

Cooking everything in a single pan or sheet is a dream for busy couples. Not only does it simplify prep, but it also cuts down on dishes. Therefore, you’ll spend more time together and less time scrubbing.

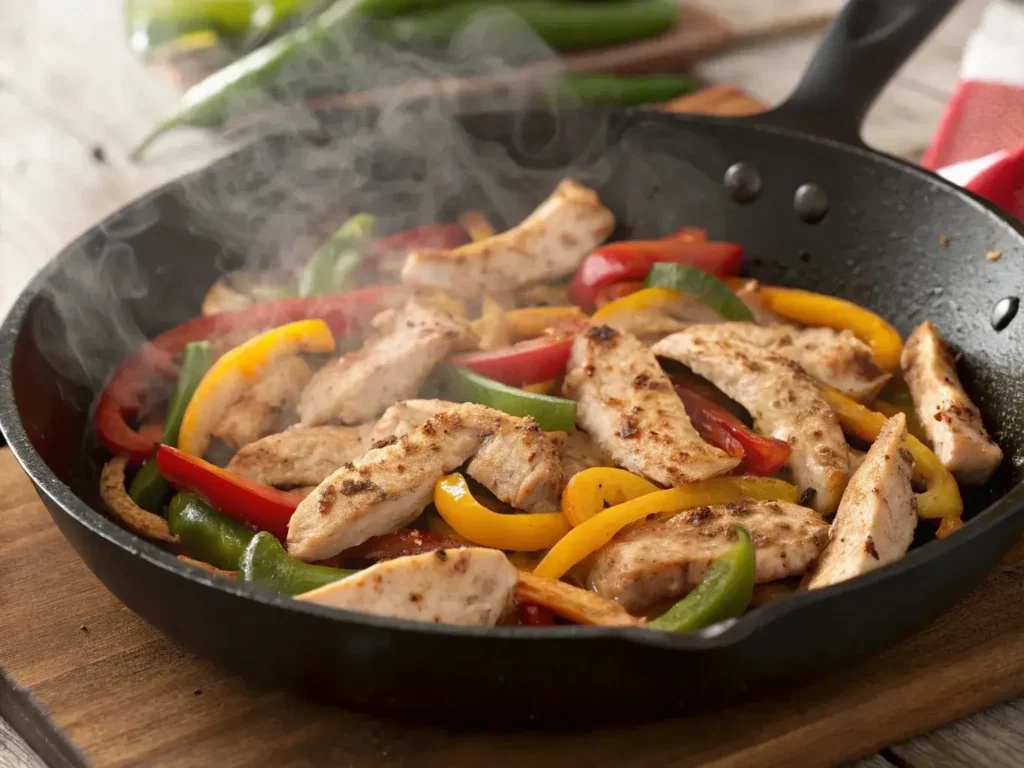
5.1 One-Pan Chicken and Veggies

One-pan chicken breasts and mixed veggies fresh from the oven
Savor a balanced meal with minimal cleanup.

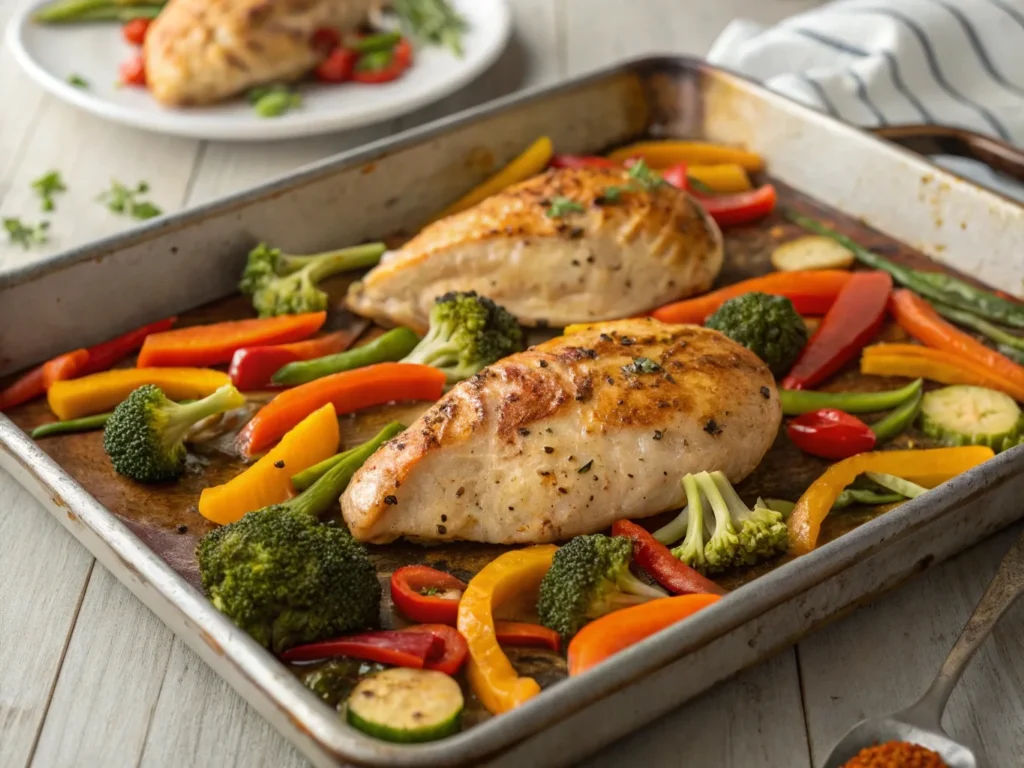
A reliable go-to dish, One-Pan Chicken and Veggies packs protein and vitamins in one meal. However, you can easily tweak the vegetables based on what’s in season.

  • Ingredients
    • 2 chicken breasts (boneless, skinless)
    • 2 cups chopped veggies (e.g., carrots, broccoli, onions)
    • 2 tablespoons olive oil
    • 1 teaspoon dried oregano
    • Salt and pepper
  • Instructions
    1. Preheat oven to 400°F (200°C).
    2. Season chicken with salt, pepper, and oregano.
    3. Arrange chicken and veggies on a baking sheet.
    4. Drizzle with olive oil and bake for 20–25 minutes or until chicken is fully cooked.
  • Tips & Variations
    • Substitute chicken with turkey breast or firm tofu.
    • Add sweet potatoes or butternut squash for a sweet twist.
    • Finish with a squeeze of fresh lemon juice.

5.2 Sausage, Peppers, and Potatoes Skillet

Packed with hearty ingredients, this skillet meal combines savory sausage with sweet peppers. In addition, it’s an ideal comfort dish for cooler evenings.

  • Ingredients
    • 2 sausages (chicken, turkey, or plant-based)
    • 2 medium potatoes, diced
    • 1 cup sliced bell peppers
    • 1 onion, sliced
    • 1 tablespoon olive oil
    • Salt, pepper, paprika
  • Instructions
    1. Brown sausage in a hot skillet, then set aside.
    2. In the same skillet, sauté potatoes in olive oil until golden.
    3. Add onions and bell peppers, cooking until tender.
    4. Return sausage to the skillet, season, and cook until flavors blend.
  • Tips & Variations
    • Use turkey sausage for a leaner option.
    • Add sliced zucchini or mushrooms for extra veggies.
    • Top with shredded cheese if desired.

5.3 Minimizing Cleanup

Fewer pots and pans mean less time cleaning. Therefore, line your baking sheet with foil or parchment paper to make cleanup a breeze.

  • Wash and cut vegetables on a single board
  • Store used utensils in a designated bowl to rinse together
  • Wipe surfaces immediately to prevent stuck-on debris

5.4 Creative Serving Suggestions

On the other hand, presentation can elevate a humble one-pan meal. For instance, arrange colorful veggies around the protein or add fresh herbs before serving.

  • Use vibrant plates for a pop of color
  • Include a simple side salad for contrast
  • Drizzle a homemade sauce or dressing

6. FAQs about Easy Dinner Ideas For Two

Below are common questions about creating Easy Dinner Ideas For Two. Therefore, feel free to adapt these answers to fit your personal style or dietary preferences.

Q1: Can I double these ”Easy Dinner Ideas For Two” for guests?

A: Absolutely. Most recipes scale up easily. However, cooking times might vary when you increase quantities, so monitor doneness carefully.

Q2: How do I store leftovers safely?

A: Let cooked dishes cool, then refrigerate in sealed containers. On the other hand, for meals like soup or casseroles, you can freeze them for up to three months. Always label containers with dates.

Q3: Are there vegetarian substitutes for some of the proteins?

A: Yes. Tofu, tempeh, beans, and lentils work perfectly. Therefore, you can swap them in without changing cooking times too much. Just be sure to season them well.

Q4: What if I have limited cooking equipment?

A: You can still make most of these recipes. For example, if you don’t own an oven, focus on stovetop dishes like the shrimp tacos or risotto. Also, consider one-pot or one-pan meals that only need a skillet.

7. Conclusion

You’ve now explored five major sections filled with Easy Dinner Ideas For Two, each featuring multiple recipes and helpful tips. Therefore, whether you’re aiming for a quick meal, a romantic date night, or a healthy weeknight dinner, you have plenty of choices at your fingertips. In addition, you learned about budget-friendly tips, one-pan wonders, and ways to elevate your dining experience.

We encourage you to try one or more of these Easy Dinner Ideas For Two. On the other hand, feel free to adjust the ingredients based on what you have available. Cooking at home should be fun, flavorful, and stress-free.

Cube Steak in Crock Pot: Comfort Food Done Right

Are you searching for a reliable way to make cube steak in crock pot without ending up with tough, chewy meat? You’ve come to the right place. In this guide, you’ll learn how to transform an affordable beef cut into a tender, savory delight that comforts both your taste buds and your wallet. In addition, you’ll discover how to layer flavors, choose complementary sides, and avoid common mistakes that can ruin an otherwise perfect meal. By the time you finish reading, you’ll feel confident enough to whip up an impressive dinner for your family—even on the busiest weeknights.

1. Why You’ll Love This Slow Cooker Steak

Raw cube steak with seasonings beside a crock pot
Gather your steak and spices for a quick and flavorful slow cooker meal.

1.1 A Budget-Friendly Favorite

Cube steak is a wallet-friendly cut derived from tougher parts of the cow, such as the top round or sirloin tip. However, the mechanical tenderizing process that forms those signature “cube” markings helps break down some of the muscle fibers. As a result, you can enjoy a hearty beef meal without breaking the bank.

Nevertheless, many people avoid cube steak because they worry about it becoming chewy. In a crock pot, though, you can cook this cut at a gentle temperature for hours. Therefore, your beef will develop fork-tender texture while soaking up all the flavors you add. In addition, the extended cooking time works wonders for those looking to stretch their grocery dollars even further.

1.2 How Low-and-Slow Cooking Works

Slow cooking relies on low heat over a longer period. Thus, the connective tissues in beef gradually break down, yielding tender meat with minimal effort. This process especially benefits cuts like cube steak, which have more robust muscle fibers compared to premium steaks.

On the other hand, rushing the process by cranking the heat up often results in a tough, unpleasant dish. Therefore, letting the crock pot do its magic for six to eight hours on low ensures you’ll get a meal that practically melts in your mouth. Moreover, the crock pot locks in moisture, reducing the risk of dryness.

1.3 Key Benefits for Busy Schedules

Your time is precious, especially on weekdays. In addition, you might not always feel like cooking after a long day. Fortunately, cube steak in crock pot allows you to set it and forget it, freeing you to focus on work, errands, or family. There’s little risk of burning or scorching if you keep an eye on liquid levels.

Meanwhile, the slow cooker makes it easier to prepare side dishes. You can steam vegetables or whip up mashed potatoes during the last 20 minutes of your crock pot cycle. Thus, dinner can come together without any stressful last-minute scrambling.

1.4 Choosing the Right Crock Pot Tools

Before you begin, make sure you have the correct equipment. A 5- to 6-quart crock pot is ideal for feeding four or more people. Additionally, keep a sturdy cutting board and a sharp knife on hand. You’ll also want tongs for quick handling of the steaks.

Furthermore, some people prefer to sear the meat in a separate skillet before transferring it to the slow cooker. This step is optional, yet it adds a delightful crust and deeper flavor. Therefore, you might also consider having a heavy-bottomed skillet ready if you decide to sear.

For safe handling and recommended internal temperatures of beef, visit the USDA Official Site. There, you’ll find guidelines on cooking temperatures that ensure your meals are both safe and delicious.

2. Prepping for the Perfect Crock Pot Steak

2.1 Marinating & Seasoning Strategy

 Brushing marinade onto cube steak before slow cooking
Enhance flavor by brushing a simple marinade onto your cube steak.

Before you toss your cube steak into the crock pot, you might wonder if marinating is worth the effort. Although marinating isn’t mandatory, it can be beneficial if you have the time. Therefore, consider a simple marinade of olive oil, garlic, Worcestershire sauce, and a pinch of salt. Let the meat rest for 30 minutes to an hour if possible.

When seasoning, keep it straightforward. A blend of salt, pepper, onion powder, and garlic powder is often enough. In addition, you can include dried herbs like thyme or rosemary for extra aroma. However, avoid over-salting at the start; you can always adjust seasoning after a few hours in the slow cooker.

Don’t miss How To Make The Ultimate Fajita Marinade In 5 Minutes

2.2 Optional Pre-Sear Tips

Searing cube steak before slow cooking is a game-changer for many home cooks. This step caramelizes the meat’s surface, locking in flavors and juices. However, searing isn’t required if you’re pressed for time. You can still achieve mouthwatering results by placing the seasoned steak directly into your crock pot.

If you decide to sear, heat a tablespoon of oil in a skillet over medium-high heat. Then, add each piece of steak and let it brown for about 1–2 minutes per side. On the other hand, do not overcrowd the pan. Doing so lowers the heat and prevents a proper sear.

2.3 Building Layers of Flavor

Layering your ingredients is another smart way to maximize flavor. You can start by placing onions or sliced mushrooms at the bottom of your crock pot. Thus, these vegetables infuse your steak with aromatic juices as they cook down. In addition, they help prevent your meat from scorching on the pot’s base.

You can also add a flavorful liquid or sauce. Consider using beef broth, mushroom soup, or even a packet of onion soup mix. Meanwhile, a dash of Worcestershire sauce or soy sauce can add a deeper dimension. Therefore, combine these liquids in a small bowl before pouring them over your steak.

2.4 Smart Ingredient Swaps

Not everyone has the same staples in their pantry. Hence, you might need alternatives. If you’re out of beef broth, for instance, you can substitute chicken broth or vegetable stock. On the other hand, if you want a thicker gravy, stir in a bit of cornstarch near the end.

For a creamier dish, some cooks swear by adding cream of mushroom or cream of celery soup. Feel free to customize your recipe to suit dietary preferences. For instance, use low-sodium broth if you’re watching your salt intake, or opt for gluten-free soup alternatives if you have sensitivities.

3. Step-by-Step Guide to a Savory Crock Pot Cube Steak

Layering onions and seasoned cube steak in crock pot
Place onions at the bottom, then add your seasoned cube steak for an aromatic base.

3.1 Gathering Your Ingredients

To create your easy cube steak recipe, keep a list of simple ingredients within arm’s reach:

  • Cube steak (about 2 pounds, sliced into portions)
  • Salt and pepper (1 teaspoon each, or to taste)
  • Garlic powder (1 teaspoon)
  • Onion powder (1 teaspoon)
  • Oil (1 tablespoon, if searing)
  • Beef broth (1 cup, or substitute)
  • Sliced onions (1 medium onion)
  • Optional: sliced mushrooms, bell peppers, or diced carrots

In addition, measure these ingredients ahead of time to ensure you don’t miss anything. It’s easy to forget a spice or garnish when you’re juggling multiple tasks.

3.2 Layering for Maximum Tenderness

Start by lightly greasing the inside of your crock pot or using a liner. Then, spread your onions (or other vegetables) on the bottom. If you pre-seared your steaks, place them directly on top of this layer. Otherwise, add the raw, seasoned cube steak.

Next, whisk together your broth (or soup) with any seasonings you wish to use. Pour the mixture carefully over the meat. Therefore, the flavors will seep into each piece. Make sure the liquid covers the steaks about halfway. You can add more broth if necessary.

3.3 Monitoring Cook Times

Cooking cube steak in crock pot typically takes 6–8 hours on the low setting or 3–4 hours on high. However, times may vary based on your slow cooker’s brand and the thickness of your meat. Keep in mind that opening the lid often can release heat, thus extending your cook time.

If you’d like a quick check, lift the lid around the halfway mark. Gently pierce a steak with a fork to test tenderness. On the other hand, if it’s still tough, it likely needs more time. In addition, taste the liquid for seasoning. You can sprinkle in more salt, pepper, or dried herbs if needed.

3.4 Final Touches & Thickening Your Gravy

As your steak nears the end of its cook time, you can enhance its gravy consistency. One easy way is to remove a few tablespoons of the hot cooking liquid and whisk it together with cornstarch or flour. Then, return this slurry to the crock pot, stirring gently. Therefore, the sauce will thicken into a cozy gravy that coats each bite.

When your steak feels fork-tender, turn off the crock pot and let it rest for a few minutes. Meanwhile, you can finish preparing your side dishes. After resting, serve your tender slow cooker steak with a drizzle of gravy on top. Sprinkle chopped parsley or green onions for a fresh pop of color.

4. Creative Add-Ons & Side Dishes

Tender crock pot cube steak served with mashed potatoes and greens
Pair your tender cube steak with creamy mashed potatoes and fresh greens.

4.1 Classic Pairings Everyone Loves

For many people, mashed potatoes are the go-to side for cube steak in crock pot. The creamy potatoes contrast beautifully with the savory gravy. However, you can also opt for buttered egg noodles or fluffy white rice to soak up those tasty juices.

Additionally, bread rolls or crusty baguettes work wonders for sopping up leftover sauce. In fact, some families even prefer to serve cube steak with homemade biscuits. Regardless of your choice, make sure it complements the rich flavors of your slow cooker creation.

4.2 Going Beyond Basic Vegetables

Although onions and mushrooms are popular additions, don’t be afraid to branch out. For instance, you can add sliced bell peppers or zucchini toward the last hour of cooking. In addition, diced tomatoes lend a slight tang to your gravy.

If you prefer a sweet-and-savory contrast, try adding baby carrots. They’ll soften in the crock pot while absorbing the seasoning. On the other hand, root vegetables like parsnips or turnips can also be diced and placed in the pot. Therefore, you have many possibilities for personalizing the meal with your favorite produce.

4.3 Dietary Modifications & Tips

If you’re watching your sodium intake, opt for low-sodium beef broth and skip the soup mix. You can rely more on natural seasonings like fresh herbs, garlic, and onion. On the other hand, if you follow a gluten-free diet, check your soup labels carefully, or use cornstarch instead of flour.

Keto enthusiasts can still enjoy cube steak in crock pot by avoiding starchy sides. Serve your steak alongside cauliflower mash or zucchini noodles, which soak up the gravy just as well. Therefore, you can easily adapt this recipe to various eating styles without losing flavor or texture.

4.4 Storage & Reheating

After your meal, store leftover steaks in an airtight container with their gravy. Keep them refrigerated for up to three days. In addition, you may freeze the dish if you want to extend storage time. When reheating, add a splash of broth or water to maintain moisture.

For best results, use the stovetop over medium-low heat or place everything back in a crock pot on the warm setting. Microwave reheating can cause uneven warming, so stir frequently if you choose that method. Thus, a little extra attention ensures that the meat remains juicy and tender.

5. Common Pitfalls & Best Practices

5.1 Avoiding Tough Meat

Nothing ruins a meal faster than unyielding meat. Therefore, remember that low and slow is the secret. A short cooking duration or high heat will not properly break down the connective tissues. Keep your crock pot on low for the recommended time, and resist the urge to peek too often.

In addition, overcooking can be an issue if you leave the crock pot on for too long—especially on high. Hence, if your schedule demands more than eight hours, consider using an automatic timer feature that switches the cooker to a warm setting after a set time.

5.2 Balancing Liquids & Seasonings

Too much liquid can dilute the flavors of your meal. However, too little might cause your steak to dry out or even burn. Aim for enough liquid to cover roughly half the thickness of your meat. This ratio typically allows for evaporation while retaining enough moisture for braising.

Moreover, taste your sauce halfway through cooking. If it seems bland, add spices or a dash of hot sauce for an extra kick. On the other hand, if it tastes too salty, balance it out with a bit of water or unsalted broth.

5.3 When & How to Add Veggies

Sturdy vegetables like carrots or potatoes can handle the full cooking cycle. Therefore, place them at the bottom of the crock pot. Delicate vegetables like bell peppers or zucchini, however, might get mushy if cooked too long. Thus, add them in the final hour or so to preserve their texture.

If you choose to sear these veggies beforehand—especially onions and mushrooms—they’ll develop a delightful caramelization. Nevertheless, skipping this step won’t make or break the dish. You simply have different flavor profiles depending on your method.

5.4 Checking Doneness Without Overcooking

You can use a fork or a small knife to test for tenderness. If the meat flakes or cuts easily, it’s usually ready. Keep in mind that “doneness” for cube steak is more about texture than a specific internal temperature. However, the USDA recommends reaching a minimum internal temperature of 145°F (about 63°C) for beef safety.

Overcooking can cause the protein fibers to tighten again, resulting in dryness. Therefore, aim for that sweet spot where the steak is fully cooked but retains enough moisture. In addition, let your meat rest for a few minutes before serving to allow juices to redistribute.

FAQs

Q1: Why is my cube steak tough in the crock pot?

Often, cube steak becomes tough when it’s either cooked at too high a heat or not given enough time to break down connective tissues. Thus, cooking low and slow with enough liquid helps keep the meat tender. If you notice dryness, try adding more broth or sauce and extending the cook time slightly.

Q2: Does cube steak get tender the longer it cooks?

Yes, cube steak typically benefits from extended cook times in moist heat. Therefore, the low-and-slow method allows collagen and fibers to soften, which results in a melt-in-your-mouth texture. However, be mindful that cooking it too long on a high setting can lead to dryness.

Q3: How long does it take for steak to cook in a crock pot?

Generally, cube steak requires 6–8 hours on low or 3–4 hours on high. However, factors such as the thickness of the steaks, your specific slow cooker, and whether or not you seared the meat first can influence the exact timing. Check for tenderness around the halfway point and adjust as needed.

Q4: How do you cook cube steak without it getting tough?

You keep the heat gentle, use enough liquid, and let the steak simmer until fork-tender. On the other hand, pre-searing can lock in juices and add flavor. Also, adding vegetables and seasoning layers helps maintain moisture, preventing the meat from drying out during the cooking process.

Conclusion

Preparing cube steak in crock pot doesn’t have to be an intimidating experience. When done correctly, this simple method allows you to enjoy fork-tender meat with minimal fuss. By layering flavors, balancing liquids, and choosing the right add-ins, you’ll transform an affordable cut of beef into a hearty, mouthwatering meal. Furthermore, slow cooking fits perfectly into a busy lifestyle, letting you focus on other tasks while your dinner takes care of itself.

How To Make Burrata Cheese At Home: A Step-by-Step Guide

If there’s one cheese that feels like a little luxury on your plate, it’s burrata cheese. This Italian masterpiece combines a soft mozzarella shell with a creamy center that spills out like a silky surprise when sliced. It’s versatile, too perfect in salads, as a pizza topping, or simply drizzled with olive oil.

What makes burrata cheese so special isn’t just its taste; it’s also the joy of crafting it yourself. Imagine pulling mozzarella curds into a delicate pouch and filling it with fresh cream it’s an experience as satisfying as the cheese itself. In this guide, we’ll walk you through everything you need to know about making your own burrata cheese. Trust us, it’s easier than you think, and the results? Absolutely worth it.

What Is Burrata Cheese?

Understanding Burrata: The Basics

Burrata cheese is a fresh Italian cheese known for its creamy, indulgent texture. At first glance, it looks like a ball of fresh mozzarella, but inside lies the magic—a soft, velvety center made of cream and shredded curds. This combination creates a flavor that’s both mild and rich, making burrata cheese a favorite among cheese lovers worldwide.

Unlike aged cheeses, burrata is meant to be enjoyed fresh. Its delicate flavor and luxurious consistency make it perfect for pairing with simple, high-quality ingredients. Whether drizzled with olive oil, served with tomatoes, or spread over warm bread, it’s a versatile addition to any table.

Why Burrata Cheese Is So Special

What sets burrata cheese apart from other cheeses is its unique construction. The outer layer, made from fresh mozzarella, provides structure, while the creamy interior offers a delightful contrast in both texture and taste. When sliced open, the center flows out like a rich, savory filling, creating a visual and culinary treat.

Its versatility adds to its appeal. From elegant appetizers to hearty main dishes, burrata cheese can transform even the simplest ingredients into a gourmet experience. Additionally, its short shelf life highlights its freshness, making it a rare treat when enjoyed at its peak.

How Burrata Differs from Mozzarella

Hands stretching mozzarella curd for burrata cheese.
A key step in making burrata cheese: stretching curd.

Although burrata and mozzarella are closely related, they are far from identical. Mozzarella, a semi-soft cheese, has a firmer texture and is commonly used in cooking. On the other hand, burrata cheese combines mozzarella with cream, giving it a softer, more indulgent consistency.

Mozzarella is often melted on pizzas or sliced for sandwiches, while burrata shines as the centerpiece of dishes where its creamy texture can be showcased. For example, a fresh tomato and basil salad comes alive when paired with the richness of burrata cheese. For a detailed comparison, visit this guide to mozzarella and burrata.

The Perfect Occasions to Serve Burrata Cheese

Burrata cheese is an ideal choice for special occasions, casual gatherings, or everyday meals. Its versatility makes it a star in both simple and elaborate dishes. Serve it as a centerpiece for a charcuterie board, or pair it with crusty bread and roasted vegetables for an elegant appetizer.

In addition, it’s a seasonal favorite. During the summer, burrata cheese pairs beautifully with ripe tomatoes, peaches, or arugula salads. In cooler months, it complements hearty pastas or roasted root vegetables, adding a touch of creaminess to warming dishes. No matter the season, burrata is always a crowd-pleaser.

How to Make Burrata Cheese at Home

Ingredients You’ll Need

Making burrata cheese at home starts with the right ingredients. The essentials include:

  • Fresh mozzarella curds: These form the base of the cheese. You can purchase them from a specialty store or make them yourself.
  • Heavy cream: This creates the creamy, luscious filling known as stracciatella.
  • Whole milk: High-quality milk ensures a rich and smooth texture for the mozzarella.
  • Rennet: This enzyme is crucial for curdling milk and forming the cheese.
  • Salt: Enhances the flavor and preserves the cheese.

Each ingredient plays a vital role in achieving that perfect balance of firm outer shell and creamy center. For those seeking an extra layer of flavor, adding a dash of olive oil or herbs to the filling can create a personalized touch.

Equipment You’ll Need

To make burrata cheese, you don’t need professional tools—just some basic kitchen equipment:

  • Cheesecloth: Used to drain the whey and shape the curds.
  • Thermometer: Ensures precise temperatures during milk heating and curd formation.
  • Mixing bowls: For holding curds, cream, and whey.
  • Large pot: Used to heat milk and create the curds.
  • Slotted spoon: Ideal for handling curds without breaking them.

While these tools are simple, their role in the process is essential. For beginners, a basic setup is sufficient, but as you refine your technique, you may want to invest in specialized cheese-making tools.

Step-by-Step Burrata Recipe

 Milk in a pot with cheese-making tools for burrata.
Milk and tools prepared for homemade burrata cheese.
  1. Prepare the curds: Heat the milk to the required temperature (approximately 90°F), add rennet, and let it rest until curds form. This step creates the foundation for burrata cheese.
  2. Stretch the mozzarella: Once the curds are ready, stretch and knead them in warm water until smooth and pliable. This forms the outer shell.
  3. Make the filling: Mix shredded mozzarella with heavy cream to create the creamy stracciatella filling.
  4. Assemble the burrata: Shape the mozzarella into a pouch, fill it with the creamy mixture, and seal it carefully.
  5. Chill and enjoy: Let the finished burrata cool in salted water before serving.

Common Mistakes to Avoid

Making burrata cheese can be tricky, especially for beginners. Avoid these common pitfalls:

  • Overheating the milk: This can cause curds to break down, leading to a gritty texture. Use a thermometer to maintain the correct temperature.
  • Improper stretching: If the mozzarella isn’t stretched enough, the outer shell may tear during assembly.
  • Watery filling: Drain the mozzarella thoroughly before mixing it with cream to prevent a runny filling.
  • Skipping salt: Proper seasoning enhances the cheese’s natural flavor and ensures it’s not bland.

If you’re a fan of creamy cheeses, don’t miss our collection of Cottage Cheese Recipes for Wholesome Meals.

Creative Ways to Enjoy Burrata Cheese

Burrata as the Star of Salads

Burrata Cheese salad with tomatoes, greens, and balsamic glaze.
A fresh salad with creamy burrata, tomatoes, and balsamic glaze.

Burrata cheese shines brightest when paired with fresh, vibrant ingredients in salads. One classic pairing is with juicy, ripe tomatoes, fresh basil, and a drizzle of balsamic glaze a perfect match for the cheese’s creamy texture. For a seasonal twist, consider a peach and arugula salad topped with burrata, olive oil, and a sprinkle of sea salt.

During colder months, roasted vegetable salads with burrata add a warming and indulgent element. Think roasted beets or butternut squash tossed with mixed greens and finished with burrata. These combinations elevate simple ingredients to gourmet status, making burrata a versatile choice for salads all year round.

Using Burrata in Appetizers

When it comes to appetizers, burrata cheese is the ultimate crowd-pleaser. Its rich creaminess pairs beautifully with crusty bread or crackers. Serve it on a wooden board with sliced prosciutto, olives, and cherry tomatoes for an elegant yet easy antipasto.

Another idea is to use burrata as a topping for crostini. Spread a thin layer of garlic-infused olive oil on toasted bread, add a dollop of burrata, and finish with roasted cherry tomatoes or caramelized onions. These appetizers are simple to prepare but guaranteed to impress guests at any gathering.

Main Dishes Featuring Burrata Cheese

 Mini pizzas with burrata, basil, and tomatoes.
Hot and fresh mini pizzas topped with burrata and basil.

Burrata cheese isn’t just for appetizers—it can transform main dishes too. One of the simplest yet most luxurious ways to use burrata is as a pizza topping. Add it after the pizza is baked, letting its creamy center melt slightly over the hot crust.

For pasta lovers, burrata can replace heavy cream in sauces. Try tossing it with freshly cooked spaghetti, sautéed garlic, and a squeeze of lemon juice for a light yet decadent dish. It’s also a fantastic addition to risotto, lending creaminess without overpowering the delicate flavors of the dish.

Dessert Ideas with Burrata

While cheese in desserts might sound unusual, burrata cheese proves otherwise. Pair it with fresh fruit like figs, strawberries, or peaches, drizzled with honey or a balsamic reduction. This combination balances the richness of burrata with the natural sweetness of fruit.

For something more indulgent, use burrata in place of whipped cream alongside chocolate desserts. A dark chocolate cake or brownie served with a spoonful of burrata creates a unique flavor profile that’s both savory and sweet. Burrata in desserts is a surprising yet delightful twist on traditional pairings.

Tips for Serving and Storing Burrata Cheese

Best Practices for Serving Burrata Cheese

To truly enjoy the creamy decadence of burrata cheese, serving it correctly is essential. Always bring burrata to room temperature before serving; this ensures the creamy center is soft and at its most flavorful. Slice it gently to reveal the rich filling, allowing it to flow naturally over the plate.

Pair burrata cheese with simple ingredients that highlight its mild flavor. Drizzle it with high-quality olive oil and a sprinkle of flaky sea salt, or serve it with fresh bread and a side of ripe tomatoes. For a touch of sweetness, add a drizzle of honey or fig jam. The key is to keep the flavors balanced, so the burrata remains the star.

How to Store Fresh Burrata Cheese

Because burrata cheese is a fresh product, it has a short shelf life and requires careful storage. Keep it submerged in its liquid (usually whey or brine) and refrigerate it immediately after purchase. This helps maintain its moisture and creamy texture.

However, burrata is best enjoyed within 1-2 days of purchase. Beyond this, the quality begins to decline, and the creamy filling can lose its silky consistency. If you’re unable to finish it, try using the leftover burrata in recipes like pasta sauces or baked dishes, where its texture won’t be as noticeable.

Enhancing Burrata Cheese with Simple Additions

One of the easiest ways to elevate burrata cheese is by pairing it with complementary ingredients. For a classic Italian touch, top it with olive oil, fresh basil, and a splash of balsamic reduction. This simple combination enhances burrata’s creamy and slightly tangy profile.

For a more creative twist, sprinkle chopped pistachios or drizzle chili oil over burrata for a bold contrast. Pairing it with roasted vegetables, caramelized onions, or even grilled peaches can turn a simple dish into something extraordinary. These additions not only enhance the flavor but also bring texture and color to your presentation.

Common Mistakes to Avoid with Burrata Cheese

While burrata cheese is simple to serve, there are a few common mistakes to watch out for. First, avoid serving it too cold, as the creamy interior won’t reach its ideal texture. Always allow burrata to sit at room temperature for about 30 minutes before serving.

Additionally, don’t overwhelm burrata with overly strong flavors. Ingredients like spicy sauces or pungent dressings can mask its delicate taste. Instead, opt for light, fresh pairings that complement rather than compete with the cheese. Lastly, handle burrata gently to prevent tearing the outer shell, which can cause the filling to spill prematurely.

FAQs About Burrata Cheese

What is the difference between mozzarella and burrata?

While both mozzarella and burrata cheese originate from Italy, they are distinct in texture and composition. Mozzarella is a semi-soft cheese made from stretched curds, giving it a firm and elastic texture that’s perfect for melting or slicing.

On the other hand, burrata cheese has a soft mozzarella shell but is filled with a rich, creamy mixture of stracciatella and cream. This makes burrata much softer and more indulgent compared to mozzarella. While mozzarella is often used in cooking, burrata is best enjoyed fresh as its creamy interior is its defining feature.

How should burrata be eaten?

Burrata cheese is best eaten fresh and at room temperature to fully appreciate its creamy texture and delicate flavor. Start by slicing it gently to reveal the creamy center, allowing it to flow naturally. Pair burrata with simple ingredients like olive oil, sea salt, and crusty bread to highlight its richness.

For a more robust dish, you can serve it with fresh salads, ripe tomatoes, roasted vegetables, or even grilled peaches. Its versatility also makes it a great topping for pizzas or pastas. To create a sweet-savory balance, try pairing burrata with honey or balsamic glaze alongside fruit like figs or strawberries.

Is burrata a healthy cheese?

While burrata cheese is rich in protein and calcium, which are essential for strong muscles and bones, it’s also higher in fat and calories compared to other cheeses due to its creamy filling. A typical serving of burrata contains around 300 calories and 25 grams of fat, so moderation is key if you’re watching your intake.

That said, burrata can still be part of a balanced diet when paired with nutrient-rich ingredients like fresh vegetables, whole grains, or fruit. Enjoy it occasionally as a treat rather than a staple if you’re mindful of your health goals.

What is the closest cheese to burrata?

The closest cheese to burrata cheese is fresh mozzarella, as it forms the outer shell of burrata. However, mozzarella lacks the creamy interior that defines burrata. If you’re looking for a substitute with a similar texture and richness, consider ricotta or stracciatella, which can mimic burrata’s filling.

For a creative alternative, you can mix mozzarella and cream to achieve a similar flavor profile. While these substitutes can replicate some aspects of burrata, they won’t fully match its luxurious combination of firm and creamy textures.

Conclusion

Burrata cheese is more than just a culinary delight it’s an experience. With its firm mozzarella shell and luscious, creamy interior, it brings an indulgent touch to any dish, whether served fresh, paired with seasonal ingredients, or incorporated into main courses. From understanding its differences from mozzarella to learning how to serve and store it, this guide has covered everything you need to enjoy burrata to its fullest.

Whether you’re savoring it with a drizzle of olive oil and fresh tomatoes or experimenting with desserts and roasted vegetables, burrata offers endless possibilities. By making it at home, you can customize every detail and elevate your meals with this Italian classic. Now, it’s your turn to bring the magic of burrata cheese to your kitchen and table. Enjoy every creamy bite!

Dungeness Crab Legs: 7 Easy Recipes You’ll Love

Picture this: succulent Dungeness crab legs glistening with butter, the aroma of garlic and spices wafting through your kitchen. Hungry yet? It’s no wonder these West Coast treasures have captured the hearts of seafood lovers everywhere. Packed with flavor and surprisingly easy to prepare, they’re perfect for family dinners, date nights, or even a solo indulgence.

What makes Dungeness crab legs so special? Their rich, slightly sweet meat is like no other, offering a taste of the ocean in every bite. In this blog, you’ll learn foolproof methods to steam, boil, bake, and grill these beauties, along with irresistible recipes that are sure to impress. Let’s crack into it your next seafood masterpiece awaits!

Why Dungeness Crab Legs Are a Seafood Favorite

What Makes Dungeness Crab Legs Special?

Dungeness crab legs are celebrated for their sweet, tender meat and versatility in the kitchen. Unlike other types of crab, such as snow crab or king crab, Dungeness crabs offer a rich, buttery flavor that feels like a taste of the ocean. This makes them perfect for a wide range of dishes, from simple steamed legs to elaborate seafood boils.

In addition to their flavor, their slightly larger size makes them easier to crack and enjoy. Whether you’re new to seafood or a seasoned crab lover, Dungeness crab legs are a delight to cook and eat. Plus, they’re a sustainable seafood option, meaning you can indulge without guilt.

How to Choose the Best fresh crab legs

Selecting the right Dungeness crab legs is crucial to a successful meal. If you’re buying fresh crab, look for legs that are firm to the touch and smell faintly sweet. Avoid anything with a strong fishy odor, as that could indicate the crab isn’t fresh.

For frozen options, check the packaging for signs of freezer burn or excessive ice crystals, as these can impact the quality. Brands that freeze crabs right after harvesting often deliver the best results. If you’re unsure where to start, try visiting trusted seafood marketplaces like Seafood Watch for sustainable options.

The Nutritional Value of Crab Legs

If you’re searching for a nutritious yet indulgent seafood option, Dungeness crab legs fit the bill perfectly. Packed with high-quality protein, they’re an excellent source of essential amino acids that support muscle repair and overall health. They’re also low in calories, making them a smart choice for those watching their weight.

Beyond protein, Dungeness crab legs are rich in important nutrients like zinc, selenium, and vitamin B12. These nutrients not only boost your immune system but also promote healthy skin and energy levels. Compared to other protein sources, crab legs offer a leaner, more flavorful alternative.

The History of Crab in Cuisine

Did you know that fresh crab legs have been a favorite on the West Coast for centuries? Named after the fishing village of Dungeness in Washington State, these crabs have a deep history rooted in Native American and Pacific Northwest cuisine. Traditionally, they were steamed or roasted over open fires and enjoyed with minimal seasoning to highlight their natural flavor.

Today, their culinary popularity spans far beyond the Pacific. From creamy pastas to savory soups, This delicious seafood has become a global seafood staple, loved for their unique taste and texture.

Master the Art of Cooking Crab

How to Steam Crab for Best Results

Steaming succulent  Dungeness crab legs with garlic, butter, and lemon slices.
A pot of Dungeness crab legs steaming with garlic, butter, and lemon.

Steaming is one of the best ways to preserve the natural flavor of crab legs. This method keeps the meat moist and tender, while also retaining more nutrients compared to boiling. To steam Dungeness crab legs, you’ll need a large pot, a steamer basket, and about two cups of water. Add a splash of lemon juice or white wine for extra flavor.

Bring the water to a boil, place the crab legs in the steamer basket, and cover the pot tightly. Steam for 5-7 minutes, or until the legs are heated through.

Boiling Dungeness Crab Legs

 Seafood boil with Dungeness crab legs, shrimp, corn, and potatoes.
A classic seafood boil featuring Dungeness crab legs, corn, and shrimp.

If you’re craving Dungeness crab legs with a punch of seasoning, boiling is the way to go. This method allows you to infuse the crab meat with bold flavors, like garlic, Old Bay seasoning, or Cajun spices. Start by filling a large pot with water and adding your chosen seasonings. Bring the water to a rolling boil, then carefully add the crab legs.

Cook for 4-6 minutes, ensuring the legs are submerged in the seasoned water. However, avoid overcooking, as this can make the meat rubbery. Once done, drain the legs and serve with melted butter or your favorite dipping sauce.

What Makes Grilling Crab So Flavorful?

Grilled Dungeness crab legs on a barbecue grill.
Smoky grilled Dungeness crab legs, charred to perfection.

Grilling crab legs adds a smoky, charred flavor that pairs beautifully with their natural sweetness. This method is perfect for summer cookouts or when you want to try something different. To grill crab legs, preheat your grill to medium-high heat. Brush the legs lightly with olive oil or a marinade of garlic and herbs.

Place the crab legs directly on the grill grates and cook for about 5 minutes per side. The heat caramelizes the shell slightly, enhancing the overall taste. Grilled Dungeness crab legs are delicious on their own or served with a zesty lemon aioli.

Baking Crab Legs

Baking is a simple yet effective way to prepare Dungeness crab legs. This method is ideal if you want to cook large batches without standing over the stove. Preheat your oven to 375°F and line a baking sheet with foil. Arrange the crab legs in a single layer, then drizzle with garlic butter or sprinkle with your favorite seasoning.

Cover the legs with foil to lock in moisture and bake for 12-15 minutes. If you’re aiming for a golden finish, remove the foil in the last 3 minutes. Serve these baked Dungeness crab legs with roasted vegetables or a crusty loaf of bread for a satisfying meal.

7 Easy Recipes Featuring Dungeness Crab Legs

Garlic Butter Dungeness Crab Legs

Few things can rival the rich, savory flavor of garlic butter Dungeness crab legs. This recipe is not only simple but also a guaranteed crowd-pleaser. Start by melting unsalted butter in a saucepan and adding minced garlic. Let the mixture simmer for a minute to release the aroma, then brush it generously over pre-cooked crab legs.

Bake the crab legs at 375°F for 12-15 minutes, allowing the flavors to soak in. Serve them hot with an extra bowl of garlic butter for dipping. This dish pairs wonderfully with a side of crusty bread or roasted asparagus. For more quick and flavorful recipes, check out How To Make Shrimp Garlic Without Butter In 15 Minutes.

Crab Legs in a Seafood Boil

A seafood boil featuring Dungeness crab legs is a festive meal perfect for gatherings. This recipe combines crab legs with shrimp, potatoes, corn, and sausage for a complete one-pot feast. Begin by filling a large pot with water and adding Old Bay seasoning, lemon slices, and bay leaves.

Bring the water to a boil, then add the potatoes and sausage. After 10 minutes, toss in the corn and crab legs. Cook everything together for another 5-7 minutes until the crab is heated and the vegetables are tender. Drain the pot, spread the contents on a large tray, and sprinkle with more seasoning for added flavor. Don’t forget to serve with lemon wedges and melted butter!

Spicy Cajun Dungeness Crab Legs

If you love bold, zesty flavors, try this recipe for spicy Cajun Dungeness crab legs. The Cajun seasoning adds a delightful kick that perfectly complements the crab’s natural sweetness. To prepare, mix Cajun spices, paprika, garlic powder, and cayenne pepper with melted butter in a bowl.

Brush the mixture over the crab legs, then grill them over medium heat for about 5 minutes per side. Alternatively, you can bake them at 400°F for 10-12 minutes. Serve these spicy crab legs with a creamy dipping sauce or a side of coleslaw to balance the heat. They’re perfect for a casual dinner or game night snack.

Creamy Dungeness Crab Leg Pasta

Creamy crab pasta with parsley garnish.
A rich and creamy pasta dish with Dungeness crab meat.

Turn them into a luxurious pasta dish that’s sure to impress. Begin by cooking your favorite pasta fettuccine or linguine works well. In a large skillet, melt butter and sauté minced garlic until fragrant. Stir in heavy cream, Parmesan cheese, and a pinch of black pepper to create a creamy sauce.

Gently fold in the meat from Dungeness crab legs and cook until warmed through. Toss the pasta in the sauce, ensuring every strand is coated. Garnish with fresh parsley and a squeeze of lemon juice for a bright finish. This dish is elegant enough for a dinner party yet simple enough for a weeknight treat.

Tips and Tricks for Cooking Crab Legs

How to Properly Thaw Frozen Crab Legs

When working with frozen Dungeness crab legs, proper thawing is essential to ensure they retain their texture and flavor. The best method is to thaw them slowly in the refrigerator overnight. Simply place the crab legs in a sealed container or on a tray to catch any dripping water.

If you’re short on time, you can use the cold water method. Place the Dungeness crab legs in a sealed plastic bag and submerge them in a bowl of cold water. Change the water every 30 minutes until thawed. Avoid using hot water or microwaves, as they can cause uneven thawing and compromise the quality of the meat.

Essential Tools for Cooking and Eating Crab Legs

Cooking and enjoying Dungeness crab legs is much easier with the right tools. A large pot or steamer is a must for boiling or steaming, while a baking tray and foil come in handy for oven-based recipes. For grilling, invest in a pair of heat-resistant tongs to handle the legs safely.

When it’s time to eat, crab crackers and seafood scissors are invaluable for breaking through the shell without damaging the tender meat. On the other hand, if you prefer an eco-friendly option, consider using the back of a spoon or a butter knife as a substitute. Having small bowls for melted butter and dipping sauces can also elevate the dining experience.

Common Mistakes to Avoid

Cooking Dungeness crab legs can be simple, but there are a few pitfalls to steer clear of. One of the most common mistakes is overcooking, which can make the meat rubbery and dry. Remember, most store-bought crab legs are pre-cooked, so you’re merely reheating them.

Another error is skipping the thawing process for frozen crab legs. Cooking them directly from frozen can result in uneven heating, with some parts being overcooked while others remain cold. Finally, avoid underseasoning—while crab legs are naturally flavorful, a touch of garlic butter or Cajun spices can take them to the next level.

Enhancing the Flavor of Crab Legs

While Dungeness crab legs are delicious on their own, a few tweaks can elevate their taste. Start by experimenting with marinades—lemon, garlic, and parsley are classic options that complement the crab’s sweetness. For a spicy kick, try a Cajun or chili-lime seasoning.

Dipping sauces are another way to add variety. Melted butter is a staple, but you can also serve a tangy cocktail sauce or a creamy aioli. For an Asian-inspired twist, pair your crab legs with a soy-ginger dip. These small additions can transform your dish into a gourmet experience.

FAQs

What is the best way to cook Dungeness crab?

The best way to cook Dungeness crab legs largely depends on your preferences. Steaming is ideal if you want to preserve the crab’s natural flavor and texture. Boiling, on the other hand, allows you to infuse the crab with seasonings like Old Bay or garlic. Grilling and baking are also excellent methods for adding a smoky or buttery flavor. Whichever method you choose, ensure you don’t overcook the crab legs, as they only need to be reheated for 5-7 minutes if pre-cooked.

Are Dungeness crab legs already cooked?

Yes, most Dungeness crab legs you find in stores are already cooked and flash-frozen to preserve their quality. This means your primary goal is to reheat them rather than cook them from scratch. Always check the packaging to confirm, and avoid overcooking, as this can make the meat tough and dry. If you’re buying fresh crab legs, however, you’ll need to steam or boil them until the meat turns opaque and tender.

Is it better to steam or boil Dungeness crab legs?

Both methods are excellent for preparing Dungeness crab legs, but each has its advantages. Steaming is better for retaining the crab’s natural sweetness and delicate texture, as it uses minimal water. It’s also a quicker method with less risk of overcooking. Boiling, however, is great if you want to add flavors directly to the crab legs. By seasoning the water with spices, garlic, or lemon, you can infuse the meat with extra flavor. Choose steaming for pure crab flavor and boiling for seasoned results.

What should I season my crab legs with?

Seasoning your Dungeness crab legs enhances their already delicious taste. Classic options include melted butter with garlic or lemon, which highlight the crab’s natural sweetness. For a spicy twist, Cajun seasoning, paprika, or chili powder work wonders. You can also experiment with Asian-inspired flavors like soy sauce, ginger, and sesame oil. Don’t forget to pair the seasoned crab legs with dipping sauces such as garlic butter, cocktail sauce, or a tangy mustard dip for an extra layer of flavor.

Conclusion

Cooking Dungeness crab legs at home is easier than you might think and offers endless opportunities to enjoy this delicious seafood. Whether you prefer steaming, boiling, grilling, or baking, each method brings out unique flavors and textures. From simple garlic butter recipes to bold Cajun spices, you can customize your crab legs to suit any occasion.

We’ve explored everything from choosing the best Dungeness crab legs to essential cooking tips and flavor-enhancing tricks. Now it’s your turn to try these methods and recipes. Remember, the key is to avoid overcooking and to season the crab legs to your taste. Whether you’re hosting a seafood feast or treating yourself to a special meal, Dungeness crab legs are sure to impress.

The Best Chicken Fajita Marinade For Juicy Flavor!

Let’s be real fajitas are all about that first bite, right? The juicy chicken, the smoky spices, the zesty lime… it’s pure bliss. But what’s the secret behind it all? It’s the chicken fajita marinade! Yep, that humble mixture is the unsung hero, transforming plain chicken into a mouthwatering masterpiece. The best part? Making it at home is super easy and totally worth it. Whether you love bold heat, a touch of sweetness, or something in between, you can tweak this marinade to match your cravings. So, roll up your sleeves, grab your spices, and let’s create a fajita experience you won’t forget. Trust me, it’s gonna be epic!

Why Your Fajitas Deserve the Perfect Chicken Fajita Marinade

What Makes a Marinade Essential?

A good chicken fajita marinade isn’t just an extra step it’s the foundation of bold, mouthwatering flavor. Marinades serve a dual purpose: they tenderize the chicken while infusing it with a blend of spices, acidity, and richness. For fajitas, the marinade plays a crucial role in balancing the smoky heat of spices like paprika and chili powder with the tang of lime juice. Without this step, the chicken can feel dry and bland, leaving your fajitas lackluster.

Moreover, marinades allow the flavors to penetrate deep into the chicken, creating a harmony that’s hard to achieve otherwise. For instance, the oil in the marinade helps carry fat-soluble flavors, while the acid breaks down the meat’s proteins, ensuring tenderness. In short, skipping the marinade would mean missing out on the very heart of what makes fajitas so irresistible.

The Benefits of a Homemade Chicken Fajita Marinade

Let’s talk options. Sure, you could grab a premade marinade from the store, but is it worth it? Homemade chicken fajita marinades offer something store-bought versions simply can’t match: control. By making your marinade at home, you can adjust the salt, tweak the spice level, and avoid artificial preservatives or excessive sugar.

Store-bought marinades may save a few minutes, but they often come with drawbacks like overpowering flavors or hidden additives. Homemade versions, on the other hand, let you use fresh ingredients like minced garlic, freshly squeezed lime juice, and fragrant spices to create a marinade tailored to your preferences. Plus, they’re often more affordable and versatile. For more on why homemade recipes are superior, check out this guide to creating your own marinades.

Choosing the Right Chicken for Fajitas

Believe it or not, the type of chicken you use makes a big difference. Chicken breasts and chicken thighs are the two most common choices, but they perform differently when paired with a chicken fajita marinade.

Chicken thighs are known for their rich flavor and higher fat content, which makes them naturally juicy and harder to overcook. They’re perfect for grilling or searing since they can handle high heat without drying out. On the other hand, chicken breasts are leaner and cook faster, making them a convenient option. However, they’re more prone to drying out, so marinating them thoroughly is key to keeping them moist and flavorful.

For fajitas, both cuts work well, but thighs often win for their tenderness and rich taste. Whichever you choose, ensure the pieces are sliced evenly so they cook consistently.

The Science of Marinating Chicken

Marinating chicken might seem simple, but there’s a bit of science behind the magic. A chicken fajita marinade combines three essential components: fat, acid, and flavorings. Each plays a specific role in transforming the chicken into a tender, flavor-packed delight.

  1. Fat: Ingredients like olive oil help carry the flavors of spices and herbs into the chicken. It also creates a barrier that keeps the meat juicy during cooking.
  2. Acid: Lime juice or vinegar breaks down muscle proteins in the chicken, which makes it more tender. However, too much acid can overdo it, leaving the chicken mushy—so stick to the recommended marination times.
  3. Flavorings: Spices like cumin, paprika, and chili powder, combined with aromatics like garlic and onion, create the bold flavors you associate with fajitas. These ingredients cling to the chicken and caramelize beautifully during cooking.

Understanding these elements ensures you’re not just marinating but mastering the art of fajita-making. With this knowledge, your fajitas are bound to be a hit!

How to Make the Ultimate Chicken Fajita Marinade

Essential Ingredients for a Flavor-Packed Marinade

The key to a great chicken fajita marinade lies in its ingredients. Each component serves a unique purpose, working together to deliver bold flavors and tenderize the chicken. Here’s what you’ll need:

  • Citrus juice (lime or lemon): Adds brightness and tenderizes the meat.
  • Oil (olive or avocado): Helps the flavors stick to the chicken and keeps it juicy.
  • Spices (paprika, cumin, chili powder): Create that classic smoky, spicy flavor.
  • Garlic and onion: Enhance the depth and savory notes.
  • Sweeteners (honey or brown sugar): Balance the tang and spice with a hint of sweetness.

You can also include optional ingredients like soy sauce for umami or jalapeños for extra heat. Feel free to experiment, but remember, balance is the key to a successful marinade.

Step-by-Step Recipe for Chicken Fajita Marinade

Chicken Fajita Marinade Being Mixed in a Bowl
Fresh lime, garlic, and spices come together in this bold chicken fajita marinade.

Crafting the perfect chicken fajita marinade is simple and only takes a few minutes:

  1. Combine the ingredients: Mix lime juice, olive oil, minced garlic, and your spices in a bowl.
  2. Taste and adjust: Always taste your marinade before applying it. Add a pinch of salt or a touch more lime juice as needed.
  3. Marinate the chicken: Place the chicken in a resealable bag or container, pour the marinade over it, and seal it tightly.
  4. Let it rest: Refrigerate for at least 2 hours, but no more than 6 hours to avoid a mushy texture.

With this easy recipe, your chicken will soak up all the zesty, smoky flavors, ensuring your fajitas are anything but boring. For a detailed marinade recipe, check out this guide.

Tips for Proper Marination

To get the most out of your chicken fajita marinade, follow these expert tips:

  • Don’t skimp on marination time: Allow the chicken to marinate for at least 2 hours so the flavors can penetrate the meat.
  • Use a resealable plastic bag: This ensures the marinade evenly coats all sides of the chicken.
  • Refrigerate immediately: Always keep marinating chicken in the fridge to prevent bacteria growth.
  • Avoid over-marinating: While it’s tempting to let it sit overnight, acids in the marinade can break down the meat too much, resulting in an unappealing texture.

By keeping these tips in mind, you’ll achieve tender, flavorful chicken every time.

Cooking Techniques for Fajitas

Sizzling Grilled Chicken Fajitas with Bell Peppers
Juicy marinated chicken and fresh bell peppers sizzling in a skillet.

Now that your chicken fajita marinade has done its magic, it’s time to cook! Here are three popular methods to bring your fajitas to life:

  1. Grilling: Preheat your grill to medium-high heat. Cook the chicken for 6-8 minutes per side or until it reaches an internal temperature of 165°F (75°C). Grilling adds a smoky char that complements the marinade beautifully.
  2. Pan-searing: Heat a cast-iron skillet over medium-high heat. Sear the marinated chicken for about 4-6 minutes per side. This method is perfect for getting a nice caramelized crust.
  3. Baking: If grilling or searing isn’t an option, bake the marinated chicken in a preheated oven at 400°F (200°C) for 20-25 minutes.

Each method has its perks, but grilling often delivers the best flavor. Pair your cooked chicken with sautéed bell peppers and onions for a classic fajita experience.

Secrets to Juicy and Flavorful Chicken Fajitas

Balancing Acidity, Spice, and Sweetness

The key to a well-rounded chicken fajita marinade lies in its balance of flavors. A good marinade isn’t just spicy or tangy it’s a harmonious blend of acidity, spice, and a touch of sweetness. For instance, lime juice adds the zesty kick that’s essential in fajitas, but pairing it with a sweetener like honey or brown sugar ensures the acidity doesn’t overpower the dish.

Spices like cumin, smoked paprika, and chili powder create depth, while garlic and onion bring in savory undertones. Adjusting these ingredients to your taste is simple: if you prefer a bolder kick, add a pinch of cayenne; if you like a milder profile, dial back the chili powder and let the natural sweetness of the honey shine. By tweaking these elements, you can create a marinade that perfectly suits your palate.

The Importance of Cooking Temperatures

Cooking chicken to the right temperature is crucial for retaining its juiciness, especially when using a chicken fajita marinade. Undercooked chicken can be unsafe, while overcooked chicken tends to be dry and chewy.

To achieve the best results, aim for an internal temperature of 165°F (75°C) at the thickest part of the chicken. Using a meat thermometer removes the guesswork. On the grill, medium-high heat is ideal, as it helps achieve that signature char while keeping the meat tender. In a skillet, ensure the pan is hot enough to sear the chicken without burning the marinade.

Keeping a close eye on the cooking process ensures your chicken stays moist and flavorful, with the marinade’s spices caramelizing beautifully during cooking.

Resting and Slicing the Chicken

Once your marinated chicken is cooked to perfection, resist the urge to slice it immediately. Resting the chicken for about 5-10 minutes allows the juices to redistribute, ensuring every bite is tender and juicy. This small step can make a big difference in the final texture of your fajitas.

When it’s time to slice, use a sharp knife and cut the chicken against the grain. This technique shortens the muscle fibers, making each piece more tender and easier to chew. For fajitas, aim for thin, uniform strips that pair well with sautéed vegetables and tortillas. Proper slicing ensures the chicken fajita marinade flavor is present in every bite.

Pairing Marinade with Fajita Toppings and Sides

The chicken fajita marinade is only part of the equation—pairing it with the right toppings and sides takes your meal to the next level. For toppings, consider guacamole, sour cream, shredded cheese, or a squeeze of fresh lime. Each adds a unique flavor or texture that complements the marinated chicken.

As for sides, classics like Mexican rice, refried beans, or even a simple green salad work wonderfully. If you’re feeling adventurous, grilled corn or a creamy avocado salad can add a fresh twist. For more inspiration, check out our guide to grilled chicken thigh recipes, which includes creative ideas for side dishes.

Variations of Chicken Fajita Marinade to Try

Different Types of Chicken Fajita Marinades in Glass Bowls
Explore various chicken fajita marinade options for every taste.

Spicy Fajita Marinade

For those who love a fiery kick, a spicy chicken fajita marinade is the way to go. Adding ingredients like chipotle peppers in adobo sauce, fresh jalapeños, or cayenne pepper can turn up the heat without overpowering the other flavors.

For example, you can blend a tablespoon of chipotle sauce with lime juice, olive oil, and garlic to create a smoky, spicy base. To balance the heat, consider adding a touch of honey or brown sugar. This combination ensures that your fajitas pack a punch while remaining well-rounded.

Adjust the spice level according to your preference by experimenting with different chili varieties. Remember, the marinade should complement the other elements of your fajitas, like sautéed vegetables and creamy toppings, rather than dominate them.

Sweet and Tangy Fajita Marinade

If you prefer a more balanced flavor profile, try a sweet and tangy chicken fajita marinade. Ingredients like honey, orange juice, or even pineapple juice can add a delightful sweetness that pairs beautifully with the tang of lime and the warmth of fajita spices.

For instance, combine orange juice with garlic, cumin, and smoked paprika to create a marinade that’s bursting with citrusy goodness. The natural sugars in the juice will caramelize during cooking, giving the chicken a slightly crispy, golden finish.

This variation is especially popular for grilled fajitas, as the sweet elements enhance the smoky charred flavor of the chicken. Serve with fresh salsa or guacamole to complement the tangy notes.

Healthy and Low-Calorie Marinade Options

Looking for a lighter option? A healthy chicken fajita marinade can be just as flavorful without unnecessary calories. Swap traditional oils for low-fat yogurt or use a small amount of avocado oil, which is packed with healthy fats.

For a simple low-calorie marinade, mix Greek yogurt, lime juice, garlic, and a pinch of chili powder. The yogurt not only tenderizes the chicken but also gives it a creamy texture. Additionally, using fresh herbs like cilantro or parsley can enhance the flavor without adding extra calories.

By choosing lighter ingredients, you can enjoy all the bold flavors of fajitas without compromising on your health goals. Pair this version with whole-grain tortillas and a side of roasted vegetables for a guilt-free meal.

Vegan and Vegetarian Marinade Options

A chicken fajita marinade can easily be adapted for vegan or vegetarian fajitas. By using the same flavorful base and substituting chicken with tofu, portobello mushrooms, or even jackfruit, you can create a plant-based version that’s just as satisfying.

For tofu, press it to remove excess moisture, then marinate it in a blend of lime juice, olive oil, smoked paprika, and garlic. For mushrooms, their meaty texture works beautifully with a marinade that includes balsamic vinegar and chili powder.

When cooking vegan fajitas, the marinade is especially important, as it infuses the plant-based ingredients with the smoky, zesty flavors you’d expect in classic fajitas. These options are perfect for anyone looking to explore meat-free alternatives without sacrificing taste.

Common Mistakes to Avoid When Making Chicken Fajita Marinade

 Plated Chicken Fajitas with Garnishes
A perfect chicken fajita meal with all the trimmings.

Over-Marinating Chicken

While it might seem like leaving chicken in a marinade for hours is a good idea, overdoing it can actually ruin the texture. Acidic ingredients, such as lime juice or vinegar, are essential in a chicken fajita marinade, but they can break down the proteins in chicken too much if left for too long. This results in a mushy or stringy texture that’s far from ideal.

To avoid this mistake, stick to a marination window of 2-6 hours. For a quick fix, even 30 minutes of marination can work wonders. On the other hand, anything over 12 hours is usually too much and can lead to disappointing results. Timing is everything when it comes to achieving that perfect balance of flavor and tenderness.

Skipping Proper Cooking Techniques

Even the best chicken fajita marinade won’t save you if the chicken isn’t cooked properly. One common mistake is using a skillet or grill that’s not hot enough, which prevents the chicken from developing that beautiful seared crust. Alternatively, cooking at too high a heat can cause the marinade to burn before the chicken is fully cooked.

For optimal results, preheat your skillet or grill to medium-high heat. This ensures even cooking while allowing the marinade’s sugars and spices to caramelize. Using a cast-iron skillet can enhance the smoky flavors, while grilling imparts a delicious char that complements the marinade perfectly.

Forgetting to Taste and Adjust

A great chicken fajita marinade starts with a great balance of flavors, but what works on paper may not always work on your palate. Forgetting to taste and adjust the marinade before applying it is a missed opportunity to refine the final dish.

Always take a small spoonful of your marinade to ensure it’s balanced. Too tangy? Add a splash of oil or a pinch of sugar. Not bold enough? Increase the spices slightly. By tasting and adjusting as needed, you’ll ensure the flavors are exactly how you want them before they hit the chicken.

Not Resting Chicken After Cooking

Resting the chicken after cooking is a simple step that many overlook, but it’s vital for retaining juiciness. When chicken is cooked, its juices are concentrated in the center. Slicing it immediately lets those juices escape, leaving the meat dry.

To avoid this, let the chicken rest for 5-10 minutes after it’s taken off the heat. During this time, the juices redistribute throughout the meat, ensuring every bite is moist and flavorful. Whether you’re grilling, baking, or pan-searing, this final step can make all the difference in your fajitas.

FAQs

Can you marinate fajitas too long?

Yes, you can marinate fajitas too long, especially when using a chicken fajita marinade with acidic ingredients like lime juice or vinegar. These acids are essential for tenderizing the chicken, but over-marination (more than 12 hours) can break down the meat’s proteins excessively, leading to a mushy texture.

To avoid this, aim for a marination time between 2-6 hours. If you’re short on time, even 30 minutes can impart great flavor. However, sticking to the optimal marination window ensures tender, flavorful chicken without compromising its texture.

How long do you grill chicken fillet

When grilling chicken fillets marinated in a chicken fajita marinade, the cooking time depends on the thickness of the fillets. Generally, grill the chicken over medium-high heat for about 6-8 minutes per side, or until the internal temperature reaches 165°F (75°C).

Using a meat thermometer ensures accuracy and prevents overcooking. Additionally, the sugars and spices in the marinade can caramelize beautifully on the grill, so keeping a close eye on the chicken will help avoid burning.

Where are chicken fajitas from?

Chicken fajitas have their roots in Tex-Mex cuisine, a fusion of Texas and Mexican culinary traditions. The term “fajita” originates from the Spanish word faja, meaning “strip” or “belt,” referring to the sliced meat traditionally used in the dish.

Originally made with skirt steak, fajitas became popular in the 20th century and evolved to include chicken, vegetables, and a variety of toppings. Today, they’re a global favorite known for their bold, smoky flavors and sizzling presentation.

What is the formula for chicken marinade?

A classic formula for a flavorful chicken fajita marinade includes three essential components:

  1. Fat: Usually olive oil, which carries the flavors and keeps the chicken moist.
  2. Acid: Lime juice, vinegar, or other citrus juices to tenderize the chicken.
  3. Flavorings: A mix of spices (like cumin, chili powder, and paprika), garlic, and sometimes sweeteners like honey or brown sugar.

A typical ratio is 3 parts oil to 1 part acid, plus seasonings to taste. This balance ensures your marinade is both effective and delicious.

Conclusion

Creating the perfect chicken fajita marinade is simpler than you might think, yet it holds the power to elevate your fajitas from good to truly unforgettable. By understanding the balance of flavors: acid, fat, and seasonings you can craft a marinade that ensures tender, juicy chicken packed with bold, zesty flavors.

From mastering marination times to choosing the right cooking method, each step contributes to making your fajitas a crowd-pleasing success. Whether you prefer a spicy kick, a sweet and tangy twist, or even a low-calorie option, there’s a marinade variation to suit your taste. And by avoiding common mistakes, like over-marinating or skipping proper cooking techniques, you’ll guarantee flavorful results every time.

How To Make The Ultimate Fajita Marinade In 5 Minutes

Let’s be honest: the secret to unforgettable fajitas isn’t in the sizzle—it’s in the fajita marinade. That tangy, smoky blend of spices transforms ordinary ingredients into a mouthwatering Tex-Mex masterpiece. If you’ve ever wondered how restaurants get their fajitas so juicy and flavorful, here’s the good news: you can do it too! All it takes is a few pantry staples, a splash of lime juice, and five quick minutes. Whether you’re grilling steak, searing chicken, or tossing veggies, this marinade guarantees bold flavors with minimal effort. So, grab your whisk, and let’s dive into the world of homemade fajita marinade magic!

What Is a Fajita Marinade?

Understanding the Basics of Marinades

A fajita marinade is more than just a seasoning mix; it’s the key to unlocking bold, authentic Tex-Mex flavors. Marinades combine three essential components: acid, oil, and seasonings. The acid, like lime juice or vinegar, tenderizes the protein, breaking down fibers for a juicy bite. Oils, such as olive or avocado oil, ensure the seasonings coat evenly, while locking in moisture during cooking. Finally, spices like chili powder, cumin, and paprika create the signature smoky and zesty flavor we all love in fajitas.

Marinades aren’t limited to just meat. In fact, they work wonders on vegetables too! Bell peppers, onions, and even zucchini soak up the flavors beautifully, making this a versatile solution for meat-lovers and vegetarians alike. With a simple fajita marinade, you can elevate any dish from bland to brilliant in just a few minutes.

Why Use a Marinade for Fajitas?

The magic of a fajita marinade lies in its ability to transform basic ingredients into a flavorful Tex-Mex feast. By marinating proteins like chicken, beef, or shrimp, you allow the flavors to penetrate deep into the meat. This creates not only a delicious crust when grilled but also ensures the meat remains tender and juicy.

In addition, marinades help enhance texture. For example, lime juice gently breaks down the fibers in steak, making it easier to chew and enjoy. For veggies, the oil and spices prevent drying out during cooking, while adding a delightful smoky char. Moreover, using a marinade can save time when meal-prepping since everything is seasoned and ready to cook.

It’s no wonder that a well-made fajita marinade is a staple in Tex-Mex cuisine. The combination of practicality and flavor makes it an essential step in creating restaurant-quality fajitas at home.

Types of Proteins and Veggies That Work Best

A great fajita marinade works wonders on a variety of proteins and vegetables. Here’s a quick guide to help you choose the best ingredients for your dish:

  • Chicken: Boneless, skinless chicken breasts or thighs are excellent options. They absorb marinades quickly and cook evenly.
  • Beef: Flank steak and skirt steak are traditional choices. Their bold flavors pair perfectly with smoky spices and citrusy acids.
  • Shrimp: These cook fast and require only 15–30 minutes to marinate, making them perfect for quick meals.
  • Vegetables: Bell peppers, onions, zucchini, and mushrooms are fantastic choices. They caramelize beautifully when grilled, soaking up every drop of the marinade.

For inspiration on fajita-friendly ingredients, check out this helpful guide on vegetable grilling from The Spruce Eats. It offers excellent tips for achieving the perfect texture and flavor for your veggies.

The Tex-Mex Origins of Fajita Marinades

The origins of the fajita marinade trace back to the vibrant Tex-Mex cuisine of the Southwestern United States. Fajitas themselves were traditionally made with skirt steak, a tough cut of meat that required tenderizing. Early cooks discovered that soaking the meat in acidic blends like lime juice and vinegar made it not only tender but incredibly flavorful.

Over time, this technique expanded to include a variety of proteins and vegetables, creating the customizable fajitas we enjoy today. What makes Tex-Mex marinades unique is their balance of bold spices, tangy citrus, and subtle sweetness each ingredient working harmoniously to enhance the dish. This history underscores the importance of a well-crafted fajita marinade, as it remains the heart of this beloved culinary tradition.

Essential Ingredients for a Fajita Marinade

The Core Elements of a Perfect Fajita Marinade

Ingredients for making a fajita marinade on a cutting board.
Gather all the fresh and pantry ingredients for the ultimate fajita marinade.

At the heart of every delicious fajita marinade is a simple yet powerful combination of ingredients. These core components acid, oil, and spices work together to tenderize, flavor, and seal in moisture. Acidic elements like lime juice or vinegar help break down proteins, making meats like steak or chicken tender and juicy. Oils, such as olive or avocado oil, coat the ingredients evenly while preventing them from drying out during cooking.

Spices and aromatics, however, are what truly define a fajita marinade. Staples like garlic, chili powder, cumin, and paprika provide the bold, smoky Tex-Mex flavor that makes fajitas irresistible. A pinch of cayenne or a splash of soy sauce can also be added for a unique twist. Whether you’re cooking chicken, beef, or vegetables, these ingredients form the foundation of an unforgettable marinade.

Choosing the Right Spices

The spices you choose for your fajita marinade can make or break your dish. Traditional Tex-Mex spices like cumin, chili powder, and smoked paprika are essential for creating that signature smoky heat. Fresh garlic and onion powder enhance the savory notes, while a dash of oregano adds an earthy balance.

For an extra burst of flavor, consider adding chipotle powder or even a touch of adobo sauce. These ingredients provide a smoky depth that pairs beautifully with grilled or seared fajitas. On the other hand, if you prefer milder flavors, use sweet paprika and reduce the chili powder. The goal is to balance spice and aromatics to suit your taste preferences.

Fresh vs. Store-Bought Ingredients

When it comes to making a fajita marinade, using fresh ingredients can elevate your dish to a new level. Freshly squeezed lime juice, minced garlic, and chopped cilantro offer vibrant flavors that pre-packaged options simply can’t match. In addition, they allow you to control the quality and balance of your marinade.

However, store-bought ingredients can be a convenient alternative. Bottled lime juice, garlic powder, and ready-made spice mixes like McCormick fajita seasoning are great for saving time. These products provide consistent results while reducing prep work. The key is to strike a balance between freshness and convenience, ensuring your marinade is flavorful and easy to prepare.

Customizing Your Marinade for Dietary Preferences

One of the best things about a fajita marinade is its adaptability. Whether you’re cooking for a family dinner or catering to dietary needs, you can easily tweak the recipe. For a gluten-free version, swap soy sauce for tamari or coconut aminos. If you’re looking for a vegan option, avoid honey and use maple syrup for a touch of sweetness instead.

Reducing oil content is another common customization. Greek yogurt can replace oil for a lighter, tangier marinade that still keeps proteins tender. For spice-sensitive diners, you can tone down the heat by using mild chili powder and omitting cayenne. This flexibility ensures that your marinade can accommodate any preference or lifestyle, making fajitas a dish everyone can enjoy.

Step-by-Step Guide to Making the Best Fajita Marinade

How to Mix Your Ingredients

Marinated chicken and steak ready for grilling.
Chicken and steak soaked in a bold fajita marinade, ready to cook

Creating a fajita marinade is as simple as combining a few pantry staples and fresh ingredients. Start by whisking together the acidic component, such as lime juice, with olive oil in a medium-sized bowl. This blend acts as the base of your marinade, ensuring the flavors are both bold and balanced.

Next, add your spices—chili powder, cumin, smoked paprika, and garlic powder. If you want a touch of sweetness, consider adding a teaspoon of honey or maple syrup. Whisk until everything is well-combined and aromatic. For an even quicker prep, you can place all the ingredients in a mason jar, seal it, and shake vigorously. This not only mixes the marinade but also makes it easy to store if you’re prepping ahead.

For more inspiration, check out How To Make The Perfect Ensalada De Pollo At Home

Marinating Times for Different Proteins

The time you let your ingredients soak in the fajita marinade is crucial for achieving the best results. Each type of protein benefits from different marination times:

  • Chicken: Marinate for 2–4 hours for maximum flavor, but even 30 minutes will do in a pinch.
  • Beef: Cuts like flank steak or skirt steak should sit in the marinade for at least 4 hours, but no more than 8 hours to avoid over-tenderizing.
  • Shrimp: Since shrimp are delicate, 15–30 minutes is usually sufficient. Longer times can overpower their natural flavor.
  • Vegetables: Vegetables only need 15–20 minutes to soak up the seasoning. The oil helps prevent sticking during cooking.

Keep in mind that marinating too long, especially with acidic ingredients like lime juice, can break down the protein fibers too much, resulting in mushy textures.

Pro Tips for Even Flavor Distribution

Ensuring that every piece of your dish is coated in the fajita marinade can make all the difference. To achieve even flavor distribution, follow these simple tips:

  1. Use zip-top bags: Place your protein or vegetables in a resealable bag with the marinade. Seal tightly and massage the bag gently to coat every piece.
  2. Stir frequently: If you’re marinating in a bowl, stir the ingredients occasionally to redistribute the marinade.
  3. Avoid overcrowding: Ensure the marinade fully surrounds the ingredients. For large batches, divide the protein or vegetables into smaller portions with equal amounts of marinade.
  4. Pat dry before cooking: Removing excess marinade prevents steaming and allows for a proper sear, especially if you’re grilling or pan-frying.

By following these tips, you’ll ensure your fajitas are evenly flavored and perfectly cooked.

Mistakes to Avoid When Marinating

Even the best fajita marinade won’t shine if common marinating mistakes are made. Here are a few pitfalls to steer clear of:

  • Over-marinating: As mentioned earlier, leaving proteins like chicken or shrimp in an acidic marinade for too long can lead to an unpleasant mushy texture.
  • Skipping the oil: While it might be tempting to skip the oil for a lighter dish, it’s essential for locking in moisture and preventing sticking during cooking.
  • Using reactive containers: Always marinate in glass, plastic, or stainless steel. Reactive materials like aluminum can alter the taste of the marinade.
  • Reusing marinade: Never reuse leftover marinade as a sauce without boiling it first. This ensures it’s safe to consume if it has touched raw meat.

By avoiding these mistakes, you’ll guarantee a hassle-free cooking experience and fajitas that taste amazing every time.

How to Cook Fajitas After Marinating

Grilling vs. Pan-Searing

Cooking fajitas after using a fajita marinade can be as simple or as sophisticated as you’d like. Two popular methods—grilling and pan-searing—each bring unique benefits to the dish.

Grilling fajitas is the go-to method for achieving that smoky, charred flavor. Preheat your grill to medium-high heat, ensuring it’s hot enough to sear the meat and lock in the juices. Place the marinated protein directly on the grates, flipping once to cook evenly. Vegetables, like bell peppers and onions, can be grilled in a basket or directly on the grates for added smoky flavor.

On the other hand, pan-searing is perfect when you’re cooking indoors or prefer a quicker option. Heat a cast-iron skillet over high heat and add a drizzle of oil to prevent sticking. Sear the marinated meat and veggies in batches to avoid overcrowding, which could steam the food instead of giving it a crisp exterior. Both methods produce flavorful, juicy fajitas, so choose based on your tools and time.

Sautéing Veggies for Fajitas

Vegetables play a starring role in any fajita dish, and a fajita marinade enhances their natural sweetness and texture. To sauté veggies to perfection, start with a hot skillet or wok and a splash of oil. Add the marinated bell peppers, onions, and other veggies, stirring frequently to ensure even cooking.

Cook the vegetables over medium-high heat until they’re slightly softened but still have a bit of crunch. This balance in texture is essential to complement the tender, flavorful meat. If you like caramelized veggies, let them sit undisturbed for a minute or two before stirring, creating golden edges that add depth to your fajitas.

For extra flavor, sprinkle in a dash of your fajita seasoning mix or a squeeze of fresh lime juice as the veggies finish cooking. These small touches bring out the bold Tex-Mex flavors in every bite.

How to Slice and Serve Fajitas

Fajita meat and vegetables cooking in a skillet.
Sizzling fajita meat and vegetables cooked to perfection in a skillet.

Once your marinated meat is cooked, slicing it correctly is crucial for optimal flavor and texture. Always slice meat like steak or chicken against the grain. This means cutting perpendicular to the muscle fibers, which shortens them and makes each bite more tender.

Arrange the sliced meat on a platter alongside the sautéed veggies for a colorful, family-style presentation. Warm tortillas, either flour or corn, are essential for serving. Wrap them in a clean kitchen towel or foil to keep them soft and pliable.

If you’re feeling creative, set up a fajita bar with toppings like guacamole, sour cream, shredded cheese, and fresh salsa. These additions let everyone customize their fajitas, turning dinner into a fun and interactive meal.

Tips for Cooking Fajitas Like a Pro

Even with a great fajita marinade, a few cooking techniques can elevate your dish:

  1. Preheat thoroughly: Whether grilling or using a skillet, ensure it’s fully heated before adding the meat. This prevents sticking and helps achieve a proper sear.
  2. Cook in batches: Overcrowding the pan or grill can lead to uneven cooking and steaming rather than searing.
  3. Don’t overcook: Remove the meat from heat just before it reaches your desired doneness, as it will continue to cook slightly while resting.
  4. Let it rest: Resting the meat for 5–10 minutes after cooking allows the juices to redistribute, resulting in moist and flavorful slices.

By combining these tips with a perfectly balanced fajita marinade, you’ll create restaurant-quality fajitas that everyone will rave about.

Tips for Customizing Your Fajita Marinade

Adding Bold Flavors

One of the easiest ways to make your fajita marinade stand out is by experimenting with bold flavors. While classic ingredients like lime juice, garlic, and chili powder provide a solid base, small tweaks can make your marinade unforgettable.

For instance, adding a touch of smoked chipotle powder or a teaspoon of adobo sauce can introduce a deep, smoky heat. If you prefer a tangier profile, consider increasing the lime juice or adding a splash of apple cider vinegar. On the other hand, for a hint of sweetness, a drizzle of honey or agave syrup works wonders. These adjustments not only customize the marinade to your taste but also ensure your fajitas never feel repetitive.

Healthy Alternatives and Substitutions

Whether you’re catering to dietary restrictions or simply aiming for a lighter option, a fajita marinade can be easily adapted. Replace olive oil with Greek yogurt for a creamy, low-fat alternative that adds tanginess while keeping your proteins moist. Similarly, use coconut aminos in place of soy sauce to make the marinade gluten-free without sacrificing flavor.

For those avoiding sugar, skip the honey or agave and let the natural sweetness of the grilled vegetables shine through. By making small swaps, you can tailor your marinade to suit a wide range of dietary needs, making fajitas an inclusive and versatile meal.

Making a Double Batch for Meal Prep

A fajita marinade is not just for tonight’s dinner—it’s a fantastic tool for meal prepping. Doubling the recipe allows you to marinate proteins in advance and store them in the freezer for busy weeknights. To do this, portion your meat or vegetables into zip-top bags, add the marinade, and remove as much air as possible before sealing.

When you’re ready to cook, simply thaw the pre-marinated ingredients in the refrigerator overnight. This method saves time and ensures you have a flavorful meal ready to go. Additionally, consider storing extra marinade in an airtight container for up to a week in the refrigerator. Having it on hand lets you whip up fresh fajitas or even use it as a quick dressing for salads and grain bowls.

Pairing Marinades with Sides and Drinks

A delicious fajita marinade deserves equally amazing accompaniments. For sides, classics like Mexican rice, refried beans, or a vibrant corn salad perfectly complement the bold flavors of fajitas. A side of guacamole or fresh salsa adds texture and brightness to the plate, while warm tortillas tie the entire dish together.

When it comes to drinks, a margarita with a splash of lime is the ultimate pairing for Tex-Mex meals. However, for a non-alcoholic option, sparkling water infused with citrus or a refreshing agua fresca balances the spice beautifully. These combinations elevate your fajitas from a simple dinner to a memorable dining experience.

FAQs

How to make fajita marinade?

Making a fajita marinade is quick and easy. Start by whisking together olive oil, lime juice, minced garlic, chili powder, cumin, smoked paprika, and a pinch of salt. This simple blend creates the perfect balance of tangy, smoky, and savory flavors. You can also customize it with additional ingredients like honey for sweetness or cayenne for heat. Once mixed, pour the marinade over your protein or veggies, and let it work its magic!

How to marinade steak for fajitas?

To marinate steak for fajitas, choose a cut like flank steak or skirt steak for the best results. Place the steak in a zip-top bag or shallow dish, and pour your fajita marinade over it, ensuring the meat is fully coated. Seal the bag or cover the dish, then refrigerate for 2–4 hours. Avoid marinating longer than 8 hours, as the acidic lime juice can break down the meat too much, affecting its texture. Before cooking, pat the steak dry to ensure a good sear.

Can you use fajita seasoning as a marinade?

Yes, you can use fajita seasoning to create a flavorful marinade. Simply combine the seasoning mix with olive oil and lime juice to form a paste-like consistency. This method is perfect for when you’re short on time or want a convenient solution. The pre-blended spices offer a consistent flavor profile that works well with chicken, beef, or vegetables. However, fresh ingredients like garlic and lime juice can enhance the marinade’s freshness and depth.

Can you use McCormick fajita seasoning as a marinade?

Absolutely! McCormick fajita seasoning is a fantastic shortcut for making a quick fajita marinade. Mix the seasoning packet with olive oil and lime juice to create a balanced marinade that’s ready in minutes. This ready-made option saves time while still delivering the bold flavors of chili, cumin, and paprika. Just remember to taste and adjust the salt level, as store-bought seasonings can vary in sodium content.

Conclusion

A great fajita marinade is the cornerstone of flavorful, juicy fajitas. By combining simple ingredients like lime juice, olive oil, and bold spices, you can create a marinade that enhances the taste and texture of your protein or veggies. Whether you’re grilling steak, searing chicken, or sautéing veggies, the right marinade takes your fajitas from good to amazing.

How To Make shrimp garlic recipe -butter In 15 Minutes

If you think butter is the secret to delicious shrimp dishes, think again! This shrimp garlic recipe -butter proves that you can achieve incredible flavor and richness without it. Picture this: tender shrimp, sizzling in a fragrant mix of garlic and olive oil, with hints of fresh lemon and herbs to brighten every bite. It’s a simple yet sophisticated recipe that’s ready in minutes, perfect for those evenings when time is tight but you still want something special. Plus, it’s healthier and completely dairy-free, making it a go-to for anyone with dietary restrictions. So, whether you’re serving it with crusty bread, tossing it into pasta, or eating it straight from the skillet, one thing’s for sure you’re in for a treat!

Why Choose a Butter-Free Shrimp Garlic Recipe?

The Health Benefits of Cooking Without Butter

Choosing to make a shrimp garlic recipe -butter isn’t just a tasty choice it’s also a healthier one. By skipping butter, you reduce saturated fats and calories without sacrificing flavor. Olive oil, often used as a substitute, is rich in healthy fats that support heart health. For those looking to maintain a balanced diet, this butter-free version is a no-brainer.

On the other hand, butter-free cooking also caters to dietary needs. If you’re lactose intolerant or following a dairy-free lifestyle, this recipe fits perfectly into your plan. Plus, garlic itself offers numerous health benefits, such as boosting immunity and improving heart health. Therefore, this recipe is a win-win for flavor and nutrition.

Flavor Profiles: How Garlic and Shrimp Shine Without Butter

One might wonder if removing butter will compromise the dish’s flavor. The answer? Not at all! A shrimp garlic recipe -butter relies on the rich, aromatic qualities of garlic and olive oil to bring the dish to life. As garlic caramelizes in olive oil, it develops a sweet, nutty flavor that pairs perfectly with the natural sweetness of shrimp.

In addition, using fresh herbs like parsley or thyme enhances the dish’s overall flavor. For a zesty twist, a squeeze of fresh lemon juice brightens up the shrimp, balancing its richness. These layers of flavor show that butter isn’t necessary to create a memorable dish it’s all about choosing complementary ingredients.

A Quick and Easy Dinner Solution for Busy Days

Let’s face it: weeknight dinners need to be quick and hassle-free. That’s where this shrimp garlic recipe -butter truly shines. With just a handful of ingredients and a single skillet, you can create a restaurant-quality meal in under 15 minutes. It’s perfect for those evenings when you’re short on time but still want something satisfying.

The best part? This dish is versatile. You can serve it over pasta, rice, or even a bed of roasted vegetables for a complete meal. For inspiration, check out this guide to pairing shrimp with side dishes. Whether it’s a last-minute dinner for two or a family feast, this recipe is your go-to solution.

A Versatile Recipe for Every Occasion

What makes a shrimp garlic recipe -butter so special is its adaptability. Hosting a dinner party? Serve this dish as an appetizer alongside crusty bread for dipping. Need a protein-packed lunch? Toss it into a salad with your favorite greens and a tangy vinaigrette. The possibilities are endless.

In addition, this recipe is a great way to experiment with flavors. Add a pinch of red pepper flakes for some heat, or sprinkle grated Parmesan on top for extra indulgence. The beauty of this dish lies in its simplicity you can make it your own while keeping it light and delicious.

Essential Ingredients for a Delicious Shrimp Garlic Recipe -Butter

Must-Have Ingredients for Butter-Free Garlic Shrimp

For a shrimp garlic recipe -butter, quality ingredients make all the difference. Here’s what you’ll need:

  1. Shrimp: Use fresh or frozen shrimp, peeled and deveined for convenience. Medium to large shrimp work best, as they cook quickly while staying juicy.
  2. Garlic: Freshly minced garlic is key to this recipe. It infuses the dish with a rich, aromatic flavor.
  3. Olive Oil: A healthier and equally flavorful alternative to butter, olive oil helps sauté the garlic and shrimp beautifully.
  4. Lemon Juice: A splash of fresh lemon juice adds brightness, enhancing the shrimp’s natural sweetness.
  5. Herbs and Spices: Parsley, red pepper flakes, salt, and black pepper round out the dish with layers of flavor.

When choosing your ingredients, opt for wild-caught shrimp if possible, as they often have a better texture and taste compared to farmed options.

Add-Ins to Elevate Your Shrimp Garlic Dish

While the base ingredients are delicious on their own, adding a few extras can elevate this shrimp garlic recipe -butter to a whole new level:

  • Chili Flakes: For those who enjoy a spicy kick, a pinch of chili flakes is a simple yet effective addition.
  • Paprika: Smoked or sweet paprika can introduce a subtle depth to the dish.
  • Vegetables: Sautéed zucchini, cherry tomatoes, or asparagus pair wonderfully with the shrimp and garlic.

Adding a few of these optional ingredients lets you tailor the dish to your taste preferences or what you have on hand in your pantry.

Ingredient Substitutions for a Custom Twist

What if you’re out of certain ingredients? No worries! Here are some simple swaps for your shrimp garlic recipe -butter:

  • Replace olive oil with avocado oil for a neutral flavor and high smoke point.
  • Use lime juice instead of lemon juice for a tangy variation.
  • If garlic cloves aren’t available, substitute with garlic powder, though fresh garlic is always preferred for authenticity.

These substitutions make the recipe adaptable, ensuring you can enjoy it even if you’re missing a key ingredient.

How to Select the Best Ingredients for Garlic Shrimp

Selecting the best ingredients ensures your dish shines. For shrimp, look for a firm texture, a translucent appearance, and no fishy odor. Frozen shrimp are also great, especially when they’re flash-frozen immediately after being caught.

For garlic, avoid pre-minced options in jars as they lack the same punchy flavor. Fresh garlic cloves, when minced at home, release essential oils that make this dish truly irresistible. Lastly, use extra virgin olive oil for the best taste, and fresh herbs whenever possible they make a noticeable difference!

Step-by-Step Guide to Cooking a Shrimp Garlic Recipe -Butter

Preparing Your Ingredients

Preparing fresh shrimp, garlic, and olive oil for a butter-free recipe.
Fresh ingredients for a shrimp garlic recipe without butter.

Before you dive into cooking, it’s essential to have everything ready. Proper preparation ensures that your shrimp garlic recipe -butter comes together smoothly:

  1. Clean the Shrimp: Start by peeling and deveining the shrimp. If you’re using frozen shrimp, thaw them under cold water and pat them dry with a paper towel.
  2. Mince the Garlic: Freshly minced garlic works best for this recipe. Its strong aroma and rich flavor elevate the dish.
  3. Measure the Ingredients: Have all your seasonings, olive oil, and lemon juice measured and ready to go. This makes the cooking process faster and more efficient.

By preparing ahead, you’ll ensure that your dish is cooked perfectly and remains stress-free.

The Cooking Process: From Pan to Plate in Minutes

Shrimp sautéed with garlic in a skillet with olive oil.
Shrimp sizzling in a garlic and olive oil mixture.

Cooking this shrimp garlic recipe -butter is straightforward and quick. Follow these steps:

  1. Heat the Olive Oil: In a large skillet, warm two tablespoons of olive oil over medium heat. Once it’s shimmering, add the minced garlic.
  2. Cook the Garlic: Stir the garlic constantly for 30 seconds until it becomes fragrant. Be careful not to let it burn, as this can make it bitter.
  3. Add the Shrimp: Place the shrimp into the pan in a single layer. Cook for 2-3 minutes per side until they turn pink and opaque.
  4. Season and Serve: Add salt, black pepper, and a splash of lemon juice to taste. Garnish with fresh parsley for added freshness.

This process takes just about 10 minutes, making it ideal for busy weeknights or last-minute meals.

Tips for Perfectly Sautéed Shrimp

Cooking shrimp can be tricky, but with these tips, you’ll achieve tender, flavorful results every time:

  • Use High Heat: High heat ensures the shrimp cook quickly, sealing in their juices and preventing them from becoming rubbery.
  • Don’t Overcrowd the Pan: Overcrowding traps steam, which can make the shrimp soggy instead of crispy on the outside. Cook in batches if necessary.
  • Flip Only Once: Resist the urge to stir constantly. Let the shrimp cook undisturbed for 2-3 minutes per side to develop a slight sear.

By keeping these tips in mind, your shrimp garlic recipe -butter will turn out perfectly every time.

Serving Suggestions for a Balanced Meal

shrimp garlic recipe -butter served over linguine with parsley and lemon.
A perfect pairing of garlic shrimp and linguine.

This shrimp garlic recipe -butter is versatile and pairs wonderfully with various side dishes. Here are some ideas:

  1. Over Pasta: Toss the shrimp and garlic sauce with linguine or spaghetti for a hearty meal.
  2. With Rice: Serve the shrimp over steamed jasmine rice or cauliflower rice for a lighter option.
  3. As a Topping: Use the shrimp as a topping for a fresh salad with mixed greens, cherry tomatoes, and cucumbers.
  4. With Vegetables: Pair the dish with roasted asparagus or sautéed zucchini for a complete meal.

Why Olive Oil is the Ideal Substitute for Butter

Health Advantages of Olive Oil

When crafting a shrimp garlic recipe -butter, olive oil is the perfect substitute for butter. It’s not only a flavorful alternative but also a healthier one. Olive oil is packed with monounsaturated fats, which are known to support heart health and lower bad cholesterol levels. Unlike butter, it contains no saturated fats, making it a great choice for anyone aiming to maintain a balanced diet.

In addition, olive oil is rich in antioxidants, such as vitamin E, which protect your cells from damage. Therefore, replacing butter with olive oil in your cooking doesn’t just cut calories it adds nutritional value to your meals.

Flavor Compatibility with Shrimp and Garlic

One of the main reasons olive oil shines in a shrimp garlic recipe -butter is its ability to complement the natural flavors of shrimp and garlic. The mild, fruity notes of olive oil allow the garlic’s robust aroma and shrimp’s sweetness to take center stage.

In contrast, butter can sometimes overpower these delicate flavors with its richness. Olive oil, on the other hand, enhances the dish without masking its key ingredients. For an extra flavor boost, consider using extra virgin olive oil, which has a more pronounced taste and aroma.

Other Cooking Oils to Consider

While olive oil is a fantastic choice, other oils can work well in a shrimp garlic recipe -butter, depending on your preferences or what you have on hand:

  1. Avocado Oil: This oil has a neutral flavor and a high smoke point, making it perfect for sautéing shrimp.
  2. Coconut Oil: For a slightly sweet and tropical twist, coconut oil is a great option, though it may alter the dish’s flavor profile.
  3. Grapeseed Oil: Light and versatile, grapeseed oil is another excellent alternative that pairs nicely with garlic and shrimp.

When choosing a substitute, consider the flavor and health benefits each oil brings to your recipe. However, olive oil remains a top choice for its balance of flavor, nutrition, and versatility.

Tips for Cooking with Olive Oil

To get the most out of olive oil in your shrimp garlic recipe -butter, keep these tips in mind:

  • Use Medium Heat: Olive oil has a lower smoke point than some other oils, so cook over medium heat to avoid burning it.
  • Choose High-Quality Oil: Extra virgin olive oil offers the best flavor and health benefits. Look for cold-pressed varieties for maximum freshness.
  • Add Lemon Juice After Cooking: If your dish includes lemon juice, add it after removing the shrimp from the heat. This prevents the acidity from breaking down the oil and ensures a bright, fresh flavor.

By following these tips, you’ll ensure your dish is both flavorful and nutritious.

Common Mistakes to Avoid When Making Garlic Shrimp

Using Low-Quality Ingredients

When preparing a shrimp garlic recipe -butter, the quality of your ingredients matters more than you might think. Shrimp that’s not fresh or improperly frozen can result in a bland or rubbery texture. Similarly, using pre-minced garlic from a jar often leads to a less flavorful dish, as it lacks the punch of freshly minced garlic.

To avoid this, always opt for fresh or properly frozen shrimp and freshly minced garlic. If you’re unsure how to select quality shrimp, look for firm, translucent flesh and avoid any that have a strong fishy odor. These small steps ensure your dish is bursting with flavor.

Overcooking Shrimp

One of the most common pitfalls in a shrimp garlic recipe -butter is overcooking the shrimp. Shrimp cook remarkably quickly—just 2-3 minutes per side. When overcooked, they turn rubbery and lose their delicate, sweet flavor.

To avoid this, watch for visual cues. Shrimp are done when they turn opaque and pink with a slight curl. They should form a “C” shape rather than a tight spiral. Remember, it’s always better to slightly undercook shrimp and let them finish cooking in the residual heat of the pan.

Skipping the Garlic Prep

Garlic is the star of this dish, but improper preparation can lead to uneven cooking or a bitter taste. Burning garlic is a common mistake that can ruin your shrimp garlic recipe -butter. Garlic burns quickly, especially over high heat, and develops an unpleasant bitterness.

To prevent this, mince your garlic finely and stir it constantly when adding it to the hot oil. This ensures even cooking and releases the garlic’s aromatic oils, which infuse the shrimp with flavor.

Overloading the Pan

Cooking too many shrimp at once is another frequent error that can impact the dish’s quality. Overloading the pan causes the shrimp to steam instead of sear, resulting in a soggy texture rather than a crisp, flavorful exterior.

For the best results, cook the shrimp in batches if your skillet is small. This allows each piece to develop a nice sear, enhancing both texture and flavor. After all, part of what makes a shrimp garlic recipe -butter so delicious is its lightly caramelized surface.

FAQs

What goes well with garlic shrimp?

Family dinner table with garlic shrimp, rice, and vegetables.
A family-style dinner featuring garlic shrimp and complementary sides.

Garlic shrimp pairs beautifully with a variety of sides, making it a versatile dish. Popular options include:

  • Pasta: Toss your shrimp garlic recipe -butter with linguine or spaghetti for a hearty, satisfying meal. Add a drizzle of olive oil and sprinkle of Parmesan for extra flavor.
  • Rice: Steamed jasmine or basmati rice works wonderfully, as it absorbs the savory garlic and shrimp juices. For a low-carb option, try cauliflower rice.
  • Vegetables: Roasted asparagus, sautéed zucchini, or a fresh green salad make light and healthy pairings.
  • Bread: Crusty bread or garlic bread is perfect for soaking up the rich sauce.

These combinations allow you to tailor the dish to any occasion, from casual dinners to elegant gatherings.

What’s the tastiest way to cook shrimp?

The tastiest way to cook shrimp depends on the recipe, but for a shrimp garlic recipe -butter, sautéing is ideal. Cooking shrimp in a hot skillet with olive oil and garlic creates a lightly seared, flavorful coating while keeping the shrimp juicy and tender.

Other delicious methods include grilling or broiling, which add a smoky depth to the shrimp’s natural sweetness. Whatever cooking style you choose, ensure the shrimp are not overcooked—they only need a few minutes per side to become perfectly done.

What sauces go well with shrimp?

Shrimp is incredibly versatile and pairs well with a range of sauces, including:

  • Garlic Butter Sauce: For a more indulgent variation, use a butter-free alternative like olive oil garlic sauce in your shrimp garlic recipe -butter.
  • Lemon Herb Sauce: A zesty mix of lemon juice, olive oil, and fresh herbs like parsley or dill enhances shrimp’s natural flavors.
  • Creamy Alfredo Sauce: If you’re serving shrimp with pasta, this rich, cheesy sauce is a fantastic choice.
  • Spicy Aioli: For a kick, serve shrimp with a dipping sauce made of mayonnaise, garlic, and chili paste.

These sauces elevate shrimp dishes, offering diverse flavor profiles to suit any palate.

Why do you soak shrimp in milk before frying?

Soaking shrimp in milk before frying serves two purposes:

  1. Reduces Odor: Milk helps neutralize the strong, fishy smell that some shrimp may have, ensuring a milder, fresher flavor.
  2. Tenderizes the Meat: The enzymes in milk can soften the shrimp, making it juicier and more tender after cooking.

Although this step isn’t necessary for a shrimp garlic recipe -butter, it’s an excellent tip for other shrimp preparations, particularly fried or breaded versions.

Conclusion

By now, you’ve discovered that a shrimp garlic recipe -butter is not only delicious but also versatile, healthy, and quick to prepare. From choosing high-quality ingredients like fresh shrimp and olive oil to mastering the art of sautéing, this dish brings bold flavors without the need for butter. You’ve also learned how to avoid common cooking mistakes, like overcrowding the pan or overcooking the shrimp, ensuring a perfect dish every time.

Whether you’re serving it with pasta, rice, or roasted vegetables, this recipe fits seamlessly into any meal plan. Plus, with tips for pairing sauces and sides, you can easily customize it to suit your taste and occasion.

5 Simple Recipes from ”recipe justalittlebite” That Anyone Can Make

Let’s face it sometimes, you just want a recipe that’s quick, tasty, and doesn’t leave your kitchen looking like a tornado hit it. That’s where recipe justalittlebite shines! With its knack for creating easy-to-follow recipes that deliver maximum flavor with minimal fuss, this is your go-to guide for everything from cozy dinners to irresistible desserts. Imagine whipping up a creamy pasta dish in minutes or surprising your family with a no-bake treat they’ll rave about for days. Sound tempting? You’re not alone! These recipes are designed to fit your busy life while still making mealtime special. Ready to get started?

Quick and Easy Breakfast Recipes

Fluffy Pancakes from Recipe Justalittlebite

Fluffy pancakes with fresh berries and maple syrup.
These fluffy pancakes are topped with fresh berries and a drizzle of maple syrup.

Nothing beats waking up to the smell of fresh, fluffy pancakes! This recipe justalittlebite takes the classic pancake to the next level by adding a creative twist. Whether you mix in blueberries, chocolate chips, or a hint of cinnamon, these pancakes are a breeze to make and even easier to enjoy. To get that perfect fluffy texture, use a touch of baking powder and avoid overmixing the batter. For an added treat, drizzle with warm maple syrup or top with whipped cream. Breakfast has never been this delightful!

Avocado Toast with a Hint of Lemon

Avocado toast might seem simple, but the recipe justalittlebite version adds a zesty lemon kick to wake up your taste buds. Start with crusty bread toasted to golden perfection. Then, mash a ripe avocado with a squeeze of lemon juice, a pinch of salt, and a sprinkle of chili flakes for a spicy edge. It’s a quick, healthy breakfast that’s loaded with flavor and packed with nutrients. Pair it with a poached egg for a protein boost. For more avocado toast variations, check out this trusted guide from Bon Appétit.

Sweet and Savory Crepes by Recipe Justalittlebite

Crepes are the ultimate breakfast treat, and with recipe justalittlebite, they’re easier than ever to master. Whether you prefer sweet or savory fillings, this versatile dish can be customized to your cravings. Fill your crepes with Nutella and bananas for a dessert-like indulgence, or opt for smoked salmon and cream cheese for something savory. The key is achieving a thin, golden crepe, so be sure to swirl the batter evenly in the pan. With a bit of practice, you’ll be making these delicate delights like a pro!

Overnight Oats with Chia Seeds

Overnight oats are a lifesaver for busy mornings, and the recipe justalittlebite version includes chia seeds for an extra nutritional punch. Simply combine oats, milk (or your favorite non-dairy alternative), and chia seeds in a jar. Add a drizzle of honey or maple syrup for sweetness, and let it sit overnight in the fridge. The result? A creamy, ready-to-eat breakfast that’s perfect on the go. You can top it with fresh berries, nuts, or shredded coconut for added texture and flavor. It’s quick, satisfying, and endlessly customizable.

Satisfying Lunch Ideas with Recipe Justalittlebite Inspiration

Creamy Tomato Basil Soup from Recipe Justalittlebite

When it’s lunchtime, nothing hits the spot like a warm, comforting bowl of soup. This recipe justalittlebite version of tomato basil soup is not only creamy and rich but also incredibly easy to prepare. Using simple ingredients like ripe tomatoes, fresh basil, and a splash of cream, you can create a meal that feels gourmet without the hassle. To elevate the flavor, consider roasting the tomatoes first it adds a subtle sweetness that pairs perfectly with the creamy base. Serve with crusty bread or a classic grilled cheese for the ultimate lunch duo. For more soup recipes, check out Quick Meals Recipes’ collection of hearty soups.

Mediterranean Chickpea Salad

ive dishes from recipe justalittlebite showcasing breakfast, lunch, dinner, and dessert options on a beautifully set table.
A refreshing Mediterranean chickpea salad packed with flavor and nutrients.

If you’re looking for a light yet filling lunch, this Mediterranean recipe justalittlebite is perfect. Packed with protein-rich chickpeas, crunchy cucumbers, and juicy tomatoes, this salad is a celebration of fresh ingredients. Toss everything with a tangy lemon vinaigrette, and sprinkle some crumbled feta cheese and fresh herbs for a burst of flavor. What’s great about this recipe is its versatility—you can add grilled chicken or swap the chickpeas for black beans if you’re in the mood for variety. It’s ideal for meal prep, too, as the flavors intensify when left to marinate.

Classic Grilled Cheese with a Gourmet Twist

A grilled cheese sandwich may sound simple, but this recipe justalittlebite takes it up a notch with a gourmet twist. Start with thick slices of sourdough bread and layer on a blend of cheeses like sharp cheddar, creamy mozzarella, and tangy Gruyère. For an extra kick, add caramelized onions, crispy bacon, or a dollop of spicy mustard. The key to perfection is cooking it slowly on medium heat, ensuring the bread is golden and crisp while the cheese melts to gooey perfection. It’s comfort food reimagined with sophistication.

Light Veggie Wraps by Recipe Justalittlebite

Veggie wraps are a lifesaver when you need a quick, no-cook lunch option. This recipe justalittlebite features fresh, crunchy vegetables like shredded carrots, bell peppers, and leafy greens, all wrapped in a soft tortilla. To add more depth, spread a layer of hummus or tzatziki before piling on the veggies. These wraps are not only delicious but also highly adaptable—throw in some grilled chicken or tofu for added protein. Plus, they’re perfect for lunchboxes or on-the-go meals, making them a versatile favorite.

Easy Dinner Recipes That Impress

One-Pot Garlic Butter Pasta from Recipe Justalittlebite

When it comes to quick and comforting dinners, this recipe justalittlebite for one-pot garlic butter pasta is a must-try. Made with a handful of pantry staples like pasta, garlic, and butter, this dish is both flavorful and fuss-free. The magic lies in cooking the pasta directly in the sauce, allowing it to absorb all the buttery goodness. Sprinkle with freshly grated Parmesan and parsley for a gourmet touch. On the other hand, if you prefer a creamier version, add a splash of heavy cream toward the end. This recipe is perfect for those busy weeknights when you want something delicious without spending hours in the kitchen.

Sheet Pan Lemon Herb Chicken

Sheet pan recipes are a game changer, and this recipe justalittlebite for lemon herb chicken is no exception. Juicy chicken thighs are marinated in a zesty lemon and herb blend, then roasted alongside colorful vegetables like carrots and zucchini. The result? A perfectly balanced dinner that’s as beautiful as it is delicious. Plus, cleanup is a breeze since everything cooks on one pan! For extra flavor, try adding garlic cloves or a sprinkle of smoked paprika.

Classic Beef Stroganoff

Few dishes can compete with the comforting richness of beef stroganoff. This recipe justalittlebite simplifies the classic by using tender strips of beef, sautéed mushrooms, and a creamy sauce made with sour cream. Serve it over egg noodles or mashed potatoes for a hearty meal that feels like a warm hug on a plate. To make it even easier, you can substitute the beef with ground beef or use pre-sliced mushrooms. While this dish is indulgent, it’s surprisingly quick to prepare, making it perfect for busy evenings when you still crave something special.

Easy Vegetarian Stir-Fry

For a lighter but equally satisfying dinner, this recipe justalittlebite for vegetarian stir-fry is a great choice. Packed with vibrant veggies like bell peppers, broccoli, and snap peas, this dish is as colorful as it is nutritious. The sauce, a blend of soy sauce, ginger, and sesame oil, ties everything together beautifully. Serve it over steamed rice or noodles for a complete meal. For added protein, toss in some tofu or chickpeas. The best part? You can customize this recipe with whatever vegetables you have on hand, making it a versatile and budget-friendly option.

Sweet and Simple Desserts Anyone Can Make

No-Bake Oreo Cheesecake

A no-bake Oreo cheesecake garnished with whipped cream and crushed Oreos.
This no-bake Oreo cheesecake is rich, creamy, and easy to make.

When it comes to easy desserts, this recipe justalittlebite for no-bake Oreo cheesecake is unbeatable. With just a handful of ingredients, you can create a rich, creamy treat that’s perfect for any occasion. The crust, made from crushed Oreos, provides the perfect base for the velvety cream cheese filling. Simply refrigerate it for a few hours, and voilà—you have a dessert that looks like it took hours but came together in minutes. For an extra special touch, garnish with whipped cream and whole Oreo cookies. This dessert is a guaranteed crowd-pleaser and ideal for those who love chocolatey indulgence without the hassle of baking.

3-Ingredient Peanut Butter Cookies

Sometimes, less really is more, and this recipe justalittlebite proves it. With only three simple ingredients—peanut butter, sugar, and an egg—you can whip up delicious cookies in no time. The result is a soft, chewy cookie with just the right amount of sweetness. If you want to switch things up, consider adding a pinch of sea salt or a drizzle of melted chocolate on top. These cookies are perfect for last-minute cravings or when you need a quick snack to share. Plus, they’re gluten-free, making them a great option for everyone to enjoy.

Classic Vanilla Pudding by Recipe Justalittlebite

This recipe justalittlebite for classic vanilla pudding brings back the comforting flavors of childhood. Made with simple pantry staples like milk, sugar, cornstarch, and vanilla extract, it’s both easy and satisfying. The key to getting a silky-smooth texture is whisking continuously while the pudding thickens on the stove. Once it’s ready, chill it in the fridge before serving. For a bit of flair, top it with fresh berries, whipped cream, or a sprinkle of cinnamon. Whether served as a standalone dessert or used as a filling for pies, this pudding is a timeless favorite.

Refreshing Berry Sorbet from Recipe Justalittlebite

For a light and refreshing dessert, this recipe justalittlebite for berry sorbet is an excellent choice. Made with fresh or frozen berries, a touch of sugar, and a squeeze of lemon juice, this sorbet is bursting with natural flavor. Simply blend the ingredients together, freeze, and enjoy a fruity treat that’s both healthy and delicious. On a hot day, this dessert is a lifesaver, offering a cool and refreshing finish to any meal. For added variety, you can mix different berries or even incorporate a splash of orange juice for a citrus twist.

Snacks and Appetizers for Any Occasion

Cheesy Garlic Breadsticks

Whether you’re hosting a party or simply craving something savory, these cheesy garlic breadsticks are a must-try. This recipe justalittlebite starts with soft, pillowy breadsticks, brushed generously with garlic butter and topped with a blend of melted cheeses. Mozzarella adds that classic gooey stretch, while Parmesan delivers a sharp, nutty flavor. These breadsticks are perfect as a side dish or a standalone snack. For an extra touch, serve them with a side of marinara sauce for dipping. They’re so easy to make that you’ll wonder why you ever bought store-bought breadsticks!

Classic Deviled Eggs

Deviled eggs are a timeless appetizer, and this recipe justalittlebite makes them both easy and impressive. Start by hard-boiling eggs, then mix the yolks with mayo, mustard, and a pinch of paprika to create a creamy, flavorful filling. Pipe the mixture back into the egg whites for a polished look. You can also get creative by adding bacon bits, chives, or even a dash of hot sauce for a spicy kick. These deviled eggs are ideal for picnics, holiday gatherings, or whenever you need a quick, crowd-pleasing snack.

Homemade Guacamole with a Kic

Guacamole is a crowd favorite, and this recipe justalittlebite brings the perfect balance of creamy and zesty flavors. Start with ripe avocados, mash them with lime juice, and stir in diced tomatoes, onions, and a pinch of salt. The twist? Add a finely chopped jalapeño or a sprinkle of cayenne pepper for a spicy edge. Serve it with tortilla chips, or use it as a topping for tacos or burgers. This guacamole is fresh, flavorful, and takes just minutes to prepare. It’s a versatile dish that never fails to impress.

Crispy Sweet Potato Fries

For a healthier snack option, try this recipe justalittlebite for crispy sweet potato fries. These fries are baked, not fried, but they still deliver that irresistible crunch. The secret is coating them in a light layer of cornstarch before baking, which helps them crisp up beautifully. Season with a mix of salt, paprika, and garlic powder for a bold flavor. Sweet potato fries are perfect on their own, but they’re even better with a dipping sauce—try a spicy aioli or a honey mustard dip for extra flair. They’re great as an appetizer, side dish, or a guilt-free snack.

FAQs

Is it possible to use a different type of pasta for this recipe?

Absolutely! Most pasta types work well with this recipe justalittlebite, so you can easily swap the suggested pasta for your favorite. For example, fettuccine is great for Alfredo sauces, but penne or rigatoni can hold creamy sauces just as effectively. If you’re aiming for a lighter dish, try using angel hair pasta or zucchini noodles. Whole wheat or gluten-free pasta are also excellent alternatives for dietary preferences, allowing you to adapt the recipe to suit your needs without compromising flavor.

What’s the Best Way to Make Alfredo Sauce Without Heavy Cream?

If you don’t have heavy cream on hand, or you prefer a lighter option, you can still make a rich Alfredo sauce. This recipe justalittlebite suggests using whole milk or half-and-half combined with a tablespoon of flour or cornstarch to thicken the sauce. For an extra creamy texture, you could add a dollop of cream cheese. To enhance the flavor, include a generous amount of freshly grated Parmesan cheese and a pinch of nutmeg. This substitution ensures your sauce remains velvety and indulgent without the heaviness of cream.

How Can I Make Chicken Alfredo Ahead of Time?

Preparing Chicken Alfredo in advance is simple with a few adjustments. Cook the pasta and sauce separately, as pasta can absorb too much sauce if stored together. Toss the cooked pasta with a small amount of olive oil to prevent sticking. Store the sauce in an airtight container in the fridge, then reheat gently on the stove, adding a splash of milk to maintain its creaminess. Combine the pasta and sauce just before serving. This method ensures your recipe justalittlebite remains fresh and flavorful even when made ahead.

How Can I Scale This Recipe for Larger Groups?

Scaling this recipe justalittlebite to serve a crowd is easy. Simply double or triple the ingredients while maintaining the same cooking process. To ensure even cooking, use a larger pot or prepare the dish in batches. For Alfredo sauce, cook it in a wide pan to prevent uneven thickening. When serving, consider using a large platter to display the pasta and sauce beautifully. This approach makes it simple to feed a group while keeping the dish as delicious as the original.

Conclusion

From breakfast delights to hearty dinners and indulgent desserts, this journey through recipe justalittlebite proves that cooking can be both easy and enjoyable. Whether you’re whipping up a quick one-pot garlic butter pasta, crafting no-bake Oreo cheesecakes, or preparing a light and refreshing berry sorbet, these recipes offer something for every craving and occasion.

Throughout the article, we’ve explored how to adapt recipes, create lighter versions, and even prepare dishes in advance all while keeping flavor at the forefront. With the versatility of these dishes, you can confidently experiment in the kitchen and make them your own.

Now it’s your turn to bring these ideas to life! Whether you’re cooking for family, entertaining guests, or simply treating yourself, these recipes are guaranteed to impress. Dive into the recipe justalittlebite collection today and transform your meals with ease and creativity.

The Best Dutch Oven Camping Recipes: Delicious And Simple

What’s the secret to elevating a camping trip from good to unforgettable? It’s the food, of course! And with these Dutch oven camping recipes, you’ll discover just how easy it is to cook gourmet-quality meals in the great outdoors.

Imagine starting your morning with a warm breakfast casserole, sharing a hearty chili for lunch, and ending the day with a decadent peach cobbler—all cooked in a single pot! Dutch ovens make it possible to create simple yet flavorful dishes that bring people together around the campfire. Whether you’re craving comfort food or a sweet treat, these recipes are the key to making every meal a memorable moment.

So pack your Dutch oven and get ready to impress your fellow campers with meals they’ll rave about. The adventure starts here!

Breakfast Recipes for the Perfect Start

Dutch Oven Breakfast Casserole

Start your camping day with a Dutch oven breakfast casserole that’s hearty, flavorful, and packed with protein to keep you energized for outdoor adventures. This dish combines eggs, sausage, shredded potatoes, and melted cheese into a one-pot masterpiece. What’s more, it’s incredibly versatile you can toss in bell peppers, onions, or even spinach for added flavor and nutrients.

The beauty of this recipe lies in its simplicity. All you need is a few fresh ingredients, your Dutch oven, and about 30 minutes of cooking time over a low campfire flame. Whether you’re camping with family or friends, this is one of those Dutch oven camping recipes that will have everyone asking for seconds.

Campfire Cinnamon Rolls

Who says you can’t enjoy a sweet treat for breakfast while camping? Campfire cinnamon rolls are a quick and indulgent option that feels like a warm hug on a crisp morning. Simply place pre-made dough rolls in your Dutch oven, sprinkle them with cinnamon and sugar, and let the magic happen.

For best results, use parchment paper to prevent sticking and ensure easy cleanup. The rolls bake evenly, creating soft, gooey centers and golden-brown edges. These Dutch oven camping recipes bring a touch of comfort and nostalgia to your outdoor meals. Get camping recipes, whether you’re campfire cooking or using a camp stove. We have easy camping meal ideas.

Fluffy Pancake Bake

If flipping pancakes sounds like too much effort while camping, a fluffy pancake bake is your new best friend. This Dutch oven camping recipe is perfect for a relaxed morning when you want something light yet satisfying.

To make it, mix pancake batter and pour it directly into your preheated Dutch oven. Add toppings like blueberries, chocolate chips, or banana slices for extra flair. Cover and let it bake until golden brown. The result? A thick, fluffy pancake that’s ready to be sliced and served like a cake. Pair it with syrup or honey for a breakfast that feels both easy and indulgent.

Cheesy Hash Browns with Eggs

Few things scream “camping breakfast” like cheesy hash browns with eggs. This dish is a delightful combination of crispy potatoes, melted cheese, and perfectly cooked eggs, all prepared in your trusty Dutch oven.

Begin by cooking the hash browns until golden and crispy, then sprinkle shredded cheese over the top. Crack a few eggs onto the mixture, cover, and let the heat do its work. The result? A gooey, cheesy, and filling breakfast that’s sure to please. This is one of the simplest Dutch oven camping recipes, yet it packs a punch when it comes to flavor.

These breakfast recipes are designed to kick-start your camping day with deliciousness and ease. Whether you’re craving something savory or sweet, your Dutch oven makes it all possible with minimal effort. Let the campfire set the stage for your next outdoor feast!

Easy Lunch Recipes to Refuel

Dutch Oven Tacos

Transform your camping lunch into a fiesta with Dutch oven tacos. This recipe is as easy as it is delicious, combining ground beef or turkey, taco seasoning, and your choice of toppings. First, cook the meat in your Dutch oven until it’s browned and flavorful. Then, set up a taco bar with tortillas, shredded lettuce, cheese, and salsa.

What makes this one of the best Dutch oven camping recipes? Its flexibility! You can customize it for every camper’s taste. Plus, cleanup is minimal—always a win when you’re outdoors.

Hearty Chil

Nothing beats a bowl of hearty chili after a morning of outdoor adventures. This Dutch oven camping recipe combines ground meat, beans, tomatoes, and a medley of spices to create a dish that warms you from the inside out.

The secret to a great chili is letting it simmer. As it cooks, the flavors blend together, creating a rich and satisfying meal. For a vegetarian twist, swap the meat for extra beans and diced sweet potatoes. Serve with cornbread for a complete meal that’s sure to please everyone around the campfire.

BBQ Pulled Chicken Sandwiches

BBQ pulled chicken sandwiches are a crowd-pleaser and surprisingly simple to make with a Dutch oven. Begin by simmering chicken breasts or thighs in a mix of BBQ sauce, onions, and a splash of apple cider vinegar. Once the chicken is tender, shred it with forks and pile it onto toasted buns.

This recipe is perfect for those who crave bold, smoky flavors. Moreover, it’s an excellent choice for feeding larger groups. These sandwiches pair wonderfully with coleslaw or a side of chips, making them a camping favorite among Dutch oven camping recipes.

Vegetable Stew with Herbs

For a lighter yet satisfying lunch, try vegetable stew with herbs. This vegetarian-friendly option is packed with fresh produce like carrots, zucchini, potatoes, and tomatoes. The addition of garlic, thyme, and rosemary infuses the dish with comforting flavors.

Start by sautéing the garlic and onions in your Dutch oven before adding the vegetables and broth. Let it simmer until the veggies are tender, and serve with a slice of crusty bread. Not only is this stew nourishing, but it’s also a fantastic way to use up leftover ingredients. It’s proof that Dutch oven camping recipes can be both healthy and hearty!

Dinner Recipes for Around the Campfire

Friends enjoying Dutch oven chili around a campfire in the woods.
Friends sharing a hearty chili cooked in a Dutch oven by the campfire.

Dutch Oven Lasagna

Imagine serving up layers of noodles, rich marinara sauce, gooey cheese, and savory meat in the great outdoors—yes, Dutch oven lasagna makes it possible! This recipe brings a touch of Italian comfort food to your camping experience.

To create this camping classic, layer cooked noodles, your favorite sauce, and a blend of cheeses in the Dutch oven. Repeat until it’s full, cover, and let it bake over medium coals. The result is a golden, bubbling dish that will leave everyone asking for more. Among the many Dutch oven camping recipes, this one stands out for its ability to wow even the pickiest eaters.

Chicken and Dumplings

For a hearty, comforting dinner that feels like home, chicken and dumplings is a winning choice. This Dutch oven camping recipe combines tender chicken, a creamy broth, and fluffy dumplings, making it the perfect meal after a day of hiking.

Start by cooking the chicken with onions, carrots, and celery until everything is tender. Then, drop spoonfuls of biscuit dough on top, cover, and let the heat work its magic. The dumplings will puff up, creating a delicious topping that soaks up the flavorful broth. If you’re looking for more cozy meal ideas, check out our guide to How To Make The Best Taco Soup

Campfire Pizza

Who says you can’t enjoy pizza while camping? With this campfire pizza recipe, your Dutch oven can double as a pizza oven. This dish is versatile and fun to customize, making it a family favorite.

Start with a pre-made pizza dough, spreading it evenly in the bottom of your oiled Dutch oven. Add sauce, cheese, and your favorite toppings—pepperoni, veggies, or even pineapple—and cover it to bake. Within minutes, you’ll have a crispy, cheesy pizza that’s perfect for sharing. Compared to other Dutch oven camping recipes, this one is guaranteed to bring smiles around the fire.

Sausage and Bean Casserole

A sausage and bean casserole is a simple yet satisfying dish that pairs smoky sausages with hearty beans and a rich tomato sauce. This one-pot wonder is perfect for cold evenings when you need something warm and filling.

Brown the sausage in your Dutch oven, then add beans, diced tomatoes, and spices like paprika or chili powder. Let it simmer until the flavors meld together into a comforting, stew-like consistency. Serve with crusty bread for a meal that’s both easy to make and impossible to resist. This is one of those Dutch oven camping recipes that checks all the boxes: minimal effort, maximum flavor, and a happy group of campers.

Desserts to End the Day on a Sweet Note

Close-up of peach cobbler in a Dutch oven with ice cream on top.
A warm peach cobbler baked in a Dutch oven, topped with vanilla ice cream.

Dutch Oven Peach Cobbler

Nothing wraps up a day of camping like a warm, comforting Dutch oven peach cobbler. This classic dessert is a favorite among Dutch oven camping recipes because of its simplicity and rich, sweet flavor.

To make this cobbler, start by layering canned or fresh peaches in your Dutch oven, then sprinkle a mix of sugar, cinnamon, and cake mix on top. Add a few pats of butter, cover, and let it bake over hot coals until golden and bubbly. Serve it with whipped cream or a scoop of ice cream, and you’ve got the perfect end to your outdoor feast.

Campfire Chocolate Lava Cake

Indulgent and surprisingly easy to prepare, campfire chocolate lava cake is a show-stopper. This dessert combines the deep richness of chocolate with the fun of gooey molten centers, making it a memorable addition to your Dutch oven camping recipes.

Mix up a simple chocolate cake batter and pour it into your greased Dutch oven. Add dollops of chocolate chips or squares in the center, then cover and bake until the edges are set but the middle remains soft. The result? A dessert that’s sure to have everyone asking for seconds.

Apple Crisp with Oats

For a lighter yet equally delicious option, try apple crisp with oats. This dessert brings together tender baked apples, crunchy oats, and warm spices like cinnamon and nutmeg. It’s both wholesome and indulgent, striking the perfect balance.

To prepare, layer sliced apples in the Dutch oven, then top with a mixture of oats, sugar, and butter. Cover and bake until the topping is crispy and golden. Not only is this one of the healthiest Dutch oven camping recipes, but it’s also a fantastic way to use up extra fruit from your trip.

Banana Boat S’mores

If you love traditional s’mores, you’ll adore this creative twist: banana boat s’mores. This fun dessert is quick to make and a hit with kids and adults alike.

Slice a banana lengthwise without cutting through the bottom peel, then stuff it with chocolate chips, marshmallows, and graham cracker crumbs. Wrap the banana in foil, place it in your Dutch oven, and let it heat until everything melts into gooey perfection. These Dutch oven camping recipes are a playful way to end your meal with a sweet treat everyone will love.

These dessert recipes are the cherry on top of your camping menu, proving that your Dutch oven isn’t just for savory dishes. Whether you crave the warmth of cobbler, the indulgence of lava cake, or the fun of banana s’mores, these recipes bring sweetness to your outdoor adventures.

Dutch Oven Bread Recipes for Any Meal

No-Knead Campfire Bread

No-knead campfire bread is a simple, foolproof recipe that’s ideal for beginners and seasoned campers alike. This crusty bread is perfect for dipping into soups, pairing with stews, or enjoying with a smear of butter.

Start by mixing flour, yeast, salt, and water in a bowl until it forms a sticky dough. Let it rise while you prepare your campfire, then transfer it to your preheated Dutch oven. Bake it with hot coals on top and bottom for an evenly golden crust. Among all the Dutch oven camping recipes, this one proves that fresh-baked bread isn’t just a luxury—it’s a camping essential.

Garlic Herb Rolls

Take your meals to the next level with garlic herb rolls. These buttery, savory rolls pair beautifully with just about any dish, from hearty chili to roasted chicken.

To make these, roll out a basic bread dough, brush it with garlic butter, and sprinkle it with fresh herbs like rosemary or parsley. Arrange the dough balls in your Dutch oven and bake until golden. This is one of those Dutch oven camping recipes that combines simplicity with incredible flavor, making it a favorite around the campfire.

Dutch Oven Cornbread

Dutch oven cornbread is a classic side dish that’s quick, easy, and always a crowd-pleaser. With its slightly sweet flavor and moist texture, it complements everything from BBQ pulled chicken to hearty stews.

To prepare, mix cornmeal, flour, sugar, eggs, and milk in a bowl, then pour the batter into your greased Dutch oven. Bake it until the edges are golden and the top is firm. For a fun twist, add jalapeños or cheddar cheese for extra flavor. This is one of the most versatile Dutch oven camping recipes, perfect for breakfast, lunch, or dinner.

Classic Sourdough

If you’re looking for a challenge and have a bit of time to spare, why not try classic sourdough? This rustic bread brings a tangy depth of flavor that pairs beautifully with campfire meals.

Start with your prepared sourdough starter, mixing it with flour, water, and salt. Let it rise, then shape the dough and place it in your Dutch oven. Bake it with even heat distribution for a chewy interior and a crispy crust. While it requires patience, this recipe is deeply rewarding and a testament to the versatility of Dutch oven camping recipes.

These bread recipes prove that you don’t need a kitchen to enjoy freshly baked goods. From quick no-knead bread to flavorful garlic herb rolls, your Dutch oven makes it all possible. Bread-lovers and campers alike will find these recipes irresistible, adding a homemade touch to every meal.

FAQs

What are the top-rated Dutch oven camping recipes for hearty and satisfying dinners?

When it comes to hearty and satisfying dinners, some of the top-rated Dutch oven camping recipes include dishes like Dutch oven lasagna, chicken and dumplings, and sausage and bean casserole. These meals are not only filling but also rich in flavor, making them perfect for ending a day of outdoor activities. Each recipe is designed to be simple yet packed with ingredients that bring comfort and warmth, ideal for a campfire dinner.

What are some one-pot Dutch oven camping meals that require minimal cleanup?

One-pot meals are a lifesaver when camping because they require minimal cleanup and are incredibly convenient. Popular options include hearty chili, vegetable stew with herbs, and campfire tacos. These Dutch oven camping recipes are designed to deliver delicious results with minimal effort. Plus, with only one pot to wash, you can spend more time enjoying the great outdoors and less time on chores.

What are the best breakfast Dutch oven recipes for a quick start to a camping day?

If you’re looking for quick and energizing breakfasts, consider recipes like Dutch oven breakfast casserole, campfire cinnamon rolls, and fluffy pancake bake. These recipes are easy to prepare and can be customized with your favorite ingredients. Whether you prefer something sweet or savory, these Dutch oven camping recipes ensure you start your day on the right note with minimal hassle.

What are some gluten-free Dutch oven camping recipes that are easy to prepare outdoors?

For gluten-free campers, there are plenty of delicious options to enjoy. Recipes like vegetable stew with herbs, grilled chicken and potatoes, and apple crisp with oats are naturally gluten-free and simple to make in a Dutch oven. These dishes focus on whole, fresh ingredients that are both healthy and satisfying, making them a great choice for outdoor cooking without sacrificing flavor.

Conclusion

With the versatility of a Dutch oven, your camping meals can go from ordinary to extraordinary. From hearty dinners like lasagna and chicken and dumplings to quick breakfasts such as pancake bakes and cinnamon rolls, there’s no limit to what you can create. One-pot meals simplify cleanup, while gluten-free options ensure everyone in your group can enjoy a delicious meal.

Whether you’re preparing warm desserts like peach cobbler or baking fresh bread such as no-knead campfire bread, Dutch oven camping recipes bring comfort, convenience, and culinary excitement to your outdoor adventures. So, pack your Dutch oven, gather your favorite ingredients, and get ready to make memories—and meals—that your friends and family will rave about for years to come. Happy camping!

How To Make The Best Taco Soup Frios Recipe At Home

When life calls for something cozy yet bold, it’s time to whip up a taco soup frios recipe that’ll warm your soul and excite your taste buds. Imagine a bowl filled with hearty beans, juicy ground beef, and zesty taco spices, all simmered to perfection. Oh, and let’s not forget the toppings – shredded cheese, sour cream, and a sprinkle of fresh cilantro. Whether you’re feeding a crowd or just craving some comfort food, this recipe is the ultimate way to bring the bold flavors of tacos to your table in a new, satisfying form. With just a few simple ingredients and a little simmering magic, you’ll have a meal that’s perfect for any day of the week. So, grab your ladle and get ready – dinner just got a whole lot more exciting!

Ingredients for Taco Soup Frios

Essential Ingredients

To make the ultimate taco soup frios recipe, you’ll need a mix of simple yet flavorful ingredients. The base of this soup is built with tender ground beef (or ground turkey for a lighter option), hearty black beans, and sweet corn kernels. Add a can of diced tomatoes with green chilies to bring in that spicy, tangy kick taco lovers adore. Don’t forget the taco seasoning mix – it’s the secret to infusing the soup with those bold, smoky flavors. Finally, round it out with beef or chicken broth to create a rich, savory foundation.

When gathering your ingredients, make sure they’re fresh and high-quality. For example, opt for organic or no-salt-added beans to keep the sodium in check. The key to success? Keeping it simple and letting each ingredient shine in this delightful taco soup frios recipe.

Optional Additions

Want to add your own flair to this taco soup frios recipe? Consider throwing in some fresh diced jalapeños if you like things spicy or bell peppers for an extra crunch. For a creamier version, a dollop of cream cheese stirred in towards the end can elevate the texture and flavor. Feeling adventurous? Toss in some shredded zucchini or squash to sneak in a serving of veggies.

Another great addition is avocado – its smooth, buttery taste balances the spicy notes perfectly. Customizing this recipe lets you cater to your personal preferences while still keeping the essence of a classic taco soup frios recipe. For more ideas on ingredient swaps, check out this guide to customizing taco soups.

Key Spices and Herbs

Spices are where the magic happens in a taco soup frios recipe. Taco seasoning is essential, but layering additional flavors can take your dish from good to unforgettable. Try adding cumin for a smoky depth, smoked paprika for subtle heat, and a dash of garlic powder to amplify the savory notes. A pinch of onion powder works wonders too, especially if you’re skipping fresh onions.

Fresh herbs like cilantro bring brightness to the soup. If cilantro isn’t your thing, parsley can be a milder alternative. Spice it up or tone it down – this recipe is as flexible as it is flavorful. Just remember, a balanced spice mix ensures every bite of your taco soup frios is packed with bold, irresistible flavor.

Toppings to Elevate the Flavor

The toppings are where you get to have some fun with this taco soup frios recipe. Shredded cheddar cheese is a classic choice, melting into the warm soup and adding a gooey richness. A dollop of sour cream or Greek yogurt not only cools down the spice but also adds a creamy tang.

For crunch, sprinkle crushed tortilla chips or fry up some strips of fresh tortillas. And let’s not forget the garnishes – a squeeze of lime juice, diced avocado, and a handful of chopped cilantro or green onions can transform a simple bowl of taco soup into a masterpiece. These finishing touches turn this dish into a customizable experience that’s as fun to make as it is to eat!

Step-by-Step Instructions

A pot of ground beef being cooked with diced peppers, forming the base of a taco soup frios recipe.
Ground beef and diced peppers cooking in a pot, creating the rich, flavorful base for the taco soup frios recipe.

Preparing the Ingredient

Before diving into the cooking process, it’s essential to prepare all your ingredients for the taco soup frios recipe. Start by rinsing and draining canned beans to reduce sodium content. Dice fresh vegetables like bell peppers and onions to ensure even cooking. If you’re using fresh ground beef or turkey, have it ready to go. This prep step keeps your cooking process smooth and ensures the final dish is packed with flavor.

Gather your spices, including taco seasoning, garlic powder, and smoked paprika. Having everything measured and ready will make the cooking experience easier and more enjoyable. Explore more easy cooking tips for flavorful dishes: The Best Leftover Rotisserie Chicken Recipes for Every Occasion

Cooking the Protein

Heat a drizzle of olive oil in a large pot over medium heat. Add your ground beef or turkey and cook it until it’s fully browned, breaking it up into smaller pieces as it cooks. Sprinkle in half of your taco seasoning during this step to infuse the meat with bold, savory flavors.

Once cooked, drain any excess grease to keep the soup from becoming overly rich. This step is crucial for creating the perfect balance in your taco soup frios recipe. Don’t rush – giving the meat time to develop a slight crust adds an extra layer of depth to your dish.

Building the Base

Now, it’s time to build the soup’s rich and flavorful base. Add your diced tomatoes (with green chilies for a bit of heat) and chicken or beef broth to the pot. Stir in the remaining taco seasoning, ensuring it’s well-distributed for a consistent flavor throughout.

Toss in your black beans, corn, and any additional vegetables you’ve prepped. Bring the mixture to a boil, then reduce the heat to a gentle simmer. Let it cook for about 15–20 minutes to allow the flavors to meld beautifully. This simmering step is where the magic of the taco soup frios recipe truly comes alive.

Simmering for Flavor

Patience is key here. While your taco soup frios recipe simmers, the spices and ingredients come together to create a harmonious blend of bold, comforting flavors. Stir occasionally to prevent sticking, and taste-test to adjust the seasoning if needed.

If you prefer a creamier texture, now’s the time to stir in a bit of cream cheese. It melts beautifully into the soup, adding a velvety finish without overpowering the other ingredients. Once the soup has thickened slightly and the vegetables are tender, it’s ready to serve.

Tips for the Perfect Taco Soup Frios

Balancing Flavors

Creating the perfect taco soup frios recipe means achieving a balance of bold and harmonious flavors. If your soup tastes a bit too acidic due to the tomatoes, a small pinch of sugar or a splash of cream can mellow it out. On the other hand, if the soup feels flat, try adding a squeeze of fresh lime juice or an extra dash of taco seasoning. These small adjustments can make a huge difference and ensure every bite is packed with flavor.

Remember, tasting as you go is crucial. A well-balanced soup is the secret to keeping everyone at the table coming back for seconds. And for more tips on enhancing soups, explore our guide to making soups more flavorful.

Thickening the Soup

If you prefer a heartier texture, there are a few easy ways to thicken your taco soup frios recipe. One popular method is to stir in a cornstarch slurry (a mix of cornstarch and water) during the simmering stage. Another option is to mash a portion of the beans before adding them to the pot – this naturally thickens the broth while maintaining the soup’s rich flavor.

Cheese lovers can stir in extra shredded cheese, which not only thickens the soup but also adds a creamy, indulgent texture. Don’t forget to let the soup simmer gently as you thicken it to avoid lumps and ensure even consistency.

Making It Healthier

The beauty of the taco soup frios recipe lies in its adaptability. For a lighter version, swap ground beef with lean ground turkey or even ground chicken. You can also reduce sodium by using low-sodium broth and rinsing canned beans thoroughly. Skipping the cream cheese or sour cream can help cut down on calories without sacrificing too much flavor.

Vegetable enthusiasts can bulk up the soup with zucchini, spinach, or diced carrots, turning it into a nutrient-packed meal. These small changes can make the dish more wholesome while still satisfying your cravings for bold taco-inspired flavors.

Storage and Reheating

Leftovers of your taco soup frios recipe can be just as delicious as the freshly made version – sometimes even better as the flavors meld together over time. Store your soup in an airtight container and refrigerate for up to 4 days. For longer storage, freeze individual portions in freezer-safe containers for up to 3 months.

When reheating, use a saucepan over medium heat to warm it evenly. Add a splash of broth or water if the soup has thickened too much in the fridge. Avoid overheating, as it can break down the texture of the ingredients. This ensures your reheated soup is just as delightful as it was on day one.

How to Serve Your Taco Soup Frios Recipe

A fully garnished bowl of taco soup frios topped with sour cream, cheese, and tortilla chips.
A close-up of taco soup frios garnished with melted cheese, sour cream, tortilla chips, and fresh herbs for an irresistible presentation.

Pairing Taco Soup Frios

To complete your taco soup frios recipe, think about pairing it with dishes that complement its bold and zesty flavors. Warm, buttered cornbread is a classic option that adds a slightly sweet contrast to the spicy soup. If you’re looking for something lighter, a fresh, crisp side salad with a lime vinaigrette balances the hearty richness of the soup.

Another excellent pairing is tortilla chips or quesadillas – they’re perfect for dipping and add an extra crunch to your meal. These combinations elevate your dining experience, turning a simple soup into a memorable feast.

Family-Friendly Additions

One of the best parts of the taco soup frios recipe is how customizable it is, especially when serving a family with varying tastes. Set up a toppings bar with options like shredded cheese, diced avocado, sour cream, and chopped cilantro. Kids might enjoy milder toppings like plain tortilla chips or a sprinkle of cheese, while spice enthusiasts can load up on jalapeños or hot sauce.

You can also include a side of rice or mashed black beans for a more filling meal. These additions make your taco soup frios an interactive and fun experience that everyone can enjoy.

Drink Pairings

The right drink can enhance your taco soup frios recipe even further. For adults, a margarita or a michelada pairs wonderfully with the spicy, savory notes of the soup. The citrusy tang of these beverages complements the flavors beautifully.

For non-alcoholic options, sparkling water with a splash of lime or a chilled glass of horchata provides a refreshing contrast. These drinks not only quench your thirst but also highlight the bold, vibrant ingredients in the soup.

Seasonal Variations for Taco Soup Frios Recipe

Fall Favorites

As the leaves begin to change, so can your taco soup frios recipe. Adding a cup of pumpkin puree to the broth not only thickens the soup but also adds a subtle sweetness that pairs beautifully with taco spices. Garnish with toasted pumpkin seeds for an autumn-inspired twist that’ll have everyone asking for seconds.

Summer Freshness

Summer is the perfect time to incorporate fresh, seasonal produce into your taco soup frios recipe. Swap canned corn for grilled corn kernels to give the soup a smoky-sweet flavor. You can also top the soup with fresh pico de gallo for a bright, tangy contrast that celebrates the vibrant flavors of summer.

Winter Warmers

When the temperatures drop, your soup should rise to the occasion. Add roasted red peppers and a pinch of smoked paprika to deepen the flavor and make it even cozier. For an indulgent winter treat, serve the soup with a side of warm, cheesy quesadillas – the perfect combination for a chilly evening.

Spring Delights

Springtime calls for lighter, fresher versions of comfort food. Enhance your taco soup frios recipe with fresh herbs like cilantro and parsley, or add a handful of spinach or kale for a nutrient boost. These small tweaks brighten the soup and make it perfect for the season of renewal.

FAQs

What can I use to thicken taco soup?

To thicken your taco soup frios recipe, you can use a cornstarch slurry (equal parts cornstarch and water) or mash some of the beans to naturally thicken the broth. Adding cheese or cream cheese can also create a rich, creamy texture.

How long to reheat taco soup?

Reheat your taco soup frios recipe on the stove over medium heat for 5–7 minutes, stirring occasionally. If using a microwave, heat individual portions for 2–3 minutes, pausing to stir halfway through for even warming.

How do you cut the heat in taco soup?

You can reduce the spiciness of your taco soup frios recipe by adding dairy like sour cream, cream cheese, or Greek yogurt. Another option is to serve it with bread or tortilla chips to balance the heat.

Does taco soup have a lot of carbs?

The carb content of your taco soup frios recipe depends on the ingredients. Beans, corn, and tomatoes contribute to the carbs, but you can reduce them by using fewer beans or substituting with low-carb veggies like zucchini.

Can I freeze taco soup?

Yes, the taco soup frios recipe freezes beautifully! Store it in airtight containers and freeze for up to 3 months. Thaw overnight in the fridge and reheat on the stove or microwave when ready to serve.

Conclusion

The taco soup frios recipe is more than just a meal – it’s a celebration of bold flavors, hearty ingredients, and endless customization possibilities. From seasonal twists to unique toppings, this dish has something for everyone. Whether you’re cooking for a busy weeknight, hosting a gathering, or meal prepping for the week ahead, this recipe guarantees satisfaction every time.

With its rich spices, creamy textures, and vibrant toppings, taco soup frios is the ultimate comfort food that never goes out of style. Now that you’ve learned how to make it, customize it, and store it, you’re ready to create a bowl of taco-inspired happiness. So, grab your ladle and start cooking – a delicious, satisfying meal awaits!