7 Game-Changing Tips for the Best Cajun Sausage and Rice

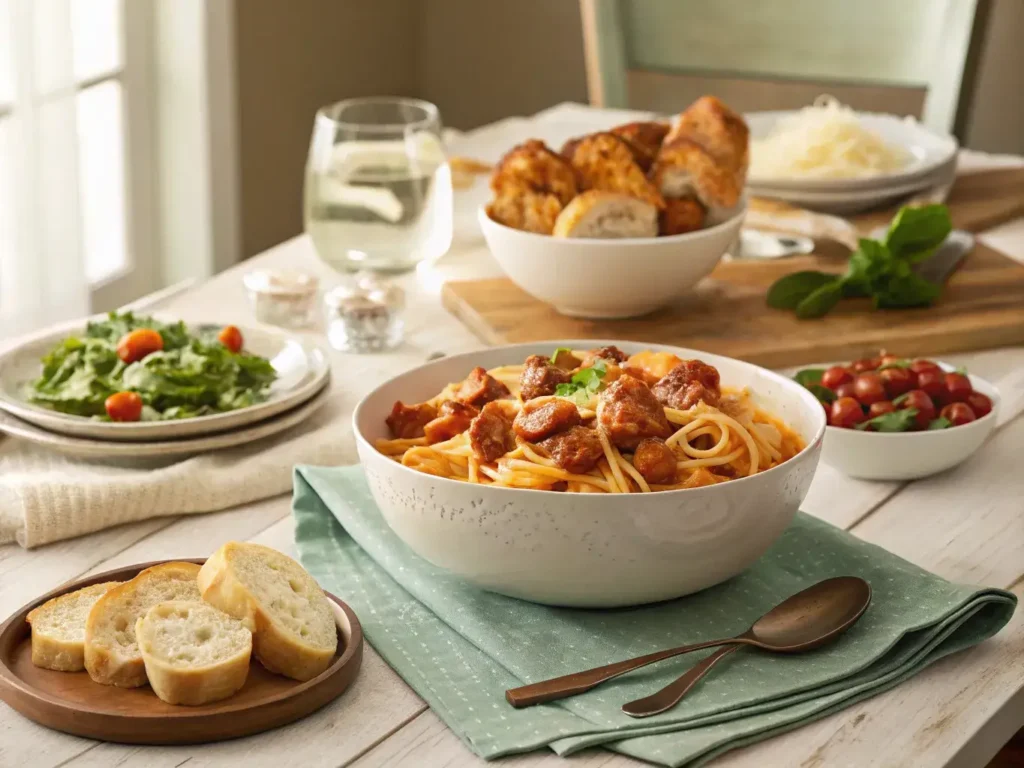
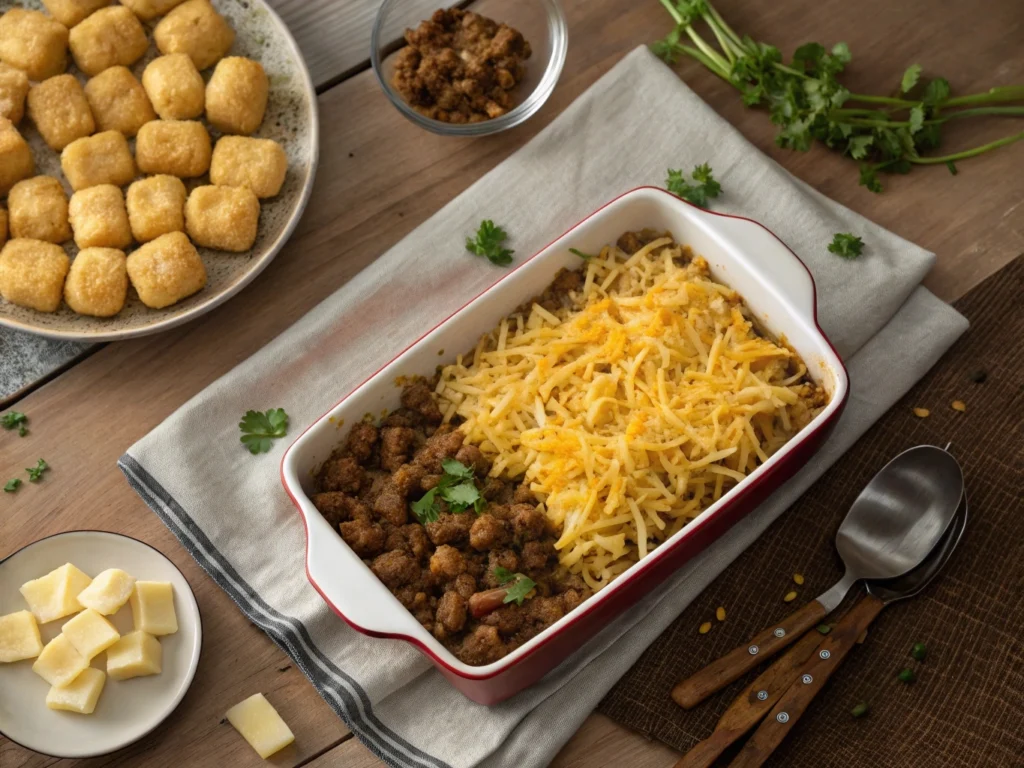
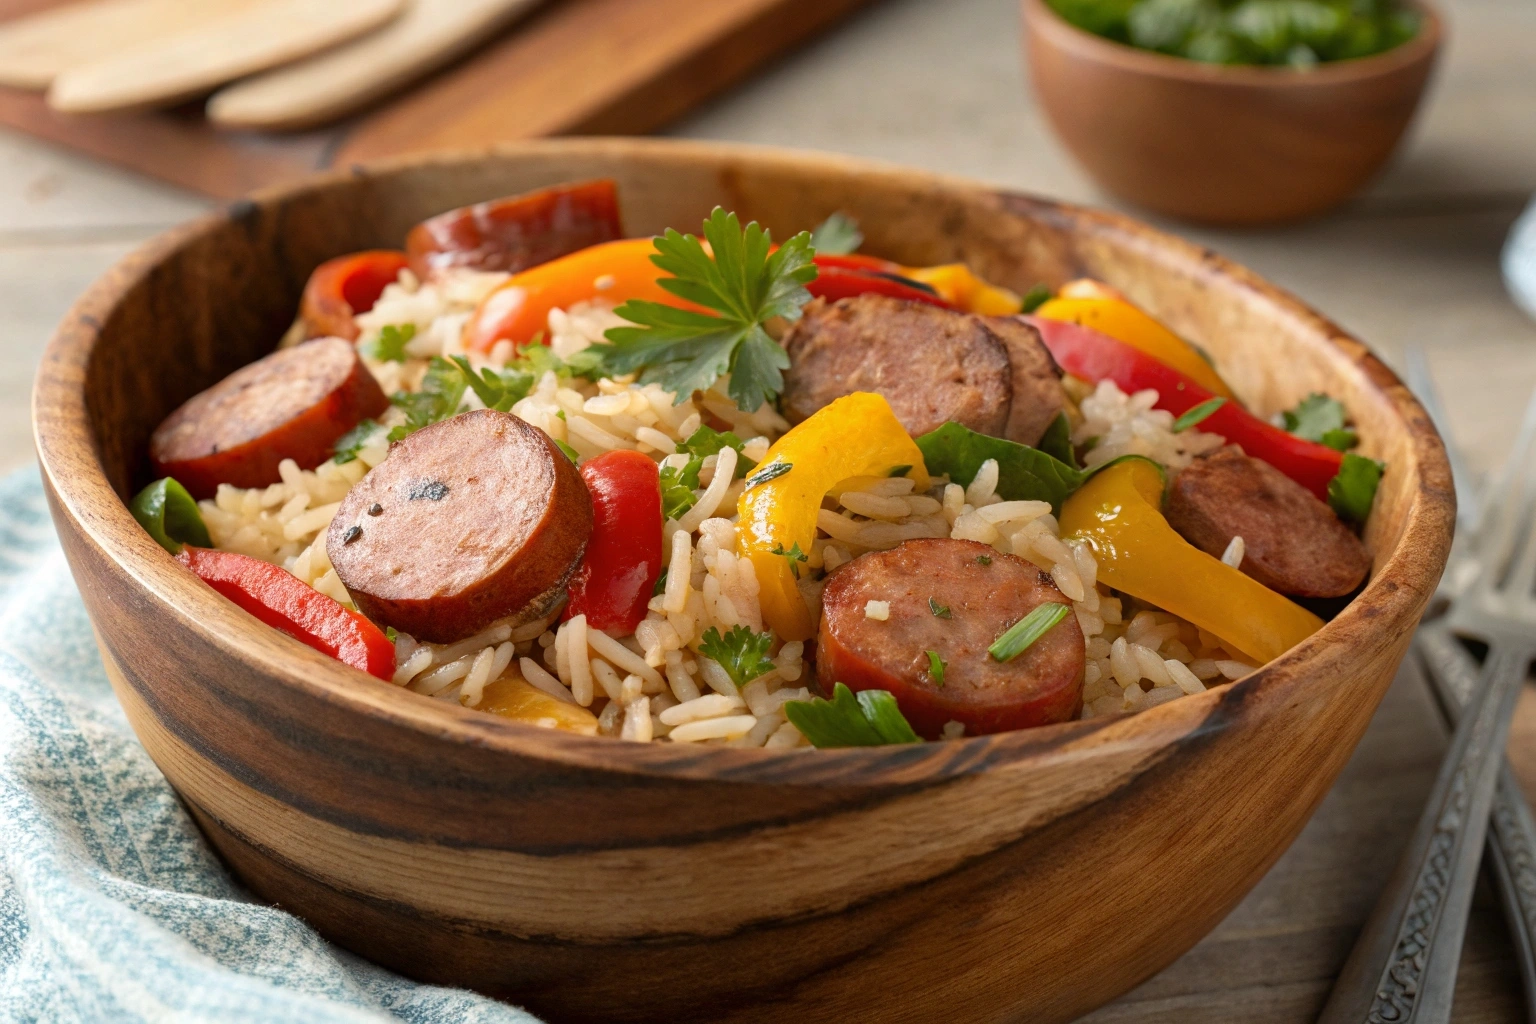
Hello, flavor-packed goodness! If you’ve ever craved the bold, smoky taste of jambalaya but didn’t want to spend hours in the kitchen, this Cajun Sausage and Rice recipe is about to be your new obsession. It’s hearty, a little spicy, and irresistibly comforting perfect for those busy weeknights when you want big flavor without the fuss. Oh, and the leftovers? Let’s just say they’re even better the next day. Get ready to add this dish to your weeknight dinner MVP list!

Choose the Right Sausage for Authentic Flavor

Why Andouille Sausage is a Game-Changer

Andouille sausage sizzling in a skillet.
Browning Andouille sausage enhances the bold flavors of Cajun sausage and rice.

When it comes to making the perfect Cajun sausage and rice, not all sausages are created equal. For a truly authentic taste, Andouille sausage is your best bet. Its smoky, bold flavor comes from a combination of pork, spices, and a special smoking process that captures the essence of Louisiana cuisine.

If Andouille isn’t available, don’t worry! You can substitute with smoked kielbasa or even a spicy chorizo for a slightly different but equally delicious twist. Each option brings its own unique touch, making it easy to tailor this dish to your taste.

Prepping Your Sausage for Maximum Flavor

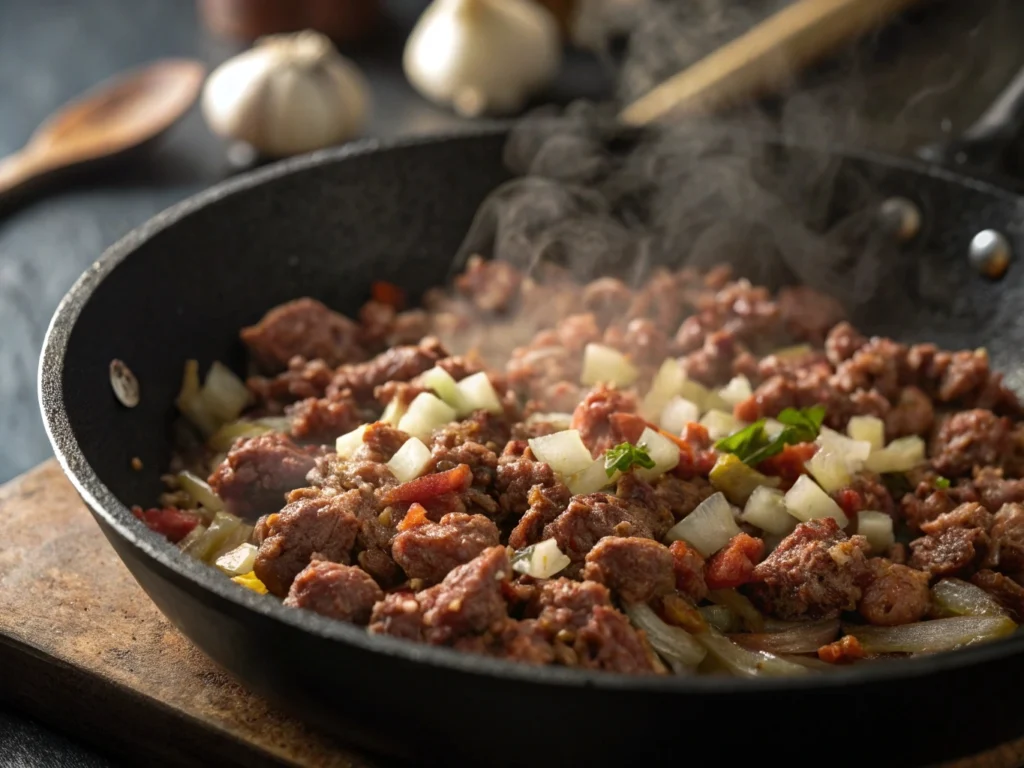
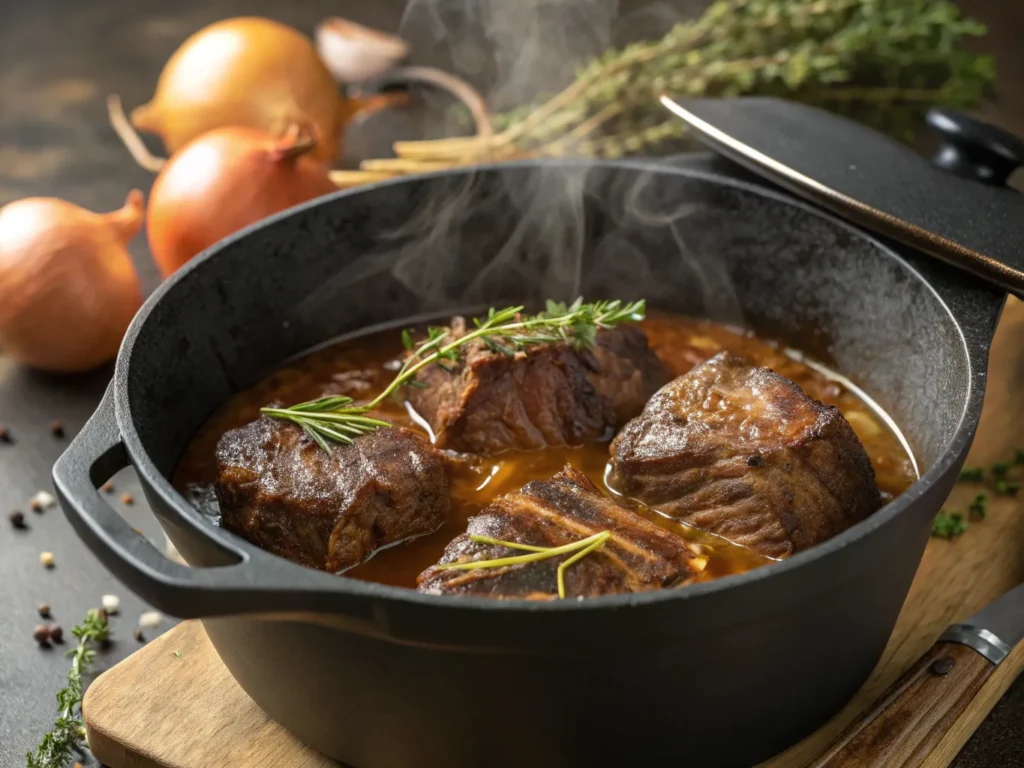
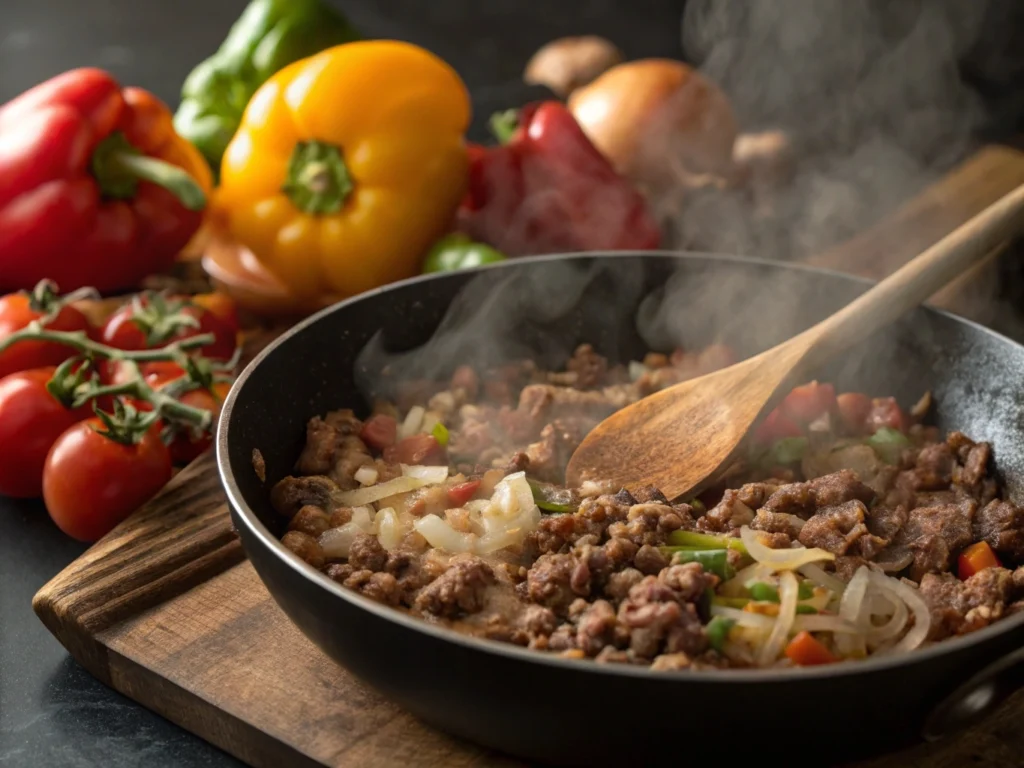
The secret to enhancing the sausage’s flavor lies in the way you prepare it. Start by slicing it into even rounds to ensure it cooks evenly. Next, brown the slices in a hot skillet before adding them to your Cajun sausage and rice. This simple step caramelizes the sausage, creating crispy edges and unlocking layers of smoky, savory goodness.

Don’t forget to scrape up the browned bits from the bottom of the pan—these bits, known as the fond, add a depth of flavor to the dish that’s hard to beat.

Pro Tips for Vegan and Vegetarian Substitutes

If you’re looking for a plant-based alternative, you’re in luck! Many brands now offer vegan sausages that mimic the smoky and spicy flavor of traditional Andouille. Just be sure to check the label for Cajun-inspired spices.

Alternatively, you can use seasoned tofu or jackfruit with a sprinkle of Cajun seasoning for a meat-free version of Cajun sausage and rice. This way, everyone can enjoy the bold flavors of this classic dish.

Enhance Flavor with Sausage Variety

Mixing different types of sausages can take this dish to a whole new level. For instance, pairing spicy Andouille with a milder sausage like kielbasa balances the heat while adding complexity.

By choosing the right sausage and preparing it properly, you set the stage for a dish that’s bursting with authentic flavor and perfect for any occasion.

Use the Perfect Rice for Texture and Taste

Long-Grain Rice: The Gold Standard for Cajun Cooking

The choice of rice can make or break your Cajun sausage and rice. Long-grain rice is the gold standard, offering a light and fluffy texture that perfectly absorbs the bold Cajun flavors without becoming mushy. Whether you use white or brown varieties, the key is its ability to remain distinct yet flavorful.

For those who enjoy experimenting, jasmine or basmati rice can be excellent substitutes. They add a subtle aroma that complements the spices, although they slightly alter the traditional profile of the dish.

Prepping Rice for Best Results

Long-grain rice being rinsed in a sieve.
Rinsing rice removes excess starch for perfectly fluffy grains.

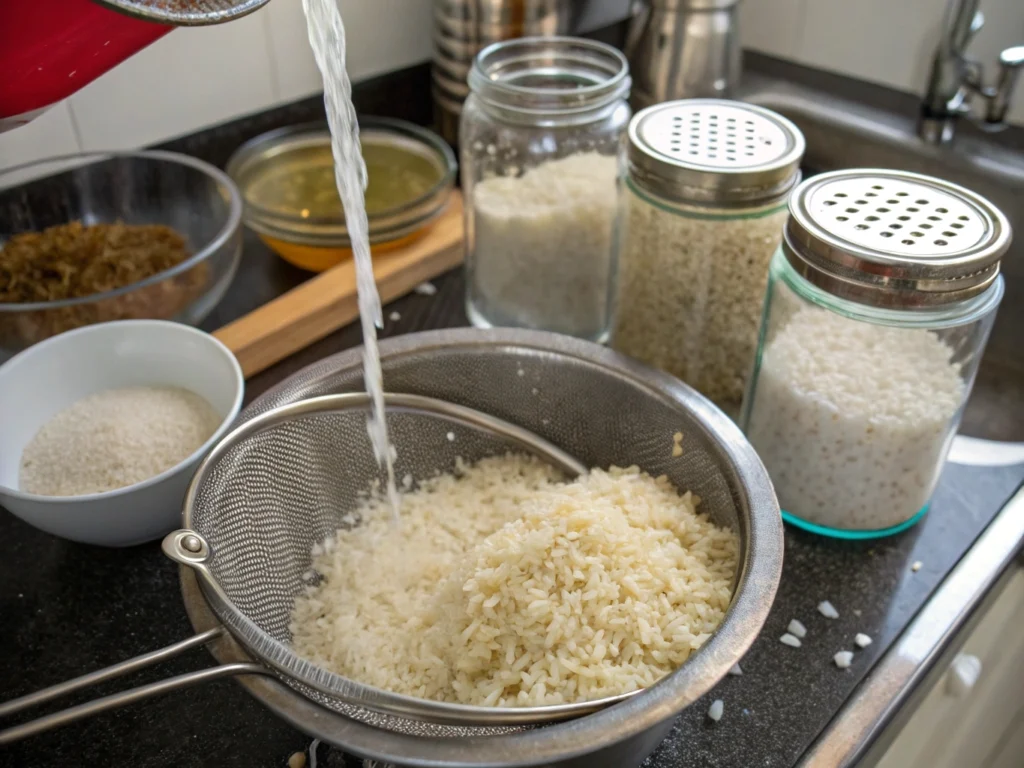
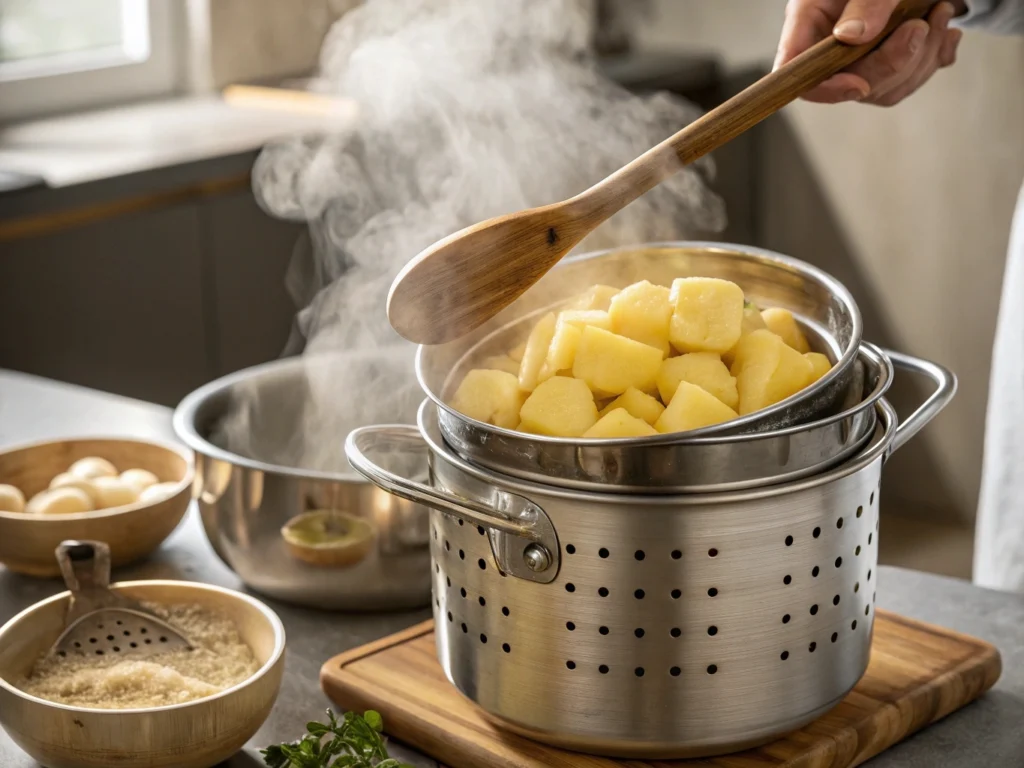
Prepping your rice correctly is crucial for nailing this dish. Start by rinsing it under cold water until the water runs clear. This removes excess starch, ensuring the rice doesn’t clump or become gummy.

Additionally, use the proper rice-to-liquid ratio. For Cajun sausage and rice, stick to 1:2 (one part rice to two parts liquid) for perfectly cooked grains every time. You can even cook the rice in chicken broth for added depth of flavor.

Using Brown Rice or Cauliflower Rice

For those seeking a healthier twist, brown rice is a great option. It’s packed with fiber and nutrients, though it does require a longer cooking time. Simply adjust the liquid and simmer until the rice reaches the desired tenderness.

If you’re going low-carb, cauliflower rice can be a game-changer. Cook it separately with a little olive oil and Cajun seasoning, then mix it into the dish just before serving. This keeps it from becoming soggy and ensures every bite is bursting with flavor.

Avoiding Sticky Rice Mishaps

Sticky rice can ruin the texture of your Cajun sausage and rice. To avoid this, resist the urge to over-stir while the rice is cooking. Stirring releases more starch, which leads to clumping. Instead, gently fluff the rice with a fork after it’s done.

By choosing the right type of rice and following these simple steps, you can elevate your Cajun sausage and rice to perfection every time.

Master the Art of Seasoning

Cajun Seasoning vs. Creole Seasoning: What’s the Difference?

The heart of Cajun sausage and rice lies in its bold seasoning. Many people confuse Cajun and Creole seasonings, but they each have distinct flavors. Cajun seasoning is typically spicier and simpler, focusing on paprika, cayenne, garlic powder, and black pepper. In contrast, Creole seasoning adds herbs like thyme, oregano, and parsley, offering a more aromatic profile.

For authentic Cajun sausage and rice, stick with Cajun seasoning. If you prefer a more balanced flavor, blend in a touch of Creole seasoning to suit your taste.

Make Your Own Cajun Seasoning at Home

Store-bought blends are convenient, but making your own Cajun seasoning ensures you get the freshest, boldest flavors. Here’s a quick recipe to try:

  • 2 tablespoons paprika
  • 1 tablespoon garlic powder
  • 1 tablespoon onion powder
  • 1 teaspoon cayenne pepper (adjust for heat preference)
  • 1 teaspoon black pepper
  • 1 teaspoon dried thyme
  • 1 teaspoon dried oregano

Mix these ingredients and store them in an airtight container. This versatile blend is perfect not only for Cajun sausage and rice but also for other dishes like grilled chicken or roasted vegetables.

Balancing Heat and Flavor

Achieving the right balance between heat and flavor is key to making Cajun sausage and rice a crowd-pleaser. If you love spicy food, don’t hesitate to add extra cayenne or a splash of hot sauce. However, for a milder version, use smoked paprika instead of cayenne to retain the smoky depth without overwhelming spice.

Additionally, taste as you cook! This allows you to adjust the seasoning gradually, ensuring every bite is just right.

Pro Tips for Layering Flavors

Layering flavors is the secret to making your Cajun sausage and rice unforgettable. Begin by seasoning the sausage as it browns, allowing the spices to develop and coat the pan. When adding vegetables like bell peppers and onions, sprinkle them with additional seasoning to build complexity.

Don’t forget to season the liquid or broth before adding the rice. This ensures the rice absorbs the vibrant flavors as it cooks. For an extra burst of freshness, finish with a sprinkle of parsley or a squeeze of lemon.

For more inspiration on using seasoning creatively, check out our guide to flavor-packed meals.

Perfect Your Cooking Technique

The One-Pot Wonder Approach

Cooking Cajun sausage and rice in one pot isn’t just convenient—it’s the secret to locking in rich, layered flavors. When everything cooks together, the rice absorbs the smoky goodness of the sausage and the spices from the seasoning, creating a dish that’s bursting with flavor.

To perfect the one-pot method, start by browning your sausage in a heavy-bottomed pot or skillet. Once the sausage is golden and crispy, remove it and sauté your vegetables in the same pot. This ensures all the delicious browned bits (fond) from the sausage are incorporated into the dish. Add your rice, broth, and spices, then cover and simmer until the rice is tender and fluffy.

Avoiding Common Mistakes

Even with simple dishes like Cajun sausage and rice, there are a few pitfalls to watch out for. One of the most common mistakes is using too much liquid, which can result in mushy rice. Stick to the recommended rice-to-liquid ratio (usually 1:2) for the best texture.

Another mistake is over-stirring. While it’s tempting to check on the rice constantly, stirring too much can release excess starch, leading to a sticky consistency. Instead, let the rice cook undisturbed and fluff it gently with a fork after it’s done.

How to Save a Mushy or Overcooked Dish

If your Cajun sausage and rice turns out too soft or overcooked, don’t panic! Spread the rice mixture onto a baking sheet and place it in the oven at a low temperature (around 250°F) for 10–15 minutes. This helps evaporate some of the excess moisture and restores some of the dish’s texture.

Alternatively, transform the leftovers into something new. Add an egg and breadcrumbs to the mixture and shape it into patties for a quick fry-up. These crispy rice cakes are a delicious way to repurpose a less-than-perfect dish.

Pro Tips for Even Cooking

To ensure your Cajun sausage and rice cooks evenly, use a pot with a thick, heavy base, such as a Dutch oven. This type of cookware distributes heat evenly, preventing hotspots that can burn the bottom layer.

It’s also a good idea to taste the dish as you cook. Adjust the seasoning, especially if you’ve added extra ingredients like vegetables or seafood. A splash of chicken broth or water can also help keep the rice moist as it simmers.

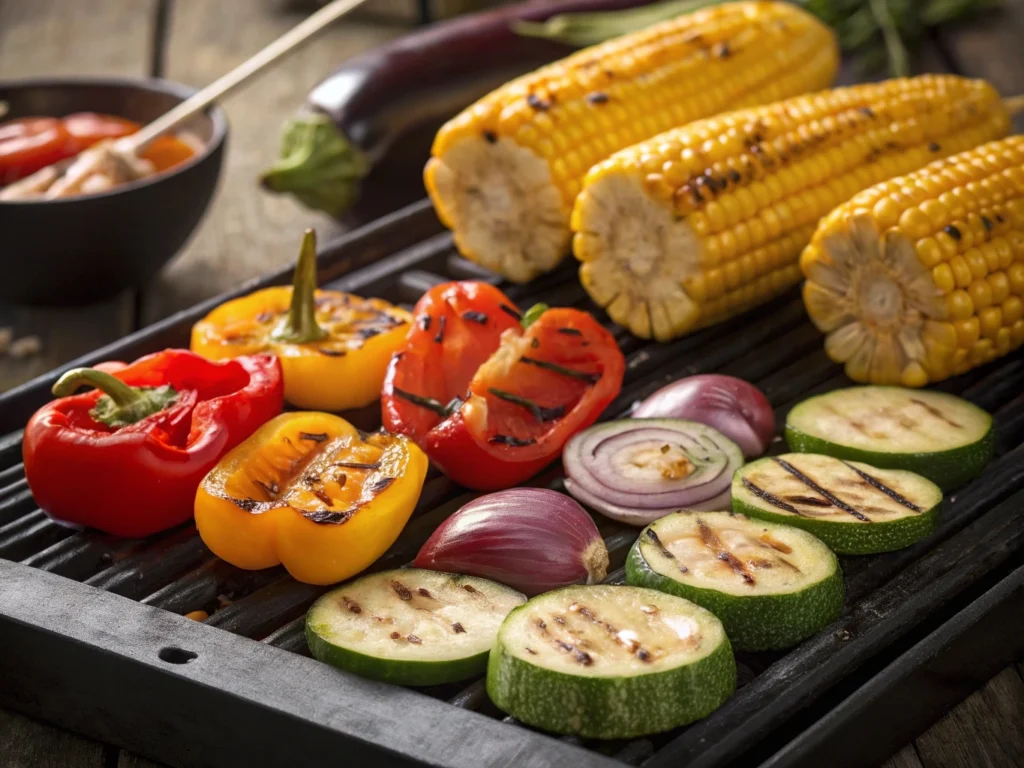
Add Vegetables for Color and Nutrition

Chopped bell peppers, celery, and onions on a cutting board.
The “Holy Trinity” of Cajun cooking: bell peppers, celery, and onions.

Classic Choices: Bell Peppers, Celery, and Onions

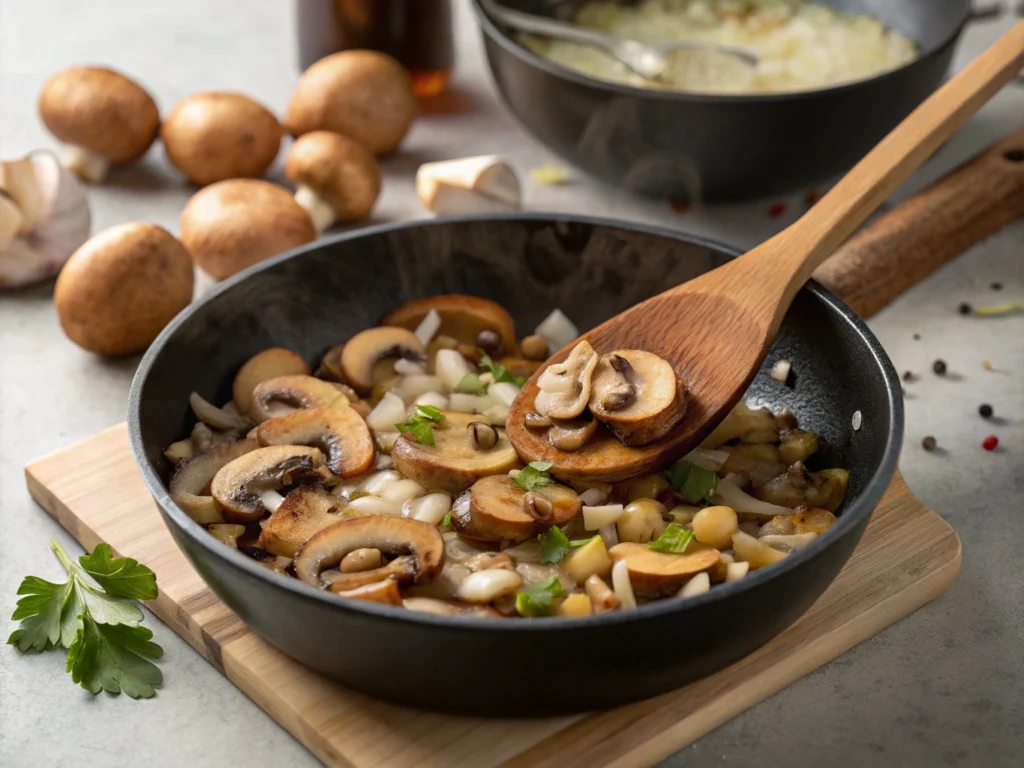
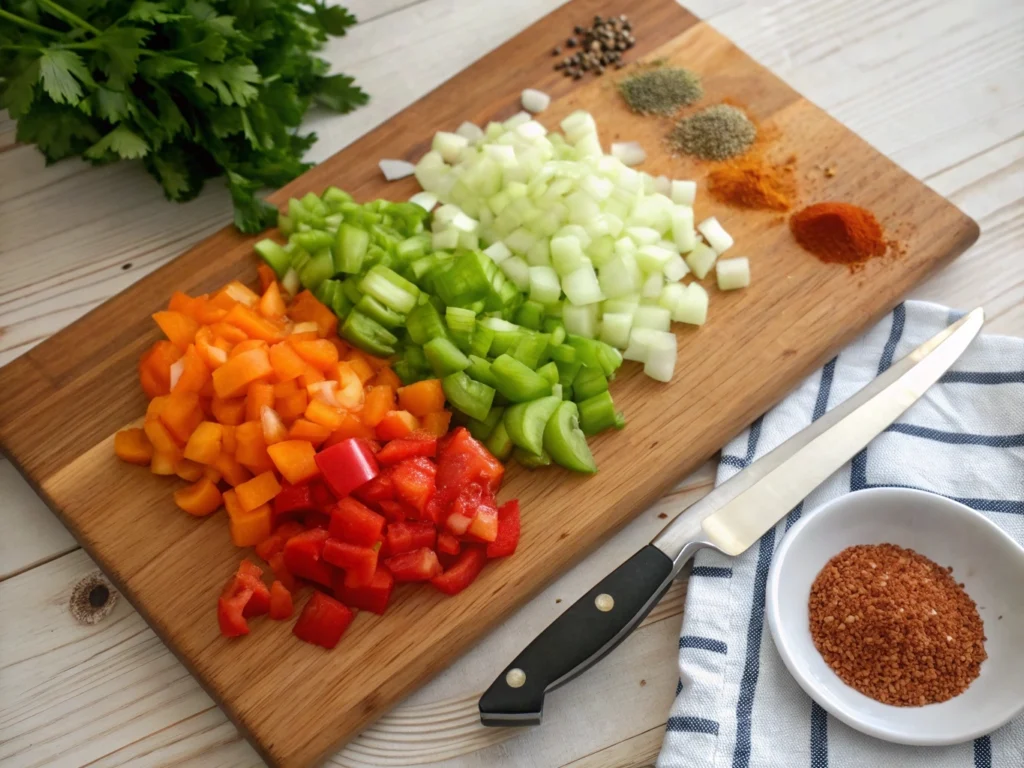
When it comes to crafting a well-rounded Cajun sausage and rice, the “Holy Trinity” of Cajun cuisine—bell peppers, celery, and onions—should always take center stage. These vegetables not only add vibrant colors but also infuse the dish with a subtle sweetness that balances the smoky and spicy flavors of the sausage and spices.

To get the best flavor, dice these vegetables evenly and sauté them in the sausage drippings. This allows the vegetables to soak up all the savory goodness left behind, creating a rich base for your dish.

Creative Additions to Boost Nutrition

While the classic trio is a must, you can easily customize your Cajun sausage and rice with other vegetables to suit your taste or dietary needs. Consider adding zucchini or yellow squash for a touch of sweetness, or toss in diced tomatoes to bring a slightly tangy note to the dish.

For those looking to pack in more nutrients, fresh spinach or kale works wonders when stirred in during the last few minutes of cooking. These greens wilt beautifully and add a pop of color without overpowering the other flavors.

Pro Tip: Cooking Veggies Without Losing Flavor

To keep your vegetables flavorful and slightly crisp, avoid overcooking them. Bell peppers and onions, for example, should remain slightly tender for a pleasant texture. Start by sautéing them for 5–7 minutes before adding the rice and liquid to the pot.

For added depth, sprinkle the vegetables with a pinch of Cajun seasoning as they cook. This ensures every bite of your Cajun sausage and rice is layered with bold, cohesive flavors.

Balancing the Veggies with the Dish

It’s important to strike the right balance between vegetables and rice. Too many vegetables can overwhelm the dish, while too few might leave it feeling incomplete. A good ratio is about 1 cup of diced vegetables for every cup of rice.

Want to experiment? Try roasted vegetables as a garnish. Roasting intensifies their natural sweetness, adding a new dimension to your Cajun sausage and rice.

FAQs

Is jambalaya healthy to eat?

Jambalaya can be a healthy dish, depending on the ingredients you use. Traditional jambalaya is packed with proteins like sausage, chicken, or shrimp, and includes vegetables such as bell peppers, celery, and onions. These provide essential nutrients and vitamins.

However, the healthiness of jambalaya depends on factors like portion size, the type of sausage (opt for lower-fat options like turkey sausage), and the type of rice (brown rice adds more fiber). If you’re watching your calorie intake, reducing the amount of oil or using a lighter sausage can make jambalaya more diet-friendly without sacrificing flavor.

How to cook Cajun sausage and rice?

Cooking Cajun sausage and rice is straightforward and perfect for a quick, flavorful meal. Here’s a basic method:

  1. Start by browning sliced sausage in a heavy-bottomed pot. Remove the sausage once it’s crispy.
  2. In the same pot, sauté the “Holy Trinity” of Cajun cooking—bell peppers, onions, and celery—until tender.
  3. Add your rice, Cajun seasoning, and broth, then return the sausage to the pot.
  4. Cover and simmer until the rice is cooked and has absorbed all the liquid, usually about 20–25 minutes.
  5. Fluff the rice with a fork and serve hot.

This dish is a one-pot wonder that blends bold flavors with ease. For additional tips, refer to the section on cooking techniques in this article.

Side dishes for Cajun sausage and rice?

  • Cajun sausage and rice is hearty enough to be a standalone dish, but adding side dishes can round out your meal beautifully. Some great options include:
  • Cornbread: Its slightly sweet flavor complements the spicy sausage and rice perfectly.
  • Collard Greens or Spinach: These greens add a fresh, healthy contrast to the richness of the dish.
  • Simple Salad: A crisp garden salad with a light vinaigrette keeps the meal balanced.
  • Roasted Vegetables: Zucchini, carrots, or asparagus roasted with a touch of olive oil and garlic bring extra texture and flavor to the table.

What is the difference between Creole food and Cajun food?

The main difference between Creole and Cajun food lies in their origins and ingredients. Creole cuisine is often considered “city food,” originating in New Orleans, and incorporates influences from French, Spanish, African, and Caribbean cultures. It typically uses tomatoes in dishes, like Creole gumbo or shrimp Creole, and includes a wider variety of herbs.

Cajun food, on the other hand, is known as “country food,” rooted in the cooking of French Acadian settlers. It relies more on rustic, simple ingredients and bold spices. Dishes like Cajun sausage and rice often exclude tomatoes and focus on smoky flavors and hearty, one-pot preparations.

Both cuisines are delicious, but Cajun dishes tend to be spicier and more robust, while Creole dishes are more complex and aromatic.

Conclusion

Cajun sausage and rice is more than just a meal it’s a flavorful journey through the heart of Louisiana’s vibrant cuisine. From choosing the right sausage and rice to mastering seasoning and cooking techniques, each step contributes to a dish that’s as satisfying as it is delicious.

By incorporating fresh vegetables, layering bold spices, and embracing the one-pot approach, you can create a dish that’s perfect for weeknight dinners or special occasions. Whether you’re customizing it with your favorite ingredients or pairing it with a side of cornbread or greens, this recipe is endlessly versatile.

Now it’s your turn! Bring a taste of Louisiana to your kitchen with this simple yet flavorful dish. Don’t forget to share your twists and tips in the comments, and explore our site for more delicious recipes to try next.


6 Genius Ways to Upgrade Your Chicken Scampi with Garlic Parmesan Rice

What if your weeknight dinner could feel like a restaurant-worthy indulgence, without the hefty price tag or hours in the kitchen? Enter chicken scampi with garlic parmesan rice a dish that combines tender, juicy chicken with creamy, garlicky rice infused with the savory punch of parmesan.

Perfecting the Basics of Chicken Scampi and Garlic Parmesan Rice

Understanding the Classic Chicken Scampi Recipe

Chicken scampi with garlic parmesan rice starts with mastering the essentials. At its core, chicken scampi is all about balance—tender chicken pieces bathed in a buttery garlic sauce, brightened with a splash of lemon and the subtle tang of white wine. The key to achieving restaurant-level flavor lies in the simplicity of fresh ingredients.

For example, freshly minced garlic creates a bold, aromatic base, while high-quality olive oil enhances the sauce’s richness. By combining these simple elements, you’ll create a dish that’s both comforting and elegant. Transitioning to the rice, the creamy parmesan flavor acts as the perfect partner, soaking up every bit of that delicious scampi sauce.

Crafting Garlic Parmesan Rice That Shines

Fresh garlic, grated parmesan, raw chicken, and rice on a wooden board.
Essential ingredients for creating chicken scampi with garlic parmesan rice.

A perfect garlic parmesan rice is more than just a side dish—it’s the backbone of this meal. To get it just right, start by toasting the rice in a bit of butter. This simple step adds a subtle nuttiness, elevating the dish from basic to brilliant.

When cooking, opt for chicken broth instead of water. This trick infuses the rice with a savory depth of flavor that pairs beautifully with the scampi. As the final touch, stir in freshly grated parmesan cheese and a splash of cream. The result? A creamy, dreamy bed of rice that complements the zesty, garlicky chicken scampi effortlessly.

For more details on selecting the right type of rice for creamy dishes, check out this resource on rice varieties.

Essential Tools for the Best Results

Great tools make great dishes! When preparing chicken scampi with garlic parmesan rice, a few essential tools can make all the difference:

  • Heavy-bottomed skillet: Distributes heat evenly, ensuring perfectly seared chicken and no burnt garlic.
  • Microplane grater: Ideal for finely grating parmesan cheese or zesting lemon without clumps.
  • Rice cooker or sturdy pot: Guarantees fluffy, evenly cooked rice every time.

Investing in these kitchen staples simplifies the process, making it easier to recreate this dish consistently.

Common Mistakes to Avoid

Even a classic dish like chicken scampi with garlic parmesan rice can go wrong without the right techniques. Here are a few pitfalls to watch out for:

  • Overcooking the chicken: Dry chicken can ruin the dish. To avoid this, cook chicken breasts or thighs only until they’re golden and just cooked through.
  • Burning the garlic: Garlic burns quickly, turning bitter. To prevent this, sauté it over medium heat and add liquid (like wine or broth) as soon as it becomes fragrant.
  • Under-seasoning: Always taste and adjust seasoning at each stage, particularly when balancing the rich scampi sauce with the mild parmesan rice.

Genius Way #1: Experiment with Bold Flavors

Chicken sautéing in garlic butter sauce with chili flakes and parsley.
Chicken cooked in garlic butter sauce, garnished with chili flakes and parsley for bold flavor.

Adding Heat with Chili Flakes or Cajun Seasoning

Spice can take chicken scampi with garlic parmesan rice to a whole new level. Adding a pinch of chili flakes or a dash of Cajun seasoning creates a delightful contrast to the creamy rice and buttery scampi sauce. For a mild kick, try smoked paprika or a pinch of cayenne pepper instead. These simple additions add warmth and depth without overpowering the dish.

Experiment by sprinkling spice into the scampi sauce as it simmers, allowing the heat to infuse evenly. For families with varying spice preferences, serve spicy seasonings on the side as a customizable garnish.

Incorporating Fresh Herbs

Fresh herbs can completely transform the flavor profile of your chicken scampi with garlic parmesan rice. Tossing in chopped parsley, basil, or thyme not only enhances the aroma but also adds vibrant color to the dish.

For example, fresh basil complements the garlic and parmesan beautifully, while parsley provides a hint of earthiness. Add herbs just before serving to retain their bright, fresh flavor. This little tweak makes the dish feel light and sophisticated, perfect for impressing guests.

Using Citrus for a Tangy Twist

Lemon juice is a classic addition to chicken scampi, but you can elevate it further by exploring other citrus options like lime or orange. A drizzle of fresh juice brightens the entire dish, cutting through the richness of the garlic butter sauce and creamy parmesan rice.

To go the extra mile, grate some citrus zest into the sauce for an aromatic finish. This small step adds an unexpected yet delightful layer of complexity. Citrus lovers might even garnish the dish with thin lemon slices for a visually appealing touch.

Enhancing Umami with Anchovy Paste or Capers

For those who love bold, savory flavors, anchovy paste or capers are game-changers. Just a teaspoon of anchovy paste blended into the sauce boosts the umami, making every bite of chicken scampi with garlic parmesan rice irresistibly rich.

Capers, on the other hand, introduce a salty, briny note that pairs well with the garlic and parmesan. Sprinkle them sparingly to avoid overwhelming the dish, and let their tangy punch surprise your taste buds.

Genius Way #3: Get Creative with the Sauce

Add a Splash of White Wine or Broth

The sauce is the heart of chicken scampi with garlic parmesan rice, and adding a splash of white wine or chicken broth can elevate its flavor. White wine introduces a tangy depth and a hint of acidity that balances the creamy parmesan rice, while chicken broth offers a rich and savory base for those who prefer a non-alcoholic option.

For the best results, use a dry white wine like Sauvignon Blanc, as its crisp notes blend seamlessly with the garlic and butter. On the other hand, if you’re using broth, ensure it’s low-sodium so you can control the saltiness of the dish.

Infuse the Sauce with Garlic Butter

Garlic butter is an easy yet luxurious way to enhance the scampi sauce. Start by melting unsalted butter and gently sautéing minced garlic until it’s aromatic. The rich, velvety texture of garlic butter not only coats the chicken but also seeps into the rice, making every bite of your chicken scampi with garlic parmesan rice indulgent and flavorful.

For an extra layer of flavor, mix in a pinch of Italian seasoning or fresh thyme while preparing the garlic butter. This step ensures that the sauce is both fragrant and perfectly seasoned.

Incorporate a Cheese Blend

While parmesan is a staple in this dish, combining it with other cheeses can add complexity. A mix of parmesan, asiago, and mozzarella brings creamy, nutty, and stretchy elements to the sauce, transforming your chicken scampi with garlic parmesan rice into a gourmet experience.

Grate the cheeses finely so they melt smoothly into the sauce. Stir them in gradually over low heat to prevent clumps, ensuring a silky texture. This cheese blend not only enhances the sauce but also creates a luscious finish for the garlic parmesan rice.

Use Sun-Dried Tomatoes for a Sweet and Tangy Touch

Sun-dried tomatoes add a sweet and tangy contrast to the buttery richness of the scampi sauce. Chop them finely and stir them into the sauce as it simmers. Their slightly chewy texture also provides a delightful contrast to the tender chicken and creamy rice.

These tomatoes work particularly well if you’re aiming for a Mediterranean twist on the classic chicken scampi with garlic parmesan rice. For added depth, try using oil-packed sun-dried tomatoes, which infuse the dish with even more flavor.

For more delicious ideas to transform your favorite meals, check out our article on Quick Dinner Upgrades.

Genius Way #4: Elevate the Rice

Creamy garlic parmesan rice being stirred with a wooden spoon.
Garlic parmesan rice being prepared with fresh parmesan and herbs.

Use Arborio Rice for Creaminess

To take your chicken scampi with garlic parmesan rice to the next level, consider swapping traditional long-grain rice for Arborio rice. Known for its creamy texture, Arborio rice creates a luxurious base that perfectly complements the bold flavors of the scampi sauce.

Begin by toasting the Arborio rice in butter, just as you would for risotto, and cook it slowly with chicken broth for added depth. Stirring frequently helps release the starches, resulting in a rich and velvety texture. This small change makes the dish feel like a restaurant-quality indulgence.

Add Vegetables for Color and Texture

Incorporating vegetables not only brightens the dish but also adds a pleasing variety of textures. Peas, for example, bring a pop of green and a hint of sweetness that balances the savory scampi sauce. Similarly, roasted red peppers lend a smoky flavor and vibrant color to your chicken scampi with garlic parmesan rice.

Spinach is another excellent option—it wilts beautifully into the rice, enhancing its creamy consistency without overpowering the dish. For an extra burst of freshness, consider stirring in cherry tomatoes right before serving.

Toast the Rice Before Cooking

One simple yet often overlooked technique for elevating garlic parmesan rice is to toast the rice before adding any liquid. This step enhances the nutty, aromatic qualities of the rice, giving it a distinct depth of flavor that pairs beautifully with the zesty, garlicky chicken scampi.

Toasting is easy: heat a small amount of butter or olive oil in your pan, then sauté the rice until it’s lightly golden. This method works particularly well with basmati or jasmine rice, ensuring each grain stays fluffy and flavorful.

Experiment with Broths and Infusions

While water is a standard choice for cooking rice, using chicken broth or vegetable stock can infuse your garlic parmesan rice with savory notes that complement the scampi sauce. For a creative twist, you could even add a splash of coconut milk for a touch of creaminess and subtle sweetness.

Additionally, try infusing the broth with herbs like bay leaves, thyme, or rosemary as it heats. This step adds aromatic undertones that tie the rice and scampi flavors together seamlessly. The result is a dish that feels both elevated and comforting.

Genius Way #5: Presentation Matters

Plating Like a Pro

A dining table with plated chicken scampi and garlic parmesan rice
Chicken scampi with garlic parmesan rice plated elegantly with garnishes and wine

The way you present your chicken scampi with garlic parmesan rice can make a big difference in how it’s received. Use shallow bowls for this dish, as they allow the creamy rice to pool beneath the chicken, showcasing the luscious sauce. Arrange the chicken pieces neatly on top, leaving enough room for garnishes.

To create a restaurant-style look, use a ring mold to shape the rice into a neat circle before placing the chicken on top. This extra step elevates the presentation, making it feel special for a dinner party or a cozy family meal.

Garnish with Style

A well-chosen garnish not only enhances flavor but also adds a touch of elegance. Fresh herbs like parsley or basil provide a burst of color and a fresh aroma. For a finishing flourish, sprinkle freshly grated parmesan over the dish, letting it melt into the warm garlic parmesan rice.

Lemon wedges on the side add a pop of brightness and allow guests to customize their plates. Alternatively, drizzle a small amount of olive oil or balsamic reduction for a polished look and an extra layer of flavor.

Pair with the Perfect Sides

While chicken scampi with garlic parmesan rice is satisfying on its own, pairing it with complementary sides can create a complete dining experience. A crisp Caesar salad, for instance, provides a refreshing contrast to the creamy rice.

Garlic bread is another classic option, ideal for soaking up any extra sauce. For a lighter side, roasted vegetables like asparagus or zucchini add both flavor and texture. These accompaniments ensure your meal feels well-rounded and satisfying.

Lighting and Table Settings for Ambiance

To make your dish even more appealing, consider how it’s presented at the table. Soft, warm lighting highlights the golden tones of the garlic parmesan rice and the rich sauce on the chicken. Use simple, clean plates to let the colors of the food stand out.

Set the table with a few candles or a simple floral centerpiece to create an inviting atmosphere. These small touches enhance the overall dining experience, turning an ordinary meal into a memorable occasion.

FAQs About Chicken Scampi with Garlic Parmesan Rice

What is a substitute for white wine in chicken scampi?

If you don’t have white wine on hand or prefer not to use alcohol, there are several great substitutes. Chicken broth is one of the best options, as it adds a savory depth to the scampi sauce. For a hint of acidity, you can mix chicken broth with a tablespoon of lemon juice or apple cider vinegar. Other alternatives include vegetable broth or a splash of white grape juice diluted with water. These substitutions maintain the bright and flavorful profile of chicken scampi with garlic parmesan rice.

Why is it called chicken scampi?

The term “scampi” originally referred to a type of small, edible crustacean, similar to shrimp, commonly prepared in Italy with garlic, butter, and wine. Over time, the preparation method became synonymous with the name. Today, “scampi” describes a cooking style characterized by sautéing meat or seafood in a rich garlic butter sauce. In the case of chicken scampi with garlic parmesan rice, this traditional technique is applied to chicken, resulting in a flavorful and satisfying dish.

What can I use in place of wine for shrimp scampi?

Just like with chicken scampi, you can replace wine in shrimp scampi with chicken broth, vegetable broth, or a mixture of lemon juice and water. For a slightly sweeter alternative, try white grape juice or even diluted apple juice. These substitutes ensure the scampi sauce retains its signature tanginess and pairs beautifully with creamy garlic parmesan rice.

Can I skip white wine in a recipe?

Yes, you can absolutely skip white wine in a recipe without compromising flavor. Instead, use chicken or vegetable broth with a touch of acidity from lemon juice or vinegar. For chicken scampi with garlic parmesan rice, this adjustment maintains the sauce’s richness while adding a bright, zesty note. Skipping the wine also makes the recipe more family-friendly and accessible to all.

Conclusion

You’ve just explored six genius ways to upgrade your chicken scampi with garlic parmesan rice, transforming it from a simple dinner into a memorable culinary masterpiece. From experimenting with bold flavors and enhancing the sauce to perfecting the rice and elevating the presentation, these tips ensure your dish is as visually stunning as it is delicious.

Whether you’re cooking for a special occasion or a cozy family meal, these creative ideas will help you master the art of chicken scampi with garlic parmesan rice. Don’t forget to add your personal touch—be it a unique garnish, a surprising ingredient, or a beautifully set table. Now, it’s time to grab your apron, gather your ingredients, and enjoy the satisfaction of creating a dish that’s sure to impress.

Why 9 Out Of 10 People Love Instant Pot Marry Me Chicken Pasta

What if one dish could steal the show, win hearts, and make any dinner feel like a romantic occasion? Say hello to Instant Pot Marry Me Chicken Pasta a creamy, flavorful masterpiece that’s as effortless as it is irresistible. With tender chicken, sun-dried tomatoes, and a velvety Parmesan sauce, this recipe promises to deliver restaurant-quality magic right from your Instant Pot.

1. What Is Marry Me Chicken Pasta?

The Story Behind the Name

Have you ever tasted something so good that you wanted to drop everything and shout, “Marry me”? That’s the playful story behind Marry Me Chicken Pasta! It’s said that this dish is so irresistibly creamy and flavorful that it’s sparked more than a few proposals. While the story may be lighthearted, the flavors are anything but—combining tender chicken, a rich Parmesan sauce, and tangy sun-dried tomatoes, this meal truly feels like love on a plate.

What makes Instant Pot Marry Me Chicken Pasta even more enticing is how it transforms this show-stopping dish into a quick, easy recipe. With your Instant Pot, you can whip up this restaurant-worthy meal in under 30 minutes without sacrificing its signature depth of flavor.

Why It’s a Hit Among Instant Pot Users

The Instant Pot is a game-changer for busy home cooks, and this recipe proves it. Traditionally, a dish like Marry Me Chicken Pasta would require juggling multiple pots and pans. However, the Instant Pot makes everything simpler by combining sautéing, pressure cooking, and simmering all in one device.

For fans of Instant Pot Marry Me Chicken Pasta, the appeal lies in its versatility. Whether you’re cooking for a cozy dinner for two or feeding a hungry family, this one-pot wonder scales effortlessly. And with minimal cleanup afterward, it’s no surprise why it’s a favorite for weeknight meals and special occasions alike.

The Essential Ingredients

Ingredients for Instant Pot Marry Me Chicken Pasta arranged on a countertop.
Essential ingredients for preparing Instant Pot Marry Me Chicken Pasta.

At the heart of Instant Pot Marry Me Chicken Pasta are a few key ingredients that make this dish truly shine:

  • Chicken: Boneless, skinless chicken breasts or thighs work best, ensuring tender, juicy bites.
  • Pasta: Short varieties like penne or rigatoni hold the sauce perfectly, delivering a creamy bite every time.
  • Sun-Dried Tomatoes: These gems add a sweet, tangy flavor that balances the richness of the dish.
  • Parmesan Cheese: Freshly grated Parmesan creates a velvety, luxurious sauce.
  • Heavy Cream: This ingredient provides the creamy base that ties all the flavors together.

Ingredient Substitutions

While the original recipe is a crowd-pleaser, it’s always helpful to have options. Here are some great substitutions for Instant Pot Marry Me Chicken Pasta:

  • Dairy-Free: Swap heavy cream with coconut milk or a dairy-free cream alternative.
  • Vegetarian Version: Replace chicken with chickpeas, tofu, or a medley of roasted vegetables.
  • Gluten-Free: Use your favorite gluten-free pasta for a dish that everyone can enjoy.

These substitutions ensure that no matter your dietary needs, you can enjoy the comforting flavors of this recipe. Plus, they allow you to experiment with different variations, keeping the dish exciting and new.

2. Key Ingredients for the Perfect Instant Pot Marry Me Chicken Pasta

Family-style table with Instant Pot Marry Me Chicken Pasta and side dishes.
A cozy dinner setup featuring Instant Pot Marry Me Chicken Pasta and side dishes.

The Essential Ingredients

To make the most irresistible Instant Pot Marry Me Chicken Pasta, you’ll need a combination of staple items and a few standout ingredients that take this dish to the next level. Each element plays an important role in creating the perfect balance of creamy, savory, and tangy flavors.

  • Chicken: Opt for boneless, skinless chicken breasts or thighs. They cook quickly and remain juicy under pressure, making them ideal for Instant Pot recipes.
  • Pasta: Short pasta like penne or rigatoni works best because it holds the sauce well and cooks evenly in the Instant Pot.
  • Sun-Dried Tomatoes: These add a tangy sweetness that cuts through the richness of the sauce. Look for oil-packed ones for added depth of flavor.
  • Heavy Cream and Parmesan Cheese: Together, these ingredients create the dish’s luxurious, creamy texture. Freshly grated Parmesan is recommended for the best results.
  • Seasonings: Garlic, Italian seasoning, and a pinch of red pepper flakes bring the whole dish to life.

Ingredient Substitutions

One of the best things about Instant Pot Marry Me Chicken Pasta is its adaptability. Whether you have dietary restrictions or just want to switch things up, here are some substitution ideas:

  • For a lighter sauce: Replace heavy cream with half-and-half or evaporated milk.
  • Gluten-free option: Use gluten-free pasta; just adjust the cooking time slightly as it tends to cook faster in an Instant Pot.
  • Dairy-free alternative: Swap Parmesan and cream with plant-based versions. Nutritional yeast can also add a cheesy flavor.
  • Vegetarian twist: Replace chicken with chickpeas or sautéed mushrooms for a hearty, plant-based version.

These substitutions allow you to enjoy this dish no matter your preferences or dietary needs, ensuring Instant Pot Marry Me Chicken Pasta stays a household favorite.

Flavor-Boosting Additions

While the classic recipe is already bursting with flavor, there are several ways to enhance it further:

  1. Fresh Herbs: Add chopped basil or parsley right before serving for a pop of freshness.
  2. Vegetables: Toss in baby spinach, roasted red peppers, or zucchini for added nutrients and color.
  3. Spices: If you love heat, sprinkle in extra red pepper flakes or even a dash of cayenne.
  4. Protein Variations: Swap chicken for shrimp or sausage for a different flavor profile.

Experimenting with these additions keeps your Instant Pot Marry Me Chicken Pasta exciting every time you make it.

Tips for Selecting the Best Ingredients

Selecting high-quality ingredients is key to achieving that “wow” factor. Here are a few tips to keep in mind:

  • Chicken: Look for organic or free-range chicken to ensure tender and flavorful meat.
  • Parmesan Cheese: Skip the pre-grated variety and go for a wedge of Parmesan to grate fresh—it melts better and tastes richer.
  • Pasta: Choose a brand known for al dente results, as Instant Pot cooking can make some pastas mushy.
  • Sun-Dried Tomatoes: Opt for those packed in oil with herbs to enhance the overall flavor of the sauce.

3. How to Make Instant Pot Marry Me Chicken Pasta

Step-by-Step Instructions

Making Instant Pot Marry Me Chicken Pasta is surprisingly simple and doesn’t require any advanced cooking skills. Follow these easy steps to create a creamy, flavorful meal in less than 30 minutes:

Instant Pot showing sautéed chicken and sun-dried tomatoes with broth being stirred.
Cooking chicken and sun-dried tomatoes in the Instant Pot.
  1. Prepare the Ingredients: Gather everything you need—chicken, pasta, sun-dried tomatoes, garlic, cream, Parmesan, and seasonings. Chop the sun-dried tomatoes and grate the cheese to save time later.
  2. Sauté the Chicken: Set the Instant Pot to sauté mode. Add a splash of olive oil and brown the chicken on both sides. This step locks in flavor, but don’t worry if the chicken isn’t fully cooked—it will finish during pressure cooking.
  3. Layer the Ingredients: Add pasta, sun-dried tomatoes, garlic, and seasonings. Pour in chicken broth or water, ensuring the pasta is just submerged but not over-stirred to avoid sticking.
  4. Pressure Cook: Seal the lid and cook on high pressure for about 5 minutes (adjust the time based on your pasta type). Use a quick release to prevent overcooking.
  5. Finish the Sauce: Stir in the heavy cream and freshly grated Parmesan while the pasta is still hot. This will create a velvety, luscious sauce that clings perfectly to the pasta.

By following these steps, you’ll have a restaurant-quality dish ready to impress anyone who takes a bite!

Common Troubleshooting Tips

Even the best recipes can encounter minor hiccups. Here are a few tips to keep your Instant Pot Marry Me Chicken Pasta foolproof:

  • Sauce Too Thin? Add a slurry of cornstarch and water, simmering on sauté mode until it thickens.
  • Pasta Too Firm? Simply close the lid and let the residual heat soften it for another minute or two.
  • Chicken Not Cooked Through? Slice it and stir it back into the hot pasta—it will finish cooking in no time.
  • Stuck Pasta: To prevent sticking, avoid stirring the pasta after layering it with liquids.

Remember, practice makes perfect, and small adjustments can ensure a flawless dish every time!

Tools and Equipment

Having the right tools can make all the difference. Here’s what you’ll need for Instant Pot Marry Me Chicken Pasta:

  • Instant Pot: A 6-quart or 8-quart model works best.
  • Tongs: Essential for flipping and handling the chicken without tearing it.
  • Measuring Cups and Spoons: Accuracy is key for achieving a balanced sauce.
  • Cheese Grater: Freshly grated Parmesan melts better and gives a richer taste.

While these tools are standard for most home kitchens, investing in quality versions ensures hassle-free cooking and consistent results.

Helpful Cooking Tips for Beginners

If you’re new to cooking with an Instant Pot, here are some beginner-friendly tips to keep your experience stress-free:

  1. De-glaze the Pot: After sautéing the chicken, add a splash of broth to scrape up any brown bits. This step prevents a “burn” warning and adds extra flavor to the dish.
  2. Follow the Layering Order: Always add liquids last and avoid stirring. This ensures the pasta cooks evenly without clumping.
  3. Quick Release Carefully: Use a kitchen towel to shield your hand from the steam when releasing pressure.
  4. Prep Ahead: Chop your ingredients and measure spices beforehand to save time and stay organized.

For additional beginner tips, check out our article on Easy Dinner Ideas for Two, which includes other foolproof recipes.

4. Why This Recipe Is a Crowd-Pleaser

Rich and Creamy Texture

One of the biggest reasons Instant Pot Marry Me Chicken Pasta is so beloved is its incredibly rich and creamy texture. The combination of heavy cream and freshly grated Parmesan cheese creates a velvety sauce that perfectly coats each piece of pasta and chicken.

The magic lies in the Instant Pot’s ability to cook everything together, allowing the flavors to meld seamlessly. Unlike stovetop versions, the pressure cooking process intensifies the sauce’s depth, giving it a luxurious feel without requiring hours of simmering.

If you enjoy dishes like Alfredo or carbonara, you’ll find this pasta even more indulgent thanks to its tangy sun-dried tomatoes and tender chicken. It’s a comforting yet sophisticated recipe that satisfies every craving!

Perfect for Any Occasion

Instant Pot Marry Me Chicken Pasta isn’t just a meal; it’s an experience. Whether you’re preparing a romantic date-night dinner, hosting a cozy family gathering, or needing a quick but impressive weeknight meal, this dish fits the bill.

What makes it stand out is its versatility. You can dress it up with elegant garnishes like fresh basil and shaved Parmesan, or keep it simple and let the creamy flavors speak for themselves. No matter the occasion, this recipe is guaranteed to make everyone at the table feel special.

Kid-Friendly and Customizable

One of the many reasons families adore Instant Pot Marry Me Chicken Pasta is how easily it appeals to kids. The creamy, cheesy sauce is a crowd-pleaser for picky eaters, and the pasta shape can be switched to fun options like bowties or shells to keep things exciting.

If you need to cater to dietary preferences, the recipe is highly adaptable. For example, you can swap out the chicken for ground turkey or even tofu for a vegetarian twist. Adding vegetables like spinach, peas, or bell peppers not only boosts nutrition but also makes the dish more colorful and vibrant—perfect for kids and adults alike.

A Proven Winner for Meal Prepping

Another reason this dish earns high marks is its suitability for meal prepping. Instant Pot Marry Me Chicken Pasta stores well in the refrigerator, making it a fantastic option for make-ahead lunches or dinners.

To keep the creamy sauce fresh and silky, store the pasta in an airtight container and reheat with a splash of milk or chicken broth to restore its original consistency. Unlike many pasta dishes that dry out when reheated, this one retains its rich flavor and texture beautifully.

If you enjoy recipes that save you time without compromising on taste, this pasta is a perfect addition to your rotation. Pair it with side salads or roasted veggies for a complete and balanced meal.

5. Tips for Serving and Pairing Instant Pot Marry Me Chicken Pasta

Side Dish Suggestions

Pairing your Instant Pot Marry Me Chicken Pasta with the right side dishes can elevate your meal to the next level. Here are some crowd-pleasing options:

  1. Garlic Bread: The buttery, garlicky goodness of warm bread perfectly complements the creamy sauce. Use it to mop up any extra sauce left on your plate!
  2. Caesar Salad: Crisp romaine lettuce, tangy Caesar dressing, and crunchy croutons provide a refreshing contrast to the rich pasta.
  3. Roasted Vegetables: A side of roasted asparagus, zucchini, or Brussels sprouts balances the meal with earthy, caramelized flavors.
  4. Caprese Salad: Mozzarella, tomatoes, and basil with a drizzle of balsamic glaze add a light and tangy touch.

These sides ensure your Instant Pot Marry Me Chicken Pasta shines as the centerpiece while offering a variety of flavors and textures.

Storage and Reheating Tips

One of the many advantages of Instant Pot Marry Me Chicken Pasta is how well it stores for later. Follow these tips to keep your leftovers just as delicious:

  • Refrigeration: Place the pasta in an airtight container and store it in the refrigerator for up to three days.
  • Reheating: To prevent the sauce from drying out, reheat it gently on the stove or in the microwave with a splash of milk, chicken broth, or cream. Stir frequently to ensure even heating.
  • Freezing: For longer storage, freeze the pasta in individual portions. When reheating from frozen, thaw overnight in the fridge and heat as described above.

These methods preserve the creamy texture and rich flavors, making this dish a reliable option for meal prep or leftovers.

Make It Your Own

Customizing Instant Pot Marry Me Chicken Pasta is not only easy but also a fun way to experiment in the kitchen. Consider these ideas:

  • Add a Protein Twist: Swap chicken with shrimp, scallops, or even sausage for a unique flavor profile.
  • Vegetable Boost: Stir in spinach, kale, or roasted bell peppers to add nutrients and color.
  • Spice It Up: A pinch of cayenne pepper or a drizzle of spicy chili oil can give the dish a fiery kick.
  • Cheese Variations: Try adding shredded mozzarella or a sprinkle of Pecorino Romano for a different cheesy depth.

These variations ensure that no two servings of your Instant Pot Marry Me Chicken Pasta are ever the same, keeping it exciting for both the cook and the diners.

Serving Tips for Maximum Enjoyment

 A plated serving of Instant Pot Marry Me Chicken Pasta with fresh garnishes.
A delicious serving of Instant Pot Marry Me Chicken Pasta garnished with basil and Parmesan.

To make the most of your Instant Pot Marry Me Chicken Pasta, consider these serving tips:

  1. Garnish Generously: Sprinkle freshly chopped basil or parsley and a touch of grated Parmesan on top for a professional finish.
  2. Serve Immediately: For the best texture, serve the pasta right after mixing the sauce with the cooked ingredients.
  3. Warm Plates: Warming your serving plates beforehand keeps the pasta hotter for longer, enhancing the dining experience.
  4. Pair with Wine: A crisp white wine, such as Sauvignon Blanc or Chardonnay, balances the dish’s creamy richness beautifully.

These small touches turn a delicious dinner into a memorable event, ensuring that every bite of Instant Pot Marry Me Chicken Pasta feels special.

FAQs

In Tuscany, pappardelle is one of the most popular pasta types. This wide, flat pasta is perfect for holding rich sauces, such as those made with wild boar or hearty ragù. While Instant Pot Marry Me Chicken Pasta typically uses shorter pasta like penne or rigatoni, you could experiment with pappardelle for a rustic twist inspired by Tuscan cuisine. Its broad surface would beautifully complement the creamy sauce.

What is the best way to clean an Instant Pot?

The best way to clean your Instant Pot is to break it down into its individual parts:

  1. Inner Pot: Wash it with warm soapy water or place it in the dishwasher. For stubborn stains, use a mix of baking soda and vinegar.
  2. Sealing Ring: Remove and soak the ring in warm, soapy water. If it retains food odors, soak it in a vinegar-water solution.
  3. Lid: Wash the lid thoroughly under running water, paying close attention to the steam release valve.
  4. Exterior: Wipe down the outer housing with a damp cloth. Never submerge the base in water.

Regular maintenance keeps your Instant Pot performing its best, ensuring flawless dishes like Instant Pot Marry Me Chicken Pasta.

What sides to eat with Tuscan chicken?

Tuscan chicken, with its creamy and savory flavors, pairs beautifully with a variety of sides. Here are a few ideas:

  • Garlic Mashed Potatoes: The creamy texture complements the rich sauce.
  • Grilled Asparagus: Its slightly charred flavor balances the chicken’s creaminess.
  • Fresh Bread: A crusty baguette or focaccia is perfect for soaking up the sauce.
  • Simple Green Salad: A light salad with vinaigrette adds a refreshing contrast.

These sides also pair wonderfully with Instant Pot Marry Me Chicken Pasta, making them versatile options for your table.

How do you clean the inside of an Instant Pot?

Cleaning the inside of your Instant Pot is simple and essential for maintaining its performance:

  • For the Inner Pot: Remove it and clean with warm soapy water or a non-abrasive sponge. If food has stuck to the bottom, soak it with hot water and dish soap for a few minutes before scrubbing gently.
  • Steam Release Valve: Check and clean this part regularly to ensure safety and proper functionality.
  • Burnt Residue: If you encounter burnt-on residue, a paste made of baking soda and water can work wonders. Gently scrub, then rinse thoroughly.

Proper cleaning ensures your Instant Pot remains in excellent condition, ready to whip up dishes like Instant Pot Marry Me Chicken Pasta effortlessly.

Conclusion

There’s a reason why Instant Pot Marry Me Chicken Pasta has captured the hearts (and stomachs) of so many it’s quick, easy, and packed with irresistible flavor. With its tender chicken, creamy Parmesan sauce, and tangy sun-dried tomatoes, this recipe truly feels like a restaurant-quality meal that you can make in under 30 minutes.

From learning how to make it step-by-step to customizing it with different proteins or veggies, you now have all the tools to master this dish. Whether you’re serving it for a cozy dinner or meal-prepping for the week, it’s sure to impress every time.

So, grab your Instant Pot, gather your ingredients, and get ready to fall in love with Instant Pot Marry Me Chicken Pasta. Don’t forget to experiment with sides or share your own twists on this beloved recipe.

Easy Ground Beef Stroganoff Recipe in Just 30 Minutes!

Few dishes evoke the warmth and satisfaction of a homemade meal quite like Ground Beef Stroganoff. This timeless comfort food has earned its place as a family favorite, blending hearty flavors and creamy textures into a dish that feels like a warm hug. Whether you’re tackling a busy weekday or simply craving something indulgent yet simple, this recipe delivers on all fronts.

With its short prep time and straightforward instructions, Ground Beef Stroganoff is a go-to solution for dinner dilemmas. You’ll love how quickly it comes together ready to serve in just 30 minutes without compromising on bold, savory flavors. From the tender ground beef to the velvety sauce that coats every bite, this dish is a guaranteed crowd-pleaser.

Why You’ll Love This Ground Beef Stroganoff Recipe

Quick and Easy for Busy Nights

When you’re juggling work, family, or a packed schedule, cooking can feel overwhelming. That’s where this Ground Beef Stroganoff shines. With just 30 minutes from start to finish, it’s the perfect solution for busy weeknights. The recipe uses simple steps that even beginner cooks can follow, ensuring you have a delicious meal on the table without stress.

Additionally, this dish doesn’t require fancy ingredients or hours of simmering to develop flavor. Instead, the combination of ground beef, onions, garlic, and a creamy sauce delivers robust taste in a fraction of the time. In other words, it’s a practical yet satisfying choice for those evenings when time is short but you still want something hearty and flavorful.

Perfect for the Whole Family

There’s something magical about a dish that can please everyone at the table. Ground Beef Stroganoff checks all the boxes: it’s creamy, savory, and comforting. Kids love the mild flavors and the creamy sauce, while adults appreciate the hearty texture and classic taste.

If your family has varying preferences, this recipe is flexible enough to accommodate them. For example, you can serve it over egg noodles for a traditional touch, or pair it with rice or mashed potatoes for variety. Even picky eaters will ask for seconds, thanks to the dish’s simple yet delicious flavor profile.

Affordable and Pantry-Friendly

Cooking on a budget? Ground Beef Stroganoff is a fantastic option. Ground beef is not only affordable but also widely available, making it an excellent choice for creating a cost-effective yet indulgent meal. The other ingredients—like onions, garlic, beef broth, and sour cream—are staples you probably already have in your pantry or fridge.

Moreover, this recipe reduces food waste by using versatile ingredients that can be repurposed in other dishes. For example, leftover beef broth can be used for soups or stews, and extra sour cream works well as a topping for baked potatoes. This practical approach helps you save money and time.

For additional tips on selecting budget-friendly ingredients, you can refer to this guide on affordable cooking basics, which provides actionable advice for home cooks.

Brings Bold, Comforting Flavors

What sets Ground Beef Stroganoff apart from other quick recipes is its ability to deliver bold, comforting flavors with minimal effort. The combination of savory ground beef, caramelized onions, and earthy mushrooms creates a delicious base. Then, the creamy sauce made with sour cream and a hint of Worcestershire sauce ties everything together beautifully.

To take the flavor up a notch, consider adding a pinch of paprika or a dash of Dijon mustard to the sauce. These small additions can make a big difference without complicating the recipe. The result is a dish that feels indulgent but is surprisingly easy to make.

Ingredients for the Best Ground Beef Stroganoff

Ground Beef: The Heart of the Recipe

The ground beef in this dish sets the foundation for its savory richness. When choosing beef, opt for a lean blend (80/20 or 85/15) to balance flavor and reduce excess grease. Leaner cuts cook faster and require less draining, making them perfect for a quick recipe like this one.

If you’re looking for alternatives, ground turkey or chicken work well, though they offer a lighter flavor. On the other hand, plant-based crumbles are a great substitution for vegetarian stroganoff while still delivering a hearty texture.

Creamy Sauce Essentials

A good stroganoff sauce combines creamy, tangy, and savory notes seamlessly. The classic combination includes sour cream, beef broth, and Worcestershire sauce. These ingredients create a velvety base that ties the dish together.

  • Pro Tip: Use room-temperature sour cream to prevent curdling.
  • For a dairy-free option, substitute coconut cream or a vegan sour cream alternative.

To add an extra dimension of flavor, consider a pinch of paprika or a splash of Dijon mustard. These small additions enhance the depth of the sauce without overpowering the dish.

Flavor-Boosting Vegetables

No Ground Beef Stroganoff is complete without a mix of aromatic vegetables. Traditionally, onions and garlic provide a savory base, while mushrooms add an earthy richness. Fresh mushrooms like cremini or baby bella are ideal, but canned mushrooms work as a convenient option.

For added nutrition, toss in a handful of spinach or peas near the end of cooking. These vegetables not only boost the flavor but also provide a pop of color, making the dish even more inviting.

Explore more tips for working with mushrooms and vegetables in recipes in this guide to cooking mushrooms.

Pasta and Starch Pairings

While egg noodles are the traditional choice for Ground Beef Stroganoff, there’s plenty of room for creativity. Wide noodles hold the sauce beautifully, but mashed potatoes or rice offer equally delicious alternatives.

If you’re catering to dietary needs, consider gluten-free pasta or spiralized zucchini for a lighter twist. In addition to being customizable, these pairings make the dish adaptable for various preferences.

  • Tip for Perfect Noodles: Cook pasta slightly under al dente if you plan to mix it with the stroganoff, as it will absorb some of the sauce.

How to Make Ground Beef Stroganoff

Step 1: Gather Your Ingredients

Before you start, ensure you have all your ingredients measured and ready. This includes ground beef, onions, garlic, mushrooms, beef broth, sour cream, Worcestershire sauce, and egg noodles. Having everything prepped saves time and helps the cooking process go smoothly.

For best results, choose fresh vegetables and high-quality ground beef. If you’re looking for more pantry-friendly swaps, canned mushrooms and pre-minced garlic can work in a pinch. Additionally, keeping a small bowl of spices nearby ensures you don’t miss any flavor boosters like paprika or black pepper.

Step 2: Cook the Ground Beef

Ground beef cooking with onions and garlic in a skillet
Browned ground beef with onions and garlic forms the base of this delicious stroganoff.

Heat a large skillet over medium heat and add your ground beef. Break it into smaller pieces as it browns to ensure even cooking. When the beef is no longer pink, drain any excess grease, but leave a little for flavor.

In addition, season the beef with salt and pepper as it cooks. If you prefer a slightly richer taste, you can add a splash of Worcestershire sauce directly to the meat at this stage. Set the cooked beef aside on a plate while you prepare the other ingredients.

Step 3: Sauté the Vegetables

Mushrooms and onions sautéing in butter for stroganoff
Butter-sautéed mushrooms and onions bring depth to the stroganoff sauce.

Using the same skillet, add a bit of oil or butter, then sauté the onions and garlic until they’re soft and translucent. Afterward, toss in the mushrooms and cook until they release their moisture and develop a golden-brown color.

If you enjoy extra depth in your Ground Beef Stroganoff, consider adding a pinch of paprika or a sprinkle of thyme while the vegetables cook. These spices pair well with the creamy sauce and hearty beef.

Step 4: Create the Creamy Sauce

Stroganoff sauce simmering in a skillet with sour cream
The secret to perfect stroganoff is in its rich and creamy sauce.

With the vegetables still in the skillet, sprinkle in the flour and stir to coat. Next, slowly pour in the beef broth while whisking to prevent lumps. Let the mixture simmer until it thickens slightly, which usually takes 3–5 minutes.

Lower the heat and stir in the sour cream and Worcestershire sauce to create the dish’s signature creamy sauce. Make sure to blend everything well for a smooth texture. For a tangier sauce, add a splash of lemon juice or a teaspoon of Dijon mustard.

For more hearty dinners, check out our Cowboy Casserole Recipe, a comforting dish perfect for weeknights.

Pro Tips for Perfect Ground Beef Stroganoff

How to Prevent the Sauce from Curdling

One of the most common challenges when making Ground Beef Stroganoff is curdled sauce. However, there are easy ways to avoid this issue. First, use room-temperature sour cream to ensure a smoother blend with the hot liquid. Adding cold sour cream directly to the sauce can cause it to separate.

In addition, avoid bringing the sauce to a boil after adding the sour cream. Instead, keep the heat on low and gently stir until the ingredients are fully combined. If you’re worried about lumps, mix a tablespoon of cornstarch with water and add it to the sauce for extra stability.

Make It Your Own

The beauty of Ground Beef Stroganoff lies in its versatility. You can easily adjust the recipe to suit your taste preferences or dietary needs. For example, if you want to lighten the dish, replace ground beef with ground turkey or chicken. Alternatively, for a vegetarian option, use mushrooms and plant-based protein crumbles instead of beef.

Adding a splash of white wine to the sauce can enhance its depth, while a pinch of smoked paprika gives it a subtle kick. Moreover, you can experiment with garnishes like fresh dill, parsley, or even crispy fried onions to elevate the presentation.

Storage and Reheating Tips

Ground Beef Stroganoff is just as delicious the next day, making it a great option for meal prep. To store leftovers, let the dish cool completely before transferring it to an airtight container. It can be kept in the refrigerator for up to three days.

When reheating, use a skillet over low heat and add a splash of beef broth or milk to restore the sauce’s creamy consistency. On the other hand, if reheating in the microwave, stir halfway through to ensure even heating. Avoid overheating, as this can cause the sauce to thicken too much or separate.

Serving Suggestions

While egg noodles are the traditional pairing for Ground Beef Stroganoff, there are plenty of other options to consider. Mashed potatoes offer a creamy and hearty base, while rice provides a light and fluffy alternative. If you’re looking for a low-carb option, serve the stroganoff over cauliflower rice or zucchini noodles.

To complete the meal, pair it with roasted vegetables like green beans, carrots, or asparagus. A simple side salad with a tangy vinaigrette can also provide a refreshing contrast to the rich flavors of the dish.

Variations and Substitutions

Plated Ground Beef Stroganoff with egg noodles and parsley garnish
Serve your stroganoff with egg noodles, a side salad, and your favorite juice.

Dairy-Free Ground Beef Stroganoff

If you’re avoiding dairy, you can still enjoy the creamy goodness of Ground Beef Stroganoff. Coconut cream makes an excellent substitute for sour cream, offering a rich texture without the dairy. To mask the coconut flavor, add a splash of lemon juice or a teaspoon of Dijon mustard.

Additionally, plant-based butter works well for sautéing vegetables, and dairy-free beef broth can keep the flavors intact. With these swaps, you’ll still achieve the signature creaminess of stroganoff while accommodating dietary preferences.

Gluten-Free Version

For a gluten-free twist on Ground Beef Stroganoff, swap traditional flour with cornstarch or a gluten-free flour blend to thicken the sauce. Rice noodles, quinoa, or gluten-free pasta are perfect replacements for egg noodles.

Another option is to serve the stroganoff over mashed potatoes or roasted spaghetti squash. Moreover, double-check the Worcestershire sauce you’re using, as some brands may contain gluten. Look for a certified gluten-free version to ensure your dish stays safe for those with gluten sensitivities.

Vegetarian Twist

Turning Ground Beef Stroganoff into a vegetarian delight is easier than you think. Replace ground beef with finely chopped mushrooms or plant-based ground meat. Lentils are another excellent substitute, offering a meaty texture that absorbs the flavors of the sauce.

You can also enhance the dish by adding a variety of vegetables like zucchini, bell peppers, or even broccoli. On the other hand, using a mix of hearty mushrooms such as portobello or cremini can create an earthy, satisfying base for the stroganoff.

Kid-Friendly Adaptations

To make Ground Beef Stroganoff more appealing to picky eaters, keep the flavors mild and avoid any additions that might seem too “fancy,” like mushrooms or paprika. Instead, stick to a simple combination of ground beef, sour cream, and noodles.

If your kids prefer a cheesy flavor, mix in a handful of grated Parmesan or cheddar cheese before serving. In addition, serving the stroganoff with buttered noodles or crispy garlic bread can make it extra enticing for younger palates.

FAQs

What to Serve with Ground Beef Stroganoff?

Ground Beef Stroganoff pairs beautifully with a variety of sides that complement its creamy and savory flavors. Classic egg noodles are a traditional choice, but you can also serve it with rice, mashed potatoes, or even roasted vegetables like green beans or asparagus. A crisp green salad with a tangy vinaigrette adds freshness, balancing the richness of the dish. For a heartier meal, consider serving it alongside garlic bread or dinner rolls to soak up the creamy sauce.

Dessert to Pair with Stroganoff?

After enjoying the rich and hearty flavors of Ground Beef Stroganoff, a light and refreshing dessert is the perfect way to end the meal. Fruit-based desserts like apple crisp, lemon bars, or a mixed berry parfait provide a tangy contrast to the savory main course. If you’re in the mood for something indulgent, try a simple chocolate mousse or a slice of vanilla cheesecake to round out the meal.

What to Pair with Stroganoff?

In addition to traditional sides like egg noodles or rice, consider pairing Ground Beef Stroganoff with roasted or steamed vegetables to add color and nutrition to your plate. Drinks like a light white wine or an earthy red complement the creamy sauce, while sparkling water with lemon keeps the meal refreshing. Bread options like crusty baguettes or fluffy dinner rolls are also ideal for mopping up every bit of the delicious sauce.

Ground Beef Stroganoff with Sour Cream?

Sour cream is a key ingredient in Ground Beef Stroganoff, giving the sauce its signature creamy texture and tangy flavor. To ensure the sour cream doesn’t curdle, always add it at the end of cooking and stir gently over low heat. If you’re looking for an alternative, Greek yogurt works well, offering a similar tang while being slightly lighter. Remember, using room-temperature sour cream will help blend it smoothly into the sauce.

Conclusion

Ground Beef Stroganoff is a timeless comfort food that combines creamy, savory, and hearty flavors into one irresistible dish. With its quick preparation time and versatility, it’s perfect for busy weeknights or family gatherings. Whether you stick with the classic recipe or customize it to suit your dietary needs, this dish always delivers.

Throughout this guide, you’ve learned how to prepare the perfect stroganoff, from choosing the right ingredients to creating a velvety sauce. You also discovered tips for avoiding common mistakes, like curdled sauce, and explored creative variations, such as dairy-free or gluten-free options.

Now it’s your turn to bring this comforting dish to life in your kitchen. Pair it with your favorite sides, experiment with different ingredients, and enjoy the satisfaction of serving a meal that’s both easy and unforgettable. For more delicious and practical recipes, explore the other quick meal ideas on our website.

How to Cook Beef Cheek Meat Like a Pro in 5 Steps

Are you ready to discover the incredible potential of beef cheek meat? Often hailed as one of the most underrated cuts of beef, beef cheek meat truly deserves a place in the culinary spotlight. This hidden gem, known for its intensely rich flavor and incredibly tender texture, offers a unique versatility that makes it perfect for a variety of dishes. Sourced directly from the cheek muscles of the cow, beef cheek meat undergoes a remarkable transformation when cooked properly, becoming a melt-in-your-mouth delicacy.

Step 1: Delving Deep into Beef Cheek Meat

What Exactly is Beef Cheek Meat?

Have you ever wondered about the secrets behind truly flavorful beef? Then, let’s talk about beef cheek meat. This unique cut, sourced from the cheek muscles of cattle, is a hidden treasure among meat lovers. The robust, hardworking nature of these muscles gives beef cheek meat its unparalleled richness and depth of flavor. Packed with connective tissue and collagen, this cut transforms through slow cooking methods, rendering incredibly tender, succulent pieces of meat. Unlike the more widely known ribeye or sirloin, beef cheek meat is set apart by its distinctive texture, and incredibly satisfying, beefy taste. Often hailed by chefs for its amazing ability to both absorb flavors and retain its melt-in-your-mouth texture, when cooked correctly beef cheek meat offers a delightful and unforgettable dining experience.

Why Should You Choose Beef Cheek Meat?

There are many compelling reasons to embrace beef cheek meat. For a start, it is an extremely budget-friendly alternative to some of the more expensive cuts of beef, which makes it perfect for feeding the whole family or for hosting events without exceeding your budget. Despite being an affordable option, the flavor is anything but second rate. Beef cheek meat delivers an amazingly savory and satisfying flavor that can rival even the finest steaks. Furthermore, beef cheek meat offers a wonderful versatility. It is equally at home in rustic comfort meals, such as hearty, slow-cooked stews, or in elevated gourmet meals with a more refined finish. On top of this, the high collagen content of beef cheek meat gives a wonderfully rich mouthfeel and, when slow cooked, contributes to a velvety smooth and rich sauce.

Finding the Best Beef Cheek Meat

When sourcing beef cheek meat it is crucial to choose a high-quality cut to ensure the best results. When shopping, you should prioritize cheeks that are bright red in color, well marbled with fat, and free from any discoloration. Any meat with a grey or overly dry look should be avoided as this is a sign that it may be past its prime. You can always check with your local butcher who is an excellent source for buying fresh beef cheek meat. They can often provide custom cuts based on your requirements as well as providing you with their expert advice.

The Nutritional Value

In addition to being incredibly delicious, beef cheek meat is also incredibly nutritious. It is packed with protein, which is vital for building muscle mass as well as helping repair damage to the body. Also, it is naturally high in collagen which is thought to benefit joint health and improve skin elasticity. Beef cheek meat also includes vital vitamins and minerals, such as iron, zinc, and B12 which are all crucial for overall well-being and energy production. Though it does contain a higher amount of fat than leaner cuts, most of the fat will render down during the slow cooking process, leaving you with deliciously tender and guilt-free results.

Step 2: Expertly Preparing Your Beef Cheek Meat

Raw beef cheeks on a cutting board with cooking ingredients.
Raw beef cheeks ready to be trimmed and prepared for cooking.

Trimming: The Essential First Step

Before you start cooking your beef cheek meat, it is vitally important to prepare it correctly to get the best results. The first step to this process is to trim the beef cheek meat to remove any silver skin and excess fat. Silver skin is a tough, shiny membrane, that doesn’t break down during cooking and, if not removed, can negatively affect the texture of your finished dish. You can use a sharp knife, carefully cutting away the silver skin, while being careful to leave the natural marbling of fat intact for added flavor. If you’re a beginner, it can be helpful to place your beef cheek meat on a flat surface, and work slowly and carefully, to ensure you don’t waste any of the wonderfully tender meat. Properly trimming the beef cheek meat in this way will ensure that it cooks evenly and reaches the absolute peak of tenderness.

Marinating Beef Cheek Meat for Maximum Flavor and Tenderness

Marinating your beef cheek meat is an incredibly simple but very effective way to enhance its flavor and overall tenderness. This cut of beef is naturally rich in collagen, and by using an acidic marinade you can help break down the tough fibers, which will ensure you achieve that much sought after melt-in-your-mouth texture. A good basic marinade would be to combine red wine, garlic, thyme, rosemary, and a splash of olive oil. Place your trimmed beef cheek meat into a large resealable bag or a dish, cover with the marinade, and let it sit in the fridge for at least 4 hours – or, ideally, leave it overnight. If you would like a more detailed explanation of how to create the perfect marinade, take a look at this marinade guide for tips on balancing flavors with herbs and spices.

The Essential Tools You Need to Prepare Beef Cheek Meat

Cooking beef cheek meat like a professional requires a few essential tools to get the best result. A slow cooker is the perfect solution for hands-off cooking as this allows the meat to gently simmer over many hours. Another excellent option would be a Dutch oven, which provides an evenly distributed heat for braising. In addition to cooking tools, a sharp chef’s knife is vital for correctly trimming and prepping the meat, while a meat thermometer will ensure the meat is cooked to the perfect temperature. If you are short on time, a pressure cooker will significantly reduce the cooking time, while still delivering an incredibly tender and flavorful result.

Final Prep Before Cooking Beef Cheek Meat

Right before you start cooking your beef cheek meat it is important to pat it dry with paper towels. This step will allow the meat to sear properly which is needed to create a golden-brown crust that locks in flavor. Then, season your beef cheek meat generously with salt and pepper, or whatever your favorite spice blend is, to add additional depth of flavor to the finished dish. If you are planning to braise the beef cheek meat, you will need to preheat your cooking pot and add a little oil to prevent any sticking. Searing each side of your beef cheek meat will not only add more flavor but also provide a rich base for your cooking liquid.

Step 3: Mastering the Art of Cooking Beef Cheek Meat

Braising: The Ultimate Method for Beef Cheek Meat

Beef cheeks searing in a Dutch oven with aromatic steam.
Searing beef cheek meat in a Dutch oven enhances flavor before braising.

When it comes to truly transforming beef cheek meat into a wonderfully tender and flavorful dish, braising is widely considered to be the gold standard. This technique requires you to first sear your beef cheek meat, and then slowly cook it in a delicious liquid, at a low temperature. The end result is a dish that is incredibly rich in flavor, with pieces of meat that practically melt in your mouth. Start by heating a heavy bottomed pot or a Dutch oven over a medium-high heat. Add a splash of oil to the pot, then sear the beef cheek meat on all sides until it is golden brown. Once you have achieved a good sear, deglaze the pot with red wine or beef stock, making sure you scrape up all of the caramelized bits at the bottom to really enhance the flavor. Add your aromatic ingredients, such as onions, garlic, and fresh herbs, then cover the pot with a lid and let the beef cheek meat gently simmer for 3-4 hours. For a detailed guide on braising techniques, check out our related article: Cowboy Casserole Recipe.

Slow Cooking: A Hands-Off Approach to Unmatched Tenderness in Beef Cheek Meat

If you prefer a method that requires less hands-on work, then slow cooking your beef cheek meat is an excellent choice. The consistent low heat in a slow cooker ensures that the connective tissues will break down completely. This means that you will achieve wonderfully fork-tender meat with minimum effort. To prepare using this method, simply add your seasoned beef cheek meat, along with vegetables, and your choice of liquid, such as beef broth or a tomato-based sauce to the slow cooker. Set your slow cooker to a low heat, and then let it work its magic for 6-8 hours. For busy people who want a gourmet quality meal, this method allows you to prepare something fantastic while you get on with other tasks.

Pressure Cooking: Achieving Perfect Results with Beef Cheek Meat in Less Time

If you are short on time, but still want to achieve the tenderness that beef cheek meat is famous for, then pressure cooking is a perfect option. Using a pressure cooker can reduce the overall cooking time to just 1-1.5 hours, which makes it a good method for a weeknight dinner. To cook using this method, you first sear the beef cheek meat in the pressure cooker using the saute mode. Then add your liquid and aromatics. Seal the lid, and cook at high pressure, making sure that the steam builds up fully before you start the timer. Once the cooking is finished, let the pressure release naturally, for the best results.

Sous Vide: Precision Cooking for Beef Cheek Meat

Sous vide cooking is a popular method that is often favored by gourmet chefs. With this method, you can achieve perfectly cooked beef cheek meat, every time. By immersing the meat in a water bath that is carefully controlled to a certain temperature, over an extended period, you can ensure that it is evenly cooked, and retains all of its delicious juices. For the best sous vide preparation of beef cheek meat, season the meat and vacuum seal it, then set the water bath to 185°F (85°C). Allow the meat to cook for 12-16 hours. Finally, sear the cheeks in a hot pan, to develop a beautiful caramelized crust before serving.

Step 4: Serving Your Perfectly Cooked Beef Cheek Meat

Creative Serving Ideas for Beef Cheek Meat

One of the greatest things about beef cheek meat is how incredibly versatile it is, and how wonderfully it can be paired with a vast range of different dishes, from rustic, to gourmet. For a classic approach, serve your beef cheek meat as part of a hearty, and comforting stew, with potatoes, carrots, and a rich, thick savory sauce. This traditional preparation perfectly highlights the wonderfully rich, melt-in-your-mouth texture of the meat. Or, if you prefer, use your beef cheek meat as a key component of some more creative dishes, such as tacos. Simply shred the wonderfully tender meat, and serve it in warm tortillas, with a range of fresh toppings like cilantro, diced onions and a squeeze of lime for a truly bold, flavorful twist. If you are going for a gourmet style, plate the beef cheek meat on top of some creamy polenta, or buttery mashed potatoes, and drizzle over the cooking juices.

Tips for Plating and Garnishing Beef Cheek Meat

Even dishes that are incredibly delicious, will benefit from a thoughtful and appealing presentation. For rustic dishes, serve the beef cheek meat in a deep bowl, letting all of the delicious sauce pool around the meat, creating a wonderfully inviting and hearty look. Garnish with a sprig of fresh rosemary or thyme, to further enhance the wonderful aroma of the dish. If you are plating a meal with a more refined approach, consider carefully slicing the beef cheek meat and arranging the pieces over a bed of vegetables, or grains. Use a drizzle of reduced sauce to give a perfectly polished finish, and add a sprinkle of finely chopped parsley for a burst of vibrant color. These small touches really help to elevate the dish, and make it incredibly visually appealing.

Pairing Suggestions for Beef Cheek Meat

Pairing your beef cheek meat with the correct sides and drinks will greatly enhance the overall dining experience. If you are serving a stew, crusty bread, or a side of roasted vegetables, will work perfectly and offer a wonderful contrast of textures and flavors. Creamy polenta, or risotto, will be a fantastic compliment to the richness of the meat if you are serving a more gourmet style dish. When choosing a drink to serve with your beef cheek meat consider a bold red wine, such as Cabernet Sauvignon or Syrah, as this will pair wonderfully with the deep flavor of the meat. If you are looking for a non-alcoholic option, a rich grape juice, or sparkling water infused with herbs, can offer a wonderfully refreshing touch.

Serving Beef Cheek Meat for Special Occasions

Because it feels indulgent but yet so approachable, beef cheek meat is a fantastic choice for special gatherings and holidays. Serve it as the main course for a dinner party, pairing it with some elegant sides such as truffle mashed potatoes or roasted asparagus. If you want a more casual approach, you could serve beef cheek sliders which are both fun, and packed with flavor. Simply shred the cooked meat, and pile it onto small buns, adding a little dollop of coleslaw for added crunch. Whether your approach is rustic or gourmet, beef cheek meat is sure to bring a touch of sophistication to any meal.

Step 5: Expert Tips, Troubleshooting and Common Mistakes

Common Mistakes to Avoid When Cooking Beef Cheek Meat

Although cooking beef cheek meat can be an incredibly rewarding experience, there are several common mistakes that you should be aware of, as they can negatively affect your results. One very frequent mistake is cooking at a high heat throughout the entire cooking process. Although using a high heat might seem like a good way to save time, it can actually toughen the beef cheek meat rather than breaking down the collagen. So, to ensure that your beef cheek meat becomes wonderfully tender, it is best to always opt for a low and slow method of cooking. Another mistake that people often make is skipping the all important searing step. Searing the beef cheek meat locks in all of the delicious juices, and adds a wonderfully caramelized flavor, which really helps to elevate the overall dish. Even if you are using a slow cooker for your method of cooking, taking the time to sear the beef cheek meat beforehand, will make a noticeable and positive difference. Finally, a common error is to avoid under-seasoning your beef cheek meat. Because this cut is so rich and full of flavor, it actually pairs incredibly well with bold seasonings. So, don’t be afraid to experiment with different herbs and spices to create a dynamic and delicious tasting experience.

Time Saving Hacks When Cooking Beef Cheek Meat

Cooking beef cheek meat can be a fairly time-consuming process, however, there are a number of ways that you can save some time, without sacrificing any quality. For example, if you are short on time you can always trim and marinate your beef cheek meat the night before you want to cook it. Not only will this save time on the day of cooking, but it will also allow the flavors to fully penetrate the meat. Another time saving tip, would be to use a pressure cooker. As discussed earlier, this method will greatly reduce the cooking time, while still allowing you to achieve a tender and flavorful result. If you are hosting a gathering, it is also a good tip to cook the beef cheek meat in advance, and then simply reheat it in its sauce when you are ready to serve, which will really help save time on last-minute preparations.

Tips for Storage and Reheating Beef Cheek Meat

Leftover beef cheek meat in a glass container with reheating tools.
Properly storing beef cheek meat in an airtight container keeps it fresh and flavorful.

If you have any left-over beef cheek meat, it is important that you store and reheat it correctly, to ensure that it is just as delicious as when it was first served. You should always store cooked beef cheek meat in an airtight container, and be sure to store it with its sauce, to help keep it wonderfully moist. If stored correctly in the fridge, left-overs can last up to 3 days, and if you are freezing it you can store it for up to 3 months. When reheating your beef cheek meat, the best method to use is a stovetop. Simply place the meat and the sauce into a covered pan, and heat gently on a low setting, remembering to stir it occasionally, to prevent it from sticking. If possible, you should avoid reheating in the microwave as this can dry out the meat and negatively affect the texture. Gently reheating the meat on the stovetop, will help to preserve the wonderfully tender texture.

Pro Tips to Elevate Your Beef Cheek Meat Dish

For the very best results when cooking beef cheek meat, be sure to use a good quality stock, or wine, as your cooking liquid. The flavors will really concentrate as the beef cheek meat cooks, so using a robust base will ensure you achieve a more delicious final dish. Also, be sure to never discard the liquid once the meat is cooked as it makes an incredible sauce! Simply strain the liquid, reduce it on the stovetop, and then whisk in a small pat of butter, to give you a silky smooth finish. Finally, remember to always rest your beef cheek meat for a few minutes after cooking, as this allows the juices to redistribute through the meat, and ensures that every bite will be as flavorful as it possibly can be.

FAQs

What is beef cheek meat?

Beef cheek meat is a flavorful cut of beef sourced from the cheek muscles of cattle. This cut is known for its high collagen content, which makes it tough when raw but incredibly tender and juicy when cooked slowly. Its rich, meaty flavor makes it a favorite in recipes like braises, stews, and tacos. With proper preparation and slow-cooking techniques, beef cheek meat transforms into a melt-in-your-mouth delicacy that’s perfect for hearty, satisfying meals.

Why is beef cheek so expensive?

Although not as costly as premium cuts like tenderloin or ribeye, beef cheek meat can be relatively expensive due to its limited supply. Each cow only provides a small amount of cheek meat, making it less available compared to larger cuts. Additionally, its popularity among chefs and food enthusiasts for its unique flavor and texture increases demand, contributing to its price. However, its versatility and ability to create gourmet-level dishes often justify the cost.

Is beef cheek meat tough?

Raw beef cheek meat is naturally tough because it comes from a hardworking muscle. However, when cooked using slow, moist-heat methods like braising or slow cooking, its high collagen content breaks down, resulting in an incredibly tender and luscious texture. This transformation makes it ideal for dishes that require long cooking times, such as stews or shredded beef recipes. With the right technique, you’ll achieve a dish that’s far from tough—it’ll be perfectly tender.

Is beef cheek a good cut?

Yes, beef cheek meat is an excellent cut of beef, especially for those who appreciate rich, bold flavors and tender textures. While it requires more preparation and longer cooking times than some other cuts, the payoff is well worth the effort. It’s also highly versatile, lending itself to a wide range of dishes, from rustic stews to gourmet plates. If you’re looking for a cut that’s both affordable and capable of delivering a memorable dining experience, beef cheek meat is a fantastic choice.

Conclusion

Cooking beef cheek meat like a true professional is definitely much easier than you might initially think, and the final results are undeniably worth the small effort that is required. From gaining a full understanding of what makes this incredibly delicious cut so very special, to mastering the various preparation techniques, cooking methods, and all the best serving ideas, you now have all the necessary tools and information you could possibly need to create wonderfully mouthwatering dishes that are sure to impress every single time you cook them. Whether you choose to use the braising method, a slow cooker, or a pressure cooker, the beef cheek meat will reward your patience with unmatched tenderness, and a flavor that is truly unforgettable. Its incredible versatility means that you can enjoy it in many different ways, from hearty comforting stews, to incredibly flavorful tacos, or even as a key component in stunningly beautiful gourmet meals that taste just as good as they look.

10 Tips to Host the Perfect Parrillada Mexicana

Have you ever dreamt of a feast that’s as vibrant and lively as it is delicious? Well, let me tell you, a parrillada mexicana is just that, and moreover, it’s an experience you won’t soon forget! Indeed, imagine sizzling grilled meats, a colorful array of grilled vegetables, and the tantalizing aroma of Mexican marinades filling the air, all while gathered with friends and family. Therefore, this isn’t just about grilling; it’s about creating memories, sharing laughter, and, of course, devouring some seriously mouthwatering food. So, if you’re looking to host an unforgettable Mexican barbecue, complete with all the trimmings, you’ve come to the right place. Because, I’m about to show you my very best tips to make your outdoor cooking experience absolutely incredible. Let’s dive in, shall we?

Getting Ready for Your Mexican Grilling Celebration

First Steps: The Right Charcoal for Your Grill

Planning a fantastic parrillada mexicana begins before the first steak hits the grill. Therefore, one of the most crucial steps is selecting the right fuel. Indeed, high-quality lump charcoal is your best bet for a consistent, smoky heat that infuses your food with that authentic grilled flavor. In addition, steer clear of briquettes, which often contain chemical additives that can impart an undesirable taste.

Meat Selection and the Magic of Marination

Hands marinating meat for parrillada mexicana
Marinating is key to a flavorful parrillada

Now, let’s talk about the star of the show: the meat! For a truly memorable parrillada, it’s great to offer a diverse range of proteins, including carne asadachorizo, and tender chicken. Furthermore, don’t underestimate the power of a good marinade! For example, a citrus-based mix with garlic, cilantro, and achiote paste will not only tenderize the meat but also impart a beautiful depth of flavor. Allow these flavors to meld by marinating for at least 2 hours, or even better, overnight.

Essential Tools for a Smooth Grilling Experience

Moving on, having the right tools at your disposal makes the entire process not only safer but also much more enjoyable. Make sure you have long tongs for safe handling, a sturdy spatula for flipping, a reliable meat thermometer to ensure the meat is cooked to perfection, and a good grill brush for easy cleanup. Moreover, extra platters are a fantastic way to keep your ingredients organized and within easy reach.

The Secret to Flavor: Crafting Authentic Mexican Marinades

Furthermore, the magic of a parrillada mexicana lies within the Mexican marinadesTherefore, preparing your marinades ahead of time, even a day in advance, gives the flavors time to truly come together. To experiment, combine fresh citrus juices, minced garlic, chopped onions, dried chilies, and your favorite herbs for a truly unique flavor profile.

Make Ahead Magic: Preparing Your Salsa Recipes

Also, no parrillada mexicana would be complete without some delicious, homemade salsa recipesTherefore, consider crafting two or three different types, perhaps a classic tomato-based salsa, a fiery option with habaneros, and a creamy fresh avocado salsa, ensuring there is a salsa for everyone.

Choosing the Best Ingredients for Your Parrillada Mexicana

Bringing the Balance: The Best Grilled Vegetables

Assortment of fresh *grilled vegetables
Fresh *grilled vegetables* are a healthy addition to your parrillada

First of all, though meats often take center stage, adding grilled vegetables is vital to a well-rounded and nutritious meal. Therefore, select a colorful mix of fresh and seasonal produce like bell peppers, onions, zucchini, and corn on the cob. In addition, don’t be afraid to try other seasonal veggies for added variety.

A Must-Have: The Importance of Fresh Tortillas

And of course, what’s a parrillada mexicana without some fresh, warm tortillasTherefore, offer both corn and flour tortillas, allowing your guests to choose their preference. Also, consider keeping them warm in a tortilla warmer for the best possible experience.

Seeking Authentic Flavor: Finding Quality Mexican Chorizo

Now, quality Mexican chorizo is key for a truly unforgettable parrillada mexicanaThus, seek out authentic options from your local market for a burst of flavor that will elevate the entire dish. Be sure to look for fresh chorizo, not the cured kind, for best results.

A Staple Dip: Creating the Perfect Guacamole Recipe

Furthermore, every parrillada mexicana needs a creamy, flavorful guacamole recipeThus, use ripe avocados, fresh lime juice, chopped cilantro, and a touch of onion for a simple yet sublime dip. Be sure to season with salt to taste, it will make all the difference.

The Final Touches: Essential Lime Juice and Garnishes

In addition, always have a generous amount of fresh lime juice on hand, essential for both marinades and garnishing your delicious cooked dishes. Therefore, buy fresh limes and squeeze the juice yourself for the best flavor. Additionally, always keep other garnishes like freshly chopped cilantro and diced onions ready to go.

Mastering Outdoor Cooking for an Authentic Mexican Barbecue

Grilling carne asada on a charcoal grill for a parrillada mexicana
The art of searing and slow cooking *grilled meats* for a perfect parrillada.

Achieving Ideal Grill Temperature

First, getting your grill to the perfect temperature is absolutely crucial for even cooking. Therefore, aim for a two-zone fire: a hot zone for searing and a cooler zone for cooking through. Consequently, you will have a consistent grill for different cooking needs.

Grilling Like a Pro: Searing and Slow Cooking Techniques

Moreover, mastering effective grilling techniques is paramount for a perfect parrilladaTherefore, quickly sear your marinated meats over high heat before moving them to the cooler side of the grill. Subsequently, slow cook them to a juicy and tender interior.

Tips for Different Meats

Also, it’s important to know how to grill different types of meat. Therefore, adjust heat and grilling time for each, as carne asada requires a higher heat, while chicken skewers will require less heat and more cooking time.

Simple and Delicious: Grilling Your Vegetables

On the other hand, cooking your grilled vegetables is quite a simple process. Therefore, grill them over medium heat until they are tender and lightly charred, but be sure to add them later in the grilling process since they cook faster than meats.

Grilling Safely

Finally, let’s not forget about safety! Using your grilling tools safely and responsibly will ensure a fun and accident-free outdoor cooking experience. Therefore, use long tongs, heat-resistant gloves, and keep kids and pets at a safe distance while you’re grilling. Also, keep all your ingredients and tools within reach to avoid any unwanted accidents.

Creating an Authentic Mexican Fiesta Atmosphere

Festive Mexican fiesta setting for a parrillada mexicana
A beautifully set up outdoor patio for a joyful parrillada

Setting the Mood with Music and Decorations

Indeed, setting the right ambiance is essential for any Mexican fiestaTherefore, put on some lively Mexican music to get the party started, and consider adding Mexican decorations, such as colorful banners, piñatas, and vibrant serape blankets to create a truly festive environment.

Refreshing Drinks for Your Fiesta

Moreover, serving refreshing beverages is also a key element. Therefore, offer your guests a variety of options, including chilled margaritas, cold beers, and flavored waters. Furthermore, keep lots of ice and garnishes on hand.

Creating a Functional and Festive Outdoor Patio

In addition, setting up your outdoor patio with both function and style in mind will make all the difference. Therefore, ensure that there is enough seating and tables for everyone. Also, consider using colorful tablecloths to match your vibrant Mexican fiesta theme.

Fun and Games

And last but not least, interactive games and activities will take your parrillada mexicana to the next level. Therefore, setting up a fun game like a piñata or a bean bag toss to keep the playful spirit of your Mexican fiesta high. Also, consider having a lively music playlist for everyone to dance to.

A Warm and Inviting Ambiance

Finally, making sure you create a warm and inviting atmosphere is the key for an unforgettable Mexican fiestaTherefore, be the gracious and friendly host, add touches such as fresh flowers, and consider string lights to elevate the party ambiance.

Serving and Enjoying Your Delicious parrillada mexicana

Arranging Your Parrillada Platter

To start, arranging your parrillada mexicana platter in an attractive and enticing manner is also important. Therefore, consider showcasing your grilled meats, vegetables, and garnishes artfully on a large serving platter. Also, be sure to have plenty of tortillas and your delicious salsa recipes readily available.

Choosing Your Serving Style

In addition, choosing the best serving style for your gathering can also enhance the user experience. Therefore, consider whether you are having a buffet or if you will create individual plates. Also, always have serving utensils for all of your dishes.

Taking Flavors to the Next Level: Sauces and Dips

Furthermore, having a variety of sauces and dips can take your parrillada mexicana to the next level. Therefore, be sure to serve your homemade salsa recipesguacamole, and other toppings in separate bowls. In addition, be sure to have extra flavors like sour cream and pickled onions available.

Setting up a Tortilla Station

Additionally, setting up a designated tortilla station will make serving smoother and more organized. Therefore, keep warm tortillas in a warmer with tongs available. Also, consider setting up a toppings station right next to it.

Easy Cleanup Tips

Finally, planning for an easy cleanup will ensure you can relax and enjoy the party. Therefore, have trash and recycling bins within easy reach. Also, using disposable plates and cups will help simplify the post-party cleanup process.

FAQs about Parrillada Mexicana

Q1: What Exactly is a Parrillada Mexicana?

A: A parrillada mexicana is a traditional Mexican barbecue, often a large social gathering where friends and family come together to enjoy delicious food grilled over charcoal.

Q2: What’s the Best Way to Cook a Parrillada?

A: Cooking a parrillada involves using a charcoal grill, a variety of marinated meats, and an assortment of vegetables. The key is grilling everything to perfection while keeping the flavor authentic, and serving them hot to your guests.

Q3: What’s the Real Purpose of a Parrillada?

A: Parrilladas are more than just a meal; they’re a social event, a celebration of food, family, and community, where good company, laughter, and delicious food come together for a truly memorable event.

Q4: What Kind of Food is Normally Served at a Parrillada?

A: You’ll typically find a mouthwatering mix of grilled meats, such as carne asadachorizo, and chicken. Alsogrilled vegetables, various salsa recipes, creamy guacamole, warm tortillas, and refreshing drinks are also a must.

Conclusion

Hosting the perfect parrillada mexicana is about more than just cooking great food; it’s about creating a complete and memorable experience. Therefore, by following these 10 simple tips, you’ll be on the right path for a truly fun, flavorful, and unforgettable event for your loved ones. Indeed, from planning your menu and crafting those Mexican marinades to setting a vibrant and festive atmosphere, every aspect contributes to a successful Mexican fiesta. So, gather your friends and family, ignite that grill, and get ready to enjoy all the delicious flavors and joy of an authentic parrillada!

Classic Cowboy Casserole: An Easy Family Dinner

Introduction to Cowboy Casserole

When life gets busy, and you’re craving something warm and comforting, cowboy casserole steps in as the perfect solution. This classic dish is a blend of simplicity, hearty flavors, and customizable ingredients that make it a favorite among families. Whether you’re whipping it up for a quick weeknight dinner or preparing for a cozy weekend meal, this casserole has everything you need to satisfy hungry appetites.

Cowboy casserole is a one-pan wonder, combining tender ground beef, creamy sauces, and colorful vegetables, all topped with golden, crispy tater tots. Its appeal lies in its versatility you can adjust the recipe to match your family’s preferences or what you have in your pantry. For instance, if you prefer a spicier kick, you can easily add diced jalapeños or a pinch of chili powder. On the other hand, a milder version with simple seasoning and classic ingredients works just as well.

This dish isn’t just about convenience it’s also about bringing people together. Casseroles like this one have been staples in home kitchens for decades, providing a sense of nostalgia and comfort. If you’re a fan of hearty dishes like shepherd’s pie or tater tot casserole, you’ll appreciate the unique twist cowboy casserole brings to the table.

Why Choose Cowboy Casserole?

There are plenty of reasons to love this recipe:

  1. Easy to Make: With simple steps and common ingredients, it’s perfect even for beginner cooks.
  2. Family-Friendly: Its mild, savory flavors appeal to both kids and adults.
  3. Customizable: You can swap out ingredients to suit your tastes or dietary needs.
  4. Budget-Friendly: Most components are affordable and likely already in your kitchen.

In addition, cowboy casserole is incredibly forgiving. If you’re short on one ingredient, there’s almost always an alternative that works just as well. For example, if you’re out of tater tots, you can use hash browns or sliced potatoes instead.

A Recipe Rooted in Tradition

The origins of cowboy casserole are inspired by the hearty meals of the American West, where simplicity and sustenance were key. While the dish has evolved over time, its roots remain in creating a flavorful, filling meal that’s easy to prepare. Today, it’s a staple in many households, offering a nostalgic nod to comfort food while embracing modern conveniences.

This casserole is more than just a recipe; it’s an opportunity to get creative in the kitchen and enjoy a dish that feels like home. Ready to get started? Let’s dive into the ingredients and how they come together to create this delicious meal.

Core Ingredients and Their Roles

Ingredients for cowboy casserole laid out on a wooden table.
Essential ingredients for a hearty cowboy casserole, ready to prepare.

The success of a cowboy casserole lies in its simple yet flavorful ingredients. Each component plays an essential role, coming together to create a dish that’s comforting, hearty, and downright irresistible. Let’s explore the key ingredients and why they’re crucial to this recipe.

1. Meat: The Hearty Foundation

Ground beef is the traditional protein in cowboy casserole, providing a savory and rich base. Its robust flavor complements the creamy and cheesy elements perfectly.

  • Why Ground Beef?
    Ground beef is not only flavorful but also easy to cook and budget-friendly. Its natural fats add depth to the dish, ensuring a satisfying bite in every forkful.
  • Substitutions to Consider
    If ground beef isn’t your preference, there are plenty of alternatives:
    • Ground Turkey or Chicken: These are leaner options that still offer a tasty foundation.
    • Plant-Based Meat: Ideal for vegetarians, these substitutes mimic the texture and flavor of ground beef.
    • Sautéed Mushrooms: A vegetarian-friendly choice that brings an earthy richness to the casserole.

2. Vegetables: Adding Flavor and Nutrition

Vegetables in this recipe don’t just add color; they bring vital nutrients and textures that balance the richness of the meat and sauce.

  • Essential Vegetables
    • Onions: Sautéed onions lay the flavor groundwork, enhancing the savory profile of the casserole.
    • Corn: A touch of sweetness from canned or frozen corn contrasts beautifully with the savory elements.
  • Optional Additions
    Feel free to get creative with your vegetables. Some great options include:
    • Frozen or Canned Veggies: Green beans, peas, or carrots.
    • Fresh Produce: Spinach, zucchini, or diced bell peppers for a vibrant twist.
  • Pro Tip: If using frozen vegetables, thaw and drain them to prevent excess liquid from making the casserole soggy.

3. Sauce and Creamy Component

The sauce is the glue that binds all the flavors together, making every bite creamy and indulgent.

  • Condensed Soups
    • Cream of Mushroom Soup: A classic choice, it provides a savory and slightly earthy flavor.
    • Alternatives: Cream of chicken or cream of celery soup works well, depending on your taste.
  • Dairy Additions
    • Sour cream or yogurt enhances the creaminess while adding a tangy note.
    • Milk or half-and-half helps achieve the desired consistency.
  • Homemade Option
    For those who prefer to skip the canned soups, a homemade sauce made with butter, flour, milk, and parmesan is an excellent substitute.

4. Cheese: The Flavor Booster

No casserole is complete without cheese, and cowboy casserole is no exception.

  • Primary Choice
    • Cheddar cheese adds sharpness and creaminess, melting beautifully into the layers.
  • Creative Variations
    • Mozzarella for a gooey texture.
    • Monterey Jack for a mild, creamy flavor.
    • Parmesan for a salty, nutty finish.

Pro Tip: Layer some cheese between the filling and tater tots for extra flavor in every bite.

5. Tater Tot Topping: The Crispy Crown

The golden, crispy tater tots are what make cowboy casserole stand out from other dishes.

  • Why Tater Tots?
    They create a crunchy contrast to the creamy filling, making the dish more satisfying.
  • Substitutes for Tater Tots
    • Hash browns, sliced potatoes, or even mashed potatoes can work in a pinch.
    • Cornbread or biscuit dough offers a fun, alternative topping for a unique spin.

6. Flavor Boosters and Add-Ins

Adding a few extras can elevate your cowboy casserole to new heights.

  • Seasonings
    Onion powder, garlic powder, black pepper, and paprika are essentials. For more depth, try taco seasoning, ranch mix, or chili powder.
  • Optional Garnishes
    • Crispy bacon bits for smoky flavor.
    • Fresh chives or parsley for a pop of color and freshness.
    • Jalapeños or green chilies for a hint of spice.

With these ingredients and their variations, you have endless possibilities to customize your cowboy casserole while ensuring it remains a crowd-pleaser. In the next section, we’ll walk through the cooking process, step-by-step, to bring all these flavors together seamlessly.

Step-by-Step Cooking Instructions

Ground beef and onions sautéing in a skillet with a wooden spoon.
Step 2: Sauté ground beef and onions, creating the flavorful base for the casserole

Making cowboy casserole is a straightforward process, but with a few helpful tips, you’ll get the perfect balance of creamy, cheesy filling and crispy, golden topping. Follow these simple steps to create a dish that’s sure to impress.

1. Preparation

Preparation is key to ensuring your cooking process is smooth and stress-free.

  1. Preheat the Oven
    Begin by preheating your oven to 375°F (190°C). A properly heated oven ensures the casserole bakes evenly and the tater tots crisp up perfectly.
  2. Prepare the Ingredients
    • Thaw your tater tots slightly if they’re frozen; this helps them cook evenly.
    • Dice your onions, measure out your seasonings, and shred the cheese ahead of time.
  3. Optional Bacon Prep
    If you’re adding bacon for extra flavor, cook it until crispy, then crumble it into small pieces. Save some of the rendered fat for sautéing the onions for added depth.

Pro Tip: Organizing your ingredients before cooking not only saves time but also prevents the stress of searching for items mid-recipe.

2. Cook the Meat

The base of any good cowboy casserole starts with perfectly browned meat.

  1. Heat the Skillet
    Place a large skillet over medium heat. Add a drizzle of oil or a bit of bacon fat for added flavor.
  2. Brown the Ground Meat
    Add the ground beef (or your chosen protein) and cook until fully browned, breaking it apart with a wooden spoon as it cooks. This step ensures even cooking and a crumbly texture.
  3. Sauté Aromatics
    Toss in the diced onions and minced garlic. Cook until the onions are translucent and the garlic is fragrant—this usually takes about 2-3 minutes.

Note: If there’s excess grease in the skillet, drain it carefully to avoid a greasy filling.

3. Combine the Filling

This step ties together the rich flavors of your casserole.

  1. Add the Creamy Components
    Stir in the cream of mushroom soup, sour cream (or yogurt), and milk. Mix thoroughly to create a smooth, creamy base.
  2. Season Generously
    Add salt, pepper, and your chosen seasonings (paprika, chili powder, or ranch seasoning). Taste as you go to adjust the flavor to your liking.
  3. Incorporate Vegetables
    Fold in the corn, peas, or any other vegetables you’re using. This not only adds a pop of color but also balances the richness of the dish.
  4. Optional Cheese Layer
    Stir half of the shredded cheese into the filling for an extra burst of flavor in every bite.

Pro Tip: For a spicier kick, add diced jalapeños or green chilies at this stage.

4. Assemble the Casserole

Cowboy casserole pre-baked with creamy filling, cheese, and arranged tater tots.
The casserole is ready for the oven, with creamy filling and neatly arranged tater tots.

Now it’s time to bring everything together in your baking dish.

  1. Layer the Filling
    Spread the meat and vegetable mixture evenly across the bottom of a 9×13 baking dish.
  2. Add the Cheese
    Sprinkle a generous layer of cheese over the filling. This ensures every bite is cheesy and satisfying.
  3. Arrange the Tater Tots
    Place the tater tots on top in a single, even layer. For the best presentation, arrange them neatly in rows, but you can also scatter them for a rustic look.

Pro Tip: Use slightly thawed tater tots to achieve maximum crispiness during baking.

5. Bake and Finish

The final step is where all the magic happens!

  1. Bake the Casserole
    Place the baking dish in the preheated oven and bake for 30-45 minutes. You’ll know it’s ready when the tater tots are golden brown and the filling is bubbling around the edges.
  2. Broil for Extra Crispiness
    If you prefer an extra-crispy topping, turn on the broiler for the last 3-5 minutes. However, keep a close eye to avoid burning.
  3. Rest and Garnish
    Allow the casserole to rest for about 5 minutes before serving. This helps the filling set and makes it easier to scoop. Garnish with fresh chives, parsley, or crumbled bacon for a finishing touch.

Enjoy Your Homemade Cowboy Casserole!
You’ve just created a comforting, crowd-pleasing dish that’s perfect for any occasion, Now we’ll explore variations and adaptations to make this recipe even more versatile.

Cooking Variations and Adaptations

One of the best things about cowboy casserole is its versatility. You can tweak the recipe to suit different tastes, dietary needs, or available ingredients. Whether you’re looking to make it healthier, spicier, or more convenient, there’s an option for everyone. Let’s explore some creative ways to adapt this dish.

1. Slow Cooker Cowboy Casserole

If you prefer a hands-off approach, the slow cooker is your best friend.

  • How to Adapt:
    • Layer the ingredients in the slow cooker, starting with the meat mixture, followed by cheese and tater tots.
    • Cook on low for 5-6 hours or high for 2-3 hours, until the filling is bubbling and the tater tots are golden.
    • To achieve a crispier topping, transfer the casserole to an oven-safe dish and broil it for a few minutes after slow cooking.
  • Why Choose This Method?
    A slow cooker allows the flavors to meld beautifully, and it’s perfect if you need to prep the meal ahead of time.

2. Make-Ahead and Freezing Options

Planning meals in advance? This casserole is a great candidate for meal prep.

  • Make-Ahead Instructions:
    • Assemble the casserole as directed but don’t bake it.
    • Cover the dish tightly with plastic wrap and aluminum foil, then store it in the refrigerator for up to 24 hours.
  • Freezing the Casserole:
    • Assemble the casserole in a freezer-safe dish, wrap it securely, and freeze for up to 3 months.
    • Thaw in the refrigerator overnight before baking, or bake directly from frozen, adding extra time to the cooking process.
  • Pro Tip: Label the dish with the date and baking instructions to make it easy to prepare later.

3. Healthy Swaps and Modifications

If you want a lighter version of cowboy casserole, there are simple adjustments you can make without sacrificing flavor.

  • Lean Proteins: Use ground turkey or chicken instead of beef.
  • Low-Fat Dairy: Opt for low-fat sour cream, cheese, and milk to reduce calories.
  • More Veggies: Replace some of the tater tots with a layer of thinly sliced zucchini or sweet potatoes for added nutrition.
  • Homemade Sauce: Skip the condensed soups and make a lighter, homemade sauce using unsweetened almond milk and flour.

These substitutions ensure the dish remains flavorful while catering to a healthier lifestyle.

Looking for more quick and easy dinner options? Check out these Easy Dinner Ideas for Two.

4. Adding a Spicy Twist

If you love bold flavors, there are plenty of ways to turn up the heat.

  • Spicy Ingredients:
    • Add diced jalapeños or green chilies to the meat mixture.
    • Sprinkle cayenne pepper or crushed red pepper flakes into the seasoning mix.
    • Drizzle hot sauce over the casserole before serving.
  • Cheese with a Kick: Use pepper jack or habanero cheddar cheese for a fiery twist.

This variation is perfect for those who enjoy a little spice with their comfort food.

5. Topping Alternatives

Tater tots are iconic, but there are other options if you’re looking to switch things up.

  • Hash Browns: Shredded or diced hash browns offer a similar crispy topping.
  • Mashed Potatoes: Spread a layer of creamy mashed potatoes over the filling for a shepherd’s pie vibe.
  • Cornbread: Top the casserole with a layer of cornbread batter for a sweet and savory combination.
  • Biscuits: Use canned or homemade biscuit dough for a fun, flaky topping.

Each topping brings a unique texture and flavor, allowing you to personalize the dish even further.

Why Customize Your Cowboy Casserole?

Adapting recipes to your needs not only makes cooking more enjoyable but also ensures the meal feels personal and exciting. Whether you’re meal prepping, exploring new flavors, or catering to dietary preferences, these variations make cowboy casserole a versatile, go-to dish for any occasion.

Serving and Storage Tips

Once your cowboy casserole is baked to golden perfection, the next step is serving it in a way that enhances its flavors and ensures everyone enjoys a delicious, satisfying meal. Additionally, knowing how to store and reheat leftovers can make your life easier and your dish even more versatile.

1. Serving Suggestions

Cowboy casserole is a hearty dish that pairs well with a variety of sides to create a well-rounded meal.

A portion of cowboy casserole served with parsley garnish.
A warm and inviting serving of cowboy casserole, perfect for dinner.
  • Classic Pairings:
    • A simple green salad with a tangy vinaigrette provides a refreshing contrast to the casserole’s richness.
    • Steamed or roasted vegetables, such as broccoli or carrots, add color and nutrients to the plate.
    • Buttery dinner rolls or garlic bread are perfect for soaking up every bit of the creamy filling.
  • Garnish for Extra Flavor:
    • Sprinkle fresh herbs like chives, parsley, or cilantro over the casserole just before serving for a pop of freshness.
    • Add a dollop of sour cream or a drizzle of hot sauce for those who like a bit of tang or spice.

Pro Tip: Serve the casserole directly from the baking dish to keep it warm and minimize cleanup. Using a cast-iron skillet can also double as a serving dish for a rustic presentation.

Pair your cowboy casserole with a classic side like this Old-Fashioned Baked Macaroni and Cheese for a truly comforting meal.

2. Storing Leftovers

If you’re lucky enough to have leftovers, cowboy casserole stores beautifully, making it an ideal meal for the days ahead.

  • Refrigeration:
    • Transfer the casserole to an airtight container or cover the baking dish tightly with foil or plastic wrap.
    • Store in the refrigerator for up to 3-4 days.
  • Freezing for Later:
    • Divide the leftovers into individual portions and store them in freezer-safe containers or resealable bags.
    • Label each container with the date for easy reference.
    • Freeze for up to 3 months without compromising on flavor or texture.

Pro Tip: To prevent freezer burn, make sure there’s minimal air in the containers or bags before sealing.

3. Reheating Tips

Proper reheating ensures that your casserole retains its creamy texture and crispy topping.

  • In the Oven:
    • Preheat your oven to 350°F (175°C).
    • Place the casserole in an oven-safe dish, cover with foil to prevent drying out, and heat for 20-25 minutes, or until warmed through.
    • For crispy tater tots, remove the foil during the last 5 minutes of reheating.
  • In the Microwave:
    • For smaller portions, transfer to a microwave-safe plate and cover lightly with a damp paper towel.
    • Heat on medium power for 2-3 minutes, checking and stirring halfway to ensure even heating.
  • Directly from Frozen:
    • If reheating from frozen, bake in the oven at 375°F (190°C) for about 50-60 minutes, covering with foil for the first half of the time.

Pro Tip: Add a small splash of milk or cream to the filling before reheating to keep it moist and creamy.

Why Proper Storage and Reheating Matter

Taking the time to store and reheat your casserole correctly not only saves time but also preserves the flavors and textures that make this dish so special. By following these tips, you can enjoy cowboy casserole fresh from the oven or as a delicious leftover meal that tastes just as good as the first day.

Next, let’s address some common questions about this dish to help you troubleshoot or customize your casserole even further.

FAQs About Cowboy Casserole

To ensure your cowboy casserole turns out perfect every time, here are answers to some commonly asked questions. Whether you’re a first-time cook or a seasoned pro, these tips and clarifications will help you make the most of this comforting dish.

1. Can I make cowboy casserole vegetarian?

Yes! Cowboy casserole is highly adaptable for vegetarians.

  • Meat Substitutes: Use plant-based ground meat, crumbled tofu, or sautéed mushrooms to replace the ground beef.
  • Add Protein: Incorporate beans such as black beans, kidney beans, or lentils for an extra protein boost.
  • Use Vegetable Broth: If making a homemade sauce, substitute chicken or beef broth with vegetable broth.

This variation maintains the hearty, satisfying qualities of the dish while catering to a vegetarian diet.

2. How do I make the tater tots extra crispy?

Achieving a perfectly crispy topping is easier than you think!

  • Thaw the Tater Tots: Allow them to thaw slightly before baking. This helps them crisp up faster in the oven.
  • Use a Hot Oven: Baking at 375°F (190°C) or even 400°F (204°C) ensures the tater tots become golden and crunchy.
  • Broil at the End: For the ultimate crispness, broil the casserole for 3-5 minutes once it’s fully cooked. However, watch closely to prevent burning.

3. Can I add extra heat to my casserole?

Absolutely! Adding spice is an excellent way to customize the flavor profile.

  • Spicy Ingredients: Diced jalapeños, green chilies, or even a splash of hot sauce can be mixed into the filling.
  • Seasoning Options: Chili powder, cayenne pepper, or a pinch of crushed red pepper flakes will add a subtle heat.
  • Cheese with a Kick: Use pepper jack or a spicy cheddar cheese to infuse some spice.

Adjust the spice level to suit your taste, ensuring it remains enjoyable for everyone at the table.

4. How far in advance can I prepare cowboy casserole?

You can make the casserole ahead of time, making it a convenient option for busy schedules.

  • Assemble Ahead: Prepare the casserole and refrigerate it (unbaked) for up to 24 hours. Cover tightly with plastic wrap or aluminum foil to keep it fresh.
  • Freeze for Later: Assemble the dish and freeze it for up to 3 months. Thaw overnight in the fridge before baking or bake directly from frozen, adding additional cooking time.

These options are perfect for meal prepping or hosting gatherings without last-minute stress.

5. What are some alternative toppings for cowboy casserole?

While tater tots are a classic choice, there are plenty of delicious alternatives.

  • Hash Browns: Use shredded or diced hash browns for a similar crispy texture.
  • Mashed Potatoes: Spread a layer of creamy mashed potatoes for a shepherd’s pie-inspired twist.
  • Cornbread: A layer of cornbread batter adds a sweet and savory element.
  • Biscuits: Use canned or homemade biscuit dough for a flaky topping.

These variations allow you to tailor the dish to different preferences while keeping its comfort-food charm.

6. How long does cowboy casserole take to bake?

Typically, the casserole takes about 30-45 minutes to bake at 375°F (190°C).

  • When It’s Ready: The filling should be bubbling, and the tater tots should be golden brown.
  • For Crispy Topping: You can broil the dish for a few minutes at the end for an extra crunch.

If baking from frozen, extend the cooking time by 15-20 minutes, checking periodically for doneness.

7. Can I customize the vegetables in the casserole?

Yes, the vegetables are one of the most flexible parts of this recipe.

  • Classic Choices: Onions and corn are staples.
  • Additional Options: Peas, carrots, green beans, zucchini, or bell peppers work well.
  • Fresh vs. Frozen: Fresh veggies add a bright flavor, while frozen options are convenient and work just as well.

Mix and match based on your preferences or what’s in your pantry to make the casserole your own.

8. How should I serve cowboy casserole at a party or potluck?

Cowboy casserole is a crowd-pleaser, making it an excellent choice for gatherings.

  • Use a Cast-Iron Skillet: This keeps the casserole warm and looks great on the table.
  • Add Garnishes: Sprinkle fresh herbs, crumbled bacon, or shredded cheese on top just before serving for a polished presentation.
  • Pair with Sides: Serve with a side salad, bread rolls, or steamed veggies to complete the meal.

Conclusion

Cowboy casserole is the ultimate comfort food, a dish that’s hearty, versatile, and loved by all. Its combination of creamy filling, crispy tater tots, and cheesy goodness makes it perfect for weeknight dinners, potlucks, or any time you need a satisfying meal. Whether you stick to the classic recipe or customize it with your favorite ingredients, this casserole is sure to become a staple in your kitchen.

We’d love to hear how your cowboy casserole turned out! Share your thoughts, variations, or favorite toppings in the comments below. And don’t forget to explore other casserole recipes for even more cozy meal inspiration.

The Ultimate Guide to Yukon Gold Potatoes

Have you ever wondered why some mashed potatoes taste so creamy and flavorful without needing loads of extra butter? Yukon Gold potatoes may be the secret. In this guide, you will learn about their history, best cooking methods, and why they are prized by cooks everywhere. Moreover, you will discover an easy recipe for silky mashed potatoes that will impress your family and friends. Let’s dive in!

Why Yukon Gold potatoes Deserve the Spotlight

Have you ever bitten into a potato dish that practically melted in your mouth, leaving a slightly sweet and buttery impression behind? If so, there is a good chance it featured the famed Yukon Gold variety. While it is easy to think of potatoes as a simple staple, these spuds have many nuances. Thus, understanding why they shine can help you elevate your cooking game, no matter your level of expertise.

Yukon Gold potatoes, in particular, have a reputation for being one of the most flavorful, visually appealing, and adaptable varieties available. On the one hand, many conventional potatoes require heavy seasoning to bring out their best side. On the other hand, Yukon Golds already have a nuanced taste that requires minimal enhancement. However, you can still jazz them up with herbs, cheeses, or sauces for an elevated meal.

What Are Yukon Gold Potatoes?

History and Origins of Yukon Gold potatoes

The story of this golden-fleshed variety begins in Ontario, Canada. In the 1960s, agricultural scientists set out to develop a new type of potato that combined the best traits of both wild South American yellow potatoes and North American white potatoes. Their goal was to create a high-yielding, disease-resistant cultivar with a distinctive color and taste. After years of careful cross-breeding and testing, Yukon Gold potatoes were finally introduced to the market.

They are now widely grown in multiple regions, including Idaho in the United States. In fact, because they quickly gained popularity, you will frequently find them at local supermarkets, farmers’ markets, and even in the gardens of avid home growers who appreciate how relatively straightforward these potatoes can be to cultivate. Meanwhile, the shorter harvest window from around August to February makes them slightly more seasonal compared to other varieties that may be available year-round. However, this timing adds to their allure, encouraging many people to look forward to the period when Yukon Golds are at peak freshness.

Defining Characteristics

Close-up of raw Yukon Gold potatoes with rosy pink eyes
Notice the rosy pink eyes and vibrant yellow skin of these Yukon Golds.

Appearance

One of the first things you will notice about Yukon Gold potatoes is their thin, smooth skin. While some potatoes have robust, thick exteriors, these golden beauties have a more delicate surface. Their skin often has subtle rosy pink eyes, giving them a distinctive look that stands out from the moment you spot them in the produce aisle. Beneath that thin skin lies vibrant yellow flesh, which is a strong visual indicator of their naturally buttery taste.

Texture

Yukon Golds are frequently described as possessing a texture that sits halfway between the dryness of a starchy Russet and the firm, waxy nature of red potatoes. In other words, they strike the perfect balance. Thus, you can count on them to hold their shape in stews or braises without falling apart, while still offering a creamy consistency when mashed. This versatility is one of their primary selling points.

Natural Flavor

Another distinctive trait is the noticeable buttery sweetness that comes through, even before you add any seasoning. Therefore, a simple preparation—like roasting or boiling—often yields a delicious outcome without the need for heavy sauce or added fats. Nevertheless, people who enjoy customizing flavors with extra herbs, garlic, or cheeses will find that Yukon Golds serve as a delightful canvas for various culinary experiments.

Seasonal Availability and Cost

You can usually find these potatoes from late summer through winter. However, keep in mind that availability can vary by region, and some grocers maintain stocks all year. Because they are in high demand and have a slightly shorter harvest season, Yukon Golds often cost a bit more than typical white or red potatoes. Yet, they usually remain less expensive than specialty varieties like fingerlings or certain heirloom types. If you are on a tight budget, watch for seasonal sales or consider growing your own if you have access to a garden plot.

Why Choose These Yukon Gold potatoes?

Balance of Starch and Moisture

Yukon Gold potatoes offer a medium starch content, which is crucial for achieving a texture that is not too mealy yet not overly firm. In contrast, Russets contain higher starch levels, which gives them that fluffy quality many people enjoy in baked potatoes. On the other hand, red potatoes have a waxier, firmer feel. Meanwhile, Yukon Golds land comfortably in the middle, ensuring they can be used in an incredible array of recipes.

Because they have more moisture than Russets, Yukon Golds do not dry out as easily when baked or roasted. Therefore, you can slice or dice them for soups and stews, confident that they will maintain their structure. They also make exceptionally creamy mashed potatoes, which we will discuss in more detail later.

Naturally Buttery Taste

One of the prime reasons people gravitate to Yukon Golds is their buttery flavor, which is slightly sweet. This subtle sweetness interacts beautifully with savory ingredients like garlic, onions, and herbs. Thus, it is no wonder professional chefs often showcase them in dishes where the potato is meant to shine, such as pommes purée (a silky, French-style mashed potato) or a rustic potato soup where flavor depth is essential.

In addition, the golden color plays a psychological role by reinforcing that impression of creaminess and richness, even before you take a bite. On the other hand, white potatoes may lack that visual cue and can appear more neutral in presentation.

Versatility in the Kitchen

A big advantage of these tubers is their ability to adapt to different cooking methods:

  • Roasting: Thanks to their light skin, you can roast them with olive oil, salt, pepper, and maybe some rosemary to create a side dish that is crispy on the outside yet soft on the inside.
  • Mashing: Their moderate starch content ensures a creamy consistency without turning gummy, which is a risk if you use ultra-starchy varieties and over-mix them.
  • Stews and Soups: Because they hold up without disintegrating, Yukon Golds are excellent for simmering over longer periods in broths or sauces.
  • Steaming: This method helps them stay moist and flavorful while retaining more nutrients than boiling might.

However, they are not ideal for making French fries. Since these golden spuds carry more water than some varieties, achieving that crisp exterior can be trickier without specific techniques. Nevertheless, they excel in almost every other cooking method you can think of.

Where to Buy and How to Store Yukon Gold potatoes

Where to Purchase

Yukon Golds are fairly common, so you will likely find them in large grocery stores, specialty supermarkets, health food stores, and even online retailers. Look for labels or signage that specifically read “Yukon Gold” or identify them by their distinctive yellow flesh. Furthermore, you can sometimes purchase them in bulk bins if you only need a few. Alternatively, they are sold in 5- or 10-pound bags that are perfect if you plan to cook multiple potato-centric meals in a week.

In addition, farmers’ markets often have fresh, locally grown Yukon Golds when they are in season, which can provide an even more flavorful product. If you are the gardening type, you might consider buying seed potatoes and planting them in your backyard. Growing your own can be rewarding, but it does require proper soil, space, and diligence in pest management.

Selecting Quality Potatoes

When choosing your potatoes, inspect them carefully for any signs of damage. Therefore, avoid those with bruises, cuts, or soft spots. Additionally, watch out for any greenish hue, which indicates the presence of solanine—a substance that can impart bitterness and cause discomfort if consumed in large quantities. A few small green patches can be trimmed away, but if half the potato is green, you are better off discarding it.

Storing Your Yukon Gold potatoes

Proper storage helps ensure your potatoes remain fresh and flavorful. Since Yukon Golds have a slightly higher sugar content than some other varieties, they can start to turn sweet or grow sprout eyes if kept in poor conditions.

  • Cool, Dark Place: Aim for a temperature range of 40 to 50°F. Storing them in a paper or perforated plastic bag allows for airflow and prevents moisture buildup.
  • Avoid Light: Exposure to sunlight triggers the production of solanine, turning potatoes green and causing a bitter taste. Keep them in a cupboard, pantry, or refrigerator crisper.
  • Keep Away from Onions: Onions and potatoes release gases that can accelerate spoilage when they are placed together.
  • Use Within Several Weeks: Yukon Golds do not last quite as long as Russets, so plan your meals accordingly.

Cooking Methods and Best Practices

Preparation Tips

Before you start cooking, give the potatoes a light scrub to remove any lingering dirt. However, do not wash them far in advance, as moisture can lead to premature sprouting or rot during storage. The thin skin means you can opt to peel them for a more refined texture or leave the peels on for extra fiber and nutrients. In addition, consider cutting them into uniform pieces. This consistency ensures even cooking whether you are steaming, boiling, or roasting.

Ideal Cooking Approaches

Steaming Yukon Gold potato chunks in a kitchen pot
Steaming is an excellent method to retain flavor and nutrients.
  1. Steaming: Steaming is a gentle way to cook the potatoes without submerging them in water. Therefore, they retain more minerals and vitamins, not to mention a more intense flavor.
  2. Boiling: If a steamer is not available, boiling Yukon Golds in salted water is an excellent fallback. Just be sure not to overboil them or they may become waterlogged, diluting that subtle sweetness.
  3. Baking: Consider baking your potatoes if you want a hands-off approach. Brush them with a little oil, prick with a fork, and pop them in the oven. The thin skin becomes slightly crispy, but not as thick as a typical Russet’s.
  4. Roasting: Toss cubes or wedges of these spuds with olive oil, herbs, salt, and pepper, then roast at around 400 to 425°F. Their natural sugars caramelize at the edges, resulting in a deliciously crisp outer layer and a creamy interior.
  5. In Soups and Stews: Yukon Golds shine in slow-cooked dishes because they do not break down rapidly. Whether you are preparing a hearty beef stew or a vegetarian chowder, they will hold their shape yet remain tender.

Texture and Flavor Insights

Thanks to their moderate starch content and higher moisture, Yukon Golds often require less added cream or butter compared to drier varieties. In addition, their sweet, vegetal notes form a beautiful partnership with aromatic herbs like rosemary, thyme, or chives. On the other hand, if you prefer a smoky flavor, consider adding bacon bits or smoked paprika, which can accentuate their natural richness.

Mashed Potatoes: A Buttery Recipe to Try

Creamy mashed Yukon Gold potatoes garnished with butter and chives
Rich and velvety mashed Yukon Golds, perfect for any meal.

Now that we have explored why these spuds are so special, let us dive into a recipe that showcases them in one of the most comforting forms: mashed potatoes.

Ingredients

  • 2 pounds of Yukon Gold potatoes, peeled or unpeeled, cut into 1-inch chunks
  • 3 tablespoons of butter (salted or unsalted)
  • 2 cloves garlic, minced (or 1 tablespoon of roasted garlic for a sweeter note)
  • ½ cup heavy cream (you can also use half-and-half or whole milk)
  • 1 teaspoon fine sea salt (plus additional to taste)
  • Chopped chives (optional garnish)

Tip: If you want a tangy twist, keep some sour cream on hand. Meanwhile, roasted garlic can add a sweet, complex flavor that elevates the dish even further.

Step-by-Step Instructions

  1. Steam the Potatoes
    Place the potato chunks in a steamer basket over boiling water. Cover and steam for about 15 to 20 minutes. Test a piece with a fork—it should slide in easily. If you prefer boiling, place the chunks in lightly salted water and cook for the same duration, being careful not to overdo it.
  2. Heat Butter and Garlic
    Meanwhile, melt the butter in a small saucepan over low heat. Therefore, add the minced garlic and stir gently for about 1 minute or until fragrant. Avoid browning the garlic, as it can turn bitter.
  3. Add Cream
    Stir in the heavy cream (or your chosen dairy) along with the salt. Let the mixture warm through, but do not allow it to boil. This step helps ensure that you are not shocking the potatoes with cold ingredients later.
  4. Mash or Rice
    Drain the potatoes (if you boiled them) or remove the steamer basket. Transfer the hot chunks to a large bowl. Consequently, use a ricer or food mill for the smoothest, most luxurious texture. If you prefer a more rustic style, grab a hand masher and go to town. However, do not use a blender or food processor, as that can make the potatoes gummy.
  5. Combine and Garnish
    Slowly pour in the warm butter-cream mixture, stirring gently until everything is well combined. Taste to check if you need more salt. Finally, top with fresh chives if you want a pop of color and mild onion-like flavor. Serve immediately, or keep them warm in a covered dish until mealtime.

Helpful Tips and Variations

  • Avoid Overworking: It is crucial not to mix the potatoes too aggressively, which can release extra starch and yield a gluey texture.
  • Roasted Garlic Variation: If you have a bit of extra time, wrap a head of garlic in foil with a drizzle of oil, roast at 400°F for about 30 to 40 minutes, and squeeze the softened cloves into your mashed potatoes. Consequently, it adds a sweet complexity that raw garlic cannot match.
  • Make-Ahead Option: Mashed potatoes can be prepared up to two days in advance. Cool them, cover them tightly, and store them in the refrigerator. Reheat gently on the stove with a splash of milk to bring them back to creamy perfection.
  • Serving Suggestions: Pair them with meatloaf, roasted chicken, or a vegetarian main dish like grilled mushrooms for an easy yet satisfying meal. If you want a festive flair for the holidays, add some sour cream or Parmesan cheese to the mix.

Comparing to Russet Potatoes

Many people wonder whether Yukon Golds can substitute for Russets or vice versa. Indeed, there is no single answer; it often depends on the dish you want to create.

  • Moisture Content: Russets are drier, making them ideal for baked potatoes with that characteristic fluffy center. Yukon Golds contain more water, so they turn out creamier when mashed.
  • Flavor Profile: While Russets have an earthier, more neutral taste, Yukon Golds possess a lightly sweet, buttery flavor. Therefore, you can often use fewer extra fats or seasonings when cooking with them.
  • Best Uses: Russets make excellent fries and crispy roasted wedges if that is your preference. Yukon Golds can crisp up, but they truly excel in recipes that need a moist, tender potato—like soups, stews, or mashes.
  • Gnocchi Consideration: Some cooks swear by Russets for making light, airy gnocchi because of their low moisture content. On the other hand, Yukon Golds can yield a slightly denser dumpling, which some people prefer for heartier sauces.

In short, choose Yukon Golds when you want an inherently flavorful, creamy texture in your dish, and opt for Russets if you are aiming for fluffy bakes or crispy fries. Nevertheless, there is ample room for experimentation, especially if you love exploring new textures and flavors in the kitchen.

Nutritional Information for Yukon Gold Potatoes

Similarities with Russets

Despite their differences in moisture and flavor, Yukon Golds and Russets have strikingly similar nutritional profiles. Both varieties are:

  • Naturally Fat-Free, Sodium-Free, and Cholesterol-Free
  • High in Carbohydrates, making them a solid source of energy
  • Loaded with Potassium: A medium-sized potato typically offers more potassium than a banana.
  • Rich in Vitamin C: This nutrient contributes to immune function and overall health.

Vitamins, Minerals, and Fiber

A medium 5.3-ounce potato with the skin on provides roughly 2 grams of fiber and about 3 grams of protein, in addition to the carbohydrates that form the bulk of its caloric content. Therefore, if you are seeking a balanced diet, these spuds can be a valuable component, particularly when combined with protein sources like beans, poultry, or fish. To explore more detailed nutritional data, you might check out the USDA Nutrient Database, which provides extensive information on the macro- and micronutrient compositions of many foods.

Healthy Cooking Tips

Although potatoes themselves are quite nutritious, the preparation method can significantly influence their health factor. Therefore, try these strategies:

  • Go Easy on the Added Fats: Use smaller amounts of butter or oil, and focus on flavoring with herbs, spices, and low-sodium broths.
  • Incorporate the Skin: Leaving the skin on adds extra fiber and some vitamins.
  • Portion Control: While potatoes can be part of a balanced meal, keep portion sizes in check to avoid excessive caloric intake.

Make Ahead, Storage, and Reheating

Storing Leftover Cooked Potatoes

Leftover cooked potatoes last about three days in the fridge. However, it is a good idea to store them in an airtight container, as exposure to air can dry them out or cause off flavors. For maximum freshness, try to use them within that three-day window.

Reheating Methods of Yukon Gold potatoes

  • Stovetop: If you have leftover mashed potatoes, add a spoonful or two of milk or water to a saucepan. Heat them over medium-low, stirring frequently to distribute the heat evenly.
  • Oven: Another option is to place mashed or roasted potatoes in a covered baking dish and warm them in a 350°F oven until heated through, typically 20 to 30 minutes depending on the quantity.
  • Microwave: For speed, the microwave can work for smaller portions. However, do so in short bursts, stirring each time to minimize hot spots and dryness.

Freezing Guidelines of Yukon Gold potatoes

Mashed Yukon Gold potatoes can be frozen for up to three months, but be aware that the texture may become slightly grainy once thawed. If you decide to freeze them, consider adding a bit more cream or butter to help maintain smoothness. On the other hand, if you freeze diced or cooked potato chunks, they may develop a mealy quality. Still, they can be acceptable for soups or stews after thawing since their consistency will be less noticeable in a broth.

Looking for another cheesy delight? Check out our Cheesy Chicken Sloppy Joe Recipes for an easy and satisfying meal option.

Conclusion

Yukon Gold potatoes Advantages

In summary, Yukon Gold potatoes excel in many dishes thanks to their moderate starch content, gorgeous yellow hue, and subtly sweet, buttery taste. Whether you want to create a simple side of roasted potatoes, a comforting pot of soup, or a luxurious bowl of mashed potatoes, this variety delivers both flavor and visual appeal. Additionally, their adaptability allows them to stand in for other potato types in many recipes, although each variety has its own specialty.

Share Your Experience

Have you tried making our mashed potato recipe, or are you planning on experimenting with these golden tubers for the first time? We would love to hear about your experiences, tips, or any creative twists you have discovered. Feel free to leave comments below or reach out on social media to share how Yukon Golds have transformed your dishes.

If you are interested in learning even more about potatoes, such as detailed recipe ideas or nutritional insights, visit the Idaho Potato Commission for additional trustworthy resources and inspiration. Moreover, do not forget to check your local farmers’ market or trusted grocery stores for the freshest batches of these golden spuds when they are in peak season.

how to cook duck breast with sauerkraut In Under An Hour

Ever wondered how to create a restaurant-quality dish at home? How to cook duck breast with sauerkraut might sound intimidating, but trust me, it’s surprisingly easy! Picture this: crispy duck skin, tender, juicy meat, and tangy sauerkraut blending together in perfect harmony. This recipe combines elegance with comfort, bringing you the best of both worlds.

Ingredients for Duck Breast with Sauerkraut

 Ingredients for cooking duck breast with sauerkraut.
All the essential ingredients for making a flavorful duck and sauerkraut dish.

Essential Ingredients for Success

To master how to cook duck breast with sauerkraut, having the right ingredients is key. This dish combines simple yet bold flavors, and every ingredient plays a part in creating the perfect balance. Here’s what you’ll need:

  • Duck breasts: Choose fresh, high-quality duck breasts with a thick layer of fat for crispy skin.
  • Sauerkraut: Opt for traditional sauerkraut or a red cabbage version for added sweetness.
  • Seasonings: Salt, black pepper, thyme, and garlic for aromatic flavor.
  • Cooking fat: Butter or olive oil for searing the duck breast.
  • Optional add-ins: Apples, onions, or a splash of white wine to enhance the tangy sauerkraut.

Each ingredient complements the others, ensuring your dish turns out flavorful and balanced.

Selecting Quality Duck Breast

Choosing the right duck breast is crucial for this recipe. For a tender, juicy result, look for duck breasts with firm, plump meat and a smooth layer of fat. The fat is what renders into that irresistible crispy skin.

If you’re unsure where to start, consider sourcing your duck breast from a trusted local butcher or farmer’s market. For tips on selecting the freshest duck, check out this guide to choosing poultry.

Choosing the Right Sauerkraut

The sauerkraut you choose can elevate your dish, so don’t overlook it. Traditional sauerkraut is tangy and bold, but if you prefer something sweeter, try red cabbage sauerkraut. Look for brands with minimal preservatives for the best flavor.

You can also enhance store-bought sauerkraut with add-ins like caramelized onions, shredded apples, or even a touch of brown sugar. These additions create layers of flavor, complementing the richness of the duck.

Optional Add-Ins for Extra Flavor

While this dish shines on its own, a few creative add-ins can make it truly unforgettable. Here are some ideas:

  • Apples: Slice thinly and cook alongside sauerkraut for a sweet, fruity contrast.
  • Onions: Caramelize them in the rendered duck fat for a savory depth.
  • Wine or cider: Deglaze the pan with a splash of white wine or apple cider to enhance the tangy flavors.
  • Herbs: Add bay leaves or rosemary sprigs for an earthy aroma.

These small tweaks can help you customize the recipe to suit your personal preferences.

Preparing the Duck Breast

Scoring and Seasoning the Duck Breast

Scoring the duck breast for crispy skin.
Scoring the fat layer on a duck breast ensures crispy skin when cooked.

Mastering how to cook duck breast with sauerkraut begins with properly preparing the duck breast. Start by scoring the duck’s skin in a crosshatch pattern, being careful not to cut into the meat. This technique allows the fat to render effectively, resulting in a crispy, golden crust.

Season the duck generously with salt and freshly ground black pepper. For an aromatic twist, you can rub the skin with minced garlic or sprinkle it with dried thyme. These simple steps lay the foundation for a perfectly cooked duck breast that pairs beautifully with sauerkraut.

Searing the Duck for Crispy Skin

Searing duck breast in a skillet for crispy skin.
The secret to crispy skin is starting with a cold pan and rendering the fat slowly.

The next step in how to cook duck breast with sauerkraut is achieving crispy skin through proper searing. Place the scored and seasoned duck breast skin-side down in a cold, dry skillet. Starting in a cold pan ensures the fat renders slowly, creating a crispy texture without burning.

Cook over medium heat for about 6–8 minutes, pressing gently to ensure even contact with the pan. Once the skin is golden and crispy, flip the duck breast and cook the meat side for another 2–3 minutes. This process locks in moisture while creating a rich, caramelized flavor.

Cooking Duck Breast to the Perfect Temperature

Achieving the right internal temperature is essential when learning how to cook duck breast with sauerkraut. Use a meat thermometer to ensure your duck breast is cooked to perfection. For a medium-rare finish, aim for an internal temperature of 130–135°F (54–57°C).

After cooking, let the duck rest for 5–7 minutes. Resting allows the juices to redistribute, ensuring tender and juicy meat. Remember, overcooking can lead to a tough texture, so keep a close eye on the temperature.

What to Do with Rendered Duck Fat

Don’t let that flavorful duck fat go to waste! It’s a culinary treasure that can elevate many dishes. After searing, strain the rendered fat into a heat-safe container. Use it to sauté vegetables, roast potatoes, or even caramelize the sauerkraut for this recipe.

Adding caramelized sauerkraut cooked in duck fat creates a rich, savory flavor that perfectly complements the tender duck breast. This step takes your dish to the next level, enhancing its depth and complexity.

Cooking Sauerkraut with Duck

Preparing Sauerkraut for Cooking

To master how to cook duck breast with sauerkraut, preparing the sauerkraut correctly is essential. Start by deciding whether to drain or rinse your sauerkraut. Leaving it undrained gives a tangier flavor, while rinsing mellows the acidity. If you prefer a balance, lightly rinse and then press out excess liquid.

For added depth, sauté the sauerkraut with onions and garlic in a tablespoon of the rendered duck fat. This step softens the sauerkraut and infuses it with savory notes that complement the duck breast beautifully.

Enhancing Sauerkraut with Flavorful Add-Ins

While sauerkraut is flavorful on its own, a few additions can elevate it further. For instance:

  • Apples: Add thin slices for a subtle sweetness that balances the tang.
  • White wine or cider: Deglaze the pan with a splash to enhance the sauerkraut’s complexity.
  • Spices: Bay leaves or caraway seeds lend an earthy aroma.

These small touches create a layered dish that pairs seamlessly with the richness of the duck breast.

Cooking Sauerkraut with Rendered Duck Fat

One of the secrets to how to cook duck breast with sauerkraut is using rendered duck fat to caramelize the sauerkraut. After searing the duck, drain most of the fat, leaving about two tablespoons in the skillet.

Add the prepared sauerkraut, stirring to coat it evenly in the flavorful fat. Cook over medium heat for 5–7 minutes until lightly browned. This method creates a savory, slightly crispy sauerkraut that complements the tender duck breast.

Combining Duck Breast and Sauerkraut

Once the sauerkraut is ready, it’s time to bring the dish together. Place the cooked sauerkraut on a serving platter, creating a flavorful bed for the duck breast. Slice the rested duck breast into thin pieces and arrange them over the sauerkraut.

For an extra touch, drizzle any juices from the resting duck over the dish. This step not only enhances the flavor but also adds a visually appealing gloss to your presentation.

Suggestion for More Recipes

If you’re looking for another dish that balances rich and tangy flavors, check out The Ultimate Guide to Grilled Chicken Thigh Recipes

Serving Duck Breast with Sauerkraut

Plated duck breast with sauerkraut and roasted potatoes.
A restaurant-quality duck breast served with tangy sauerkraut and roasted potatoes.

Plating Like a Pro

When learning how to cook duck breast with sauerkraut, presentation matters just as much as flavor. Start by creating a bed of caramelized sauerkraut on your serving platter or individual plates. The rich, golden tones of the sauerkraut contrast beautifully with the rosy slices of duck breast.

Slice the rested duck breast thinly and arrange it neatly over the sauerkraut. Drizzle any remaining juices from the pan or resting plate over the top for added shine and flavor. Garnish with fresh thyme or a sprinkle of sea salt to elevate the visual appeal.

Side Dishes to Complement the Dish

To complete the meal, pair your duck and sauerkraut with sides that enhance the dish’s rich and tangy flavors. Here are some suggestions:

  • Roasted potatoes: Crispy and golden, they soak up the flavorful juices perfectly.
  • Buttered spaetzle: These soft, egg-based noodles are a traditional and comforting pairing.
  • Seasonal vegetables: Try honey-glazed carrots or sautéed green beans for a touch of sweetness.

These sides not only round out the meal but also create a balanced dining experience.

Wine Pairings for Duck and Sauerkraut

A great wine pairing can transform your dining experience. For this dish, opt for a wine that complements both the richness of the duck and the tanginess of the sauerkraut:

  • Dry Riesling: Its acidity mirrors the sauerkraut while cutting through the duck’s richness.
  • Pinot Noir: A light, fruity red wine that enhances the flavors of the duck without overpowering it.
  • Gewürztraminer: A slightly sweet white wine that balances the tangy and savory elements.

Serving the right wine adds an extra layer of sophistication to your meal.

Creative Leftover Ideas

If you have leftovers, don’t let them go to waste! The combination of duck and sauerkraut is versatile and can shine in other dishes:

  • Duck and sauerkraut sandwiches: Layer thin slices of duck and sauerkraut on crusty bread with a touch of mustard.
  • Savory crepes: Fill crepes with sauerkraut and duck, then drizzle with a light cream sauce.
  • Hearty salad: Toss leftover duck and sauerkraut with mixed greens and a Dijon vinaigrette for a quick, tangy salad.

For another rich and comforting dish, explore our Cube Steak in Crock Pot: Comfort Food Done Right

FAQs

What is the best way to cook duck breasts?

The best way to cook duck breasts is to start with a cold, dry pan to render the fat and achieve crispy skin. Place the duck breasts skin-side down and cook over medium heat for 6–8 minutes until the skin is golden and crispy. Flip the breast and cook the meat side for another 2–3 minutes. To ensure tender, juicy meat, use a meat thermometer to check for a medium-rare internal temperature of 130–135°F. Let the duck rest for 5–7 minutes before slicing. If you’re combining this with sauerkraut, resting the duck allows time to prepare the sauerkraut as a perfect pairing.

Do you have to drain sauerkraut before cooking?

You don’t always have to drain sauerkraut before cooking—it depends on your flavor preference. If you enjoy a tangier dish, use the sauerkraut straight from the jar or package. However, if you prefer a milder flavor, rinse it under cold water and press out the excess liquid. For recipes like how to cook duck breast with sauerkraut, you can lightly rinse the sauerkraut to balance the dish, especially if you’re adding sweet elements like apples or onions.

What is the preferred cooking method for duck?

Pan-searing is the preferred cooking method for duck breasts because it renders the fat, creating crispy skin while keeping the meat tender and juicy. After searing, you can finish the duck in the oven to ensure even cooking. For duck legs or whole ducks, braising or roasting is often better, as these methods break down tougher cuts and infuse them with flavor. When paired with sauerkraut, pan-searing works best to maintain the textural contrast between the rich duck and tangy sauerkraut.

Do you cook sauerkraut or not?

Yes, cooking sauerkraut enhances its flavor and texture, making it a perfect complement to richer dishes like duck breast. Sautéing sauerkraut with onions, garlic, or apples mellows its tanginess and creates a slightly caramelized, savory taste. Cooking sauerkraut in rendered duck fat takes it to another level, adding depth and richness to the dish. For recipes such as how to cook duck breast with sauerkraut, cooking is a step you don’t want to skip.

Conclusion

Cooking duck breast with sauerkraut might sound like a gourmet challenge, but it’s simpler than you think. By starting with high-quality ingredients, mastering techniques like scoring and searing, and adding flavorful enhancements like caramelized sauerkraut, you can create a dish that’s both elegant and comforting.

Throughout this guide, you’ve learned how to cook duck breast with sauerkraut step-by-step, from preparing the duck breast for perfect crispiness to balancing the tanginess of sauerkraut with sweet and savory add-ins. Whether you’re making this dish for a family dinner or a special occasion, it’s sure to impress.

Now it’s your turn to bring this recipe to life! Gather your ingredients, follow these easy steps, and treat yourself to a restaurant-quality meal right at home. Don’t forget to explore other recipes on our site for more culinary inspiration, and share your results with us.

Neapolitan Ice Cream Secrets: Your Creamy, Tasty Guide!

Are you ready to indulge in a timeless dessert that artfully combines three layers of deliciousness? In this post, we’re diving into Neapolitan ice cream, a classic treat that balances chocolate, vanilla, and strawberry flavors in one beautiful package. By following these steps, you’ll discover how to make a vibrant, tri-flavored dessert from scratch, learn helpful tips for ensuring distinct stripes, and gain insights into surprising variations. Therefore, let’s get started on this journey toward creating a creamy, tasty masterpiece right in your own kitchen!

Understanding the Tri-Flavored Dessert

Creating the perfect three-layered ice cream requires more than simply freezing different flavors. Although the final result may seem straightforward, there’s a rich culinary history and a set of flavor principles at play. In addition, small details like layering technique and ingredient selection can make or break the success of this layered treat. Let’s explore the fundamentals so you can appreciate why this dessert has become a go-to option for many home cooks.

The Fascinating History Behind Layered Ice Cream

Homemade neapolitan ice cream sandwich with pink strawberry filling held between two graham crackers.
A quick and playful twist on the classic tri-flavored dessert.

Although it’s commonly referred to as “Neapolitan,” the dessert owes its lineage to Italian immigrants who popularized the concept of layered confections in the United States. Historically, southern Italy (particularly Naples) had a culture of making frozen sweets that fused multiple flavors. Thus, the tri-flavored configuration we know today became the standard for this style of ice cream once it hit American shores in the 19th century.

Some historians speculate that chocolate, vanilla, and strawberry were chosen because they were among the most popular ice cream flavors of the time. Others argue that it was initially about offering consumers variety in a single package. Either way, it has become a beloved symbol of culinary creativity, bridging together contrasting tastes that somehow complement each other perfectly.

Key Flavor Characteristics

When you look at neapolitan ice cream, you’ll see three distinct blocks:

  • Chocolate Layer: Rich, indulgent, and often slightly bitter. The cocoa content or type of chocolate used can drastically influence how this layer tastes.
  • Vanilla Layer: Creamy, subtle, and sweet. This segment acts as the perfect “middle ground” between bold chocolate and bright strawberry.
  • Strawberry Layer: Fruity, refreshing, and occasionally tangy. Fresh strawberries or high-quality purée make all the difference here.

From a flavor standpoint, the magic lies in how each segment offers its own experience, yet all three combined result in a symphony of taste.

Several blogs and culinary platforms have reimagined this layered dessert in fascinating ways. For instance, Addicted to Dates introduces vegan-friendly approaches, ensuring those who avoid dairy can still enjoy a tri-flavored treat. Meanwhile, Bigger Bolder Baking focuses on a no-churn technique that’s accessible to beginners, allowing you to craft a layered masterpiece without specialized equipment. On the other hand, Nitha’s Kitchen provides a more traditional approach, emphasizing the importance of distinct stripes through partial freezing. And if you’d like to see how a store-bought brand does it, Simply Recipes offers an insightful review of Tillamook Neopolitan Ice Cream, analyzing the brand’s flavor strengths and creaminess.

Setting Up for Success: Tools and Ingredients

Before you make your first batch, it’s important to gather all your essentials. You’ll likely need:

  • A freezer-safe container or loaf pan, typically one that holds about 1.5 to 2 quarts.
  • Mixing bowls: one for each layer, plus an extra for your base mixture if you’re making a custard.
  • Measuring cups and spoons to ensure proper proportions.
  • Whisks or a stand mixer to whip cream efficiently if you’re opting for the no-churn approach.
  • A spatula to help layer each flavor without mixing them.
  • High-quality ingredients, such as premium cocoa powder, fresh strawberries (or a well-sourced purée), and real vanilla extract.

If you’re going the custard route, you’ll also want an ice cream maker on hand or you can follow an alternative method like the no-churn technique from Bigger Bolder Baking, which relies on whipped cream and sweetened condensed milk. For general ice cream-making guidelines (including temperatures and storage tips), consult The Spruce Eats.

Crafting Your Homemade Trio of Flavors

Now that you’ve gathered your basics, it’s time to dive into the step-by-step process. As you’ll see, layering and flavoring are equal parts art and science. However, with patience and the right approach, you’ll achieve vibrant stripes and balanced tastes.

Preparing the Base Mixture

To kick things off, decide whether you’ll go for a traditional custard base or a no-churn recipe. A custard-based ice cream involves cooking egg yolks, sugar, and dairy until it thickens. This approach often produces a richer texture and slightly more “professional” result. However, it does require extra steps heating, cooling, and churning.

If you’re short on time, the no-churn method from Bigger Bolder Baking might be your best bet. Here’s a simple breakdown:

  1. Whip the Cream: Combine heavy cream with a pinch of salt (and sometimes sugar) until you form soft peaks.
  2. Add Sweetened Condensed Milk: Fold the milk into the whipped cream gently, maintaining as much air as possible.
  3. Flavor Divisions: Separate into three bowls for each flavor.

Regardless of the method you choose, your first step is to ensure the base mixture is silky-smooth and ready to absorb flavors. Thus, invest time in perfecting this foundation.

Dividing and Flavoring Each Layer

Three bowls with chocolate, vanilla, and strawberry ice cream bases ready for layering
Separate bowls of chocolate, vanilla, and strawberry mixtures before creating layered ice cream.

Once you have a single large batch of base, the next step is dividing it into three portions. Typically, you’ll measure out roughly equal volumes in separate bowls. Then:

  1. Chocolate Portion: Stir in high-quality cocoa powder or melted chocolate. The ratio varies, so start small and keep tasting until the chocolate flavor feels bold enough.
  2. Vanilla Portion: Infuse your base with vanilla extract or real vanilla bean seeds. If you’d like an ultra-smooth middle layer, consider straining the mixture to catch any pods or lumps.
  3. Strawberry Portion: Blend fresh strawberries into a purée (or use a premade jam or sauce) and incorporate it into the base. Keep in mind that the more liquid you add, the higher the risk of watery ice crystals, so do a quick taste check to ensure consistency.

When working with dairy-free or vegan alternatives, Addicted to Dates suggests coconut cream or oat-based creams for a lush texture. In addition, you may want to reduce the sugar if using sweetened non-dairy milks.

Layering Techniques for Sharp Stripes

Pouring the chocolate layer into a loaf pan as part of the neapolitan ice cream layering process.
Ensuring each flavor remains distinct by partially freezing before adding the next layer.

To get those iconic stripes, you’ll need a gentle hand and the right sequence. An easy approach is:

  1. Pour the First Layer (chocolate, vanilla, or strawberry) into your container. Smooth it evenly with a spatula.
  2. Partial Freeze for 20–30 minutes, allowing the layer to firm up slightly.
  3. Add the Second Layer, smoothing it gently to avoid merging.
  4. Repeat the partial freeze step again before adding the final layer.

No-Churn vs. Churned Approaches

  • Churned: For a custard-based recipe, you’ll typically churn each flavor separately in an ice cream maker. After you finish churning one flavor, transfer it to your container and freeze, then proceed with the next. Although it can be time-consuming, you’ll often get a luxurious consistency.
  • No-Churn: This simplified route relies on whipped cream and condensed milk. The layering process is similar, but you’ll skip the actual churning machine. Because you incorporate air manually, the final texture is somewhat softer and melts faster.

On the other hand, you might prefer a hybrid approach, especially if you have leftover homemade vanilla ice cream. In that scenario, you could churn chocolate and strawberry flavors only, layering them with store-bought or leftover vanilla.

(Time-Saving Hack: Use store-bought vanilla ice cream and make only the chocolate and strawberry layers from scratch!)

Secrets to Ensuring a Perfect Three-Flavor Treat

Although the layering concept is straightforward, there are subtleties that help differentiate a so-so dessert from a show-stopping tri-flavored ice cream.

Overcoming Common Ice Cream Pitfalls

One of the most typical issues is a grainy or icy texture. This often stems from improper freezing conditions or insufficient mixing. However, you can conquer these pitfalls by:

  • Ensuring the mixture is very cold before freezing—chill your base in the fridge for a few hours.
  • Using enough sugar or sweetener: Sugar lowers the freezing point, keeping the texture softer.
  • Storing it in an airtight container to reduce ice crystal formation.

If your dessert accidentally turns grainy, you can still salvage it by pulsing it in a food processor or letting it thaw partially and re-freeze. On the other hand, if it’s rock-solid, let it sit at room temperature for about five minutes before scooping.

Preserving Distinct Flavors in Each Layer

You want your chocolate, vanilla, and strawberry layers to stand out. Therefore, consider these tips:

  • Add distinct sweeteners: A drizzle of honey in your strawberry portion or a bit of powdered sugar in your chocolate batch can enhance each layer’s unique profile.
  • Keep Tools Separate: Use a clean spatula or spoon for each flavor so you won’t mix them inadvertently.
  • Taste As You Go: Adjust sugar, cocoa, or vanilla to ensure each portion tastes great on its own.

Maintaining Bright Colors

The visual appeal of neapolitan ice cream matters just as much as its flavor. Therefore, do the following:

  • Choose Fresh Berries: Ripe, vibrant strawberries will give you a naturally pink hue. If you’re using jam, pick a brand with minimal artificial dyes to maintain authentic color.
  • Opt for Top-Notch Cocoa: High-quality cocoa powder results in a deeper, more appealing chocolate shade.
  • Avoid Over-Mixing: Too much stirring can cause swirl effects that blur your stripes. Gently pour and smooth each layer.

Keeping the Scoop Soft and Creamy

When serving your tri-layered creation, a too-firm texture can be frustrating. Thus, consider these strategies:

  • Add a small amount of alcohol (for adult versions), such as vodka or liqueur, which helps lower the freezing point.
  • Incorporate invert sugar (like corn syrup or golden syrup) in small quantities. This can prevent an overly icy final product.
  • Let It Rest: Removing the container from the freezer a few minutes before serving allows the dessert to soften slightly.

Creative Serving Ideas and Variations

Three separate bowls labeled chocolate, vanilla, and strawberry ice cream bases on a pastel background.
Portioning the ice cream base for each flavor ensures bold, distinct layers

After you’ve gone through all the effort of crafting these three delicious layers, you deserve a bit of fun in how you serve and modify your masterpiece. In addition, these creative possibilities can help you elevate your dessert game even further.

Beyond the Scoop Unique Presentations

Serving neapolitan ice cream in a standard bowl is classic, but you can level up by:

  • Creating Mini Dessert Cups: Layer the flavors in small clear cups for individual servings, topped with whipped cream and sprinkles.
  • Using Waffle Cones: The sweet crunch of a waffle cone adds an extra dimension, plus it looks incredibly inviting.
  • Layering in Mason Jars: For a rustic, Instagram-worthy approach, scoop each layer into small mason jars with fruit toppings, cookie bits, and whipped cream.

Many of these ideas tie in with Bigger Bolder Baking’s flamboyant presentation style, proving that a bit of pizzazz makes the final product even more appealing.

Vegan and Dairy-Free Versions

To include everyone, why not try a dairy-free variation? Addicted to Dates offers a fantastic vegan approach by using coconut cream or cashew milk. Here are some pointers:

  • Coconut Cream Base: It whips nicely and yields a rich mouthfeel.
  • Non-Dairy Alternatives: Almond milk, soy milk, or oat milk can all work, but the final consistency might differ slightly.
  • Natural Sweeteners: Maple syrup or agave can seamlessly replace standard sugar in many recipes, though you may need to adjust ratios to maintain thickness.

For more inspiration check out How To Make Cottage Cheese Snacks That Everyone Will Love

Toppings and Mix-Ins

Once you’ve nailed the core tri-flavored dessert, consider spicing it up with add-ons:

  • Candy Pieces: Mini chocolate chips, crushed peppermint candies, or swirl ribbons of fudge.
  • Fresh Fruit: Sliced bananas, macerated berries, or tropical fruit slices can provide surprising bursts of flavor.
  • Textural Elements: Crushed cookies, cereal flakes, and chopped nuts create a varied bite in each spoonful.

Remember that too many add-ins might blur the separate layers. However, a light sprinkle on top can be perfect for adding visual flair.

Neapolitan Ice Cream Cake and Beyond

Why stop at ice cream alone when you can transform these layers into a show-stopping cake? The basic formula involves:

  1. Lining a Springform Pan: Press in a cookie crust or a layer of chocolate cake if desired.
  2. Layering Your Three Flavors: Freeze each layer partially before adding the next.
  3. Decorating: Top with whipped cream, fruit, or a drizzle of chocolate sauce.

This approach can be ideal for birthdays, anniversaries, or any occasion where a sliceable dessert steals the show. On the other hand, you could also create milkshakes, parfaits, or even neapolitan ice cream sandwiches using your favorite cookies.

FAQs about Neapolitan Ice Cream

Why is Neapolitan ice cream a thing?

Neapolitan ice cream caught on because it offers chocolate, vanilla, and strawberry flavors side by side, catering to varying tastes in one convenient container. Moreover, it has ties to Italian influence, and the combination of these three classic flavors has timeless appeal.

What 3 Flavours make up a Neapolitan ice cream?

The traditional trio is chocolate, vanilla, and strawberry. These flavors are layered together to create the distinct stripes you typically see in this dessert.

What is the difference between Neapolitan and Neopolitan ice cream?

The correct spelling is “Neapolitan,” which references its Italian heritage from Naples. “Neopolitan” is simply a misspelling but often used interchangeably in casual settings. The dessert itself remains the same three-layered concept.

Which flavor is not part of the Neapolitan ice cream?

Commonly, chocolate, vanilla, and strawberry constitute the classic flavors. Anything else, like pistachio or mint, would fall under a variation and not the traditional tri-flavored format.

Conclusion

As you can see, neapolitan ice cream is more than just a convenient marriage of three flavors. It represents culinary tradition, creativity, and the joy of blending contrasting tastes into a single dessert. Whether you choose a custard-based method or opt for a quick no-churn route, the keys are patience, quality ingredients, and a bit of layering finesse. Therefore, the next time you crave something that combines the richness of chocolate, the velvety sweetness of vanilla, and the bright tang of strawberry, you’ll know precisely how to craft it at home.

Ready to put your newfound knowledge to the test? Grab your ingredients, get creative with layering, and savor each cool, flavorful spoonful. You’ll soon discover why neapolitan ice cream has been delighting dessert enthusiasts for generations and why it continues to captivate the hearts (and taste buds) of foodies worldwide.