Salsa Chicken Tacos: Spice Up Your Dinner with This Easy Dish

Imagine coming home after a long day and wanting something tasty but quick. Salsa chicken tacos are here to save the day! They make your weeknight dinners exciting and easy.

Taco recipes are great for fast, tasty meals. But salsa chicken tacos are something special. With a few ingredients, you can make a dish that tastes like it came from a restaurant. The mix of tender chicken, zesty salsa, and fresh toppings is a winner.

Why Salsa Chicken Tacos Are Your New Favorite Mexican Dish

Delicious Chicken Tacos Family Meal

Imagine making your family meals more exciting with a dish that’s both tasty and easy to make. Chicken tacos are a hit for families who love Mexican food. They’re a tasty, protein-rich meal that will change your dinner plans.

The Perfect Blend of Authentic Flavors

Mexican food is more than just food; it’s an experience. Salsa chicken tacos bring the real taste of Mexico to your table. The mix of soft chicken and spicy salsa is a perfect match that will make your taste buds dance.

  • Rich, complex spice combinations
  • Fresh, locally-inspired ingredients
  • Authentic cooking techniques

Nutritional Powerhouse for Healthy Families

Chicken tacos are not only tasty but also good for you. Chicken is full of protein, which helps build muscles. The fresh salsa adds vitamins and minerals. Your family gets a healthy meal that’s also delicious.

Time-Saving Magic for Busy Households

Making chicken tacos is quick and easy, yet they taste amazing. You can have a meal that rivals a restaurant in less than 30 minutes. It’s perfect for families with busy schedules.

Try salsa chicken tacos and make your family meals more exciting today!

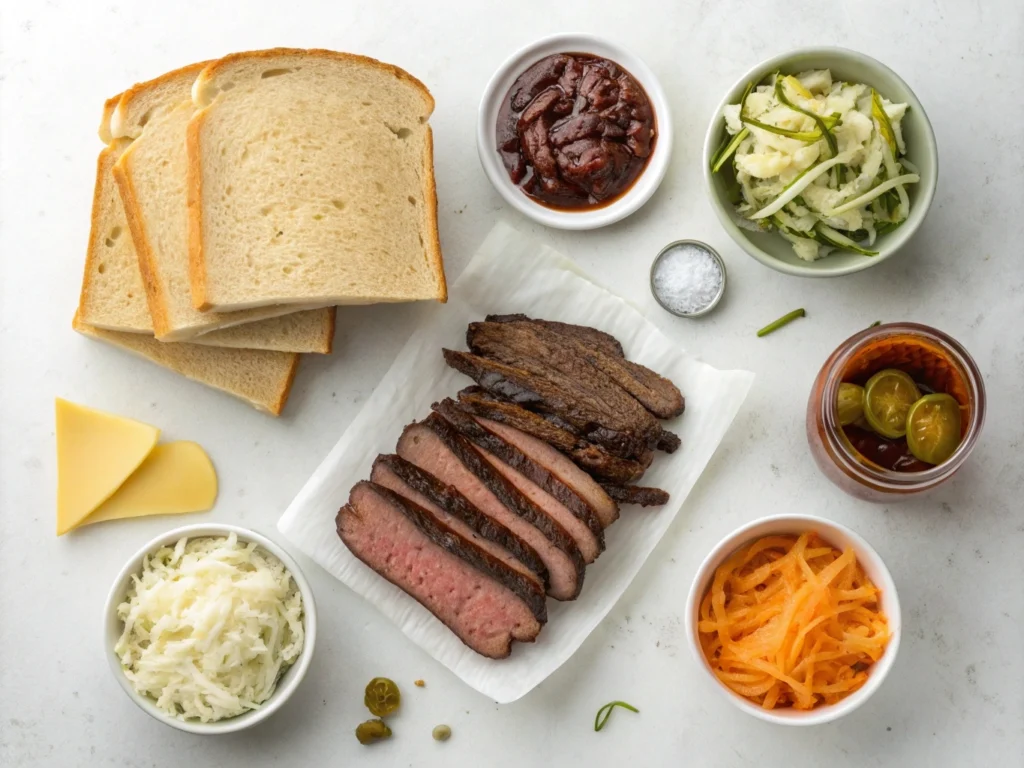
Essential Ingredients for Perfect Salsa Chicken Tacos

Salsa Chicken Taco Ingredients

Starting to make salsa chicken tacos is all about picking the right ingredients. Your journey to a tasty Mexican dinner begins with choosing top-notch parts. These will turn your meal into a feast to remember.

For the best shredded chicken, focus on these key items:

  • Protein Base: Boneless, skinless chicken breasts or thighs are perfect for salsa recipes
  • Fresh salsa (homemade or store-bought)
  • Soft corn or flour tortilla wraps
  • Seasonings like cumin, chili powder, and garlic powder

Choosing how to cook your chicken is important. You can use a slow cooker, instant pot, or stovetop. This way, you get tender, flavorful meat that’s easy to shred.

Your tortilla wraps are the base of your tacos. Pick fresh, soft tortillas that can hold the chicken without breaking. Corn tortillas give a real Mexican taste, while flour tortillas are softer.

Pro tip: For the best taste, try different salsa recipes. Choose fresh pico de gallo or a rich roasted tomato salsa. This will make your chicken tacos amazing.

Step-by-Step Guide to Making Restaurant-Quality Chicken Tacos

Making delicious chicken tacos at home is easier than you think. With the right ingredients and techniques, your kitchen can become a taco lover’s dream. Follow this guide to make mouth-watering chicken tacos that are as good as your favorite restaurant’s.

Homemade Chicken Tacos Preparation

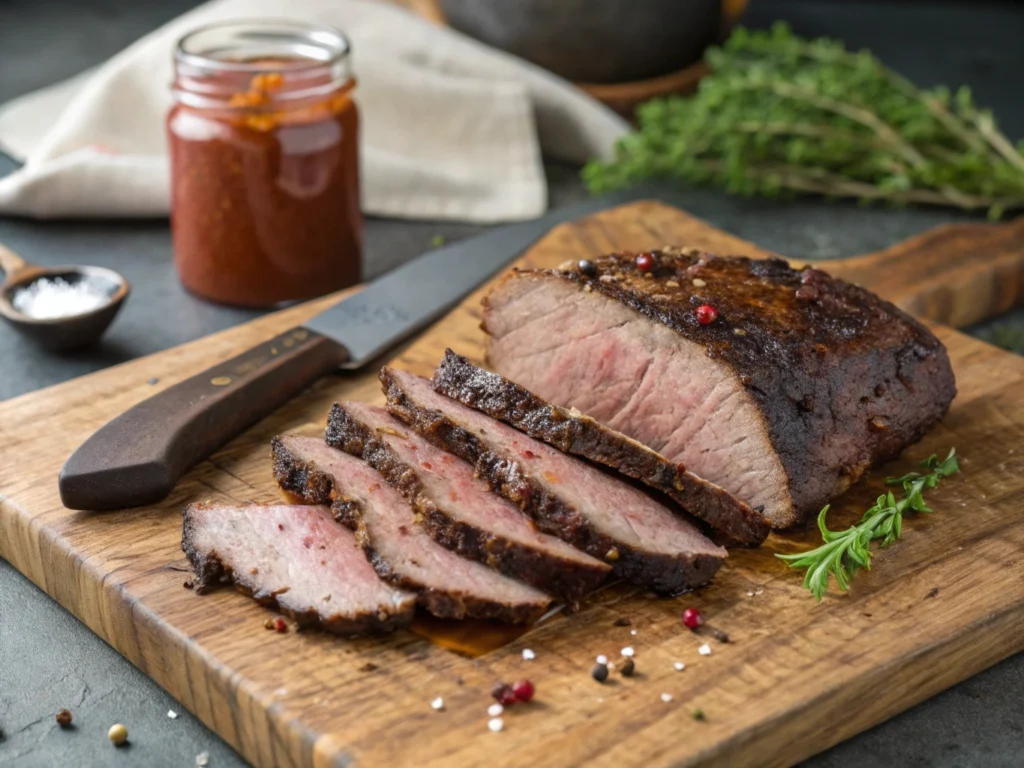
Mastering the Chicken Preparation

The secret to amazing tacos is in the chicken. Use boneless, skinless chicken breasts or thighs for the best results. Your seasoning blend is key for authentic flavor:

  • Chili powder
  • Cumin
  • Garlic powder
  • Smoked paprika
  • Salt and pepper

Crafting Your Homemade Salsa

No chicken tacos are complete without a fresh salsa. Fresh ingredients make a big difference in creating a zesty topping that boosts your dish.

IngredientQuantity
Ripe tomatoes4 medium
Red onion1/2 small
Fresh cilantro1/4 cup chopped
Lime juice2 tablespoons

Perfect Taco Assembly Techniques

The final step for your chicken tacos is the assembly. Warm your tortillas on a skillet to add flavor. Layer your ingredients carefully:

  1. Warm tortilla base
  2. Seasoned chicken
  3. Homemade salsa
  4. Optional toppings like cheese or sour cream
  5. Fresh cilantro garnish

Pro tip: Squeeze fresh lime juice over your tacos just before serving to brighten all the flavors. Your homemade chicken tacos will taste like they came straight from a professional kitchen!

Mastering the Art of Homemade Spicy Salsa

Making the perfect spicy salsa is a skill in Mexican cooking. It can turn your salsa chicken tacos into something amazing. The key is to pick the right ingredients and mix the flavors just right.

When making spicy salsa, pick chilies that fit your taste for heat. Here’s a simple guide to chili pepper heat:

  • Mild: Poblano peppers (1,000-1,500 Scoville units)
  • Medium: Jalapeño peppers (2,500-8,000 Scoville units)
  • Hot: Serrano peppers (10,000-23,000 Scoville units)
  • Extreme: Habanero peppers (100,000-350,000 Scoville units)

Using fresh ingredients is key to making real salsa. Choose ripe tomatoes, crisp onions, and fresh cilantro. Roasting your peppers can also add a rich flavor to your salsa.

IngredientQuantityPurpose
Tomatoes4 mediumBase flavor and texture
Jalapeños2-3Heat and spice
Cilantro1/4 cupFresh, bright notes
Lime juice2 tablespoonsAcidity and balance

Pro tip: Always taste and adjust your salsa in small batches. Start with less spice and add more as needed. Your homemade spicy salsa will make your tacos and other Mexican dishes even better.

Creative Taco Toppings and Garnishes

Make your salsa chicken tacos special with creative toppings. The right garnishes can make a simple meal exciting. They will delight your taste buds and impress your guests.

Fresh Vegetable Options

Fresh veggies add crunch and nutrition to your tacos. Try these vibrant toppings:

  • Crisp diced red onions
  • Julienned radishes
  • Shredded purple cabbage
  • Diced bell peppers
  • Fresh cilantro leaves

Cheese and Cream Variations

Mexican cuisine has amazing cheese and cream options. Add these to your tacos for extra flavor:

  • Queso fresco – crumbly and mild
  • Cotija cheese – salty and aged
  • Mexican crema – smooth and tangy
  • Sour cream with a lime zest twist

Herb and Citrus Combinations

Enhance your tacos with fresh herbs and citrus. They add a bright touch to your salsa chicken tacos:

  • Chopped fresh cilantro
  • Lime wedges for squeezing
  • Pickled jalapeños
  • Fresh mint leaves
  • Orange zest for unexpected brightness

Make-Ahead and Storage Solutions for Busy Weeknights

Getting dinner ready doesn’t have to be hard. Salsa chicken tacos are perfect for busy families. They offer easy prep that saves time and eases weeknight stress. With a little planning, you can make tasty tacos in no time.

Start by cooking chicken in big batches on the weekend. Shred it and store it in airtight containers. Keep your salsa, veggies, and tortillas separate to keep them fresh. This way, you can quickly make healthy tacos when dinner time comes.

Meal Prep Strategies

Set aside a few hours each weekend for prep work. Use slow cookers to make tender chicken that you can freeze. Label your containers so you know what’s inside. Cooked chicken stays good for 3-4 days in the fridge, and frozen chicken lasts up to three months.

Proper Storage Methods

Keep cooked chicken and salsa in different containers to avoid sogginess. Use glass containers with tight lids to keep flavors in and bacteria out. Store tortillas in their original packaging or a sealed bag to keep them fresh.

Reheating Guidelines

To warm up your taco ingredients, reheat chicken gently in a skillet or microwave. Add a bit of broth to keep it moist. Warm tortillas on a griddle or in foil. These tips will help you make delicious tacos with little effort.

FAQ

How long can I store salsa chicken for tacos?

Cooked shredded chicken can stay in the fridge for 3-4 days in an airtight container. For longer storage, freeze it for up to 3 months. Make sure it’s sealed well to keep its taste and texture.

Can I make salsa chicken tacos with different types of protein?

Yes! You can use chicken, ground beef, pork, turkey, or plant-based proteins. Just remember to keep the seasoning and cooking methods similar to keep the Mexican flavor.

What’s the best way to shred chicken for tacos?

Use two forks to shred the chicken, or a stand mixer with a paddle for quick work. If it’s cooked in a slow cooker, it will be so tender it shreds easily.

How can I make my salsa chicken tacos spicier?

Add jalapeños, cayenne pepper, or use spicier salsa. For homemade salsa, add more hot peppers or a dash of hot sauce to adjust the heat.

Are salsa chicken tacos healthy?

They can be when made with care. They’re full of protein and can have lots of veggies. Use lean chicken and whole wheat tortillas for more health benefits.

What are some kid-friendly toppings for salsa chicken tacos?

Kids like mild toppings like cheese, tomatoes, sour cream, and guacamole. Setting up a taco bar lets them pick their favorites, making mealtime fun.

Can I make salsa chicken tacos in advance?

Yes! Prepare the chicken and salsa ahead and store them in the fridge. Reheat the chicken and warm tortillas when you’re ready for a quick meal.

What type of tortillas work best for salsa chicken tacos?

Corn tortillas are traditional and flavorful. Flour tortillas are softer. You can also find whole wheat or low-carb options. Warm tortillas slightly for better taste and texture.

Print
clock clock iconcutlery cutlery iconflag flag iconfolder folder iconinstagram instagram iconpinterest pinterest iconfacebook facebook iconprint print iconsquares squares iconheart heart iconheart solid heart solid icon
salsa chicken tacos

Salsa Chicken Tacos


  • Author: Emily
  • Total Time: 35 minutes
  • Yield: 4 servings (8 tacos) 1x

Description

These Salsa Chicken Tacos are the perfect blend of bold flavors and easy preparation. Juicy, seasoned chicken slow-cooked with salsa creates a mouthwatering filling, while fresh toppings add a delicious crunch. Perfect for busy weeknights, these tacos are sure to be a family favorite!


Ingredients

Scale
  • 2 boneless, skinless chicken breasts (or thighs)
  • 1 cup salsa (homemade or store-bought)
  • 1 teaspoon chili powder
  • 1/2 teaspoon cumin
  • 1/2 teaspoon garlic powder
  • 1/2 teaspoon smoked paprika
  • 1/2 teaspoon salt
  • 1/4 teaspoon black pepper
  • 1/4 cup chicken broth (optional, for extra moisture)
  • 8 small corn or flour tortillas

Toppings (Optional):


  • Fresh cilantro, chopped
  • Diced red onion
  • Shredded lettuce
  • Sliced avocado or guacamole
  • Sour cream or Mexican crema
  • Crumbled queso fresco or shredded cheese
  • Lime wedges

Instructions


  1. Cook the Chicken: Place the chicken breasts in a slow cooker, Instant Pot, or stovetop pan. Sprinkle the chili powder, cumin, garlic powder, smoked paprika, salt, and pepper over the chicken.
  2. Add Salsa & Cook: Pour the salsa over the seasoned chicken. Add chicken broth if using for extra moisture.
    • Slow Cooker: Cook on low for 4-6 hours or high for 2-3 hours.
    • Instant Pot: Cook on high pressure for 10 minutes, then allow natural release for 5 minutes.
    • Stovetop: Simmer covered on low heat for about 25-30 minutes, stirring occasionally.
  3. Shred the Chicken: Once cooked, use two forks to shred the chicken directly in the pot, mixing it with the salsa sauce.
  4. Warm the Tortillas: Heat a skillet over medium heat and warm the tortillas for about 20-30 seconds on each side until soft.
  5. Assemble the Tacos: Place shredded salsa chicken on each tortilla. Top with fresh cilantro, diced red onion, avocado, cheese, and any other desired toppings.
  6. Serve & Enjoy: Squeeze fresh lime juice over the tacos and serve warm!

Keywords: salsa chicken tacos, easy chicken tacos, Mexican chicken recipe, slow cooker tacos, shredded chicken tacos, weeknight dinner, family-friendly meals, taco toppings, healthy tacos, quick dinner idea

Tagged : / / / /

Delicious Hawaiian Chicken Sheet Pan Dinner

sometimes you just don’t have the time to cook something complicated, but you still want a tasty and satisfying meal. That’s where our Hawaiian chicken sheet pan recipe comes in! It’s the perfect way to make dinner hassle-free and enjoy a delicious meal with your family and friends. Get ready to enjoy a scrumptious and easy Hawaiian chicken recipe that will become a new favorite in your home.

Why You’ll Love This Hawaiian Chicken Sheet Pan Recipe

This Hawaiian Chicken Sheet Pan Recipe is a game-changer. It offers a hawaiian chicken bake that’s both flavorful and convenient. With simple ingredients and quick cooking, you can enjoy a satisfying hawaiian chicken dinner without spending too much time.

This recipe is great for busy families who need a quick meal. It also has minimal cleanup, keeping your kitchen clean and organized. Plus, the tropical flavors will make you feel like you’re in Hawaii, right at home.

Here are just a few reasons why you’ll love this recipe:

  • Quick and easy to make, perfect for weeknights
  • Minimal cleanup required, making it a breeze to maintain a clean kitchen
  • Tropical flavors that will transport you to a Hawaiian paradise
Freshly roasted Hawaiian chicken sheet pan dinner in a metal baking tray showing caramelized chicken, pineapple chunks, bell peppers, and red onions
Fresh-baked Hawaiian chicken sheet pan displaying perfect caramelization

With this recipe, you can enjoy a delicious hawaiian chicken dinner that’s both healthy and flavorful. The hawaiian chicken bake is a great way to mix things up and try something new. And the best part is, it’s easy to customize to your tastes. So why not give it a try and experience the convenience and flavor of this amazing Hawaiian Chicken Sheet Pan Recipe?

Essential Ingredients for Hawaiian Chicken Sheet Pan Dinner

To make a tasty sheet pan chicken recipe, you need some key ingredients. These include protein, produce, and marinade parts. They add a special flavor to your dish. For a simple sheet pan dinner, focus on easy and convenient ingredients.

Chicken breasts or thighs are great for protein. Add colorful bell peppers, onions, and pineapple chunks for produce. The marinade, with soy sauce, brown sugar, and garlic, ties it all together.

  • 1-2 pounds chicken breasts or thighs
  • 1-2 bell peppers, sliced
  • 1 onion, sliced
  • 1 cup pineapple chunks
  • 1/4 cup soy sauce
  • 2 tablespoons brown sugar
  • 2 cloves garlic, minced

With these ingredients, you’re set to make a delicious sheet pan chicken recipe. It’s perfect for a weeknight dinner. Just adjust the amounts to fit your taste and the number of guests.

Preparing Your Sheet Pan for Success

To make a tasty quick weeknight meal, start by getting your sheet pan ready. Choose the right size and type for your needs. A bigger pan is great for cooking more food, perfect for families or meal prep.

Then, cover your sheet pan with parchment paper or aluminum foil. This stops food from sticking and makes cleaning up a breeze. It’s a key step for a quick weeknight meal, saving you time and effort.

Preheat your oven to about 400°F (200°C). This ensures your Hawaiian chicken sheet pan cooks evenly and well.

Before adding your ingredients, clean your sheet pan well. This removes any unwanted flavors or textures from your dish. By doing these simple steps, you’re on your way to a delicious Hawaiian chicken sheet pan dinner, ideal for a quick weeknight meal.

Some extra tips to remember:

  • Use a sheet pan with a lip to prevent food from spilling over
  • Don’t overcrowd your sheet pan, as this can affect cooking time and quality
  • Consider using a silicone mat for easy food release and cleanup
Hawaiian chicken sheet pan served with white rice, mango chunks, cherry tomatoes, and lime wedges,
Hawaiian chicken bowl with tropical fruits and hot sauce

Making the Perfect Hawaiian Chicken Sheet Pan Meal

To make a tasty one-pan Hawaiian chicken dish, start by getting your ingredients ready. This recipe is great for a weeknight dinner because it’s easy to clean up and cooks fast. You’ll marinate your chicken in a mix of soy sauce, brown sugar, and pineapple juice. This gives it a sweet and savory taste.

After marinating your chicken, it’s time to set up your sheet pan. Add your chicken, sliced bell peppers, onions, and pineapple chunks. This mix creates a colorful and tasty one-pan dish that will wow everyone.

Marinating Instructions

  • Combine soy sauce, brown sugar, and pineapple juice in a bowl
  • Add your chicken to the marinade and refrigerate for at least 30 minutes
  • Preheat your oven to 400°F (200°C)

Assembly Steps

  • Line your sheet pan with aluminum foil or parchment paper
  • Add your marinated chicken to the sheet pan
  • Add sliced bell peppers, onions, and pineapple chunks to the sheet pan
Close-up shot of Hawaiian chicken sheet pan meal featuring glazed chicken, pineapple chunks, red onions, and white rice
Detailed view of glazed Hawaiian chicken with pineapple and rice

Cooking Guidelines

To cook your one-pan Hawaiian chicken, just put the sheet pan in the oven. Bake for 25-30 minutes, or until the chicken is done and the veggies are tender. This recipe is perfect for a quick and tasty dinner. Serve it with rice or noodles for a full meal.

Customization Options and Serving Suggestions

Creating a delicious hawaiian chicken dinner is all about personal touch. You can add your favorite vegetables, seasonings, and spices. This makes your meal unique and flavorful. Try adding roasted vegetables like Brussels sprouts or sweet potatoes for a healthy twist.

To make your dinner more filling, pair it with steamed rice or quinoa. A side salad or fresh herbs like parsley or cilantro can also add a nice touch. The secret to a great hawaiian chicken dinner is to keep trying new things until you find your favorite combination.

  • Spice it up with red pepper flakes or sliced jalapenos
  • Try using shrimp or tofu for a different twist
  • Experiment with soy sauce or ginger for extra flavor

By exploring these options, you can make a hawaiian chicken dinner that’s both tasty and tailored to your liking.

Conclusion: Mastering Your Hawaiian-Inspired Sheet Pan Dinner

With the simple and delicious hawaiian chicken sheet pan recipe, you can create a tasty meal for your family and friends. This recipe is great for busy weeknights or special occasions. You can also add your favorite ingredients or try different proteins and vegetables.

To make this hawaiian chicken sheet pan dinner, you’ll need a few basic ingredients. These include chicken breasts, pineapple, bell peppers, and a sweet and sour sauce. You can find these at your local grocery store or online. Then, just follow the step-by-step instructions to prepare and cook the meal.

This sheet pan chicken recipe is easy to make and requires minimal cleanup. You can cook the entire meal on one sheet pan. This makes it perfect for busy families or individuals who want to spend less time in the kitchen. So, try this hawaiian chicken sheet pan recipe and enjoy the delicious flavors of Hawaii at home.

FAQ

What is a Hawaiian Chicken Sheet Pan Dinner?

A Hawaiian Chicken Sheet Pan Dinner is a tasty meal. It’s made with chicken, veggies, and a sweet sauce. All cooked on one sheet pan in the oven. It’s great for a quick dinner or a weeknight meal.

What ingredients do I need for a Hawaiian Chicken Sheet Pan Dinner?

You’ll need chicken, bell peppers, onions, and pineapple. Also, soy sauce, brown sugar, and garlic for the marinade. Optional add-ins like nuts or seeds can add extra flavor and texture.

How do I prepare my sheet pan for a Hawaiian Chicken Sheet Pan Dinner?

Choose the right size and type of pan. Line it with parchment paper or foil. Preheat your oven to the right temperature. Make sure the pan is clean before adding your ingredients.

Can I customize the Hawaiian Chicken Sheet Pan Dinner recipe to suit my tastes?

Yes, you can customize the recipe. Try adding different veggies or using different seasonings. Serve it with rice, quinoa, or a fresh salad for variety.

Is the Hawaiian Chicken Sheet Pan Dinner recipe suitable for busy families?

Absolutely, it’s perfect for busy families. It’s quick, easy, and has minimal cleanup. You can have a delicious Hawaiian chicken dinner ready in no time.

What are some benefits of making a Hawaiian Chicken Sheet Pan Dinner?

Making this dinner offers tropical flavors at home. It’s easy to prepare and clean up. You can also customize it to your liking. It’s a quick and delicious meal for any time.

Can I make the Hawaiian Chicken Sheet Pan Dinner recipe in advance?

Yes, you can prepare it in advance. But cook the chicken and veggies just before serving. This keeps them fresh and flavorful. Prepare the marinade and chopped ingredients ahead of time for easier cooking.

Print
clock clock iconcutlery cutlery iconflag flag iconfolder folder iconinstagram instagram iconpinterest pinterest iconfacebook facebook iconprint print iconsquares squares iconheart heart iconheart solid heart solid icon
Hawaiian chicken sheet pan served with white rice, mango chunks, cherry tomatoes, and lime wedges,

Hawaiian Chicken Sheet Pan Dinner


  • Author: Emily
  • Total Time: 1 hour 10 minutes
  • Yield: 46 servings 1x

Ingredients

Scale
  • 2 pounds boneless, skinless chicken breasts or thighs, cut into 1-inch pieces
  • 2 cups fresh pineapple chunks
  • 2 bell peppers (any color), cut into 1-inch pieces
  • 1 large red onion, cut into wedges
  • 3 cloves garlic, minced
  • 2 tablespoons fresh ginger, grated
  • 3 green onions, chopped for garnish
  • 1 tablespoon sesame seeds for garnish
  • For the Marinade:
  • 1/2 cup soy sauce
  • 1/4 cup pineapple juice
  • 3 tablespoons brown sugar
  • 2 tablespoons sesame oil
  • 2 tablespoons rice vinegar
  • 1 teaspoon black pepper

Instructions

  1. In a large bowl, whisk together all marinade ingredients until the brown sugar dissolves
  2. Add chicken pieces to the marinade and refrigerate for 30 minutes to 2 hours
  3. Preheat oven to 400°F (200°C)
  4. Line a large sheet pan with parchment paper or aluminum foil
  5. Remove chicken from marinade, reserving the liquid
  6. Arrange chicken, pineapple chunks, bell peppers, and onion wedges on the prepared sheet pan
  7. Pour half of the reserved marinade over the ingredients
  8. Bake for 20-25 minutes, stirring halfway through
  9. Switch to broil for the last 2-3 minutes to achieve caramelization
  10. Garnish with chopped green onions and sesame seeds before serving
Tagged : / / /

Why Chicken Leg Soup Is Your Ultimate Winter Remedy

Winter broke me this year! cold, miserable, desperate for comfort. Then I remembered my grandmother’s chicken leg soup, a recipe that’s more magic potion than mere meal. Some dishes heal the body, but this one? It resurrects your entire spirit. One spoonful, and suddenly the world feels right again.

The Science Behind the Soup

Nutritional Powerhouse of Chicken Legs

Chicken leg soup stands out as a nutritional superhero, offering more than just warmth and comfort. Let’s break down why these often-overlooked protein sources are a game-changer for your health:

NutrientChicken Leg ValueBenefit for the Soup
Protein13.5g per legMuscle recovery and satiety
Zinc1.5mgImmune system support
Selenium20.6 mcgAntioxidant protection
Vitamin B60.3mgMetabolism regulation

Key advantages of using chicken leg soup for nutrition:

  • Higher fat content creates richer, more flavorful broth
  • More collagen compared to chicken breast
  • Superior mineral extraction during slow cooking
  • Supports joint health and inflammation reduction

Understanding the Protein-Rich Benefits

When preparing this soup, you’re not just making a meal – you’re crafting a nutritional powerhouse. Therefore, choosing bone-in chicken legs ensures maximum nutrient release. Consequently, each spoonful delivers a complex blend of proteins, minerals, and healing compounds.

Why Bone-In Matters for Maximum Nutrition

Chicken leg soup truly shines when prepared with bone-in legs. The slow cooking process extracts:

  • Collagen for joint health
  • Minerals like calcium and phosphorus
  • Essential amino acids
  • Gelatin for gut support

The Immune-Boosting Secret Weapon

Moreover, chicken leg soup acts as a natural immunity booster. However, the key lies in proper preparation and ingredient selection. For instance, adding immune-supporting herbs like thyme or garlic can enhance the soup’s healing properties.

Mastering the Art of Chicken Leg Soup: A Step-by-Step Guide

Selecting the Perfect Chicken Legs

Raw chicken legs prepared for soup
Selecting the Perfect Chicken for Your Soup

Crafting the ultimate soup starts with choosing the right ingredients. Not all chicken legs are created equal, and here’s what you need to know:

Chicken Leg TypeBest For Chicken Leg SoupFlavor Profile
Organic ChickenMaximum nutritionRich, deep flavor
Free-RangeBetter textureMore complex taste
Bone-In LegsSuperior brothMaximum nutrient extraction

Pro Tips for Chicken Leg Selection:

  • Look for legs with smooth, unblemished skin
  • Choose bone-in legs for richer chicken leg soup
  • Organic options provide better overall nutrition
  • Fresh is always better than frozen

Essential Ingredients for a Flavor-Packed Soup

Chicken leg soup becomes extraordinary with the right supporting cast. Therefore, consider these game-changing ingredients:

Aromatic Vegetable Combination:

  • Carrots for sweetness
  • Celery for depth
  • Onions for foundational flavor
  • Garlic for immune-boosting punch

Herb Selection Guide:

  • Thyme: Earthy undertones
  • Rosemary: Robust flavor
  • Parsley: Fresh finish
  • Bay leaves: Subtle complexity

Cooking Techniques

Cooking methods can make or break your chicken leg soup. Here’s a comparative breakdown:

Cooking methods for chicken leg soup
Mastering Soup Preparation Methods
Cooking MethodProsCons
Slow CookerMaximum flavor developmentLonger cooking time
Pressure CookerQuick preparationLess depth of flavor
StovetopTraditional methodRequires more attention

Key Technique Insights:

  • Low and slow wins the flavor race
  • Skim off excess fat for clearer broth
  • Allow soup to rest before serving

Secret Tips from Professional Chefs

Check out our Ultimate Winter Soup Collection for more warming recipes!

Professional Chicken Leg Soup Secrets:

  • Layer flavors by browning chicken legs first
  • Use homemade stock when possible
  • Season in stages, tasting as you go
  • Let soup sit overnight for enhanced flavor

Flavor-Boosting Hack:
Add a splash of acid (like apple cider vinegar) to help extract more nutrients from the bones and brighten the overall taste of your chicken leg soup.

Cooking Techniques That Elevate Your Soup

Slow Cooking vs. Pressure Cooking: The Ultimate Showdown

Chicken leg soup isn’t just a meal – it’s an art form that depends heavily on your cooking method. Let’s break down the pros and cons of different cooking techniques:

Slow Cooking Magic:

  • Develops deeper, more complex flavors
  • Allows collagen to break down slowly
  • Creates incredibly tender chicken meat
  • Minimal effort, maximum flavor
  • Perfect for busy home cooks
  • Extracts maximum nutrients from chicken leg soup ingredients

Pressure Cooking Perks:

  • Reduces cooking time dramatically
  • Locks in nutrients and flavors
  • Ideal for last-minute meal preparation
  • Creates equally delicious chicken leg soup
  • Great for time-pressed home chefs

Essential Equipment

Cooking Tools That Make a Difference:

  • Heavy-bottomed Dutch oven
  • Slow cooker or multi-cooker
  • Sharp kitchen knife
  • Large cutting board
  • Fine mesh strainer
  • Sturdy ladle
  • Quality soup pot with thick bottom

Flavor Layering Techniques

Flavor-Boosting Strategies:

  • Brown chicken legs before adding to soup
  • Use homemade stock when possible
  • Toast spices to enhance their complexity
  • Add fresh herbs at the end of cooking
  • Deglaze the pan with wine or stock
  • Season in stages, tasting as you go

Chef’s Secret Techniques

Insider Tricks for Chicken Leg Soup Perfection:

  • Let soup rest overnight for deeper flavor
  • Skim excess fat for clearer broth
  • Use acid (like vinegar) to help extract nutrients
  • Balance flavors with a pinch of salt
  • Learn to adjust seasoning as you cook
  • Experiment with different herb combinations

Chef’s Pro Hack: The secret to an mind-blowing chicken leg soup is patience and layering flavors slowly. Don’t rush the process – let each ingredient tell its story.

Health Benefits:

Nutritional ingredients for chicken leg soup
Immunity-Supporting Soup Components

Immune-Boosting Properties of Chicken Leg Soup

Winter’s chill can knock anyone down, but chicken leg soup is your secret weapon. The combination of nutrient-dense chicken legs and healing broth creates a powerful immune-boosting elixir. Scientific research suggests that the minerals and proteins in homemade soup can actually help reduce inflammation and support your body’s natural defense mechanisms.

The Gut Health Connection

Believe it or not, chicken leg soup is like a superhero for your digestive system. The collagen-rich broth helps heal and seal your gut lining, potentially reducing inflammation and supporting overall digestive health. Moreover, the slow-cooked bones release minerals that can improve gut bacteria balance and promote better nutrient absorption.

Fighting Winter Inflammation Naturally

Inflammation doesn’t stand a chance against a well-prepared chicken leg soup. The combination of ingredients works synergistically to combat winter-related inflammation. Particularly, the amino acids in chicken legs, combined with anti-inflammatory herbs like turmeric or ginger, can help your body fight off seasonal aches and pains.

Nutrition That Supports Whole-Body Wellness

More than just a comfort food, chicken leg soup is a nutritional powerhouse. Each spoonful delivers a complex blend of proteins, minerals, and healing compounds. The bone broth base provides essential nutrients that support:

  • Joint health
  • Muscle recovery
  • Immune system function
  • Overall cellular health

Pro Tip: The magic of chicken leg soup lies in its simplicity. Slow cooking allows nutrients to develop fully, transforming humble ingredients into a healing meal that nourishes both body and soul.

Serving of homemade chicken leg soup in rustic bowl
Warm Up with the Ultimate Winter Soup

FAQs About Chicken Leg Soup

Is Chicken Leg Soup Healthy?

Absolutely! Chicken leg soup is a nutritional powerhouse that packs a serious health punch. Unlike many processed foods, this homemade remedy is loaded with essential nutrients, proteins, and minerals that support your immune system. Each spoonful delivers a natural boost of wellness, helping you fight off winter blues and keep your body strong.

What Part of Chicken Is Best for Soup?

When it comes to chicken leg soup, bone-in chicken legs are the ultimate champions. They offer:

  • More flavor than chicken breast
  • Higher fat content for richer broth
  • More collagen and minerals
  • Deeper, more complex taste
  • Better nutritional profile

How Long to Boil Chicken Legs?

The perfect chicken leg soup requires patience. Typically, you’ll want to:

  • Boil chicken legs for 30-45 minutes
  • Ensure internal temperature reaches 165°F
  • Watch for tender, falling-off-the-bone meat
  • Allow slow cooking to extract maximum nutrients

Are Drumsticks Good for Broth?

Drumsticks are the secret weapon of chicken leg soup enthusiasts! They:

  • Release more collagen during cooking
  • Create a richer, more nutritious broth
  • Provide deeper flavor profiles
  • Offer superior mineral extraction
  • Support overall soup quality

Conclusion

Your journey through the world of chicken leg soup doesn’t end here it’s just beginning! From understanding its incredible health benefits to mastering cooking techniques, you’ve discovered a nutritional treasure that’s more than just a meal. It’s comfort, healing, and love, ladled into a single bowl.

Remember, the magic of chicken leg soup lies in its simplicity and the care you put into preparing it. Whether you’re fighting off a winter cold or simply craving something soul-warming, this soup is your ultimate remedy.

How to Cook Perfect Sirloin Strip Steak (Step-by-Step)

Confession time: my first attempt at cooking a sirloin strip steak was… well, let’s just say the dog wouldn’t even eat it! But here’s the thing – that kitchen fail led me down a rabbit hole of testing and tweaking until I cracked the code. Now my family literally cheers when they see strip steak on the menu. Ready to learn all my tried-and-true tricks? Let’s dive in!

Understanding Your Sirloin Strip Steak

What Makes Strip Steak Special

Let’s talk about why the sirloin strip steak deserves a special place in your cooking repertoire. First off, this cut comes from the short loin of the cow, which basically means it’s from a part of the animal that doesn’t do much heavy lifting. As a result, you get this amazing balance of tenderness and rich, beefy flavor that’s hard to beat.

What’s really cool about a strip steak is its distinctive muscle structure. Unlike other cuts, it has this beautiful marbling throughout, but not so much that it becomes overwhelming. This means you’ll get that melt-in-your-mouth experience while still enjoying a meaty bite that really satisfies.

Selecting the Perfect Cut

Here’s where things get exciting! When you’re at the butcher counter, look for a sirloin strip steak with bright cherry-red color and fine white marbling threads running through the meat. According to Meat Science Journal, this marbling is crucial for flavor development during cooking.

Thickness matters big time – aim for about 1 to 1.5 inches thick. Why? Because thinner steaks can go from perfect to overcooked in seconds, while thicker cuts give you more wiggle room to nail that gorgeous crust while keeping the inside just right.

Reading the Labels

Let’s decode those confusing meat grades! Prime strip steaks are the cream of the crop with the most marbling, but honestly, a well-chosen Choice grade can be just as delicious for home cooking. Look for steaks with:

  • Even color throughout
  • No dark spots or discoloration
  • Firm to the touch, but not hard
  • Marbling that looks like fine cobwebs through the meat

Storage and Prep Tips

Once you’ve got your perfect strip steak home, proper storage is key. If you’re cooking within 2-3 days, keep it in the fridge wrapped in butcher paper or loosely in plastic wrap. The meat needs to breathe a little! For longer storage, wrap it tightly in freezer paper and use within 3 months for the best flavor.

Pro tip: Always (and I mean always) let your steak come to room temperature before cooking. This usually takes about 30-45 minutes and makes a huge difference in how evenly it cooks. Trust me on this one – I learned it the hard way!

Essential Preparation Techniques

Temperature Matters

Alright, let’s get real about temperature – it’s seriously the make-or-break factor for a perfect sirloin strip steak! First things first: take your steak out of the fridge about 30-45 minutes before cooking. Why? Because a room-temperature steak cooks way more evenly than a cold one. Think of it like warming up before exercise – it just works better!

While your steak is coming to room temp, go ahead and pat it dry with paper towels. This step might seem small, but trust me, it’s crucial for getting that gorgeous brown crust we’re all dreaming of. Remember, moisture is the enemy of a good sear!

Seasoning Your Strip Steak

Seasoning raw sirloin strip steak with salt and pepper
Season generously – don’t be shy with that salt

Now for the fun part – seasoning! When it comes to a quality strip steak, sometimes less is more. Start with a generous coating of kosher salt (about 1 teaspoon per pound) and freshly ground black pepper. However, if you’re feeling adventurous, here are some killer additions:

  • Fresh crushed garlic
  • Sprigs of fresh rosemary or thyme
  • A light brush of good olive oil

Pro tip: Salt your steak at least 40 minutes before cooking. This gives the salt time to do its magic, enhancing the meat’s natural flavors and improving moisture retention.

Prepping Your Workspace

Before you start cooking your sirloin strip, get your workspace ready like a pro chef. You’ll need:

  • A heavy-bottomed pan (cast iron is perfect!)
  • Tongs for flipping
  • An instant-read thermometer
  • A warm plate for resting

Having everything ready beforehand means you can focus completely on cooking your steak to perfection. No running around the kitchen looking for stuff while your steak overcooks!

Essential Tools Check

Testing sirloin strip steak doneness with finger method
Master this simple trick for perfect doneness every time

Let’s talk tools because having the right equipment makes cooking a strip steak so much easier. Your MVP is definitely going to be a good pan – I’m talking about something that can handle high heat and distribute it evenly. Cast iron is amazing, but a heavy stainless steel pan works great too.

Next up, get yourself a reliable meat thermometer. After years of cooking steaks, I still use one every time. It’s not cheating – it’s being smart! The difference between medium-rare and medium can be just a few degrees, so why guess when you can know for sure?

Remember, good tools make cooking more enjoyable, but you don’t need anything fancy to make a great steak. Start with what you have, and upgrade as you go along. The most important ingredient is your attention to detail!

Pro tip: Keep a pair of dedicated tongs for your steaks – they’re way better than a fork which can pierce the meat and let all those precious juices escape. Nobody wants that!

Cooking Methods Master Guide

Pan-Searing Perfection

Let’s dive into my favorite way to cook a sirloin strip steak – the pan-sear method! Think restaurant-quality results right in your kitchen. First, get your pan screaming hot (and I mean HOT!). Cast iron is your best friend here, but any heavy-bottomed pan will work.

Once your pan is hot (you should see a little smoke), add a tiny bit of high-heat oil – just enough to coat the bottom. Now, place your room-temperature strip steak in the pan. That sizzle? That’s the sound of magic happening!

Here’s your timing guide:

  • For medium-rare (my go-to): 4-5 minutes per side
  • For medium: 5-6 minutes per side
  • For medium-well: 6-7 minutes per side

Pro tip: Use tongs to hold your steak on its side for about 30 seconds to render that fat cap. Trust me, it’s worth it!

Grilling Guide

Nothing beats the smoky flavor of a grilled sirloin strip steak! Start by setting up your grill with two zones – one hot side for searing and one cooler side for more controlled cooking. Aim for about 450-500°F on the hot side.

Before grilling, make sure your steak is dry and well-seasoned. Place it on the hot side of the grill and – here’s the important part – don’t touch it for 4-5 minutes! Those gorgeous grill marks need time to develop. Then flip once (yep, just once!) and cook for another 3-4 minutes for medium-rare.

Mastering the Butter Baste

Want to take your strip steak to the next level? Try butter basting! About a minute before your steak is done, add a knob of butter to the pan along with some fresh herbs (thyme and rosemary are amazing). As the butter melts, tilt the pan slightly and use a spoon to repeatedly pour that flavored butter over the steak.

The butter will foam and brown, creating this incredible nutty flavor that coats your steak. Plus, it helps create that steakhouse-worthy crust we’re all after!

Love steak but want to explore different cuts? While this sirloin strip steak is my weekend go-to, our Easy Black Pepper Angus Steak Recipe is perfect for busy weeknights when you still want something special.

Getting Creative

While a perfectly cooked sirloin strip is amazing on its own, sometimes it’s fun to mix things up! Try:

  • Adding crushed garlic cloves and herbs to your butter baste
  • Creating a quick pan sauce with red wine and shallots
  • Topping with a pat of compound butter (herb-infused butter)

Remember, cooking should be fun! Don’t be afraid to experiment once you’ve got the basics down.

Pro tip: If you’re loving this steak guide, you might want to check out our guide on making the perfect pan sauce for steaks. It’s a game-changer!

Advanced Tips for Restaurant-Quality Results

Temperature Control

Getting that perfect sirloin strip steak means mastering your temperatures! Let me break down these game-changing temp targets for you:

  • Rare: 125°F (bright red center)
  • Medium-rare: 135°F (warm red center – my personal fave!)
  • Medium: 145°F (warm pink center)
  • Medium-well: 150°F (slightly pink center)

Remember, your strip steak will continue cooking even after you take it off the heat. This is called carryover cooking, and it can raise the temperature by about 5°F. So, pull your steak when it’s about 5 degrees below your target temp!

The Art of Resting

Here’s something I learned the hard way – a rested steak is a juicy steak! After cooking your sirloin strip steak, let it hang out on a warm plate for 5-10 minutes. I know it’s tempting to dig right in (believe me, I’ve been there!), but this resting time lets those tasty juices redistribute throughout the meat.

Pro tip: Loosely tent your steak with foil while it rests. Don’t wrap it tight though – we want to keep that beautiful crust we worked so hard for!

Slicing for Success

Ready for the big reveal? When slicing your sirloin strip steak, always cut against the grain. Look for the lines running through the meat and slice perpendicular to them. This breaks up those muscle fibers and gives you the most tender bite possible.

Aim for slices about ½ inch thick – thin enough to be bite-sized but thick enough to maintain that gorgeous pink center. And hey, if you’re taking photos for the ‘gram (who isn’t these days?), slice on a slight angle for that dramatic presentation!

Sliced medium-rare sirloin strip steak with melting herb butter
This could be your dinner tonight!

Perfect Pairings

A perfectly cooked sirloin strip steak deserves perfect sides! Here are some winning combinations I’ve discovered through lots of delicious “research”:

  • Crispy roasted potatoes with garlic and herbs
  • Grilled asparagus with lemon zest
  • Sautéed mushrooms in red wine sauce
  • Fresh arugula salad with shaved parmesan

Remember, the best side dish is one that complements your steak without overshadowing it. Think of your steak as the star of the show, with the sides playing supporting roles!

Pro tip: Save those meat juices that collect while resting – they’re liquid gold for drizzling over your plated steak!

Frequently Asked Questions

Is sirloin strip a good steak?

Absolutely! The sirloin strip steak is one of the best value-for-money cuts you’ll find. Think of it as the sweet spot between fancy special-occasion steaks and everyday cuts. It has this amazing balance of flavor and tenderness, plus that beautiful marbling that gives you tons of beefy flavor. The best part? It’s pretty forgiving when you’re cooking, so it’s perfect whether you’re just starting your steak journey or you’re a seasoned pro!

What is the best way to cook sirloin steak strips?

From my endless kitchen experiments (and trust me, I’ve tried every method!), pan-searing your strip steak is the way to go. Get your pan screaming hot, add a tiny bit of oil, and cook for 4-5 minutes per side for medium-rare. The key is letting that gorgeous crust develop – no peeking or flipping too early! Want to level up? Try the butter-basting technique I mentioned earlier. It’s a total game-changer!

Is strip sirloin steak tender?

You bet it is! While not quite as buttery-soft as a filet mignon, a sirloin strip steak has excellent tenderness, especially when cooked properly. The secret? It’s all about two things: cooking temperature and slicing against the grain. Get these right, and you’ll have a steak that’s tender enough to make your dinner guests think you’ve been taking secret chef lessons!

What is another name for sirloin strip steak?

Here’s a fun fact: your sirloin strip steak goes by quite a few aliases! You might see it labeled as New York Strip, Kansas City Strip, or simply Strip Steak. In some places, it’s even called a Club Steak or Ambassador Steak. Same delicious cut, just different names depending on where you’re shopping!

Conclusion

Remember, great steak cooking is all about temperature, timing, and a little bit of patience. Don’t be afraid to practice, and most importantly, have fun with it! Whether you’re pan-searing, grilling, or trying out that fancy butter-basting technique, you’ve got all the tools you need to nail it every time. Now, go forth and cook some amazing steaks!


Print
clock clock iconcutlery cutlery iconflag flag iconfolder folder iconinstagram instagram iconpinterest pinterest iconfacebook facebook iconprint print iconsquares squares iconheart heart iconheart solid heart solid icon
Sliced medium-rare sirloin strip steak with melting herb butter

Perfect Sirloin Strip Steak Recipe: Steakhouse Quality at Home


  • Author: Emily
  • Total Time: 1 Hour
  • Yield: 24 servings (depends on steak size) 1x

Description


Ready to nail that restaurant-worthy sirloin strip steak right in your kitchen? This foolproof recipe delivers a perfectly juicy, crusty steak every single time. I’ve tested this method hundreds of times (tough job, but someone had to do it! 😉), and it never fails to impress.


Ingredients

Scale
  • 1 (1½-inch thick) sirloin strip steak (about 11.5 pounds)
  • 2 teaspoons kosher salt
  • 1 teaspoon freshly ground black pepper
  • 2 tablespoons high-heat cooking oil (like avocado or grapeseed)
  • 4 tablespoons unsalted butter
  • 4 garlic cloves, peeled and smashed
  • 4 sprigs fresh thyme
  • 2 sprigs fresh rosemary

Instructions

  • Remove your strip steak from the fridge 30-45 minutes before cooking to reach room temperature. Pat it dry really well with paper towels (moisture is the enemy of a good crust!).
  • Season generously with salt and pepper on all sides, including the edges. Don’t be shy – some will fall off during cooking.
  • Heat a cast-iron skillet or heavy-bottomed pan over high heat until it’s smoking hot (about 5 minutes).
  • Add oil to the pan – it should shimmer immediately.
  • Carefully place your steak in the pan. Let it sear undisturbed for 4-5 minutes until a beautiful brown crust forms.
  • Flip once and cook for another 3-4 minutes.
  • Add butter, garlic, and herbs to the pan. Once butter melts, tilt the pan slightly and start basting! Spoon that gorgeous butter over the steak continuously for about 1-2 minutes.
  • Check internal temperature:
    • Rare: 125°F
    • Medium-rare: 135°F (my recommendation!)
    • Medium: 145°F
    • Medium-well: 150°F
  • Transfer to a warm plate and let rest for 5-10 minutes (no cheating – this step is crucial!).
  • Slice against the grain and serve with those flavorful pan juices.

Notes


  • Your pan needs to be HOT – if you’re not setting off smoke detectors, it’s probably not hot enough (kidding… kind of! 😅)
  • Use tongs to handle your steak – no forks allowed!
  • The finger test works great for checking doneness, but a meat thermometer is foolproof
  • Let your steak rest on a warm plate, not a cold one
  • Don’t forget to pour those buttery pan juices over the sliced steak before serving

mongolian ground beef noodles: Amazing Ultimate Recipe

mongolian ground beef noodles burst onto the scene as a fusion dish that marries the heartiness of ground beef with the bold flavors of a traditional Mongolian-inspired sauce. This recipe has gained popularity due to its unique twist on classic noodles, offering a dish that is both comforting and exciting.

What Are Mongolian Ground Beef Noodles?

Mongolian ground beef noodles are a creative take on a beloved dish. The recipe blends ground beef, tender noodles, and a savory sauce that captures the spirit of Mongolian cuisine. Traditionally, Mongolian beef is known for its robust flavor, and when combined with noodles, it forms a dish that is both hearty and versatile. This recipe stands out due to its balance of sweet, savory, and slightly spicy notes.

In addition, the dish is perfect for busy weeknights and festive gatherings. Chefs and home cooks alike appreciate the simplicity and depth of flavor in each bite.

Essential Ingredients for Mongolian Ground Beef Noodles

A successful dish starts with quality ingredients. Fresh produce and premium ground beef are key to an amazing outcome. Here are the essentials:

Essential ingredients for mongolian ground beef noodles arranged neatly
A top-down view of fresh ingredients including ground beef, noodles, and vegetables
  • Ground Beef: Choose lean ground beef to ensure a rich yet light flavor. The beef is the centerpiece of this dish.
  • Noodles: Use egg noodles or your preferred variety. They should be firm and able to absorb the sauce.
  • Sauce Components: A blend of soy sauce, garlic, ginger, brown sugar, and a splash of vinegar creates the perfect balance.
  • Vegetables: Bell peppers, onions, and scallions add color and crunch.
  • Spices: Red pepper flakes or a dash of chili oil give the dish a subtle kick.

Furthermore, fresh herbs like cilantro or basil can be added for a burst of freshness. Seasonings are adjusted to taste, making the recipe adaptable for various palates.

How to Prepare the Mongolian Beef Sauce

The secret behind the delicious taste lies in the sauce. This sauce is the soul of mongolian ground beef noodles, offering a perfect blend of sweet and savory. Here’s how to prepare it:

  1. Combine the Ingredients: In a bowl, mix soy sauce, brown sugar, minced garlic, grated ginger, and a splash of vinegar. Stir until the sugar dissolves.
  2. Heat and Thicken: In a pan, heat a small amount of oil. Pour in the mixture and let it simmer until it thickens slightly.
  3. Adjust Seasoning: Taste and adjust the seasoning. You may add a pinch of red pepper flakes for a mild heat.

This sauce is versatile and can be modified. Some variations include adding hoisin sauce or sesame oil to enhance the flavor profile further. The result is a sauce that perfectly coats each strand of noodle and morsel of beef.

Step-by-Step Cooking Process

The process of cooking mongolian ground beef noodles is straightforward. Follow these steps to create a dish that is both impressive and delicious.

Close-up of mongolian ground beef noodles sauce preparation in a sizzling pan
A detailed view of the sauce preparation process with bubbling sauce and aromatic spices

Preparing the Noodles

Begin by cooking the noodles according to the package directions. Use plenty of water and a pinch of salt to ensure they remain flavorful. Once cooked, drain and set aside. Drizzle a bit of oil to prevent sticking.

In addition, rinse the noodles briefly under warm water. This helps remove excess starch and keeps them from clumping together.

Cooking the Ground Beef

Next, heat a large skillet or wok over medium-high heat. Add a small amount of oil. Crumble the ground beef into the pan and cook until browned. Stir frequently to ensure even cooking. Season lightly with salt and pepper as the beef cooks.

Moreover, drain any excess fat from the pan. This step is important to avoid a greasy final dish. The beef should be well-cooked yet remain tender.

Combining the Sauce and Noodles

After the beef is ready, lower the heat and return the cooked noodles to the pan. Pour the prepared Mongolian beef sauce over the mixture. Toss gently to ensure every noodle and beef piece is evenly coated.

Furthermore, add the pre-sliced vegetables like bell peppers and onions. Cook for an additional 2–3 minutes, allowing the vegetables to soften while retaining a slight crunch.

Bringing It All Together

Mix everything thoroughly. The sauce should have a glossy sheen on each noodle strand. Ensure that the dish is heated evenly and that all components meld together into a cohesive flavor profile.

Final plated mongolian ground beef noodles in an artful presentation
A collage showcasing the final presentation of delicious mongolian ground beef noodles

Tips and Variations for Your Recipe

Cooking is an art, and recipes are a starting point for creativity. Here are some tips and variations to enhance your dish:

  • Substitute Noodles: If you cannot find the perfect noodles, consider using rice noodles or even spaghetti. Each variant offers a unique texture.
  • Extra Vegetables: For a healthier twist, add broccoli, snap peas, or carrots. These vegetables not only boost nutrition but also add crunch.
  • Spice It Up: Adjust the level of heat by adding more red pepper flakes or a dash of chili oil.
  • Make It Creamy: For a richer flavor, stir in a small amount of cream or coconut milk at the end of cooking.

Need a quick and hearty meal? Try this Easy Ground Beef Stroganoff Recipe in Just 30 Minutes! for a creamy, savory dish that the whole family will love. Perfect for busy weeknights!

Creative Twists to Elevate Your Dish

Elevating a simple dish into something extraordinary is part of the culinary adventure. Consider these creative twists for mongolian ground beef noodles:

  • Fusion Flair: Incorporate Asian spices like five-spice powder or a sprinkle of toasted sesame seeds.
  • Herbal Infusion: Garnish with fresh basil or cilantro. The herbs add an aromatic finish.
  • Crunchy Toppings: Top the dish with crushed peanuts or crispy fried onions for an added texture contrast.
  • Vegan Variation: Swap ground beef for plant-based protein such as crumbled tofu or tempeh. Use a vegan soy sauce to maintain the flavor balance.

These variations allow you to tailor the dish to your taste, making it both unique and memorable. The versatility of the recipe is one of its greatest strengths.

Serving and Plating Suggestions

Serving your dish beautifully is just as important as the taste. Here are some ideas to enhance your presentation:

  • Rustic Bowl: Serve in a rustic, deep bowl to emphasize the hearty nature of the dish.
  • Garnish Artfully: Add finely sliced scallions, sesame seeds, or a drizzle of extra sauce on top.
  • Side Accompaniments: Pair the noodles with a light salad or steamed greens. This creates a balanced meal.
  • Plating Techniques: For an elegant presentation, swirl the noodles in the center of the plate and arrange the beef and vegetables on top.

In addition, consider using contrasting colors in your plating. A bright garnish can transform a simple dish into a visually appealing meal.

Troubleshooting Common Issues

Even the best recipes can sometimes present challenges. Here are common issues and their fixes:

  • Overcooked Noodles: Ensure that you follow the package instructions carefully. Overcooked noodles can become mushy.
  • Sauce Too Thick or Too Thin: If the sauce is too thick, add a splash of water. Conversely, if it’s too thin, let it simmer a little longer.
  • Bland Flavor: Taste frequently. Adjust salt, sugar, or spices to achieve a balanced flavor.
  • Greasy Texture: Drain excess fat from the beef and avoid adding too much oil. This keeps the dish light yet flavorful.

Conclusion: Enjoy Your Amazing Mongolian Ground Beef Noodles

Mongolian ground beef noodles are a delightful mix of flavors, textures, and aromas. Each step, from preparing the noodles to perfecting the sauce, contributes to a dish that is both satisfying and impressive. This recipe offers endless opportunities for customization, making it a favorite in many kitchens.

FAQ

How to cook Mongolian ground beef noodles?

Start by cooking the noodles until al dente. Brown the ground beef and combine it with a prepared sauce made of soy sauce, garlic, ginger, and brown sugar. Toss the noodles and beef together, add vegetables, and simmer briefly for a perfectly balanced dish.

What is Mongolian beef sauce made of?

Mongolian beef sauce typically includes soy sauce, brown sugar, garlic, ginger, and sometimes a splash of vinegar. This combination creates a sweet and savory profile that complements the beef and noodles.

How to make Mongolian sauce?

To make Mongolian sauce, mix soy sauce, brown sugar, minced garlic, and grated ginger in a bowl. Heat a little oil in a pan, add the mixture, and let it simmer until it thickens slightly. Adjust the seasoning as needed for the perfect flavor.

What is a substitute for Mongolian noodles?

If Mongolian noodles are unavailable, you can use egg noodles, rice noodles, or even spaghetti. Each option provides a slightly different texture while still working well with the robust sauce and ground beef.


Print
clock clock iconcutlery cutlery iconflag flag iconfolder folder iconinstagram instagram iconpinterest pinterest iconfacebook facebook iconprint print iconsquares squares iconheart heart iconheart solid heart solid icon
Eye-catching mongolian ground beef noodles featured image.

mongolian ground beef noodles


  • Author: Emily
  • Total Time: 35 minutes
  • Yield: 4 servings 1x

Ingredients

Scale

  • 1 lb lean ground beef
  • 8 oz egg noodles (or noodles of choice)
  • 1 tablespoon vegetable oil
  • 1 medium onion, thinly sliced
  • 1 red bell pepper, thinly sliced
  • 3 cloves garlic, minced
  • 1 tablespoon fresh ginger, grated
  • 1/4 cup soy sauce
  • 2 tablespoons brown sugar
  • 1 tablespoon rice vinegar
  • 1/4 teaspoon red pepper flakes (optional)
  • 2 scallions, sliced (for garnish)
  • Fresh cilantro or basil (optional garnish)
  • Salt and pepper, to taste

Instructions

  1. Cook noodles in a large pot of boiling salted water until al dente, then drain and set aside.
  2. Heat vegetable oil in a large skillet or wok over medium-high heat.
  3. Add ground beef and cook until browned, breaking it apart as it cooks; season lightly with salt and pepper.
  4. Remove excess fat from the skillet.
  5. Add the sliced onion and red bell pepper; sauté for 2-3 minutes until slightly softened.
  6. Stir in minced garlic and grated ginger; cook for about 1 minute until fragrant.
  7. In a separate bowl, mix soy sauce, brown sugar, rice vinegar, and red pepper flakes until the sugar dissolves.
  8. Pour the sauce mixture into the skillet and let it simmer with the beef and vegetables for 2-3 minutes.
  9. Add the cooked noodles to the skillet, tossing gently to coat them evenly with the sauce.
  10. Allow the mixture to heat through for an additional 2 minutes, stirring constantly.
  11. Remove from heat and garnish with sliced scallions and fresh cilantro or basil, if desired.
  12. Serve hot and enjoy your delicious Mongolian ground beef noodles!

Easy 30-Min Chicken and Cheese Jalousie Recipe for Dinners

Today, you can whip up a sensational chicken and cheese jalousie recipe that marries succulent chicken with velvety cheese and flaky pastry. Additionally, this recipe is a game-changer for weeknights. Thus, roll up your sleeves, dive into this flavorful journey, and savor every comforting, delicious bite now.

Introduction and Background

What Is a Chicken and Cheese Jalousie Recipe?

A chicken and cheese jalousie recipe is a delightful dish that brings together tender chicken, rich melted cheese, and a light, flaky pastry. In this recipe, you layer the ingredients so they bake into crisp, golden folds. For example, each bite offers a mix of savory and buttery flavors. Moreover, this dish is perfect for those who enjoy quick chicken dinner recipes without compromising taste.

The Culinary Story Behind Jalousie

The jalousie technique has an interesting past. Originally, it comes from classic French pastry methods, which emphasize creating delicate layers. For instance, you can explore traditional pastry techniques on BBC Good Food. In addition, many modern cooks have adapted these methods to create innovative dishes, including our chicken and cheese jalousie recipe. Therefore, understanding its history adds a special touch to your cooking experience, making each bite more meaningful.

Why You Should Try This 30-Minute Meal

You’ll love this recipe because it’s both fast and flavorful. In just 30 minutes, you can prepare a meal that combines succulent chicken with melted cheese and a crisp pastry. Furthermore, it fits perfectly into your busy weeknight schedule. Therefore, if you’re looking for an easy chicken dinner recipe that delivers gourmet taste without the hassle, this dish is a must-try.

What to Expect from This Recipe Guide

In this guide, you will get a clear, step-by-step approach to creating the perfect chicken and cheese jalousie recipe. For example, we start with ingredient preparation, then move on to assembling the layers, and finally guide you through the baking process. Meanwhile, you’ll discover useful tips and creative serving ideas. Thus, by following these steps, you can easily enjoy a delicious, homemade meal that brightens any dinner table.

Ingredients and Preparation

Sourcing the Freshest Ingredients

Fresh ingredients for chicken and cheese jalousie recipe
A selection of fresh chicken, cheese, herbs, and pastry sheets arranged neatly.

Your success with this chicken and cheese jalousie recipe starts with using the best ingredients. First, pick fresh chicken, quality cheese, and premium pastry components. In addition, visit your local market or specialty store for seasonal produce.

Preparing Your Chicken and Cheese

Before you cook, proper preparation is key for this chicken and cheese jalousie recipe. First, marinate your chicken with a pinch of salt and pepper, then slice it evenly for consistent cooking. Moreover, select cheeses that melt smoothly to add richness. Thus, these simple steps ensure your dish turns out balanced and flavorful, making your meal even more enjoyable.

Essential Kitchen Tools and Equipment

Using the correct tools can make your chicken and cheese jalousie recipe a breeze. You will need a reliable oven, a sturdy baking tray, and a pastry brush for that perfect finish.

Pre-Cooking Setup and Organization

Before you start, organizing your workspace is crucial. Preheat your oven and arrange all your ingredients neatly. In addition, setting up in advance reduces stress and ensures that every step flows smoothly. Therefore, with a good pre-cooking setup, you can follow the chicken and cheese jalousie recipe easily and enjoy a stress-free cooking experience.

Step-by-Step Cooking Process

Step-by-step assembly of chicken and cheese jalousie recipe.
An instructional image showing the layering of chicken, cheese, and pastry.

Step 1: Preheating and Initial Setup

Before you begin your chicken and cheese jalousie recipe, preheat your oven to 375°F. Meanwhile, gather all your ingredients and tools so that nothing is left behind. In addition, make sure your baking tray is clean and ready. Therefore, a proper setup ensures that every step flows smoothly and that your dish bakes evenly.

Step 2: Assembling the Layers

Next, arrange your ingredients with care. First, place the sliced chicken evenly on your tray; then, add a layer of cheese and a crisp sheet of pastry. For example, spreading the cheese evenly ensures each bite is flavorful. However, take your time to create distinct layers because this careful assembly is key to the perfect chicken and cheese jalousie recipe. In addition, a neat arrangement makes the final dish even more appealing.

Step 3: Baking to Golden Perfection

After you assemble the layers, slide the dish into the preheated oven. Meanwhile, monitor the progress closely. For instance, you should see the pastry turning a light, golden color as it bakes. In addition, adjusting the temperature if needed helps maintain a moist center while crisping the top. Thus, these steps guarantee that your chicken and cheese jalousie recipe emerges from the oven with a delightful texture and aroma.

Step 4: Finishing Touches and Plating

Once baking is complete, allow the dish to rest for a few minutes. Then, add a final garnish such as a sprinkle of fresh herbs or a light drizzle of olive oil. Moreover, carefully plate the dish so that each layer is visible and inviting. On the other hand, if you prefer extra crunch, consider adding a small side salad to enhance the meal. Therefore, these finishing touches elevate your chicken and cheese jalousie recipe into a visually stunning and delicious dinner.

Expert Tips, Variations, and Serving Suggestions

Finished chicken and cheese jalousie recipe plated elegantlyvvvvvvv
A beautifully plated chicken and cheese jalousie dish garnished with fresh herbs.

Creative Variations to Personalize Your Recipe

One of the joys of a chicken and cheese jalousie recipe is its flexibility. For instance, you might swap one type of cheese for another or add fresh herbs to enhance the flavor. Moreover, you can experiment with different vegetables like spinach or bell peppers to give your dish a vibrant twist.

Common Pitfalls and How to Avoid Them

Even though the chicken and cheese jalousie recipe is straightforward, a few common pitfalls can occur if you’re not careful. For example, overbaking the pastry may make it too dry, while under-seasoning the chicken might leave the dish bland. However, you can prevent these issues by checking the oven frequently and adjusting the seasoning as needed.

Perfect Pairings for a Complete Meal

To elevate your chicken and cheese jalousie recipe, consider pairing it with complementary side dishes. For example, a fresh green salad or a light vegetable soup can add a refreshing contrast to the rich flavors of the dish. In addition, a serving of roasted vegetables or a crisp cucumber slaw works well to complete your meal.

Nutritional Insights and Health Benefits

A thoughtfully prepared chicken and cheese jalousie recipe can be both delicious and nutritious. Chicken, being a lean protein, provides essential amino acids, while cheese contributes valuable calcium and vitamins. In addition, when you use fresh ingredients and moderate portions, the dish supports a balanced diet. However, remember to include a variety of vegetables to boost the meal’s overall nutritional value.

Chicken and Cheese Jalousie Recipe
plated chicken and cheese jalousie dish

FAQs

What is a jalousie pastry?

A jalousie pastry is a thin, flaky, and layered dough that forms a delicate, crisp exterior. In the chicken and cheese jalousie recipe, this pastry plays a key role by encasing the juicy filling while adding texture. Moreover, its design mimics elegant window shutters, which gives the dish a unique, stylish look.

Do chicken and cheese go together?

Absolutely, chicken and cheese are a classic combination. In the chicken and cheese jalousie recipe, the mild flavor of chicken perfectly complements the rich, melting cheese. Furthermore, the balance between the savory protein and the creamy dairy creates a dish that is both satisfying and versatile, suitable for any meal occasion.

What does jalousie mean in cooking?

In cooking, the term “jalousie” refers to a technique of preparing layered pastry that results in a light and airy texture. For instance, in our chicken and cheese jalousie recipe, this method ensures that the pastry remains crisp on the outside while soft and flavorful on the inside. Additionally, this style highlights the craftsmanship involved in creating each delicate layer.

What is the most difficult pastry to make?

The difficulty of making a pastry often depends on its technique. Many find laminated doughs like puff pastry to be the most challenging due to the precise folding and temperature control required. However, with practice and patience, even the pastry used in the chicken and cheese jalousie recipe becomes manageable. Thus, while some pastries are more complex, you can master this recipe with time and effort.

Conclusion

In summary, your journey with the chicken and cheese jalousie recipe has shown that with quality ingredients, clear steps, and a touch of creativity, you can easily create a memorable meal. You now understand the art behind jalousie pastry, why chicken and cheese are a winning pair, and how to bring it all together in a delightful dish.

Print
clock clock iconcutlery cutlery iconflag flag iconfolder folder iconinstagram instagram iconpinterest pinterest iconfacebook facebook iconprint print iconsquares squares iconheart heart iconheart solid heart solid icon
Finished chicken and cheese jalousie recipe plated elegantlyvvvvvvv

Chicken and Cheese Jalousie Recipe


  • Author: Emily
  • Total Time: 30 minutes
  • Yield: 2 servings 1x

Ingredients

Scale


    1. 2 boneless, skinless chicken breasts
    2. 1 cup shredded cheese (mozzarella, cheddar, or your favorite blend)
    3. 1 sheet ready-made jalousie pastry (or puff pastry)
    4. 1 tablespoon olive oil
    5. Salt, to taste
    6. Pepper, to taste
    7. 1 teaspoon dried oregano (optional)
    8. 1 teaspoon paprika (optional)
    9. Fresh herbs (parsley or basil) for garnish


Instructions


  1. Preheat your oven to 375°F (190°C).
  2. Season the chicken breasts with salt, pepper, oregano, and paprika.
  3. Heat olive oil in a skillet over medium-high heat, then sear the chicken for 2 minutes per side until lightly browned.
  4. Remove the chicken from the skillet and let it rest for a few minutes.
  5. On a lightly floured surface, roll out the jalousie pastry.
  6. Place the chicken in the center of the pastry and evenly sprinkle the shredded cheese over it.
  7. Carefully fold the pastry over the chicken, ensuring the edges are well sealed.
  8. Transfer the wrapped chicken onto a baking tray lined with parchment paper.
  9. Bake for 20 minutes, or until the pastry turns golden and crispy.
  10. Remove from the oven, garnish with fresh herbs, and let it rest for 5 minutes before serving.

Chipped Beef & Dumplings with Potatoes – Easy Recipe!

If you love hearty, old-fashioned meals, you’re in for a treat! This chipped beef flour dumplings potatoes recipe is the perfect blend of creamy, savory, and oh-so-satisfying flavors. Picture soft dumplings swimming in a rich, velvety sauce, paired with buttery potatoes—pure comfort on a plate! Ready to dig in?

Ingredients & Substitutions

Ingredients for chipped beef flour dumplings potatoes recipe.
All the ingredients needed to make this comforting dish.

A delicious dish starts with the right ingredients! This chipped beef flour dumplings potatoes recipe brings together simple yet flavorful components to create a rich, comforting meal. Below, we’ll cover the must-have ingredients, possible substitutions, and ways to tweak the recipe to fit different diets and preferences.

Essential Ingredients for Chipped Beef & Dumplings

For a classic, hearty flavor, you’ll need a few key ingredients:

  • Chipped beef – This dried, salted beef is the star of the dish. It adds a deep, savory taste that pairs perfectly with creamy sauces. Look for it in jars or vacuum-sealed packs in the deli or canned meat section.
  • Flour dumplings – Soft, pillowy dumplings soak up the creamy sauce, adding a satisfying texture. They’re made from flour, baking powder, salt, butter, and milk, creating a tender bite.
  • Potatoes – Starchy Russet or Yukon Gold potatoes work best, as they hold their shape while becoming wonderfully tender.
  • Butter and flour – These form the base of the roux, which thickens the sauce and gives it a smooth, velvety texture.
  • Milk or cream – Whole milk, half-and-half, or heavy cream makes the sauce rich and indulgent.
  • Seasonings – A pinch of black pepper, garlic powder, and a touch of mustard powder enhance the dish’s flavor.

Alternative Ingredients & Dietary Adjustments

Need to adjust the recipe to fit your diet? No problem! Here are some swaps:

  • Gluten-free dumplings – Replace all-purpose flour with a gluten-free blend to keep the texture soft while avoiding gluten.
  • Low-sodium version – Since chipped beef is naturally salty, rinse it under warm water before cooking to remove excess salt. Use unsalted butter and low-sodium broth to further control the salt level.
  • Dairy-free option – Swap butter for plant-based margarine and use oat or almond milk instead of dairy. The sauce may be slightly thinner, so add a teaspoon of cornstarch to help thicken it.
  • Extra protein – Love a heartier dish? Stir in cooked bacon bits or shredded chicken for even more flavor.

Where to Buy the Best Chipped Beef

Since chipped beef isn’t always available in every grocery store, here’s where to look:

  • Local grocery stores – Check the deli section or canned meat aisle.
  • Butcher shops – Some specialty butchers carry high-quality dried beef.
  • Online retailers – Stores like Amazon or gourmet food shops often sell jarred chipped beef with different flavor variations.

If you can’t find chipped beef, thinly sliced dried pastrami or corned beef makes a great substitute!

Additional Flavors & Enhancements

Want to make this dish even more special? Try these flavorful add-ins:

  • Cheesy upgrade – Stir in grated sharp cheddar or Parmesan for extra richness.
  • Spicy twist – A dash of paprika or cayenne pepper adds a little heat.
  • Fresh herbs – Sprinkle chopped parsley or chives on top for a fresh finish.
  • Tangy kick – A splash of Worcestershire sauce or Dijon mustard enhances the umami flavors.

Step-by-Step Cooking Instructions

Making this chipped beef flour dumplings potatoes recipe is easier than you think! With a few simple steps, you’ll create a rich, creamy sauce, tender dumplings, and perfectly cooked potatoes. Follow these detailed instructions for the best results.

Preparing the Chipped Beef

Before you start, it’s important to reduce the saltiness of chipped beef, as it’s often quite salty. Here’s what to do:

  1. Rinse the beef – Place the chipped beef in a colander and rinse it under warm water for about 30 seconds to remove excess salt.
  2. Pat dry and slice – Use a paper towel to blot dry, then slice into thin strips or bite-sized pieces.
  3. Sauté for flavor – Heat a tablespoon of butter in a skillet over medium heat. Add the beef and cook for 2-3 minutes, stirring occasionally. This enhances the savory taste.

Making the Creamy Sauce

The creamy white sauce is what brings everything together in this dish! Follow these steps for a smooth, velvety texture:

Dumplings simmering in creamy chipped beef sauce.
Fluffy dumplings steaming in a rich, velvety chipped beef sauce.
  1. Make a roux – In the same skillet, melt 2 tablespoons of butter over medium-low heat. Stir in 2 tablespoons of flour and whisk continuously for 1-2 minutes until golden.
  2. Add the milk – Slowly pour in 2 cups of warm milk, whisking constantly to prevent lumps.
  3. Season to taste – Stir in a pinch of black pepper, garlic powder, and mustard powder for extra depth.
  4. Simmer until thickened – Let the sauce cook for 3-5 minutes, stirring occasionally, until it reaches a smooth, creamy consistency.

Pro Tip: Want to add an extra layer of flavor? Mix in ½ cup of shredded cheddar for a cheesy twist!

Cooking the Flour Dumplings

Dumplings add a soft, pillowy texture to this dish, making it even more satisfying. Here’s how to make them:

  1. Prepare the dough – In a bowl, mix 1 cup of flour, 1 teaspoon of baking powder, and ½ teaspoon of salt. Cut in 1 tablespoon of butter until crumbly.
  2. Add the liquid – Pour in ½ cup of milk and stir until a soft dough forms. Be careful not to overmix!
  3. Shape and drop – Scoop small portions (about 1 tablespoon each) and drop them directly into the simmering sauce.
  4. Cover and steam – Reduce heat to low, cover the skillet, and let the dumplings steam for 10-12 minutes until cooked through.

Bringing It All Together with Potatoes

Now that your chipped beef and dumplings are ready, it’s time to prepare the potatoes:

  1. Peel and chop – Use Russet or Yukon Gold potatoes, peeling them if desired, then cut into 1-inch cubes.
  2. Boil until tender – Place the potatoes in a pot of salted water and boil for 10-12 minutes until fork-tender.
  3. Drain and mix – Drain the potatoes and gently stir them into the creamy chipped beef and dumplings mixture.
  4. Final seasoning – Taste and adjust seasoning with salt, pepper, or fresh herbs like parsley for a finishing touch.

Serving Suggestions & Storage Tips

Now that your chipped beef flour dumplings potatoes recipe is ready, it’s time to serve it in the best possible way! Whether you’re enjoying it fresh or saving leftovers for later, the right approach will enhance the flavor and texture. Below, we’ll cover serving ideas, side dishes, reheating tips, and how to store leftovers properly.

Served chipped beef flour dumplings potatoes with side dishes.
A warm and hearty meal, served with fresh sides for the perfect balance.

Best Ways to Serve Chipped Beef & Dumplings

This dish is rich, creamy, and comforting, making it a standout meal on its own. However, pairing it with the right sides can balance the flavors and add variety to your plate. Here are some great serving ideas:

  • Classic presentation – Serve it in a deep bowl, allowing the creamy sauce to coat the dumplings and potatoes perfectly. Garnish with fresh parsley or chives for a pop of color.
  • With a crunchy contrast – A simple side salad with vinaigrette or a serving of steamed green beans adds freshness and balances the richness.
  • For a Southern twist – Pair with buttered cornbread or warm biscuits to soak up every bit of the flavorful sauce.
  • Lighter option – If you want to cut the heaviness, serve with roasted Brussels sprouts, sautéed spinach, or steamed asparagus.

Storing & Reheating Leftovers

If you have leftovers, you’re in luck! This dish stores well and can be enjoyed later with just a few simple steps.

How to Store Leftovers:

  1. Cool before storing – Let the dish cool to room temperature before placing it in a container.
  2. Use airtight containers – Store in a sealed container to prevent drying out.
  3. Refrigerate for up to 3 days – Keep it in the fridge for up to 72 hours for the best taste.
  4. Freeze for longer storage – If you need to keep it longer, freeze portions in freezer-safe bags or containers for up to 3 months.

How to Reheat:

  • Stovetop method (best for texture): Heat in a saucepan over low heat, adding a splash of milk or broth to revive the sauce. Stir gently until warmed through.
  • Microwave option (quick but needs care): Place a portion in a microwave-safe dish, cover it, and heat in 30-second intervals, stirring in between.
  • Oven method (best for large batches): Preheat the oven to 300°F (150°C), place leftovers in an oven-safe dish, and cover with foil. Bake for 15-20 minutes until warm.

Preventing Texture Changes in Leftovers

While this dish tastes amazing fresh, it can change texture after refrigeration. Here’s how to maintain its best quality:

  • Dumplings can get dense – To keep them soft, add a few tablespoons of broth or milk when reheating.
  • Sauce may thicken too much – If the sauce looks too thick, stir in a bit of warm milk or water before reheating.
  • Potatoes can absorb liquid – If they become dry, mash them slightly and mix with extra sauce for a smoother texture.

Making This Dish Ahead of Time

Want to make your chipped beef flour dumplings potatoes recipe ahead for busy nights? Here’s how you can prepare it in advance without losing freshness:

  1. Cook the chipped beef and sauce separately – The sauce thickens over time, so making it ahead and storing it separately prevents it from becoming too thick.
  2. Prep dumpling dough but don’t cook it yet – You can mix the dough a few hours before cooking, but store it covered in the fridge until ready to drop into the sauce.
  3. Partially cook potatoes – If you want to cut down on cooking time, boil the potatoes halfway, then drain and store them in an airtight container in the fridge.
  4. Combine and finish cooking when ready – Reheat the sauce, bring it to a simmer, drop in the dumplings, and add the potatoes just before serving.

Final Thoughts on Serving & Storing This Classic Dish

This chipped beef flour dumplings potatoes recipe is a hearty, old-fashioned favorite that can be easily adjusted to fit any meal plan. Whether you’re serving it fresh, making it ahead, or reheating leftovers, following these tips ensures a delicious, satisfying meal every time.

FAQs

Here are answers to some common questions about making the perfect chipped beef flour dumplings potatoes recipe.

How do you make chipped beef less salty?

Chipped beef is naturally salty due to the curing process, but you can easily adjust its saltiness. The best way is to rinse it under warm water for 30 seconds before cooking. For an even milder taste, soak it in a bowl of warm water for 5-10 minutes, then pat it dry before using. If you’re still concerned about salt levels, pair it with low-sodium broth or unsalted butter in the recipe.

Can I make this recipe without dairy?

Yes! You can make a dairy-free version of this chipped beef flour dumplings potatoes recipe by swapping out a few ingredients:

  • Butter → Use plant-based margarine or olive oil.
  • Milk → Try unsweetened oat milk, almond milk, or coconut milk for a creamy texture.
  • Heavy cream → Use canned coconut cream or cashew cream for a rich alternative.

Just keep in mind that non-dairy substitutes may slightly alter the flavor, but they’ll still result in a delicious, creamy dish.

Can I freeze chipped beef and dumplings?

Yes, but with some precautions! Here’s how to freeze and reheat this dish properly:

  • Freeze the sauce separately – The creamy chipped beef sauce freezes well in an airtight container for up to 3 months.
  • Dumplings don’t freeze well – They tend to get dense when thawed, so it’s best to make them fresh when reheating.
  • Reheating tips – Thaw the sauce overnight in the fridge, then reheat it slowly on the stovetop. Add fresh dumplings and potatoes when serving for the best texture.

What are the best side dishes to serve with this recipe?

This dish is rich and creamy, so pairing it with a lighter side can balance the flavors. Some great options include:

  • Steamed or roasted vegetables – Green beans, carrots, or Brussels sprouts add freshness.
  • Simple salads – A light mixed greens salad with vinaigrette helps cut through the richness.
  • Crusty bread or biscuits – Perfect for soaking up every last drop of the delicious sauce.
  • Pickled vegetables – If you like a tangy contrast, serve with pickles or sauerkraut.

Conclusion

This chipped beef flour dumplings potatoes recipe is the ultimate comfort food, bringing together tender dumplings, creamy chipped beef sauce, and hearty potatoes in one satisfying dish. Whether you’re making it fresh, saving leftovers, or tweaking it to fit your dietary needs, this meal is easy to customize and always delicious. Try it for your next cozy family dinner, and don’t forget to experiment with flavors and sides to make it your own!

Beef Brisket Sandwich: 7 Secrets for Perfect Flavor

If you’ve never experienced the magic of a homemade beef brisket sandwich, you’re in for a treat. Juicy brisket, perfectly seasoned and slow-cooked to perfection, meets crisp, toasted bread and your choice of bold toppings. It’s a little smoky, a little tangy, and completely irresistible. Best of all, it’s easier to make than you might think. Whether for a casual dinner or a weekend feast, this sandwich always delivers.

What Makes a Perfect Beef Brisket Sandwich?

Understanding the Art of Beef Brisket

A beef brisket sandwich is only as good as the brisket itself. Brisket is a flavorful cut of beef that becomes tender and juicy when cooked low and slow. To achieve the best results, choose between the point cut, which is fattier and perfect for shredding, or the flat cut, which is leaner and slices beautifully.

Seasoning is key! Whether you prefer a dry rub with paprika, garlic powder, and brown sugar or a marinade packed with smoky and savory flavors, seasoning sets the stage for a mouthwatering sandwich. Slow cooking or smoking for hours creates the ideal melt-in-your-mouth texture, making the brisket irresistible.

Building the Foundation: The Right Bread

The bread is just as important as the brisket in a beef brisket sandwich. Soft yet sturdy bread, like brioche buns, ciabatta rolls, or sourdough slices, is ideal. These options soak up the flavorful juices without becoming soggy.

For added texture, lightly toast the bread before assembling the sandwich. A golden, crispy surface provides the perfect contrast to the tender brisket. To learn more about choosing the best bread for sandwiches, check out this bread guide.

The Secret to Juicy Brisket

One of the secrets to a perfect beef brisket sandwich is ensuring the brisket stays moist and flavorful. Start by letting the cooked brisket rest for at least 20 minutes before slicing. This step locks in the juices, preventing dryness.

When slicing brisket, always cut against the grain for maximum tenderness. Thin slices are ideal for sandwiches, as they allow the brisket to layer evenly. If you’re using leftovers, reheat the brisket gently with a splash of beef broth or barbecue sauce to restore its juiciness.

Toppings That Elevate the Flavor

Toppings are the finishing touch that can make or break a beef brisket sandwich. For a classic option, pair the brisket with coleslaw for crunch and tanginess. Prefer a smoky twist? Add caramelized onions and pickles for a flavor-packed bite.

If you’re feeling adventurous, consider toppings like crispy fried onions, sliced jalapeños, or a drizzle of horseradish aioli. These bold additions enhance the sandwich’s overall flavor without overpowering the tender brisket. Don’t forget a generous slathering of barbecue sauce for that perfect balance of smoky, sweet, and tangy!

Ingredients You’ll Need for the Ultimate Beef Brisket Sandwich

 Ingredients for beef brisket sandwich arranged on a countertop
Fresh and flavorful ingredients ready to build a beef brisket sandwich

Selecting the Perfect Brisket

The heart of a beef brisket sandwich lies in the brisket itself. Choosing the right cut can make all the difference. For a tender, juicy sandwich, opt for point cut brisket, which is fattier and perfect for shredding. Alternatively, flat cut brisket offers a leaner option that slices beautifully and is ideal for stacking in a sandwich.

When shopping, look for brisket with good marbling to ensure the meat stays moist during cooking. If you’re short on time, pre-cooked brisket or leftovers can still produce a fantastic sandwich.

Must-Have Condiments and Sauces

A beef brisket sandwich wouldn’t be complete without the right condiments and sauces. Barbecue sauce is a classic choice, offering smoky and tangy notes that complement the brisket’s deep flavor. For a lighter, tangy twist, try a mustard-based sauce or horseradish aioli.

Choosing Fresh, Flavorful Ingredients

Fresh ingredients elevate the flavor profile of a beef brisket sandwich. Opt for crisp, vibrant vegetables like lettuce, tomatoes, or even thinly sliced red onions. Fresh herbs such as parsley or cilantro can add a burst of freshness to balance the sandwich’s richness.

Don’t forget cheese! Cheddar, Swiss, or provolone are excellent choices that melt beautifully over the warm brisket, enhancing its overall flavor.

Essential Equipment for Success

Making the perfect beef brisket sandwich is easier when you have the right tools. Use a meat thermometer to ensure your brisket is cooked to perfection, a carving knife for clean, even slices, and a griddle pan for toasting bread.

These tools not only save time but also guarantee consistency, allowing you to create sandwiches that look and taste like they came straight from a deli.

Step-by-Step Guide to Crafting a Beef Brisket Sandwich

Step 1: Preparing the Brisket

The foundation of any great beef brisket sandwich starts with the brisket itself. Begin by seasoning the brisket generously with your favorite spice rub. A mix of paprika, garlic powder, salt, and brown sugar works beautifully to enhance the natural flavors.

For cooking, slow and steady wins the race. Whether you’re smoking the brisket with hickory wood for a smoky flavor or slow-cooking it in a Dutch oven, aim for a low temperature over several hours. This process ensures tender, juicy meat that will melt in your mouth. Don’t forget to let the brisket rest for 20 minutes before slicing to lock in all the juices.

Step 2: Toasting the Bread

While the brisket rests, it’s time to prep the bread. A beef brisket sandwich deserves bread that’s not only delicious but also sturdy enough to hold the fillings. Choose brioche buns, ciabatta rolls, or sourdough slices, and lightly butter them on the cut sides.

Toast the bread on a griddle or in a skillet until golden brown. The crispy exterior provides a satisfying contrast to the tender brisket while also preventing the bread from becoming soggy when layered with sauce.

Step 3: Assembling the Sandwich

Now comes the fun part—assembling your beef brisket sandwich. Start by spreading your favorite sauce on both slices of bread. Layer the brisket slices evenly, adding just enough for a hearty bite without overwhelming the sandwich.

For toppings, classic options like coleslaw and pickles add crunch and tang, while caramelized onions bring a hint of sweetness. Prefer a spicy twist? Add sliced jalapeños or a dash of hot sauce. Don’t hesitate to get creative with your combinations!

Step 4: Serving Suggestions

A beef brisket sandwich isn’t complete without the perfect sides. Serve your masterpiece with classic barbecue accompaniments like coleslaw, baked beans, or potato salad. For a more indulgent option, pair it with crispy onion rings or loaded fries.

For drinks, a craft beer or a refreshing glass of iced tea complements the smoky flavors beautifully. Whether you’re hosting a backyard barbecue or enjoying a quiet dinner, this sandwich is guaranteed to satisfy.

For more delicious recipes that pair well with your sandwich, check out our garlic bread rolls recipe!

Step-by-Step Guide to Crafting a Beef Brisket Sandwich

Step 1: Preparing the Brisket

Sliced beef brisket on a wooden cutting board
Tender, flavorful brisket sliced perfectly for sandwiches

The foundation of any great beef brisket sandwich starts with the brisket itself. Begin by seasoning the brisket generously with your favorite spice rub. A mix of paprika, garlic powder, salt, and brown sugar works beautifully to enhance the natural flavors.

For cooking, slow and steady wins the race. Whether you’re smoking the brisket with hickory wood for a smoky flavor or slow-cooking it in a Dutch oven, aim for a low temperature over several hours. This process ensures tender, juicy meat that will melt in your mouth. Don’t forget to let the brisket rest for 20 minutes before slicing to lock in all the juices.

Step 2: Toasting the Bread

While the brisket rests, it’s time to prep the bread. A beef brisket sandwich deserves bread that’s not only delicious but also sturdy enough to hold the fillings. Choose brioche buns, ciabatta rolls, or sourdough slices, and lightly butter them on the cut sides.

Toast the bread on a griddle or in a skillet until golden brown. The crispy exterior provides a satisfying contrast to the tender brisket while also preventing the bread from becoming soggy when layered with sauce.

Step 3: Assembling the Sandwich

Now comes the fun part—assembling your beef brisket sandwich. Start by spreading your favorite sauce on both slices of bread. Layer the brisket slices evenly, adding just enough for a hearty bite without overwhelming the sandwich.

For toppings, classic options like coleslaw and pickles add crunch and tang, while caramelized onions bring a hint of sweetness. Prefer a spicy twist? Add sliced jalapeños or a dash of hot sauce. Don’t hesitate to get creative with your combinations!

Step 4: Serving Suggestion

Beef brisket sandwich served with baked beans and a pickle
A hearty beef brisket sandwich paired with baked beans and a pickle spear

A beef brisket sandwich isn’t complete without the perfect sides. Serve your masterpiece with classic barbecue accompaniments like coleslaw, baked beans, or potato salad. For a more indulgent option, pair it with crispy onion rings or loaded fries.

For drinks, a craft beer or a refreshing glass of iced tea complements the smoky flavors beautifully. Whether you’re hosting a backyard barbecue or enjoying a quiet dinner, this sandwich is guaranteed to satisfy.

FAQs

What Goes Well with a Brisket Sandwich?

A beef brisket sandwich pairs wonderfully with classic barbecue sides like coleslaw, baked beans, or potato salad. These sides provide a balance of flavors and textures, complementing the smoky richness of the brisket. For a crunchier option, try pairing the sandwich with crispy onion rings or sweet potato fries. Looking for something lighter? A fresh green salad or roasted vegetables works perfectly to cut through the sandwich’s richness.

What Sauce is Good for a Brisket Sandwich?

The sauce you choose can transform your beef brisket sandwich. Barbecue sauce is a classic choice, offering a smoky, tangy kick that enhances the brisket’s flavors. For something different, consider mustard-based sauces or a creamy horseradish aioli for a bold and zesty twist. If you enjoy heat, chipotle or sriracha mayo can add a spicy punch. Whichever you choose, the sauce should complement, not overpower, the tender brisket.

What Cheese Goes with Beef Brisket?

Cheese can take a beef brisket sandwich to the next level by adding creaminess and depth. Popular choices include cheddar, for its sharp, tangy flavor, and Swiss, which melts beautifully and adds a mild nuttiness. If you prefer a bolder option, go with provolone or pepper jack, which offers a hint of spice. Melted cheese not only enhances the overall flavor but also adds a satisfying, gooey texture to each bite.

What Tastes Good with Beef Brisket?

Beef brisket is incredibly versatile and pairs well with a variety of flavors. Sweet options like honey-glazed carrots or cornbread complement the brisket’s smoky notes. Savory sides, such as roasted potatoes or sautéed greens, provide hearty companions to the meat. For beverages, a cold craft beer or a glass of iced tea makes an excellent match, while desserts like fruit cobbler or pecan pie round out the meal beautifully.

Conclusion

A beef brisket sandwich is more than just a meal—it’s a culinary experience that combines tender, smoky meat, perfectly toasted bread, and your choice of bold toppings and sauces. Throughout this guide, you’ve learned how to select the best ingredients, prepare brisket to perfection, and create variations to suit every palate.

Easy Garlic Parmesan Chicken Pasta in 30 Minutes

Few things are as satisfying as a plate of garlic parmesan chicken pasta. With its rich, garlicky sauce, perfectly cooked pasta, and juicy chicken, it’s a dish that feels like a hug in a bowl. Best of all, it’s ready in no time! Whether you’re a kitchen pro or just getting started, this easy recipe delivers restaurant-quality flavor that’ll have everyone asking for seconds. Let’s get cooking!

Why Garlic Parmesan Chicken Pasta is the Perfect Dinner Choice

The Appeal of Creamy Pasta Dishes

There’s something magical about creamy pasta dishes—they’re hearty, comforting, and incredibly satisfying. Garlic parmesan chicken pasta takes this to the next level by combining rich, velvety sauce with tender chicken and perfectly cooked pasta. The garlic adds warmth, while the Parmesan delivers a savory, cheesy punch. This balance of flavors makes it a favorite for pasta lovers everywhere.

But here’s the best part: it’s not just about taste. This dish is also quick and simple to prepare, making it perfect for busy weeknights or last-minute dinner plans. Whether you’re a seasoned cook or a beginner, this recipe promises success every time.

A Versatile Recipe for Any Occasion

One of the most delightful things about garlic parmesan chicken pasta is its versatility. It works equally well for casual family dinners and special occasions. Pair it with a crisp Caesar salad or a warm slice of garlic bread to create a complete meal that feels both comforting and elegant.

For extra flair, consider adding a pop of color with sautéed spinach or sun-dried tomatoes. These simple additions not only enhance the dish visually but also add layers of flavor. To explore more ways to elevate your pasta dishes, check out this guide to pasta pairings.

A Crowd-Pleaser for All Ages

Let’s face it—pleasing everyone at the dinner table can be a challenge. That’s why garlic parmesan chicken pasta is such a win. Kids love its creamy texture and cheesy taste, while adults appreciate the depth of flavor brought by the garlic and Parmesan.

Even picky eaters are drawn to the simplicity of this dish. Its approachable ingredients and balanced flavors make it a reliable choice when you’re cooking for a group. And if someone prefers a little extra heat? A sprinkle of red pepper flakes does the trick without altering the dish’s creamy base.

Why This Recipe Stands Out

Not all pasta recipes are created equal, and garlic parmesan chicken pasta proves that simplicity can be sensational. This dish stands out because it’s both time-efficient and incredibly flavorful. In just 30 minutes, you can create a meal that tastes like something straight out of a fine dining restaurant.

The key lies in the ingredients: fresh garlic for bold flavor, Parmesan cheese for a nutty richness, and tender chicken cooked to perfection. The sauce ties everything together, coating each strand of pasta with creamy deliciousness. Once you’ve tried this recipe, it’s bound to become a staple in your kitchen!

Ingredients You’ll Need for Garlic Parmesan Chicken Pasta

Ingredients for garlic parmesan chicken pasta arranged on a counter
Everything you need to make garlic parmesan chicken pasta at home

Essential Pantry Staples

Making garlic parmesan chicken pasta starts with a few pantry staples and fresh ingredients. Here’s what you’ll need:

  • Boneless, skinless chicken breasts or thighs for tender protein.
  • Pasta, such as penne, spaghetti, or fettuccine, to soak up the creamy sauce.
  • Fresh garlic cloves to provide bold, aromatic flavor.
  • Grated Parmesan cheese for a savory, cheesy base.
  • Heavy cream to create a rich, velvety sauce.
  • Butter and olive oil to sauté the garlic and chicken.

These ingredients come together to create a dish that’s both simple and indulgent, perfect for a quick dinner or special occasion.

Choosing the Right Pasta

The type of pasta you use can make all the difference in garlic parmesan chicken pasta. For a classic look and feel, penne or fettuccine work beautifully. Penne holds the creamy sauce in its ridges, while fettuccine provides a luxurious, flat surface for the sauce to cling to.

If you’re feeling adventurous, swap in spaghetti or linguine for a lighter texture. Whole-grain or gluten-free options also work well if you’re looking for healthier alternatives. The goal is to choose a pasta that complements the sauce’s creamy richness without overpowering it.

Tips for Selecting Fresh Ingredients

Fresh ingredients are key to elevating your garlic parmesan chicken pasta. Start with freshly grated Parmesan rather than pre-packaged versions. Not only does it melt better, but it also delivers a nuttier, more authentic flavor.

When it comes to garlic, fresh cloves are a must. Their robust aroma and sharp taste are essential for achieving the signature garlicky depth in the sauce. Avoid garlic powder, as it lacks the complexity of fresh garlic. Finally, opt for high-quality butter and olive oil to enhance the sauce’s smooth, savory finish.

Optional Add-Ins

Want to personalize your garlic parmesan chicken pasta? Consider adding some colorful and flavorful extras:

  • Spinach: Adds a pop of green and a hint of earthiness.
  • Sun-dried tomatoes: For a tangy, slightly sweet contrast.
  • Mushrooms: A hearty addition that pairs wonderfully with creamy sauces.
  • Red pepper flakes: A pinch of spice to brighten the dish.

These optional ingredients allow you to tailor the recipe to your taste, turning a simple dish into a gourmet creation.

Step-by-Step Guide to Making Garlic Parmesan Chicken Pasta

Step 1: Prepare the Chicken

The key to delicious garlic parmesan chicken pasta lies in tender, juicy chicken. Start by seasoning boneless, skinless chicken breasts or thighs with a mix of salt, pepper, and a sprinkle of garlic powder. Heat a large skillet over medium heat, add a tablespoon each of butter and olive oil, and sear the chicken for 4-5 minutes on each side until golden brown.

For even cooking, slice the chicken into thin, even pieces. Once cooked through (165°F internal temperature), transfer the chicken to a plate and cover with foil to keep it warm. This step ensures the chicken remains moist while you prepare the pasta and sauce.

Step 2: Cook the Pasta

While the chicken rests, cook your chosen pasta. For garlic parmesan chicken pasta, penne, spaghetti, or fettuccine works best. Bring a large pot of salted water to a boil and cook the pasta according to the package instructions until al dente.

Before draining, reserve about a cup of pasta water. This starchy liquid can be used to adjust the sauce’s consistency later. Once the pasta is cooked, drain it and toss it with a bit of olive oil to prevent sticking.

Step 3: Make the Creamy Garlic Parmesan Sauce

Whisking creamy garlic Parmesan sauce in a pan
Stirring the creamy garlic Parmesan sauce to perfection

The sauce is the heart of this recipe. Start by melting butter in the same skillet you used for the chicken—this helps retain those flavorful browned bits. Add minced garlic and sauté for 30 seconds to release its aroma, being careful not to burn it.

Next, pour in heavy cream and stir until it begins to simmer. Gradually whisk in freshly grated Parmesan cheese, letting it melt into a smooth, creamy base. Season the sauce with salt, pepper, and a pinch of Italian seasoning for added depth. If the sauce feels too thick, stir in a splash of the reserved pasta water until it reaches your desired consistency.

Step 4: Combine Everything

Plated garlic parmesan chicken pasta with garlic bread on the side
Garlic parmesan chicken pasta served with garlic bread and wine

Now it’s time to bring it all together! Add the cooked pasta to the sauce, tossing until every strand is coated in creamy goodness. Slice the chicken into strips and layer it over the pasta. For extra flair, garnish with chopped parsley and an extra sprinkle of Parmesan cheese.

Serve the garlic parmesan chicken pasta immediately while it’s hot and fresh. Pair it with a side of garlic bread or a simple green salad for a complete meal. For more inspiration, check out our Chicken Scampi with Garlic Parmesan Rice recipe for another take on creamy garlic dishes.

5 Variations to Try with Garlic Parmesan Chicken Pasta

Spicy Garlic Parmesan Chicken Pasta

If you enjoy a little heat in your dishes, this spicy variation of garlic parmesan chicken pasta is a must-try. Simply add crushed red pepper flakes to the sauce while it’s simmering, or sprinkle them on top before serving. A touch of cayenne pepper can also give the dish a subtle kick.

The spiciness pairs beautifully with the creamy sauce, creating a flavor contrast that’s bold yet balanced. This version works especially well for those who love dishes with a fiery edge.

Low-Carb Garlic Parmesan Chicken

Looking for a low-carb option? Swap the pasta with zucchini noodles or spaghetti squash to create a lighter version of garlic parmesan chicken pasta. Both options soak up the creamy sauce while keeping the dish lower in calories and carbs.

Prepare the zucchini noodles by sautéing them lightly in olive oil until tender but not mushy. Alternatively, roast spaghetti squash in the oven for a naturally sweet and tender base. This variation is perfect for anyone following a keto or gluten-free diet.

Vegan Garlic Parmesan Pasta (No Chicken)

Yes, you can enjoy the flavors of garlic parmesan chicken pasta without the chicken—or the dairy! For a vegan version, use plant-based cream and cheese substitutes. Coconut cream or cashew cream can replicate the sauce’s velvety texture, while nutritional yeast adds a cheesy flavor.

To replace the chicken, try grilled tofu, roasted chickpeas, or sautéed mushrooms. These plant-based alternatives are hearty and work well with the garlic-infused sauce. This version ensures everyone at the table can enjoy a creamy pasta dish without compromise.

Mediterranean-Inspired Version

Transform garlic parmesan chicken pasta into a Mediterranean-inspired masterpiece with just a few extra ingredients. Add sun-dried tomatoes, kalamata olives, and a handful of spinach to the creamy sauce.

These additions create a vibrant, tangy twist that pairs beautifully with the savory Parmesan and garlic flavors. For extra Mediterranean flair, garnish the dish with a sprinkle of feta cheese and fresh basil. This variation feels elegant and works well for entertaining guests.

FAQs

Can I Use Milk Instead of Heavy Cream?

Yes, you can substitute milk for heavy cream in garlic parmesan chicken pasta, but the sauce will be less rich and creamy. To mimic the thickness of heavy cream, mix 1 cup of milk with 1-2 tablespoons of all-purpose flour or cornstarch. Heat this mixture gently while stirring, and it will thicken to create a sauce base. For extra flavor, add a tablespoon of butter or a splash of half-and-half if available.

What Should I Serve With This Garlic Parmesan Chicken and Pasta?

Garlic parmesan chicken pasta is versatile and pairs wonderfully with a variety of sides. For a light and refreshing option, try a crisp Caesar salad or steamed broccoli. If you’re craving something more indulgent, garlic bread or cheesy breadsticks are excellent choices. Roasted vegetables, like asparagus or zucchini, also make a healthy, vibrant addition to the meal. Don’t forget to offer a glass of white wine, such as Chardonnay, for an elegant pairing.

How Do the Leftovers Store?

Leftovers of garlic parmesan chicken pasta store beautifully, making it a great meal prep option. Place the pasta in an airtight container and refrigerate for up to 3 days. When reheating, do so gently on the stovetop or in the microwave, adding a splash of milk or cream to restore the sauce’s creamy texture. Avoid overheating, as this can cause the sauce to separate. Leftovers are perfect for a quick lunch or a no-fuss dinner the next day.

Can I Make This Garlic Parmesan Chicken and Pasta Gluten Free?

Absolutely! To make garlic parmesan chicken pasta gluten-free, simply swap traditional pasta with a gluten-free alternative like chickpea, rice, or lentil-based pasta. Be sure to check that other ingredients, such as Parmesan cheese and seasonings, are certified gluten-free. If you’re thickening the sauce, use cornstarch instead of flour for a safe alternative. With these easy adjustments, you can enjoy this creamy dish without worry.

Conclusion

Whether you’re hosting a dinner party or just need a quick weeknight meal, this recipe is a guaranteed crowd-pleaser. From its versatility to its restaurant-quality taste, garlic parmesan chicken pasta truly delivers on every level. So grab your skillet, gather your ingredients, and get cooking! Don’t forget to explore more delicious recipes on our blog for your next culinary adventure.

How to Make Incredible Hibachi Steak and Shrimp in 20 Minutes

Craving that sizzling, flavorful experience of a Japanese steakhouse? With this hibachi steak and shrimp recipe, you can bring all the excitement and taste of hibachi right into your own kitchen. Imagine tender, juicy steak, perfectly seared shrimp, and crisp vegetables all tossed in a buttery garlic sauce it’s a feast for the senses! The best part? You don’t need a fancy grill or hours of prep time to pull it off. In just 20 minutes, you’ll have a restaurant-quality meal that’s as fun to make as it is to eat. So, grab your skillet, and let’s dive into the savory world of homemade hibachi you’re going to love it!

What Is Hibachi Cooking?

Plate of hibachi steak and shrimp with vegetables and garlic butter.
A perfect hibachi steak and shrimp dinner served with fresh vegetables.

The Origin of Hibachi Cooking

Hibachi cooking has its roots in Japan, where it originally referred to a traditional heating device. However, over time, the term evolved to represent a style of cooking that involves grilling food on a flat, open surface. This method gained popularity for its simplicity and the way it enhances the natural flavors of fresh ingredients. While authentic hibachi grilling uses charcoal, modern hibachi recipes like hibachi steak and shrimp are often prepared on flat-top grills or skillets, making them accessible to home cooks. The beauty of hibachi lies in its ability to bring bold, savory flavors to life with minimal fuss perfect for busy households or special occasions.

Why Hibachi Steak and Shrimp?

There’s something uniquely satisfying about the pairing of hibachi steak and shrimp. The tender, juicy steak complements the sweet, succulent shrimp, creating a balance of textures and flavors that’s hard to resist. In addition to being a classic combo, it’s also versatile. Whether you’re craving a quick weeknight dinner or entertaining guests, this dish delivers restaurant-quality results with minimal effort. Plus, the garlic butter sauce that coats every bite is a game-changer, adding richness without overwhelming the dish. For those who enjoy vibrant, flavorful meals, hibachi is a must-try.

Must-Have Tools for Hibachi at Home

To recreate the magic of hibachi steak and shrimp in your own kitchen, you’ll need the right tools. A flat-top grill or cast-iron skillet works best because they can handle the high heat necessary for searing and caramelizing the food. If you don’t own a flat-top grill, don’t worry—a heavy-bottomed skillet is a fantastic alternative. Other essentials include a sharp knife for cutting steak and vegetables, metal spatulas for flipping and tossing ingredients, and a pair of tongs for handling shrimp. For those looking to elevate their setup, a tabletop electric griddle is a great investment that mimics the hibachi restaurant experience.

Tips for Creating Authentic Hibachi Flavors

Achieving the authentic taste of hibachi steak and shrimp comes down to a few key ingredients and techniques. Soy sauce, sesame oil, and garlic butter are the backbone of most hibachi dishes, offering a rich, umami-packed flavor profile. Don’t forget to add freshly grated ginger or a splash of lemon juice to brighten the dish. Cooking at high heat is another essential step it helps seal in the juices of the steak while giving the shrimp a perfectly caramelized exterior.

Ingredients for Hibachi Steak and Shrimp

Ingredients for hibachi steak and shrimp on a counter.
All the fresh ingredients needed to prepare hibachi steak and shrimp at home.

Choosing the Best Steak and Shrimp

Selecting the right ingredients is key to creating flavorful hibachi steak and shrimp. For the steak, opt for tender cuts like ribeye, New York strip, or filet mignon, as these deliver the perfect balance of juiciness and flavor. When it comes to shrimp, large or jumbo varieties work best—look for fresh, deveined shrimp with the shells removed for convenience. If you can’t find fresh shrimp, frozen options are just as good—just thaw them overnight in the refrigerator. By starting with high-quality proteins, you set the stage for a truly restaurant-worthy dish.

Key Seasonings and Sauces

The bold flavors of hibachi steak and shrimp come from its signature seasoning blend. Essential ingredients include soy sauce, garlic butter, sesame oil, and a pinch of ginger. These simple pantry staples create the savory, umami-packed profile hibachi is known for. For an extra layer of flavor, add a splash of lemon juice to brighten the dish. Want to make it even more authentic? Serve with a dollop of homemade Chimichurri Sauce a sweet and tangy dipping sauce that perfectly complements the steak and shrimp.

Vegetable Additions

A classic hibachi meal isn’t complete without colorful, sautéed vegetables. Popular choices include zucchini, onions, mushrooms, and broccoli, which bring both flavor and texture to the dish. Slice your veggies evenly so they cook at the same rate, and toss them in sesame oil and soy sauce before stir-frying. The result? Tender-crisp vegetables that pair beautifully with the savory steak and shrimp. If you’re short on time, pre-chopped vegetable mixes from the store can be a great shortcut.

Balancing the Plate: Rice and Noodles

While hibachi steak and shrimp can shine on its own, pairing it with fried rice or noodles takes the meal to the next level. Hibachi fried rice, cooked with a splash of soy sauce, scrambled eggs, and green onions, is a crowd favorite. If you prefer noodles, use yakisoba or udon, tossing them in garlic butter and soy sauce for a delicious side. These carb-based additions not only complete the dish but also soak up every bit of that irresistible hibachi sauce.

Step-by-Step Hibachi Steak and Shrimp Recipe

Step 1: Prep the Ingredients

Preparation is the foundation of a smooth cooking experience, especially for a quick dish like hibachi steak and shrimp. Start by cutting your steak into bite-sized pieces—this not only ensures even cooking but also makes serving easier. Next, peel and devein the shrimp, leaving the tails on for a restaurant-style presentation. For the vegetables, slice zucchini, onion, and mushrooms into uniform pieces so they cook evenly. Finally, prepare the sauce by mixing soy sauce, garlic butter, and a splash of sesame oil in a small bowl. By organizing everything beforehand, you’ll save time and avoid last-minute scrambling.

Step 2: Make the Garlic Butter Sauce

The secret to the rich, savory flavor of hibachi steak and shrimp lies in its garlic butter sauce. In a small saucepan, melt unsalted butter over low heat, then stir in minced garlic until fragrant. Add soy sauce, sesame oil, and a touch of ginger for extra depth. Stir the mixture until well combined and silky smooth. This sauce not only coats the steak and shrimp beautifully but also doubles as a drizzle for rice or noodles. For a citrusy twist, consider adding a squeeze of fresh lemon juice before serving.

Step 3: Cook the Steak and Shrimp

Cooking hibachi steak and shrimp is all about high heat and quick movements. Heat a flat-top grill or a large skillet until it’s almost smoking. Start with the steak, searing the pieces for about 2–3 minutes per side until browned and cooked to your desired doneness. Remove the steak and set it aside. Next, add the shrimp to the same pan, cooking them for 2–3 minutes per side or until they turn pink and opaque. The high heat ensures a caramelized crust on the steak and a slightly charred exterior on the shrimp, which enhances the flavor.

Step 4: Add the Vegetables and Combine

Once the steak and shrimp are cooked, it’s time to bring everything together. Toss the prepared vegetables into the skillet, stirring constantly to prevent burning. Cook until they’re tender but still crisp—about 4–5 minutes. Add the steak, shrimp, and garlic butter sauce back to the pan, tossing everything together to coat evenly. This step melds the flavors, making every bite of your hibachi steak and shrimp perfectly balanced and delicious. Serve immediately alongside fried rice or noodles for a complete meal.

If you enjoyed learning how to prepare hibachi steak and shrimp, you might also like these recipes:

Tips and Tricks for Perfect Hibachi Steak and Shrimp

Secrets to Getting Restaurant-Quality Results

Recreating the magic of restaurant-style hibachi steak and shrimp at home is easier than you think with a few insider tips. First, always cook over high heat to achieve that signature sear. A flat-top grill or cast-iron skillet works wonders for this because it holds heat evenly. Secondly, don’t overcrowd the pan if the steak and shrimp are too close together, they’ll steam instead of sear, resulting in less flavor. Finally, use fresh ingredients whenever possible. Freshly minced garlic, quality soy sauce, and real butter can make a noticeable difference in the taste and aroma of your dish.

Time-Saving Hacks

Preparing hibachi steak and shrimp can be even quicker with a few clever shortcuts. Pre-chopped vegetables from the store save time without sacrificing quality, and pre-minced garlic can make your prep work a breeze. If you’re in a pinch, consider using frozen shrimp, but make sure to thaw them properly before cooking. Another trick is to double the garlic butter sauce recipe and store the extra in the fridge for future meals it’s perfect for drizzling over rice or vegetables later in the week.

Ingredient Substitutions

Sometimes, you may want to tweak your hibachi steak and shrimp recipe to suit your preferences or dietary needs. For a leaner option, substitute chicken breast or tofu for the steak. If you’re avoiding soy, coconut aminos can be used as a flavorful alternative to soy sauce. Don’t have sesame oil? Try using a mild olive oil instead. These swaps ensure that everyone can enjoy the bold flavors of hibachi while catering to their specific needs.

Serving Suggestions and Pairings

Plated hibachi steak and shrimp with fried rice and yum yum sauce.
A complete hibachi steak and shrimp meal served with fried rice and yum yum sauce.

To elevate your hibachi steak and shrimp meal, pair it with classic sides that complement the dish’s rich flavors. Hibachi fried rice, made with scrambled eggs, soy sauce, and green onions, is a traditional choice. Alternatively, garlic butter noodles or a simple mixed greens salad provide a refreshing balance to the savory main course. For drinks, green tea or a light sake pairs beautifully, while a crisp white wine like Sauvignon Blanc adds an elegant touch.

Common Mistakes to Avoid

Overcrowding the Pan

One of the most common pitfalls when making hibachi steak and shrimp is overcrowding the pan. When too many ingredients are crammed into the skillet, the heat distribution is uneven, and instead of searing, the steak and shrimp steam. This results in a less flavorful dish with a soggy texture. To avoid this, cook in batches if necessary, giving each piece enough space to develop a golden, caramelized crust. It may take a bit longer, but the end result is well worth it.

Using the Wrong Cooking Surface

The type of cookware you use plays a huge role in the success of your hibachi steak and shrimp. Nonstick pans are tempting, but they don’t handle the high heat required for proper searing. Instead, opt for a flat-top grill, cast-iron skillet, or stainless steel pan. These surfaces retain heat better, ensuring your proteins and vegetables cook evenly. If a flat-top grill isn’t available, a griddle is a fantastic alternative for achieving that restaurant-quality sear.

Skipping the Garlic Butter Sauce

While the steak and shrimp are delicious on their own, skipping the garlic butter sauce would be a missed opportunity to elevate the dish. This sauce adds a rich, savory layer of flavor that ties the entire meal together. Be sure to coat the shrimp, steak, and vegetables generously, letting the sauce seep into every bite. For an extra burst of flavor, drizzle the sauce over your side of fried rice or noodles it’s a simple step that makes a big difference.

Overcooking the Shrimp

Shrimp cook incredibly quickly, and leaving them on the heat for too long can turn them rubbery and dry. To avoid this, keep a close eye on the shrimp and cook them for just 2–3 minutes per side, or until they turn pink and opaque. Remember, they’ll continue to cook slightly after being removed from the pan. Perfectly cooked shrimp should be tender, juicy, and bursting with flavor, complementing the seared steak beautifully.

FAQs

What type of steak is used for hibachi?

The best type of steak for hibachi steak and shrimp is a tender, flavorful cut that cooks quickly and evenly. Ribeye, New York strip, and filet mignon are popular choices because they have the right balance of fat and tenderness to achieve that juicy, melt-in-your-mouth texture. If you prefer a leaner option, sirloin steak is a great alternative that still delivers excellent flavor. Always cut the steak into bite-sized pieces before cooking to ensure even searing and easy serving.

Is steak and shrimp hibachi healthy?

Yes, hibachi steak and shrimp can be a healthy meal, depending on how it’s prepared. The dish typically includes lean proteins (steak and shrimp), fresh vegetables, and simple seasonings like soy sauce and garlic. To make it even healthier, use minimal butter and opt for low-sodium soy sauce. Pairing the dish with steamed rice or a light salad instead of fried rice can also reduce the calorie count. This makes hibachi a well-rounded option that’s both satisfying and nutritious.

What seasoning do they use at hibachi?

Hibachi dishes like hibachi steak and shrimp are known for their bold, savory flavors, achieved with a handful of simple seasonings. The essentials include soy sauce, sesame oil, garlic, and ginger. Some chefs also add mirin (a sweet rice wine) or a splash of sake for depth. The dish is often finished with a generous dollop of garlic butter, which enhances the flavor while adding a rich, creamy texture. These seasonings combine to create the unmistakable umami profile that makes hibachi so delicious.

What kind of shrimp is used in hibachi?

For hibachi steak and shrimp, large or jumbo shrimp are ideal. These sizes cook evenly, hold up well to high heat, and have a sweet, succulent flavor that complements the steak. Make sure the shrimp are peeled and deveined for convenience, though leaving the tails on can add a professional touch to the presentation. Whether you choose fresh or frozen shrimp, thaw them completely before cooking to ensure they sear properly and absorb the flavors of the sauce.

Conclusion

Recreating the magic of restaurant-style hibachi steak and shrimp at home is a fun and rewarding experience. By choosing tender cuts of steak like ribeye or filet mignon and pairing them with fresh jumbo shrimp, you set the foundation for a flavorful dish. The bold seasonings—soy sauce, sesame oil, garlic, and butter are simple yet essential for achieving the authentic hibachi taste.

So, what are you waiting for? Grab your skillet, gather your ingredients, and bring the sizzling flavors of hibachi steak and shrimp to your table tonight. Let us know how it turns out in the comments below!