Easy Mexican Potato Skillet: The Ultimate Breakfast Recipe

Transform your morning routine with this game-changing mexican potatoes breakfast recipe! Imagine perfectly crispy potatoes dancing with smoky chilies and fresh herbs, all coming together in one sizzling skillet. Whether you’re feeding a hungry weekend crowd or meal-prepping for busy mornings, these spicy breakfast potatoes deliver restaurant-worthy flavors right from your kitchen.

Why This mexican potatoes breakfast recipe Will Become Your Morning Favorite

The Story Behind These Authentic Mexican Breakfast Potatoes

Let’s be honest – mornings deserve something special, and this Mexican breakfast potatoes recipe delivers just that! As someone who’s spent countless weekends perfecting breakfast recipes, I can confidently say that these crispy potato skillets stand out from the crowd. Not only do they bring authentic flavors to your table, but they also offer the perfect balance of simplicity and wow-factor that makes breakfast truly memorable.

Key Ingredients That Make This Recipe Special

First and foremost, the secret lies in choosing the right potatoes. While traditional papas con chorizo often uses russet potatoes, I’ve discovered that small, waxy varieties like Yukon Gold or red potatoes work wonderfully in this recipe. According to America’s Test Kitchen, these varieties hold their shape better while still achieving that coveted crispy exterior. Moreover, the combination of authentic Mexican spices including smoky chipotle, earthy cumin, and bright chili powder transforms ordinary potatoes into a breakfast sensation.

Time-Saving Tips and Meal Prep Options

Here’s the best part about this Mexican potato skillet breakfast it’s incredibly versatile and meal-prep friendly! You can prep the potatoes and spice mixture the night before, which means you’re just minutes away from a restaurant-worthy breakfast come morning. Furthermore, these potatoes reheat beautifully, making them perfect for busy weekday mornings or weekend meal planning.

Health Benefits of Starting Your Day with this Skillet

Beyond their irresistible taste, these breakfast potatoes pack quite a nutritional punch. Potatoes provide essential carbohydrates for sustained energy, while the addition of fresh vegetables and herbs boosts the vitamin content. Additionally, when prepared with heart-healthy oils and paired with protein-rich toppings like eggs or black beans, this dish becomes a well-rounded breakfast option that’ll keep you satisfied until lunch.

Speaking of satisfaction, the versatility of this recipe means you can easily adjust the spice levels and toppings to suit your preferences. While some might prefer a milder version garnished with fresh cilantro and lime, others might opt for the full Mexican breakfast experience with added jalapeños and a sprinkle of queso fresco.

Essential Ingredients and Equipment for Perfect mexican potatoes breakfast recipe

Ingredients for Mexican breakfast potatoes recipe
Fresh ingredients ready for our Mexican breakfast potatoes

Choosing the Perfect Potatoes for Your Mexican Skillet

When it comes to creating the ultimate Mexican breakfast potatoes recipe, choosing the right spuds makes all the difference! For best results, grab yourself some Yukon Gold potatoes – these golden beauties have the perfect starch content for achieving that coveted crispy-outside, creamy-inside texture. You’ll need about 2 pounds of potatoes, preferably cut into ½-inch cubes for even cooking.

Must-Have Spices and Seasonings

Now, let’s talk about what makes these breakfast potatoes truly Mexican! Your spice blend should include:

  • 2 tablespoons Mexican chili powder
  • 1 tablespoon ground cumin
  • 1 teaspoon smoked paprika
  • 1 teaspoon garlic powder
  • ½ teaspoon Mexican oregano

Additionally, you’ll need kosher salt and freshly ground black pepper to taste. For that extra kick of authenticity, consider adding a pinch of chipotle powder or cayenne pepper.

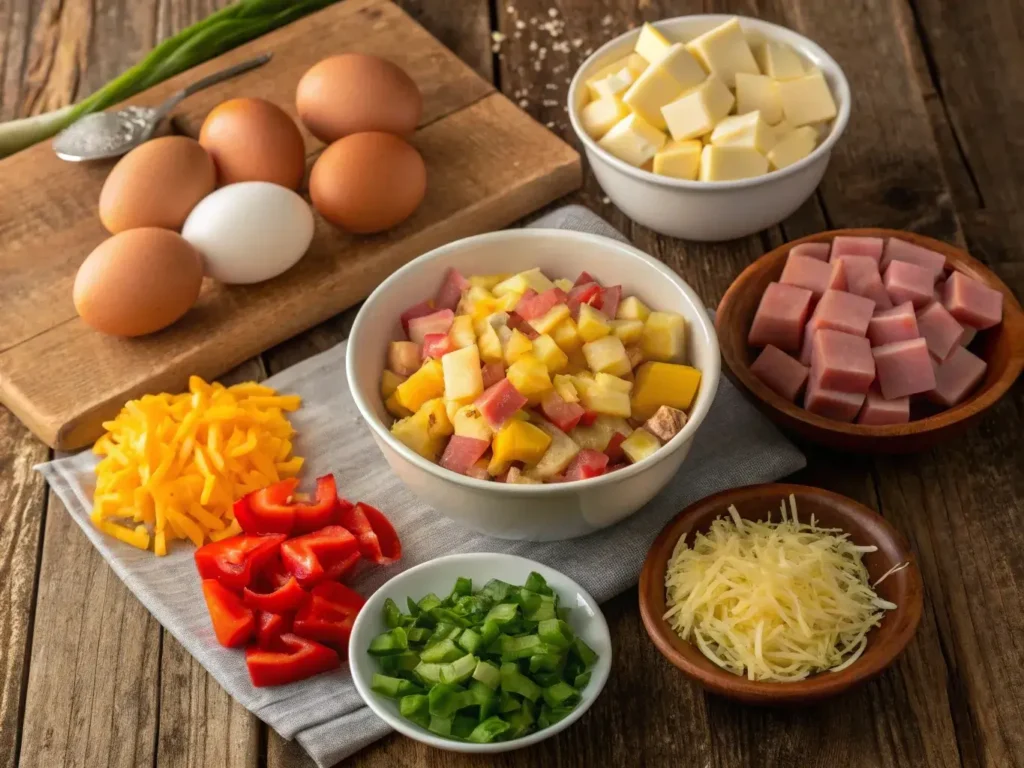
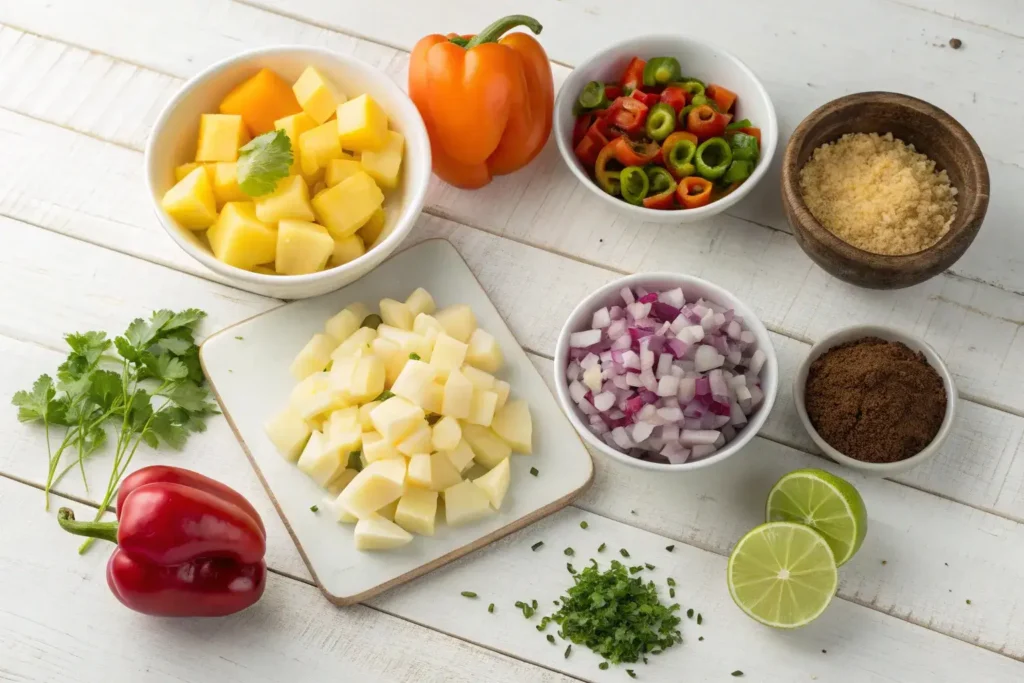
Fresh Ingredients That Make the Difference

To elevate your Mexican potato skillet breakfast, you’ll want to include:

  • 1 white onion, finely diced
  • 2 bell peppers (any color), chopped
  • 4 cloves fresh garlic, minced
  • Fresh cilantro for garnish
  • Lime wedges for serving

For added flavor and authenticity, consider incorporating diced poblano peppers or jalapeños if you enjoy some heat. Moreover, keeping some queso fresco and Mexican crema on hand can transform your breakfast potatoes into a complete meal.

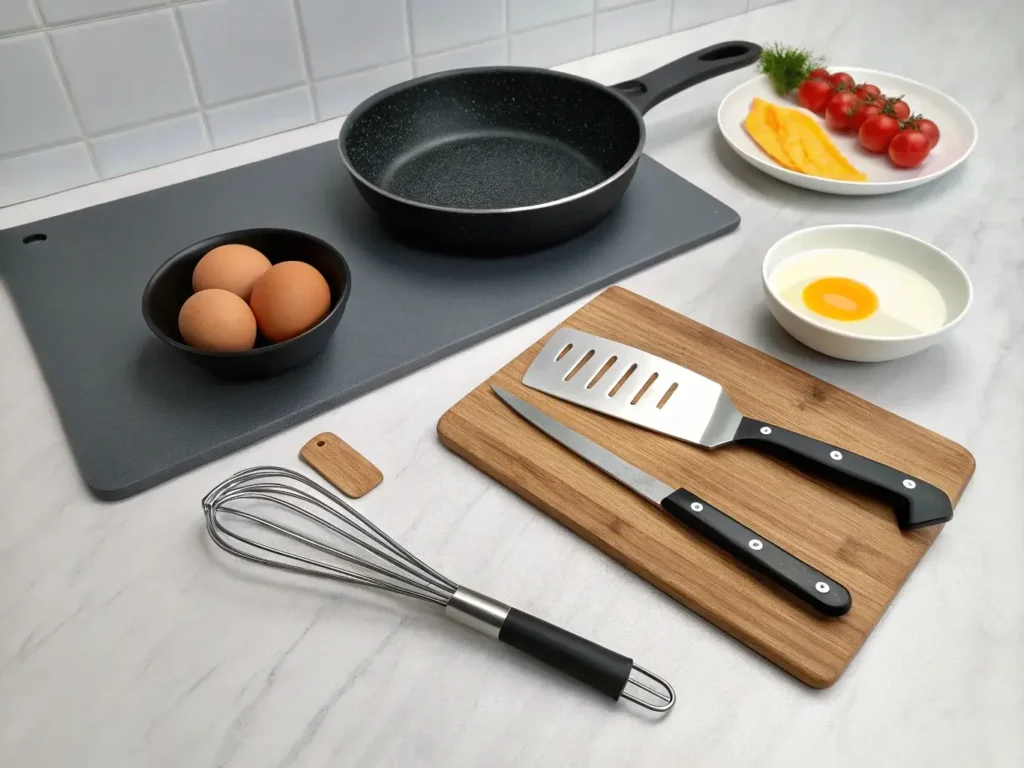
Kitchen Tools You’ll Need

Success with this recipe starts with the right equipment. Here’s what you’ll need:

  • A 12-inch cast iron skillet (preferred) or heavy-bottom pan
  • Sharp knife for uniform potato cutting
  • Large mixing bowl for seasoning
  • Sturdy spatula for flipping
  • Measuring spoons for precise seasoning

The most crucial tool is undoubtedly your skillet a well-seasoned cast iron pan will give you those restaurant-worthy crispy edges that make this dish unforgettable. Furthermore, its heat retention ensures even cooking throughout the entire batch.

Pro Tip: Before starting, make sure all your ingredients are prepped and within reach. This Mexican breakfast potatoes recipe moves quickly once you begin cooking, so having everything ready to go (mise en place) will make the process smooth and enjoyable.

Step-by-Step Cooking Instructions for mexican potatoes breakfast recipe

Cooking stages of Mexican breakfast potatoes in skillet
Watch the magic happen as your potatoes turn golden brown

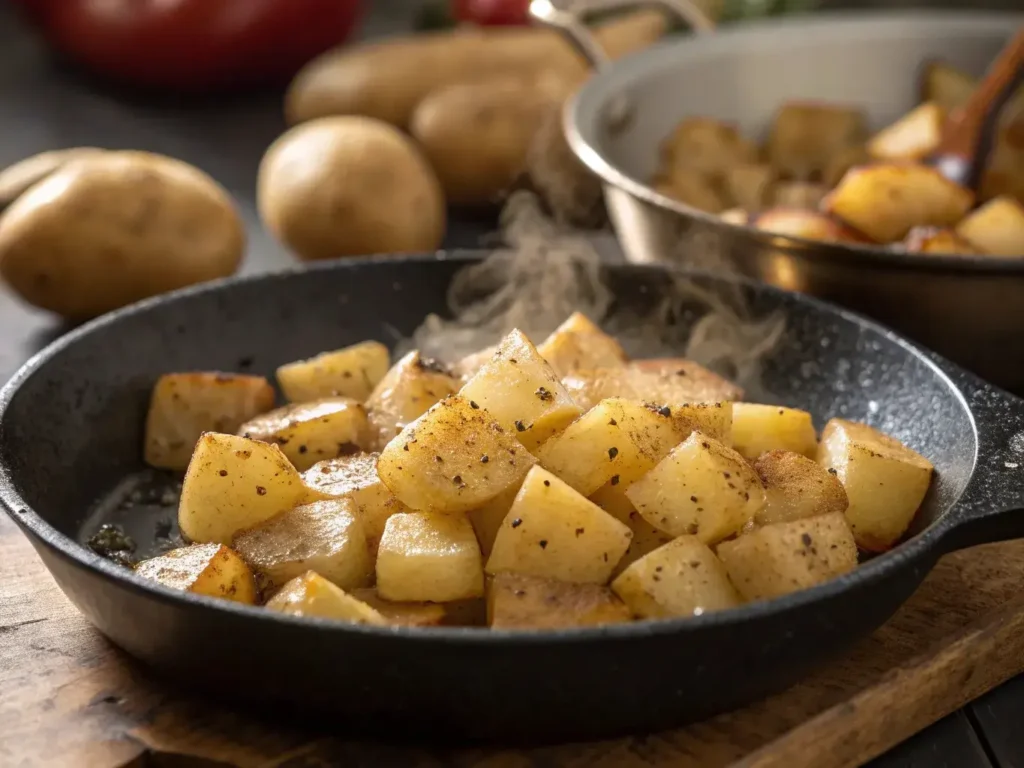
Preparing Your Potatoes for Perfect Crispiness

Let’s dive into making the most amazing Mexican breakfast potatoes recipe you’ve ever tasted! First, wash and cube your potatoes into uniform ½-inch pieces consistency is key for even cooking. Here’s a game-changing tip: after cutting, soak your potatoes in cold water for 15 minutes, then pat them completely dry. This extra step removes excess starch and ensures maximum crispiness.

Meanwhile, preheat your skillet over medium-high heat. Once hot, add 2 tablespoons of oil and let it heat until shimmering. This preparation method guarantees those irresistibly crispy breakfast potatoes you’re craving!

Creating the Authentic Mexican Spice Blend

Now for the magic that transforms ordinary potatoes into Mexican-style breakfast potatoes! In a small bowl, combine your spices:

  1. First, mix chili powder and cumin as your base
  2. Then, add paprika and garlic powder
  3. Finally, incorporate oregano and salt

Pro tip: Toast your spices in the dry skillet for 30 seconds before adding oil. This quick step awakens the flavors and creates an incredible aroma that’ll have everyone rushing to the kitchen!

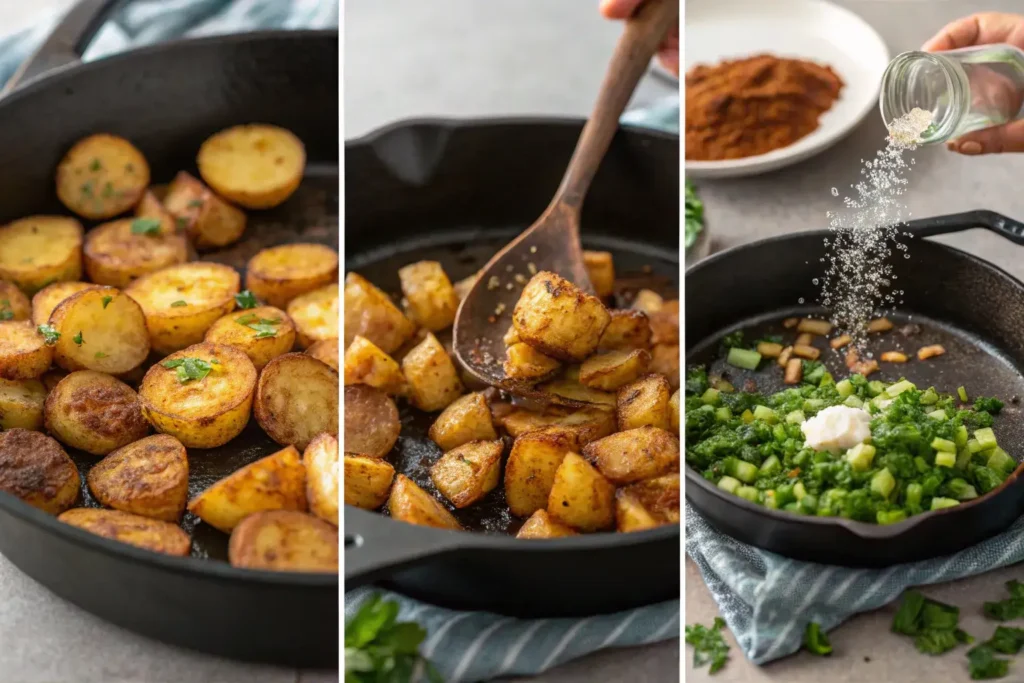
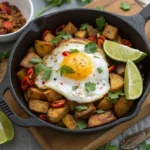
Mastering the Skillet Cooking Technique

Here’s where our Mexican potato skillet breakfast really comes to life! Begin by adding your dried potatoes to the hot oil in a single layer. The secret to perfectly crispy potatoes lies in these three key steps:

  1. Don’t overcrowd the pan – work in batches if needed
  2. Let them cook undisturbed for 4-5 minutes until golden brown
  3. Flip only once to ensure even browning

As the potatoes near completion, add your diced onions and peppers. Cook for an additional 5 minutes until the vegetables are tender and the potatoes are cooked through.

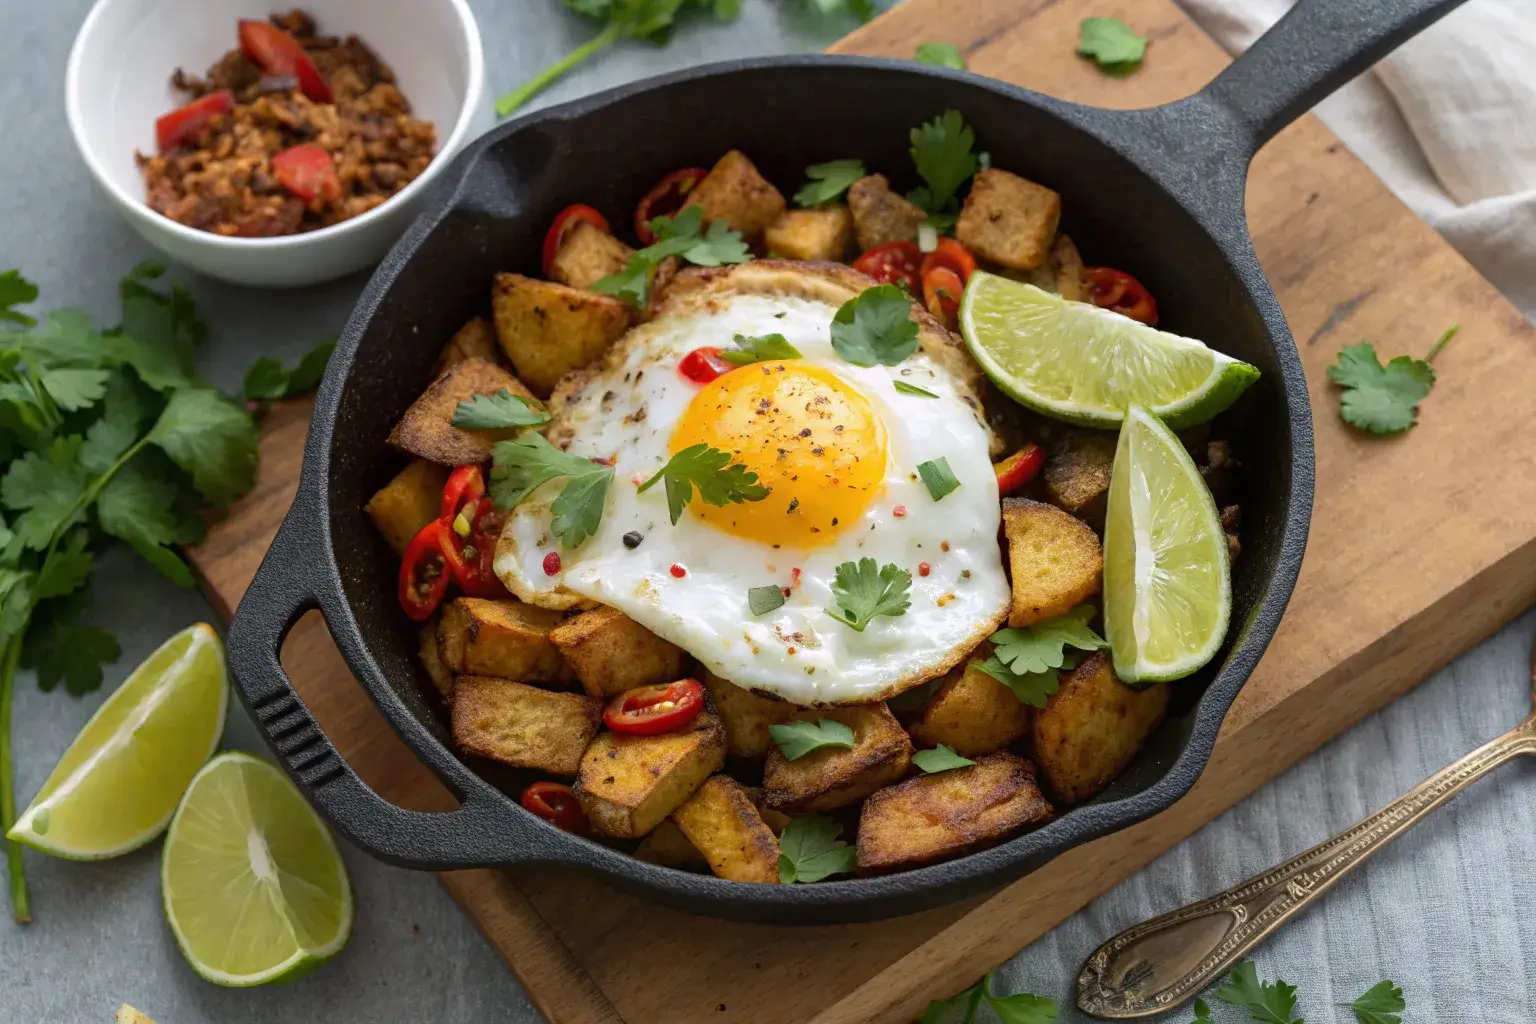
Garnishing and Serving Suggestions

Served Mexican breakfast potatoes with toppings
Your Mexican breakfast potatoes are ready to serve! Add your favorite toppings

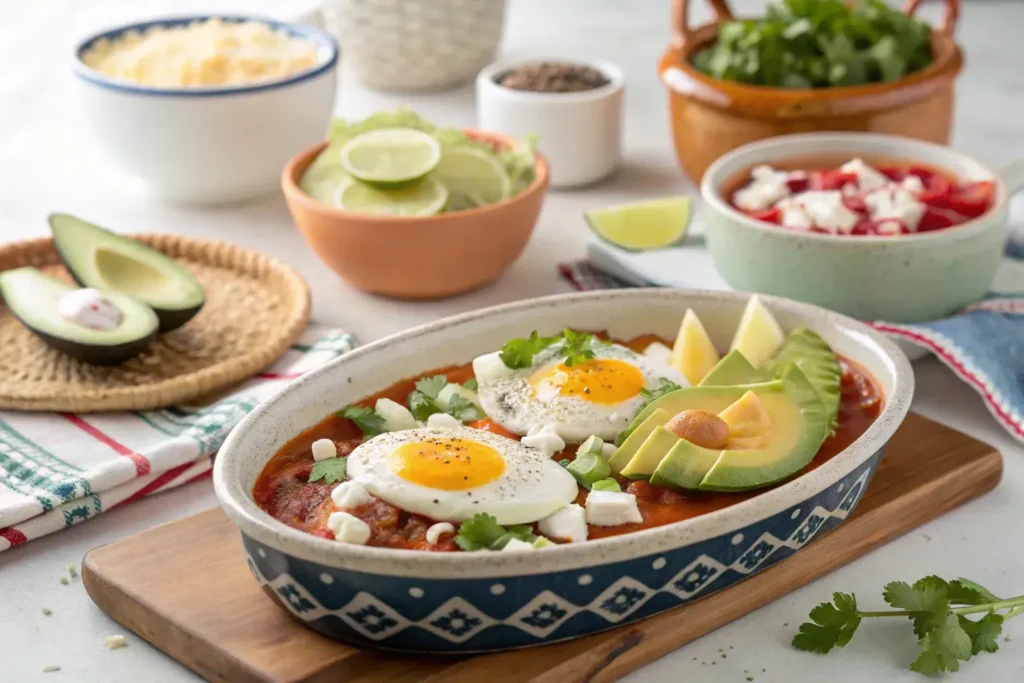
The finishing touches make this Mexican breakfast potatoes recipe truly special! While the potatoes are still hot, toss them with fresh cilantro and a squeeze of lime juice. For serving, consider these delicious combinations:

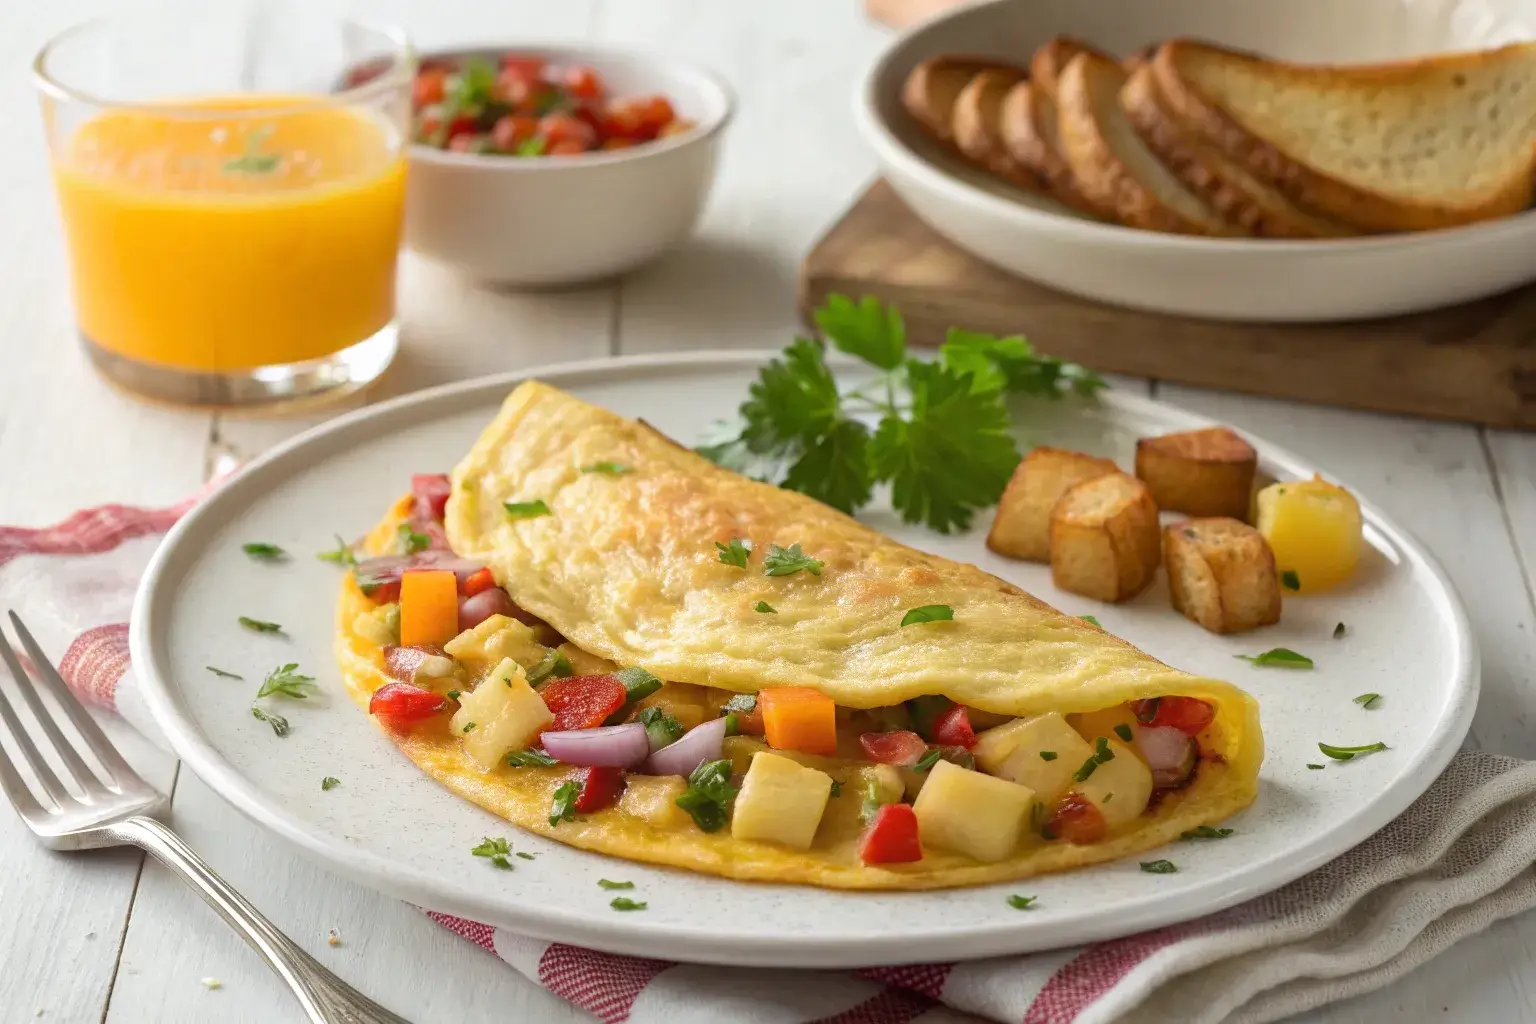
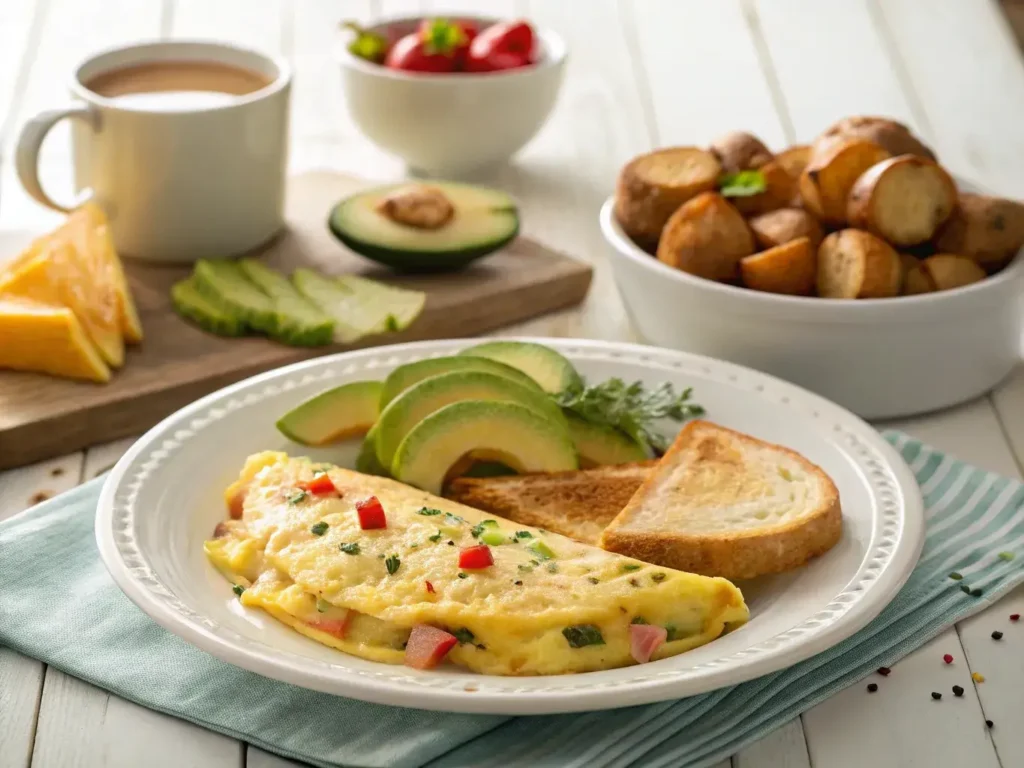
  • Top with a fried egg and avocado slices
  • Sprinkle with queso fresco and drizzle with Mexican crema
  • Serve alongside fresh pico de gallo and warm tortillas

Remember, these potatoes should be served immediately while piping hot for the best texture and flavor experience!

Recipe Variations and Customization for Your Mexican Breakfast Potatoes

Vegetarian and Vegan Adaptations

Let’s make this Mexican breakfast potatoes recipe work for everyone! The basic recipe is naturally vegetarian, but you can easily make it vegan by skipping traditional toppings like queso fresco. Instead, try these plant-based alternatives:

  • Sprinkle with nutritional yeast for a cheesy flavor
  • Add diced avocado for creaminess
  • Top with black beans for extra protein
  • Drizzle with cashew crema

The beauty of this recipe lies in its flexibility you can create a hearty, satisfying breakfast that fits any dietary preference while maintaining those authentic Mexican flavors!

Spice Level Adjustments

Everyone has their own spice tolerance, so let’s explore how to customize your Mexican potato skillet breakfast! Here’s a simple guide:

  • Mild: Skip the jalapeños and use mild chili powder
  • Medium: Add one diced poblano pepper
  • Hot: Include serrano peppers and a pinch of cayenne
  • Extra Hot: Add habanero peppers or hot sauce

Remember, you can always start mild and adjust the heat level up it’s much harder to cool things down once they’re too spicy!

Adding Proteins (Chorizo, Eggs, or Bean Options)

Transform your breakfast potatoes into a complete meal by adding protein! Here are some winning combinations:

  • Chorizo and potatoes: Add Mexican chorizo while cooking the potatoes
  • Egg variations: Top with fried, scrambled, or poached eggs
  • Bean medley: Mix in pinto or black beans
  • Tofu scramble: Add crumbled tofu seasoned with turmeric

Each protein option brings its own unique flavor while making the dish more filling and nutritious. Furthermore, you can prep these additions alongside your potatoes for a quick and easy breakfast solution.

Make-Ahead and Storage Tips

These Mexican-style potatoes are perfect for meal prep! Here’s how to make them work for busy mornings:

  1. Prep vegetables and spice mix in advance
  2. Par-cook potatoes and store in the fridge
  3. Reheat in a hot skillet with a splash of oil
  4. Add fresh garnishes just before serving
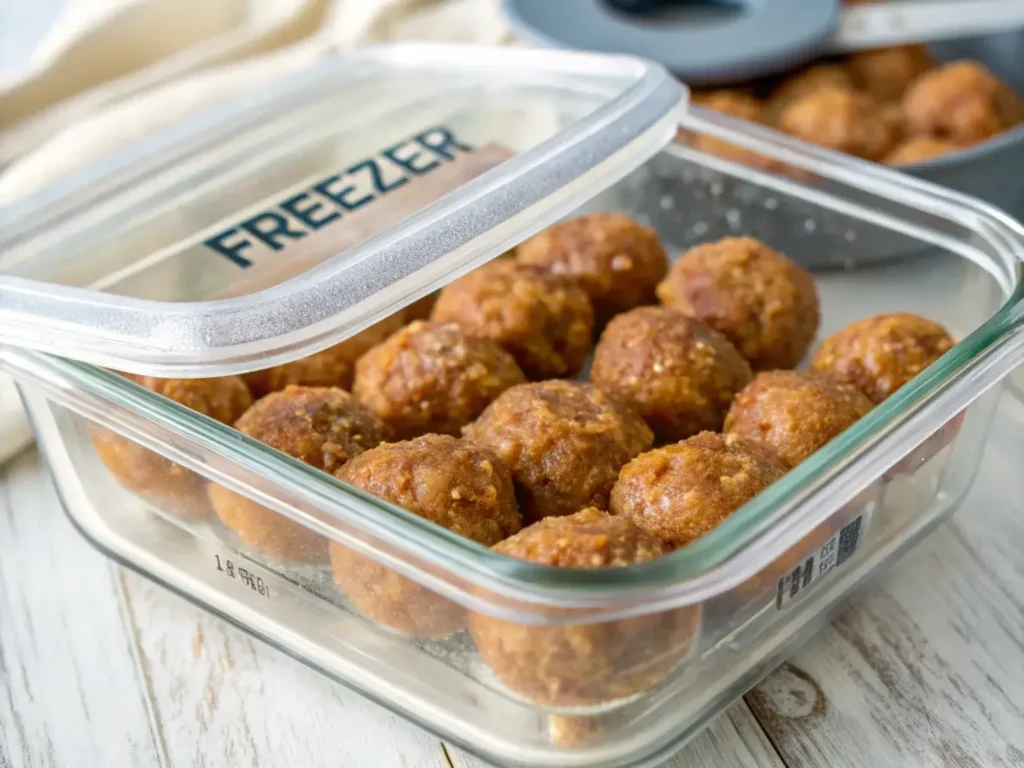
Storage guidelines:

  • Refrigerate leftovers for up to 3 days
  • Freeze cooked potatoes for up to 1 month
  • Always reheat in a skillet (never microwave) for best texture
  • Add fresh toppings after reheating

Frequently Asked Questions

What is the traditional Mexican breakfast?

A traditional Mexican breakfast goes way beyond your typical toast and coffee! While our Mexican breakfast potatoes recipe makes a fantastic addition to any morning meal, authentic Mexican breakfasts typically include dishes like chilaquiles, huevos rancheros, and papas con chorizo. Many families enjoy these hearty dishes with warm tortillas, fresh salsas, and sometimes refried beans. The key is creating a filling meal that powers you through your morning!

What kind of potatoes are used in Mexico?

Mexican cuisine traditionally uses several potato varieties, but the most common are papa blanca (white potatoes) and papa alfa (similar to Yukon Gold). For this Mexican potato skillet breakfast, you’ll get the best results using Yukon Gold or red potatoes, as they hold their shape well while getting perfectly crispy on the outside. However, any waxy potato variety will work beautifully in this recipe!

What breakfast food is made from potatoes?

Potatoes are breakfast superstars worldwide! Beyond our Mexican breakfast potatoes, you’ll find classics like hash browns, home fries, and potato pancakes. What makes this Mexican-style version special is the vibrant blend of spices and fresh ingredients that transform simple spuds into a flavor-packed morning feast. Plus, these potatoes work perfectly as a base for eggs, chorizo, or any protein you prefer!

Are potatoes part of Mexican food?

Absolutely! While corn and beans might get more attention, potatoes play a significant role in Mexican cuisine. From papas con chorizo to potato tacos (tacos de papa), these versatile tubers appear in countless traditional dishes. The Mexican breakfast potatoes recipe celebrates this heritage while adding a contemporary breakfast twist that works beautifully in any morning routine.

Conclusion:

There you have it, friends everything you need to master this Mexican breakfast potatoes recipe! Whether you’re cooking for a hungry family or meal-prepping for the week ahead, these crispy, flavorful potatoes are sure to become your new breakfast go-to. Remember, the key to success lies in proper potato preparation, bold seasoning, and that perfect crispy finish. Now it’s your turn to get cooking and make this recipe your own!


Print
clock clock iconcutlery cutlery iconflag flag iconfolder folder iconinstagram instagram iconpinterest pinterest iconfacebook facebook iconprint print iconsquares squares iconheart heart iconheart solid heart solid icon
Crispy Mexican breakfast potatoes in cast iron skillet with fried egg

Crispy Mexican Breakfast Potatoes Skillet


  • Author: Emily
  • Total Time: 45 minutes
  • Yield: 6 servings 1x

Ingredients

Scale

For the Potatoes:

  • 2 lbs Yukon Gold potatoes, cut into ½-inch cubes
  • 3 tablespoons vegetable oil or avocado oil
  • 1 large white onion, diced
  • 1 red bell pepper, diced
  • 1 green bell pepper, diced
  • 4 cloves garlic, minced

For the Spice Blend:

  • 2 tablespoons Mexican chili powder
  • 1 tablespoon ground cumin
  • 1 teaspoon smoked paprika
  • 1 teaspoon garlic powder
  • 1 teaspoon Mexican oregano
  • 1½ teaspoons kosher salt
  • ½ teaspoon black pepper

For Garnish:


  • ½ cup fresh cilantro, chopped
  • 2 limes, cut into wedges
  • 1 jalapeño, thinly sliced (optional)
  • Queso fresco for serving (optional)
  • Mexican crema for drizzling (optional)

Instructions


  1. Prep the Potatoes:
    • Cube potatoes and soak in cold water for 15 minutes
    • Drain and pat completely dry with paper towels
    • Mix all spice blend ingredients in a small bowl
  2. Start Cooking:
    • Heat oil in a large cast-iron skillet over medium-high heat
    • Once oil is shimmering, add dried potatoes in a single layer
    • Cook undisturbed for 4-5 minutes until golden brown
    • Flip and cook another 4-5 minutes
  3. Add Aromatics:
    • Add onions and bell peppers to the skillet
    • Cook for 5 minutes, stirring occasionally
    • Add minced garlic and spice blend
    • Cook for another 1-2 minutes until fragrant
  4. Finish and Serve:
    • Cover skillet and reduce heat to medium-low
    • Cook 5-7 minutes until potatoes are tender
    • Remove from heat and toss with fresh cilantro
    • Serve hot with lime wedges and optional toppings

Notes


  • For extra crispy potatoes, don’t skip the soaking step!
  • Work in batches if needed – overcrowding the pan prevents proper browning
  • Make ahead: Prep vegetables and spice mix the night before
  • Store leftovers in an airtight container for up to 3 days
  • Reheat in a hot skillet (avoid microwave) for best texture

7 Easy Steps to Make the Perfect Strawberry Shortcake Parfait

Who can resist a strawberry shortcake parfait? This no-bake dessert layers juicy strawberries, fluffy whipped cream, and soft cake for a sweet treat that’s as easy to make as it is to devour. Whether it’s a hot summer day or a cozy celebration, this parfait’s got you covered!

Print
clock clock iconcutlery cutlery iconflag flag iconfolder folder iconinstagram instagram iconpinterest pinterest iconfacebook facebook iconprint print iconsquares squares iconheart heart iconheart solid heart solid icon
A beautifully layered strawberry shortcake parfait with fresh strawberries and whipped cream in a glass.

How to Make the Perfect Strawberry Shortcake Parfait


  • Author: Emily
  • Total Time: 15 minutes
  • Yield: 4 servings 1x

Description

This strawberry shortcake parfait is a no-bake dessert that layers juicy strawberries, soft cake, and fluffy whipped cream into a delightful treat. Ready in just minutes, it’s perfect for breakfast, brunch, or a quick sweet snack.


Ingredients

Scale
  • 2 cups fresh strawberries (washed, hulled, and sliced)
  • 2 cups shortcake or pound cake (cut into small cubes)
  • 1 cup whipped cream (store-bought or homemade)
  • 1 tablespoon granulated sugar (optional, for macerating strawberries)
  • 1 teaspoon vanilla extract (optional, for whipped cream)
  • Garnishes: whole strawberries, mint leaves, or chocolate shavings (optional)

Instructions

  1. Wash the strawberries thoroughly, pat them dry, and slice them evenly. If desired, toss the slices with sugar to enhance their sweetness. Let them sit for 5 minutes to release their natural juices.
  2. Cut the shortcake or pound cake into small, bite-sized cubes for easy layering.
  3. If making whipped cream from scratch, whip 1 cup of heavy cream with 1-2 tablespoons of sugar and vanilla extract until soft peaks form.
  4. In a clear glass or jar, start by adding a layer of cake cubes as the base.
  5. Add a layer of sliced strawberries on top of the cake, followed by a generous spoonful of whipped cream.
  6. Repeat the layers until the glass is full, ending with a dollop of whipped cream on top.
  7. Garnish with a whole strawberry, mint leaf, or chocolate shavings for a decorative touch.

Notes

  • To make this recipe dairy-free, substitute whipped cream with coconut cream and use a dairy-free cake.
  • For a healthier option, use Greek yogurt instead of whipped cream and reduce or omit the sugar.
  • Prepare the parfaits just before serving to maintain the fresh texture of the cake and fruit.
  • This recipe is highly customizable—add nuts, granola, or even a drizzle of caramel for extra flavor.

Why Strawberry Shortcake Parfait is the Ultimate Dessert

The Perfect Balance of Flavors

A strawberry shortcake parfait isn’t just any dessert—it’s a carefully crafted balance of sweetness, freshness, and creaminess. The juicy strawberries bring natural sweetness and a hint of tang, while the soft, crumbly cake adds richness and texture. Topping it all off is the fluffy whipped cream, which ties everything together like a dream.

This dessert satisfies every craving, whether you’re in the mood for something fruity, creamy, or indulgent. Unlike heavier treats, its light and airy layers make it perfect for any time of the day.

A No-Bake Summer Treat

On hot summer days, the last thing you want is to turn on the oven. That’s why a strawberry shortcake parfait is your go-to dessert! This no-bake treat is quick to assemble and keeps you cool while delivering maximum flavor.

With just a few simple ingredients strawberries, cake, and whipped cream—you can create a visually stunning dessert in minutes. Plus, it’s great for last-minute gatherings when you want to impress without breaking a sweat. For more tips on summer desserts, check out this guide to no-bake recipes.

Versatility in Presentation

One of the best things about a strawberry shortcake parfait is its versatility. You can serve it in elegant glasses for a fancy dinner party, pack it into mason jars for a picnic, or simply layer it in bowls for a quick family dessert.

You can even adjust the portion sizes mini parfaits are perfect for kids, while larger servings are great for when you’re treating yourself. No matter how you serve it, this dessert looks as good as it tastes.

Perfect for Any Occasion

Whether you’re celebrating a birthday, hosting a brunch, or craving a solo indulgence, a strawberry shortcake parfait fits the bill. It’s fancy enough for special occasions but simple enough to whip up for everyday enjoyment.

Because it’s so easy to customize, you can make it feel right at home on any menu. Add some chocolate shavings for a romantic twist, or sprinkle in granola for a breakfast-inspired treat. This dessert is truly as flexible as your imagination.

Ingredients You’ll Need for Strawberry Shortcake Parfait

Ingredients for strawberry shortcake parfait including strawberries, whipped cream, and shortcake on a cutting board.
An overhead view of the ingredients for a strawberry shortcake parfait, ready for layering.

Fresh, Juicy Strawberries

To make the perfect strawberry shortcake parfait, fresh strawberries are essential. Look for ripe, bright red berries with a sweet aroma. Wash them thoroughly, remove the green tops, and slice them evenly for layering. For an extra burst of sweetness, toss the slices with a teaspoon of sugar or a splash of orange juice.

The Ideal Cake for Layering

The cake forms the base of your strawberry shortcake parfait. Shortcake is the traditional choice, but you can also use pound cake or sponge cake for a lighter texture. Store-bought options work well if you’re short on time, but homemade cake brings extra flavor to the dessert. For gluten-free parfaits, substitute with gluten-free cake or biscuits.

Rich and Creamy Whipped Cream

Whipped cream adds a luscious layer to your strawberry shortcake parfait. You can make it from scratch by whipping heavy cream with a touch of sugar and vanilla extract until soft peaks form. If you prefer a time-saving option, store-bought whipped cream works just as well. For a healthier twist, swap in Greek yogurt or coconut cream.

Optional Add-Ins for Creativity

While the classic ingredients shine on their own, you can add extra layers for a unique twist on the strawberry shortcake parfait. Crushed graham crackers or granola bring a satisfying crunch, while chocolate shavings or caramel drizzle add indulgence. For a tangy contrast, consider adding a dollop of lemon curd between the layers.

Step-by-Step Guide to Making Strawberry Shortcake Parfait

Preparing the Strawberries

Start by preparing the star of the strawberry shortcake parfait: the strawberries. Wash them thoroughly under cold water, pat them dry, and remove the green tops. Slice them evenly to create beautiful, uniform layers. For added sweetness, sprinkle the slices with a teaspoon of sugar or drizzle them with honey. Allow the strawberries to sit for a few minutes so they release their natural juices, which will enhance the parfait’s overall flavor.

Cutting and Preparing the Cake

Your choice of cake plays a big role in how your strawberry shortcake parfait turns out. If you’re using shortcake, pound cake, or sponge cake, cut it into small cubes or tear it into bite-sized pieces. This ensures each bite of the parfait includes the perfect blend of flavors and textures.

For those short on time, store-bought cake works wonderfully, but homemade cake takes this dessert to the next level. If you’d like to try a complementary recipe, check out our Gluten-Free Mozzarella Sticks Recipe for a savory pairing idea!

Layering the Parfait

Layering a strawberry shortcake parfait with fresh strawberries, whipped cream, and cake.
Step-by-step layering of a strawberry shortcake parfait for a visually appealing dessert.

Now comes the fun part—layering your strawberry shortcake parfait! Use a glass or jar to show off the dessert’s vibrant colors and textures. Start with a base layer of cake cubes, followed by a generous spoonful of sliced strawberries. Add a layer of whipped cream to create a creamy contrast, then repeat the layers until the glass is full.

Make sure to end with a whipped cream topping for a polished finish. For an extra decorative touch, top the parfait with a whole strawberry, a mint leaf, or even some crushed graham crackers.

Pro Tips for Perfect Parfait Assembly

To ensure your strawberry shortcake parfait looks as good as it tastes, keep these tips in mind:

  1. Use even layers: Balance each ingredient to avoid overpowering the parfait with too much cream or cake.
  2. Chill before serving: Let the parfait rest in the fridge for 15-20 minutes to enhance the flavors and firm up the layers.
  3. Serve immediately: While these parfaits can be prepped in advance, they’re best enjoyed fresh for maximum crunch and flavor.
  4. Customize to taste: Add chocolate chips, crushed nuts, or a drizzle of caramel for a personalized twist.

Variations of Strawberry Shortcake Parfait

Three variations of strawberry shortcake parfaits: classic, chocolate, and mixed berry.
Three creative variations of strawberry shortcake parfaits, perfect for any occasion.

Dairy-Free Strawberry Shortcake Parfait

If you’re looking for a dairy-free version of the strawberry shortcake parfait, don’t worry it’s easy to adapt! Swap the whipped cream for coconut cream or a dairy-free whipped topping. For the cake layer, use a dairy-free shortcake or sponge cake made with plant-based milk.

This version is just as creamy and delicious as the classic but caters to those with dietary restrictions. For an added flavor twist, sprinkle in a touch of cinnamon or nutmeg to the coconut cream before layering!

Low-Sugar or Keto-Friendly Options

For a healthier take on the strawberry shortcake parfait, you can reduce the sugar without sacrificing flavor. Replace traditional cake with a low-carb almond flour cake, and use a sugar-free whipped cream alternative. Sweeten the strawberries naturally with a sugar substitute like stevia or monk fruit.

This version is perfect for those watching their sugar intake but still craving a sweet and refreshing dessert. Plus, it’s an excellent choice for anyone following a keto diet!

Mixed Berry Shortcake Parfait

Why stick to just strawberries? Create a vibrant mixed berry shortcake parfait by adding blueberries, raspberries, or blackberries to the layers. The combination of berries not only adds a pop of color but also enhances the flavor with a mix of sweet and tart notes.

This variation is perfect for summer picnics or festive gatherings, as the colorful presentation is bound to impress your guests. Pair it with a dollop of lemon or vanilla yogurt for a refreshing twist.

Chocolate Strawberry Shortcake Parfait

For a decadent dessert, transform your strawberry shortcake parfait into a chocolate lover’s dream. Add a layer of chocolate ganache or drizzle melted chocolate between the layers. Alternatively, use a chocolate cake base instead of the classic shortcake.

To make it even more indulgent, sprinkle some mini chocolate chips or shaved dark chocolate on top. This variation is perfect for date nights or when you’re in the mood for something extra luxurious.

FAQs About Strawberry Shortcake Parfait

What is a traditional parfait made of?

A traditional parfait is a layered dessert made with yogurt or whipped cream, fresh fruit, and granola or cake pieces. Each layer offers a balance of textures and flavors, making parfaits both visually appealing and delicious. When creating a strawberry shortcake parfait, the layers are typically strawberries, shortcake, and whipped cream for a classic twist.

What is the difference between strawberry cake and strawberry shortcake?

While both desserts feature strawberries, they differ in preparation and texture. Strawberry cake is a fully baked dessert, often layered with strawberry-flavored frosting and sponge or butter cake. In contrast, strawberry shortcake combines fresh strawberries, whipped cream, and soft, crumbly shortcake or biscuit layers. A strawberry shortcake parfait captures the essence of strawberry shortcake but presents it in a layered, glass-style dessert for easy assembly and serving.

What does strawberry parfait taste like?

A strawberry shortcake parfait offers a delightful blend of sweet and tangy flavors. The fresh strawberries provide a natural sweetness, while the shortcake adds a buttery richness. Combined with fluffy whipped cream, the parfait delivers a creamy, refreshing treat with layers of soft cake and juicy fruit. It’s like enjoying summer in every bite!

What is in the middle of a strawberry shortcake?

The middle of a strawberry shortcake traditionally features a generous layer of fresh strawberries and lightly sweetened whipped cream sandwiched between two layers of shortcake. In a strawberry shortcake parfait, this combination is layered repeatedly in a glass, creating a visually stunning dessert that’s just as delicious as its plated counterpart.

Conclusion

A strawberry shortcake parfait is the ultimate dessert, combining layers of soft cake, juicy strawberries, and fluffy whipped cream in a single serving. Whether you’re making it dairy-free, keto-friendly, or adding a twist with chocolate or mixed berries, this versatile dessert is perfect for any occasion. Plus, it’s quick, easy, and customizable to suit your tastes.

Now it’s your turn to make this irresistible dessert. Grab your favorite ingredients, get creative with the layers, and enjoy every delicious spoonful!

How to Make Perfect Breakfast Sausage Crescent Rolls in 15 Minutes

Who says mornings have to be rushed and uninspired? With these Breakfast Sausage Crescent Rolls, you’ll have a delicious, golden-brown treat that’s as easy to make as it is to enjoy. These little pockets of joy combine flaky crescent roll dough with savory sausage for a combination that’s nothing short of irresistible. Need more? Toss in some gooey cheese or sprinkle in your favorite herbs for a personalized twist. Perfect for feeding a hungry family or impressing friends at brunch, these rolls will quickly become your breakfast MVP. Ready in just 15 minutes, they’re ideal for busy weekdays or lazy weekend mornings. Let’s roll into the recipe and get baking!

What Are Breakfast Sausage Crescent Rolls?

A Quick Overview of Breakfast Sausage Crescent Rolls

Breakfast Sausage Crescent Rolls are a simple yet irresistible combination of flaky crescent roll dough and savory breakfast sausage. These bite-sized treats are easy to prepare, making them a go-to option for busy mornings or relaxed weekends. What makes them so special? It’s the perfect balance of buttery pastry and juicy, seasoned sausage in every bite. You can even add a touch of cheese or herbs to make them your own! Whether you’re feeding a crowd or just indulging in a quick breakfast, these rolls deliver satisfaction without the fuss.

Why These Rolls Are a Breakfast Game-Changer

If you’re tired of the same old cereal or toast routine, Breakfast Sausage Crescent Rolls are here to save the day. Their versatility is unmatched—you can serve them plain for a quick snack or dress them up for a holiday brunch. Unlike more elaborate breakfast dishes, these rolls require just a few basic ingredients and minimal prep time. Ready in just 15 minutes, they’re a lifesaver for mornings when time is short but flavor is non-negotiable. Plus, they’re portable, so you can take them on the go or pack them in a lunchbox.

How Crescent Rolls Pair Perfectly with Breakfast Sausage

There’s something magical about the way buttery crescent rolls complement savory breakfast sausage. The soft, flaky texture of the dough wraps around the sausage, creating a satisfying bite every time. Want to enhance the flavor even more? Add shredded cheddar cheese for a creamy, melty surprise. For an extra twist, sprinkle in some garlic powder or fresh parsley before baking. The result is a dish that feels indulgent yet simple, perfect for anyone who loves combining textures and flavors.

Origins and Popularity of Breakfast Sausage Crescent Rolls

While crescent rolls originated as a French pastry, they’ve become a staple in American kitchens, especially for quick and easy recipes. Combining crescent rolls with breakfast sausage likely started as a way to create a satisfying meal with minimal effort. Over time, this dish has gained popularity as a family favorite, particularly during busy mornings or festive occasions. Today, Breakfast Sausage Crescent Rolls are a beloved breakfast option, appreciated for their taste, convenience, and ability to bring people together at the table.

Ingredients and Tools You’ll Need

Essential Ingredients for Breakfast Sausage Crescent Rolls

To make these Breakfast Sausage Crescent Rolls, you’ll need just a handful of ingredients, most of which you probably already have on hand:

Ingredients for Breakfast Sausage Crescent Rolls on Wooden Surface
Crescent roll dough, sausages, cheese, and herbs ready for preparation
  • Crescent roll dough: A can of store-bought dough (like Pillsbury) is convenient and gives that perfect flaky texture.
  • Breakfast sausage: Pre-cooked sausages work best to save time. Choose pork, chicken, or turkey based on your preference.
  • Optional additions: Shredded cheddar cheese, mozzarella, or even cream cheese for a creamy twist.
  • Seasoning options: Garlic powder, paprika, or fresh herbs like parsley can elevate the flavor.

Having these simple staples means you can whip up a batch of rolls whenever the craving strikes!

Handy Tools for Easy Preparation

Creating Breakfast Sausage Crescent Rolls doesn’t require fancy gadgets—just a few basic tools will do:

  1. Baking sheet: A standard sheet pan lined with parchment paper ensures even baking and easy cleanup.
  2. Silicone baking mat: A reusable option that keeps the rolls from sticking.
  3. Basting brush: Perfect for applying melted butter or egg wash for a golden finish.
  4. Sharp knife or pizza cutter: If you want to trim the dough for custom-sized rolls.

These tools make the process smooth and enjoyable, even if you’re not a seasoned cook.

Ingredient Substitutions and Variations

Don’t have all the ingredients on hand? No problem! Here are some easy swaps:

  • Crescent roll dough alternative: Puff pastry or homemade biscuit dough can work in a pinch.
  • Sausage substitutes: Try vegetarian or vegan sausage for a plant-based option.
  • Cheese options: Experiment with Swiss, pepper jack, or even a sprinkle of Parmesan for added flavor.
  • Healthier twists: Use whole-grain crescent rolls or low-fat cheese to make this dish lighter.

Experimenting with variations is a fun way to make these Breakfast Sausage Crescent Rolls uniquely yours!

Where to Buy High-Quality Ingredients

For the best results, choose high-quality ingredients. Look for:

  • Crescent roll dough: Found in the refrigerated section of most grocery stores. Brands like Pillsbury are reliable.
  • Breakfast sausage: Local butcher shops often have fresh, flavorful options. Alternatively, major retailers like ‘Whole Foods’ offer organic and grass-fed choices.
  • Cheese: Opt for freshly shredded cheese rather than pre-packaged varieties for better melting.

Shopping smartly ensures your Breakfast Sausage Crescent Rolls turn out as delicious as possible!

Step-by-Step Instructions for Perfect Breakfast Sausage Crescent Rolls

Rolling Sausage into Crescent Dough for Breakfast Rolls
Step-by-step preparation of Breakfast Sausage Crescent Rolls

Preparing Your Ingredients and Workspace

Before you dive into making these Breakfast Sausage Crescent Rolls, take a moment to prep everything. Start by preheating your oven to 375°F (190°C). Line a baking sheet with parchment paper or use a silicone mat to prevent sticking. Make sure your crescent roll dough is chilled—this makes it easier to handle. If your sausages aren’t pre-cooked, brown them in a skillet over medium heat until fully cooked, then set them aside to cool slightly.

Having everything ready ensures the assembly process is smooth and stress-free.

Rolling and Stuffing the Crescent Rolls

Now comes the fun part—assembling your Breakfast Sausage Crescent Rolls! Follow these simple steps:

  1. Open the can of crescent roll dough and carefully unroll it onto a clean surface.
  2. Separate the dough along the perforations to create individual triangles.
  3. Place a sausage at the wide end of each triangle. For extra flavor, sprinkle shredded cheese or a pinch of garlic powder over the sausage.
  4. Roll the dough tightly around the sausage, starting at the wide end and working toward the pointed tip.

Don’t worry if they’re not perfect once they bake, the flaky layers will hide any imperfections.

Baking Your Breakfast Sausage Crescent Rolls

Once your rolls are assembled, place them seam-side down on the prepared baking sheet. If you’d like a golden, glossy finish, brush the tops with a little melted butter or an egg wash. Bake for 10–12 minutes, or until the rolls are puffed and golden brown.

Keep an eye on them as they bake every oven is slightly different, and you don’t want to risk overbaking. The aroma of buttery pastry and sizzling sausage will let you know they’re almost ready!

Tips for Perfect Results Every Time

To make sure your Breakfast Sausage Crescent Rolls turn out just right, here are a few helpful tips:

  • Keep the dough cold: Warm dough can become sticky and hard to work with. If it softens too much, pop it back in the fridge for a few minutes.
  • Use pre-cooked sausages: This saves time and ensures the sausage is fully cooked by the time the dough is done.
  • Customize to your taste: Add a sprinkle of herbs, cheese, or even diced veggies to elevate the flavor.
  • Let them cool slightly: Freshly baked rolls will be very hot inside, so let them sit for a minute or two before serving.

For more delicious breakfast recipes, check out our article on Perfect Denver Omelette with Cheese & Potatoes

Delicious Variations of Breakfast Sausage Crescent Rolls

Cheesy Breakfast Sausage Crescent Rolls

For those who love a cheesy surprise, this variation takes your Breakfast Sausage Crescent Rolls to the next level. Before rolling the sausage in the dough, add a generous sprinkle of shredded cheddar or mozzarella cheese. As the rolls bake, the cheese melts into gooey perfection, creating an irresistible flavor combination. For an extra kick, try pepper jack cheese—it adds a hint of spice without overwhelming the dish.

Cheesy rolls pair perfectly with ketchup, honey mustard, or a dollop of sour cream for dipping.

Sweet and Savory Breakfast Sausage Crescent Rolls

If you’re a fan of sweet and savory flavors, this variation is a must-try. Drizzle a little honey or maple syrup over the sausage before rolling it in the dough. The sweetness caramelizes as the rolls bake, creating a delightful contrast to the savory sausage.

For a fun twist, sprinkle cinnamon or nutmeg on the dough before adding the sausage. These rolls are especially popular during the holiday season, offering a unique flavor that feels both indulgent and festive.

Veggie-Stuffed Breakfast Sausage Crescent Rolls

Looking for a way to add some extra nutrients to your breakfast? Veggie-stuffed Breakfast Sausage Crescent Rolls are a fantastic option. Dice up sautéed spinach, bell peppers, or mushrooms, and layer them on the dough before rolling.

Not only do the veggies add vibrant color, but they also enhance the flavor and texture of the rolls. If you want to get creative, consider adding a sprinkle of feta or goat cheese along with the veggies for a Mediterranean-inspired twist.

Mini Breakfast Sausage Crescent Rolls for Snacks

Sometimes, smaller bites are more fun—and practical! To make mini Breakfast Sausage Crescent Rolls, cut the crescent roll dough into smaller triangles and use cocktail sausages instead of full-sized ones.

These bite-sized versions are perfect for serving at parties, as appetizers, or for packing in lunchboxes. Plus, they bake even faster—usually in about 8–10 minutes. Serve them with a side of marinara or barbecue sauce for dipping, and watch them disappear in minutes!

Pairing Ideas for Breakfast Sausage Crescent Rolls

Breakfast Sausage Crescent Rolls Served with Eggs and Fruit
A complete breakfast with sausage crescent rolls, eggs, and fresh fruit

Serve with Fresh Fruit or Smoothies

For a balanced breakfast, pair your Breakfast Sausage Crescent Rolls with a side of fresh fruit. The natural sweetness of strawberries, blueberries, or orange slices complements the savory rolls beautifully. Alternatively, whip up a quick smoothie using ingredients like bananas, spinach, and almond milk for a refreshing, nutrient-packed drink.

This combination not only enhances the flavor profile of your meal but also adds a healthy boost to start your day right.

Dipping Sauces for Extra Flavor

Take your Breakfast Sausage Crescent Rolls to the next level by serving them with dipping sauces. Honey mustard and ranch are classic choices, offering tangy and creamy flavors. For a more adventurous twist, try a drizzle of sriracha mayo or a savory marinara sauce.

Dipping sauces are especially fun if you’re serving these rolls at a party or brunch, as they let everyone customize their bite.

Pair with Scrambled Eggs and Bacon

If you’re hosting a hearty breakfast or brunch, serve these Breakfast Sausage Crescent Rolls alongside scrambled eggs and crispy bacon. The combination of flaky pastry, creamy eggs, and crunchy bacon creates a complete and satisfying meal.

For a healthier option, swap the bacon for turkey strips or a side of sautéed vegetables like spinach or zucchini.

Coffee, Tea, or Juice Pairings

Beverages play an important role in enhancing any meal, and Breakfast Sausage Crescent Rolls are no exception. For a cozy vibe, serve them with a hot cup of coffee or spiced chai tea. If you prefer a lighter drink, fresh orange or apple juice is a great choice.

This pairing ensures that your breakfast feels cohesive and flavorful, no matter the occasion.

FAQs

What is the difference between a crescent roll and a croissant?

Though they may look similar, crescent rolls and croissants are quite different. Crescent rolls are made with a simpler dough, typically pre-made and found in cans for easy use. They have a soft, flaky texture but lack the intricate layers of a croissant.

On the other hand, croissants are made with a laminated dough, which involves folding and layering butter into the dough multiple times. This process gives croissants their signature airy, flaky, and buttery texture. For recipes like Breakfast Sausage Crescent Rolls, crescent dough is ideal because it’s quick, convenient, and versatile.

Is there a difference between breakfast sausage and regular sausage?

Yes, there’s a difference! Breakfast sausage is usually made with pork and seasoned with spices like sage, black pepper, and a touch of sweetness (like maple syrup). These flavors are mild and complement breakfast dishes perfectly.

Regular sausage, however, can vary widely in seasoning and meat type (pork, chicken, beef, or even plant-based options). It’s often spicier or bolder, depending on its intended use. For Breakfast Sausage Crescent Rolls, breakfast sausage is the preferred choice because its subtle flavors pair well with the buttery dough.

Can you have a sausage roll for breakfast?

Absolutely! Sausage rolls are a versatile meal option and are perfect for breakfast. Whether you enjoy a classic sausage roll or opt for a variation like Breakfast Sausage Crescent Rolls, they’re filling, flavorful, and easy to prepare.

Pair them with fresh fruit, scrambled eggs, or even a smoothie for a complete breakfast. Their portability also makes them an excellent choice for busy mornings or on-the-go snacks.

What do you eat sausage rolls with?

Breakfast Sausage Crescent Rolls are incredibly versatile and pair well with a variety of sides and dips. For breakfast, you can serve them with scrambled eggs, crispy bacon, or sautéed vegetables. If you’re enjoying them as a snack or appetizer, try dipping them in honey mustard, marinara, or ranch dressing.

To add a healthy twist, consider serving them with a side salad or fresh fruit. No matter what you choose, these rolls adapt easily to different meals and occasions.

Conclusion

Breakfast Sausage Crescent Rolls are the ultimate combination of convenience and flavor. With their buttery, flaky texture and savory sausage filling, they’re a hit for any occasion—whether you’re hosting brunch, prepping for a busy weekday morning, or simply craving a comforting snack.

From the simplicity of their ingredients to the endless variations you can try, these rolls are as versatile as they are delicious. You’ve learned how to make them step by step, explored unique twists like cheesy or veggie-stuffed versions, and discovered how to pair them with the perfect sides and dips.

how many teaspoons in an ounce ? Find Out Fast!

Let’s face it conversions like how many teaspoons in an ounce can feel as puzzling as deciphering Grandma’s handwritten recipe cards. But don’t let a little math intimidate you! Whether you’re whipping up a luscious dessert or crafting a flavorful sauce, knowing this simple measurement is a game-changer. Did you know that 1 ounce equals exactly 6 teaspoons? With this guide, you’ll learn not only the conversion but also why it matters for dry vs. liquid ingredients. Say goodbye to the days of guessing and hello to perfectly balanced dishes. From baking to cooking, we’ve got your back because even the tiniest measurements make the biggest difference in flavor!

Understanding the Basics of Ounces and Teaspoons

What Is an Ounce? Exploring Its Importance in Cooking

An ounce is one of the most commonly used units in cooking and baking. But did you know there are two types of ounces fluid ounces for liquids and dry ounces for solids? While they share the same name, they measure very different things. A fluid ounce refers to volume, while a dry ounce measures weight, which is why they aren’t interchangeable in recipes.

In the kitchen, using precise measurements like how many teaspoons in an ounce ensures that your dishes turn out as expected. For instance, when making a vinaigrette, the right balance of oil and vinegar depends on accurate liquid measurements. That’s where understanding ounces becomes invaluable—it’s the difference between a perfectly seasoned dish and one that falls flat.

What Is a Teaspoon? A Small Yet Mighty Unit

A teaspoon may be small, but its impact in the kitchen is huge. It’s a standard unit of measurement for ingredients like spices, baking powder, and even liquids in smaller quantities. When you see “tsp” in a recipe, it’s shorthand for teaspoon, a tool every cook relies on to measure precision amounts.

If you’ve ever wondered, how many teaspoons in an ounce? the answer is straightforward—there are 6 teaspoons in 1 fluid ounce. This simple conversion makes it easy to scale recipes or adjust flavors without guessing. Think of a teaspoon as your secret weapon for ensuring every pinch of salt or splash of vanilla extract is just right.

The Relationship Between Ounces and Teaspoons

When converting ounces to teaspoons, it helps to understand their relationship. A single fluid ounce equals exactly 6 teaspoons. This fixed ratio is a lifesaver when measuring small quantities of liquids like lemon juice for a marinade or soy sauce for a stir-fry.

However, keep in mind that this ratio applies specifically to fluid ounces. For dry ingredients, factors like density and texture come into play. For example, a dry ounce of sugar may measure differently in teaspoons compared to a dry ounce of flour. To avoid missteps, always consider the type of ingredient you’re working with.

For a deeper dive into accurate conversions, this measurement guide from AllRecipes offers helpful tips on getting it right every time.

Why Conversions Differ for Dry and Liquid Ingredients

Conversions between dry and liquid ingredients can be tricky, but they’re crucial for accurate results. Liquids like milk or water have consistent density, so 1 fluid ounce = 6 teaspoons. Dry ingredients, on the other hand, vary significantly in weight and volume.

For instance, how many teaspoons in an ounce of flour? The answer depends on how tightly the flour is packed. In contrast, 1 ounce of granulated sugar, which is denser, will require fewer teaspoons. This is why recipes often specify “packed” or “leveled” measurements to ensure accuracy.

To simplify conversions, consider using a kitchen scale for dry ingredients. It’s a foolproof way to measure precisely, ensuring your cookies turn out chewy and your sauces stay perfectly thick.

How to Convert Ounces to Teaspoons with Confidence

The Exact Formula for Ounces to Teaspoons

Close-up of measuring spoons for teaspoon and tablespoon conversions.
A tablespoon and teaspoon set for easy conversions.

Converting measurements in the kitchen doesn’t have to be stressful. For liquids, the formula is straightforward: 1 ounce = 6 teaspoons. Whether you’re mixing salad dressings or crafting a cocktail, this simple rule will save you time and ensure accuracy. For instance, if a recipe calls for 2 ounces of syrup, you’ll know it’s equivalent to 12 teaspoons.

But why is this conversion so important? Precision ensures your recipes taste as intended. A dish can go from balanced to overpowering with even a small mistake, especially in baking or flavor-intensive recipes. Understanding how many teaspoons in an ounce gives you confidence in the kitchen!

Practical Tips for Accurate Measurements

Kitchen scale and measuring spoons for precise ingredient measurements.
A kitchen scale and measuring spoons ensure accuracy in cooking.

Accurate measurements are key to delicious recipes, but it’s easy to slip up. Here are some tips to avoid common mistakes:

  • Use a liquid measuring cup for wet ingredients and a dry measuring spoon for powders or solids.
  • Level off the teaspoon with the back of a knife for precise amounts.
  • Double-check the unit—fluid ounces and dry ounces measure differently.

If you’re looking for a practical recipe to try this with, check out our guide on 2-Ingredient Banana Bread for an easy way to practice these conversions!

Common Mistakes to Avoid During Measurement

Even experienced cooks can fall into measurement traps. One frequent mistake is not understanding the distinction between fluid ounces and dry ounces. For example, measuring 1 ounce of honey in a dry measuring cup might leave you with more than you intended due to the density of the liquid.

Another error? Eye-balling! While it may seem convenient, guesswork can lead to inconsistencies. Remember, the conversion of how many teaspoons in an ounce only holds true when tools are used correctly.

Quick Reference Conversion Chart

Sometimes, having a handy chart can simplify your cooking process. Here’s an easy-to-follow guide:

OuncesTeaspoonsTablespoons
162
2124
3186

Bookmark this chart, and you’ll never need to pause mid-recipe to calculate conversions again. By understanding how many teaspoons in an ounce, you’re one step closer to cooking like a pro!

When and Why You’ll Need These Conversions

Perfecting Recipes with Accurate Measurements

Precision is the key to cooking and baking success. Imagine preparing a delicate custard or a creamy sauce where even a slight deviation in measurements can throw off the entire dish. Understanding how many teaspoons in an ounce lets you follow recipes with confidence.

For example, recipes for vinaigrettes or glazes often require a tablespoon or two of liquid, which translates to specific teaspoon measurements. Knowing that 1 ounce equals 6 teaspoons ensures that each dish turns out balanced and flavorful. Accuracy isn’t just for professionals—it’s for anyone aiming to elevate their cooking game.

Adjusting Serving Sizes with Ease

Scaling recipes up or down often involves converting measurements. Whether you’re doubling a recipe to feed a crowd or halving it for a small dinner, understanding conversions like how many teaspoons in an ounce becomes invaluable.

Let’s say you’re doubling a soup recipe that calls for 1 fluid ounce of seasoning. Instead of guessing, you’ll know that means 12 teaspoons making adjustments quick and effortless. By using precise conversions, you avoid the risk of under-seasoning or overpowering the flavors, which is crucial when cooking for a group.

If you’re interested in scaling recipes for two, explore our guide on Easy Dinner Ideas for Two for inspiration.

Making Do Without Measuring Tools

We’ve all been there mid-recipe and no measuring tools in sight. Luckily, knowing how many teaspoons in an ounce allows you to improvise with everyday items.

For example, if a recipe calls for 1 ounce of vanilla extract, you can use a standard teaspoon and measure out exactly 6 teaspoons. Similarly, a tablespoon (which equals 3 teaspoons) can help you convert quickly. While precise tools are best, these simple tricks can keep your cooking on track when tools aren’t available.

Practical Uses in Everyday Cooking

Conversions like how many teaspoons in an ounce aren’t just for special recipes; they’re useful in everyday cooking too. From measuring honey for a morning smoothie to portioning soy sauce for a stir-fry, these conversions simplify your routine.

Consider baking, where measurements are especially unforgiving. A recipe that calls for 3 ounces of sugar translates to 18 teaspoons. Without this conversion knowledge, it’s easy to add too little or too much, leading to inconsistent results. By mastering this skill, you’ll feel more at ease in the kitchen.

Differences Between Fluid Ounces and Dry Ounces

What Are Fluid Ounces?

Fluid ounces measure volume and are commonly used for liquids like water, milk, and oil. If you’ve ever poured juice into a measuring cup, you’ve worked with fluid ounces. When converting how many teaspoons in an ounce, the calculation is straightforward for liquids: 1 fluid ounce equals 6 teaspoons.

This simplicity is one reason why fluid ounces are a go-to measurement in recipes for dressings, syrups, and beverages. By ensuring you use liquid-specific tools, such as clear measuring cups with volume markings, you’ll achieve accurate results every time.

What Are Dry Ounces

Unlike fluid ounces, dry ounces measure weight rather than volume. They’re often used for dry ingredients like sugar, flour, or spices. This difference can create confusion, especially when a recipe calls for “1 ounce” without specifying whether it’s dry or fluid.

For instance, how many teaspoons in an ounce of flour? The answer depends on the ingredient’s density and how it’s measured. A loosely packed teaspoon of flour may differ greatly from a packed one, making a kitchen scale a reliable option for such ingredients.

Why Fluid and Dry Ounces Aren’t Interchangeable

The key distinction between fluid and dry ounces lies in how they measure different properties: volume versus weight. This difference is why you can’t directly swap them in recipes. For example, 1 fluid ounce of milk is equivalent to 6 teaspoons, but 1 dry ounce of sugar might only fill about 4.5 teaspoons, depending on its granule size.

Understanding these differences prevents measurement errors that can alter a dish’s texture and flavor. When in doubt, consult your recipe carefully to see if it specifies the type of ounce required.

Conversion Tools to Simplify Measurements

 Smartphone with a kitchen conversion app and measuring tools.
Use apps to simplify conversions like teaspoons in an ounce.

If you often cook or bake, investing in reliable conversion tools can make your life easier. Measuring spoons, liquid measuring cups, and digital kitchen scales are invaluable for precise cooking. For instance, a scale can help you determine the exact weight of a dry ingredient when you’re unsure how many teaspoons in an ounce.

Additionally, several smartphone apps can provide instant conversions, making it simple to switch between teaspoons, ounces, and even grams. Whether you’re measuring ingredients for a creamy pasta dish or a sweet dessert, these tools ensure accuracy and eliminate guesswork.

Advanced Tips for Kitchen Conversions

Substituting Ingredients Without Compromising Flavor

Cooking isn’t always about following a recipe word for word—it’s about adapting! If you’re out of an ingredient, knowing how many teaspoons in an ounce can help you substitute seamlessly. For instance, if you’re replacing sugar with honey in a recipe, remember that 1 ounce of honey equals 6 teaspoons. Adjusting for the sweetness and liquid content ensures your dish remains balanced.

Similarly, consider swapping oil with melted butter. Both measure similarly in fluid ounces, so understanding these conversions can save you a trip to the store while keeping your dish on track.

Converting Between Metric and Imperial Systems

Navigating between metric and imperial measurements can be tricky, but it’s essential for global recipes. For example, how many teaspoons in an ounce might translate into milliliters for metric users: 1 teaspoon equals approximately 5 milliliters, meaning 1 fluid ounce equals about 30 milliliters.

Let’s say a European dessert recipe calls for 50 milliliters of liquid. By converting to teaspoons (10 teaspoons), you can stick with familiar tools while recreating international flavors. Metric-imperial conversions make it easier to try recipes from around the world!

How to Store Measuring Tools for Longevity

Caring for your kitchen tools ensures they provide accurate measurements for years. Measuring spoons and cups are small but mighty, especially when you need to calculate how many teaspoons in an ounce.

Here are some tips for storing them properly:

  • Keep them dry: Avoid leaving tools damp, as moisture can lead to rust or warping.
  • Organize by size: Hang measuring spoons on hooks or stack cups neatly to prevent misplacement.
  • Clean promptly: Sticky ingredients like honey can leave residue, so wash tools immediately after use.

Proper storage not only keeps your tools functional but also helps you cook with confidence every time.

Recommended Resources for Conversion Accuracy

Even the most seasoned cooks need a little help sometimes. Bookmarking resources or apps for quick conversions can simplify your cooking process. Websites like USDA FoodData Central provide reliable ingredient measurements, while apps like Kitchen Conversion simplify figuring out how many teaspoons in an ounce.

FAQs

How many teaspoons does it take to make 1 oz?

It takes 6 teaspoons to make 1 fluid ounce. This measurement applies to liquid ingredients, such as water, milk, or vanilla extract. For dry ingredients, the number of teaspoons may vary slightly depending on the ingredient’s density. Understanding how many teaspoons in an ounce ensures you measure accurately, whether you’re baking a cake or mixing a marinade.

Does 2 tablespoons equal 1 oz?

Yes, 2 tablespoons equal 1 fluid ounce. Since each tablespoon contains 3 teaspoons, this also means that 1 fluid ounce equals 6 teaspoons. This conversion is especially handy when scaling recipes or substituting measurements with different tools.

How many dry teaspoons are in an oz?

The number of dry teaspoons in an ounce depends on the ingredient’s weight and volume. For instance, 1 dry ounce of sugar may equal about 4.5 teaspoons, while 1 ounce of flour might take up more volume. If you’re unsure, using a kitchen scale can help you determine precise amounts. Remember, when working with liquids, 1 fluid ounce equals 6 teaspoons.

Does 4 teaspoons equal 1 oz?

No, 4 teaspoons do not equal 1 ounce. A fluid ounce is equal to 6 teaspoons, so 4 teaspoons would fall short of a full ounce. This distinction is crucial when measuring ingredients to ensure your recipes turn out just right.

Conclusion

Knowing how many teaspoons in an ounce is a small but essential skill that can elevate your cooking and baking. Whether you’re working with liquid or dry ingredients, understanding the nuances of measurements ensures accuracy and consistency in your dishes.

In this guide, you’ve learned that 1 fluid ounce equals 6 teaspoons, and we’ve explored how this conversion applies to everyday cooking scenarios. From scaling recipes to substituting ingredients, mastering these conversions saves time and guarantees delicious results.

With the tips and charts provided, you can confidently navigate your kitchen, whether you’re making a simple salad dressing or tackling a complex baking project. Keep this guide handy, and remember: precision is the secret ingredient to culinary success!

Now it’s your turn try out these conversions in your next recipe and let us know how it went. For more tips, tricks, and delicious ideas, explore other recipes on our website!

How To Make 2 banana bread recipe

Got a couple of overripe bananas sitting on your counter? Don’t toss them just yet! With this easy 2 banana bread recipe, you can turn those spotty bananas into a moist, golden loaf that’s bursting with flavor. Whether you’re a seasoned baker or a kitchen newbie, this recipe is simple enough for anyone to whip up.

What makes it special? It only takes two bananas yes, just two! plus a few pantry staples you probably already have on hand. Perfect for a cozy breakfast, a midday snack, or even a sweet dessert, this banana bread has a tender crumb and just the right hint of sweetness.

Ingredients You’ll Need

 Ingredients for a 2 banana bread recipe on a counter.
All the ingredients you need for a quick banana bread recipe.

Pantry Staples for the Perfect Banana Bread

When it comes to baking a delicious 2 banana bread recipe, simplicity is key. Most of the ingredients are likely sitting in your pantry right now, waiting to be transformed into something extraordinary. Here’s what you’ll need:

  • 2 ripe bananas: The riper, the better! They add natural sweetness and moisture.
  • All-purpose flour: A versatile base for a tender crumb.
  • Granulated sugar: Just enough to balance the banana’s natural sweetness.
  • Eggs: These bind everything together and create structure.
  • Butter or oil: Butter adds richness, while oil makes the loaf extra moist.
  • Baking soda and salt: Baking soda helps the bread rise, and salt enhances flavor.

Feel free to tweak this recipe to suit your taste coconut sugar, whole wheat flour, or even a dairy-free butter alternative can work beautifully!

Tips for Choosing the Right Bananas

The key to a successful 2 banana bread recipe lies in the bananas. Overripe bananas are your best friends here those with brown speckles or even fully brown skins pack the most flavor and sweetness.

If your bananas aren’t ripe enough, don’t worry! There are quick fixes. Place them in a 300°F (150°C) oven for 15–20 minutes until the skins darken, or pop them into a paper bag with an apple overnight. These tricks speed up the ripening process, ensuring you always have perfect bananas for baking.

Substituting Ingredients Without Compromising Flavor

Sometimes, you might not have every ingredient on hand. Luckily, this 2 banana bread recipe is flexible:

  • No butter? Use equal parts coconut oil, vegetable oil, or even applesauce for a lighter loaf.
  • Out of eggs? Replace each egg with ¼ cup of mashed avocado, yogurt, or a flaxseed mixture (1 tablespoon ground flaxseed + 3 tablespoons water).
  • Prefer less sugar? Swap out granulated sugar for honey, maple syrup, or a sugar substitute like erythritol.

Experimenting with these swaps won’t just save a trip to the store it might even lead to a new favorite variation! For more substitution ideas, check out this guide to common baking swaps.

Optional Add-ins to Elevate Your Banana Bread

Although this 2 banana bread recipe shines in its simplicity, adding a twist can make it even more special. Consider mixing in:

  • Chocolate chips for a decadent touch.
  • Chopped walnuts or pecans for a nutty crunch.
  • Cinnamon or nutmeg to enhance the comforting flavors.
  • Dried fruits like raisins or cranberries for a chewy surprise.

Feel free to get creative! Whether you’re craving indulgence or keeping it simple, these add-ins can easily take your banana bread from classic to unforgettable.

Step-by-Step Guide: Making Banana Bread with 2 Bananas

Preparing Your Ingredients and Equipment

To begin your 2 banana bread recipe, ensure you’re fully prepared. Start by preheating your oven to 350°F (175°C) and greasing a standard loaf pan with butter or lining it with parchment paper. This prevents sticking and ensures easy removal.

Next, gather all your ingredients. Double-check that your bananas are overripe—this is the secret to achieving that sweet, moist texture. Also, measure your flour, sugar, and other staples accurately. Baking is all about precision, so consider using a kitchen scale for the best results.

Mixing the Wet Ingredients

Mixing the banana bread batter for a 2 banana recipe.
Mixing the batter for a moist and fluffy banana bread.

Grab a mixing bowl and mash the 2 ripe bananas with a fork or potato masher. Aim for a slightly lumpy texture it’ll blend better with the other ingredients. Add melted butter, sugar, and eggs, whisking until the mixture becomes creamy and smooth.

If you want to enhance the flavor, a teaspoon of vanilla extract works wonders. The aroma will already hint at the deliciousness to come!

Combining the Dry Ingredients

In a separate bowl, sift together the flour, baking soda, and a pinch of salt. Sifting helps avoid lumps and ensures an even distribution of leavening agents, which is critical for a light loaf.

Gradually fold the dry ingredients into the wet mixture. Use a spatula and a gentle motion to prevent overmixing, as this could make your banana bread dense instead of tender. The goal is a smooth batter with no visible streaks of flour.

Baking and Testing for Doneness

Banana bread loaf pan entering the oven.
The final step: baking your banana bread to perfection.

Pour the batter into your prepared loaf pan, spreading it evenly. Place it in the oven and bake for 50–60 minutes. Your kitchen will soon fill with the heavenly aroma of banana bread!

To test for doneness, insert a toothpick or skewer into the center of the loaf. If it comes out clean or with a few crumbs, it’s ready. Let the bread cool in the pan for 10 minutes before transferring it to a wire rack to cool completely.

Variations and Substitutions

Dietary Adaptations

The beauty of a 2 banana bread recipe lies in its flexibility. Whether you have dietary restrictions or simply prefer lighter ingredients, there are many ways to tweak the recipe without compromising taste.

  • Gluten-free option: Swap out all-purpose flour for a gluten-free flour blend. For best results, choose a blend that contains xanthan gum, which helps maintain the bread’s structure.
  • Vegan alternative: Replace the eggs with flax eggs (1 tablespoon ground flaxseed mixed with 3 tablespoons water per egg) and substitute melted butter with coconut oil or a neutral-flavored vegetable oil.
  • Lower sugar variation: Reduce the sugar by half and add a touch of honey or maple syrup for natural sweetness.

These adaptations not only accommodate dietary needs but also offer unique twists on a classic recipe.

Flavor Enhancements

While the classic 2 banana bread recipe is undeniably delicious, a few flavor upgrades can make it truly unforgettable.

  • Cinnamon or nutmeg: Add a teaspoon of ground cinnamon or a pinch of nutmeg for a warm, spiced flavor.
  • Vanilla or almond extract: A teaspoon of vanilla extract enhances the natural sweetness of bananas, while almond extract adds a subtle nutty note.
  • Citrus zest: Grate a bit of orange or lemon zest into the batter for a refreshing twist that balances the sweetness.

These simple additions elevate the flavor profile without requiring extra effort.

Creative Uses for Leftovers

Slices of banana bread served with coffee.
Enjoy a slice of banana bread with your morning coffee.

If you have extra slices of banana bread or want to give your 2 banana bread recipe a new life, there are plenty of creative ways to use leftovers:

  • French toast: Dip slices of banana bread into a mixture of eggs and milk, then fry until golden. The result is a decadent breakfast treat.
  • Bread pudding: Cube the leftover bread, mix it with a custard base, and bake until bubbly for a comforting dessert.
  • Croutons: Cut the bread into small cubes, toast them lightly, and use them as a topping for yogurt or ice cream.

Repurposing banana bread is a fun way to enjoy it in unexpected forms.

Add-ins for Extra Flair

For those who want to customize their 2 banana bread recipe, mix-ins can take it to the next level. Here are a few ideas:

  • Chocolate chips: A handful of semi-sweet or dark chocolate chips adds indulgence to every bite.
  • Nuts: Chopped walnuts, pecans, or almonds provide a satisfying crunch.
  • Dried fruits: Try raisins, dried cranberries, or even chopped dates for a chewy texture.
  • Swirls and spreads: Gently swirl peanut butter, Nutella, or cream cheese into the batter before baking for added richness.

These add-ins not only enhance the flavor but also make the recipe uniquely yours.

Suggestion for More Recipes

For more baking inspiration, check out the Sweet Potato Bread Recipe. It’s another easy and flavorful way to enjoy homemade treats!

Common Mistakes and Troubleshooting

Why Did My Banana Bread Turn Out Dry?

One common issue when making a 2 banana bread recipe is ending up with a dry loaf. This usually happens due to incorrect measurements or overbaking. For instance, using too much flour can absorb all the moisture, leaving your bread crumbly.

To prevent this, use the spoon-and-level method to measure flour—spoon it into the measuring cup and level it off with a knife. Additionally, keep an eye on your baking time. Start checking your banana bread about 10 minutes before the timer goes off to ensure it doesn’t bake longer than necessary.

My Banana Bread Didn’t Rise

A dense or flat loaf can be disappointing, but it’s a fixable problem. This issue often arises from inactive leavening agents or overmixing the batter. If your baking soda is past its expiration date, it won’t provide the lift your 2 banana bread recipe needs.

To test baking soda, add a pinch to a tablespoon of vinegar or lemon juice. If it fizzes, it’s good to go! Also, remember to fold the wet and dry ingredients gently. Overmixing the batter can knock out the air needed for a light, fluffy texture.

How to Fix a Dense Texture

If your banana bread feels too dense, the culprit might be an imbalance of wet and dry ingredients. Adding more bananas than the recipe calls for, for instance, can throw off the moisture ratio. Similarly, skipping the sifting step for flour might lead to uneven mixing, contributing to density.

The solution is simple: stick to the recipe and always sift your dry ingredients before combining. If you want a richer banana flavor without compromising texture, consider adding banana extract instead of extra fruit.

Avoiding Cracks on the Surface

Although cracks on the surface of banana bread are common, they can sometimes make the loaf look less appealing. These cracks are usually caused by an oven that’s too hot or unevenly preheated.

To avoid this, preheat your oven for at least 10–15 minutes to ensure an even temperature. If cracks still appear, embrace them—they’re often a sign of a well-baked loaf with a moist interior!

Suggestion for More Tips

Looking for more troubleshooting advice? Check out our detailed guide on baking sweet quick breads. It’s packed with practical tips to help you achieve perfect results every time.

FAQs

Can I Make Banana Bread With Only 2 Bananas?

Absolutely! A 2 banana bread recipe is specifically designed to work with just two ripe bananas. This recipe balances the natural sweetness and moisture from the bananas with other essential ingredients like flour, sugar, and eggs to create a perfectly moist and flavorful loaf. If your bananas are smaller, you can consider adding a touch of applesauce or yogurt for extra moisture.

What Makes Banana Bread Moist?

The secret to moist banana bread lies in using overripe bananas, which are naturally sweeter and more flavorful. Additionally, ingredients like butter or oil and eggs play a crucial role in keeping your 2 banana bread recipe tender and soft. Avoid overmixing the batter, as this can result in a dense loaf. Baking at the right temperature and testing for doneness with a toothpick also helps prevent dryness.

How Do I Store Banana Bread to Keep It Fresh?

To keep your 2 banana bread recipe fresh, let it cool completely before storing it. Wrap it tightly in plastic wrap or aluminum foil and place it in an airtight container. You can keep it at room temperature for 3–4 days or in the refrigerator for up to a week. For longer storage, freeze individual slices in a freezer-safe bag for up to three months.

Can I Add Chocolate Chips to My Banana Bread?

Yes, adding chocolate chips is a fantastic way to enhance your 2 banana bread recipe. Fold in about ½ cup of semi-sweet or dark chocolate chips into the batter for bursts of sweetness in every bite. Other options include white chocolate chips, peanut butter chips, or even a mix of all three for a unique twist.

Conclusion

Banana bread is a timeless favorite, and this 2 banana bread recipe proves that you don’t need a mountain of ingredients to create something truly delicious. By using just two ripe bananas and a few pantry staples, you can whip up a moist, flavorful loaf that’s perfect for breakfast, a snack, or dessert.

Throughout this guide, you’ve learned how to prepare your ingredients, troubleshoot common baking issues, and customize your banana bread with add-ins and variations. Whether you’re keeping it classic or experimenting with chocolate chips and nuts, this recipe is flexible enough to suit all tastes and occasions.

Now it’s time to preheat your oven, grab those ripe bananas, and get baking. Once you’ve mastered this simple yet satisfying recipe, you’ll never let bananas go to waste again. Don’t forget to share your creations and check out other recipes on our site for more inspiration!

Perfect denver omelette with cheese and potatoes – Try Now

Are you craving a hearty breakfast that bursts with flavor in every bite? Look no further, because this denver omelette with cheese and potatoes delivers a savory, satisfying meal that you can whip up in no time. Whether you are brand-new to cooking eggs or you already consider yourself an omelette master, this recipe will help you create a fluffy, cheesy, and perfectly cooked dish. In this guide, you will learn not only how to prepare this beloved breakfast staple but also how to customize, serve, and troubleshoot it to fit any occasion.

1. Why Denver Omelette with Cheese & Potatoes Is Your Next Must-Try

A Brief History of This Cheesy Delight

The Denver omelette is thought to have evolved from the Western sandwich, which traditionally involved chopped ham, onions, and bell peppers. Over time, inventive cooks started mixing these ingredients with eggs. However, you might be wondering how cheese and potatoes came into play. Many home cooks soon realized that adding gooey cheese enhanced the omelette’s creaminess, while potatoes provided a hearty boost. Thus, the denver omelette with cheese and potatoes was born, offering a filling and flavorful twist on a breakfast classic.

In addition, historians believe that the “Denver” name became popularized out West, although the exact origin story remains a bit fuzzy. Despite this mystery, one thing is certain: the combination of soft eggs, melted cheese, tender potatoes, and crisp veggies will transport you to breakfast heaven.

Essential Kitchen Tools for Your Cheese and Potato Omelet

Kitchen tools on a countertop for making a Denver omelette
Gather your nonstick skillet, spatula, whisk, and knife for the perfect Denver omelette.

When it comes to making a fluffy omelette, having a few key kitchen tools will greatly improve your experience. Therefore, consider gathering these before you get started:

  • Nonstick skillet or well-seasoned cast-iron pan (8–10 inches)
  • Silicone or rubber spatula to gently lift and fold the omelette
  • Sharp chef’s knife or paring knife for dicing vegetables
  • Cutting board with a stable surface
  • Whisk or fork for beating the eggs

Moreover, you will want to make sure your workspace is tidy and well-organized because this will help you move smoothly through each step of the cooking process.

Choosing the Freshest Ingredients

You can’t create a great cheese and potato omelette without fresh, high-quality ingredients. Thus, if possible, purchase your eggs, cheese, and produce locally. Look for:

  • Eggs: The fresher, the better. Check the sell-by date and ensure there are no cracks.
  • Cheese: Sharp cheddar, pepper jack, or Swiss are popular choices. However, feel free to experiment with Gouda or feta for a different flavor profile.
  • Potatoes: Russet or Yukon Gold potatoes work best since they hold up well in the skillet.
  • Veggies: Bell peppers and onions are classic. On the other hand, you can also add mushrooms, spinach, or zucchini for variety.
  • Ham or Bacon (Optional): Use a good-quality deli ham or bacon, if desired, for that meaty touch.

According to the Egg Nutrition Center, eggs are a valuable source of high-quality protein and nutrients like vitamin D and choline, so you can feel good about enjoying them regularly.

Setting the Stage: Preparing Your Workspace

Before you start cooking, make sure you have everything laid out within arm’s reach. In addition, pre-measure your ingredients:

  • Dice your potatoes, peppers, and onions.
  • Grate your cheese.
  • Beat your eggs in a bowl with a dash of salt and pepper.

A clean and organized workspace not only makes the process more enjoyable but also helps ensure you don’t miss a crucial ingredient. Therefore, you’ll have a stress-free cooking experience from start to finish.

2. Key Steps for a Fluffy Denver Omelette with Cheese and Potatoes

Denver omelette ingredients including eggs, potatoes, peppers, onions, and cheese
Prepare these wholesome ingredients for a savory, cheese-stuffed omelette.

If you’re excited to cook an irresistible denver-style omelette with cheese and potatoes, then you’re in the right place. Below is a thorough process with time-saving tips and visuals in mind. Remember: This dish is easy to customize, so feel free to adjust the ratio of potatoes, cheese, and veggies according to your preference.

For another delicious breakfast recipe, check out our Sweet Potato Bread from Scratch to pair with your omelette!

Gathering & Measuring Your Ingredients

It’s essential to measure your ingredients accurately to achieve consistent results. Thus, consider the following standard quantities for one generous serving:

  • 3 large eggs
  • 1/2 cup diced potatoes (Yukon Gold or Russet)
  • 1/4 cup diced bell peppers (mixed colors for variety)
  • 1/4 cup diced onions (yellow, white, or red)
  • 1/4–1/2 cup shredded cheese (Cheddar, Gouda, or Swiss)
  • 2 tablespoons ham or bacon bits (optional)
  • 1 tablespoon cooking oil or butter
  • Salt and pepper to taste

In addition, keep an extra pinch of cheese on hand to sprinkle on top just before serving.

Cooking the Potatoes for Optimal Texture

Diced potatoes cooking in a skillet for a Denver omelette
Sauté diced potatoes for extra flavor and texture in your Denver omelette.

Most people underestimate the importance of properly cooking the potatoes. However, this step can make or break your omelette:

  1. Preheat your skillet over medium heat and add the oil or butter.
  2. Sauté diced potatoes for 5–7 minutes, stirring occasionally.
  3. Add a pinch of salt and pepper, plus any herbs you love (e.g., rosemary or thyme).
  4. Check tenderness by piercing a potato cube with a fork; it should go through easily, but the potatoes should still hold their shape.

Therefore, allow the potatoes to form a light golden crust for added flavor. If you like softer potatoes, add a splash of water and cover the pan briefly to steam them.

Building the Perfect Omelette Filling

Once the potatoes are partially cooked, it’s time to add your veggies and optional ham or bacon bits:

  1. Add bell peppers and onions to the same skillet. Cook for an additional 3–4 minutes until onions become translucent.
  2. Stir in ham or bacon bits (if using) and continue cooking for another minute.
  3. Season with a little more salt and pepper, tasting as you go.
  4. Remove the filling from the skillet and set aside in a small bowl.

Moreover, if you like a spicier kick, toss in diced jalapeños or a dash of chili flakes at this stage. This approach ensures maximum flavor infusion without overwhelming the rest of the omelette.

Mastering the Fold & Final Touches

Now for the fun part: cooking and folding the eggs into a fluffy masterpiece.

  1. Lower the heat to medium-low and coat the skillet with fresh oil or butter, ensuring it’s evenly distributed.
  2. Pour beaten eggs into the warm pan and let them settle for a few seconds.
  3. Use a silicone spatula to gently pull the edges of the eggs toward the center, allowing uncooked egg to flow underneath.
  4. Sprinkle half of your shredded cheese on the partially set eggs, followed by the potato and veggie mixture. Then add the remaining cheese on top.
  5. Fold one side of the omelette over the filling. Continue cooking for 1–2 minutes until the eggs are fully set but still soft.
  6. Slide the omelette onto your plate, seam-side down.

In addition, garnish with fresh herbs like chives or parsley. You can also drizzle hot sauce or salsa on top if you want even more flavor.

3. Variations of a Traditional Cheese and Potato Omelette

Everybody has different dietary preferences and taste buds. Therefore, customizing this omelette with cheese and potatoes ensures that you have the perfect breakfast, brunch, or even dinner.

Vegetarian Twist: Swap Out the Ham

On the other hand, if you skip the ham or bacon, you can still relish the classic flavors in your Denver omelette. Instead, consider adding:

  • Mushrooms for an earthy taste
  • Spinach for extra nutrients and color
  • Tofu crumbles if you want more protein without meat

Thus, vegetarian options don’t have to be boring. You simply need to experiment with ingredients that appeal to you.

Spicy Kick: Adding Jalapeños

If you love a tingle on your tongue, then jalapeños are the way to go. Chop them into small pieces and sauté them alongside the onions and peppers. You might also sprinkle in a little cayenne pepper or a few drops of your favorite hot sauce. Moreover, consider serving your omelette with a side of guacamole or spicy salsa to accentuate the heat.

Cheese Selection: Gouda, Cheddar & More

Although cheddar is traditionally used in many Denver-style omelettes, there are plenty of cheeses to explore:

  • Smoked Gouda: Subtle smokiness complements the potatoes.
  • Pepper Jack: Lends a bit of spice and melts beautifully.
  • Swiss: Offers a mild, nutty flavor.
  • Goat Cheese: Creamy tang pairs wonderfully with fresh vegetables.

Therefore, do not limit yourself to just one type of cheese. Mixing a couple of cheeses can yield a unique taste that sets your omelette apart from the rest.

Crispy vs. Soft: Potato Prep Methods

Not everyone likes their potatoes the same way. Therefore, if you prefer a crispier texture, you can par-cook the potatoes and then roast them in the oven with a bit of olive oil at 400°F (200°C) for about 10–15 minutes before adding them to the skillet. On the other hand, if you enjoy a softer bite, simply sauté them in the skillet until tender. Either method will work well; it’s all about personal taste.

4. Serving & Pairing Ideas

Denver omelette served with toast, avocado, and fresh fruit on a breakfast table
Serve your Denver omelette with toast, avocado, and fresh fruit for a complete breakfast.

Now that your denver omelette with cheese and potatoes is ready, you might be wondering how best to serve it. In addition, pairing the right side dishes and beverages can elevate your meal to a new level of deliciousness.

Classic Sides to Complement Your Omelette

Although an omelette is often a standalone breakfast, there are plenty of simple sides that enhance its flavors. For instance:

  • Toast or English muffins with a dab of butter or jam
  • Fresh fruit salad or a side of sliced avocado
  • Breakfast sausages or turkey bacon for extra protein
  • Crisp side salad with a light vinaigrette

These options balance the heartiness of the eggs and potatoes, ensuring a well-rounded meal that satisfies you without being overly heavy.

Beverage Pairings for Any Time of Day

Choosing the right drink can further accentuate the flavors in your omelette. Thus, consider these ideas:

  • Orange or grapefruit juice for a bright citrus complement
  • Coffee or tea if you prefer a warm morning pick-me-up
  • Iced tea or sparkling water on a hot day
  • Mimosa or Bloody Mary for a celebratory brunch vibe

On the other hand, if you are hosting a brunch gathering, offering a variety of drink choices will make your guests feel right at home.

Storing & Reheating Leftovers

Sometimes, you may cook more than you can finish. Therefore, you can store leftover omelette in an airtight container for up to two days in the fridge. To reheat:

  1. Microwave in 20-second increments, checking for warmth.
  2. Skillet reheat on low heat to maintain the texture.

In addition, if you want to keep the eggs from drying out, add a few drops of water or milk to the container before microwaving.

Elevating Presentation for Special Occasions

Although an omelette is a casual dish, a few presentation tricks can make it more appealing:

  • Garnish with fresh herbs like chives, parsley, or cilantro.
  • Drizzle with a vibrant sauce (salsa verde or chipotle crema) across the top.
  • Sprinkle colorful diced tomatoes or peppers for added visual pop.
  • Serve on a warmed plate to maintain optimal temperature.

Therefore, even a simple breakfast can feel like a restaurant-quality meal with a little extra attention to detail.

5. Pro Tips & Troubleshooting

Making a cheese and potato omelette sounds simple, but there are common pitfalls. Thus, these expert strategies will help you master the art of omelette-making.

Avoiding Overcooked Eggs

Eggs can overcook quickly, resulting in a rubbery texture. Therefore:

  • Use medium-low heat to allow gentle cooking.
  • Remove the omelette from the stovetop just as the eggs begin to firm up.
  • Remember that residual heat will continue cooking the eggs for a short period after you remove them from the heat.

Moreover, you can always put the lid on for a minute or two if you prefer a more thoroughly set top layer.

Keeping It Fluffy: Whisking Techniques

The key to a lofty omelette is aerating the eggs. Thus:

  • Whisk eggs vigorously for about 30 seconds.
  • Incorporate a splash of milk or water to keep the eggs light.
  • Avoid beating the eggs too far in advance. Mix them right before pouring into the skillet.

By following these steps, you’ll notice how your omelette remains tender without feeling dense or heavy.

Making It Healthier Without Sacrificing Taste

If you’re watching your calorie intake or simply want a more nutrient-dense meal, consider these adjustments:

  • Use egg whites or a mix of whole eggs and egg whites.
  • Swap butter for a small amount of olive oil.
  • Add more vegetables like spinach, kale, or broccoli.
  • Opt for reduced-fat cheese or a smaller quantity of full-fat cheese.

On the other hand, don’t skip flavor boosters like herbs, spices, and a dash of Parmesan sprinkled on top.

Common Mistakes & How to Fix Them

Despite your best efforts, mistakes can still happen. Therefore, here are a few common issues and solutions:

  • Eggs stuck to the pan: Make sure you properly grease the skillet and use a nonstick surface.
  • Omelette fell apart during the flip: Cook the eggs a bit longer so they set before flipping.
  • Under-seasoned dish: Taste as you go, adjusting salt, pepper, and other spices.
  • Potatoes too firm: Pre-cook the potatoes thoroughly or steam them slightly to ensure they become tender.

Should you encounter any of these issues, don’t worry. With a bit of practice, you’ll finesse the process and enjoy a perfectly layered omelette every time.

FAQs

Q1: What is the difference between an omelet and a Denver omelet?

A standard omelet can include any fillings you desire, whereas a Denver omelette traditionally features chopped ham, onions, bell peppers, and cheese. Denver omelette with cheese and potatoes adds a hearty spin on this classic by including diced potatoes, making it a more filling meal.

Q2: What ingredients are in a Denver omelet?

A classic Denver omelet usually includes eggs, ham, onions, and bell peppers, often topped with cheese. Some variations like ours also incorporate diced potatoes, mushrooms, or jalapeños for an extra flavor boost.

Q3: Why is it called a Denver omelet?

The exact origins are debated, but many believe it evolved from the “Western sandwich” popular in the 19th-century American West. It eventually became known as the Denver omelet, possibly because of the city’s role in popularizing or showcasing the dish at local restaurants.

Q4: What is the world famous omelette?

Many regions claim to have a “world famous omelette.” However, the French omelette and the Spanish tortilla (which contains potatoes and onions) are often seen as globally renowned classics. On the other hand, the denver omelette with cheese and potatoes remains a uniquely American favorite with its own loyal following.

Conclusion

Congratulations! You now have a comprehensive guide to making a perfect denver omelette with cheese and potatoes that’s both delicious and adaptable. By choosing fresh ingredients, cooking the potatoes properly, and mastering the folding technique, you can prepare a crowd-pleasing meal any time of day. Moreover, feel free to experiment with different cheeses, spices, and sides to suit your tastes.

Sweet Potato Bread: How To Make It Perfect Every Time

Have you ever bitten into something so delicious you had to pause and savor it? That’s the magic of sweet potato bread. With its naturally sweet flavor and melt-in-your-mouth texture, this bread strikes the perfect balance between indulgent and nutritious. Made with real sweet potatoes, it’s packed with fiber, vitamins, and a touch of nostalgia.

But the best part? It’s incredibly simple to make. Whether you’re a seasoned baker or a total newbie, this guide will walk you through creating a loaf that’s moist, flavorful, and downright irresistible. From classic recipes to creative twists, you’ll find everything you need to make sweet potato bread your new go-to baked good. Let’s get baking your taste buds will thank you!

Why You’ll Love Baking with Sweet Potatoes

The Irresistible Taste of Sweet Potatoes in Bread

Sweet potato bread stands out for its naturally sweet and earthy flavor. The mashed sweet potatoes not only bring a subtle sweetness but also create a moist and tender crumb. Unlike banana or pumpkin bread, which rely on stronger flavors, sweet potato bread strikes a perfect balance between sweet and savory.

This unique combination makes it versatile—you can enjoy it as a light breakfast with butter or as a dessert with a drizzle of icing. The addition of spices like cinnamon and nutmeg enhances its taste, giving it a warm, comforting feel that’s hard to resist. If you’re looking for a baked good that’s both wholesome and delicious, sweet potato bread is your go-to option.

Health Benefits of Baking with Sweet Potatoes

Not only is sweet potato bread delicious, but it’s also packed with nutrients. Sweet potatoes are a powerhouse of vitamins and minerals, particularly vitamin A, which supports eye health, and vitamin C, which boosts your immune system. They’re also high in fiber, helping with digestion and keeping you full for longer.

By incorporating sweet potatoes into your bread, you’re not just baking a treat—you’re creating a nutrient-rich dish. To make it even healthier, you can use whole wheat flour and natural sweeteners like honey or maple syrup.

A Brief History of Sweet Potato Bread

Did you know that sweet potato bread has its roots in Southern cuisine? Sweet potatoes have been a staple ingredient in the South for centuries, often used in recipes that call for natural sweetness and heartiness. Historically, baking with sweet potato was a way to make use of leftover sweet potatoes, blending them into dough to create a comforting and satisfying loaf.

Over time, it evolved from a regional favorite into a widely loved baked good, appearing in kitchens across the country. Today, it’s celebrated for its versatility and ability to fit into both traditional and modern recipes. Whether you enjoy it plain or jazzed up with nuts and spices, sweet potato bread is a classic with a rich history.

The Best Occasions for Sweet Bread

Sweet potato bread is the ultimate multitasker. It’s perfect for breakfast when paired with a cup of coffee or tea. Add a little butter or cream cheese, and you’ve got a satisfying start to your day. For lunch or a midday snack, its hearty texture makes it a filling option, especially when combined with spreads like nut butter or honey.

And let’s not forget dessert! Warm up a slice and add a dollop of whipped cream or a sprinkle of powdered sugar for a simple yet indulgent treat. During the holiday season, it shines as a festive addition to your table, whether served as a side dish or a dessert. No matter the occasion, sweet potato bread fits right in.

Your Guide to Baking with Sweet Potatoes

Key Ingredients for Perfect Sweet Bread

 Mashed sweet potatoes in a bowl on a kitchen counter.
Mashed sweet potatoes, the key ingredient in sweet potato bread, ready for mixing.

Making sweet potato bread starts with gathering the right ingredients. At the heart of the recipe is mashed sweet potatoes, which provide natural sweetness, moisture, and a rich texture. You can use fresh sweet potatoes that are roasted or boiled, or opt for canned ones for convenience.

In addition to sweet potatoes, you’ll need all-purpose flour, baking powder, and spices like cinnamon and nutmeg to bring out warm, comforting flavors. For sweetness, brown sugar is a great choice, as it complements the earthy notes of the sweet potatoes. Eggs and butter ensure a soft crumb, while vanilla extract adds a subtle depth to the flavor. If you’re feeling adventurous, mix-ins like chopped pecans or chocolate chips can elevate your loaf.

For more delicious baking ideas, check out our guide to Quick and Easy Baking Recipes.

Step-by-Step Recipe for Sweet Potato Bread

Sweet potato bread batter being poured into a loaf pan.
Pouring sweet potato bread batter into a greased pan.

Making sweet potato bread is simpler than you might think! Start by preheating your oven to 350°F and greasing a standard loaf pan. In one bowl, mix your dry ingredients—flour, baking powder, cinnamon, and nutmeg. In another, whisk together the wet ingredients: mashed sweet potatoes, eggs, melted butter, and vanilla extract.

Next, slowly combine the wet and dry ingredients, stirring just until the batter comes together. Be careful not to overmix, as this can make your bread dense. Pour the batter into your prepared pan and smooth the top with a spatula. Bake for 50-60 minutes, or until a toothpick inserted into the center comes out clean. Let the bread cool completely before slicing.

For detailed baking tips, check out this comprehensive bread baking guide.

Common Mistakes to Avoid

Even the simplest recipes for sweet potato bread can go wrong if you’re not careful. One common mistake is using sweet potatoes that are too watery, which can lead to a soggy loaf. To avoid this, make sure to drain boiled sweet potatoes thoroughly or roast them for a drier texture.

Another issue is overmixing the batter. This can develop too much gluten, resulting in a dense and chewy bread instead of a light and tender crumb. Also, don’t forget to measure your ingredients accurately—too much flour can make the bread dry, while too little can cause it to collapse. Lastly, always test the bread for doneness before removing it from the oven to ensure it’s fully baked.

Tips for Storing Your Sweet Bread

Sweet potato bread is best enjoyed fresh, but it also stores well for later. To keep it moist, wrap the loaf tightly in plastic wrap or store it in an airtight container. It will stay fresh at room temperature for up to three days. For longer storage, refrigerate it for up to a week.

If you want to freeze your bread, slice it first for easy portioning. Wrap individual slices in plastic wrap and place them in a freezer-safe bag. This way, you can grab a slice or two whenever you need a quick snack. To reheat, simply pop a slice in the microwave for 20-30 seconds or warm it in the oven at 300°F for a few minutes.

Creative Ways to Customize Your Sweet Bread

Sweet potato bread mini loaves and muffins with cream cheese glaze.
Sweet potato bread muffins and mini loaves with a creamy glaze.

How to Make Gluten-Free Sweet Bread

For those avoiding gluten, sweet potato bread can easily be adapted to fit your dietary needs. By using alternative flours like almond, oat, or coconut flour, you can create a gluten-free version that’s just as moist and flavorful as the original. Keep in mind that gluten-free flours tend to absorb more liquid, so adjusting the wet ingredients, like adding an extra egg or a splash of milk, may be necessary.

Adding a teaspoon of xanthan gum can also help maintain the structure of the bread. This gluten-free option pairs wonderfully with a dollop of nut butter for a nutritious snack.

A Vegan Twist on Sweet Bread

Transforming sweet potato bread into a vegan-friendly recipe is surprisingly simple. Replace eggs with flaxseed or chia seed “eggs” (1 tablespoon of seeds mixed with 2.5 tablespoons of water per egg) to keep the bread moist and soft. Use plant-based milk, such as almond or oat milk, and swap out butter for coconut oil or vegan margarine.

To enhance the flavor, consider adding a touch of maple syrup or agave nectar. Vegan sweet potato bread is a great option for those seeking a plant-based treat without sacrificing taste or texture.

Turning Sweet Bread into a Savory Delight

If you’re looking for a unique twist, try turning sweet potato bread into a savory delight. By reducing the sugar and omitting the spices, you can create a bread that pairs perfectly with soups, salads, or even a hearty breakfast. Add ingredients like shredded cheese, chopped chives, or fresh rosemary to the batter for an extra burst of flavor.

For best results, balance the natural sweetness of the sweet potatoes with a pinch of salt and a touch of black pepper. This savory variation is ideal for those who prefer a more robust, less sugary loaf.

Sweet Potato Muffins and Mini Loaves

If you love the taste of sweet potato bread but want something more portable, consider making muffins or mini loaves. The batter works just as well for these smaller portions, and they bake faster usually in 18-22 minutes for muffins and 25-30 minutes for mini loaves.

These smaller treats are perfect for meal prepping, gifting during the holidays, or enjoying as a quick snack on the go. To make them extra special, sprinkle some chopped nuts or a streusel topping over the batter before baking.

Perfect Pairings for Sweet Bread

A slice of sweet potato bread with whipped cream and coffee.
A delightful slice of sweet potato bread served with whipped cream and coffee.

Classic Spreads for Sweet Potato Bread

Sweet potato bread is delicious on its own, but adding a spread can elevate it to a whole new level. Classic options like butter or cream cheese are always crowd-pleasers, enhancing the bread’s natural sweetness without overpowering it. For a richer flavor, try cinnamon honey butter or a dollop of mascarpone.

If you prefer something lighter, a thin layer of apple butter or a drizzle of maple syrup works beautifully. These simple additions complement the warm, earthy notes of sweet potato bread and make each bite more indulgent.

Drinks to Pair with Sweet Baked Goods

Pairing sweet potato bread with the right beverage can enhance your overall experience. Coffee and tea are popular choices, with spiced chai or cinnamon-infused coffee being particularly great matches for the bread’s warm spices. For a more decadent treat, enjoy it with hot cocoa topped with whipped cream.

During the warmer months, iced tea or a refreshing lemonade pairs well with a chilled slice of sweet potato bread. For brunch gatherings, consider serving it alongside mimosas or a lightly spiced mulled cider in colder seasons.

Sweet Potato Bread as a Dessert

Turn sweet potato bread into an irresistible dessert by adding a few finishing touches. A drizzle of cream cheese glaze or a light dusting of powdered sugar can transform the loaf into a show-stopping treat. To create a more decadent dish, top a warm slice with a scoop of vanilla ice cream and a sprinkle of chopped pecans.

For a unique twist, use sweet potato bread as a base for bread pudding. Cube the loaf, mix it with a custard base, and bake until golden for a comforting dessert that’s perfect for family dinners or holiday celebrations.

Creative Ways to Use Leftover Sweet Bread

If you find yourself with leftover sweet potato bread, don’t let it go to waste! One simple way to repurpose it is by turning it into French toast. The dense texture of the bread soaks up the egg mixture perfectly, creating a rich and flavorful breakfast option.

Another idea is to toast slices and use them as a base for open-faced sandwiches. For example, spread goat cheese on top and add caramelized onions for a savory snack. Alternatively, cube the bread and bake it into crunchy croutons for soups and salads, adding a unique sweet-savory contrast.

FAQs About Sweet Potato Bread

What are the benefits of sweet potato bread?

Sweet potato bread offers numerous health benefits thanks to its star ingredient: sweet potatoes. These nutrient-dense vegetables are packed with vitamins A and C, which support eye health and boost your immune system. Sweet potatoes are also rich in fiber, promoting healthy digestion and keeping you full for longer. Additionally, they contain antioxidants that can reduce inflammation and improve overall health.

By incorporating sweet potatoes into bread, you’re enjoying a baked good that’s not only delicious but also more nutritious than traditional options. Plus, the natural sweetness of sweet potatoes allows you to use less added sugar, making it a healthier choice.

Is potato bread good for you?

Potato-based breads, including sweet potato bread, are often a healthier alternative to regular white bread. The addition of sweet potatoes or potatoes enhances the bread’s nutritional profile by adding essential vitamins, minerals, and fiber. Compared to traditional white bread, potato bread tends to be lower in calories and higher in nutrients, making it a better choice for those looking to balance taste with health.

However, the overall nutritional value depends on the recipe and ingredients. To maximize the benefits, opt for recipes with whole-grain flours and minimal added sugars.

Is sweet potato bread good for diabetics?

Sweet potato bread can be a good option for diabetics when prepared with care. Sweet potatoes have a low glycemic index, meaning they release sugar into the bloodstream more slowly than other starchy foods. This makes them a better choice for managing blood sugar levels.

To make sweet potato bread more diabetic-friendly, reduce or eliminate added sugars, use whole-grain or almond flour, and add high-fiber ingredients like chia seeds or flaxseeds. Always consult with a healthcare professional to ensure the recipe aligns with your dietary needs.

Can I use sweet potatoes instead of flour?

While sweet potatoes cannot fully replace flour in baking, they can be used as a partial substitute or binding agent in certain recipes. In sweet potato bread, mashed sweet potatoes contribute moisture, sweetness, and a soft texture, allowing you to reduce the amount of flour needed.

For flourless baking, pair sweet potatoes with almond flour or oat flour to create a gluten-free option. This combination retains the structure of the bread while adding a nutritional boost. Experiment with ratios to find the perfect balance for your recipe.

Conclusion

Sweet potato bread is a versatile and nutritious treat that’s perfect for any occasion. Whether you’re looking for a healthier bread option, a diabetic-friendly recipe, or creative ways to incorporate sweet potatoes into your baking, this loaf delivers on all fronts. Packed with vitamins, fiber, and natural sweetness, it’s a delicious way to enjoy the benefits of sweet potatoes.

From classic recipes to innovative variations like gluten-free or savory loaves, there’s something for everyone. Pair it with your favorite spreads, serve it with a cup of coffee, or transform it into a dessert the possibilities are endless.

sausage balls without Bisquick recipe – Quick & Tasty!

Did you know you can make sausage balls without Bisquick and still achieve that perfectly fluffy, cheesy goodness? It’s true! This recipe takes the classic appetizer to the next level by ditching the mix and going all-natural. With just a handful of simple ingredients sausage, flour, baking powder, cheese, and a pinch of seasoning you can craft a dish that’s homemade and irresistibly delicious.

Perfect for any occasion, these sausage balls make a great addition to your breakfast spread, a quick snack, or a crowd-pleasing appetizer. Plus, you’ll love the flexibility to tweak the flavors to suit your taste buds. Whether you’re a fan of spicy sausage or sharp cheddar, this recipe adapts to your cravings. Ready to discover the secret to these savory delights? Let’s get cooking!

Why Make Sausage Balls Without Bisquick?

The Benefits of Going Bisquick-Free

When you choose a sausage balls without Bisquick recipe, you’re opting for fresh, wholesome ingredients that put you in control. Bisquick may be convenient, but it often includes additives and preservatives that some prefer to avoid. By making this dish from scratch, you’ll create a more natural, delicious result that’s just as easy to prepare.

Another benefit? Customization. Without pre-made mixes, you can adjust the recipe to suit your preferences. For instance, you can make it gluten-free by swapping out flour for almond or coconut flour. Plus, the flavor is richer and more authentic when you skip the shortcuts.

Homemade vs. Store-Bought

Homemade recipes, like this sausage balls without Bisquick recipe, offer unmatched flexibility. Store-bought mixes often limit you to a single flavor profile, while homemade recipes allow you to play with seasonings, cheeses, and even types of sausage. Want to add a hint of spice? Mix in cayenne or jalapeños. Prefer a milder taste? Stick with mild cheddar and breakfast sausage.

Furthermore, by making your own dough, you ensure a fresher, fluffier texture. Bisquick-based recipes can sometimes result in dense sausage balls due to the added chemicals in the mix. With this recipe, you’ll experience that perfect balance of crispy on the outside and tender on the inside.

Perfect Occasions for Sausage Balls Without Bisquick Recipe

Whether you’re hosting a holiday party, preparing a quick snack, or looking for an easy breakfast idea, these sausage balls fit the bill. The beauty of this sausage balls without Bisquick recipe is its versatility. They’re small, portable, and packed with flavor, making them ideal for gatherings or on-the-go munching.

Consider serving them as appetizers with a side of honey mustard or barbecue sauce. Or, include them in your brunch spread alongside fresh fruit and baked goods. They’re also a hit at tailgate parties, where finger foods reign supreme. Whatever the occasion, these sausage balls are sure to be a crowd-pleaser.

Why Customize Your Sausage Balls Without Bisquick Recipe?

Making sausage balls from scratch isn’t just about taste it’s about tailoring the recipe to meet your dietary needs. If you’re gluten-sensitive, a sausage balls without Bisquick recipe lets you swap in gluten-free flour without compromising flavor. Watching your carb intake? Almond flour is a great low-carb alternative.

In addition, you control the sodium, fat, and seasoning levels. Store-bought mixes often contain hidden salt and sugar, but with this recipe, you can adjust to your liking. For inspiration on how to create healthier recipes, visit Harvard’s Healthy Eating Plate, which outlines balanced meal planning.

The Perfect Sausage Balls Without Bisquick Recipe

Essential Ingredients

For this sausage balls without Bisquick recipe, you only need a handful of pantry staples to create something amazing. The primary ingredients include:

  • Ground sausage: Choose a flavorful variety, such as mild or spicy, depending on your taste preferences.
  • All-purpose flour: This serves as the base and replaces Bisquick for a homemade touch.
  • Baking powder: Essential for achieving that light, fluffy texture.
  • Shredded cheese: Cheddar is the classic choice, but feel free to experiment with mozzarella or pepper jack.
  • Milk: Helps bind the ingredients together for a moist, cohesive dough.
  • Optional seasonings: Add garlic powder, paprika, or a pinch of cayenne for extra flavor.

By using these simple ingredients, you avoid the preservatives often found in pre-made mixes, making your sausage balls healthier and fresher.

Step-by-Step Instructions

Rolling raw sausage balls onto a lined baking tray.
Rolling sausage balls from scratch and placing them on a prepared baking tray.

Creating these delicious sausage balls is straightforward and quick. Here’s how you can make them:

  1. Preheat the oven: Set it to 375°F (190°C) and line a baking sheet with parchment paper.
  2. Prepare the dry ingredients: In a large mixing bowl, combine the flour, baking powder, and any optional seasonings.
  3. Mix in the wet ingredients: Add the ground sausage, shredded cheese, and milk. Use your hands to gently combine everything until the mixture comes together. Be careful not to overmix, as this can result in dense sausage balls.
  4. Shape the dough: Roll the mixture into 1-inch balls and place them on the prepared baking sheet.
  5. Bake to perfection: Bake for 18–20 minutes or until the sausage balls are golden brown and cooked through.

These step-by-step instructions make this sausage balls without Bisquick recipe simple enough for even beginner cooks to follow.

Pro Tips for Success

To achieve the best results, keep these tips in mind:

  • Use freshly shredded cheese: Pre-shredded cheese often contains anti-caking agents that can affect texture. Shredding your own ensures a smoother, more flavorful result.
  • Chill the dough if needed: If your mixture feels too soft to shape, refrigerate it for 15 minutes to firm up.
  • Don’t overcrowd the baking sheet: Space the sausage balls evenly to allow proper airflow and even cooking.

For additional baking tips, check out King Arthur Baking’s guide for working with dough, ensuring consistent results every time.

What Makes This Recipe Stand Ou

Unlike traditional methods that rely on Bisquick, this recipe allows you to customize every detail. Want to reduce carbs? Swap all-purpose flour for almond flour. Need a gluten-free option? Coconut flour works beautifully with slight adjustments. Additionally, the absence of pre-made mixes ensures a fresher, more authentic taste.

Another standout feature is its versatility. These sausage balls pair perfectly with dips like ranch dressing or spicy mustard, making them ideal for parties, game days, or brunch spreads. With this sausage balls without Bisquick recipe, you’re not just making a dish you’re creating a culinary experience tailored to your preferences.

Customizing Your Sausage Balls Recipe

Flavor Variations

One of the best things about this sausage balls without Bisquick recipe is how easily you can adapt it to your preferences. For a spicy kick, consider using hot sausage or adding a pinch of cayenne pepper to the mix. You can also sprinkle in red pepper flakes for extra heat.

On the other hand, if you prefer a milder flavor, opt for breakfast sausage and stick to classic cheddar cheese. Herbs like parsley or chives can add a fresh, aromatic touch, while a dash of garlic powder enhances the savory notes. Don’t be afraid to experiment this recipe is as flexible as it is delicious!

Cheese Swaps

Cheese is a key ingredient in any great sausage ball recipe, and this one is no different. While sharp cheddar is the traditional choice, you can switch things up by trying pepper jack for a spicier profile or mozzarella for a creamier texture.

Another option is to mix two cheeses together. For example, combining cheddar and Gouda creates a rich, smoky flavor that pairs perfectly with sausage. Whatever you choose, always shred your cheese fresh—it melts better and blends more evenly with the other ingredients.

Dietary Modifications

This sausage balls without Bisquick recipe can be easily modified to suit various dietary needs. If you’re following a gluten-free diet, replace the all-purpose flour with a gluten-free blend. Almond flour also works well, especially if you’re aiming for a low-carb version. However, you may need to adjust the liquid slightly, as almond flour absorbs more moisture.

Vegetarian? You’re not left out! Substitute plant-based sausage, which is widely available in most grocery stores. Brands like Beyond Meat or Impossible Sausage offer excellent flavor and texture for this recipe. These small tweaks ensure that everyone at the table can enjoy this dish.

Serving Ideas

Sausage balls served with scrambled eggs and fresh fruit.
A balanced breakfast spread featuring sausage balls, scrambled eggs, and fresh fruit.

Sausage balls are as versatile as they are delicious, making them perfect for countless occasions. Serve them as a warm appetizer at parties with a side of honey mustard or barbecue sauce. Alternatively, pair them with scrambled eggs and fresh fruit for a hearty breakfast spread.

For game days, consider presenting them alongside other finger foods like sliders or veggie trays. If you’re hosting a holiday brunch, these sausage balls fit right in next to baked casseroles and pastries. Their portability and crowd-pleasing taste make them an effortless addition to any meal.

Common Mistakes to Avoid

Overmixing the Dough

One of the most common pitfalls when preparing a sausage balls without Bisquick recipe is overmixing the dough. While it might seem like a good idea to ensure everything is thoroughly combined, excessive mixing can make the texture dense and chewy instead of light and tender.

To avoid this, mix the ingredients just until they are evenly distributed. A few small pockets of flour or cheese are perfectly fine. Using your hands instead of a mixer can help you maintain better control over the consistency, ensuring the sausage balls remain soft and airy.

Using Lean Sausage

Choosing the right sausage is crucial for flavor and texture. Lean sausage, while lower in fat, can result in dry and less flavorful sausage balls. The fat in regular sausage not only adds moisture but also enhances the taste, giving you that irresistible savory bite.

If you’re trying to cut back on fat, consider using a combination of lean sausage and a small amount of regular sausage to maintain the right balance. However, skipping the fat altogether may compromise the quality of this sausage balls without Bisquick recipe. Always prioritize flavor and texture when selecting your ingredients.

Skipping Pre-Cooked Tests

Testing a small portion of the mixture before shaping all your sausage balls might feel unnecessary, but it’s a game-changer. This step allows you to adjust seasonings, ensuring the final batch is perfectly flavored.

To do this, simply cook a small piece of the dough in a skillet or microwave and taste it. If it needs more salt, spices, or cheese, now is the time to add them. This extra step guarantees a consistent and delicious batch, which is especially important for large gatherings or special events.

Baking on an Unlined Tray

Another mistake to avoid is baking directly on an unlined tray. Without a non-stick surface, the sausage balls may stick, making cleanup difficult and potentially ruining their shape. Instead, line your tray with parchment paper or use a silicone baking mat. These materials prevent sticking and promote even cooking, ensuring your sausage balls bake up golden brown and delicious.

Additionally, spacing the sausage balls evenly on the tray is important. Overcrowding can lead to uneven cooking, so leave enough room between each ball for air to circulate properly.

How to Store, Reheat, and Serve Sausage Balls

Storage Tips

 Sausage balls stored in a glass airtight container.
Sausage balls stored in a labeled container, ready for freezing or refrigeration.

Proper storage ensures your sausage balls without Bisquick recipe stays fresh and delicious, even if you make them ahead of time. Once cooled, place the sausage balls in an airtight container and refrigerate them. They will stay fresh for up to 4 days.

For longer storage, consider freezing. Arrange the cooked sausage balls on a baking sheet, freeze them until solid, and then transfer them to a freezer-safe bag. This prevents them from sticking together and allows you to grab only the amount you need later. Frozen sausage balls can last up to 3 months, making them a convenient make-ahead option for parties or busy mornings.

Reheating Instructions

Reheating your sausage balls without Bisquick recipe is quick and easy, and it ensures they taste just as good as when freshly baked. For the best results, use an oven or air fryer, which helps maintain their crispy exterior.

  1. Oven method: Preheat your oven to 350°F (175°C). Place the sausage balls on a baking sheet and warm them for 8–10 minutes, or until heated through.
  2. Air fryer method: Set your air fryer to 350°F and reheat for about 5 minutes.
  3. Microwave method: Although less ideal, you can microwave them on a microwave-safe plate for 30–40 seconds. Keep in mind this may result in a softer texture.

By reheating gently, you’ll preserve the cheesy, savory goodness of your sausage balls without drying them out.

Serving Ideas

Sausage balls are incredibly versatile and pair well with various side dishes and dips. Serve them warm with dipping sauces like ranch, spicy mustard, or barbecue sauce for added flavor. These sauces complement the savory richness of the sausage and cheese, making them a hit at any gathering.

For a balanced breakfast, pair them with scrambled eggs, fresh fruit, or a simple salad. If you’re planning a brunch spread, sausage balls fit right in alongside casseroles, pastries, and other finger foods. They’re also perfect as a game-day snack when served with chips and salsa or other crowd-pleasing appetizers.

Tips for Serving at Parties

To keep your sausage balls without Bisquick recipe warm during a party, use a slow cooker or warming tray. Set the slow cooker to its lowest setting, and line it with parchment paper to prevent sticking. This method allows guests to enjoy warm sausage balls throughout the event.

Additionally, consider adding toothpicks or small skewers to make them easy to grab, especially for buffet-style setups. Presenting them alongside colorful dips or garnished with fresh herbs adds an extra layer of visual appeal, ensuring your dish is both delicious and inviting.

Frequently Asked Questions

What can you use instead of Bisquick in sausage balls?

If you’re making a sausage balls without Bisquick recipe, you can easily replace Bisquick with a mix of common pantry staples. Combine all-purpose flour, baking powder, and a pinch of salt for a simple DIY substitute. These ingredients provide the same structure and rise as Bisquick, but without the preservatives and additives. If you’re gluten-free, use a gluten-free flour blend or almond flour for a healthier alternative. Adjust the liquid slightly to ensure the dough binds properly when using alternative flours.

Why are my sausage balls so dry?

Dry sausage balls can result from using lean sausage, too much flour, or overbaking. Regular sausage with higher fat content keeps the mixture moist and flavorful. To fix this issue, consider adding a splash of milk or shredded cheese to the dough for extra moisture. Additionally, be cautious not to overbake—remove the sausage balls as soon as they turn golden brown and are cooked through. These small adjustments will keep your sausage balls without Bisquick recipe tender and delicious.

What is the best way to keep sausage balls warm?

To keep your sausage balls warm for a party or gathering, use a slow cooker or warming tray. Set the slow cooker to its lowest heat setting and line it with parchment paper to prevent sticking. If you’re using a warming tray, cover it with aluminum foil to retain heat. This method ensures your sausage balls without Bisquick recipe stay warm and ready to serve without drying out or overcooking.

Should sausage balls be frozen before or after cooking?

You can freeze sausage balls either before or after cooking, depending on your preference. Freezing before cooking ensures a fresher taste when baked later. Simply shape the sausage balls, freeze them on a baking sheet until solid, and transfer them to a freezer-safe bag. When ready to bake, you can cook them straight from frozen just add a few extra minutes to the baking time.

If you freeze them after cooking, they’re ready to reheat and serve anytime. Allow them to cool completely, then store in an airtight container or freezer bag. Reheat in the oven or air fryer to bring back their crispy texture.

Conclusion

This guide has shown you everything you need to create the ultimate sausage balls without Bisquick recipe. By skipping pre-made mixes, you gain control over the ingredients, allowing you to create a dish that’s healthier, customizable, and packed with fresh flavor. Whether you’re hosting a party, preparing a family brunch, or looking for an easy snack, these sausage balls are versatile and crowd-pleasing.

We’ve explored the key ingredients, step-by-step instructions, and common mistakes to avoid, ensuring your sausage balls turn out perfectly every time. Plus, with tips for storage, reheating, and serving, you’re fully equipped to enjoy these cheesy, savory bites whenever the craving strikes.

Now it’s your turn! Grab your ingredients, follow the recipe, and let your creativity shine. For more delicious ideas and tips, check out our other quick and easy recipes. Happy cooking!

How To Make Perfect madeline cookies recipe using cream

Some desserts are a feast for the eyes, while others delight the taste buds but Madeleine cookies? They do both! This madeline cookies recipe using cream takes the elegance of this classic French pastry to new heights. The addition of cream adds a velvety richness and ensures the cookies stay moist and tender, while their golden hue and delicate hump make them a showstopper on any table.

Whether you’re preparing treats for a celebration or craving something special, these Madeleines deliver both flavor and charm. Plus, they’re surprisingly easy to make! With just a few simple ingredients and some pro tips, you’ll whip up a batch of these heavenly cookies in no time. So, grab your whisk and preheat your oven let’s transform your baking routine with these irresistible cream-infused Madeleines.

Essential Ingredients for a Madeline Cookies Recipe Using Cream

When preparing the perfect madeline cookies recipe using cream, starting with the right ingredients is essential. Each component plays a specific role in creating the soft, buttery texture and golden hue that makes Madeleines so iconic. Below, we’ll explore the key ingredients, optional flavor enhancers, the best type of cream to use, and the tools you’ll need for baking success.

The Key Ingredients for a Madeline Cookies Recipe Using Cream

To make these creamy Madeleines, you’ll need a handful of simple ingredients that come together harmoniously:

  1. All-purpose flour: This provides the structure of the cookies, ensuring they hold their shape while remaining soft.
  2. Sugar: Granulated sugar gives the cookies their subtle sweetness and helps achieve a lightly crisp crust.
  3. Eggs: Room-temperature eggs are crucial for a light, fluffy batter. They create the signature airy texture.
  4. Butter: Melted and slightly cooled butter adds richness, balancing the delicate flavors.
  5. Cream: The star ingredient! Adding cream makes the Madeleines moist and adds a velvety finish that sets this recipe apart.

Pro tip: Always use fresh, high-quality ingredients for the best flavor. While substitutions can work, sticking to these basics ensures an authentic result.

Optional Add-Ins for Your Madeline Cookies Recipe Using Cream

One of the joys of baking madeline cookies is the ability to personalize them. While the traditional recipe is divine, a few extra touches can make your cookies truly memorable:

  • Lemon zest or orange zest: Add a burst of citrus freshness.
  • Vanilla extract: A classic addition for a warm, comforting aroma.
  • Almond extract: Perfect for a subtle nutty undertone.
  • Chocolate chips: For a modern twist that pairs beautifully with the cream.

Experiment with these variations based on your mood or the occasion. For example, a pinch of cinnamon can transform your Madeleines into a cozy winter treat!

Selecting the Right Type of Cream

The cream you choose will directly impact the richness and texture of your madeline cookies recipe using cream. But which type is best? Here’s what you need to know:

  • Heavy cream: This is the most common choice and adds a luxurious depth of flavor.
  • Whipping cream: A slightly lighter option that still delivers creaminess.
  • Half-and-half: While not as rich, it works in a pinch and reduces fat content slightly.

Non-dairy creamers often lack the fat needed for the perfect texture, which is crucial for a successful madeline cookies recipe using cream. For more tips on selecting the best cream for baking, check out this guide on heavy and whipping creams.

Tools You’ll Need for a Madeline Cookies Recipe Using Cream

To create those iconic shell-shaped cookies, having the right tools on hand is key. While many items are already in your kitchen, a few specialty tools will make the process smoother:

  1. Madeleine tray: Essential for achieving the classic scalloped shape. Look for non-stick trays for easy release.
  2. Mixing bowl: A large bowl to combine ingredients without spillage.
  3. Whisk or hand mixer: Ensures a smooth, lump-free batter.
  4. Spatula: Ideal for folding the batter gently, which is critical for preserving its lightness.
  5. Piping bag (optional): Helps fill the molds neatly without mess.

If you don’t have a Madeleine tray, don’t worry! Mini muffin tins are a great alternative, though the shape will differ slightly. Focus on the flavor, and your cookies will still impress.

Preparing the Batter Like a Pro

Ingredients for baking lemon madeleines, including lemons, flour, eggs, and butter, displayed on a marble countertop.
The perfect combination of fresh ingredients for the best lemon madeleines.

Creating the batter is where the magic begins in your madeline cookies recipe using cream. This stage is crucial to achieving the light, airy texture that makes Madeleines so irresistible. Below, you’ll find everything you need to know about mixing, resting, and troubleshooting the batter, ensuring your cookies turn out perfect every time.

Mixing Ingredients for a Flawless Batter

To start, gather your ingredients and a large mixing bowl. Begin by whisking the eggs and sugar until the mixture becomes pale and fluffy—this step incorporates air, which is key for the light texture of Madeleine cookies. Gradually sift in the flour, folding gently to maintain the airiness.

Next, add the melted butter and cream. The cream is what gives this recipe its signature moistness, making the cookies rich and tender. Be cautious not to overmix, as this can deflate the batter and lead to dense cookies.

Pro tip: Use a spatula for folding instead of a whisk, as it helps combine the ingredients without knocking out the air.

Why Resting Batter is Crucial for a Madeline Cookies Recipe Using Cream

Resting the batter is a step many skip, but it’s vital for creating the iconic hump that Madeleines are known for. Once mixed, cover the bowl with plastic wrap and let it rest in the fridge for at least 30 minutes, though an hour is ideal.

During this time, the gluten in the flour relaxes, resulting in a softer texture. Additionally, the chilled batter hits the hot oven, creating the steam that forms the signature bump.

Common Mistakes to Avoid When Mixing

Even experienced bakers can encounter hiccups. To ensure your madeline cookies recipe using cream is a success, avoid these common mistakes:

  1. Overmixing the batter: This can cause the cookies to lose their light, spongy texture.
  2. Skipping the resting step: Without chilling, your Madeleines may lack their signature hump.
  3. Using cold butter or eggs: Room-temperature ingredients blend more easily and evenly.

By addressing these pitfalls, you’re already on your way to better baking!

Adapting the Recipe for Dietary Needs

While this madeline cookies recipe using cream is a classic, it’s easy to tweak for dietary preferences:

  • Gluten-free Madeleines: Substitute all-purpose flour with a 1:1 gluten-free baking mix.
  • Dairy-free option: Swap butter and cream with plant-based alternatives like coconut cream and vegan butter.
  • Low-sugar variation: Use a sugar substitute suitable for baking, such as erythritol.

These adjustments ensure everyone can enjoy these delightful cookies without compromising on flavor.

With the batter mixed and rested, you’re ready for the next step: baking these golden beauties to perfection. Stay tuned as we cover how to prepare your trays and achieve that perfect golden hue in the following section!

Baking the Perfect Madeline Cookies Recipe Using Cream

Now that your batter is prepared and rested, it’s time to bake these golden, buttery treats. This step is crucial to achieving the delicate texture and iconic hump of your madeline cookies recipe using cream. Follow these simple yet effective tips to bake Madeleines that are not only beautiful but also irresistibly delicious.

Preparing the Tray and Preheating the Oven

Before you begin, ensure your Madeleine tray is ready. Grease each mold generously with butter, and dust with a light coating of flour. This step prevents the cookies from sticking and helps achieve the golden crust they’re famous for.

While prepping the tray, preheat your oven to 375°F (190°C). A consistent, hot oven is critical for forming the signature hump on your Madeleines. Avoid opening the oven door too often during baking, as this can cause a drop in temperature, affecting the rise.

Pro Tip: For an even easier release, use a non-stick Madeleine tray. If you don’t have one, a mini muffin tin works well as an alternative.

Achieving the Signature Hump

The iconic hump is the hallmark of a well-baked Madeleine, and achieving it requires precision. Chilled batter hitting a hot oven creates steam, which gives the cookies their characteristic rise. Therefore, ensure your batter is still cold when spooning it into the molds.

Fill each mold about three-quarters full to allow room for the cookies to expand. If you’re unsure how much batter to use, try a piping bag for consistent portions. The high heat at the start of baking ensures the center rises quickly, creating the distinctive bump.

On the other hand, overfilling molds or using warm batter can result in flat cookies. Always aim for balance in your preparation.

Baking Times and Visual Cues

Bake the Madeleines for 10–12 minutes, keeping a close eye on them. The edges should turn a light golden brown while the center remains soft and slightly springy to the touch.

To test doneness, insert a toothpick into the center of one cookie. If it comes out clean, your Madeleines are ready! However, be cautious not to overbake, as this can dry them out and diminish their delicate flavor.

If you’re unsure, remove the tray slightly early, as the residual heat will continue to cook the cookies for a few moments.

Cooling and Removing Without Damage

Once baked, allow the Madeleines to cool in the tray for about 5 minutes. Trying to remove them too early can cause them to break, while leaving them too long may make them stick.

To release the cookies, gently tap the tray on a flat surface, or use a small offset spatula to ease them out. Transfer the Madeleines to a wire rack to cool completely. Cooling properly is important for maintaining their light, spongy texture.

For more dessert inspiration, check out our guide to Strawberry Cheesecake Cookies a delightful complement to your Madeleine baking adventure!

Decorating, Storing, and Serving Your Madeleines

A close-up of golden brown lemon madeleines with perfectly caramelized edges.
A closer look at the caramelized edges and rich texture of these lemon madeleines.

Once your madeline cookies recipe using cream is baked to perfection, it’s time to elevate these delightful treats even further. From adding elegant decorations to storing them properly, this section covers all the essentials to ensure your Madeleines remain fresh and visually stunning.

Decorating Ideas for Extra Elegance

Decorating Madeleines is a wonderful way to personalize these already stunning cookies. A simple dusting of powdered sugar is the classic choice, but there’s so much more you can do to make them shine:

  • Chocolate drizzle: Melt dark or white chocolate, and use a spoon to drizzle elegant patterns over your cookies. For added texture, sprinkle crushed nuts or edible glitter on top.
  • Cream glaze: Whisk together powdered sugar and heavy cream until smooth. Dip one end of each Madeleine into the glaze, letting the excess drip off for a polished look.
  • Citrus zest topping: Grate fresh lemon or orange zest over the cookies for a burst of bright flavor that pairs perfectly with the creamy base.

Pro Tip: If you’re hosting a party, consider using food coloring in your glaze to match the theme. Decorated Madeleines also make thoughtful edible gifts!

Best Ways to Serve a Madeline Cookies Recipe Using Cream

Madeline cookies are incredibly versatile and can be served in a variety of ways. Traditionally, they’re enjoyed with a cup of tea or coffee, making them a lovely addition to an afternoon gathering. However, you can also get creative with these ideas:

  • Pair them with dessert wine or champagne for a sophisticated finish to a dinner party.
  • Serve alongside fresh berries and whipped cream for a light, refreshing dessert.
  • Use them as an accompaniment to ice cream or custard for a rich, indulgent treat.

Whether you’re enjoying them solo or pairing them with other desserts, these Madeleines are sure to delight!

Storing Your Madeline Cookies Recipe Using Cream Properly

Proper storage is essential to maintaining the soft, buttery texture of your madeline cookies recipe using cream. After the cookies have completely cooled, store them in an airtight container to prevent them from drying out.

Here are some tips for keeping them fresh:

  • At room temperature: Stored correctly, Madeleines stay fresh for up to 3 days.
  • In the refrigerator: If you’ve used a glaze, refrigerate them in a sealed container for up to a week.
  • Freezing: For longer storage, wrap the cookies individually in plastic wrap and place them in a freezer bag. They can be frozen for up to 2 months and thaw beautifully at room temperature.

However, avoid stacking the cookies without parchment paper in between, as this can ruin their delicate texture.

Creative Ideas for Leftover Madeleines

Although Madeleines are delicious on their own, leftovers can easily be transformed into exciting new desserts:

  1. Trifles: Layer broken Madeleines with custard, whipped cream, and fresh fruit for an elegant trifle.
  2. Tiramisu twist: Substitute Madeleines for ladyfingers in a classic tiramisu recipe for a unique twist.
  3. Crumbs for toppings: Crush leftover cookies into fine crumbs to use as a topping for yogurt, parfaits, or even cheesecake.
  4. French toast Madeleines: Dip them in a mixture of egg and milk, then fry them lightly for a decadent breakfast treat.

If you’re looking for other creative dessert recipes, check out How To Create Cottage Cheese Snacks That Everyone Will Love

Tips and Tricks for Madeleine Success

Mastering the madeline cookies recipe using cream involves more than just following the steps it’s about understanding the nuances that make these cookies so special. In this section, we’ll dive into essential tips, troubleshooting advice, advanced techniques, and creative ways to experiment with flavors, ensuring your Madeleines are always a hit.

Troubleshooting Common Issues

Even with careful preparation, small hiccups can occur. Here are some common problems and how to fix them:

  • Flat cookies: This often happens if the batter wasn’t rested or if the oven temperature was too low. Always ensure your batter is chilled and your oven is preheated to the correct temperature.
  • Sticky Madeleines: If your cookies stick to the tray, it’s likely due to insufficient greasing or flouring. Next time, grease the molds generously and dust with a thin layer of flour.
  • Dry texture: Overbaking can dry out your cookies. Remove them from the oven as soon as the edges turn golden and the centers spring back when touched.

By addressing these common challenges, you’ll achieve perfectly fluffy and moist cookies every time.

Secrets to a Bakery-Style Madeline Cookies Recipe Using Cream

For Madeleines that look like they came straight from a French patisserie, keep these tips in mind:

  1. Chill the batter: Resting the batter not only enhances the flavor but also ensures the hump rises beautifully.
  2. Use quality molds: Non-stick Madeleine trays help create clean, defined edges.
  3. Precision in portions: Use a piping bag to fill each mold evenly, which helps with uniform baking.

Additionally, using fresh, high-quality ingredients—especially butter and cream—adds a richness that elevates your madeline cookies recipe using cream. These little details make a big difference!

How to Experiment with New Flavors

While the classic recipe is beloved, experimenting with flavors can add a unique twist to your Madeleines:

  • Herbal notes: Add a hint of lavender or rosemary for a sophisticated taste.
  • Spices: Cinnamon or nutmeg can bring a warm, cozy feel to your cookies.
  • Citrus infusions: Incorporate lemon or orange zest into the batter for a zesty kick.
  • Savory variations: For something truly unique, try a savory version with a touch of parmesan and herbs.

Don’t hesitate to get creative your personal flair can make these cookies even more memorable.

Incorporating Madeleines into Festive Occasions

Madeleines aren’t just cookies; they’re an experience, making them perfect for special events. Here are some ideas for using them during holidays and celebrations:

  • Holiday-themed Madeleines: Add festive sprinkles or a glaze in seasonal colors for a Christmas or Easter treat.
  • Wedding favors: Package a few Madeleines in decorative bags tied with ribbons as elegant party favors.
  • Afternoon tea spreads: Arrange Madeleines alongside scones, finger sandwiches, and tea for a delightful gathering.

These versatile cookies can easily adapt to any occasion, adding a touch of elegance and warmth.

Frequently Asked Questions About Madeline Cookies Using Cream

How to keep Madeleine moist?

Keeping your Madeleine cookies moist is all about proper storage and baking techniques. To start, avoid overbaking them; remove the cookies from the oven as soon as the edges turn golden and the centers spring back when touched. After cooling completely, store your Madeleine cookies using cream in an airtight container to prevent them from drying out. If you’ve added a glaze, refrigerate them to maintain freshness while preserving the delicate texture. For longer storage, you can freeze them individually wrapped in plastic wrap. When thawed at room temperature, they’ll still taste as soft and fresh as the day they were baked.

What can I use instead of a Madeleine tray?

While a Madeleine tray is ideal for achieving the classic scalloped shape, you can use a mini muffin tin as an alternative. The texture and flavor of your madeline cookies recipe using cream will remain the same, though the shape will differ. To mimic the traditional look as closely as possible, fill each muffin cup only halfway, and don’t forget to grease and flour the molds for easy release. If presentation matters for a special occasion, consider investing in an authentic Madeleine tray for future bakes.

Why are Madeleine cookies so good?

Madeleines are beloved for their soft, airy texture and buttery flavor. The addition of cream in this madeline cookies recipe using cream takes these classic cookies to the next level by adding richness and keeping them moist. Their delicate crust provides a satisfying contrast to the fluffy interior, making them a treat for both the eyes and the palate. Whether paired with tea, coffee, or enjoyed on their own, Madeleines offer a unique combination of simplicity and sophistication that few desserts can match.

Why does my Madeleine not have a bump?

The iconic hump on a Madeleine forms due to a temperature contrast between cold batter and a hot oven. If your Madeleines lack a bump, it’s likely due to skipping the resting step or not preheating the oven properly. Always chill your batter for at least 30 minutes, as this allows the gluten to relax and the butter to firm up, setting the stage for a proper rise. Additionally, ensure your oven is fully preheated to the recommended temperature before baking. If the hump still doesn’t appear, double-check the recipe measurements and try using a higher initial baking temperature for the first few minutes.

Conclusion

Congratulations! you’ve mastered the art of baking Madeline cookies using cream! From gathering quality ingredients and preparing the batter to achieving the perfect golden crust, every step contributes to creating these elegant French treats. Whether you’ve added a personal touch with creative decorations or stuck to the traditional powdered sugar finish, your Madeleines are sure to impress.

Remember, proper techniques like chilling the batter, greasing the molds, and preheating the oven are key to success. Additionally, with thoughtful storage and serving ideas, you can extend the joy of these cookies well beyond baking day. And don’t forget Madeleines are wonderfully versatile, making them a delightful addition to any occasion, from casual teas to festive celebrations.

So, grab your tray (or mini muffin tin) and whip up a batch of these buttery delights. With this madeline cookies recipe using cream, you’re all set to create a dessert that’s as beautiful as it is delicious.

Gipfeli Recipe Made Simple: Flaky Pastries For Every Morning

Are you ready to experience the authentic flavors of Switzerland right in your own kitchen? If so, you’ve landed in the right spot! This gipfeli recipe will guide you through the process of crafting light, flaky pastries reminiscent of a classic Swiss breakfast. Often compared to French croissants, gipfeli have a distinct personality—slightly denser, subtly sweet, yet undeniably buttery. Moreover, they’re perfect for early morning treats or a cozy weekend brunch.

Undoubtedly, gipfeli recipe aficionados insist on high-quality ingredients, because fresh flour and top-notch butter can make all the difference. Throughout this article, you’ll discover how to prepare the dough, shape these pastries for maximum flakiness, and troubleshoot any snags that might pop up along the way. Additionally, we’ll sprinkle in tips gathered from Swiss bakery traditions to ensure each bite is just as irresistible as the last. So, let’s delve into the dough, shall we?

Part 1: Embracing Swiss Bakery Traditions

The Essence of a Swiss Gipfeli Recipe

Swiss bakery culture is rich, steeped in heritage, and altogether fascinating. Gipfeli, sometimes referred to as Swiss croissants, are emblematic of this tradition because they embody precision, patience, and quality. Although they share similarities with French croissants, there are notable distinctions that make them stand out. Chiefly, gipfeli are often slightly sweeter, and their texture is comparatively denser, giving them that hearty, melt-in-your-mouth character. Certainly, many Swiss families enjoy these pastries during special occasions, while others consider them a staple for breakfast or brunch gatherings.

Gipfeli recipe enthusiasts generally emphasize the importance of butter. Indeed, Swiss pastry chefs believe the butter-to-flour ratio is critical because it affects both flavor and layering. Moreover, the use of fresh yeast can contribute to a more pronounced taste. Additionally, some bakers incorporate a touch of sugar or honey for a subtle sweetness, but never enough to overpower the buttery essence.

Swiss Bakery Tradition Gipfeli
Freshly baked Swiss gipfeli, celebrating authentic Swiss bakery traditions.

Key Ingredients and Their Roles

When it comes to assembling the perfect gipfeli recipe, each ingredient plays a pivotal part. First and foremost, high-quality flour is a must. It provides the dough’s structure and interacts with yeast to create those tender layers. Secondly, milk offers richness and a slightly creamy flavor, while water alone can produce a drier crumb. Meanwhile, sugar adds a hint of sweetness—albeit not excessively—so that the buttery goodness remains the star of the show. Additionally, salt is indispensable because it balances flavor and strengthens the dough’s gluten network.

Most bakers gravitate toward unsalted butter to control sodium content. Nevertheless, a pinch of salt is recommended to enhance taste. Hence, choosing the best possible butter brand is paramount, as it can elevate every bite of your gipfeli recipe. If you’re looking for general guidelines on butter quality, you might visit the USDA FoodData Central for nutritional information and insights into product varieties.

Secrets Behind the Dough Preparation

The steps for making dough for gipfeli are quite simple, but each phase must be done carefully. First, mix your dry ingredients—flour, sugar, salt, and yeast. Then add softened butter and lukewarm milk, making sure every bit of flour gets moistened. Next, gently knead the dough to form enough gluten without going too far. Too little kneading can leave lumps, while too much can make the pastry tough and hurt its lightness.

After kneading, let the dough rest. Some bakers let it rise in a cooler spot to slow fermentation and boost flavor. Once the dough has doubled in size, move on to lamination. This process involves folding butter into the dough to create flaky layers. Although lamination may seem tricky at first, you’ll soon see how it adds a delicate texture to each bite.

Kneading Gipfeli Dough
Careful kneading ensures your gipfeli dough remains elastic and easy to fold

Remember, the best gipfeli recipe is often one that you adapt to suit your personal tastes. Whether you prefer a sweeter dough or a more savory version, tweak the proportions to discover your perfect bite. Soon enough, you’ll be mastering Swiss bakery traditions in the comfort of your home, impressing family and friends with your newfound pastry prowess!

Perfecting the Gipfeli Recipe Technique

Preparing and Laminating the Dough

Gipfeli recipe success hinges on two foundational steps—preparing an elastic dough and mastering lamination. Firstly, ensure your dough has had enough time to rest after the initial kneading, because this brief pause helps relax the gluten, making it more malleable for rolling. Afterward, dust your work surface with flour and roll the chilled dough into a rectangular shape. Subsequently, place thin slabs of cold butter on two-thirds of the dough. Then, fold the unbuttered section over half of the buttered portion, and fold again so all the butter is neatly sealed within the dough.

Meanwhile, keep an eye on dough temperature. If it becomes too warm, the butter may melt and seep out, consequently ruining those coveted flaky layers. To counter this, gently transfer the dough to the refrigerator between each set of folds. Certainly, this process of folding and chilling—often referred to as lamination—demands patience. However, the resulting layers will reward you with a melt-in-your-mouth texture that elevates any gipfeli recipe from ordinary to extraordinary.

Shaping and Baking to Perfection

Shaping each gipfeli is where your artistic flair gets to shine. Afterwards, roll the dough into a large rectangle, aiming for an even thickness. Use a sharp knife or pizza cutter to slice the sheet into long triangles—typically, you want the base of each triangle to be about twice as long as its height. Next, place any desired fillings (e.g., chocolate, almond paste, or savory cheese) at the wide end. Then, roll each triangle from base to tip, ensuring the tip of the triangle is tucked under to hold its shape during baking.

Comparatively, this shaping technique resembles forming croissants, yet gipfeli recipe triangles are sometimes smaller for easy handling. Before baking, brush each pastry with an egg wash, which lends them a tempting golden glow. Moreover, a quick sprinkle of seeds or coarse sugar can add visual appeal if you’re experimenting with flavors. Preheat your oven to around 200°C (392°F), and bake these morsels for approximately 15–20 minutes, or until the tops are lightly browned. Obviously, every oven varies, so keep a watchful eye to prevent overbrowning.

for different flours or butter types, you can refer to the USDA FoodData Central for insights on product variations and nutritional details.

Cutting and rolling triangular dough for a Swiss gipfeli recipe
A neat roll from base to tip is key to forming classic Swiss Gipfeli.

Variations and Flavor Twists

If you’ve mastered the basic gipfeli recipe, consequently, you’re perfectly poised to test out creative twists. For example, sweet fillings like fruit jam, cinnamon sugar, or Nutella can be swirled into the dough before rolling. Similarly, savory aficionados might opt for ham and cheese, spinach and feta, or even a spicy jalapeño cheddar version. Furthermore, you can brush a light milk wash instead of an egg wash for a subtler shine if you prefer an egg-free pastry.

Try incorporating whole wheat flour for a heartier gipfeli recipe. However, remember that whole wheat flours usually absorb more moisture, so you may need to adjust the liquid content. Surely, experimentation is part of the fun—especially if you enjoy adding personal flair to your baking.

Troubleshooting & Elevating Your Gipfeli Recipe

Tackling Common Dough Challenges

Even experienced bakers face problems with a gipfeli recipe. One of the most common issues is dough that’s either too hard or too soft. A hard dough can happen if you use too much flour, so it’s best to weigh it for accuracy. On the other hand, sticky dough often means there isn’t enough flour or there’s too much liquid—especially in humid weather. Small changes, like adding a little more flour, can help fix the problem.

Another common issue is butter leaking during layering. To avoid this, always keep the butter and dough cold. If butter starts to leak, stop, put everything in the fridge, and let it firm up. Be gentle when rolling the dough because pressing too hard can damage the layers and ruin the pastry’s light and airy texture.

Enhancing Flavor and Texture

Your gipfeli recipe can be enhanced in countless ways. For instance, you might add a hint of lemon zest or vanilla extract to the dough for extra fragrance. Additionally, replacing a portion of milk with cream brings richer taste and slightly more tender crumb. If you’re looking for health-conscious tweaks, you could explore alternative sweeteners such as honey or maple syrup—though do so sparingly, lest the flavor overshadows that classic buttery taste.

Moreover, consider a final dusting of powdered sugar or a drizzle of melted chocolate to turn your pastries into a dessert delight. If you want more advanced pastry tips, explore our Quickmealsrecipes for in-depth tutorials on flavor infusion and creative toppings.

Keeping Your Gipfeli Recipe Fresh

If you happen to end up with leftovers—though that’s unlikely storing gipfeli properly is essential to retain their crispness. Once they cool, place them in an airtight container at room temperature. Shortly afterward, you can reheat them in a low-temperature oven to restore freshness. Alternatively, freeze unbaked shaped dough on a tray, then transfer the frozen pastries to a sealed bag. You can bake them straight from frozen with just a few extra minutes in the oven, saving time on future mornings.

Overall, remember that your gipfeli recipe journey is as unique as you are. Take these tips in stride, explore creative flavors, and keep an open mind whenever you troubleshoot. With each baking session, you’ll inch closer to perfecting the art of Swiss pastry-making in your own home—keeping tradition alive, one buttery layer at a time!

Elevating Your Gipfeli Recipe

Tips for Success

If you want to perfect your gipfeli recipe, there are several simple tips to make sure your pastries are flaky and delicious. First, keep all your ingredients cold—especially butter—while making the layers. Also, handle the dough gently to protect the thin layers, and roll it out carefully instead of pressing hard. Weighing your ingredients helps keep the right balance and prevents the dough from being too dry or too wet. Patience is also important: give the dough enough time to rise, as rushing can make the pastry heavy.

Using good-quality ingredients is another key step. For example, butter with more fat adds better flavor and creates clearer layers, making a big difference in your gipfeli recipe. Some bakers add a little sugar or honey to make the pastry sweeter without losing the buttery taste. Salt is also important, as it balances the sweetness and improves the overall flavor.

Variations and Substitutions

Close-up of two almond-topped Swiss Gipfeli pastries on a decorative plate.
Freshly baked Swiss Gipfeli, topped with almond slices and a light dusting of powdered sugar, perfect for a cozy breakfast or snack.

Though the classic gipfeli recipe is mouthwateringly delicious, experimenting with flavors can be exciting. Consequently, sweet tooth enthusiasts might try a chocolate or almond paste filling, adding a subtle richness to each bite. Alternatively, savory options like smoked salmon or cheese and herbs bring a satisfying contrast to the buttery dough. However, always ensure the filling complements rather than overpowers the pastry’s delicate texture.

If you follow a special diet, there are still ways to enjoy a fabulous gipfeli recipe. Undoubtedly, dairy-free butter alternatives and plant-based milks work well, though you may need to adjust the dough’s moisture. Similarly, gluten-free flour blends can be substituted; yet, be prepared for minor textural differences. Nevertheless, with a bit of patience and creativity, you’ll find a variation that suits your preferences while keeping the spirit of Swiss pastries intact.

Wrapping Up Your Gipfeli Recipe Adventure

Conclusion

All in all, this gipfeli recipe captures the very essence of Swiss pastry craftsmanship. Certainly, the layers of buttery dough, painstakingly formed through lamination, produce a flaky masterpiece that can transform any breakfast into a gourmet experience. Hence, by mastering essential tips—such as keeping ingredients cold, measuring accurately, and allowing your dough to rest—you’ll consistently achieve results that rival your favorite bakery.

Moreover, feel free to tailor the gipfeli recipe to your taste buds by experimenting with sweet or savory fillings. Surely, each batch will boost your confidence in the kitchen, inspiring you to tackle more advanced recipes and share your newfound skills with family and friends.

Mastering Final Details for Your Gipfeli Recipe

Maximizing Flavor in Your Gipfeli Recipe

A truly unforgettable gipfeli recipe requires attention to flavor-boosting details that make each flaky bite a delight. Firstly, consider infusing your dough with subtle ingredients like grated citrus zest or a pinch of nutmeg—these enhancements brighten the buttery layers without overwhelming them. Additionally, experiment with premium European-style butter because its higher fat content intensifies flavor and yields extra-luscious results. Similarly, sprinkling sea salt flakes or crushed nuts over the egg wash can add contrasting textures that complement the pastry’s softer interior.

Moreover, shape and size play a significant role in delivering that melt-in-your-mouth consistency. Generally, a thinner dough sheet will yield more delicate layers, whereas a thicker one may result in a dense interior. Hence, roll out your dough consistently, ensuring even thickness across every triangle. Certainly, a well-preheated oven also matters, so aim for about 200°C (392°F) and maintain steady heat for uniform browning. Undoubtedly, each oven behaves differently, so keep a close eye on the pastries during baking to prevent overcooking.

Presentation and Serving Ideas

When it comes to wowing guests, the aesthetics of your gipfeli recipe presentation matter. Consequently, consider arranging the freshly baked pastries on a wooden board or a sleek serving tray for a rustic yet refined look. Additionally, garnish the platter with seasonal fruit or tiny bowls of jam to encourage dipping. Likewise, a side of whipped cream or honey butter complements sweet variants perfectly, whereas savory versions pair nicely with a cheese board or cured meats.

Comparatively, plating these Swiss pastries with fresh greenery—like a sprig of rosemary or thyme—adds an elegant pop of color that makes the golden crusts stand out. Afterward, a gentle dusting of powdered sugar or a drizzle of melted chocolate can give your gipfeli recipe that bakery-level finish. Overall, your creativity, combined with impeccable layering and baking techniques, will keep everyone asking for second helpings.

Your Gipfeli Recipe FAQs and Final Words

Addressing Common Queries

Curious about how a gipfeli recipe compares to a French croissant? Certainly, these pastries share a flaky structure, but gipfeli often have a slightly denser crumb and sometimes feature subtle sweet undertones. Additionally, if you’re wondering about egg-wash alternatives, a simple milk wash can still deliver a beautiful sheen albeit with a gentler color. Moreover, when it comes to storing leftover pastries, keep them in an airtight container at room temperature to maintain freshness for up to two days. However, for extended storage, freeze the unbaked dough and simply add a few extra minutes to your baking time.

Final Thoughts on Your Gipfeli Recipe Journey

Embarking on this gipfeli recipe adventure undoubtedly enriches your baking repertoire. Hence, mastering the lamination process and fine-tuning those delicate layers might seem challenging at first. Nevertheless, with patience, quality ingredients, and a few helpful tips, you’ll soon elevate your homemade pastries to Swiss-bakery status. Enjoy every buttery, golden-brown bite, and don’t hesitate to share your baking triumphs (or challenges) in the comments. Eventually, your persistence will pay off, and you’ll relish the sweet taste of success—literally!