Caramel Apple Candy: A Sweet Fall Delight

My love for autumn desserts started with one unforgettable bite of caramel apple candy. The golden caramel coating on a crisp apple is more than a sweet treat. It’s a sensory experience that brings warmth and nostalgia of fall.

In this journey, we’ll explore the world of caramel apple candy. We’ll look at its rich history, mouthwatering recipes, and creative variations. We’ll see why these treats are a cherished autumn tradition in the United States.

The Rich History of Candy-Coated Apples

Candy apples have been a favorite for many years. They bring joy to sweet lovers across America. These treats have a rich story of creativity and celebration.

The story of candy apples started in the early 1900s. In 1908, William Kolb from Newark, New Jersey, made the first candy apple. He was experimenting with red cinnamon-flavored hard candy.

Origins of the Classic Candy Apple

The first candy apples were quite different. They had:

  • Bright red, hard sugar coating
  • Primarily sold at carnivals and fairs
  • A crisp, glossy exterior

Evolution into Caramel Varieties

Over time, toffee and caramel apples became more popular. The softer, richer caramel made them a fall favorite.

The change brought new tastes and textures. Caramel apples offered:

  1. Smoother, more buttery coating
  2. Options for additional toppings like nuts
  3. Greater versatility in flavor combinations

Cultural Impact in American Fall Traditions

Today, candy apples are a symbol of autumn. They’re enjoyed at county fairs and Halloween parties. They’re more than a snack; they’re a part of American traditions.

The change from simple sugar to gourmet caramel shows our creativity and love for seasonal treats.

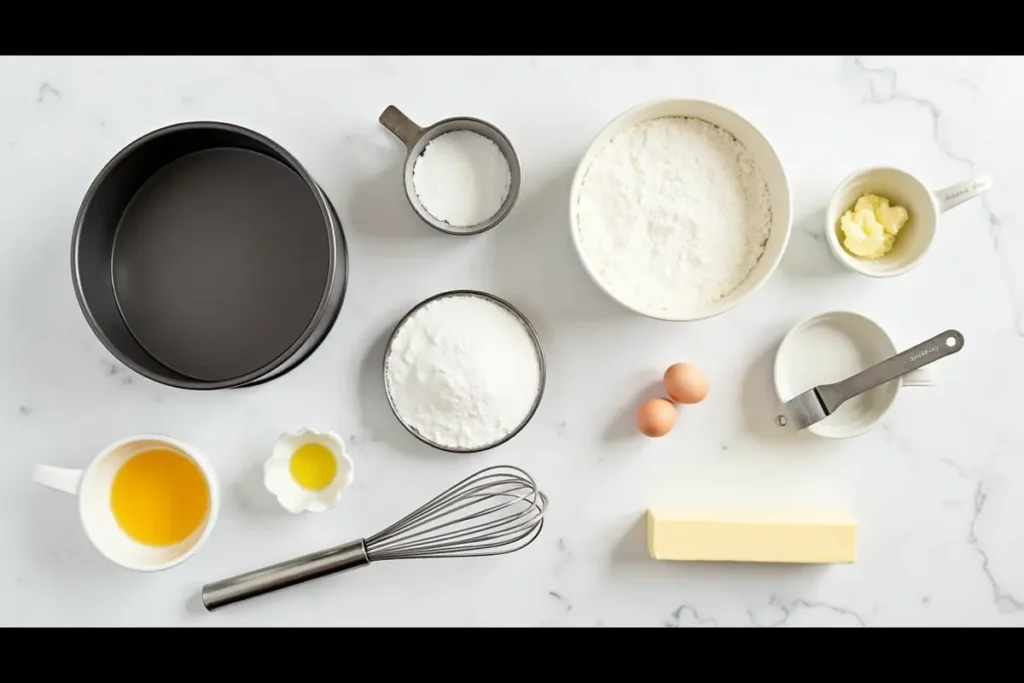
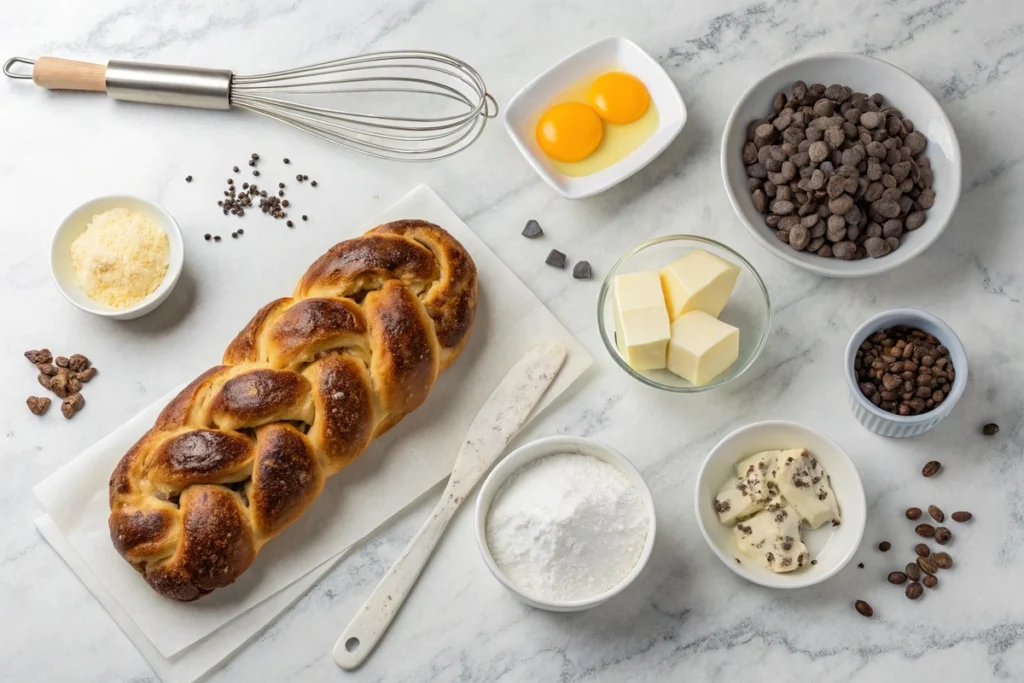
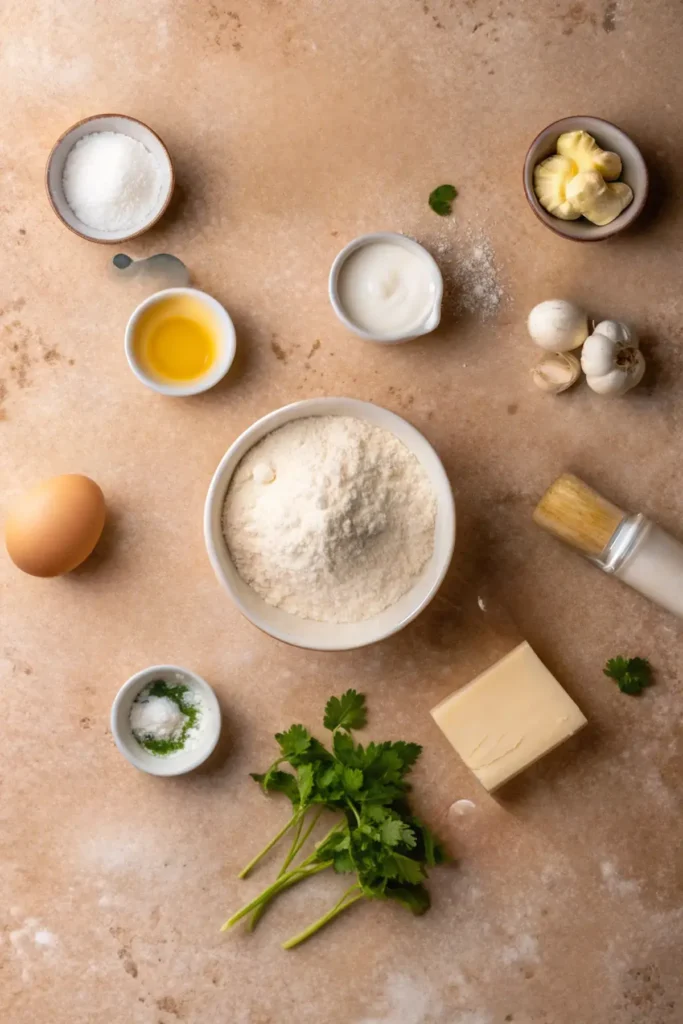
Essential Ingredients for Perfect Caramel Apple Candy

Homemade caramel apple candy cooling on parchment paper with artisanal toppings
Handcrafted caramel apples ready for decorating

Making gourmet caramel apples is all about choosing the right ingredients and techniques. Let’s explore the key components that turn simple apples into tasty caramel treats. These will wow your family and friends.

Choosing the Perfect Apple

The base of a great caramel apple candy is the apple itself. Here are my top picks:

  • Granny Smith: Tart and crisp, perfect for balancing sweet caramel
  • Honeycrisp: Provides a satisfying crunch and natural sweetness
  • Gala: Mild flavor that complements caramel coating

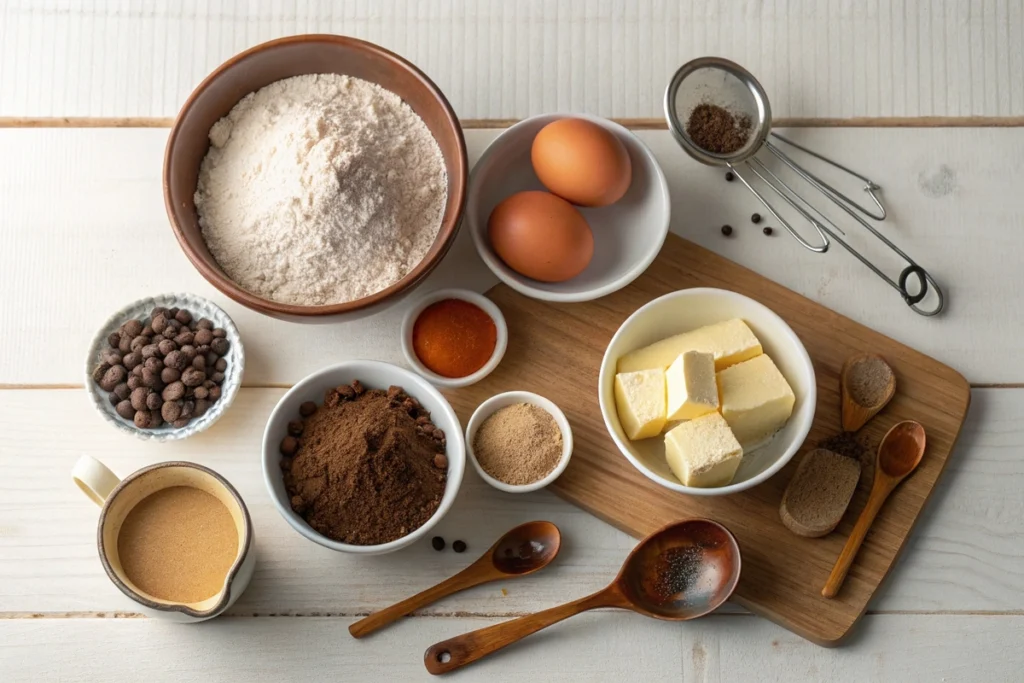
Crafting the Ideal Caramel Coating

Your caramel coating is what makes your apples special. Use these ingredients for the best results:

  • High-quality butter
  • Dark brown sugar
  • Heavy cream
  • Pure vanilla extract

Creative Toppings and Decorations

Take your caramel apples to the next level with these toppings:

  • Crushed pecans
  • Mini chocolate chips
  • Colorful sprinkles
  • Crushed graham crackers
  • Toasted coconut flakes

Pro tip: Always dry your apples completely before adding caramel. This ensures perfect adhesion and a shiny finish.

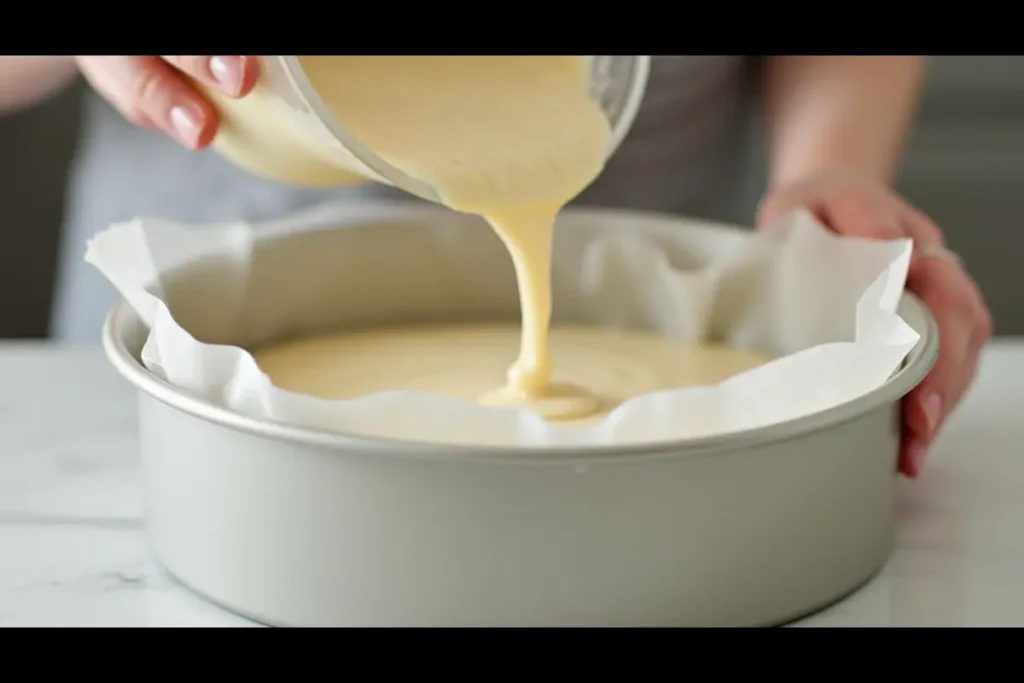
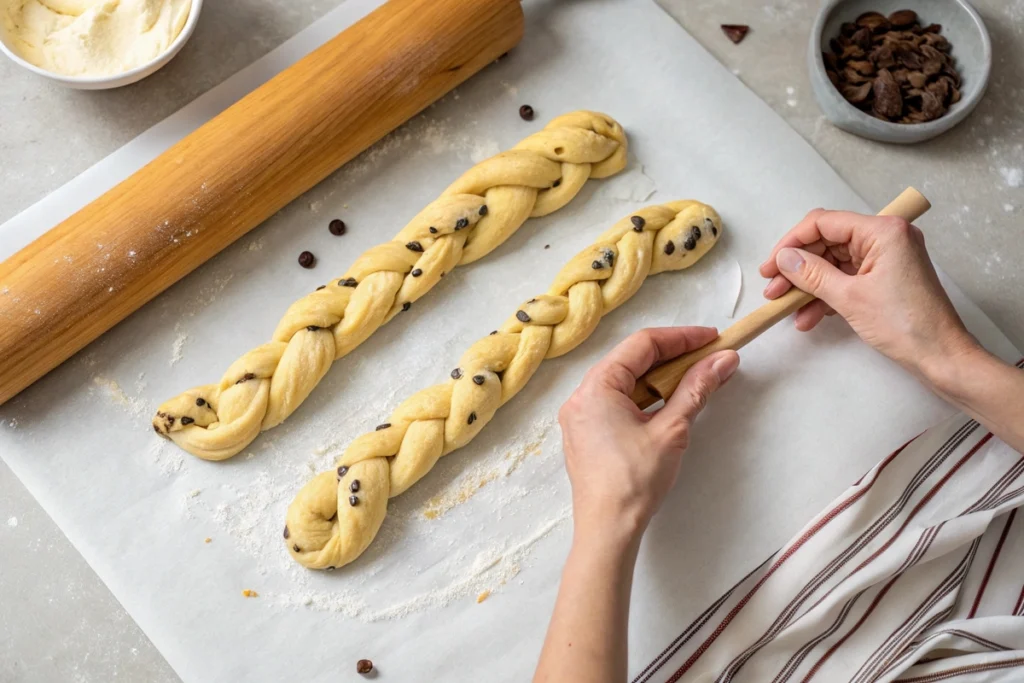
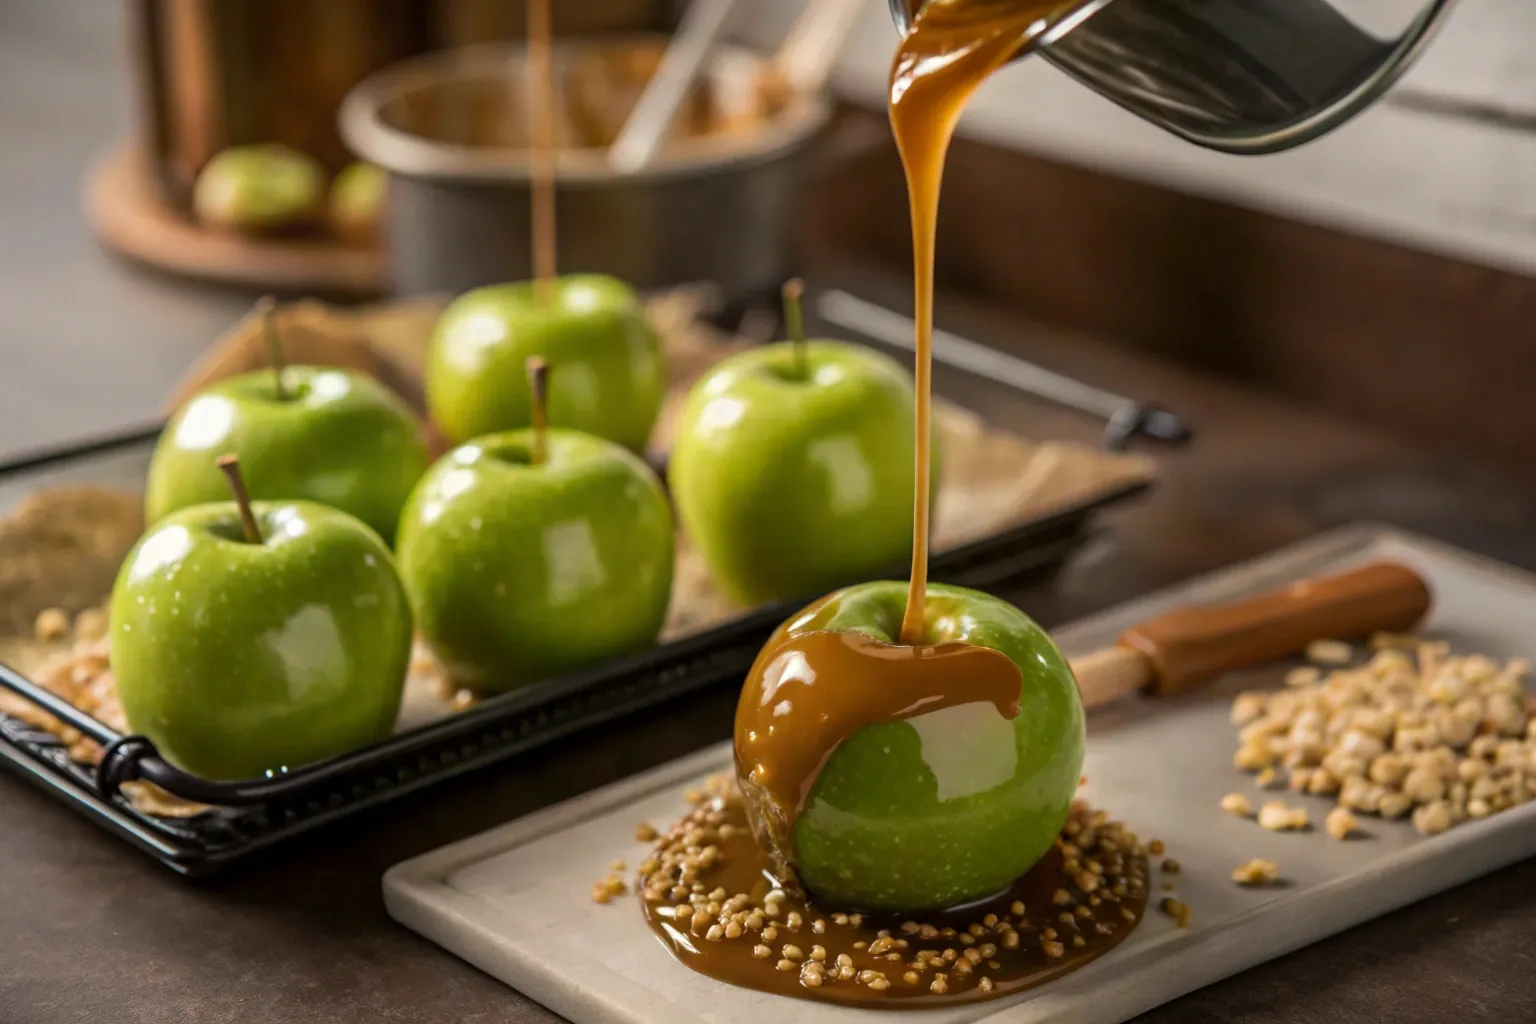
Step-by-Step Guide to Making Gourmet Caramel Apples

Making gourmet caramel apples at home is simple. I’ll show you how to create amazing caramel treats that will wow everyone. They’re great for fall parties or as a sweet homemade gift.

Making caramel apple candy with flowing golden caramel
Capturing the moment of transformation

First, get your workspace ready. Collect all your ingredients and tools before you start:

  • Fresh, crisp apples
  • High-quality caramel
  • Wooden skewers
  • Parchment paper
  • Optional toppings (nuts, chocolate, sprinkles)

Choose firm, tart apples like Granny Smith for the best taste. Wash and dry them well. Then, put wooden skewers in the apple’s top. Chill the apples in the fridge for about 15 minutes to help the caramel stick better.

When making caramel, temperature is very important. Use a candy thermometer to get the caramel just right. Slow and steady wins the race when creating these delectable treats!

StepKey ActionPro Tip
1Prepare ApplesRemove waxy coating by dipping in hot water
2Make CaramelHeat to 240°F (soft ball stage)
3Dip ApplesTwist and shake off excess caramel
4Add ToppingsWork quickly before caramel sets

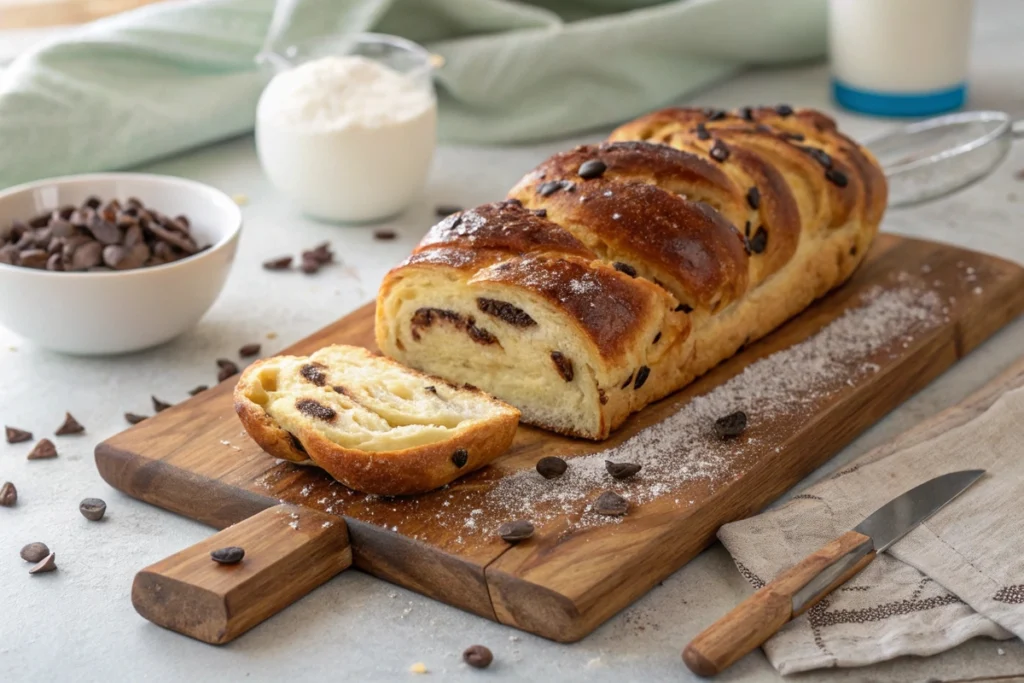
The last step is decorating. Quickly roll your caramel apples in crushed nuts, chocolate chips, or colorful sprinkles. Place them on parchment paper to cool and set. These gourmet caramel apples will look professional and taste amazing!

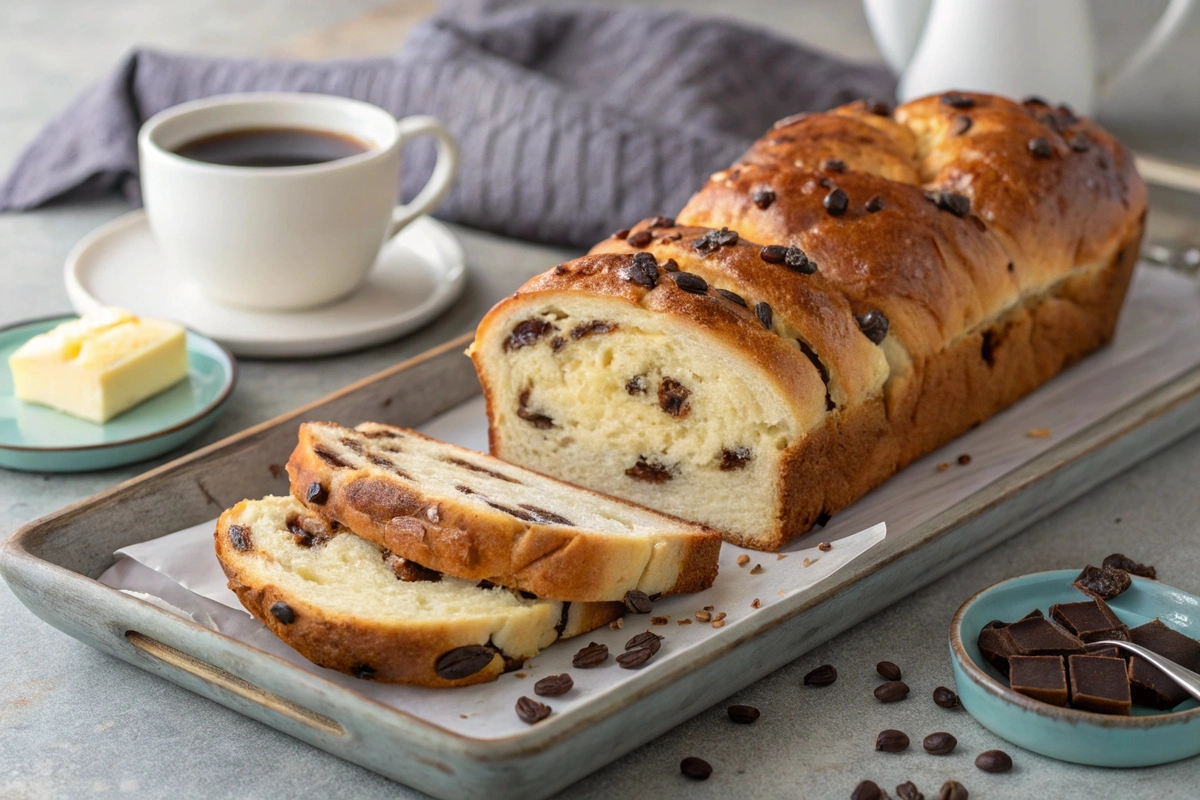
Looking for more cozy baking ideas? Check out our Sweet Potato Bread recipe – it’s another fall favorite that’ll make your kitchen smell incredible!


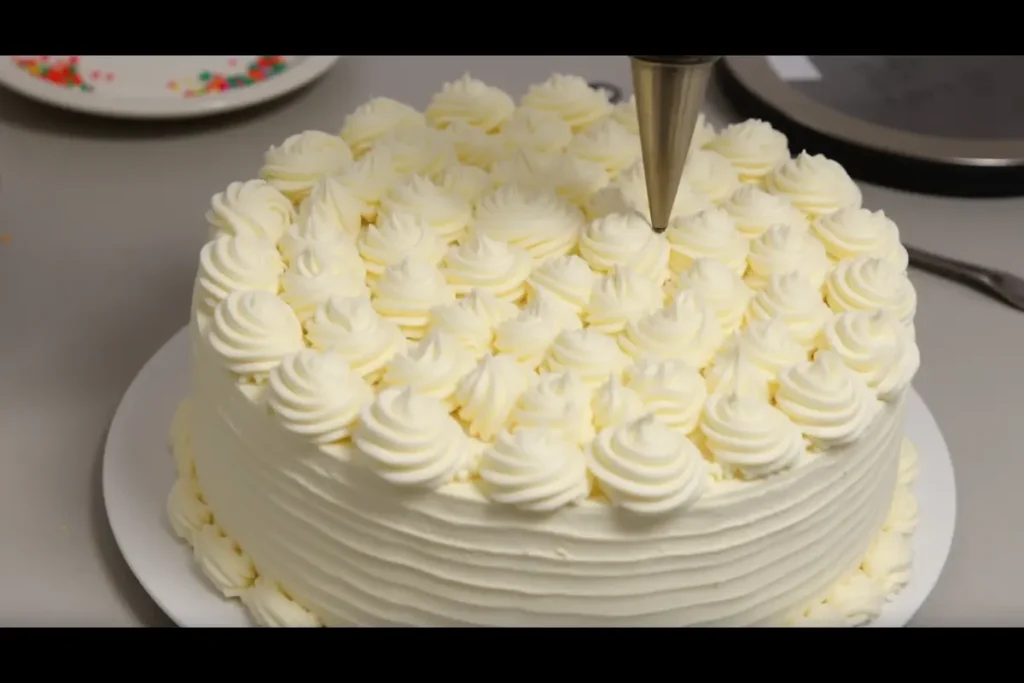
Creative Variations and Modern Twists

Caramel apples have grown beyond the classic recipe. I’ve found amazing ways to make these autumn treats into true works of art. They excite the taste buds and spark creativity.

Assortment of decorated caramel apple candy varieties
A festive display of fall’s favorite treat

Chocolate-Drizzled Options

Adding dark chocolate and white chocolate drizzles can make caramel apples gourmet. I enjoy layering rich chocolate over smooth caramel. This adds depth and complexity to these seasonal favorites.

Some of my top picks include dark chocolate with sea salt or white chocolate with crushed peppermint.

Nutty and Crunchy Varieties

Texture is key in caramel fruit snacks. Rolling caramel apples in chopped nuts like pecans, almonds, or macadamia nuts adds a great crunch. Make sure to use freshly roasted nuts for the best flavor.

Also, chop the nuts finely to ensure an even coating.

Seasonal Flavor Combinations

Autumn desserts are best when they use seasonal spices and ingredients. Try using pumpkin spice caramel, maple-infused coatings, or a hint of bourbon. These can turn a simple caramel apple into a sophisticated treat that captures fall’s essence.

FAQ

What’s the difference between a candy apple and a caramel apple?

A candy apple has a hard, shiny sugar shell in bright colors. A caramel apple, on the other hand, has a thick, creamy caramel layer. Candy apples are crunchy, while caramel apples are soft and gooey.

How do I choose the best apples for making caramel apples?

Choose firm, tart apples like Granny Smith or Honeycrisp. These apples are perfect for caramel because they’re crisp and tart. Make sure to wash and dry the apples well, and remove the stems for better caramel adhesion.

Are caramel apple pops still available?

Yes, many candy brands still make caramel apple-flavored lollipops. Brands like Tootsie Pops offer these treats, which are popular in the fall.

Are caramel apples healthy?

Caramel apples are tasty but not healthy. They have some apple benefits like fiber and vitamins. But the caramel adds a lot of sugar and calories. Enjoy them in small amounts as a special treat.

What are some creative toppings for caramel apples?

Try different toppings like crushed nuts, chocolate chips, or sprinkles. You can also use coconut flakes, crushed cookies, or mini marshmallows. Get creative and mix toppings for a unique flavor.

How long do homemade caramel apples last?

Homemade caramel apples last 2-3 days in the fridge. Wrap them in wax paper or plastic wrap to keep them fresh. Keep them cold to keep the caramel firm and the apple crisp.

Can I make caramel apples without a candy thermometer?

Yes, you can make caramel apples without a thermometer. Use a soft ball stage method. This means the caramel forms a soft ball in cold water. Just be careful not to burn the caramel.

What’s the best way to insert the stick into the apple?

Use wooden craft sticks for the best results. Insert the stick from the top, about halfway through. Chilling the apples first helps the stick stay in place and makes dipping easier.

Print
clock clock iconcutlery cutlery iconflag flag iconfolder folder iconinstagram instagram iconpinterest pinterest iconfacebook facebook iconprint print iconsquares squares iconheart heart iconheart solid heart solid icon
Making caramel apple candy with flowing golden caramel

Perfect Caramel Apple Candy: A Fall Family Favorite


  • Author: Emily
  • Total Time: 1 hour 45 minutes
  • Yield: 6 caramel apples 1x

Description


These homemade caramel apples are everything you love about fall – crisp, tart apples wrapped in buttery-smooth caramel and dressed up with your favorite toppings. They’re way better than store-bought and actually pretty simple to make!


Ingredients

Scale
  • 6 medium Granny Smith apples (pick firm ones!)
  • 2 cups granulated sugar
  • 1/2 cup water
  • 1/4 cup light corn syrup
  • 1/2 cup heavy cream (room temperature)
  • 4 tablespoons unsalted butter
  • 1 teaspoon pure vanilla extract
  • 1/4 teaspoon salt
  • Optional toppings: chopped nuts, mini chocolate chips, sprinkles, or crushed cookies

You’ll also need:


  • 6 wooden craft sticks or popsicle sticks
  • Candy thermometer
  • Parchment paper
  • Large baking sheet

Instructions


  1. First things first – let’s prep those apples! Wash and dry them super well (this helps the caramel stick better)
  2. Remove the stems and push a wooden stick deep into each apple where the stem was
  3. Pop the apples in the fridge while we make the caramel (cold apples = better caramel coating!)
  4. Line a baking sheet with parchment paper and give it a light spray of cooking oil
  5. In a medium saucepan (bigger than you think you need), mix sugar, water, and corn syrup
  6. Heat this mixture over medium heat until the sugar dissolves – don’t stir, just swirl the pan gently!
  7. Once it’s bubbling, pop in your candy thermometer and cook until it hits 240°F (aka “soft ball stage”)
  8. Here comes the fun part! Take it off the heat and carefully stir in your cream, butter, vanilla, and salt
  9. Let the caramel cool for about 5 minutes – it should be thick but still dippable
  10. Dip each cold apple, twirling to coat evenly
  11. Let excess caramel drip off, then roll in your chosen toppings if using
  12. Place on your prepared baking sheet and pop them in the fridge to set
Tagged : / / /

The Ultimate 8 Inch Round Cake Baking Tutorial

Craving a cake that’s both show-stopping and simple to bake? Look no further! This 8 inch round cake recipe delivers the perfect balance of flavor, texture, and elegance. Whether you’re a seasoned baker or just starting out, you’ll create a masterpiece worthy of any celebration. Let’s get baking!

Essential Tools and Ingredients for an 8 Inch Round Cake

Baking tools and ingredients for an 8-inch round cake on a marble countertop.
Essential baking tools and ingredients for an 8-inch round cake.

Creating a flawless 8 inch round cake starts with the right tools and ingredients. Each piece of equipment and every ingredient plays a key role in ensuring your cake turns out perfect—moist, fluffy, and utterly delicious. Let’s dive into the essentials that will make your baking experience seamless and enjoyable.

Must-Have Baking Tools

To bake an 8 inch round cake successfully, you’ll need a few key tools that make the process smoother. Here’s a quick rundown:

  • 8 inch round cake pan: This is non-negotiable. A well-made pan ensures even heat distribution, resulting in a cake that bakes evenly without burnt edges or an undercooked center.
  • Offset spatula: Perfect for spreading frosting smoothly, this tool gives your cake that professional finish.
  • Cake turntable: While optional, this tool makes decorating so much easier. Simply place your cake on the turntable and rotate as you apply frosting or decorations.
  • Parchment paper: Cut a circle to line the bottom of your pan for an easy release after baking.

Key Ingredients for Success

Every ingredient in your 8 inch round cake recipe has a purpose, so measuring accurately and choosing quality ingredients is crucial.

  • All-purpose flour: This forms the structure of your cake. Be sure to spoon the flour into your measuring cup and level it off with a knife for precision.
  • Granulated sugar: Provides sweetness and helps retain moisture. You can substitute part of it with brown sugar for a deeper flavor.
  • Unsalted butter: Adds richness. Using unsalted butter lets you control the amount of salt in your cake. If needed, you can substitute with oil, though it will slightly alter the texture.
  • Eggs: They bind the ingredients together and provide structure. For best results, use eggs at room temperature.

Optional Twist: Want to add a burst of flavor? Mix a teaspoon of almond extract or orange zest into the batter for a unique twist.

Pro Tips for Preparing Your Pan

Preparing your pan correctly can mean the difference between a cake that slides out effortlessly and one that sticks to the bottom. Here’s how to do it right:

  1. Grease your 8 inch round cake pan with butter or cooking spray. Make sure to cover the sides and edges evenly.
  2. Line the bottom of the pan with a parchment paper circle for easy removal.
  3. Dust the greased pan lightly with flour, tapping out the excess to create a nonstick layer.

Why Quality Matters in Baking

Quality ingredients and tools are not just optional—they’re game-changers. A high-quality 8 inch round cake pan prevents uneven baking, while fresh ingredients enhance flavor and texture. For example, fresh baking powder ensures your cake rises beautifully, while expired leavening agents can leave you with a dense, flat dessert.

Step-by-Step Guide to Baking an 8 Inch Round Cake

Baking an 8 inch round cake may seem intimidating, but with the right method and preparation, it becomes a straightforward and rewarding experience. This section breaks down each step to ensure your cake turns out moist, fluffy, and perfectly baked every time.

Pouring batter into an 8-inch round cake pan.
The batter is poured into a prepared 8-inch round cake pan, ready for baking.

Mixing the Batter: A Foolproof Method

The key to a light and airy 8 inch round cake lies in how you mix the batter. Here’s how to do it right:

  • Cream butter and sugar: Beat the butter and sugar together until pale and fluffy. This step creates air pockets, ensuring a tender crumb.
  • Add eggs one at a time: Gradually incorporate room-temperature eggs. Doing so prevents the batter from curdling and keeps it smooth.
  • Alternate dry and wet ingredients: To avoid overmixing, add your dry ingredients (flour, baking powder, salt) in thirds, alternating with your wet ingredients (milk or buttermilk). Mix until just combined.

Pro Tip: Scrape down the sides of your bowl as you go to ensure all ingredients are evenly incorporated.

Perfect Bake Time and Temperature

Baking an 8 inch round cake to perfection requires the right balance of temperature and timing.

  • Preheat your oven to 350°F (175°C): This is the ideal temperature for even baking without overbrowning.
  • Bake on the center rack: Positioning your cake here promotes even heat distribution.
  • Bake for 30-35 minutes: Check the cake at 30 minutes by inserting a toothpick into the center. If it comes out clean or with a few crumbs, your cake is ready.

Tip: If your cake appears golden but isn’t done, cover it loosely with foil to prevent overbrowning.

Cooling and Removing the Cake from the Pan

Once your 8 inch round cake is baked, cooling it properly is essential to preserve its structure and texture.

  1. Cool in the pan for 10-15 minutes: This allows the cake to set, reducing the chance of it breaking when removed.
  2. Transfer to a wire rack: Run a knife along the edges, invert the pan onto a wire rack, and gently lift it off. Peel away the parchment paper.
  3. Cool completely before frosting: Frosting a warm cake can cause the buttercream to melt and slide off. Patience is key!

Troubleshooting Common Baking Issues

Even with the best intentions, things can go wrong. Here’s how to fix common problems:

  • Cake is too dense: This usually happens if the batter was overmixed. Next time, mix until ingredients are just combined.
  • Cake sinks in the middle: This could mean the oven door was opened too early or the cake didn’t bake long enough. Always test for doneness before removing it.
  • Dry cake: Check your measurements—too much flour can result in a dry texture. Additionally, avoid overbaking.

Decorating Ideas for an 8 Inch Round Cake

Decorating an 8-inch round cake with buttercream rosettes using a piping bag.
A baker decorates an 8-inch round cake with elegant buttercream rosettes.

Decorating an 8 inch round cake is where creativity meets skill. Whether you’re a beginner or an experienced baker, there are endless ways to make your cake look as stunning as it tastes. From simple frosting techniques to intricate designs, this section explores ideas to elevate your cake’s presentation.

Simple Buttercream Frosting Techniques

Buttercream frosting is a classic choice that pairs beautifully with any flavor of 8 inch round cake. Here’s how to achieve a flawless finish:

  • Start with a crumb coat: Apply a thin layer of frosting to seal in crumbs and create a smooth surface for your final coat. Chill the cake for 15-20 minutes after applying the crumb coat.
  • Use an offset spatula: This tool helps spread frosting evenly across the cake. For a sleek finish, dip the spatula in hot water, then dry it before smoothing.
  • Add texture: Create waves, swirls, or patterns with the back of a spoon or the edge of your spatula for a unique touch.

Pro Tip: If you’re new to frosting, use a turntable to rotate the cake while you frost it makes the process much easier!

Creative Decorating Ideas

Take your 8 inch round cake to the next level with these simple yet eye-catching decorating ideas:

  1. Fresh Fruit: Top your cake with seasonal berries, thinly sliced citrus, or edible flowers for a fresh and elegant look.
  2. Drip Effect: Use melted chocolate or a flavored glaze to create a dramatic drip design along the edges.
  3. Sprinkles and Edible Glitter: Add a pop of color and fun with sprinkles or glitter—perfect for birthday cakes.

For inspiration on creative cake decorations, explore our Unicorn Cake Tutorial, which is filled with tips for making colorful designs!

Tips for Leveling and Stacking Cakes

Creating a multi-layer 8 inch round cake requires precision and patience. Here’s how to ensure your cake layers are even and stable:

  • Level the layers: Use a serrated knife or a cake leveler to trim the domed tops of your cakes. This ensures the layers stack neatly without wobbling.
  • Use a piping bag for filling: Pipe an even ring of frosting around the edge of the bottom layer to create a “dam” that holds the filling inside.
  • Secure with dowels: For added stability, insert a few dowels or straws through the center of the stacked cake, especially for taller cakes.

Pro Tip: Chill each layer before assembling to prevent sliding during stacking.

Customizing Your Cake for Any Occasion

An 8 inch round cake is the perfect size for small gatherings, and you can easily customize it for any celebration:

  • Birthday Party: Add colorful candles, themed toppers, or fondant decorations.
  • Anniversary: Incorporate elegant details like gold leaf, sugar flowers, or a handwritten message in frosting.
  • Seasonal Celebrations: For holidays, match the colors and flavors to the season. Think peppermint frosting for winter or lemon glaze for spring.

For more decorating tips tailored to special occasions, check out our Strawberry Shortcake Parfait Recipe for ideas on adding fresh, seasonal flair to your cakes.

Common Mistakes to Avoid When Baking an 8 Inch Round Cake

Even with a great recipe, mistakes can happen in the kitchen. Identifying and avoiding common pitfalls is essential to ensure your 8 inch round cake turns out perfectly every time. This section highlights frequent errors and offers actionable tips to help you avoid them.

Overmixing the Batter

One of the most common mistakes in baking an 8 inch round cake is overmixing the batter. While it’s tempting to mix until perfectly smooth, doing so can develop too much gluten in the flour, resulting in a dense and chewy cake.

  • How to avoid it: Mix the batter just until the dry ingredients are incorporated. A few small lumps are fine—they’ll disappear as the cake bakes.
  • Pro Tip: Use a spatula instead of a whisk for the final mixing stage to prevent overmixing.

Incorrect Oven Temperature

Another frequent issue is baking the cake at the wrong temperature, which can lead to uneven baking or a dry texture. An oven that’s too hot may burn the edges, while one that’s too cool can leave the center undercooked.

  • How to avoid it: Always preheat your oven to 350°F (175°C) before baking your 8 inch round cake.
  • Pro Tip: Use an oven thermometer to check the accuracy of your oven’s temperature. Many home ovens run hotter or cooler than the set temperature.

Skipping Pan Preparation

Neglecting to properly prepare the pan can cause your cake to stick, making it difficult to remove without damaging its shape.

  • How to avoid it: Always grease the pan, line it with parchment paper, and dust it lightly with flour before adding the batter.
  • Pro Tip: If you’re out of parchment paper, a generous greasing with butter or oil will still help the cake release more easily.

Opening the Oven Door Too Soon

While it’s tempting to peek at your cake as it bakes, opening the oven door too early can cause the temperature to drop, leading to a sunken center.

  • How to avoid it: Resist the urge to open the oven until at least 25 minutes into the baking time. At this point, you can quickly check for doneness without impacting the bake.
  • Pro Tip: Turn on the oven light to monitor the progress instead of opening the door.

By keeping these common mistakes in mind, you’ll be well on your way to baking a flawless 8 inch round cake. For additional tips and tricks, check out our Cocoa Coffee Cake Recipe to further refine your baking skills!

FAQs

How many people will an 8 inch round cake serve?

An 8 inch round cake typically serves 12-16 people if sliced into standard portions. However, the number of servings can vary depending on how you slice the cake. For larger, event-style slices, you can expect about 8-10 servings, while smaller, party-sized slices can stretch to around 16. To maximize servings, consider using a serving guide to cut uniform pieces.

How big is an 8 inch round cake?

An 8 inch round cake measures 8 inches in diameter, which is the distance across the cake from one side to the other. Typically, this size is around 2-3 inches tall, depending on the recipe and the number of layers. It’s the perfect size for small gatherings, providing enough cake to satisfy a group without overwhelming leftovers.

What is the difference between an 8-inch and 9-inch round cake?

The primary difference between an 8 inch round cake and a 9-inch one is the surface area, which impacts the amount of batter needed and the baking time. A 9-inch cake pan holds more batter (about 25% more) and has a larger surface area, resulting in a slightly thinner cake if the same amount of batter is used. Additionally, a 9-inch cake may bake faster due to its wider shape, so it’s important to adjust recipes accordingly.

How many kilograms is an 8-inch cake?

The weight of an 8 inch round cake can vary depending on the ingredients and decorations. On average, a single-layer 8 inch round cake weighs around 1.2 to 1.5 kilograms. If you’re adding frosting or multiple layers, the weight can increase significantly. Be sure to weigh your ingredients accurately to maintain the cake’s structure and flavor.

Conclusion

Baking the perfect 8 inch round cake is all about combining the right tools, ingredients, and techniques. From preparing your batter to decorating and avoiding common mistakes, this guide has covered everything you need to create a delicious, beautiful cake. Now it’s your turn to put these tips into action and bake a cake that’s sure to impress. Whether it’s for a celebration or a cozy treat at home, your 8 inch round cake is bound to be a crowd-pleaser.

Print
clock clock iconcutlery cutlery iconflag flag iconfolder folder iconinstagram instagram iconpinterest pinterest iconfacebook facebook iconprint print iconsquares squares iconheart heart iconheart solid heart solid icon
Decorating an 8-inch round cake with buttercream rosettes using a piping bag.

The Ultimate 8 Inch Round Cake Recipe


  • Author: Emily
  • Total Time: 55 minutes
  • Yield: 1216 1x

Description

This 8 inch round cake is light, fluffy, and delicious perfect for any occasion! With simple ingredients and easy-to-follow instructions, you’ll bake a show-stopping cake that’s moist, tender, and irresistible.


Ingredients

Scale

For the Cake:

  • 2 ½ cups all-purpose flour (spooned and leveled)
  • 2 ½ teaspoons baking powder
  • ½ teaspoon salt
  • ¾ cup unsalted butter, softened
  • 1 ¾ cups granulated sugar
  • 4 large eggs, room temperature
  • 1 tablespoon vanilla extract
  • 1 cup whole milk, room temperature

For the Buttercream Frosting:

  • 1 cup unsalted butter, softened
  • 4 cups powdered sugar, sifted
  • 2 teaspoons vanilla extract
  • 3 tablespoons heavy cream or milk
  • Pinch of salt


Instructions

For the Cake:

  1. Preheat your oven to 350°F (175°C). Grease two 8-inch round cake pans, line the bottoms with parchment paper, and lightly dust with flour.
  2. In a medium bowl, whisk together the flour, baking powder, and salt. Set aside.
  3. In a large mixing bowl, beat the softened butter and sugar together with a hand or stand mixer until light and fluffy (about 3-4 minutes).
  4. Add the eggs one at a time, beating well after each addition. Mix in the vanilla extract.
  5. Gradually add the dry ingredients to the wet ingredients, alternating with the milk, starting and ending with the dry ingredients. Mix until just combined. Do not overmix.
  6. Divide the batter evenly between the prepared pans. Smooth the tops with a spatula.
  7. Bake on the center rack for 30-35 minutes, or until a toothpick inserted into the center comes out clean.
  8. Remove the cakes from the oven and let them cool in the pans for 10 minutes. Transfer to a wire rack to cool completely.

For the Buttercream Frosting:

  1. Beat the softened butter in a large bowl until creamy.
  2. Gradually add the powdered sugar, one cup at a time, mixing on low speed until incorporated.
  3. Mix in the vanilla extract and heavy cream. Beat on high speed for 2-3 minutes until light and fluffy. If needed, add more cream for a thinner consistency or powdered sugar for a thicker consistency.
  4. Add a pinch of salt to balance the sweetness.

Assembly:

  1. Level the cooled cakes by slicing off any domed tops with a serrated knife.
  2. Place one cake layer on a serving plate or cake board. Spread an even layer of frosting on top.
  3. Add the second cake layer and apply a crumb coat (a thin layer of frosting to seal in crumbs). Chill for 15 minutes.
  4. Apply the final layer of frosting, smoothing the sides and top. Decorate as desired with piped rosettes, sprinkles, or fresh fruit.

Notes

  • Ensure all ingredients are at room temperature for a smoother batter and better rise.
  • Do not overmix the batter to avoid a dense cake.
  • To make ahead, bake the cake layers and store them tightly wrapped in plastic wrap at room temperature for up to 24 hours, or freeze for up to 3 months.
  • Frost the cake just before serving for the best texture and flavor.

Bake the Perfect Cocoa Coffee Cake: 4 Expert Tips

What Makes Cocoa Coffee Cake So Irresistible?

The Magic of Cocoa and Coffee Together

There’s a reason cocoa coffee cake is such a standout dessert—it brings together the best of two beloved flavors. Cocoa adds a rich, chocolatey depth, while coffee enhances the natural bitterness of the cocoa, making every bite more balanced and flavorful. For example, adding a touch of brewed coffee or espresso powder doesn’t overpower but instead intensifies the chocolatey notes. It’s a combination that transforms a simple cake into something truly indulgent.

But what sets this cake apart? It’s the way the coffee subtly lingers, balancing the sweetness and leaving you craving another slice. If you’re a coffee lover or a chocolate enthusiast, this is your match made in dessert heaven!

Key Ingredients for Success

Creating the perfect cocoa coffee cake starts with the right ingredients. Each one plays a critical role in building flavor and texture:

  • Cocoa Powder: For the deepest flavor, opt for Dutch-processed cocoa. Its alkalized nature gives a smoother, less acidic taste than natural cocoa powder.
  • Coffee: Whether you use brewed coffee, espresso powder, or instant coffee granules, the coffee should be strong enough to stand out without overwhelming.
  • Fats: Butter adds richness, while oil contributes to a moist crumb. For the best results, try a combination of both.
  • Dairy: Ingredients like sour cream or buttermilk are excellent for adding moisture and a subtle tang.

Pro tip: Using room-temperature ingredients ensures everything blends smoothly, giving your cake a consistent texture. For more insights into ingredient selection, check out this detailed guide to cocoa powders.

Perfect for Any Occasion

One of the best things about a cocoa coffee cake is its versatility. Whether it’s a casual breakfast, an elegant dessert, or a quick snack with coffee, this cake shines in any setting.

For example, you can serve it warm for brunch alongside a cappuccino, or dress it up with a drizzle of chocolate glaze for a more formal gathering. It’s even perfect for gifting during the holidays who wouldn’t love a homemade treat that combines two irresistible flavors? The ease of preparation and universal appeal make it a recipe you’ll return to time and time again.

The Role of Aroma and Texture

When you bake a cocoa coffee cake, the first thing that hits you is the aroma—a heavenly blend of chocolate and coffee wafting through your kitchen. It’s one of those smells that makes everyone pause and take a deep breath, anticipating what’s to come.

The texture is equally important. A good cocoa coffee cake should be moist and tender, with a soft crumb that practically melts in your mouth. Achieving this involves the right balance of wet and dry ingredients, along with proper mixing techniques to avoid overworking the batter. The end result? A cake that feels indulgent but not heavy, with every bite bursting with flavor and aroma.

How to Bake the Perfect Cocoa Coffee Cake

Ingredients for cocoa coffee cake neatly arranged on a countertop.
Essential ingredients for baking a cocoa coffee cake, including cocoa powder, eggs, sugar, and coffee.

Step 1: Gather Your Ingredients

The first step in baking a mouthwatering cocoa coffee cake is gathering the right ingredients. Having everything measured and prepped ahead of time saves you stress later on. You’ll need staples like all-purpose flour, baking powder, and sugar, along with Dutch-processed cocoa powder for rich chocolate flavor and espresso powder to enhance it.

If you’re missing any essentials, don’t worry—there are easy substitutions! For instance, you can use Greek yogurt instead of sour cream or coconut sugar as a natural sweetener. Preparation is key, so double-check your list before you begin.

Step 2: Prepare Your Equipment

Before you dive into mixing, it’s important to prepare your tools and baking space. A 9-inch round or square pan works best for a classic cocoa coffee cake. Grease it well with butter or line it with parchment paper to ensure a smooth release.

Additionally, have a whisk, mixing bowls, measuring cups, and a spatula handy. Using a hand or stand mixer for this recipe ensures your batter will be lump-free. A well-organized kitchen makes baking much more enjoyable!

Step 3: Master the Mixing Process

Mixing cocoa coffee cake batter in a glass bowl with a wooden spoon.
Hands mixing the rich chocolate batter for cocoa coffee cake with a wooden spoon.

Mixing the batter properly is where the magic happens. Start by whisking together your dry ingredients: flour, cocoa powder, baking powder, and salt. In a separate bowl, beat the butter and sugar until it’s light and fluffy this step adds air to the batter, making your cake tender.

Next, alternate adding the dry ingredients and the wet ingredients (such as eggs, coffee, and sour cream) to the butter mixture. This gradual process ensures a smooth batter that won’t deflate. Be careful not to overmix; otherwise, your cake might turn dense instead of soft and airy.

Step 4: Bake It to Perfection

Now it’s time to bake your cocoa coffee cake! Preheat your oven to 350°F (175°C) and pour the batter into your prepared pan. Smooth the top with a spatula for an even bake. Place it on the center rack for 30–35 minutes, or until a toothpick inserted into the middle comes out clean.

For a little flair, you can add a handful of chocolate chips or a cinnamon streusel on top before baking. Let the cake cool for 10–15 minutes in the pan, then transfer it to a wire rack. This ensures it stays moist and doesn’t crumble when sliced.

4 Expert Tips for a Rich, Moist Cocoa Coffee Cake

Tip 1: Use Fresh Ingredients

The key to a perfect cocoa coffee cake starts with fresh, high-quality ingredients. For instance, using fresh Dutch-processed cocoa powder ensures a richer chocolate flavor, while fresh baking powder guarantees the right rise. Old or expired ingredients can lead to dull flavors and poor texture.

It’s also essential to use freshly brewed coffee or a high-quality espresso powder for maximum flavor. When these ingredients are fresh, they work together to create a cake that’s truly irresistible.

Tip 2: Don’t Skimp on Coffee

Coffee is the secret weapon in any cocoa coffee cake recipe. Its bold, bitter notes enhance the chocolatey goodness of the cocoa powder, creating a perfectly balanced flavor. To achieve this, use strong brewed coffee, espresso powder, or instant coffee granules.

For those who want an even richer taste, consider mixing coffee into both the batter and the glaze. The added layer of flavor takes your cake to the next level.

Tip 3: Add a Moisture Boost

No one likes a dry cake, and with cocoa coffee cake, keeping it moist is crucial. Incorporate ingredients like sour cream, yogurt, or buttermilk to achieve a tender, melt-in-your-mouth crumb. These dairy options not only add moisture but also bring a subtle tanginess that balances the sweetness.

If you prefer a dairy-free option, try applesauce or coconut cream. Both alternatives work wonders without compromising the cake’s texture or flavor.

Tip 4: Let It Rest Before Slicing

Patience is a virtue, especially when it comes to baking. After removing your cocoa coffee cake from the oven, allow it to cool for at least 10–15 minutes before slicing. This resting period ensures the cake sets properly and retains its moisture.

Cutting into the cake too soon can result in crumbly slices and uneven texture. For the best presentation, use a sharp knife and wipe it clean between cuts to create neat, bakery-style slices.

For more baking tips and inspiration, check out our Braided Chocolate Chip Brioche Recipe, perfect for your next baking adventure!

Creative Variations to Try

Decadent Cocoa Coffee Cake with Streusel

 A slice of cocoa coffee cake with chocolate glaze and coffee beans.
A perfectly sliced cocoa coffee cake topped with chocolate glaze, served with coffee beans.

Elevate your classic cocoa coffee cake by adding a crumbly streusel topping. This blend of brown sugar, cinnamon, and butter creates a crunchy contrast to the moist cake beneath. Sprinkle the streusel generously over the batter before baking for a deliciously sweet and textured topping.

To take it up a notch, toss in some chopped nuts like pecans or walnuts for added crunch. This variation pairs perfectly with a hot cup of coffee on chilly mornings.

Vegan Cocoa Coffee Cake

Who says a cocoa coffee cake can’t be vegan? With a few simple swaps, you can enjoy this indulgent treat without using any animal products. Replace dairy with almond milk or oat milk, and use applesauce or flaxseed meal as an egg substitute.

To keep the texture moist and fluffy, incorporate coconut oil instead of butter. The result? A rich and flavorful cake that’s perfect for plant-based diets and anyone looking for a healthier option.

Gluten-Free Cocoa Coffee Cake

For those avoiding gluten, a gluten-free cocoa coffee cake is a must-try! Substitute all-purpose flour with a gluten-free baking blend or almond flour for a nutty twist. Be sure to check that all your ingredients, including baking powder and cocoa powder, are certified gluten-free.

Adding xanthan gum can improve the cake’s structure, ensuring it doesn’t crumble when sliced. This variation is so good, no one will guess it’s gluten-free!

Spiked Cocoa Coffee Cake

Want to give your cocoa coffee cake a fun, adult twist? Add a splash of coffee liqueur or rum to the batter for an extra depth of flavor. Just a tablespoon or two is enough to transform the cake into a sophisticated dessert that’s perfect for dinner parties or celebrations.

You can also drizzle the finished cake with a coffee liqueur glaze or a boozy chocolate ganache for a finishing touch. This variation pairs wonderfully with a creamy espresso martini.

For more fun and flavorful dessert ideas, check out our Strawberry Shortcake Parfait Recipe for another crowd-pleasing treat!

FAQs

Can I Use Coffee Instead of Cocoa Powder in Cake?

No, coffee cannot replace cocoa powder in a cake recipe. While coffee enhances the flavor of cocoa in a cocoa coffee cake, it doesn’t have the structure, color, or flavor profile needed to act as a substitute. Cocoa powder provides the rich chocolatey base, whereas coffee adds depth and balance. Instead, you can incorporate coffee alongside cocoa to elevate the overall taste.

How to Store Chocolate Coffee Cake?

To keep your chocolate coffee cake fresh and moist, store it in an airtight container at room temperature for up to three days. If you live in a warmer climate or want to extend its shelf life, refrigerate the cake. Wrap it tightly with plastic wrap to prevent it from drying out, and it will stay delicious for up to a week. For long-term storage, freeze individual slices in freezer-safe bags and thaw them overnight in the fridge before serving.

Can You Decorate a Coffee Cake?

Absolutely! Decorating a cocoa coffee cake is a great way to make it extra special. You can keep it simple by dusting powdered sugar or cocoa powder on top for a rustic look. If you want something more elaborate, drizzle chocolate ganache or coffee glaze over the cake. Adding chocolate shavings, nuts, or fresh berries can also enhance both the flavor and presentation.

How Long Does Chocolate Coffee Cake Last?

When stored properly, a chocolate coffee cake can last up to three days at room temperature and about a week in the refrigerator. If you need to store it longer, freezing is your best option. Frozen cake can retain its quality for up to three months—just make sure it’s wrapped tightly to prevent freezer burn. Always thaw it thoroughly before enjoying.

Conclusion

You now have everything you need to bake the perfect cocoa coffee cake—from understanding its irresistible flavor combination to mastering expert baking tips and trying out creative variations. Whether you’re making it for a cozy morning treat or an elegant dessert, this cake is sure to impress.

Give it a try, experiment with toppings or mix-ins, and make it your own! Don’t forget to explore our other delicious recipes, like the Braided Chocolate Chip Brioche, for even more baking inspiration.

Print
clock clock iconcutlery cutlery iconflag flag iconfolder folder iconinstagram instagram iconpinterest pinterest iconfacebook facebook iconprint print iconsquares squares iconheart heart iconheart solid heart solid icon
A slice of cocoa coffee cake with chocolate glaze and coffee beans.

Perfect Cocoa Coffee Cake


  • Author: Emily
  • Total Time: 50 minutes
  • Yield: 8 servings 1x

Description

A moist and flavorful cocoa coffee cake with the perfect balance of rich chocolate and aromatic coffee, ideal for breakfast, brunch, or dessert. This easy recipe is packed with expert tips to ensure a tender, delicious treat every time.


Ingredients

Scale
  • 1 ½ cups all-purpose flour
  • ½ cup Dutch-processed cocoa powder
  • 1 tsp baking powder
  • ½ tsp baking soda
  • ¼ tsp salt
  • 1 cup granulated sugar
  • ½ cup unsalted butter, softened
  • 2 large eggs, at room temperature
  • ½ cup strong brewed coffee, cooled
  • ½ cup sour cream or Greek yogurt
  • 1 tsp pure vanilla extract
  • Optional: ½ cup chocolate chips


Instructions

  1. Preheat your oven to 350°F (175°C) and grease a 9-inch round or square cake pan. Line the bottom with parchment paper for easy removal.
  2. In a medium bowl, whisk together the flour, cocoa powder, baking powder, baking soda, and salt. Set aside.
  3. In a large bowl, cream the butter and sugar together using a hand or stand mixer until light and fluffy, about 2–3 minutes.
  4. Add the eggs one at a time, beating well after each addition. Mix in the vanilla extract.
  5. Alternate adding the dry ingredients and the wet ingredients (coffee and sour cream) to the butter mixture, beginning and ending with the dry ingredients. Mix until just combined.
  6. Fold in the chocolate chips, if using, for an extra touch of richness.
  7. Pour the batter into the prepared pan and smooth the top with a spatula.
  8. Bake for 30–35 minutes, or until a toothpick inserted into the center comes out clean.
  9. Allow the cake to cool in the pan for 10–15 minutes, then transfer it to a wire rack to cool completely.
  10. Dust with powdered sugar or drizzle with chocolate glaze before serving, if desired.

Notes

  • For extra moisture, you can substitute buttermilk for the sour cream.
  • If you don’t have brewed coffee, mix 1 tsp instant coffee granules with ½ cup hot water as a substitute.
  • This cake pairs wonderfully with a dollop of whipped cream or a scoop of vanilla ice cream.

Secrets to the Best Braided Chocolate Chip Brioche Recipe

Looking for the perfect braided chocolate chip brioche recipe? You’ve come to the right place! This rich, buttery bread is swirled with gooey chocolate chips and braided for an elegant touch. Whether it’s for breakfast, dessert, or a special occasion, this recipe guarantees bakery-quality results right in your own kitchen.

Why You’ll Love This Braided Chocolate Chip Brioche Recipe

A Perfectly Fluffy Texture

The hallmark of a good braided chocolate chip brioche recipe is its soft, pillowy texture. Brioche dough is enriched with butter, eggs, and milk, giving it a rich, airy crumb that practically melts in your mouth. Unlike traditional bread, brioche feels almost like a cross between bread and cake, making it indulgent but not overly sweet.

The braiding technique also ensures that the bread bakes evenly, creating light and fluffy layers that pull apart beautifully. Whether you’re serving it as a breakfast treat or an afternoon snack, the texture alone will win you over.

Sweet Chocolate Chip Surprises in Every Bite

There’s nothing like biting into a warm slice of braided chocolate chip brioche and discovering sweet, melted chocolate chips scattered throughout. The recipe uses semi-sweet or dark chocolate chips to balance the richness of the bread, creating a flavor profile that’s both indulgent and satisfying.

For a unique twist, consider using mini chocolate chips for a more even distribution or white chocolate chips for a sweeter option.

Versatility for Any Occasion

This braided chocolate chip brioche recipe is as versatile as it is delicious. Serve it plain, toasted with a pat of butter, or even turned into French toast for a luxurious breakfast. It’s also perfect for special occasions like brunches, holiday gatherings, or even as a thoughtful homemade gift.

Want to take it up a notch? Pair it with coffee, tea, or a dollop of whipped cream for a dessert-like experience. No matter how you serve it, this brioche is sure to impress!

Beginner-Friendly Yet Impressive

While the intricate braiding might look intimidating, this braided chocolate chip brioche recipe is actually beginner-friendly. The step-by-step instructions break down the process, making it easy to follow even if you’ve never baked brioche before.

The dough is forgiving and easy to handle, and the braiding process is surprisingly straightforward. Plus, the finished loaf looks so stunning that no one will guess how simple it was to make. It’s the kind of recipe that boosts your confidence in the kitchen!

Ingredients for Braided Chocolate Chip Brioche

Essential Ingredients for the Perfect Brioche

The success of a braided chocolate chip brioche recipe lies in its high-quality, rich ingredients. Here’s what you’ll need:

Ingredients for braided chocolate chip brioche recipe including flour, eggs, chocolate chips, and yeast.
All the essential ingredients for making braided chocolate chip brioche, neatly arranged for preparation.
  • All-purpose flour or bread flour: Provides structure and elasticity to the dough.
  • Active dry yeast or instant yeast: Ensures the dough rises properly.
  • Sugar and salt: Balances sweetness and enhances the flavor.
  • Butter and eggs: Create the signature richness of brioche.
  • Chocolate chips: Add bursts of sweetness to every bite.

Opt for fresh, high-quality ingredients for the best results. Fresh yeast and premium chocolate chips make a noticeable difference!

Choosing the Right Chocolate Chips

For this braided chocolate chip brioche recipe, semi-sweet chocolate chips are ideal as they balance the bread’s richness. Dark chocolate chips work well for a more intense flavor, while milk chocolate adds extra sweetness.

Avoid overly large chunks of chocolate to prevent them from sinking to the bottom of the loaf.

Substitutions for Dietary Preferences

This recipe can be easily adapted for dietary needs:

  • Dairy-free: Replace butter with plant-based butter and use almond or oat milk instead of regular milk.
  • Gluten-free: Swap all-purpose flour with a gluten-free flour blend, ensuring it contains xanthan gum for elasticity.
  • Low sugar: Reduce the sugar content or substitute with a sugar alternative like erythritol.

Experiment with substitutions to make this brioche fit your lifestyle without compromising flavor!

The Role of Vanilla and Citrus Zest

Vanilla extract and citrus zest, such as orange or lemon, are optional but highly recommended for elevating the flavor. While not part of the traditional braided chocolate chip brioche recipe, they add a refreshing twist that complements the sweetness of the chocolate chips.

Simply mix a teaspoon of vanilla or a pinch of zest into the dough during the wet ingredient stage. These small additions make your brioche unforgettable!

Step-by-Step Guide to Prepare the Brioche Dough

Hands braiding three strands of brioche dough with chocolate chips.
Step-by-step braiding of chocolate chip brioche dough on a floured surface.

Mixing the Dough for Braided Chocolate Chip Brioche

The foundation of a perfect braided chocolate chip brioche recipe lies in mixing the dough just right. Start by combining the dry ingredients, including flour, sugar, salt, and yeast, in a large mixing bowl. Gradually add the wet ingredients—warm milk, eggs, and softened butter—while mixing continuously.

It’s essential to ensure the liquid ingredients are warm, not hot, to properly activate the yeast without killing it. Knead the dough for about 10 minutes until it’s smooth and slightly sticky. If you’re using a stand mixer, set it to medium speed with a dough hook attachment for the best results.

Proofing the Dough to Perfection

Proofing is a crucial step in any braided chocolate chip brioche recipe. After kneading, place the dough in a lightly oiled bowl and cover it with plastic wrap or a damp kitchen towel. Let it rest in a warm, draft-free spot for about 1 to 2 hours, or until it doubles in size.

To create a warm environment, you can place the bowl in a slightly preheated oven (turned off) or near a sunny window. If your kitchen is cold, consider proofing the dough in an oven with just the oven light turned on.

Incorporating Chocolate Chips into the Dough

Once the dough has risen, it’s time to add the chocolate chips. Gently punch down the dough to release excess air, then knead the chocolate chips into it. Be careful not to overwork the dough, as this can cause the chocolate chips to melt prematurely.

For even distribution, sprinkle the chocolate chips across the dough as you fold and knead. If you’re feeling adventurous, you can also add a handful of chopped nuts or dried fruits for a unique twist to your braided chocolate chip brioche recipe.

How to Shape and Braid the Brioche

Sliced braided chocolate chip brioche recipe on a serving tray with coffee and butter.
A plated braided chocolate chip brioche loaf, sliced to reveal its fluffy interior with melted chocolate chips.

Dividing and braiding the dough is where the magic happens. Divide the dough into three equal portions, rolling each into a long strand, about 12–14 inches in length. Place the strands side by side on a baking sheet lined with parchment paper.

Begin braiding by crossing the right strand over the center, followed by the left strand over the new center. Repeat this pattern until the braid is complete, tucking the ends underneath for a neat finish. Brush the braid with an egg wash for a glossy, golden crust.

For more bread-shaping tips, check out our garlic bread rolls recipe for additional inspiration.

Troubleshooting and Tips for Braided Chocolate Chip Brioche Recipe

Common Mistakes and How to Avoid Them

Even with the best intentions, mistakes can happen when making a braided chocolate chip brioche recipe. One common issue is the dough not rising properly during proofing. This is often due to inactive yeast or a cold environment. To fix this, ensure your yeast is fresh and your proofing area is warm but not too hot.

Another challenge is uneven braiding, which can result in parts of the bread being underbaked. To avoid this, roll each strand of dough evenly and braid them with gentle tension. If the dough tears, patch it lightly and avoid overworking it.

Tips for Keeping Brioche Moist and Fresh

Brioche is best enjoyed fresh, but keeping it moist can be tricky. Store your braided chocolate chip brioche in an airtight container at room temperature for up to three days. To prevent dryness, wrap it tightly in plastic wrap before placing it in a container.

If you plan to keep it longer, freezing is the best option. Slice the brioche first and wrap each piece individually before placing them in a freezer-safe bag. To reheat, warm slices in the oven or toaster at 325°F for a few minutes to restore their soft, fluffy texture.

Make-Ahead and Freezing Tips

This braided chocolate chip brioche recipe is perfect for busy schedules because the dough can be prepared ahead of time. After the first rise, place the dough in an airtight container and refrigerate it overnight. Chilled dough is easier to handle and braid, and it develops a deeper flavor during the extended resting period.

You can also freeze the fully braided and unbaked brioche. Simply wrap the braided loaf in plastic wrap and freeze it for up to two weeks. When ready to bake, thaw the brioche in the refrigerator overnight, let it come to room temperature, and then bake as directed.

Creative Ways to Serve Braided Chocolate Chip Brioche

While this braided chocolate chip brioche recipe is delicious on its own, there are many creative ways to enjoy it:

  1. French Toast: Slice the brioche into thick pieces and turn it into decadent French toast.
  2. Bread Pudding: Use day-old brioche to make a rich and custardy bread pudding.
  3. Ice Cream Sandwiches: Slice the brioche and sandwich your favorite ice cream between two slices for a fun dessert.
  4. Toast with Toppings: Toast slices lightly and top with Nutella, fresh fruit, or cream cheese for a quick snack.

FAQs About Braided Chocolate Chip Brioche Recipe

How do you keep brioche from drying out?

To keep your braided chocolate chip brioche moist, store it in an airtight container or wrap it tightly in plastic wrap. Avoid leaving it uncovered, as exposure to air causes the bread to dry out quickly. If you’re storing it for more than a couple of days, consider freezing the brioche to maintain its texture and flavor. Simply slice the loaf, wrap each piece individually, and place them in a freezer-safe bag. To reheat, warm it in the oven at 325°F for a few minutes or toast individual slices.

Does brioche burn easily?

Yes, brioche can burn easily because of its high sugar and butter content, which causes it to brown quickly. To avoid burning, bake your braided chocolate chip brioche at the recommended temperature, and check it frequently during the last few minutes of baking. If the top starts to brown too quickly, loosely cover it with aluminum foil. This simple step ensures an evenly baked loaf with a golden crust rather than a burnt one.

How long can brioche dough sit in the fridge?

Brioche dough can sit in the fridge for up to 24 hours. Chilling the dough not only slows down the yeast activity, allowing for a more developed flavor, but it also makes the dough easier to handle and braid. After refrigeration, let the dough come to room temperature for about 30 minutes before shaping or baking. This ensures an even rise and the best texture for your braided chocolate chip brioche recipe.

When to stop mixing brioche?

You should stop mixing brioche dough when it’s smooth, elastic, and slightly sticky. A great way to check if it’s ready is by performing the “windowpane test.” Take a small piece of dough and stretch it gently between your fingers. If it forms a thin, translucent sheet without tearing, the gluten is well-developed, and your dough is ready. Over-mixing can cause the dough to become too tough, so be sure to stop as soon as it reaches this stage.

Conclusion

Mastering the braided chocolate chip brioche recipe is a rewarding experience that brings bakery-quality bread right to your kitchen. From understanding the key ingredients and proofing the dough to troubleshooting common mistakes, you now have everything you need to create a perfectly fluffy, chocolate-filled loaf. Whether you’re serving it fresh or experimenting with creative ways to enjoy it, this recipe is sure to impress.

Print
clock clock iconcutlery cutlery iconflag flag iconfolder folder iconinstagram instagram iconpinterest pinterest iconfacebook facebook iconprint print iconsquares squares iconheart heart iconheart solid heart solid icon
Sliced braided chocolate chip brioche on a serving tray with coffee and butter.

Braided Chocolate Chip Brioche Recipe


  • Author: Emily
  • Total Time: 2 hours 50 minutes
  • Yield: 1 braided loaf (810 slices) 1x

Description

This rich and buttery braided chocolate chip brioche recipe is the perfect combination of soft, pillowy bread and bursts of melted chocolate chips. Whether for breakfast, brunch, or dessert, this braided loaf is as impressive as it is delicious.


Ingredients

Scale
  • 3 1/2 cups all-purpose flour
  • 1/4 cup granulated sugar
  • 2 1/4 teaspoons active dry yeast (1 packet)
  • 1 teaspoon salt
  • 1/2 cup warm milk (110°F)
  • 3 large eggs (2 for dough, 1 for egg wash)
  • 1/2 cup unsalted butter, softened
  • 1 cup semi-sweet chocolate chips
  • 1 teaspoon vanilla extract (optional)


Instructions

  1. In a large mixing bowl, combine flour, sugar, salt, and yeast.
  2. Gradually add warm milk, two eggs, and vanilla extract (if using) to the dry ingredients. Mix until a dough forms.
  3. Add softened butter, one tablespoon at a time, kneading until fully incorporated. Knead the dough for 8-10 minutes, until smooth and slightly sticky.
  4. Place the dough in a lightly greased bowl, cover it with plastic wrap, and let it rise in a warm spot for 1-2 hours or until it doubles in size.
  5. Once risen, punch down the dough and knead in the chocolate chips evenly.
  6. Divide the dough into three equal portions and roll each into a long strand, about 12-14 inches in length.
  7. Lay the strands side by side and braid them together, pinching the ends to seal.
  8. Place the braided loaf on a parchment-lined baking sheet, cover, and let it rise for another 30 minutes.
  9. Preheat the oven to 350°F (175°C). Brush the braided loaf with an egg wash made from 1 beaten egg and a tablespoon of water.
  10. Bake for 25-30 minutes, or until golden brown and the loaf sounds hollow when tapped.
  11. Let the brioche cool slightly before slicing and serving.

Notes

  • For a Dairy-Free Option: Substitute butter with plant-based butter and use almond or oat milk.
  • Storage Tip: Wrap the brioche tightly in plastic wrap and store at room temperature for up to 3 days. For longer storage, slice and freeze in individual portions.
  • Reheating: Warm slices in the oven at 325°F for 5-7 minutes to restore their softness and flavor.
  • Optional Add-Ins: Add orange zest or a pinch of cinnamon for an extra layer of flavor.

The Perfect Garlic Bread Rolls Recipe: 10 Easy Hacks

Who can resist the aroma of freshly baked bread wafting through the kitchen? These garlic bread rolls are the ultimate comfort food, blending the soft, fluffy texture of classic dinner rolls with the bold, buttery flavor of garlic. Whether you’re hosting a dinner party, craving a cozy snack, or looking to wow your family, this recipe has you covered.

What makes this garlic bread rolls recipe special? It’s not just easy to follow it’s packed with tips to make your rolls bakery-quality every time. From a perfectly golden crust to a melt-in-your-mouth center, these rolls promise to be the star of your table. So grab your apron, roll up your sleeves, and let’s dive into a recipe that’s as delightful to make as it is to eat.

Ingredients for Perfect garlic bread rolls recipe

Essential Ingredients

To achieve the best garlic bread rolls, you need a few essential ingredients that work together to create their soft, buttery texture and irresistible flavor. Here’s what you’ll need:

Ingredients for garlic bread rolls recipe neatly arranged on a marble countertop.
Essential ingredients for making soft and flavorful garlic bread rolls.
  • Flour: Use bread flour for a fluffier texture. It contains more protein than all-purpose flour, which helps create a chewy, light roll.
  • Yeast: Instant yeast is a time-saver, as it doesn’t require pre-activation. However, if you only have active dry yeast, simply dissolve it in warm water with a pinch of sugar before adding it to the dough.
  • Garlic Butter: A mixture of melted butter and fresh garlic is the key to these rolls’ bold, savory taste. For added depth, you can roast the garlic beforehand.
  • Milk and Eggs: These ingredients make the dough tender and soft, adding richness to each bite.

These ingredients are pantry staples, making this garlic bread rolls recipe both convenient and practical.

Ingredient Substitutions and Variations

One of the best things about this garlic bread rolls recipe is its adaptability. Whether you’re dealing with dietary restrictions or just want to experiment, here are some easy substitutions:

  • Flour Alternatives: For a gluten-free option, use a high-quality gluten-free baking flour blend. Just ensure it’s one that includes xanthan gum for structure.
  • Vegan Option: Replace milk with almond or oat milk and use vegan butter to make these rolls dairy-free.
  • Cheesy Twist: Mix shredded mozzarella or Parmesan cheese into the dough for a cheesy garlic roll variation.

These substitutions won’t compromise the flavor, so feel free to customize your rolls to suit your needs.

Pro Tips for Ingredient Selection

The quality of your ingredients can make or break your garlic bread rolls recipe. Here are some tips to help you pick the best ones:

  • Choose Fresh Garlic: Fresh garlic cloves provide a bolder, more vibrant flavor compared to pre-minced options. Look for firm, unblemished bulbs.
  • High-Quality Butter: Opt for unsalted butter to control the saltiness of the rolls, and make sure it’s rich and creamy. European-style butter is an excellent choice for its higher fat content.
  • Check Your Yeast: Before using, confirm your yeast is still active by testing it in warm water with a bit of sugar. If it doesn’t foam after 5 minutes, it’s time to replace it.

For more tips on selecting the best ingredients, check out this helpful guide on baking essentials.

Tips for Preparing Garlic Butter

The garlic butter is the star of this garlic bread rolls recipe, so preparing it correctly is crucial. Here’s how to get it right every time:

  1. Melt Butter Slowly: Use low heat to melt your butter, as overheating can separate the fat and water.
  2. Infuse with Garlic: Add finely minced or grated garlic to the melted butter and let it simmer for 2–3 minutes. This step ensures the garlic’s aroma and flavor infuse deeply.
  3. Optional Add-Ins: For an elevated twist, mix in chopped fresh parsley, a pinch of paprika, or a sprinkle of Parmesan cheese.

Step-by-Step Instructions for Garlic Bread Rolls

kneading dough for garlic bread rolls on a floured surface.
the dough is a crucial step for making soft, fluffy garlic bread rolls.

Preparing the Dough

Creating the dough is the foundation of any great garlic bread rolls recipe. Start by gathering your ingredients and following these steps:

  1. Activate the Yeast: In a large bowl, mix warm milk, sugar, and yeast. Allow it to rest for about 5 minutes until it becomes frothy. This ensures the yeast is active and ready to help your dough rise.
  2. Combine Ingredients: Add eggs, melted butter, and a pinch of salt to the yeast mixture. Gradually incorporate bread flour, stirring as you go, until the dough starts to form.
  3. Knead the Dough: Use your hands or a stand mixer to knead the dough for 8–10 minutes until it’s smooth and elastic. If the dough feels too sticky, add a bit more flour, but avoid overloading it.

This careful preparation sets the stage for soft, fluffy rolls bursting with garlicky goodness.

First Rise: Let the Dough Rest

After kneading, it’s time to let the dough rise. Place it in a lightly oiled bowl and cover with a damp kitchen towel. Let it sit in a warm spot for 1–2 hours or until it doubles in size.

Pro Tip: If your kitchen is cold, preheat your oven to 200°F (93°C) for a few minutes, turn it off, and place the bowl inside. The gentle warmth helps the dough rise faster.

Allowing the dough to rest properly ensures your garlic bread rolls recipe will have that soft, airy texture everyone loves.

Shaping and Adding Garlic Butter

Once the dough has risen, it’s time to shape it into rolls and infuse them with garlic butter magic:

  1. Divide the Dough: Punch down the dough to release air bubbles and divide it into 12–16 equal pieces. Roll each piece into a ball.
  2. Prepare Garlic Butter: Melt butter and mix in finely minced garlic, parsley, and a pinch of salt. Brush this mixture generously over each dough ball.
  3. Arrange in a Baking Dish: Place the rolls in a greased baking pan, leaving a bit of space between each one to allow room for expansion.

Adding the garlic butter before baking infuses every layer with rich, garlicky flavor that enhances the final result.

Baking the Rolls to Perfection

  1. Second Rise: Cover the rolls with a kitchen towel and let them rise again for 30–40 minutes until puffy.
  2. Preheat the Oven: While the rolls are rising, preheat your oven to 375°F (190°C).
  3. Bake Until Golden: Bake the rolls for 20–25 minutes or until they’re golden brown and your kitchen smells heavenly.

For an extra touch of indulgence, brush the hot rolls with another layer of garlic butter straight out of the oven. Serve warm and enjoy their soft, buttery perfection.

Pair these rolls with a hearty dish like this Garlic Parmesan Chicken and Potatoes for a comforting and complete meal.

4 Easy Hacks for Perfect garlic bread rolls recipe

Comparison of perfectly risen dough and overproofed dough for garlic bread rolls.
Understanding the difference between properly risen dough and overproofed dough helps avoid common bread-making mistakes.

Hack 1: Use a Stand Mixer for Effortless Kneading

Kneading dough can be a tiring process, especially if you’re making multiple batches. To simplify your garlic bread rolls recipe, use a stand mixer with a dough hook attachment. Not only does it save time, but it also ensures consistent mixing and kneading, which is crucial for creating soft, fluffy rolls.

Pro Tip: Mix on medium speed for 8–10 minutes. The dough should pull away from the sides of the bowl but remain slightly sticky.

Hack 2: Always Proof Your Yeast

One common mistake when making bread is using yeast that’s no longer active. To avoid this, always proof your yeast, even if you’re using instant yeast. Proofing involves dissolving the yeast in warm water with a pinch of sugar and waiting for it to foam.

Why It Matters: If your yeast doesn’t foam, it’s likely inactive and won’t allow your dough to rise properly. Skipping this step can result in dense rolls, which is the last thing you want for your garlic bread rolls recipe.

Hack 3: Garlic Butter Infusion

The secret to irresistibly flavorful rolls lies in the garlic butter. Instead of simply brushing melted butter on top, try warming the butter with crushed garlic cloves for 2–3 minutes. This infusion process extracts every bit of garlicky goodness, which enhances the overall taste.

Bonus Tip: Add a sprinkle of fresh parsley or rosemary to the butter for a hint of herbal freshness.

Hack 4: Use a Pizza Stone for Even Baking

Ever wondered how bakeries achieve perfectly golden rolls with a crisp base? A pizza stone could be the answer! Placing your baking tray on a preheated pizza stone ensures even heat distribution, which helps the rolls bake uniformly.

Pro Tip: Preheat the pizza stone along with your oven to 375°F (190°C). Place the rolls directly on the baking tray over the stone for the best results.

Looking for more garlic-flavored dishes? Check out our recipe for Chicken Scampi with Garlic Parmesan Rice. Pair it with these rolls for a meal bursting with garlic goodness!

Common Mistakes to Avoid When Making Garlic Bread Rolls

flavorful garlic bread rolls.
Soft, buttery garlic bread rolls ready to impress at any meal.

Overproofing the Dough

Proofing is essential for light, fluffy rolls, but overproofing can ruin even the best garlic bread rolls recipe. When dough is left to rise too long, it can collapse and lose its structure. This leads to dense, unevenly baked rolls.

How to Avoid It: Keep an eye on your dough during the proofing stages. Typically, the dough should double in size but not triple. If it’s ready, pressing a finger gently into the dough will leave a slight indentation that springs back slowly.

Using Too Much Flour

Adding too much flour is a common mistake that results in dry, heavy rolls. It’s tempting to add extra flour when the dough feels sticky, but this can compromise the soft texture we all love in a great garlic bread rolls recipe.

Pro Tip: Instead of adding more flour, lightly flour your hands or work surface when shaping the dough. The dough should feel tacky but not stick excessively.

Skipping Garlic Butter Layers

A proper garlic bread rolls recipe relies on the rich flavor of garlic butter. Skipping layers of butter can result in bland rolls that don’t live up to their potential. Brushing the rolls with butter before and after baking not only enhances flavor but also gives them a golden, glossy finish.

Bonus Tip: For an extra burst of flavor, sprinkle Parmesan cheese or crushed garlic on top before baking.

Baking at the Wrong Temperature

Baking rolls at an incorrect temperature can cause undercooked centers or burnt tops. Following the recommended oven settings ensures even baking and the perfect balance of soft insides and golden crusts.

Solution: Preheat your oven to 375°F (190°C) and bake for 20–25 minutes. To prevent over-browning, you can loosely cover the rolls with foil during the last few minutes of baking.

Serving Suggestions for garlic bread rolls recipe

garlic bread rolls glistening with melted butter
Perfect Garlic Bread Rolls – Golden and Buttery

Pairing Ideas

These warm, buttery rolls are a versatile addition to any meal. Whether you’re hosting a dinner party or preparing a casual family dinner, this garlic bread rolls recipe shines as the perfect side dish.

  • Soups and Stews: Pair the rolls with hearty options like creamy tomato soup, chicken noodle soup, or beef stew. The soft texture of the rolls is ideal for soaking up rich broths.
  • Italian Dishes: Serve them alongside classics such as spaghetti Bolognese, lasagna, or chicken Alfredo. Their garlicky flavor complements the bold sauces beautifully.
  • Appetizer Platters: Slice the rolls and serve them with dips like spinach artichoke dip or marinara sauce for a crowd-pleasing snack.

By pairing thoughtfully, you’ll enhance the flavors of both the rolls and the main dishes.

Storage and Reheating Tips

Proper storage is key to maintaining the soft, fluffy texture of your rolls. Follow these simple tips to keep them fresh:

  • Short-Term Storage: Store leftover rolls in an airtight container at room temperature for up to 2 days.
  • Freezing: Wrap the rolls individually in plastic wrap and place them in a freezer-safe bag. They can be frozen for up to 2 months.

When reheating, avoid microwaving, as it can make the rolls rubbery. Instead:

  • Warm them in an oven preheated to 350°F (175°C) for 5–10 minutes.
  • Brush with a little extra garlic butter to restore their freshly baked flavor.

Variations to Try

If you’re feeling adventurous, this garlic bread rolls recipe can be adapted in numerous ways to suit your taste preferences:

  • Cheesy Garlic Rolls: Add shredded mozzarella or Parmesan cheese on top before baking.
  • Herbed Rolls: Mix dried herbs like rosemary, thyme, or oregano into the dough for added flavor.
  • Spicy Rolls: Sprinkle red chili flakes on the rolls for a hint of heat.

Experimenting with these variations keeps the recipe fresh and exciting every time you make it.

Hosting Tips for garlic bread rolls recipe

If you’re serving these rolls for a special gathering, a few small touches can elevate the presentation:

  • Serve Warm: Keep the rolls in a bread basket lined with a clean towel to retain their warmth.
  • Add a Side of Butter: Offer a ramekin of garlic butter or herbed butter for guests to spread on their rolls.
  • Create a Themed Table: Pair the rolls with matching dishes and table settings for a cohesive dining experience.

These hosting tips ensure your garlic bread rolls recipe is not only delicious but also memorable for your guests.

Looking to complement your rolls with more flavorful dishes? Try our Buffalo Chicken Sliders with Cream Cheese for an irresistible pairing that’s sure to impress.

FAQs about Garlic Bread Rolls recipe

Is garlic salt or garlic powder better for garlic bread?

Garlic powder is generally better for making garlic bread because it blends more smoothly into butter and spreads evenly across the rolls. Garlic salt, while flavorful, can make the bread overly salty if not carefully measured. If you’re following this garlic bread rolls recipe, opt for garlic powder to ensure a balanced and consistent flavor.

How do you make Bobby Flay garlic bread?

Bobby Flay’s garlic bread is famous for its rich flavor and crispy texture. His version involves combining roasted garlic, unsalted butter, parsley, Parmesan cheese, and olive oil. He spreads this mixture onto slices of crusty bread and broils them until golden. You can adapt his approach to your garlic bread rolls recipe by using the same mixture and brushing it generously over the rolls before and after baking.

Why are my homemade dinner rolls hard?

Hard dinner rolls can result from using too much flour, over-kneading, or under-proofing the dough. For this garlic bread rolls recipe, ensure the dough remains slightly sticky during preparation, and knead it just until smooth and elastic. Allowing the dough to rise adequately—without overproofing—helps create soft, fluffy rolls. Additionally, bake at the correct temperature to avoid drying them out.

What is the best combination for garlic bread?

The best pairing for garlic bread is a hearty main course or a complementary dip. For example, serve these garlic bread rolls alongside creamy tomato soup, spaghetti Bolognese, or roasted chicken. You can also pair them with marinara sauce or garlic aioli as a dipping option. This versatility makes garlic bread a hit for nearly any occasion.

Conclusion

Congratulations you’re now equipped with everything you need to master the perfect garlic bread rolls recipe! From selecting high-quality ingredients and preparing a flawless dough to infusing your rolls with garlicky butter and baking them to golden perfection, this recipe covers all the essentials.

Now it’s time to put your new skills to the test. Grab your apron, roll up your sleeves, and create a batch of garlic bread rolls that will leave everyone asking for seconds. Don’t forget to explore more delicious recipes on the blog for even more mealtime inspiration!

The Ultimate Pickle Pie Pizza: A Sweet, Spicy, and Tart Delight

Are you looking for an exciting dish that blends tangy, creamy, and savory flavors all in one bite? If so, you have come to the right place. This in-depth guide reveals how to create a unique Pickle Pie Pizza that replaces traditional tomato sauce with a smooth garlic-dill mixture and sprinkles on crunchy pickles for a bright kick. Indeed, this briny twist has gone from a novelty item at gourmet pizzerias to an at-home phenomenon. Therefore, get ready to learn every detail you need to craft this bold pizza variant in your own kitchen. By the time you finish reading, you will be ready to gather your ingredients and enjoy a memorable meal that appeals to both pickle lovers and those seeking a daring culinary adventure.

Why You Should Try This pickle pie pizza

Pickle Pie Pizza may sound unconventional. However, it has continued to gain a devoted following thanks to popular spots like QC Pizza, which introduced the “Kinda Big Dill,” and chef Ann Kim’s inventive pie. Thus, social media enthusiasts and food bloggers alike began raving about this tangy delight. On the other hand, some pizza purists expressed uncertainty at first. Eventually, many discovered that pairing the crunch of dill chips with gooey cheese and creamy sauce results in a harmonious balance of flavors.

In addition, the tanginess can cut through the richness of cheese, making each slice feel surprisingly light on the palate. Beyond the novelty factor, this Pickle Pie Pizza has practical advantages. For instance, you do not need to cook a separate tomato sauce, saving both time and effort. Moreover, the recipe can be customized to accommodate a broad range of dietary preferences. Therefore, if you are ready to depart from the norm and embark on a flavor-filled journey, keep reading for a comprehensive walkthrough.

The Inspiration and Evolution of pickle pie pizza

Where the Idea Originated

You might think that placing pickles on a pizza was a random invention, but it actually emerged from creative chefs who sought ways to stand out in a crowded dining scene. Because the pizza market is highly competitive, adding tangy dill slices offered a fresh point of differentiation. Viral social media posts showcased these pies, helping them gain traction among open-minded foodies. Therefore, what began as a niche concept rapidly evolved into a mainstream dish that continues to surprise first-timers.

Personal Anecdote: The First Bite

I remember the first time I tasted this tangy creation at a small pizzeria in Minnesota. I had always been a fan of pickles, so I was intrigued but cautious when reading “garlic-dill sauce” on the menu. However, the first bite introduced me to an incredible pop of flavor: the brine from the pickles melded seamlessly with the rich cheese and delicate crust. Thus, I found myself finishing slice after slice with no regret. Indeed, that memorable experience is what inspired me to replicate the dish at home and refine the recipe for anyone else eager to savor this intriguing combination.

Why the Flavors Work So Well

  • Tangy and Crisp: The sharp taste and crunchy texture of pickles provide a lively contrast to smooth cheese.
  • Creaminess: A garlic-dill sauce adds velvety richness in place of tomato-based sauce, bringing balance to the bite.
  • Savory Punch: Low-moisture mozzarella, Parmesan, or Fontina supplies that salty note pizza lovers crave.
  • Customizable: You can control how tangy or spicy you want the dish by picking different pickle varieties, adding red pepper flakes, or drizzling sweet honey.

On the other hand, those who prefer a bolder flavor can experiment with hot dill pickles or smoked cheeses. Therefore, there is plenty of room to tailor your pizza to match personal preferences.

Core Components and Their Functions

Dough ingredients ready for homemade pizza
Gather your simple crust ingredients

You do not need to be a gourmet chef to prepare this dish, especially once you know each element’s role. Thus, feel free to swap or tweak ingredients to suit your taste.

IngredientPurposeNotes/Variations
Crust OptionsForms the sturdy base for your toppings– Homemade thin crust for freshness and a crisp bottom – Store-bought dough for speed – Puff pastry for a flaky, rich bite
Garlic-Dill SauceReplaces tomato sauce with a tangy, creamy layer– Blend of sour cream, mayo, dill, garlic powder, pickle juice, salt, and pepper – Use your favorite ranch if you need a shortcut
PicklesAdds brightness and crunchy texture– Thinly sliced dill chips – Spicy pickles if you want extra heat – Pat them dry to prevent sogginess
CheeseProvides the classic gooey, savory pizza element– Low-moisture mozzarella – Parmesan or Fontina for a sharper bite – Smoked cheddar for a deeper flavor
Optional ToppingsAllows you to personalize flavor and texture– Kettle chips, hot honey, fresh chives – Ham, Canadian bacon, or ground beef for protein

Helpful Details About Your Key Ingredients

Crust Possibilities

  • Homemade Dough
    If you have an extra half-hour, a simple dough with flour, yeast (or sometimes no yeast), water, and salt can be quick and rewarding. Indeed, kneading dough can be therapeutic, and you can control the thickness or chewiness of your crust.
  • Store-Bought Dough
    Pre-made dough saves time. It also ensures consistent results for beginners who might find yeast intimidating. However, let the dough rest at room temperature for about 20 minutes before shaping. Therefore, it becomes more pliable.
  • Puff Pastry
    Are you in the mood for something different? In that case, puff pastry offers a flaky texture reminiscent of a cross between a classic pizza and a savory tart. Just be mindful of potential grease from the butter layers.

Sauce Secrets

Creamy garlic-dill sauce with fresh dill and garlic
A tangy, flavorful spread for your pickle pie pizza

A garlic-dill sauce stands at the heart of this recipe. Thus, it is worth getting it right:

  1. Sour Cream and Mayonnaise
    These add richness and a silky feel. However, you can switch to Greek yogurt for a lighter option if desired.
  2. Pickle Juice
    This brine not only thins the sauce but also infuses it with a punch of tang. On the other hand, you can reduce or omit it if you want milder acidity.
  3. Fresh or Dried Dill
    Dill is essential for that signature pickle flavor. If you have access to fresh dill, chop it finely and taste as you go, since fresh herbs can vary in intensity.
  4. Spices
    Garlic powder provides savory warmth. Meanwhile, a pinch of onion powder or smoked paprika can offer an extra layer of complexity. Therefore, do not be afraid to experiment in small amounts.

Choosing the Right Pickles

  • Thin Slices
    Slicing your pickles too thick could overwhelm each bite and make your Pickle Pie Pizza soggy. Consequently, thin slices create a balanced crunch that pairs well with the melted cheese.
  • Spicy vs. Mild
    If you prefer a more intense flavor, look for brands like Mt. Olive Hot ‘N’ Spicy or Grillo’s Hot Pickles, both known for delivering a kick.
  • Drying Them Properly
    Patting your pickles with a paper towel is key. Therefore, you reduce moisture and help ensure a crisp crust.

Cheese Varieties

While mozzarella remains a go-to, you might also consider combining cheeses. For instance, half mozzarella and half Fontina can give you a layered flavor. In addition, sprinkling a little Parmesan over the top can yield a lovely golden crust in the oven.

Potential Toppings

  • Textural Elements: Crumbled kettle chips add a salty crunch.
  • Colorful Herbs: Fresh chives or scallions bring a pop of green.
  • Sweet Contrast: Drizzling hot honey can offset any strong tang.
  • Protein: If you want added heft, diced ham or bacon bits can round out the meal.

Step-by-Step Preparation: From Dough to Delicious

 Pickle pie pizza assembly with sauce, cheese, and pickles
Layering simple ingredients for remarkable flavor

It is always easier to tackle a new recipe when you break it down into steps. Therefore, follow this timeline, and you will soon have a steaming, tangy pie on your table.

1. Gather Your Tools and Preheat

  1. Crank Up the Heat
    Set your oven to 500°F (or its highest setting). A piping-hot oven helps achieve a crisp crust. In addition, if you own a pizza stone or steel, place it inside to preheat.
  2. Prepare a Peel or Baking Sheet
    Dust a pizza peel or a large cutting board with cornmeal, or use parchment paper to prevent sticking. However, if you do not have these on hand, a flat baking sheet can serve as a makeshift peel.

2. Whisk the Sauce

  • Combine in a Bowl
    Mix sour cream, mayonnaise, pickle juice, dill, garlic powder, salt, and pepper. Because you want a smooth blend, whisk until there are no lumps.
  • Taste and Adjust
    If it tastes too briny, add a bit more mayo. On the other hand, if you need more zip, add a few more drops of pickle juice or a pinch of acid like lemon juice.
  • Refrigerate
    Chilling the sauce for about 10–15 minutes can help the flavors meld. Thus, you end up with a more cohesive taste.

3. Shape the Crust

  1. Room-Temperature Dough
    If using store-bought dough, let it rest out of the fridge for 20 minutes. This makes it easier to stretch.
  2. Roll It Out
    Flour your work surface. Then, use a rolling pin or stretch the dough with your hands to a diameter of 12–14 inches, depending on how thin you prefer your crust.
  3. Transfer
    Place the shaped dough onto the dusted peel or your chosen parchment paper. Therefore, you avoid the dough sticking and forming holes when you move it to the oven.

4. Spread the Sauce and Layer Toppings

  1. Sauce Base
    Use a spoon to add the garlic-dill sauce, leaving about 1 inch of uncovered crust around the edge.
  2. Cheese
    Distribute your cheese of choice over the sauce. In addition, consider sprinkling a small handful of cheese over the exposed crust if you like a browned edge.
  3. Pickle Placement
    Arrange your dill slices evenly. In addition, some people place a few pickles under the cheese for a layered effect.
  4. Optional Additions
    • Red pepper flakes
    • Kettle chips
    • Cooked ground beef or diced ham

5. Slide into the Oven

  1. Transfer to Stone or Steel
    Carefully slide the pizza off your peel or baking sheet onto the preheated surface. Alternatively, you can place it on a hot baking tray if that is your only option.
  2. Baking Time
    Keep a close eye on your Pickle Pie Pizza. Generally, it will be done in about 11–13 minutes. However, ovens vary, so watch for bubbling cheese and a golden crust.
  3. Optional Broil
    For extra browning, turn the broiler on for the final 1–2 minutes. Thus, you get a crisp, slightly charred edge. Be vigilant, though, because the crust can burn quickly under intense heat.

6. Final Touches

  1. Drizzle or Dust
    Once your Pickle Pie Pizza is out of the oven, you may drizzle hot honey or sprinkle chopped chives, fresh dill, or grated Parmesan on top. Consequently, these final accents heighten color and flavor.
  2. Rest and Slice
    Let the Pickle Pie Pizza sit for about 3–5 minutes. That way, the cheese can set. Then, slice into wedges and serve.

Serving Suggestions and Approximate Nutrition

Sliced pickle pie pizza with garnish bowls
Elevate each slice with extra zest

Serving the Finished Pie

  • Main Course or Shareable
    This tangy creation can be an impressive centerpiece at a casual dinner party or a fun family meal. Therefore, serve large slices for an entrée or cut them smaller for an appetizer.
  • Suggested Sides
    Because the Pickle Pie Pizza is quite rich and tangy, you might pair it with a light salad or crisp veggie dish. In addition, consider a coleslaw that includes chopped pickles for a double dose of brine.

Nutritional Overview

Exact calorie counts differ based on the crust, toppings, and cheese amounts you use. However, here is a ballpark per average slice of a 12-inch pizza:

  • Calories: 300–350
  • Fat: ~10–15g
  • Carbs: ~35–40g
  • Protein: 12–15g
  • Sodium: Higher than some pizzas (due to pickles and cheese), so be mindful if you watch salt intake.

For precise calculations, you could use a reliable nutrition database, such as MyFitnessPal or the USDA FoodData Central. Thus, you can adjust ingredient amounts to fit dietary needs.

Troubleshooting and Variations

Even the most experienced cook can run into issues. Therefore, here are a few ways to overcome common hurdles.

Common Pitfalls

  1. Soggy Crust
    • Insufficiently preheated oven or stone
    • Using thick pickle slices or not drying them
    • Overloading sauce or cheese
  2. Overly Tangy
    • Use fewer pickles or try bread-and-butter pickles
    • Reduce the pickle juice in your sauce
    • Balance the acidity with a sweet drizzle, such as honey or a mild barbecue sauce
  3. Underseasoned Sauce
    • Be sure to taste your sauce and adjust salt or dill
    • Enhance flavors with a pinch of onion powder or a dash of chili flakes

Ingredient Swaps

  • Gluten-Free Crust: Many brands now offer GF doughs, or you can make your own using a mix of rice flour, tapioca starch, and other binders.
  • Vegan Cheese: Plant-based cheeses have come a long way in texture and taste. In addition, vegan mayo can replace standard mayo in the sauce.
  • Protein Boost: Cooked chicken, bacon, or ground beef can turn your pizza into a hearty meal. On the other hand, tofu or vegan sausage works for those avoiding meat.

Creative Flavor Boosts

  • Add Fresh Herbs: Toss some basil or oregano over the baked pizza for extra aroma.
  • Spicy Twist: Scatter pickled jalapeños or banana peppers on top.
  • Sweet & Salty: Drizzle maple syrup if you prefer a sweeter note, balancing the brine from the pickles.

Beyond Pizza: More Pickle-Focused Creations

If you love the briny flavor that pickles bring, you will be excited to know there are numerous ways to incorporate them into your cooking routine. Therefore, explore the following ideas to satisfy your tangy cravings.

  1. Fried Pickles with Creamy Dip
    • Lightly bread dill slices and fry them for a crunchy snack.
    • Serve with ranch dressing or the leftover garlic-dill sauce.
  2. Cheeseburger Pizza with Pickle Relish
    • Merge two fast-food favorites by adding ground beef, cheddar, and a special sauce that includes relish.
    • Consider toasting sesame seeds on the crust for a hamburger bun vibe.
  3. Creamy Pickle Slaw
    • Stir chopped pickles into a coleslaw mix.
    • Dress with a blend of mayonnaise, vinegar, sugar, and dill for a tangy, crunchy side.
  4. Chicago-Style Hot Dogs
    • Pile on mustard, onions, tomatoes, a pickle spear, and sport peppers.
    • Avoid adding ketchup if you want an authentic approach, but feel free to adapt to your taste.
  5. Pickle-Brined Fried Chicken
    • Let your chicken soak in pickle juice for a few hours or overnight.
    • Coat and fry as usual for a tender, flavorful bite.

In-Depth Tips for Perfecting Your Pickle Pie Pizza

Although we have covered the main steps, a few extra pointers can help you achieve pizzeria-quality results at home:

  1. Use High-Heat Methods
    Because you want a crust that is both airy and crisp, baking at a very high temperature is essential. Thus, do not hesitate to crank your oven to its highest safe setting.
  2. Top Variation
    Think of the cheese as a shield for the dough. Adding pickles on top of the cheese can help them roast slightly, but tucking a few under can keep them juicy. Consequently, you get multiple layers of texture in each bite.
  3. Timing the Bake
    If you add more toppings like meat or extra cheese, the pizza might need a bit more time. However, remain vigilant since high-heat baking can go from perfect to burnt in less than a minute.
  4. Test Small Batches
    If you are uncertain about certain flavors, try making a personal-size pizza or even a flatbread. That way, you can test if you like the ratio of sauce to pickles before committing to a full pie.
  5. Don’t Drown the Crust
    Spread the sauce lightly. Therefore, you avoid overwhelming the pizza with too much moisture. You can always serve extra sauce on the side for dipping.

Flavor Pairings and Serving Occasions

Balanced Beverages

  • Crisp Lager: Beer with a clean finish pairs well with tangy bites.
  • Light White Wine: Sauvignon Blanc or Pinot Grigio can highlight the pickle’s acidity without clashing.
  • Sparkling Water: A citrus-infused sparkling water can also cleanse your palate between slices.

Festive Events and Gatherings

  • Game Day: Combine this pizza with fried pickles or buffalo wings for a memorable sports-watching spread.
  • Pickle-Themed Parties: Yes, they exist! Serve pickle dips, relishes, and chips for a complete brine-inspired table.
  • Casual Dinners: Because the recipe is so straightforward, it can become your go-to quick dinner when you crave something different yet comforting.

Expanding Your Pickle Horizons

Although we have focused on how pickles enhance pizza, do not stop there. Indeed, pickles can elevate everything from sandwiches to soups. Thus, consider these ideas the next time you find yourself craving the tang of vinegar and dill:

  1. Pickle-Infused Salad Dressings
    Substitute part of the vinegar or lemon juice in your standard vinaigrette with pickle brine for a bright twist.
  2. Pickle Salsa
    Chop pickles, onions, tomatoes, and jalapeños. Then, mix them with lime juice and a dash of cilantro. Serve this mix with tortilla chips for a tangy alternative to pico de gallo.
  3. Pickle Pasta Salad
    Stir chopped pickles into a creamy macaroni salad. On the other hand, you can slice them into a cold orzo salad with a light, dill-forward dressing.
  4. Pickle Martinis
    Mix gin or vodka with pickle juice in place of olive brine. Garnish with a pickle spear instead of an olive.

Each of these ideas builds on the same love of tangy flavors that draw people to pickled ingredients. Therefore, if you find yourself unable to get enough of that briny taste, you can keep exploring new uses with ease.

Frequently Asked Questions

1. Can I Use Sweet Gherkins on This Pizza?

Yes, you absolutely can. In fact, many people enjoy the sweeter bite as it reduces overall tang. Therefore, if you find standard dill too sharp, try bread-and-butter pickles or gherkins. Just be sure to monitor the sauce, as you may need less pickle juice to avoid an overly sweet result.

2. What If I Do Not Have a Pizza Stone or Steel?

A regular baking sheet works fine. However, you should preheat it in the oven for a few minutes before placing your dough on top. Thus, you can mimic the effect of a hot stone and get a crisp bottom. If sticking is a concern, line the sheet with parchment paper for an easy cleanup.

3. How Do I Keep My Pizza from Becoming Oversalted?

Pickles and cheese both contribute saltiness. On the other hand, you can choose low-sodium cheese varieties and rinse your pickles if you want to reduce sodium. Alternatively, limit the extra salt in your sauce or consider balancing with a sweet drizzle at the end.

4. Can I Freeze Leftover Pizza?

While it is possible to freeze leftover slices, the pickles may become softer upon thawing. Therefore, if your schedule allows, freeze just the dough and sauce separately. Then, add fresh pickles on baking day. However, if you must freeze the entire pizza, reheat it in a hot oven or air fryer for best texture.

5. How Should I Reheat Leftovers?

Reheating in a conventional or toaster oven at 375°F is a safe bet. Let it heat for around 5–7 minutes until the cheese is melted and the crust is crisp. Indeed, try to avoid microwaving, since it can result in a chewy, less appealing texture.

6. Are There Any Healthy Tweaks I Can Make?

Use Greek yogurt instead of mayo or sour cream in the sauce. Also, opt for whole-grain or cauliflower crust if you want more fiber and nutrients. Finally, load up on veggies like onions, peppers, or mushrooms to increase the nutritional profile.

7. Do I Need Fresh Dill for the Sauce?

No, dried dill works well and often has a concentrated flavor. Therefore, start with a teaspoon or two, and then adjust based on your taste. If you do have fresh dill, chop it finely, and note that you might need a bit more than dried to achieve the same flavor.

Conclusion

By now, you have learned how to make a memorable tangy pizza that combines creamy garlic-dill sauce, crisp pickles, and melty cheese on a perfectly crisp crust. In addition, you have discovered how easy it is to swap ingredients and tailor the recipe to your dietary needs. Therefore, there is no reason to let skepticism hold you back from experiencing a lively twist on everyone’s favorite comfort food.

Easy Unicorn Cake Recipe: Step-by-Step Guide with Rainbow Buttercream

If you’ve ever dreamed of baking a unicorn cake that looks like it stepped right out of a fairytale, you’re in the right place. This mythical dessert has become one of the most popular treats for birthdays, baby showers, and celebrations of all kinds. In addition, it’s surprisingly manageable to create, provided you have the right tools, ingredients, and a bit of patience. Throughout this guide, you’ll learn not only how to build and decorate a stunning unicorn cake but also why it’s worth the effort, how to make it taste as good as it looks, and what you can do to personalize it for any special occasion. Therefore, get ready to discover everything you need to know from the origins of whimsical cakes to the final finishing touches so you can create your own magical cake at home.

1. Why a Magical Unicorn Cake Reigns Supreme

Origins and Popularity of Whimsical Cakes

Unicorn cake might feel like a modern social media creation, yet whimsical cakes have been around for decades in various forms. However, it wasn’t until the surge of visually driven platforms like Instagram and Pinterest that these rainbow-hued, fairy-tale desserts truly exploded in popularity. You’ve probably seen photos of tall, pastel-colored cakes crowned with gilded horns and playful ears while scrolling through your feed. On the other hand, you might have wondered whether making such a masterpiece at home is feasible. Rest assured, this cake trend endures because it’s not only eye-catching but also incredibly fun to customize.

Moreover, you’ll find whimsical cakes featured in bakeries around the globe, each adding its own unique twist be it sparkly sprinkles, edible flowers, or even multi-flavored layers. Thus, if you want to add a touch of enchantment to your next celebration, a unicorn cake is the perfect showstopper.

Perfect Occasions for This Fairy-Tale Dessert

You might assume a fairy-tale dessert is only suitable for children’s birthday parties. In reality, grown-ups also adore these vibrant creations for baby showers, bridal parties, and even just-because moments. Therefore, if you’re hosting a celebration where you’d like a cake that wows your guests at first glance, you can’t go wrong with this whimsical creation. In addition, you can match your color scheme by adjusting the frosting shades or customizing the fillings.

For instance, if your theme is pastel pink and mint, you can incorporate those specific colors into your cake layers or mane decorations. On the other hand, you can go big and bold with neon hues if you’re aiming for an eye-popping party centerpiece.

Healthier vs. Indulgent Approaches

Although rainbow-colored desserts are usually associated with sweetness and sugar, you do have options if you’re looking for a less indulgent version. In fact, some bakers reduce the sugar in the sponge or opt for a lightly sweetened whipped cream in place of a standard buttercream. However, because the visual impact remains the cake’s highlight, a certain amount of color and frosting is typically expected. That said, you can still experiment with fruit-based fillings, lower-sugar sprinkles, or even vegan and gluten-free versions to suit various dietary preferences.

Many professional cake decorators also use fruit extracts—like strawberry or lemon—to infuse a delicate twist into each layer. Hence, you get bursts of flavor without necessarily relying on pure sugar. Ultimately, it’s all about striking a balance that fits your event’s style and your guests’ palates.

Setting the Stage for Fun

One of the biggest joys of creating a unicorn cake is the sense of excitement it brings to your kitchen. Children and adults alike often find themselves smiling as they watch bright colors swirl into batter or as they pick out sparkly decorations. Furthermore, setting up a decorating station, especially when little helpers are around, can transform the process into a mini party before the actual celebration even begins.

If you’re new to cake decorating, don’t worry. You’ll find that each step is simpler than you might imagine particularly once you break it down into prepping, baking, frosting, and final touches. Therefore, as you embark on this journey, remember to enjoy each stage, and don’t be afraid to get creative with colors and decorations.

2. Essential Tools and Ingredients for Your Whimsical Creation

Flat lay of tools and ingredients for baking a unicorn cake
Essential equipment and colorful batters for your unicorn cake

Before you can make the perfect unicorn cake, it’s vital to gather the proper equipment and ingredients. In addition, you’ll want to consider a few extras like edible glitters or special piping tips that will give your cake that extra pop of magic. For more whimsical dessert ideas, check out Fairy Bread recipe.

Must-Have Baking Equipment

While the term “must-have” can feel strict, a few specific tools truly make your life easier:

  1. Cake Pans: Choose three 6-inch pans or two 8-inch pans, depending on how tall you want your cake. Using multiple pans ensures even baking and consistent layer sizes.
  2. Mixer (Stand or Handheld): Creaming butter, mixing batter, and whipping frosting is far simpler when you have a reliable mixer.
  3. Spatulas and Bench Scraper: An offset spatula helps you spread frosting evenly, while a bench scraper can smooth the cake’s sides.
  4. Piping Bags and Tips: Star tips (like a 1M) and round tips (like #4) are key for creating the unicorn’s mane and small decorative details.
  5. Optional Tools: If you plan on making edible images for the eyes, an edible ink printer is handy. A fondant mold or shaped cutters for ears can also save time.

With these items on hand, you’ll be better prepared to craft a cake that looks professional and because you have the right tools, you’ll reduce the risk of stress or last-minute improvisations.

Key Ingredients for Vibrant Layers

An enchanting unicorn cake typically features multiple colors inside, so consider using a white velvet or basic white cake recipe. This style of batter takes food coloring beautifully. To achieve bright and consistent hues, invest in high-quality gel colorings (rather than liquid).

  • Cake Flour (or All-Purpose): Delivers a soft crumb.
  • Butter or Oil: Brings moisture and flavor.
  • Eggs: Bind the batter. For an eggless version, you can experiment with applesauce or a commercial egg replacer.
  • Sugar: Standard granulated sugar or a sugar substitute if you’re going for a lighter approach.
  • High-Quality Gel Food Colors: We recommend Wilton’s Gel Icing Colors or Americolor’s line for vibrant, fade-resistant shades.

In addition, keep basic staples like baking powder, salt, and vanilla extract around. Once you gather these items, you’ll notice how each ingredient contributes to a fluffy, colorful, and delicious final product.

Choosing the Right Sprinkles and Decorations

If you want a fairy-tale dessert with a confetti-like appearance, you might include sprinkles directly in the cake batter—commonly known as a “funfetti” cake. Therefore, opt for sprinkles designed to hold their shape during baking so you end up with those adorable specks of color in each bite.

Beyond the batter, decorations such as edible glitter, sugar pearls, and metallic dragees can further enhance your cake’s whimsical look. However, be mindful that not all glitter labeled “non-toxic” is truly edible. In fact, some are for display only and should be removed before serving. Consequently, check labels or buy from well-reviewed baking suppliers to ensure everything on your cake is safe to eat.

Crafting Edible Horns and Ears

The horn and ears are perhaps the most iconic aspects of a unicorn cake. You can craft these using:

  • Fondant: Roll it into a cone shape for the horn, twist two pieces together for that spiral effect, then let it dry. Make leaf-like ear shapes, fold, and add pink accents.
  • Isomalt or Chocolate: Use a premade mold to form horns and ears. This method often results in a glossier finish.
  • Painting Gold: For a metallic effect, coat your horn with edible gold dust or spray.

Because these elements must stand upright, you can insert a thin dowel or cake pop stick into the horn to anchor it. In addition, you might attach the ears to toothpicks or dried spaghetti for added stability.

Flavor Profile and Variations

Vanilla is the classic go-to for a unicorn cake because it pairs beautifully with sweet frostings and doesn’t clash with bold colors. However, you can also layer in fruit jams, chocolate ganache, or even a tangy lemon curd for extra complexity. On the other hand, if you’re a chocoholic, you could make your interior layers chocolate and simply color white frosting in bright hues.

Moreover, alternate layers can offer a taste surprise without compromising the rainbow effect. For instance, a lemon layer can be pastel yellow, a strawberry layer can be soft pink, and a vanilla layer can be tinted sky blue. Thus, each bite delivers a different burst of flavor while still looking cohesive once sliced.

Looking for more ways to use up overripe ingredients? Try our 2-banana bread recipe for another quick and delightful homemade dessert.

3. Step-by-Step Unicorn Cake Construction

Once you have your tools and ingredients ready, it’s time for the main event: building your unicorn cake from the ground up. Thus, prepare your kitchen and get ready for a rewarding baking adventure.

Preparing and Coloring the Batter

 Mixing vibrant food coloring into separate bowls of cake batter
Adding pops of pink, blue, and yellow to the batter
  1. Mix Your Base: Begin with your preferred white or vanilla cake batter. Cream butter and sugar until fluffy, then add eggs (or egg substitute), followed by your dry ingredients.
  2. Divide the Batter: Separate it into multiple bowls—one for each color you plan to use. Add a few drops of gel food coloring into each bowl, stirring gently but thoroughly.
  3. Achieving Vivid Tones: Add color gradually. You can always add more, but it’s hard to tone down an overly saturated color. In addition, test a small spoonful of batter on a white plate to gauge the final shade.
  4. Layering the Colors: If you’re going for distinct layers, pour each color into its own cake pan. Alternatively, if you want a tie-dye effect, swirl different colors together in one pan.

However, make sure not to over-mix once your colors are added, as this can toughen the cake. In addition, be cautious about color overlaps if you want crisp divisions.

Baking and Cooling Techniques

  1. Oven Temperature: Most unicorn cake recipes bake at around 335ºF. This slightly lower temperature (compared to 350ºF) ensures the cake rises evenly and the color remains vibrant.
  2. Baking Time: Typically 30–35 minutes, but use the toothpick test: insert it into the center, and if it comes out clean or with a few moist crumbs, your cake is done.
  3. Preventing Domes: Tap the pans gently on your counter before baking. On the other hand, some bakers place damp strips around the cake pans to keep the tops level.
  4. Cooling: Let the cakes rest in the pans for about 10 minutes, then invert them onto a rack to cool completely. In addition, you can wrap them in plastic and freeze for an hour or refrigerate overnight for easier frosting later.

Filling and Stacking Your Cake Layers

Stacked, multi-colored cake layers with crumb coat in progress
Building the base for a perfectly frosted unicorn cake

After cooling, level the tops using a serrated knife or cake leveler if needed. This step is crucial for stability.

  1. First Layer and Filling: Place the bottom layer on a cake board or stand. Spread a thin layer of frosting or your chosen filling (e.g., jam, ganache).
  2. Adding the Second Layer: Carefully center it over the bottom layer. Press gently to ensure adhesion. Therefore, you avoid leaning or sliding.
  3. Repeat for Additional Layers: Depending on how tall you want your unicorn cake, continue stacking.
  4. Crumb Coat: Apply a thin layer of frosting around the sides and top. This catches stray crumbs. Chill the cake for 10–30 minutes to allow the crumb coat to set.

Smoothing the Outside Frosting

  1. Final Frosting Layer: Use a larger offset spatula or bench scraper to smooth buttercream around the cake. You don’t have to get it perfect—whimsical designs often look great with a bit of texture.
  2. Achieving Clean Edges: Hold the scraper at a slight angle, turning the cake stand as you go.
  3. Optional Drip: For a stylish effect, drip a thin chocolate ganache or colored glaze around the top edge. However, do this only after the final frosting has chilled, so the drip sets properly.

Because neatness can elevate the final look, take your time here. On the other hand, if you prefer a rustic vibe, slight imperfections can add charm.

Securing the Horn and Ears

  1. Horn Placement: Insert the dowel or cake pop stick–supported horn into the top center. Gently push until stable.
  2. Ear Placement: Tuck the ears on either side of the horn, ensuring they’re evenly spaced. In addition, you might secure them with extra frosting or toothpicks if needed.
  3. Double-Check Angles: Step back and view the cake from different angles to confirm everything looks balanced.

This moment often brings your cake to life, therefore enjoy seeing your hard work come together.

4. Decorating Your Magical Unicorn Cake with a Rainbow Mane

Fully decorated unicorn cake with pastel mane, horn, and eyes
Adding the final touches to your majestic unicorn design

Now comes the truly creative part. You’ll transform a simple frosted cake into a whimsical creation by piping colorful swirls, adding sparkle, and giving your unicorn its signature face.

Colorful Buttercream Swirls and Rosettes

  1. Multiple Frosting Shades: Divide your buttercream into small bowls, tinting each bowl with a different color. Pastel pink, soft lavender, bright turquoise—whatever suits your theme.
  2. Piping Bag Setup: You can either place each color in its own piping bag or try the wrap method (placing stripes of color on plastic wrap, rolling it into a log, then inserting into a single bag).
  3. Rosette Techniques: A 1M star tip works wonderfully for rosettes. In addition, varying the size of the rosettes can add dimension.

Be liberal with your transition words—first, swirl pink rosettes along the unicorn’s “forelock,” then fill in with purple and yellow. Finally, step back to ensure your color distribution looks balanced before continuing.

Piping Techniques for Mane and Forelock

If you’re new to piping:

  1. Grip and Angle: Hold the bag at a 90-degree angle for rosettes. Squeeze from the top, guiding with your other hand near the tip for control.
  2. Star or Drop Flowers: Switch tips if you want smaller star shapes or drop flowers.
  3. Layering: Build up sections so the mane has a luxurious, voluminous appearance. For instance, you might add an extra swirl of pink in a gap or a pop of teal for contrast.

However, be careful not to overdo it you still want to see each color distinctly.

Adding the Eyes and Facial Expressions

  1. Edible Printed Eyes: If you have an edible ink printer, print large eyes with eyelashes. Cut them out carefully and place them toward the lower half of the cake.
  2. Buttercream or Fondant Eyes: Alternatively, use black buttercream or fondant. For eyelashes, a small round piping tip (#2 or #3) is ideal.
  3. Extra Details: If you want added personality, pipe tiny hearts or stars near the corners of the eyes. In addition, consider rosy cheeks with a dab of pink icing.

Remember, the eyes bring character to your cake, so step back and adjust their placement until you’re pleased with the expression.

Finishing Touches and Sparkles

To elevate the fairy-tale dessert aspect:

  • Edible Glitter: Dust the mane, horn, and even the edges of the ears for subtle sparkle.
  • Sugar Pearls and Dragees: Press them into the frosting for extra texture.
  • Luster Spray: A quick spritz of pearl or gold can unify the entire design.

Therefore, if you want a statement piece, don’t hesitate to combine two or three finishing elements. Just be sure everything is labeled as food-safe.

Optional Personalization Ideas

Your unicorn cake can go beyond the classic pink-and-gold theme:

  • Galaxy or Mermaid Twist: Switch to blues, purples, and aqua for an otherworldly vibe.
  • Fresh Flowers: Add edible blooms for a whimsical meets rustic-chic style.
  • Flavor Fillings: Incorporate a fruit puree or caramel drizzle between layers for contrast in flavor.

On the other hand, keep in mind that simpler designs can also be stunning if you stick to a clean color palette. Thus, adapt your cake’s appearance to match your event.

5. Bonus Tips, Storage, and Serving Suggestions for a Whimsical Unicorn Cake

Even the most enchanting unicorn cake needs proper planning for storage, transport, and serving. Therefore, these final steps ensure your cake remains picture-perfect until it’s time to slice.

Managing Temperature for Your Magical Rainbow Cake

  • Room Temperature: If you’re serving within a few hours, you can leave the cake out (assuming your buttercream is stable).
  • Refrigeration: For hot climates or overnight storage, place your cake in the fridge. On the other hand, allow it to warm up at room temperature for about an hour or two before serving, so the buttercream softens nicely.
  • Extreme Heat: If you’re dealing with a summer party, keep an eye on melting decorations. Thus, consider a venue with air conditioning or ensure the cake stays chilled until the last possible moment.

Make-Ahead Strategies

  • Baking and Freezing: You can bake cake layers weeks ahead of time. Wrap them tightly in plastic and store them in the freezer for up to 6 months.
  • Buttercream Storage: Prepare your frosting a week in advance and refrigerate it in an airtight container. In addition, re-whip after bringing it to room temperature for a fluffier texture.
  • Decoration Prep: Fondant horns and ears can be made a few days early. This waiting time lets them harden for easier placement.

Because these strategies ease the burden of doing everything in one day, they’re invaluable if you want a stress-free experience.

Transporting a Fairy-Tale Dessert Safely

Should you need to move your cake to another venue:

  1. Sturdy Base: Use a thick cake board or drum that won’t flex.
  2. Cake Box: A box slightly larger than your cake helps protect the sides.
  3. Non-Slip Mat: Place a silicone mat or even a damp dishcloth underneath the cake board inside your car to prevent shifting.
  4. Car Temperature: However, be mindful of direct sunlight. Air conditioning can help maintain stability.

Thus, you’ll arrive with your cake intact and ready to steal the spotlight.

Enhancing the Presentation

You might not think beyond the cake itself, yet the overall display can elevate your unicorn cake to new heights:

  • Cake Stand or Decorative Platter: Choose one that complements your color scheme.
  • Coordinated Décor: Confetti, balloons, or a table runner in similar shades ties the theme together.
  • Photography Tips: Position the cake near a window with natural light. In addition, consider a clean background so your colorful design truly shines.

Moreover, a few simple steps in styling can turn your cake reveal into a memorable moment.

Serving Size and Nutrition Notes

  • Portions: A three-layer 6-inch cake can serve about 8–12 people, while an 8-inch version can feed 15–20, depending on slice thickness.
  • Calorie Count: Expect a standard buttercream-based unicorn cake to be indulgent, though you can reduce sugar or use lighter frostings to make it more health-conscious.
  • Allergies: Consider nut-free, gluten-free, or dairy-free substitutions if needed. On the other hand, always double-check labels for decorations like dragees or edible glitter.

Thus, with these factors in mind, your guests can enjoy the cake without unwelcome surprises.

6. FAQs about unicorn cake

Can I make a unicorn cake without food coloring?

Absolutely. You can opt for natural dyes such as beetroot powder or matcha. However, you could also embrace a minimalist white-and-gold unicorn theme by skipping the artificial colors altogether. This style still delivers a magical look while keeping the ingredients simpler.

Which frosting is best for a unicorn-themed cake?

Buttercream is the most popular choice due to its rich flavor and smooth texture. On the other hand, you could use stabilized whipped cream or cream cheese frosting if you want something lighter or tangier. Whichever you choose, test a small batch to confirm it holds shape during piping.

How far in advance can I bake and decorate my rainbow cake layers?

You can bake and freeze your cake layers weeks in advance, which is perfect for busy schedules. Decorating is best done one to two days before your event so the frosting remains fresh. In addition, store the finished cake in the fridge if your kitchen is warm.

What if my fondant horn won’t stay upright?

Use a wooden dowel or cake pop stick inserted through the center of the horn for structural support. In addition, you can chill the horn slightly to let it firm up before placing it on the cake. This approach provides extra stability, preventing any topple disasters.

Conclusion

Creating a unicorn cake that’s truly awe-inspiring may seem intimidating at first. However, when you break it down step by step starting from your batter and tools, moving through color selection and frosting, then adding those enchanting details like a golden horn and pastel mane—you’ll find that it’s a wonderfully achievable project. Therefore, don’t hesitate to experiment with flavors, color palettes, and finishing touches to make your cake as unique as you are.

How to Make Milk Bar pumpkin pie recipe at Home

Get ready to fall in love with the Milk Bar pumpkin pie recipe, a dessert that’s as indulgent as it is memorable. With its signature graham cracker crust and perfectly spiced pumpkin filling, this pie has everything you could want in a fall treat. But here’s the kicker it’s ridiculously easy to make!

Whether you’re a seasoned baker or a total beginner, this recipe will guide you step by step, ensuring success every time. Plus, the unique Milk Bar touch transforms a traditional pie into something truly extraordinary. So, grab your apron, and let’s turn your kitchen into a bakery. This is more than just a recipe; it’s your ticket to creating a dessert everyone will rave about. Let’s get started!

The Ingredients You’ll Need for the Milk Bar Pumpkin Pie Recipe

Key Components of the Pumpkin Filling

The heart of the Milk Bar pumpkin pie recipe lies in its rich and creamy pumpkin filling. To achieve that signature texture and flavor, you’ll need high-quality pumpkin puree. Whether you opt for canned or homemade, ensure it’s smooth and free of excess moisture this helps create the silky consistency Milk Bar is known for.

You’ll also need sweetened condensed milk, which adds sweetness and a creamy texture, along with eggs to help set the filling. Don’t forget the spices! A blend of cinnamon, nutmeg, ginger, and cloves provides that classic fall warmth. To enhance the depth of flavor, a pinch of salt balances the sweetness and brings out the earthy pumpkin notes.

Crafting the Perfect Graham Cracker Crust

Pressing Graham Cracker Crust into Pie Pan
Preparing the graham cracker crust for the Milk Bar pumpkin pie recipe.

What sets this recipe apart is its crunchy, buttery graham cracker crust. Unlike traditional pie crusts, this one doesn’t require rolling or precise cutting making it ideal for beginners. Start with finely crushed graham crackers, mix them with melted butter and a touch of sugar, and press the mixture into your pie pan.

To prevent the crust from becoming soggy, bake it briefly before adding the filling. This step ensures a crisp base that complements the creamy filling perfectly. For an in-depth guide to creating the best graham cracker crusts, check out this resource on mastering pie crusts.

Optional Toppings for Added Flavor

While the Milk Bar pumpkin pie recipe is exceptional on its own, toppings can elevate its appeal even further. A dollop of freshly whipped cream or a sprinkle of cinnamon adds a touch of elegance. If you’re feeling adventurous, consider a drizzle of salted caramel or a handful of candied pecans for extra texture and flavor.

For those who enjoy a contrast of temperatures, serving a slice with a scoop of vanilla ice cream is a game-changer. These additions not only enhance the visual presentation but also create a delightful balance of flavors and textures.

Ingredient Substitutions for the Milk Bar Pumpkin Pie

The beauty of the Milk Bar pumpkin pie recipe is its versatility. If you need a gluten-free option, substitute the graham crackers with gluten-free alternatives. For a dairy-free version, coconut milk can replace sweetened condensed milk, and plant-based butter works well in the crust.

Want to switch things up? Add a teaspoon of vanilla extract or orange zest to the filling for a unique twist. You can also experiment with spices—try cardamom or allspice to bring a fresh dimension to the classic pumpkin pie flavor. These customizations allow you to tailor the pie to your preferences while keeping the essence of the original recipe intact.

Step-by-Step Instructions

Preparing the Crust Like a Pro

The foundation of the Milk Bar pumpkin pie recipe starts with its unforgettable graham cracker crust. Begin by finely crushing your graham crackers—either by using a food processor for a quick solution or placing them in a sealed bag and crushing them with a rolling pin. Aim for a sandy texture with no large chunks, as this ensures an even crust.

Next, mix the graham cracker crumbs with melted butter and sugar until it resembles wet sand. This combination not only binds the crust but also provides the rich, buttery flavor that complements the filling. Press the mixture firmly into a pie pan, making sure the bottom and sides are evenly covered. To lock in that crispy texture, pre-bake the crust at 350°F (175°C) for about 10 minutes. This step is essential to avoid a soggy bottom when the filling is added later.

Mixing the Pumpkin Filling to Perfect the Milk Bar Recipe

The filling is the star of the Milk Bar pumpkin pie recipe, and getting it just right requires attention to detail. Start by whisking together your pumpkin puree, sweetened condensed milk, eggs, and spices in a large mixing bowl. For best results, use room-temperature ingredients—they blend more smoothly and create a silkier texture.

To elevate the flavor, add a pinch of salt and, optionally, a teaspoon of vanilla extract. For an extra hint of warmth, sprinkle a dash of allspice or cardamom. Mix until the filling is completely smooth, with no visible streaks of egg or spices. If you’d like more tips on achieving the perfect pumpkin pie consistency, check out this guide to pumpkin pie baking.

Baking Techniques for a Perfectly Cooked Pie

Baking the Milk Bar pumpkin pie recipe is where the magic happens, but timing is everything. Pour the prepared filling into the pre-baked crust, spreading it evenly with a spatula. Preheat your oven to 350°F (175°C), then place the pie on the middle rack to ensure even heat distribution.

Bake for about 45-50 minutes, checking the pie frequently toward the end. The filling should be mostly set, with just a slight jiggle in the center. Overbaking can cause cracks, so remove the pie as soon as it reaches this consistency. Let it cool on a wire rack to room temperature before refrigerating. This resting period allows the filling to firm up perfectly while developing its flavors.

Assembling and Finalizing the Milk Bar Pumpkin Pie Recipe

Now it’s time to bring all the components together into the perfect dessert. Once the pie has fully cooled, consider adding your choice of toppings for that final touch. Whipped cream is a classic option, but you can also drizzle caramel sauce or sprinkle a bit of crushed graham crackers on top for extra flair.

When serving, slice the pie using a warm, clean knife for smooth edges—wiping the blade between cuts helps maintain a neat presentation. Whether it’s for a family dinner or a festive holiday table, this pie is sure to impress everyone at the table.

For additional tips on crafting show-stopping desserts, check out The Best Kefir Sheet Cake Recipe.

Expert Tips for Mastering the Milk Bar Pumpkin Pie Recipe

Perfectly baked Milk Bar pumpkin pie with whipped cream
A perfectly baked pumpkin pie with a golden graham cracker crust, topped with whipped cream, surrounded by fall leaves and spices.

Avoiding Common Baking Mistakes

Even the best bakers sometimes encounter challenges, but with a few tips, you can avoid common pitfalls when making the Milk Bar pumpkin pie recipe. One frequent issue is a soggy crust. To prevent this, always pre-bake your graham cracker crust as outlined earlier—it creates a firm base that won’t absorb moisture from the filling.

Another common mistake is overmixing the filling. While it’s essential to combine all ingredients thoroughly, overmixing can introduce air bubbles that disrupt the pie’s smooth texture. Stir gently until just blended. Lastly, watch the oven closely during the last 10 minutes of baking. The filling should jiggle slightly in the center but not look runny. Overbaking can cause cracks, which, while harmless, can detract from the presentation.

Enhancing Flavor with Spices

The unique spice blend is what makes the Milk Bar pumpkin pie recipe so special. While the classic combination of cinnamon, nutmeg, ginger, and cloves works beautifully, don’t be afraid to experiment. For a deeper flavor, try adding cardamom or a hint of black pepper. These spices can elevate the richness of the pumpkin and create a more complex taste.

It’s also a good idea to toast your spices lightly before adding them to the filling. This simple step enhances their aroma and brings out their natural oils. If you’re unsure about measurements, start with small amounts and adjust to your taste.

Achieving a Creamy Texture in the Milk Bar Pumpkin Pie

The creamy consistency of the Milk Bar pumpkin pie recipe is a hallmark of its success. To replicate this at home, ensure your pumpkin puree is smooth and well-drained. Excess liquid can make the filling too runny and affect its ability to set properly.

Moreover, bake the pie at the correct temperature and avoid opening the oven door frequently it causes temperature fluctuations that can impact the texture. If you’re using a convection oven, consider lowering the temperature by 25°F to prevent overcooking. Let the pie cool completely before slicing, as this allows the filling to firm up for a clean cut.

Presenting the Milk Bar Pumpkin Pie for Stunning Results

A beautifully presented dessert is always a showstopper, and the Milk Bar pumpkin pie recipe is no exception. For a classic look, garnish with a swirl of whipped cream and a sprinkle of ground cinnamon. If you want something more striking, consider adding caramel drizzle or a few candied pecans for texture.

Serving on a rustic wooden board or a decorative pie plate can elevate the presentation further. To make individual servings stand out, cut neat slices and plate them with a dollop of whipped cream or a scoop of vanilla ice cream. This creates a polished look that’s perfect for dinner parties or holiday celebrations.

Variations on the Classic Recipe

Gluten-Free Milk Bar Pumpkin Pie

For those avoiding gluten, the Milk Bar pumpkin pie recipe can easily be adapted to meet your needs without sacrificing flavor. Start by substituting the graham cracker crust with a gluten-free version. Many grocery stores carry gluten-free graham crackers, or you can use almond flour as a base for a nutty twist.

To keep the filling gluten-free, ensure that all spices and canned pumpkin puree are labeled gluten-free, as cross-contamination can sometimes occur. The steps remain the same, making this a straightforward variation that’s perfect for anyone with dietary restrictions. You’ll still enjoy the same creamy filling and spiced warmth in every bite.

Vegan Milk Bar Pumpkin Pie Recipe

The Milk Bar pumpkin pie recipe is surprisingly adaptable for vegan bakers! Replace the sweetened condensed milk with coconut cream and a touch of maple syrup for sweetness. Instead of eggs, you can use flaxseed meal mixed with water or a commercial egg replacer to help set the filling.

For the crust, swap butter for a plant-based alternative that mimics its richness. This vegan-friendly version retains the decadent flavors while accommodating a plant-based diet. With these changes, you’ll have a pie that’s every bit as indulgent and crowd-pleasing as the original.

Adding a Nutty Twist

If you’re looking to enhance the Milk Bar pumpkin pie recipe with a nutty flavor, consider incorporating crushed pecans or walnuts into the crust. Mix them with the graham cracker crumbs for added texture and a deeper taste profile. You can also sprinkle toasted nuts on top of the pie for a crunchy garnish.

Another option is to add a swirl of almond butter or peanut butter into the filling before baking. This unexpected twist pairs beautifully with the spiced pumpkin and creates a unique flavor that’s sure to impress your guests.

Incorporating Seasonal Flavors

The Milk Bar pumpkin pie recipe can be customized to highlight other seasonal flavors, making it versatile for year-round enjoyment. For a winter-inspired version, add a hint of orange zest and a splash of orange juice to the filling. This brightens the flavor and complements the warm spices.

In spring or summer, consider a coconut-pumpkin variation by adding coconut flakes to the crust and a touch of coconut extract to the filling. These seasonal tweaks allow you to enjoy this iconic dessert with a fresh twist, no matter the time of year.

Looking for more dessert ideas to suit various dietary needs? Check out How To Make Perfect Madeline Cookies Using Cream for inspiration that pairs perfectly with your Milk Bar pumpkin pie recipe.

Pairing Milk Bar Pumpkin Pie with Other Desserts

Drinks That Complement Pumpkin Pie

The Milk Bar pumpkin pie recipe is a showstopper on its own, but pairing it with the right drink can elevate your dessert experience. For a cozy fall vibe, serve it alongside a warm spiced chai latte or a classic pumpkin spice coffee. The spicy notes in these drinks complement the pie’s cinnamon and nutmeg flavors perfectly.

For something cooler, a chilled glass of apple cider or a pumpkin ale adds a refreshing contrast to the rich filling. If you’re hosting a dinner party, a lightly sweet dessert wine, such as Moscato or a late-harvest Riesling, creates a sophisticated pairing. These options enhance the pie’s flavors while adding variety to your dessert spread.

Sides to Serve Alongside Your Pie

If you’re planning a dessert buffet, consider pairing the Milk Bar pumpkin pie recipe with other fall-themed treats for a cohesive menu. A crisp apple crumble or a batch of chewy ginger cookies offers complementary flavors and textures.

For lighter options, roasted spiced nuts or a seasonal fruit salad can balance the richness of the pie. These additions make your dessert table more dynamic and give guests a variety of choices to satisfy their sweet cravings.

Combining with Ice Cream or Whipped Cream

Nothing enhances the Milk Bar pumpkin pie recipe like a scoop of creamy vanilla ice cream or a generous dollop of freshly whipped cream. The coolness of the ice cream provides a delightful contrast to the warm spices, while the whipped cream adds a light and airy texture.

For a creative twist, try pairing the pie with caramel or cinnamon ice cream to echo its autumn flavors. You can also add a sprinkle of nutmeg or cinnamon on top of the whipped cream for an extra touch of elegance.

Savory Pairings for the Milk Bar Pumpkin Pie Recipe

For those who prefer a balance of sweet and savory, consider serving the Milk Bar pumpkin pie recipe with a side of sharp cheddar cheese or a slice of smoky bacon. The savory elements create a striking contrast with the pie’s sweetness, making for a unique and memorable flavor combination.

Additionally, a sprinkle of flaky sea salt on top of the pie or a small serving of salted caramel sauce can enhance its complexity. These savory accents surprise and delight guests, turning a traditional dessert into a culinary adventure.

FAQ Section

Should I use regular or quick oats?

For the Milk Bar pumpkin pie recipe, regular oats are generally preferred because they retain more texture and provide a slightly chewy bite that complements the creamy filling. However, if you only have quick oats on hand, they can be used in a pinch. Quick oats will blend more easily, creating a finer consistency, but they might lack the hearty texture of regular oats. Whichever you choose, ensure the oats are fresh to achieve the best flavor.

This is my first time making caramel. What should I know?

Making caramel for the first time can seem daunting, but with a few tips, you’ll have it mastered. First, use a heavy-bottomed saucepan to ensure even heat distribution. Combine sugar and a small amount of water over medium heat, stirring gently until the sugar dissolves. Once it begins to bubble, stop stirring and let the mixture cook until it turns a golden amber color.

Keep a close eye on the caramel, as it can burn quickly. When it reaches the desired color, remove it from heat and carefully add cream or butter, whisking continuously to prevent splattering. Caramel adds a luscious touch to the Milk Bar pumpkin pie recipe, so it’s worth the effort to perfect this technique.

Can I make pumpkin puree at home?

Absolutely! Homemade pumpkin puree can elevate the Milk Bar pumpkin pie recipe with its fresh and natural flavor. To make it, start by selecting a small, sweet pumpkin like a sugar or pie pumpkin. Cut it in half, remove the seeds, and place the halves cut-side down on a baking sheet.

Bake at 375°F (190°C) for about 45-50 minutes, or until the flesh is tender. Scoop out the cooked pumpkin and blend it in a food processor until smooth. While canned pumpkin is convenient, homemade puree has a richer taste and can be frozen for later use.

Do I have to roast the pumpkin puree?

Roasting the pumpkin puree is not mandatory, but it significantly enhances the flavor. Roasting caramelizes the natural sugars in the pumpkin, creating a deeper, sweeter taste that pairs beautifully with the spices in the Milk Bar pumpkin pie recipe.

If you’re short on time, you can skip roasting and use canned pumpkin puree instead. Just make sure to choose a brand with no added sugars or flavors to keep the recipe authentic. If using homemade puree, roasting is worth the extra step for that extra layer of flavor.

Conclusion

The Milk Bar pumpkin pie recipe is a delightful fusion of creamy pumpkin filling, warm spices, and a buttery graham cracker crust that’s perfect for any occasion. Throughout this article, you’ve learned how to create this iconic dessert step by step, including tips for mastering the crust, perfecting the filling, and adding creative variations.

From pairing it with seasonal drinks and desserts to customizing the recipe for dietary needs, this pie offers endless possibilities to suit your taste and style. Whether you’re a seasoned baker or trying your hand at pie-making for the first time, this recipe is both approachable and rewarding.

Now it’s your turn to bring the Milk Bar pumpkin pie recipe to life in your kitchen. Gather your ingredients, follow the steps, and enjoy the satisfaction of baking a dessert that’s as delicious as it is memorable. Happy baking and don’t forget to savor every bite!

The Best Kefir Sheet Cake Recipe: Soft, Easy, And Delicious

Craving a dessert that’s as simple to make as it is delicious? This kefir sheet cake recipe ticks all the right boxes. With its irresistibly moist texture, a tangy twist from creamy kefir, and a flavor that melts in your mouth, it’s bound to steal the show at any gathering. In addition, it’s easy enough for beginners yet impressive enough for seasoned bakers. Whether you top it with your favorite frosting or enjoy it plain, this cake is a crowd-pleaser. Let’s get baking! Your next favorite treat awaits.

What Makes This Kefir Sheet Cake Recipe Special?

Kefir’s Unique Role in Baking

When it comes to baking, kefir is a game-changer. This tangy, fermented dairy product does more than just add flavor—it enhances the texture and moisture of your cake. For instance, the natural acidity of kefir reacts with baking soda, helping the cake rise beautifully while keeping it soft and fluffy.

Unlike other ingredients like yogurt or buttermilk, kefir brings probiotics to the table, making this kefir sheet cake recipe not just tasty but also slightly healthier. Moreover, its versatility allows you to experiment with flavors, whether you prefer plain kefir for a subtle tang or flavored kefir for a sweeter twist. If you’ve never baked with kefir before, this recipe is the perfect place to start!

Why Sheet Cakes Are a Crowd-Pleaser

Sheet cakes are the unsung heroes of the dessert world. They’re easy to make, simple to serve, and perfect for feeding a crowd. In addition, their flat shape makes them ideal for quick frosting or creative decorations, saving you time without sacrificing presentation.

This kefir sheet cake recipe takes the concept of simplicity to the next level. Whether you’re baking for a birthday, a family dinner, or a casual tea party, this cake fits the bill. On the other hand, layer cakes might be too time-consuming for everyday baking. Need more inspiration for sheet cake ideas? Check out this trusted guide to sheet cake basics.

A Recipe Tested for Perfection

Crafting the ultimate kefir sheet cake recipe wasn’t a quick process. It involved testing different ingredient combinations, baking times, and techniques to ensure every bite is perfectly soft and flavorful. Furthermore, kefir proved to be the star ingredient, consistently delivering a moist texture and a tangy kick.

The beauty of this recipe lies in its reliability. You don’t need to be a professional baker to achieve excellent results. By following the step-by-step instructions, you’ll get a foolproof cake that’s guaranteed to impress. Plus, the simple ingredient list makes it easy to whip up whenever you’re in the mood for a treat.

A Healthier Dessert Option

Desserts aren’t usually associated with health benefits, but this kefir sheet cake recipe breaks the mold. Kefir’s probiotics support gut health, while its lower fat content compared to heavy cream or butter makes it a slightly lighter choice.

For instance, you can swap out regular butter for plant-based alternatives or use whole wheat flour for added fiber. However, even with these healthier tweaks, the cake doesn’t compromise on taste or texture. If you’re looking for a dessert that balances indulgence with a touch of wellness, this recipe is a winner.

Ingredients Breakdown for the Perfect Cake

Core Ingredients and Their Purpose

Every ingredient in this kefir sheet cake recipe plays a key role in creating a cake that’s both soft and flavorful. Flour provides the structure, while sugar adds sweetness and helps retain moisture. Eggs bind everything together, giving the cake its tender texture. Butter brings richness, and vanilla enhances the overall flavor profile.

The star ingredient, kefir, not only adds tanginess but also works as a natural leavening agent, ensuring the cake rises perfectly. In addition, its creamy consistency keeps the cake moist without being dense. These ingredients, combined thoughtfully, guarantee a dessert that’s as delicious as it is easy to make.

Optional Add-Ins to Enhance Flavor

While this kefir sheet cake recipe shines on its own, you can easily elevate it with some creative additions. For instance, a handful of chocolate chips or chopped nuts can add a delightful crunch. If you’re in the mood for fruity flavors, consider mixing in fresh blueberries, raspberries, or even diced peaches.

Moreover, spices like cinnamon, nutmeg, or cardamom can bring a warm and cozy twist to the cake. These simple tweaks not only personalize the recipe but also make it versatile for different occasions.

Choosing Between Store-Bought and Homemade Kefir

Deciding between store-bought and homemade kefir for this kefir sheet cake recipe depends on your preference and availability. Store-bought kefir is convenient and consistent in quality, making it a hassle-free choice for most bakers. However, on the other hand, homemade kefir offers the satisfaction of using a fresh, customizable ingredient that you can adjust to suit your taste.

For guidance on making kefir at home, check out this detailed kefir-making guide. Whether you opt for store-bought or homemade, both work wonderfully in this recipe, giving you that signature tang and moisture.

Substitutions and Alternatives

If you don’t have kefir on hand, don’t worry there are substitutes that work just as well. Buttermilk is a popular option, offering a similar tangy flavor and consistency. Alternatively, plain yogurt can be thinned with a splash of milk to mimic kefir’s texture.

For a dairy-free version of this kefir sheet cake recipe, try plant-based kefir made from almond or coconut milk. Thus, even with dietary restrictions, you can enjoy this delightful cake without compromising on taste or texture.

Step-by-Step Instructions for Success

Preparing Your Kitchen and Ingredients

Before diving into this kefir sheet cake recipe, preparation is key. Start by preheating your oven to 350°F (175°C) and greasing a rectangular baking pan to prevent sticking. Moreover, gather all your ingredients in advance to streamline the process.

Ensure that your butter is softened to room temperature for easy mixing, and your eggs are at room temperature to help the batter blend smoothly. Having your tools like mixing bowls, a whisk, and a spatula ready beforehand saves time and reduces stress. By preparing everything upfront, you set yourself up for a seamless baking experience.

Mixing the Perfect Batter

Close-up of kefir sheet cake batter with whisk and ingredients
Whisking the batter for a tangy and moist kefir sheet cake.

The batter is the heart of any cake, and this kefir sheet cake recipe is no exception. Begin by whisking together the dry ingredients flour, baking soda, and salt in one bowl. In another bowl, cream the softened butter and sugar until light and fluffy, as this step ensures a tender texture.

Add eggs to the butter mixture one at a time, mixing well after each addition. Next, alternate adding the dry ingredients and kefir to the wet mixture, starting and ending with the dry ingredients. Be careful not to overmix, as this can make the cake dense instead of fluffy. For added flavor, fold in optional ingredients like chocolate chips or citrus zest at this stage.

Baking Like a Pro

Pour the batter into the prepared pan, spreading it evenly for consistent baking. Place the pan in the preheated oven and bake for 25-30 minutes, or until a toothpick inserted into the center comes out clean. Additionally, rotating the pan halfway through ensures even baking, especially if your oven has hot spots.

Keep a close eye during the last few minutes of baking, as overbaking can dry out the cake. Once baked, remove the pan from the oven and allow it to cool slightly before transferring it to a wire rack. This helps the cake set without becoming soggy at the bottom.

Cooling and Frosting Options

Proper cooling is essential for a flawless cake. Let the cake cool completely on a wire rack before applying any frosting. If you’re in a hurry, you can cool it in the refrigerator for about 20 minutes. However, avoid frosting a warm cake, as the frosting might melt and ruin the presentation.

This kefir sheet cake recipe pairs beautifully with cream cheese frosting, chocolate ganache, or a simple glaze. For example, mix powdered sugar with lemon juice for a tangy finish or melt chocolate and drizzle it on top for a decadent look. The choice is yours, so get creative with the final touches!

For more inspiration, check out similar recipes on our website. For example, our strawberry cheesecake cookies recipe is another dessert you’ll love!

Creative Variations to Try

Chocolate Kefir Sheet Cake

If you’re a chocolate lover, this variation of the kefir sheet cake recipe will surely satisfy your cravings. Add ½ cup of cocoa powder to the dry ingredients and reduce the flour by the same amount to maintain the balance. Additionally, fold in a handful of chocolate chips for bursts of rich flavor in every bite.

For an extra touch of decadence, top the cake with a creamy chocolate ganache or sprinkle it with powdered sugar. On the other hand, you can keep it simple with a light glaze for a more understated treat. Either way, this chocolate twist is bound to become a favorite.

Lemon Kefir Cake

For a refreshing and zesty variation, try adding lemon to this kefir sheet cake recipe. Start by incorporating the zest of two lemons into the wet ingredients. Moreover, swap ¼ cup of kefir with freshly squeezed lemon juice to enhance the citrusy flavor.

Finish the cake with a tangy lemon glaze made from powdered sugar and lemon juice. Thus, this version becomes the perfect choice for summer gatherings or as a light dessert after a hearty meal. If you enjoy experimenting, try adding poppy seeds for a delightful texture and flavor contrast.

Berry-Infused Kefir Cake

Berries can elevate this kefir sheet cake recipe with bursts of natural sweetness and color. Mix in 1 cup of fresh or frozen berries, such as blueberries, raspberries, or chopped strawberries, into the batter. However, be sure to toss the berries in a tablespoon of flour first to prevent them from sinking to the bottom of the cake.

Top the baked cake with a dollop of whipped cream and a sprinkle of extra berries for a show-stopping presentation. In addition, this variation pairs beautifully with a hot cup of tea or coffee, making it a delightful treat for any time of day.

Spiced Kefir Cake

If you’re in the mood for warm, cozy flavors, a spiced version of this kefir sheet cake recipe is the way to go. Add 1 teaspoon each of cinnamon and nutmeg to the dry ingredients. Additionally, a pinch of ground ginger or cloves can further enhance the flavor profile.

Top this spiced cake with a cream cheese frosting or a simple dusting of powdered sugar to complement the spices. On the other hand, you can drizzle it with maple syrup for an extra layer of sweetness. This variation is perfect for the holiday season or whenever you need a comforting dessert.

Tips for Storing and Serving

Freshly baked kefir sheet cake cooling on a wire rack with a slice on a plate.
A freshly baked kefir sheet cake cooling before being frosted.

Keeping Your Cake Fresh

Proper storage is key to preserving the flavor and texture of your kefir sheet cake recipe. After the cake has cooled completely, wrap it tightly in plastic wrap or place it in an airtight container. This step ensures the cake stays moist and doesn’t dry out. If you’re planning to enjoy it within a couple of days, storing it at room temperature is perfectly fine.

However, if you want it to last longer, refrigerate the cake for up to a week. Additionally, you can freeze it for up to three months. To freeze, wrap the cake in a layer of plastic wrap, followed by aluminum foil, and thaw it in the fridge overnight when you’re ready to serve.

Best Ways to Serve

Presentation can take your kefir sheet cake recipe to the next level. Serve slices of the cake on decorative plates with a dusting of powdered sugar for a simple yet elegant touch. Moreover, adding a dollop of whipped cream or a scoop of vanilla ice cream can transform it into an indulgent dessert.

On the other hand, for a more casual approach, cut the cake into squares and serve it directly from the pan. Pair it with hot beverages like coffee or tea to complement the cake’s tangy and sweet flavors. This flexibility makes it suitable for both formal occasions and everyday treats.

Making Ahead for Special Events

If you’re preparing the kefir sheet cake recipe for a party or special event, it’s a great idea to bake it ahead of time. You can bake the cake a day in advance and store it at room temperature, tightly wrapped to maintain freshness. Furthermore, frost the cake just before serving to ensure the frosting remains smooth and appealing.

If freezing, bake and cool the cake first, but wait to add the frosting until after it has thawed. This ensures the frosting’s texture and flavor aren’t compromised. These tips help you stay stress-free while hosting, allowing you to focus on entertaining your guests.

Creative Plating and Garnishing Ideas

Adding a personal touch to your kefir sheet cake recipe can make it unforgettable. For example, sprinkle the top with edible flowers or fresh fruit for a vibrant, Instagram-worthy presentation. Alternatively, drizzle a zigzag of caramel or chocolate sauce for a polished finish.

For a more rustic look, serve it directly from the pan with a cake server, allowing guests to help themselves. Thus, you create an inviting atmosphere that feels warm and welcoming. Whether you choose an elaborate presentation or a simple garnish, this cake is sure to leave an impression.

FAQ

What does kefir do in baking?

Kefir plays a transformative role in baking, especially in recipes like the kefir sheet cake recipe. Its tangy flavor adds depth, while its acidity reacts with baking soda, helping your cake rise and achieve a light, fluffy texture. In addition, kefir contributes moisture, making baked goods tender and soft. As a bonus, its probiotics can also add a small nutritional boost to your desserts.

What’s the difference between sheet cake and regular cake?

The main difference lies in the shape and serving style. Sheet cakes, like the kefir sheet cake recipe, are baked in a flat, rectangular pan, making them thinner and easier to cut into squares or slices. On the other hand, regular cakes are often layered and baked in round pans, requiring more time for assembly and decoration. Sheet cakes are simpler and perfect for casual gatherings or large crowds.

Why is it called Texas sheet cake?

The origin of the name “Texas sheet cake” isn’t entirely clear, but it’s believed to reference the cake’s large size, much like the saying “everything’s bigger in Texas.” This dessert is often associated with Southern hospitality and potluck gatherings, where its ease of preparation and ability to serve a crowd make it a favorite. While not directly related to the kefir sheet cake recipe, this fun history highlights the versatility of sheet cakes.

Can I use kefir instead of buttermilk in cake?

Yes, kefir is an excellent substitute for buttermilk in baking, including in this kefir sheet cake recipe. Both ingredients share a similar tangy flavor and consistency, making them interchangeable in most recipes. Moreover, kefir’s probiotics offer an additional benefit over buttermilk, making it a great choice for adding both flavor and softness to your cake.

Conclusion

This kefir sheet cake recipe is more than just a dessert, it’s a celebration of simplicity, versatility, and flavor. From understanding how kefir transforms your baking to exploring creative variations like chocolate or berry-infused cakes, this guide equips you with everything you need to bake with confidence. In addition, the tips for storing, serving, and customizing ensure you can adapt this recipe for any occasion.

Whether you’re an experienced baker or trying your hand at baking for the first time, this recipe is approachable and rewarding. With its tangy richness, moist texture, and endless possibilities, the kefir sheet cake recipe is bound to become a staple in your kitchen. So, preheat your oven, gather your ingredients, and get ready to bake a cake that’s sure to delight your taste buds and impress your guests.

How to Make Strawberry Cheesecake Cookies at Home

If you love cookies and cheesecake, get ready to have your dessert dreams come true! Strawberry cheesecake cookies are the ultimate hybrid treat, combining the rich, tangy taste of cheesecake with the chewy, buttery goodness of a classic cookie. Fresh strawberries add a pop of sweetness and a burst of color, making these cookies as gorgeous as they are delicious. Whether you’re a seasoned baker or just getting started, this recipe is foolproof and fun to make. Imagine a plate of these beauties at your next brunch or holiday gathering they’re guaranteed to be the star of the show. Ready to whip up some magic? Let’s dive into the world of strawberry cheesecake cookies!

What Are Strawberry Cheesecake Cookies?

A Unique Twist on Classic Cookies

Strawberry cheesecake cookies are not your average cookies. They’re a delightful combination of rich, tangy cream cheese, sweet strawberries, and buttery cookie dough. Unlike traditional cookies that might lean on chocolate chips or nuts for flavor, these cookies stand out with their cheesecake-inspired goodness. The graham cracker crumbs woven into the dough provide that unmistakable cheesecake crust vibe, while the strawberry pieces add a fruity, colorful twist.

But here’s the kicker: they’re not just pretty to look at. These cookies offer a perfect balance of sweet and tangy flavors that’s bound to leave your taste buds dancing. Whether you’re a cheesecake lover or simply looking for something unique, strawberry cheesecake cookies promise to be a showstopper.

The Inspiration Behind Strawberry Cheesecake Cookies

Have you ever thought, “I wish I could have cheesecake in a cookie”? That’s exactly how strawberry cheesecake cookies came to life. This hybrid dessert takes the best of two worlds classic cheesecake and chewy cookies and fuses them into one irresistible treat. They’ve gained popularity in recent years, especially during summer months when fresh strawberries are abundant.

If you’re curious about more innovative dessert ideas, check out Buzzfeed’s roundup of hybrid desserts for inspiration. These unique creations are proof that there’s no limit to dessert creativity!

Why You’ll Love These Cookies

There are cookies, and then there are strawberry cheesecake cookies. What makes these so special? First, they’re incredibly versatile. Perfect for holidays, birthdays, or even an indulgent weekday treat, these cookies fit any occasion. Second, they’re visually stunning imagine vibrant strawberry pieces peeking through a golden, chewy cookie. And most importantly, they taste amazing.

Each bite delivers the creamy tang of cheesecake, the buttery richness of cookies, and the natural sweetness of strawberries. Plus, they’re surprisingly easy to whip up, even if you’re new to baking. Whether you’re serving them with coffee, milk, or just on their own, these cookies are bound to be the star of any dessert spread.

How These Cookies Differ from Traditional Desserts

Unlike a slice of cheesecake that requires a fork and plate, strawberry cheesecake cookies are handheld perfection. They bring together the creamy texture of cheesecake and the chewy satisfaction of cookies into one portable, easy-to-enjoy package.

Compared to traditional chocolate chip cookies, these stand out with their bold flavor profile. The graham cracker crumbs give a subtle crunch reminiscent of a cheesecake crust, while the diced strawberries add bursts of freshness. Moreover, these cookies don’t need the lengthy preparation time or precision of a full cheesecake, making them a convenient choice for home bakers.

If you’re looking for a dessert that’s both familiar and unique, strawberry cheesecake cookies hit the sweet spot. They’re proof that you don’t have to choose between your favorite desserts you can enjoy the best of both worlds in every bite.

Ingredients You’ll Need

Key Ingredients for the Perfect Strawberry Cheesecake Cookies

To make the best strawberry cheesecake cookies, you’ll need a handful of simple yet essential ingredients that deliver big flavors. The star of the show is cream cheese, which adds that classic cheesecake tang and keeps the cookies moist. Fresh, juicy strawberries are another key player, bringing natural sweetness and vibrant color to every bite. For that authentic cheesecake crust flavor, graham cracker crumbs are a must—trust me, they make all the difference!

Other staples include all-purpose flour, sugar, butter, eggs, vanilla extract, and a pinch of salt. These pantry essentials come together to create the perfect base for these irresistible cookies. Want to make them even more indulgent? A handful of white chocolate chips can take things up a notch!

Substitutions and Alternatives

No fresh strawberries on hand? No problem! You can use frozen strawberries, but make sure to thaw and pat them dry to avoid adding excess moisture to your dough. For those looking to reduce dairy, there are plant-based cream cheese alternatives that work well in this recipe.

Not a fan of graham crackers? Crushed digestive biscuits or even vanilla wafers can substitute beautifully. And if you’re feeling adventurous, try mixing in some freeze-dried strawberries—they pack a concentrated flavor punch without extra moisture. With these options, you can tweak strawberry cheesecake cookies to suit your taste and pantry!

Tools to Make Your Baking Easier

Having the right tools can make baking strawberry cheesecake cookies a breeze. A sturdy mixing bowl and a hand or stand mixer are essential for combining the cream cheese, butter, and sugar until fluffy. A cookie scoop ensures uniform cookie sizes, helping them bake evenly.

To prevent sticking, line your baking sheets with parchment paper or silicone mats. And don’t forget a cooling rack—it’s vital for allowing your cookies to set without becoming soggy on the bottom. These tools might seem basic, but they make the process smoother and more enjoyable.

Tips for Choosing the Best Ingredients for Strawberry Cheesecake Cookies

Quality ingredients make all the difference when baking strawberry cheesecake cookies. Opt for full-fat cream cheese to achieve the creamiest texture. When picking strawberries, choose ripe, red ones that are firm but juicy—they’ll hold up better in the dough and provide the best flavor.

For graham crackers, look for fresh, crisp varieties without any stale aroma. Lastly, don’t skimp on vanilla extract. A high-quality pure vanilla extract enhances the overall flavor, making your cookies truly unforgettable. With these tips, you’re all set to bake cookies that taste as amazing as they look.

Step-by-Step Guide to Making Strawberry Cheesecake Cookies

Preparing Your Ingredients and Workspace

Mixing bowl with creamy dough and fresh strawberry on the side for strawberry cheesecake cookies.
A creamy dough mixed for strawberry cheesecake cookies with fresh strawberry on the side.

Before diving into making strawberry cheesecake cookies, it’s essential to set yourself up for success. Start by gathering all your ingredients and tools. Measure out your cream cheese, butter, sugar, and graham crackers, ensuring you have everything at room temperature. This helps the dough mix smoothly without lumps.

Prep your fresh strawberries by washing, drying, and dicing them into small pieces. To avoid soggy cookies, pat the strawberry pieces dry with a paper towel. Meanwhile, preheat your oven to 350°F (175°C) and line your baking sheets with parchment paper. A little preparation now makes the whole process so much easier later on!

Mixing the Dough Like a Pro

To create the perfect base for your strawberry cheesecake cookies, cream together the softened butter, cream cheese, and sugar until the mixture is light and fluffy. This step is crucial as it ensures your cookies bake up soft and tender. Next, add your eggs and vanilla extract, mixing until fully combined.

In a separate bowl, whisk together the dry ingredients: flour, graham cracker crumbs, baking powder, and a pinch of salt. Gradually add the dry mixture to the wet ingredients, mixing just until combined. Finally, gently fold in the diced strawberries, being careful not to overmix. Overmixing can break down the berries, releasing too much juice and affecting the dough’s texture.

Tips for Chilling the Dough

Chilling the dough is a game-changer when it comes to making the best strawberry cheesecake cookies. Once your dough is mixed, cover the bowl with plastic wrap and refrigerate it for at least 30 minutes, though an hour is even better. Chilling helps the dough firm up, making it easier to handle and preventing the cookies from spreading too much during baking.

If you’re short on time, you can pop the dough in the freezer for 15 minutes. However, don’t skip this step entirely it’s key to achieving cookies that are chewy and hold their shape.

Baking to Perfection

A stack of strawberry cheesecake cookies with vibrant strawberry pieces inside.
A delicious stack of strawberry cheesecake cookies showcasing their creamy texture and strawberry filling.

Once your dough is chilled, it’s time to bake! Use a cookie scoop or tablespoon to portion out evenly sized balls of dough, spacing them about two inches apart on your prepared baking sheets. Bake in the preheated oven for 10–12 minutes, or until the edges are golden brown but the centers still look slightly soft.

Remember, cookies continue to cook as they cool, so resist the urge to overbake. Let the strawberry cheesecake cookies cool on the baking sheet for a few minutes before transferring them to a wire rack. This step ensures they set perfectly and stay deliciously soft.

For more delightful recipes to try at home, check out how to make Gipfeli Recipe. It’s another crowd-pleasing option that’s sure to impress!

Expert Tips for Perfect Strawberry Cheesecake Cookies

Avoiding Common Mistakes

Making strawberry cheesecake cookies isn’t difficult, but a few common mistakes can trip you up. One major pitfall is overmixing the dough. When you overmix, the strawberries can break down, releasing too much juice and making the dough soggy. To avoid this, gently fold the strawberries into the dough at the very end.

Another issue is skipping the chilling step. Chilled dough is less sticky and easier to handle, and it prevents your cookies from spreading too thin during baking. Lastly, don’t forget to pat your strawberries dry before adding them to the dough. Excess moisture from the berries can cause uneven baking or overly soft cookies.

Enhancing Flavor and Presentation

 A stack of strawberry cheesecake cookies with fresh strawberries surrounding them.
A warm stack of strawberry cheesecake cookies garnished with fresh strawberries.

Want your strawberry cheesecake cookies to stand out? Try adding a drizzle of white chocolate or a dusting of powdered sugar on top once they’ve cooled. These simple touches make the cookies look as amazing as they taste.

For an extra flavor boost, roll the cookie dough balls in crushed graham crackers before baking. This gives them a delicious, crumbly texture reminiscent of cheesecake crust. And if you’re making these for a special occasion, consider using heart-shaped cutters to give them a fun, unique look. Presentation matters, especially when you’re serving cookies at a gathering!

Scaling the Recipe for Large Batches

If you’re baking strawberry cheesecake cookies for a crowd, you can easily scale the recipe up. Simply double or triple the ingredient quantities, but remember to mix the dough in batches to avoid overloading your mixer.

When scaling, it’s also important to chill the dough in smaller portions. Large bowls of dough can take much longer to chill, so divide it into smaller containers for even cooling. And don’t forget to bake in batches—overcrowding the baking sheet can lead to uneven cookies.

Freezing and Storing Strawberry Cheesecake Cookies

Did you know you can freeze strawberry cheesecake cookies for later? To do this, scoop the dough into balls and arrange them on a baking sheet. Freeze until solid, then transfer the frozen dough balls to an airtight bag or container. When you’re ready to bake, simply place the frozen dough on a baking sheet and add a couple of extra minutes to the baking time.

If you’ve already baked the cookies, store them in an airtight container at room temperature for up to three days, or in the freezer for up to three months. Proper storage keeps your cookies fresh and delicious, so you can enjoy them whenever the craving strikes!

Serving Ideas and Variations

Perfect Pairings for These Strawberry Cheesecake Cookies

Strawberry cheesecake cookies are delightful on their own, but pairing them with the right beverage or dessert can elevate your experience. Serve them with a hot cup of coffee for a cozy morning treat, or pair them with a chilled glass of milk for a classic cookie combination.

For a more decadent option, consider serving these cookies alongside a scoop of vanilla ice cream or a dollop of whipped cream. If you’re entertaining, arrange the cookies on a platter with fresh strawberries for an eye-catching presentation. Their sweet, tangy flavor also pairs beautifully with sparkling rosé, making them an unexpected yet delightful addition to brunch or dessert parties.

Creative Variations to Try

If you love experimenting in the kitchen, there are plenty of ways to put a unique spin on strawberry cheesecake cookies. Try adding white chocolate chips to the dough for extra sweetness, or swirl in a few tablespoons of strawberry jam for a more intense fruity flavor.

For those who enjoy texture, chopped nuts like almonds or pecans can add a delightful crunch. You could even try substituting the strawberries with other fruits, like raspberries or blueberries, to create your own signature cookie flavor. These small changes can transform the recipe into something completely new, while still capturing the essence of cheesecake-inspired cookies.

Seasonal Twists on the Recipe

Strawberry cheesecake cookies are a year-round favorite, but you can give them a seasonal twist to match the time of year. In summer, use fresh strawberries for their juicy sweetness. For fall, try incorporating a hint of cinnamon or nutmeg to complement the tangy cream cheese flavor.

During the holidays, add a sprinkle of crushed peppermint candy for a festive touch. If you’re baking in spring, consider using pastel-colored sprinkles or shaping the cookies into flower designs. These small adjustments allow you to enjoy these cookies in fresh, creative ways no matter the season.

Turning Cookies into Ice Cream Sandwiches

One of the most fun ways to enjoy strawberry cheesecake cookies is by turning them into ice cream sandwiches. Simply take two cookies, add a scoop of your favorite ice cream (vanilla or strawberry work wonderfully), and press them gently together.

For an extra special touch, roll the edges of the ice cream sandwich in crushed graham crackers or sprinkles. Wrap them individually in parchment paper and freeze for a few hours to create a grab-and-go dessert. These cookie sandwiches are perfect for summer gatherings, kids’ parties, or anytime you want to impress your guests with a creative twist.

FAQs

How to Make Strawberry Cheesecake Cookies?

Making strawberry cheesecake cookies is simpler than you might think. Start by creaming softened butter, cream cheese, and sugar together until light and fluffy. Add eggs and vanilla extract, mixing thoroughly. In a separate bowl, combine the dry ingredients: flour, graham cracker crumbs, baking powder, and salt. Gradually mix the dry ingredients into the wet mixture, then gently fold in diced strawberries. Chill the dough for at least 30 minutes, scoop onto a baking sheet, and bake at 350°F for 10–12 minutes. Let the cookies cool before serving. For step-by-step instructions, refer to the detailed guide above.

Why These Strawberry Cheesecake Cookies Work?

Strawberry cheesecake cookies are the perfect combination of creamy, tangy, and sweet flavors. The cream cheese adds richness and moisture, while the graham cracker crumbs give the cookies a subtle, crust-like texture. Fresh strawberries bring a natural sweetness and vibrant color, making these cookies as visually appealing as they are delicious. Additionally, chilling the dough ensures the cookies bake up chewy and maintain their shape, resulting in a dessert that’s both satisfying and unique.

What Kind of Cream Cheese Should I Use?

For the best strawberry cheesecake cookies, use full-fat cream cheese. Its rich texture and tangy flavor are essential for achieving the classic cheesecake taste. Avoid whipped or low-fat cream cheese, as they may not provide the same creamy consistency. Make sure the cream cheese is softened before mixing to ensure a smooth, lump-free dough.

Can I Use Frozen Strawberries?

Yes, you can use frozen strawberries in strawberry cheesecake cookies, but there are a few tips to keep in mind. Thaw the strawberries completely and pat them dry with a paper towel to remove excess moisture. This prevents the dough from becoming too watery and ensures the cookies bake evenly. Frozen strawberries are a convenient alternative when fresh strawberries aren’t in season, and they still deliver great flavor.

Conclusion

Strawberry cheesecake cookies combine the creamy tang of cheesecake, the sweetness of fresh strawberries, and the buttery richness of cookies into a dessert that’s sure to impress. From preparing the ingredients and chilling the dough to baking and enjoying, every step of the process is designed to create a treat that’s as delicious as it is easy to make.

Whether you’re serving them for a special occasion, gifting them to friends, or enjoying them with a cup of coffee, these cookies are guaranteed to become a favorite. With tips for variations, creative serving ideas, and answers to common questions, you’re now equipped to bake the best strawberry cheesecake cookies right in your kitchen. So, grab your apron and get started your next batch of irresistible cookies is just a few steps away!