Confession time: my first attempt at cooking a sirloin strip steak was… well, let’s just say the dog wouldn’t even eat it! But here’s the thing – that kitchen fail led me down a rabbit hole of testing and tweaking until I cracked the code. Now my family literally cheers when they see strip steak on the menu. Ready to learn all my tried-and-true tricks? Let’s dive in!
Table of Contents
Understanding Your Sirloin Strip Steak
What Makes Strip Steak Special
Let’s talk about why the sirloin strip steak deserves a special place in your cooking repertoire. First off, this cut comes from the short loin of the cow, which basically means it’s from a part of the animal that doesn’t do much heavy lifting. As a result, you get this amazing balance of tenderness and rich, beefy flavor that’s hard to beat.
What’s really cool about a strip steak is its distinctive muscle structure. Unlike other cuts, it has this beautiful marbling throughout, but not so much that it becomes overwhelming. This means you’ll get that melt-in-your-mouth experience while still enjoying a meaty bite that really satisfies.
Selecting the Perfect Cut
Here’s where things get exciting! When you’re at the butcher counter, look for a sirloin strip steak with bright cherry-red color and fine white marbling threads running through the meat. According to Meat Science Journal, this marbling is crucial for flavor development during cooking.
Thickness matters big time – aim for about 1 to 1.5 inches thick. Why? Because thinner steaks can go from perfect to overcooked in seconds, while thicker cuts give you more wiggle room to nail that gorgeous crust while keeping the inside just right.
Reading the Labels
Let’s decode those confusing meat grades! Prime strip steaks are the cream of the crop with the most marbling, but honestly, a well-chosen Choice grade can be just as delicious for home cooking. Look for steaks with:
- Even color throughout
- No dark spots or discoloration
- Firm to the touch, but not hard
- Marbling that looks like fine cobwebs through the meat
Storage and Prep Tips
Once you’ve got your perfect strip steak home, proper storage is key. If you’re cooking within 2-3 days, keep it in the fridge wrapped in butcher paper or loosely in plastic wrap. The meat needs to breathe a little! For longer storage, wrap it tightly in freezer paper and use within 3 months for the best flavor.
Pro tip: Always (and I mean always) let your steak come to room temperature before cooking. This usually takes about 30-45 minutes and makes a huge difference in how evenly it cooks. Trust me on this one – I learned it the hard way!
Essential Preparation Techniques
Temperature Matters
Alright, let’s get real about temperature – it’s seriously the make-or-break factor for a perfect sirloin strip steak! First things first: take your steak out of the fridge about 30-45 minutes before cooking. Why? Because a room-temperature steak cooks way more evenly than a cold one. Think of it like warming up before exercise – it just works better!
While your steak is coming to room temp, go ahead and pat it dry with paper towels. This step might seem small, but trust me, it’s crucial for getting that gorgeous brown crust we’re all dreaming of. Remember, moisture is the enemy of a good sear!
Seasoning Your Strip Steak
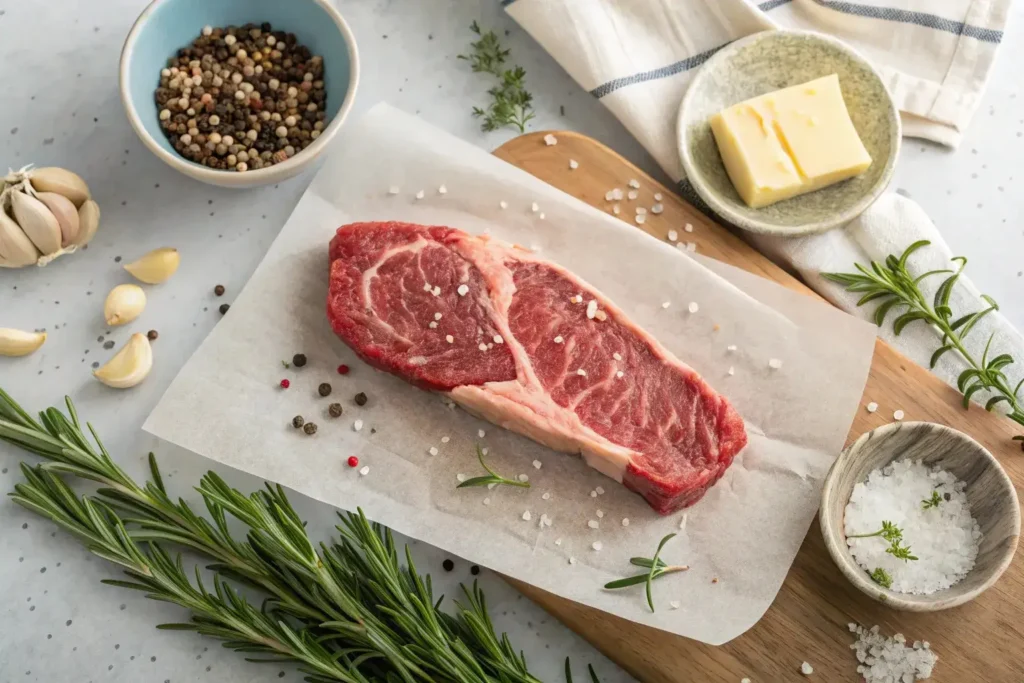
Now for the fun part – seasoning! When it comes to a quality strip steak, sometimes less is more. Start with a generous coating of kosher salt (about 1 teaspoon per pound) and freshly ground black pepper. However, if you’re feeling adventurous, here are some killer additions:
- Fresh crushed garlic
- Sprigs of fresh rosemary or thyme
- A light brush of good olive oil
Pro tip: Salt your steak at least 40 minutes before cooking. This gives the salt time to do its magic, enhancing the meat’s natural flavors and improving moisture retention.
Prepping Your Workspace
Before you start cooking your sirloin strip, get your workspace ready like a pro chef. You’ll need:
- A heavy-bottomed pan (cast iron is perfect!)
- Tongs for flipping
- An instant-read thermometer
- A warm plate for resting
Having everything ready beforehand means you can focus completely on cooking your steak to perfection. No running around the kitchen looking for stuff while your steak overcooks!
Essential Tools Check
Let’s talk tools because having the right equipment makes cooking a strip steak so much easier. Your MVP is definitely going to be a good pan – I’m talking about something that can handle high heat and distribute it evenly. Cast iron is amazing, but a heavy stainless steel pan works great too.
Next up, get yourself a reliable meat thermometer. After years of cooking steaks, I still use one every time. It’s not cheating – it’s being smart! The difference between medium-rare and medium can be just a few degrees, so why guess when you can know for sure?
Remember, good tools make cooking more enjoyable, but you don’t need anything fancy to make a great steak. Start with what you have, and upgrade as you go along. The most important ingredient is your attention to detail!
Pro tip: Keep a pair of dedicated tongs for your steaks – they’re way better than a fork which can pierce the meat and let all those precious juices escape. Nobody wants that!
Cooking Methods Master Guide
Pan-Searing Perfection
Let’s dive into my favorite way to cook a sirloin strip steak – the pan-sear method! Think restaurant-quality results right in your kitchen. First, get your pan screaming hot (and I mean HOT!). Cast iron is your best friend here, but any heavy-bottomed pan will work.
Once your pan is hot (you should see a little smoke), add a tiny bit of high-heat oil – just enough to coat the bottom. Now, place your room-temperature strip steak in the pan. That sizzle? That’s the sound of magic happening!
Here’s your timing guide:
- For medium-rare (my go-to): 4-5 minutes per side
- For medium: 5-6 minutes per side
- For medium-well: 6-7 minutes per side
Pro tip: Use tongs to hold your steak on its side for about 30 seconds to render that fat cap. Trust me, it’s worth it!
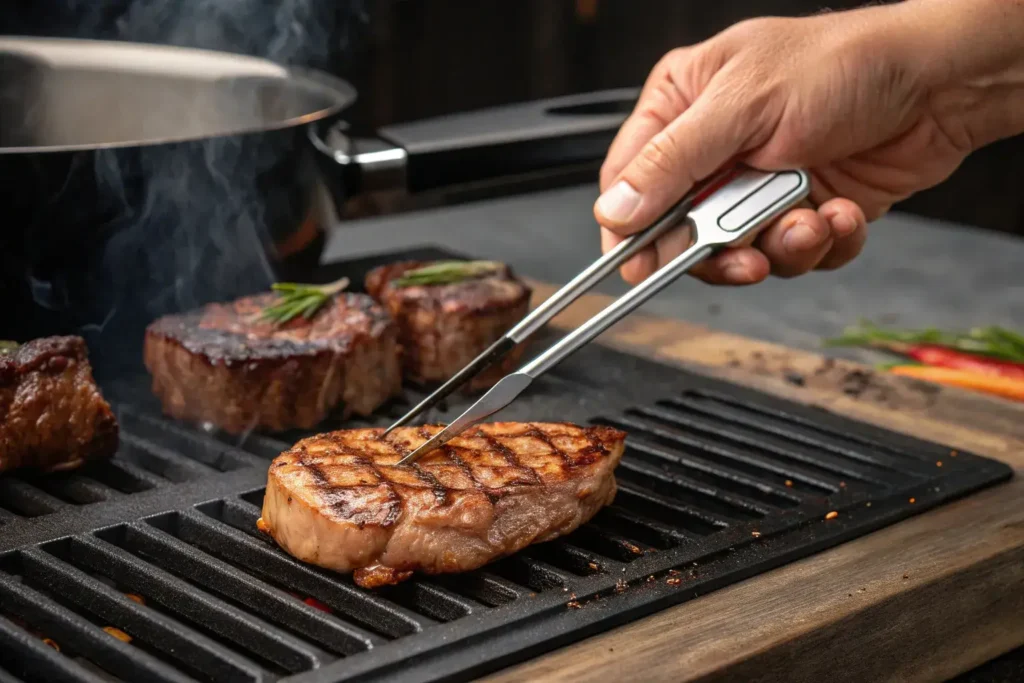
Grilling Guide
Nothing beats the smoky flavor of a grilled sirloin strip steak! Start by setting up your grill with two zones – one hot side for searing and one cooler side for more controlled cooking. Aim for about 450-500°F on the hot side.
Before grilling, make sure your steak is dry and well-seasoned. Place it on the hot side of the grill and – here’s the important part – don’t touch it for 4-5 minutes! Those gorgeous grill marks need time to develop. Then flip once (yep, just once!) and cook for another 3-4 minutes for medium-rare.
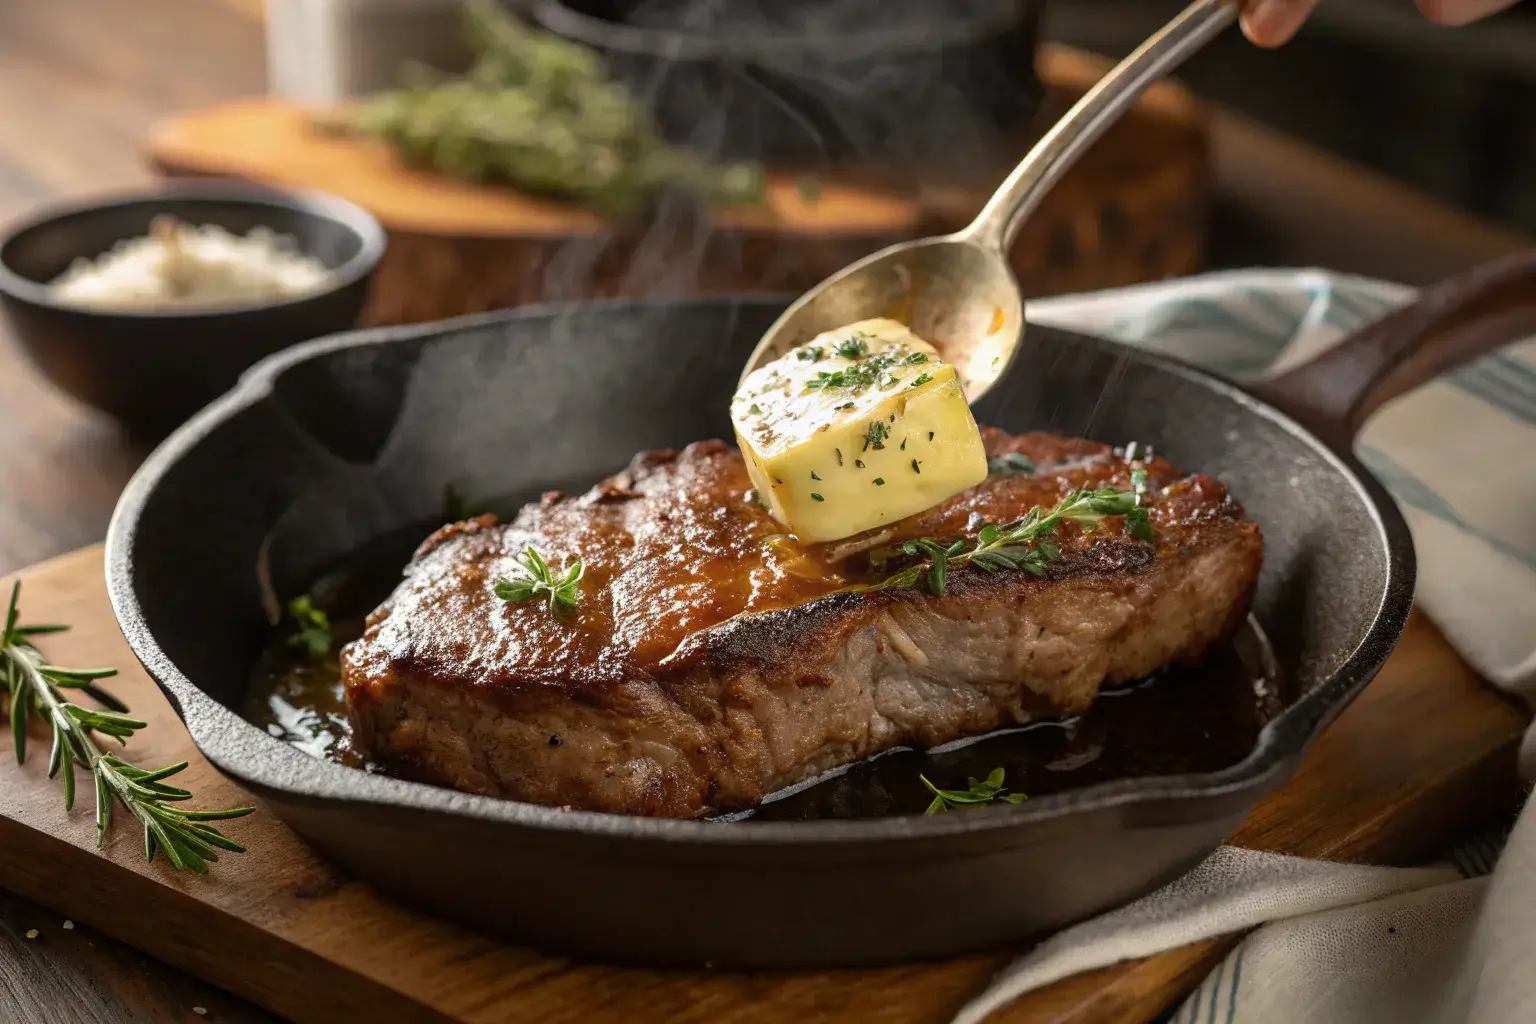
Mastering the Butter Baste
Want to take your strip steak to the next level? Try butter basting! About a minute before your steak is done, add a knob of butter to the pan along with some fresh herbs (thyme and rosemary are amazing). As the butter melts, tilt the pan slightly and use a spoon to repeatedly pour that flavored butter over the steak.
The butter will foam and brown, creating this incredible nutty flavor that coats your steak. Plus, it helps create that steakhouse-worthy crust we’re all after!
Love steak but want to explore different cuts? While this sirloin strip steak is my weekend go-to, our Easy Black Pepper Angus Steak Recipe is perfect for busy weeknights when you still want something special.
Getting Creative
While a perfectly cooked sirloin strip is amazing on its own, sometimes it’s fun to mix things up! Try:
- Adding crushed garlic cloves and herbs to your butter baste
- Creating a quick pan sauce with red wine and shallots
- Topping with a pat of compound butter (herb-infused butter)
Remember, cooking should be fun! Don’t be afraid to experiment once you’ve got the basics down.
Pro tip: If you’re loving this steak guide, you might want to check out our guide on making the perfect pan sauce for steaks. It’s a game-changer!
Advanced Tips for Restaurant-Quality Results
Temperature Control
Getting that perfect sirloin strip steak means mastering your temperatures! Let me break down these game-changing temp targets for you:
- Rare: 125°F (bright red center)
- Medium-rare: 135°F (warm red center – my personal fave!)
- Medium: 145°F (warm pink center)
- Medium-well: 150°F (slightly pink center)
Remember, your strip steak will continue cooking even after you take it off the heat. This is called carryover cooking, and it can raise the temperature by about 5°F. So, pull your steak when it’s about 5 degrees below your target temp!
The Art of Resting
Here’s something I learned the hard way – a rested steak is a juicy steak! After cooking your sirloin strip steak, let it hang out on a warm plate for 5-10 minutes. I know it’s tempting to dig right in (believe me, I’ve been there!), but this resting time lets those tasty juices redistribute throughout the meat.
Pro tip: Loosely tent your steak with foil while it rests. Don’t wrap it tight though – we want to keep that beautiful crust we worked so hard for!
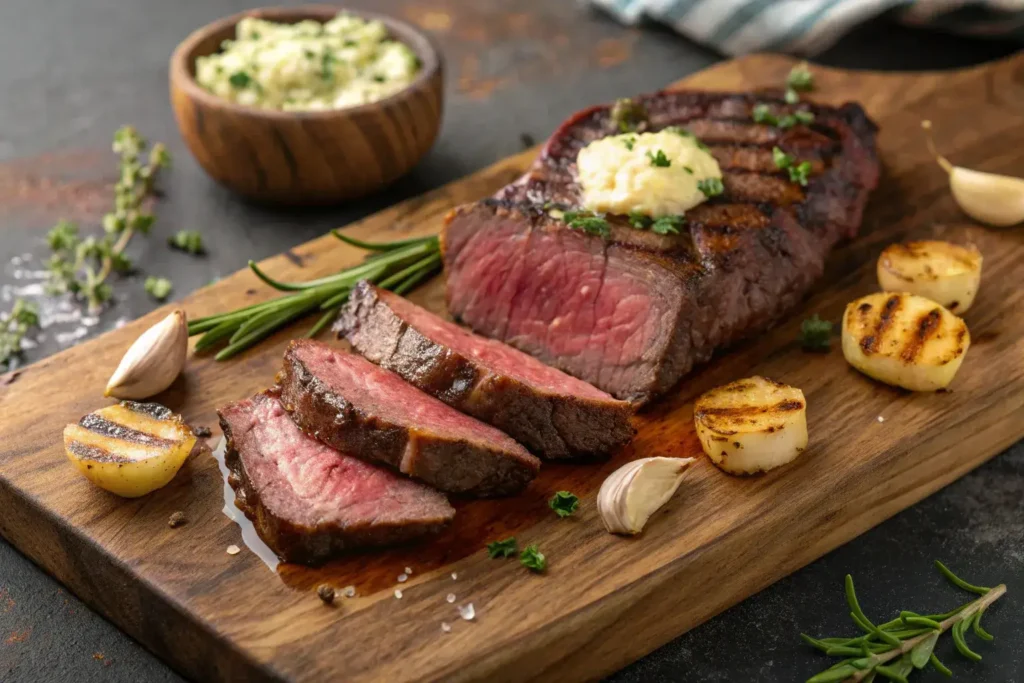
Slicing for Success
Ready for the big reveal? When slicing your sirloin strip steak, always cut against the grain. Look for the lines running through the meat and slice perpendicular to them. This breaks up those muscle fibers and gives you the most tender bite possible.
Aim for slices about ½ inch thick – thin enough to be bite-sized but thick enough to maintain that gorgeous pink center. And hey, if you’re taking photos for the ‘gram (who isn’t these days?), slice on a slight angle for that dramatic presentation!
Perfect Pairings
A perfectly cooked sirloin strip steak deserves perfect sides! Here are some winning combinations I’ve discovered through lots of delicious “research”:
- Crispy roasted potatoes with garlic and herbs
- Grilled asparagus with lemon zest
- Sautéed mushrooms in red wine sauce
- Fresh arugula salad with shaved parmesan
Remember, the best side dish is one that complements your steak without overshadowing it. Think of your steak as the star of the show, with the sides playing supporting roles!
Pro tip: Save those meat juices that collect while resting – they’re liquid gold for drizzling over your plated steak!
Frequently Asked Questions
Is sirloin strip a good steak?
Absolutely! The sirloin strip steak is one of the best value-for-money cuts you’ll find. Think of it as the sweet spot between fancy special-occasion steaks and everyday cuts. It has this amazing balance of flavor and tenderness, plus that beautiful marbling that gives you tons of beefy flavor. The best part? It’s pretty forgiving when you’re cooking, so it’s perfect whether you’re just starting your steak journey or you’re a seasoned pro!
What is the best way to cook sirloin steak strips?
From my endless kitchen experiments (and trust me, I’ve tried every method!), pan-searing your strip steak is the way to go. Get your pan screaming hot, add a tiny bit of oil, and cook for 4-5 minutes per side for medium-rare. The key is letting that gorgeous crust develop – no peeking or flipping too early! Want to level up? Try the butter-basting technique I mentioned earlier. It’s a total game-changer!
Is strip sirloin steak tender?
You bet it is! While not quite as buttery-soft as a filet mignon, a sirloin strip steak has excellent tenderness, especially when cooked properly. The secret? It’s all about two things: cooking temperature and slicing against the grain. Get these right, and you’ll have a steak that’s tender enough to make your dinner guests think you’ve been taking secret chef lessons!
What is another name for sirloin strip steak?
Here’s a fun fact: your sirloin strip steak goes by quite a few aliases! You might see it labeled as New York Strip, Kansas City Strip, or simply Strip Steak. In some places, it’s even called a Club Steak or Ambassador Steak. Same delicious cut, just different names depending on where you’re shopping!
Conclusion
Remember, great steak cooking is all about temperature, timing, and a little bit of patience. Don’t be afraid to practice, and most importantly, have fun with it! Whether you’re pan-searing, grilling, or trying out that fancy butter-basting technique, you’ve got all the tools you need to nail it every time. Now, go forth and cook some amazing steaks!
Perfect Sirloin Strip Steak Recipe: Steakhouse Quality at Home
- Total Time: 1 Hour
- Yield: 2–4 servings (depends on steak size) 1x
Description
Ready to nail that restaurant-worthy sirloin strip steak right in your kitchen? This foolproof recipe delivers a perfectly juicy, crusty steak every single time. I’ve tested this method hundreds of times (tough job, but someone had to do it! 😉), and it never fails to impress.
Ingredients
- 1 (1½-inch thick) sirloin strip steak (about 1–1.5 pounds)
- 2 teaspoons kosher salt
- 1 teaspoon freshly ground black pepper
- 2 tablespoons high-heat cooking oil (like avocado or grapeseed)
- 4 tablespoons unsalted butter
- 4 garlic cloves, peeled and smashed
- 4 sprigs fresh thyme
- 2 sprigs fresh rosemary
Instructions
- Remove your strip steak from the fridge 30-45 minutes before cooking to reach room temperature. Pat it dry really well with paper towels (moisture is the enemy of a good crust!).
- Season generously with salt and pepper on all sides, including the edges. Don’t be shy – some will fall off during cooking.
- Heat a cast-iron skillet or heavy-bottomed pan over high heat until it’s smoking hot (about 5 minutes).
- Add oil to the pan – it should shimmer immediately.
- Carefully place your steak in the pan. Let it sear undisturbed for 4-5 minutes until a beautiful brown crust forms.
- Flip once and cook for another 3-4 minutes.
- Add butter, garlic, and herbs to the pan. Once butter melts, tilt the pan slightly and start basting! Spoon that gorgeous butter over the steak continuously for about 1-2 minutes.
- Check internal temperature:
- Rare: 125°F
- Medium-rare: 135°F (my recommendation!)
- Medium: 145°F
- Medium-well: 150°F
- Transfer to a warm plate and let rest for 5-10 minutes (no cheating – this step is crucial!).
- Slice against the grain and serve with those flavorful pan juices.
Notes
- Your pan needs to be HOT – if you’re not setting off smoke detectors, it’s probably not hot enough (kidding… kind of! 😅)
- Use tongs to handle your steak – no forks allowed!
- The finger test works great for checking doneness, but a meat thermometer is foolproof
- Let your steak rest on a warm plate, not a cold one
- Don’t forget to pour those buttery pan juices over the sliced steak before serving