Recipe squash and kidney beans

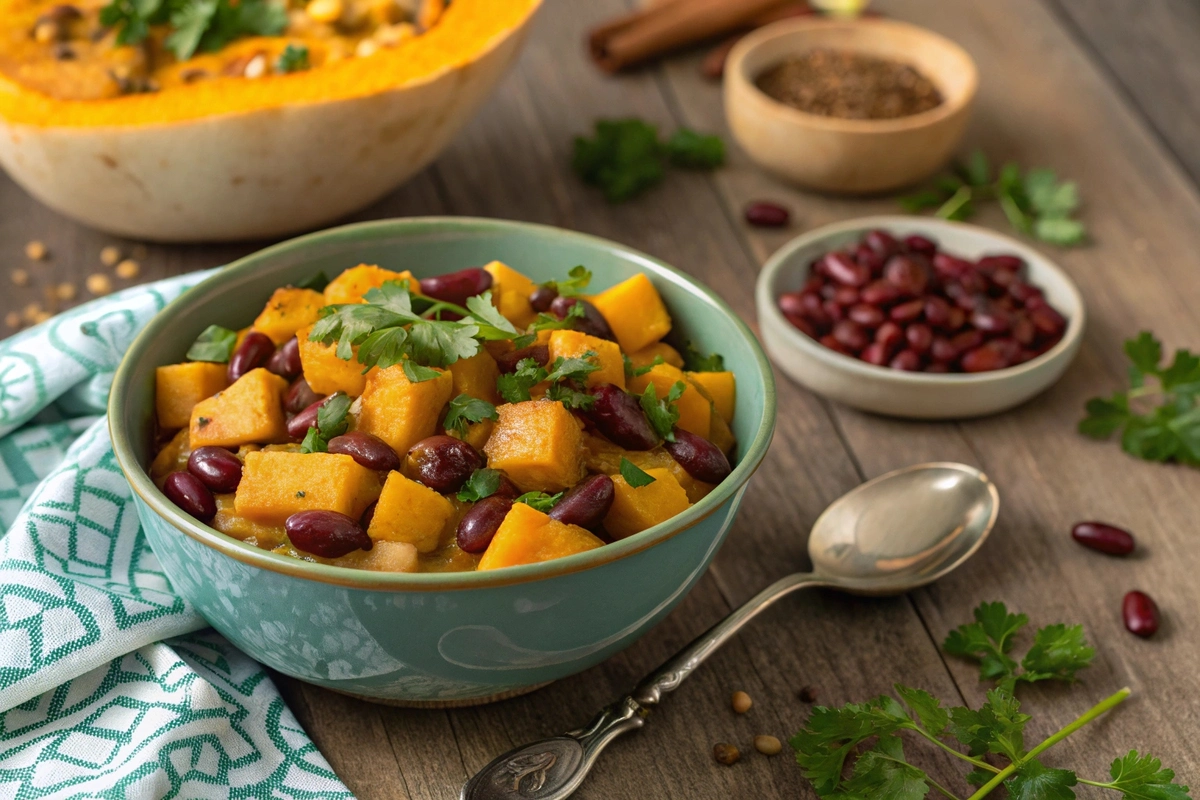
This recipe squash and kidney beans will warm your heart and fill your belly. Sweet, tender squash meets rich, earthy kidney beans in a dish that’s brimming with flavor and nutrition. Whether you’re meal-prepping or cooking for the family, this one-pot wonder is as comforting as it is versatile.

Why You’ll Love This Recipe Squash and Kidney Beans

This recipe squash and kidney beans is a wholesome and delicious way to enjoy a hearty, plant-based meal. Whether you’re looking for something cozy on a chilly evening or a nutritious weeknight dinner, this dish checks all the boxes. Let’s explore what makes it a must-try!

A Nutritious One-Pot Wonder

When it comes to nutrition, this recipe squash and kidney beans is a powerhouse! Squash is packed with vitamins A and C, offering a boost to your immune system while providing natural sweetness. On the other hand, kidney beans are a rich source of protein and fiber, making this dish both satisfying and healthy.

What’s more, combining squash and kidney beans creates a dish that’s ideal for vegetarians, vegans, and anyone aiming to add more plant-based meals to their routine. It’s filling without feeling heavy, and every bite is loaded with flavor.

Perfect for Any Season

Squash is often associated with fall, but this recipe squash and kidney beans can easily be enjoyed year-round. Butternut and acorn squash are perfect choices for cooler months, while zucchini or summer squash can be swapped in during spring and summer for a lighter variation.

Pairing the creamy, tender squash with kidney beans creates a dish that’s warming and hearty during colder seasons, yet adaptable for fresher, brighter flavors when the weather warms up.

Budget-Friendly and Accessible

This recipe squash and kidney beans is as easy on your wallet as it is on your schedule. Squash is affordable when bought in season, and kidney beans—whether dried or canned—are one of the most cost-effective sources of plant-based protein.

Canned beans are a great time-saver, but if you’re working with dried kidney beans, you can cook them in bulk for an even more budget-friendly option. Plus, the recipe doesn’t require any fancy or hard-to-find ingredients, making it accessible for home cooks everywhere.

Customizable for Your Tastes

One of the best parts of this recipe squash and kidney beans is how easily you can make it your own. Want a bit of spice? Add a pinch of chili flakes or cumin. Craving something creamy? Stir in some coconut milk. Need more greens? Toss in kale or spinach toward the end of cooking.

Here are a few ideas to try:

  • Mediterranean-inspired: Add diced tomatoes, oregano, and a sprinkle of feta cheese (or a vegan alternative).
  • Indian flavors: Mix in curry powder, turmeric, and a splash of coconut milk.
  • Hearty stew: Add vegetable broth and simmer until thickened for a rich, soup-like consistency.

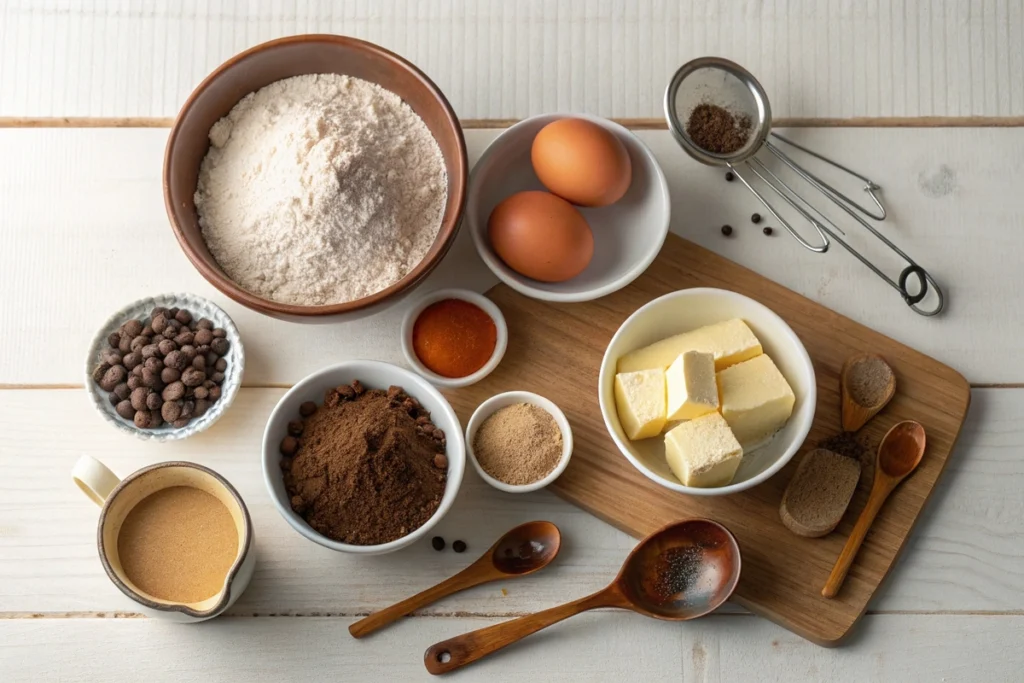
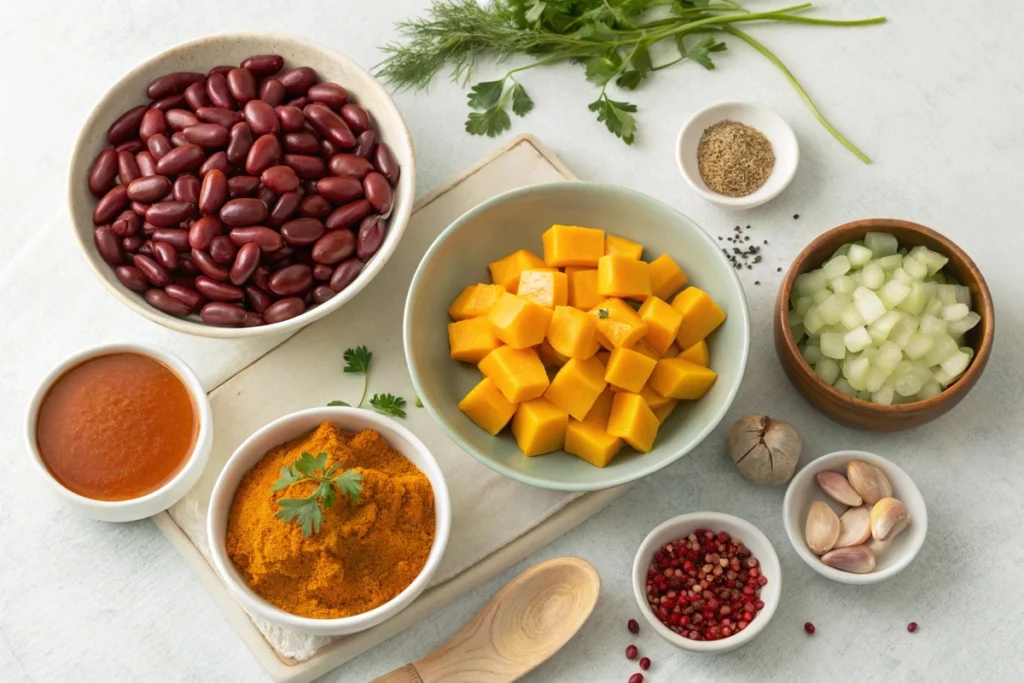
Ingredients for Recipe Squash and Kidney Beans

One of the secrets to making a great recipe squash and kidney beans is starting with fresh, wholesome ingredients. In this section, we’ll cover everything you need to create a flavorful, nutritious dish, along with tips to choose and prepare your ingredients.

Ingredients for recipe squash and kidney beans, including diced squash, kidney beans, and spices
A flat lay of fresh and wholesome ingredients for squash and kidney beans

Choosing the Right Squash

Squash is the star of this recipe squash and kidney beans, and picking the right variety makes all the difference. Butternut squash is a fantastic option because of its natural sweetness and creamy texture. Acorn squash and kabocha squash are also great choices if you prefer a nutty flavor.

  • Pro Tip: When selecting squash, look for ones that are firm, heavy for their size, and free of blemishes. A ripe butternut squash, for example, will have a matte finish, not a glossy one.

Prepping Kidney Beans

Whether you use canned or dried kidney beans, they’re a key component of this dish. Canned beans save time, but if you’re working with dried beans, follow these steps for best results:

  1. Soak the beans: Soak dried kidney beans in water overnight to reduce cooking time.
  2. Cook until tender: Boil the soaked beans for about 45–60 minutes until soft.
  3. Drain and rinse: Whether canned or cooked from dried, rinse kidney beans thoroughly to remove excess sodium and improve their flavor.

Seasonings and Spices

The flavor of your recipe squash and kidney beans will depend heavily on the seasonings you use. Here’s a simple spice blend to enhance the natural taste of the ingredients:

  • Spices: Cumin, paprika, and turmeric create a warm, earthy base.
  • Herbs: Fresh thyme, parsley, or a bay leaf can add layers of aroma and flavor.
  • Heat: If you enjoy a spicy kick, consider adding chili powder or a pinch of red pepper flakes.

Optional Ingredients for Added Depth

Want to make your recipe squash and kidney beans even more exciting? Try adding some of these optional ingredients:

  • Coconut milk: For a creamy, slightly sweet variation.
  • Tomatoes: Fresh or canned tomatoes add a tangy balance to the dish.
  • Leafy greens: Kale, spinach, or Swiss chard can be stirred in toward the end for extra nutrition.

Step-by-Step Instructions for Recipe Squash and Kidney Beans

Making this recipe squash and kidney beans is a straightforward process, and the result is a comforting, flavorful dish that’s perfect for any occasion. Follow these step-by-step instructions to create a one-pot wonder that’s both hearty and healthy.

Pot of simmering recipe squash and kidney beans being stirred with a wooden spoon.
A simmering pot of squash and kidney beans, brimming with flavor and texture.

Step 1: Prepare Your Ingredients

Proper preparation is the key to a seamless cooking experience. Start by gathering all your ingredients and prepping them in advance:

  1. Dice the squash: Peel and cut the squash into evenly sized cubes to ensure they cook at the same rate. Butternut squash is a great option for this step because it’s easy to peel and has a smooth texture.
  2. Rinse and drain the kidney beans: If you’re using canned beans, rinse them thoroughly to remove excess sodium. If using dried beans, make sure they’re fully cooked and tender.
  3. Chop aromatics: Dice the onion and mince the garlic to build the flavor base for your recipe squash and kidney beans.

Step 2: Sauté the Aromatics

Building flavor begins with cooking the aromatics. This step lays the foundation for a rich, savory dish.

  1. Heat 2 tablespoons of olive oil in a large pot or Dutch oven over medium heat.
  2. Add the chopped onion and cook for 3–4 minutes until it turns translucent. Stir frequently to prevent burning.
  3. Toss in the minced garlic, followed by your chosen spices (e.g., cumin, paprika, and turmeric). Stir for 30 seconds to toast the spices and release their aroma.

Pro tip: If you enjoy spicy food, add a pinch of red chili flakes or cayenne pepper at this stage.

Step 3: Cook the Squash

Once your aromatics are fragrant, it’s time to cook the squash, which is the heart of this recipe squash and kidney beans.

  1. Add the diced squash to the pot and stir it into the sautéed aromatics, coating it with the flavorful oil and spices.
  2. Pour in 2 cups of vegetable broth or water, ensuring the squash is partially submerged.
  3. Bring the mixture to a gentle boil, then reduce the heat to low. Cover the pot and let it simmer for 15–20 minutes, or until the squash is tender enough to pierce with a fork.

For a stew-like texture, allow some of the broth to reduce. If you prefer a creamier consistency, mash a few squash pieces with the back of your spoon.

Step 4: Add the Kidney Beans and Simmer

The final step in this recipe squash and kidney beans is to incorporate the kidney beans and let the flavors meld together.

  1. Stir in 2 cups of cooked or canned kidney beans, ensuring they’re evenly distributed throughout the dish.
  2. Let the mixture simmer for another 10–15 minutes, allowing the beans to absorb the rich flavors of the squash and spices.
  3. Taste and adjust the seasoning with salt, black pepper, or additional spices as needed.

If you’re looking for a creamier texture, consider stirring in ½ cup of coconut milk during the last few minutes of cooking.

Tips and Tricks for the Perfect Recipe Squash and Kidney Beans

Mastering the art of cooking recipe squash and kidney beans comes down to a few key tips and techniques. These will help you bring out the best flavors and textures, ensuring your dish is as satisfying as possible.

Choose the Right Squash for Your Recipe

When it comes to this recipe squash and kidney beans, the type of squash you choose can make a big difference. Butternut squash is a favorite because it becomes creamy and slightly sweet when cooked, pairing beautifully with the earthy flavor of kidney beans.

  • For sweeter flavors: Use butternut or kabocha squash.
  • For a nutty taste: Acorn squash or delicata squash are great options.
  • For convenience: Pre-cubed butternut squash is an excellent time-saver, especially for busy weeknights.

No matter which type you use, make sure to cut the squash into even pieces for uniform cooking.

Season and Layer Flavors Properly

The key to a flavorful recipe squash and kidney beans is building layers of seasoning. Start with a base of sautéed onions and garlic, then add spices like cumin, paprika, and turmeric to infuse the dish with warmth and depth.

  • Don’t skip the toasting step: Cooking the spices in oil for a few seconds releases their full aroma.
  • Adjust spice levels to suit your taste: If you prefer a kick of heat, add cayenne or red pepper flakes.
  • Add a touch of acidity: A squeeze of lemon or a splash of vinegar at the end can brighten the flavors and balance the richness of the squash and beans.

Make It Creamy or Chunky to Suit Your Preference

This recipe squash and kidney beans is incredibly versatile when it comes to texture. You can keep it chunky or make it creamy based on your preferences:

  • For a chunky stew, let the squash soften naturally and leave it whole.
  • For a creamy consistency, mash a portion of the cooked squash or blend a cup of the mixture, then stir it back into the pot.
  • Want a richer dish? Add coconut milk or a dollop of plain yogurt just before serving.

No matter the texture, the dish is sure to be satisfying and hearty.

Serving Suggestions for Every Occasion

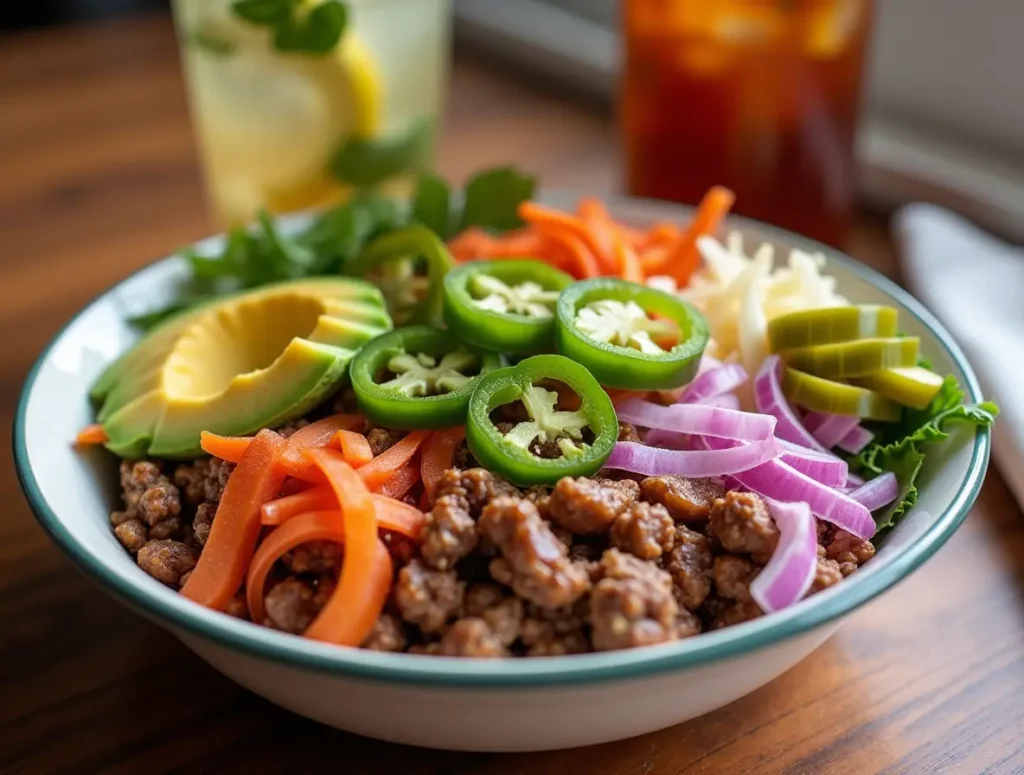
This recipe squash and kidney beans is a one-pot wonder, but how you serve it can transform the dining experience:

A bowl of squash and kidney beans garnished with parsley and served with crusty bread
A delicious serving of squash and kidney beans with crusty bread on the side.
  • As a main dish: Serve it in bowls, garnished with fresh parsley or cilantro, alongside a slice of crusty bread for dipping.
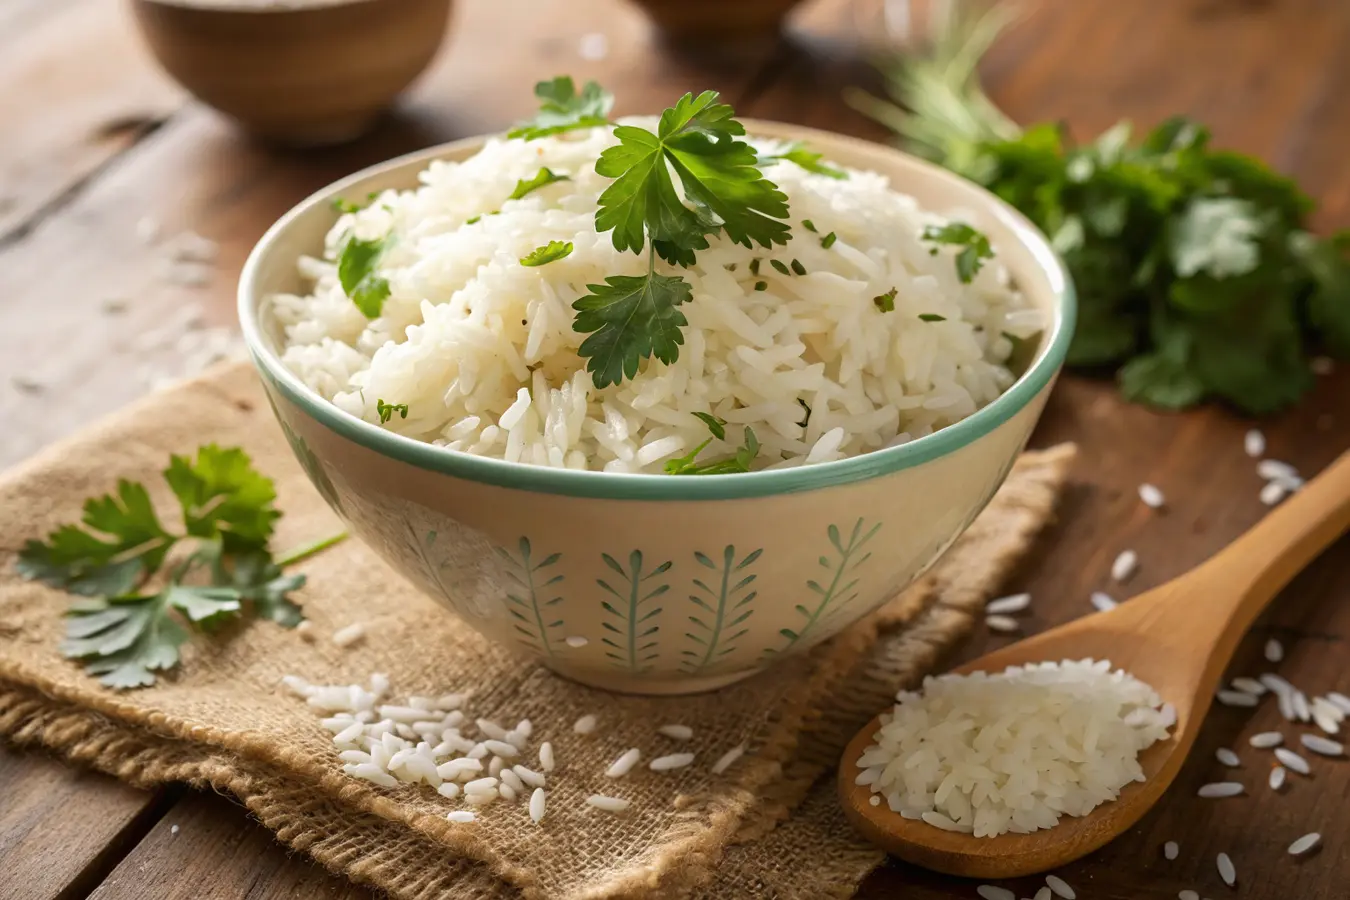
  • Over grains: Spoon it over rice, quinoa, or couscous for a more filling meal.
  • With sides: Pair it with a green salad or roasted vegetables for a balanced dinner.
  • For meal prep: Divide the dish into airtight containers for an easy, reheatable lunch throughout the week.

For more creative dinner recipes that bring both flavor and convenience to your table, check out our Burger Bowl Recipe.

FAQs

How do you know when kidney beans are cooked enough?

You can tell kidney beans are fully cooked when they’re soft and tender but still hold their shape. To test, gently press one bean between your fingers or use a fork it should mash easily without feeling tough or grainy. Properly cooked beans will enhance the texture and flavor of your recipe squash and kidney beans.

How long do kidney beans take to cook?

If you’re using dried kidney beans, they usually take 45–60 minutes to cook after soaking them overnight. The cooking time can vary depending on the bean’s size and age. For canned kidney beans, they are already cooked and only need to be rinsed and reheated for about 5–10 minutes, making them perfect for quick meals like recipe squash and kidney beans.

Can canned kidney beans be eaten cold?

Yes, canned kidney beans are safe to eat cold straight out of the can. They are pre-cooked during the canning process, so you can enjoy them in salads, dips, or even as a topping for your recipe squash and kidney beans. Be sure to rinse canned beans thoroughly to remove excess sodium or preservatives before eating.

What happens if you don’t cook kidney beans properly?

If kidney beans aren’t cooked properly, they can cause stomach discomfort due to a natural toxin called phytohaemagglutinin (lectin). Undercooked beans, especially those that have been boiled for less than 10 minutes, can cause nausea or other digestive issues. Always ensure dried kidney beans are soaked, boiled for at least 10 minutes, and fully cooked to make your recipe squash and kidney beans safe and enjoyable.

Conclusion

This recipe squash and kidney beans brings together wholesome ingredients, rich flavors, and a comforting texture in a dish that’s both versatile and nutritious. Whether you’re preparing it for a cozy dinner, meal prep, or a family gathering, this recipe is sure to satisfy. By following the simple tips and techniques shared throughout this guide, you’ll create a flavorful, hearty dish that’s perfect for any occasion.

Print
clock clock iconcutlery cutlery iconflag flag iconfolder folder iconinstagram instagram iconpinterest pinterest iconfacebook facebook iconprint print iconsquares squares iconheart heart iconheart solid heart solid icon
Pot of simmering recipe squash and kidney beans being stirred with a wooden spoon.

Recipe squash and kidney beans


  • Author: Emily
  • Total Time: 40 minutes
  • Yield: 4 servings 1x

Description

This hearty and healthy recipe squash and kidney beans combines creamy squash, protein-packed kidney beans, and flavorful spices in one comforting dish. It’s perfect for a quick dinner, meal prep, or a cozy night in.


Ingredients

Scale

For the Base:

  • 2 cups diced butternut squash (or acorn squash)
  • 1 cup cooked kidney beans (or 1 can, drained and rinsed)
  • 1 medium onion, diced
  • 3 garlic cloves, minced
  • 2 cups vegetable broth (or water)
  • 1 tablespoon olive oil

Spices and Seasonings:

  • 1 teaspoon cumin
  • 1 teaspoon paprika
  • ½ teaspoon turmeric
  • ½ teaspoon salt (adjust to taste)
  • ¼ teaspoon black pepper
  • 1 bay leaf

Optional Add-ins:

  • ½ cup canned tomatoes or diced fresh tomatoes
  • ¼ cup coconut milk for creaminess
  • 2 cups fresh spinach or kale

Garnish:

  • Fresh parsley or cilantro (chopped)


Instructions

  1. Prepare Ingredients: Peel and dice the squash into bite-sized cubes. Rinse canned kidney beans or prepare dried beans by soaking and boiling them until tender.

  2. Cook Aromatics: Heat olive oil in a large pot or Dutch oven over medium heat. Sauté the diced onion for 3–4 minutes until softened. Add the minced garlic and cook for another minute.

  3. Toast Spices: Stir in cumin, paprika, turmeric, and black pepper. Toast the spices in the oil for 30 seconds to release their flavors.

  4. Add Squash and Broth: Add the diced squash to the pot and stir to coat it in the spices. Pour in the vegetable broth and add the bay leaf. Bring to a gentle boil, then reduce heat to low. Cover and simmer for 15–20 minutes, or until the squash is tender.

  5. Add Kidney Beans and Simmer: Stir in the kidney beans and optional ingredients like tomatoes or spinach. Simmer for another 10–15 minutes to let the flavors meld. If using coconut milk, stir it in during the last 5 minutes of cooking.

  6. Adjust Seasoning: Taste and adjust salt or spices as needed. Remove the bay leaf before serving.

  7. Serve: Ladle the squash and kidney beans into bowls. Garnish with fresh parsley or cilantro and serve with crusty bread, rice, or quinoa.

Notes

  • Make It Spicy: Add chili flakes or cayenne pepper for extra heat.
  • Texture Tip: Mash some of the squash to thicken the broth naturally.
  • Storage: Store leftovers in an airtight container in the fridge for up to 3 days. Reheat on the stovetop or in the microwave.

Burger Bowl Recipe: A Healthy Twist on a Classic Dish

If you love burgers but want a healthier twist, you’re in for a treat! This burger bowl recipe combines all the savory goodness of a burger juicy protein, crisp veggies, and tangy dressings in a fresh, gluten-free bowl. It’s quick, easy, and bursting with flavor, perfect for weeknight dinners or meal prep!

What Is a Burger Bowl?

When you think of a classic burger, what comes to mind? Juicy patties, fresh toppings, and bold flavors but usually with a bun. A burger bowl recipe takes all those delicious elements and serves them in a healthier, bun-free way. It’s a creative twist that combines everything you love about burgers with the convenience of a fresh, customizable salad bowl. Whether you’re looking for a low-carb meal, something gluten-free, or just a fun way to mix up dinner, burger bowls are here to save the day!

Why Choose a Burger Bowl Over a Traditional Burger?

While burgers are undeniably tasty, they often come with a hefty calorie count thanks to the bun and fries. With a burger bowl recipe, you get all the same savory flavors without the extra carbs. This makes it perfect for keto dieters or anyone looking for a lighter option.

Plus, burger bowls are endlessly versatile. Want a spicy kick? Add jalapeños or hot sauce. Craving something creamy? Toss in avocado or drizzle ranch dressing on top. Unlike a traditional burger, which is often pre-assembled, you can completely customize every bite of your bowl. It’s a no-brainer for picky eaters and foodies alike!

The Origins of the Burger Bowl Trend

The idea of ditching the bun isn’t entirely new, but the burger bowl recipe has gained traction thanks to the growing popularity of low-carb and keto diets. Restaurants and home cooks alike have embraced this concept, finding innovative ways to reimagine the burger experience.

In fact, burger bowls are part of a broader movement toward “bowl meals,” where classic dishes are deconstructed and served in a bowl format for easier eating and more flexibility. From burrito bowls to smoothie bowls, this trend is all about combining convenience with bold flavors.

Who Will Love This Burger Bowl Recipe?

Step-by-step collage of assembling a burger bowl with lettuce, beef, cheese, and dressing
From greens to toppings, the process of creating a perfect burger bowl step by step.

Short answer? Everyone! This burger bowl recipe is designed to suit a wide range of tastes and dietary preferences.

  • Keto and low-carb enthusiasts will love that it skips the bun while keeping the flavor intact.
  • Vegetarians can swap the beef for plant-based protein options like black bean patties or tofu.
  • Busy families will appreciate how quick and easy it is to prepare perfect for those chaotic weeknights.
  • Meal preppers will enjoy how well the ingredients keep when stored separately, making it a great choice for a healthy lunch all week.

The Perfect Burger Bowl: A Balance of Flavors and Textures

What makes a burger bowl recipe truly shine? It’s all about finding the right balance between flavors and textures. Think about it every bite should have something crunchy, something creamy, and that juicy, savory protein that ties it all together.

To start, the fresh greens act as the base, providing a crisp, refreshing element. Then, the protein—whether it’s classic ground beef, lean ground turkey, or a plant-based option—adds heartiness and bold flavor. Finally, the toppings bring everything together. Imagine the crunch of diced onions, the tang of pickles, and the smoothness of sliced avocado, all topped off with a drizzle of your favorite dressing.

Ingredients for Your Perfect Burger Bowl

When it comes to creating the ultimate burger bowl recipe, the ingredients are key. By carefully choosing fresh, high-quality components, you can elevate a simple meal into something extraordinary. Let’s break down the essentials you’ll need to build your burger bowl masterpiece!

Fresh and Flavorful Base Ingredients

Every great burger bowl recipe starts with a solid base. While lettuce is the most common choice, you can get creative by experimenting with different greens or substitutes:

  • Romaine lettuce: Crisp and sturdy, perfect for holding all your toppings.
  • Iceberg lettuce: Light and refreshing, offering a classic crunch.
  • Spinach or arugula: For those who prefer a more peppery flavor.
  • Cauliflower rice or zucchini noodles: A great low-carb alternative to greens!

Pro tip: Always dry your greens thoroughly before assembling your bowl. Excess moisture can make your toppings soggy, which no one wants!

Protein Choices for Your Burger Bowl

The protein is the heart of your burger bowl recipe, and the possibilities are endless! Whether you prefer beef, turkey, or a plant-based option, there’s something for everyone:

  • Ground beef: Stick with 80/20 for the perfect balance of flavor and moisture.
  • Ground turkey or chicken: Leaner options that pair beautifully with bold toppings.
  • Plant-based patties: From black bean burgers to Beyond Meat, vegetarians can enjoy this dish too.

Season your protein with salt, pepper, garlic powder, or even a dash of Worcestershire sauce to mimic that classic burger flavor. Check out this ground beef stroganoff recipe for more inspiration on how to use beef in creative ways!

Topping Ideas for Extra Flavor

Here’s where your burger bowl recipe really shines—customizing your toppings to suit your cravings! A balance of textures and flavors is the goal:

  • Classic burger toppings: Sliced tomatoes, onions (raw or caramelized), pickles, and shredded cheese.
  • Creamy additions: Sliced avocado, sour cream, or a dollop of guacamole.
  • Crunchy options: Croutons, crispy bacon bits, or fried onions for a satisfying crunch.
  • Bold extras: Jalapeños, sautéed mushrooms, or roasted red peppers to spice things up.

Dressings That Bring It All Together

No burger bowl recipe is complete without a delicious dressing to tie all the flavors together! Here are some options to consider:

  • Special sauce: A mix of mayo, ketchup, and pickle relish for that iconic burger taste.
  • Ranch dressing: Creamy and tangy, a family favorite.
  • Vinaigrette: For a lighter, fresher touch, especially with greens-based bowls.
  • Keto-friendly options: Avocado or olive oil-based dressings for low-carb eaters.

For a deeper dive into dressings and sauces, check out this patty melt sauce recipe. It’s easy to adapt for your burger bowl needs!

How to Make a Burger Bowl

Creating the perfect burger bowl recipe is easier than you think! With just a few simple steps, you can whip up a meal that’s not only healthy but also packed with flavor. Whether you’re a beginner or a seasoned home cook, these instructions will help you prepare a delicious burger bowl in no time.

Ground beef cooking in a skillet with spices for a burger bowl recipe
Seasoned ground beef sizzling in a skillet, the foundation of a delicious burger bowl.

Step 1: Prepare Your Protein

The first step in your burger bowl recipe is cooking the protein. Whether you’re using ground beef, turkey, or a plant-based option, properly seasoning and cooking it will make all the difference.

  1. Start with seasoning: Sprinkle salt, pepper, garlic powder, and onion powder on your protein. For an extra punch, add smoked paprika or Worcestershire sauce.
  2. Cook to perfection: Heat a skillet over medium heat, add a drizzle of olive oil, and cook the protein until it’s browned and fully cooked. For ground beef or turkey, break it into small, crumbled pieces as it cooks.
  3. Drain any excess grease: This keeps your burger bowl fresh and not overly oily.

Pro tip: For more protein inspiration, check out our black pepper Angus steak recipe and adapt it for a steak-based burger bowl.

Step 2: Assemble the Fresh Base

Next, it’s time to prepare the base of your burger bowl recipe. This step is all about adding freshness and a bit of crunch to complement the warm protein.

  • Wash and dry your greens: Use a salad spinner or paper towels to ensure your lettuce is completely dry. A mix of romaine and spinach works well for added texture and flavor.
  • Chop veggies for easy eating: Dice tomatoes, cucumbers, and red onions into bite-sized pieces. Thinly slice radishes or bell peppers for extra color and crunch.
  • Layer strategically: Start with the greens, then add your chopped vegetables to create a colorful and inviting base.

Step 3: Add Your Toppings

Here’s where the fun begins! Toppings are what turn a good burger bowl recipe into a great one. The key is balancing different textures and flavors for an unforgettable bite.

  • Classic choices: Add shredded cheddar cheese, dill pickles, and caramelized onions for a true burger feel.
  • Creamy additions: Avocado slices or a dollop of sour cream can add richness to your bowl.
  • Crunchy elements: Sprinkle on crispy bacon bits, fried onions, or even toasted sunflower seeds for an extra layer of texture.

Don’t forget to customize your bowl! Love spice? Toss in some jalapeños. Prefer something smoky? Add barbecue sauce or smoked paprika to your protein.

Step 4: Drizzle with Dressing and Serve

Finally, pull it all together with a flavorful dressing. A good dressing is the cherry on top of your burger bowl recipe, bringing out the best in every ingredient.

  1. Choose your dressing: Go for classic burger sauces like Thousand Island or ranch. For lighter options, vinaigrettes with mustard or lemon juice work wonderfully.
  2. Add just enough: Drizzle your dressing lightly over the bowl or serve it on the side for dipping. This ensures every bite has the right amount of flavor.
  3. Serve immediately: Burger bowls taste best when served fresh, as the crispness of the greens and warmth of the protein create a perfect contrast.

Tips and Tricks for the Perfect Burger Bowl

Creating a flawless burger bowl recipe isn’t just about following steps—it’s about mastering small details that elevate your dish. These tips and tricks will help you refine your technique, avoid common pitfalls, and make your burger bowl absolutely irresistible.

How to Customize for Dietary Preferences

One of the best parts about a burger bowl recipe is how easy it is to customize. Whether you’re cooking for yourself or your family, there’s always a way to tweak the ingredients to fit specific dietary needs.

  • Keto-friendly bowls: Stick with low-carb toppings like avocado, cheese, and a creamy garlic dressing. Swap sugary dressings for olive oil-based vinaigrettes.
  • Vegetarian options: Substitute the beef with black bean patties, grilled portobello mushrooms, or crispy tofu. Add roasted veggies like zucchini or eggplant for a heartier feel.
  • Gluten-free bowls: Avoid croutons and double-check labels on dressings to ensure they’re free of hidden gluten. Stick to fresh, whole ingredients for peace of mind.

Time-Saving Hacks for Busy Weeknights

When you’re short on time but still want a delicious meal, these shortcuts will help you prepare your burger bowl recipe quickly without sacrificing flavor:

  1. Pre-cook your protein: Cook a large batch of ground beef, turkey, or chicken at the start of the week and store it in an airtight container in the fridge.
  2. Buy pre-washed greens: Bagged salads or pre-washed lettuce can save you several minutes during prep.
  3. Use store-bought dressings: While homemade dressings are ideal, there are plenty of low-sugar, keto-friendly options available that pair perfectly with burger bowls.
  4. Chop in advance: Dice your veggies and store them in sealed containers, so assembling your bowl is as easy as grabbing and layering.

Troubleshooting Common Issues

Even the best cooks run into snags from time to time, but don’t worry—these quick fixes will keep your burger bowl recipe on track:

  • Soggy greens: Always dry your lettuce thoroughly with a salad spinner or paper towels. Wet greens can make your toppings slide and lose their crunch.
  • Overcooked protein: To keep your meat juicy, cook it over medium heat and avoid over-stirring. A food thermometer is a great way to ensure your protein is perfectly done.
  • Bland flavors: Don’t skimp on seasoning! Be generous with salt, pepper, and spices to bring out the rich flavors of your protein and veggies.

Presentation Tips for Instagram-Worthy Burger Bowls

Colorful burger bowl with jalapeños, avocado, and pickles styled for Instagram
A vibrant burger bowl with fresh toppings styled for a perfect Instagram shot

They say we eat with our eyes first, so why not make your burger bowl recipe as stunning as it is delicious? Here are a few tricks to elevate your presentation:

  • Layer ingredients thoughtfully: Place your greens first, followed by veggies, then protein, and top it all off with a sprinkle of cheese or a drizzle of dressing.
  • Use vibrant colors: Incorporate colorful veggies like cherry tomatoes, shredded carrots, or bell peppers to make your bowl visually appealing.
  • Choose the right bowl: Use a wide, shallow bowl to give your toppings room to shine.
  • Add finishing touches: Sprinkle chopped herbs, freshly cracked black pepper, or sesame seeds over the top for extra flair.

FAQs

How many calories are in a burger bowl?

The calorie count for a burger bowl recipe depends on the ingredients you choose. A typical burger bowl with ground beef, lettuce, tomatoes, cheese, and dressing can range between 400 to 600 calories. If you add avocado, bacon, or higher-fat dressings, the number may increase. For a lighter option, use lean protein like ground turkey and opt for low-calorie dressings.

How are burgers healthy?

Burgers, including a burger bowl recipe, can be healthy when prepared with fresh, whole ingredients. By removing the bun, you cut down on refined carbs, and using lean proteins or plant-based patties can reduce fat content. Adding fresh vegetables like lettuce, tomatoes, and cucumbers increases fiber, vitamins, and minerals, making your meal both balanced and nutritious.

What type of dish is hamburger?

Hamburgers are a classic comfort food traditionally served as a sandwich with a beef patty, bun, and toppings. However, a burger bowl recipe transforms this dish into a modern, low-carb alternative by deconstructing the burger and serving the components in a bowl. This allows for endless customization and is perfect for those seeking a gluten-free or keto-friendly version of the beloved hamburger.

How many calories in a bowl of burger rings?

A bowl of burger rings, which are typically processed snack foods, contains about 150–200 calories per serving (approximately 30g). These calories largely come from refined carbs and fats, making them less nutritious compared to a fresh burger bowl recipe. If you’re looking for a healthier alternative, homemade burger bowls are a better choice, as they provide fresh ingredients and higher nutritional value.

Conclusion

With its fresh, customizable ingredients and endless flavor combinations, a burger bowl recipe is the perfect way to enjoy all the deliciousness of a classic burger without the bun. Whether you’re looking for a low-carb dinner, a gluten-free option, or just a fun way to mix up your meals, burger bowls deliver on taste and nutrition. Now it’s your turn to create your own masterpiece don’t forget to share your favorite variations!

Print
clock clock iconcutlery cutlery iconflag flag iconfolder folder iconinstagram instagram iconpinterest pinterest iconfacebook facebook iconprint print iconsquares squares iconheart heart iconheart solid heart solid icon
Perfectly assembled burger bowl with fresh ingredients and creamy dressing

Burger Bowl Recipe


  • Author: Emily
  • Total Time: 20 minutes
  • Yield: 4 servings 1x

Description

This delicious and customizable burger bowl recipe is packed with fresh greens, juicy protein, and your favorite toppings. It’s the perfect low-carb, gluten-free alternative to a traditional burger and works great for meal prep or a quick dinner.


Ingredients

Scale

For the Base:

  • 4 cups romaine lettuce (chopped)
  • 2 cups spinach or arugula

For the Protein:

  • 1 pound ground beef (80/20 or lean ground turkey)
  • 1 teaspoon salt
  • ½ teaspoon black pepper
  • ½ teaspoon garlic powder
  • ½ teaspoon onion powder
  • 1 teaspoon Worcestershire sauce (optional)

For the Toppings:

  • 1 cup cherry tomatoes (halved)
  • ½ cup diced red onions
  • ½ avocado (sliced)
  • ½ cup shredded cheddar cheese (or dairy-free alternative)
  • ¼ cup dill pickles (sliced)
  • ¼ cup cooked, crumbled bacon (optional)

For the Dressing:

  • ⅓ cup ranch dressing or Thousand Island dressing
  • 1 tablespoon olive oil (for lighter option)


Instructions

  1. Prepare the Protein:
    • In a skillet, heat 1 tablespoon olive oil over medium heat.
    • Add ground beef or turkey to the skillet and season with salt, black pepper, garlic powder, onion powder, and Worcestershire sauce (if using).
    • Cook for 8-10 minutes, stirring occasionally, until fully browned and cooked through. Drain any excess grease.
  2. Prepare the Base:
    • Wash and thoroughly dry the romaine lettuce and spinach. Chop them into bite-sized pieces and divide evenly into 4 serving bowls.
  3. Add Toppings:
    • Layer the bowls with cherry tomatoes, diced red onions, shredded cheese, sliced avocado, pickles, and crumbled bacon (if desired).
  4. Assemble the Burger Bowl:
    • Divide the cooked protein evenly among the bowls, placing it on top of the greens and toppings.
  5. Drizzle with Dressing:
    • Add a drizzle of ranch dressing, Thousand Island, or olive oil over each bowl. Adjust the amount based on personal preference.
  6. Serve and Enjoy:
    • Serve immediately for a fresh and satisfying meal.

Notes

  • Meal Prep Tip: Store ingredients separately to keep the greens crisp. Assemble the bowl just before eating.
  • Customize: Add jalapeños, roasted veggies, or swap the protein with grilled chicken or plant-based alternatives.
  • Dressing Tip: For a keto-friendly option, use olive oil-based dressings or make a homemade avocado dressing.

The Ultimate 8 Inch Round Cake Baking Tutorial

Craving a cake that’s both show-stopping and simple to bake? Look no further! This 8 inch round cake recipe delivers the perfect balance of flavor, texture, and elegance. Whether you’re a seasoned baker or just starting out, you’ll create a masterpiece worthy of any celebration. Let’s get baking!

Essential Tools and Ingredients for an 8 Inch Round Cake

Baking tools and ingredients for an 8-inch round cake on a marble countertop.
Essential baking tools and ingredients for an 8-inch round cake.

Creating a flawless 8 inch round cake starts with the right tools and ingredients. Each piece of equipment and every ingredient plays a key role in ensuring your cake turns out perfect—moist, fluffy, and utterly delicious. Let’s dive into the essentials that will make your baking experience seamless and enjoyable.

Must-Have Baking Tools

To bake an 8 inch round cake successfully, you’ll need a few key tools that make the process smoother. Here’s a quick rundown:

  • 8 inch round cake pan: This is non-negotiable. A well-made pan ensures even heat distribution, resulting in a cake that bakes evenly without burnt edges or an undercooked center.
  • Offset spatula: Perfect for spreading frosting smoothly, this tool gives your cake that professional finish.
  • Cake turntable: While optional, this tool makes decorating so much easier. Simply place your cake on the turntable and rotate as you apply frosting or decorations.
  • Parchment paper: Cut a circle to line the bottom of your pan for an easy release after baking.

Key Ingredients for Success

Every ingredient in your 8 inch round cake recipe has a purpose, so measuring accurately and choosing quality ingredients is crucial.

  • All-purpose flour: This forms the structure of your cake. Be sure to spoon the flour into your measuring cup and level it off with a knife for precision.
  • Granulated sugar: Provides sweetness and helps retain moisture. You can substitute part of it with brown sugar for a deeper flavor.
  • Unsalted butter: Adds richness. Using unsalted butter lets you control the amount of salt in your cake. If needed, you can substitute with oil, though it will slightly alter the texture.
  • Eggs: They bind the ingredients together and provide structure. For best results, use eggs at room temperature.

Optional Twist: Want to add a burst of flavor? Mix a teaspoon of almond extract or orange zest into the batter for a unique twist.

Pro Tips for Preparing Your Pan

Preparing your pan correctly can mean the difference between a cake that slides out effortlessly and one that sticks to the bottom. Here’s how to do it right:

  1. Grease your 8 inch round cake pan with butter or cooking spray. Make sure to cover the sides and edges evenly.
  2. Line the bottom of the pan with a parchment paper circle for easy removal.
  3. Dust the greased pan lightly with flour, tapping out the excess to create a nonstick layer.

Why Quality Matters in Baking

Quality ingredients and tools are not just optional—they’re game-changers. A high-quality 8 inch round cake pan prevents uneven baking, while fresh ingredients enhance flavor and texture. For example, fresh baking powder ensures your cake rises beautifully, while expired leavening agents can leave you with a dense, flat dessert.

Step-by-Step Guide to Baking an 8 Inch Round Cake

Baking an 8 inch round cake may seem intimidating, but with the right method and preparation, it becomes a straightforward and rewarding experience. This section breaks down each step to ensure your cake turns out moist, fluffy, and perfectly baked every time.

Pouring batter into an 8-inch round cake pan.
The batter is poured into a prepared 8-inch round cake pan, ready for baking.

Mixing the Batter: A Foolproof Method

The key to a light and airy 8 inch round cake lies in how you mix the batter. Here’s how to do it right:

  • Cream butter and sugar: Beat the butter and sugar together until pale and fluffy. This step creates air pockets, ensuring a tender crumb.
  • Add eggs one at a time: Gradually incorporate room-temperature eggs. Doing so prevents the batter from curdling and keeps it smooth.
  • Alternate dry and wet ingredients: To avoid overmixing, add your dry ingredients (flour, baking powder, salt) in thirds, alternating with your wet ingredients (milk or buttermilk). Mix until just combined.

Pro Tip: Scrape down the sides of your bowl as you go to ensure all ingredients are evenly incorporated.

Perfect Bake Time and Temperature

Baking an 8 inch round cake to perfection requires the right balance of temperature and timing.

  • Preheat your oven to 350°F (175°C): This is the ideal temperature for even baking without overbrowning.
  • Bake on the center rack: Positioning your cake here promotes even heat distribution.
  • Bake for 30-35 minutes: Check the cake at 30 minutes by inserting a toothpick into the center. If it comes out clean or with a few crumbs, your cake is ready.

Tip: If your cake appears golden but isn’t done, cover it loosely with foil to prevent overbrowning.

Cooling and Removing the Cake from the Pan

Once your 8 inch round cake is baked, cooling it properly is essential to preserve its structure and texture.

  1. Cool in the pan for 10-15 minutes: This allows the cake to set, reducing the chance of it breaking when removed.
  2. Transfer to a wire rack: Run a knife along the edges, invert the pan onto a wire rack, and gently lift it off. Peel away the parchment paper.
  3. Cool completely before frosting: Frosting a warm cake can cause the buttercream to melt and slide off. Patience is key!

Troubleshooting Common Baking Issues

Even with the best intentions, things can go wrong. Here’s how to fix common problems:

  • Cake is too dense: This usually happens if the batter was overmixed. Next time, mix until ingredients are just combined.
  • Cake sinks in the middle: This could mean the oven door was opened too early or the cake didn’t bake long enough. Always test for doneness before removing it.
  • Dry cake: Check your measurements—too much flour can result in a dry texture. Additionally, avoid overbaking.

Decorating Ideas for an 8 Inch Round Cake

Decorating an 8-inch round cake with buttercream rosettes using a piping bag.
A baker decorates an 8-inch round cake with elegant buttercream rosettes.

Decorating an 8 inch round cake is where creativity meets skill. Whether you’re a beginner or an experienced baker, there are endless ways to make your cake look as stunning as it tastes. From simple frosting techniques to intricate designs, this section explores ideas to elevate your cake’s presentation.

Simple Buttercream Frosting Techniques

Buttercream frosting is a classic choice that pairs beautifully with any flavor of 8 inch round cake. Here’s how to achieve a flawless finish:

  • Start with a crumb coat: Apply a thin layer of frosting to seal in crumbs and create a smooth surface for your final coat. Chill the cake for 15-20 minutes after applying the crumb coat.
  • Use an offset spatula: This tool helps spread frosting evenly across the cake. For a sleek finish, dip the spatula in hot water, then dry it before smoothing.
  • Add texture: Create waves, swirls, or patterns with the back of a spoon or the edge of your spatula for a unique touch.

Pro Tip: If you’re new to frosting, use a turntable to rotate the cake while you frost it makes the process much easier!

Creative Decorating Ideas

Take your 8 inch round cake to the next level with these simple yet eye-catching decorating ideas:

  1. Fresh Fruit: Top your cake with seasonal berries, thinly sliced citrus, or edible flowers for a fresh and elegant look.
  2. Drip Effect: Use melted chocolate or a flavored glaze to create a dramatic drip design along the edges.
  3. Sprinkles and Edible Glitter: Add a pop of color and fun with sprinkles or glitter—perfect for birthday cakes.

For inspiration on creative cake decorations, explore our Unicorn Cake Tutorial, which is filled with tips for making colorful designs!

Tips for Leveling and Stacking Cakes

Creating a multi-layer 8 inch round cake requires precision and patience. Here’s how to ensure your cake layers are even and stable:

  • Level the layers: Use a serrated knife or a cake leveler to trim the domed tops of your cakes. This ensures the layers stack neatly without wobbling.
  • Use a piping bag for filling: Pipe an even ring of frosting around the edge of the bottom layer to create a “dam” that holds the filling inside.
  • Secure with dowels: For added stability, insert a few dowels or straws through the center of the stacked cake, especially for taller cakes.

Pro Tip: Chill each layer before assembling to prevent sliding during stacking.

Customizing Your Cake for Any Occasion

An 8 inch round cake is the perfect size for small gatherings, and you can easily customize it for any celebration:

  • Birthday Party: Add colorful candles, themed toppers, or fondant decorations.
  • Anniversary: Incorporate elegant details like gold leaf, sugar flowers, or a handwritten message in frosting.
  • Seasonal Celebrations: For holidays, match the colors and flavors to the season. Think peppermint frosting for winter or lemon glaze for spring.

For more decorating tips tailored to special occasions, check out our Strawberry Shortcake Parfait Recipe for ideas on adding fresh, seasonal flair to your cakes.

Common Mistakes to Avoid When Baking an 8 Inch Round Cake

Even with a great recipe, mistakes can happen in the kitchen. Identifying and avoiding common pitfalls is essential to ensure your 8 inch round cake turns out perfectly every time. This section highlights frequent errors and offers actionable tips to help you avoid them.

Overmixing the Batter

One of the most common mistakes in baking an 8 inch round cake is overmixing the batter. While it’s tempting to mix until perfectly smooth, doing so can develop too much gluten in the flour, resulting in a dense and chewy cake.

  • How to avoid it: Mix the batter just until the dry ingredients are incorporated. A few small lumps are fine—they’ll disappear as the cake bakes.
  • Pro Tip: Use a spatula instead of a whisk for the final mixing stage to prevent overmixing.

Incorrect Oven Temperature

Another frequent issue is baking the cake at the wrong temperature, which can lead to uneven baking or a dry texture. An oven that’s too hot may burn the edges, while one that’s too cool can leave the center undercooked.

  • How to avoid it: Always preheat your oven to 350°F (175°C) before baking your 8 inch round cake.
  • Pro Tip: Use an oven thermometer to check the accuracy of your oven’s temperature. Many home ovens run hotter or cooler than the set temperature.

Skipping Pan Preparation

Neglecting to properly prepare the pan can cause your cake to stick, making it difficult to remove without damaging its shape.

  • How to avoid it: Always grease the pan, line it with parchment paper, and dust it lightly with flour before adding the batter.
  • Pro Tip: If you’re out of parchment paper, a generous greasing with butter or oil will still help the cake release more easily.

Opening the Oven Door Too Soon

While it’s tempting to peek at your cake as it bakes, opening the oven door too early can cause the temperature to drop, leading to a sunken center.

  • How to avoid it: Resist the urge to open the oven until at least 25 minutes into the baking time. At this point, you can quickly check for doneness without impacting the bake.
  • Pro Tip: Turn on the oven light to monitor the progress instead of opening the door.

By keeping these common mistakes in mind, you’ll be well on your way to baking a flawless 8 inch round cake. For additional tips and tricks, check out our Cocoa Coffee Cake Recipe to further refine your baking skills!

FAQs

How many people will an 8 inch round cake serve?

An 8 inch round cake typically serves 12-16 people if sliced into standard portions. However, the number of servings can vary depending on how you slice the cake. For larger, event-style slices, you can expect about 8-10 servings, while smaller, party-sized slices can stretch to around 16. To maximize servings, consider using a serving guide to cut uniform pieces.

How big is an 8 inch round cake?

An 8 inch round cake measures 8 inches in diameter, which is the distance across the cake from one side to the other. Typically, this size is around 2-3 inches tall, depending on the recipe and the number of layers. It’s the perfect size for small gatherings, providing enough cake to satisfy a group without overwhelming leftovers.

What is the difference between an 8-inch and 9-inch round cake?

The primary difference between an 8 inch round cake and a 9-inch one is the surface area, which impacts the amount of batter needed and the baking time. A 9-inch cake pan holds more batter (about 25% more) and has a larger surface area, resulting in a slightly thinner cake if the same amount of batter is used. Additionally, a 9-inch cake may bake faster due to its wider shape, so it’s important to adjust recipes accordingly.

How many kilograms is an 8-inch cake?

The weight of an 8 inch round cake can vary depending on the ingredients and decorations. On average, a single-layer 8 inch round cake weighs around 1.2 to 1.5 kilograms. If you’re adding frosting or multiple layers, the weight can increase significantly. Be sure to weigh your ingredients accurately to maintain the cake’s structure and flavor.

Conclusion

Baking the perfect 8 inch round cake is all about combining the right tools, ingredients, and techniques. From preparing your batter to decorating and avoiding common mistakes, this guide has covered everything you need to create a delicious, beautiful cake. Now it’s your turn to put these tips into action and bake a cake that’s sure to impress. Whether it’s for a celebration or a cozy treat at home, your 8 inch round cake is bound to be a crowd-pleaser.

Print
clock clock iconcutlery cutlery iconflag flag iconfolder folder iconinstagram instagram iconpinterest pinterest iconfacebook facebook iconprint print iconsquares squares iconheart heart iconheart solid heart solid icon
Decorating an 8-inch round cake with buttercream rosettes using a piping bag.

The Ultimate 8 Inch Round Cake Recipe


  • Author: Emily
  • Total Time: 55 minutes
  • Yield: 1216 1x

Description

This 8 inch round cake is light, fluffy, and delicious perfect for any occasion! With simple ingredients and easy-to-follow instructions, you’ll bake a show-stopping cake that’s moist, tender, and irresistible.


Ingredients

Scale

For the Cake:

  • 2 ½ cups all-purpose flour (spooned and leveled)
  • 2 ½ teaspoons baking powder
  • ½ teaspoon salt
  • ¾ cup unsalted butter, softened
  • 1 ¾ cups granulated sugar
  • 4 large eggs, room temperature
  • 1 tablespoon vanilla extract
  • 1 cup whole milk, room temperature

For the Buttercream Frosting:

  • 1 cup unsalted butter, softened
  • 4 cups powdered sugar, sifted
  • 2 teaspoons vanilla extract
  • 3 tablespoons heavy cream or milk
  • Pinch of salt


Instructions

For the Cake:

  1. Preheat your oven to 350°F (175°C). Grease two 8-inch round cake pans, line the bottoms with parchment paper, and lightly dust with flour.
  2. In a medium bowl, whisk together the flour, baking powder, and salt. Set aside.
  3. In a large mixing bowl, beat the softened butter and sugar together with a hand or stand mixer until light and fluffy (about 3-4 minutes).
  4. Add the eggs one at a time, beating well after each addition. Mix in the vanilla extract.
  5. Gradually add the dry ingredients to the wet ingredients, alternating with the milk, starting and ending with the dry ingredients. Mix until just combined. Do not overmix.
  6. Divide the batter evenly between the prepared pans. Smooth the tops with a spatula.
  7. Bake on the center rack for 30-35 minutes, or until a toothpick inserted into the center comes out clean.
  8. Remove the cakes from the oven and let them cool in the pans for 10 minutes. Transfer to a wire rack to cool completely.

For the Buttercream Frosting:

  1. Beat the softened butter in a large bowl until creamy.
  2. Gradually add the powdered sugar, one cup at a time, mixing on low speed until incorporated.
  3. Mix in the vanilla extract and heavy cream. Beat on high speed for 2-3 minutes until light and fluffy. If needed, add more cream for a thinner consistency or powdered sugar for a thicker consistency.
  4. Add a pinch of salt to balance the sweetness.

Assembly:

  1. Level the cooled cakes by slicing off any domed tops with a serrated knife.
  2. Place one cake layer on a serving plate or cake board. Spread an even layer of frosting on top.
  3. Add the second cake layer and apply a crumb coat (a thin layer of frosting to seal in crumbs). Chill for 15 minutes.
  4. Apply the final layer of frosting, smoothing the sides and top. Decorate as desired with piped rosettes, sprinkles, or fresh fruit.

Notes

  • Ensure all ingredients are at room temperature for a smoother batter and better rise.
  • Do not overmix the batter to avoid a dense cake.
  • To make ahead, bake the cake layers and store them tightly wrapped in plastic wrap at room temperature for up to 24 hours, or freeze for up to 3 months.
  • Frost the cake just before serving for the best texture and flavor.

Bake the Perfect Cocoa Coffee Cake: 4 Expert Tips

What Makes Cocoa Coffee Cake So Irresistible?

The Magic of Cocoa and Coffee Together

There’s a reason cocoa coffee cake is such a standout dessert—it brings together the best of two beloved flavors. Cocoa adds a rich, chocolatey depth, while coffee enhances the natural bitterness of the cocoa, making every bite more balanced and flavorful. For example, adding a touch of brewed coffee or espresso powder doesn’t overpower but instead intensifies the chocolatey notes. It’s a combination that transforms a simple cake into something truly indulgent.

But what sets this cake apart? It’s the way the coffee subtly lingers, balancing the sweetness and leaving you craving another slice. If you’re a coffee lover or a chocolate enthusiast, this is your match made in dessert heaven!

Key Ingredients for Success

Creating the perfect cocoa coffee cake starts with the right ingredients. Each one plays a critical role in building flavor and texture:

  • Cocoa Powder: For the deepest flavor, opt for Dutch-processed cocoa. Its alkalized nature gives a smoother, less acidic taste than natural cocoa powder.
  • Coffee: Whether you use brewed coffee, espresso powder, or instant coffee granules, the coffee should be strong enough to stand out without overwhelming.
  • Fats: Butter adds richness, while oil contributes to a moist crumb. For the best results, try a combination of both.
  • Dairy: Ingredients like sour cream or buttermilk are excellent for adding moisture and a subtle tang.

Pro tip: Using room-temperature ingredients ensures everything blends smoothly, giving your cake a consistent texture. For more insights into ingredient selection, check out this detailed guide to cocoa powders.

Perfect for Any Occasion

One of the best things about a cocoa coffee cake is its versatility. Whether it’s a casual breakfast, an elegant dessert, or a quick snack with coffee, this cake shines in any setting.

For example, you can serve it warm for brunch alongside a cappuccino, or dress it up with a drizzle of chocolate glaze for a more formal gathering. It’s even perfect for gifting during the holidays who wouldn’t love a homemade treat that combines two irresistible flavors? The ease of preparation and universal appeal make it a recipe you’ll return to time and time again.

The Role of Aroma and Texture

When you bake a cocoa coffee cake, the first thing that hits you is the aroma—a heavenly blend of chocolate and coffee wafting through your kitchen. It’s one of those smells that makes everyone pause and take a deep breath, anticipating what’s to come.

The texture is equally important. A good cocoa coffee cake should be moist and tender, with a soft crumb that practically melts in your mouth. Achieving this involves the right balance of wet and dry ingredients, along with proper mixing techniques to avoid overworking the batter. The end result? A cake that feels indulgent but not heavy, with every bite bursting with flavor and aroma.

How to Bake the Perfect Cocoa Coffee Cake

Ingredients for cocoa coffee cake neatly arranged on a countertop.
Essential ingredients for baking a cocoa coffee cake, including cocoa powder, eggs, sugar, and coffee.

Step 1: Gather Your Ingredients

The first step in baking a mouthwatering cocoa coffee cake is gathering the right ingredients. Having everything measured and prepped ahead of time saves you stress later on. You’ll need staples like all-purpose flour, baking powder, and sugar, along with Dutch-processed cocoa powder for rich chocolate flavor and espresso powder to enhance it.

If you’re missing any essentials, don’t worry—there are easy substitutions! For instance, you can use Greek yogurt instead of sour cream or coconut sugar as a natural sweetener. Preparation is key, so double-check your list before you begin.

Step 2: Prepare Your Equipment

Before you dive into mixing, it’s important to prepare your tools and baking space. A 9-inch round or square pan works best for a classic cocoa coffee cake. Grease it well with butter or line it with parchment paper to ensure a smooth release.

Additionally, have a whisk, mixing bowls, measuring cups, and a spatula handy. Using a hand or stand mixer for this recipe ensures your batter will be lump-free. A well-organized kitchen makes baking much more enjoyable!

Step 3: Master the Mixing Process

Mixing cocoa coffee cake batter in a glass bowl with a wooden spoon.
Hands mixing the rich chocolate batter for cocoa coffee cake with a wooden spoon.

Mixing the batter properly is where the magic happens. Start by whisking together your dry ingredients: flour, cocoa powder, baking powder, and salt. In a separate bowl, beat the butter and sugar until it’s light and fluffy this step adds air to the batter, making your cake tender.

Next, alternate adding the dry ingredients and the wet ingredients (such as eggs, coffee, and sour cream) to the butter mixture. This gradual process ensures a smooth batter that won’t deflate. Be careful not to overmix; otherwise, your cake might turn dense instead of soft and airy.

Step 4: Bake It to Perfection

Now it’s time to bake your cocoa coffee cake! Preheat your oven to 350°F (175°C) and pour the batter into your prepared pan. Smooth the top with a spatula for an even bake. Place it on the center rack for 30–35 minutes, or until a toothpick inserted into the middle comes out clean.

For a little flair, you can add a handful of chocolate chips or a cinnamon streusel on top before baking. Let the cake cool for 10–15 minutes in the pan, then transfer it to a wire rack. This ensures it stays moist and doesn’t crumble when sliced.

4 Expert Tips for a Rich, Moist Cocoa Coffee Cake

Tip 1: Use Fresh Ingredients

The key to a perfect cocoa coffee cake starts with fresh, high-quality ingredients. For instance, using fresh Dutch-processed cocoa powder ensures a richer chocolate flavor, while fresh baking powder guarantees the right rise. Old or expired ingredients can lead to dull flavors and poor texture.

It’s also essential to use freshly brewed coffee or a high-quality espresso powder for maximum flavor. When these ingredients are fresh, they work together to create a cake that’s truly irresistible.

Tip 2: Don’t Skimp on Coffee

Coffee is the secret weapon in any cocoa coffee cake recipe. Its bold, bitter notes enhance the chocolatey goodness of the cocoa powder, creating a perfectly balanced flavor. To achieve this, use strong brewed coffee, espresso powder, or instant coffee granules.

For those who want an even richer taste, consider mixing coffee into both the batter and the glaze. The added layer of flavor takes your cake to the next level.

Tip 3: Add a Moisture Boost

No one likes a dry cake, and with cocoa coffee cake, keeping it moist is crucial. Incorporate ingredients like sour cream, yogurt, or buttermilk to achieve a tender, melt-in-your-mouth crumb. These dairy options not only add moisture but also bring a subtle tanginess that balances the sweetness.

If you prefer a dairy-free option, try applesauce or coconut cream. Both alternatives work wonders without compromising the cake’s texture or flavor.

Tip 4: Let It Rest Before Slicing

Patience is a virtue, especially when it comes to baking. After removing your cocoa coffee cake from the oven, allow it to cool for at least 10–15 minutes before slicing. This resting period ensures the cake sets properly and retains its moisture.

Cutting into the cake too soon can result in crumbly slices and uneven texture. For the best presentation, use a sharp knife and wipe it clean between cuts to create neat, bakery-style slices.

For more baking tips and inspiration, check out our Braided Chocolate Chip Brioche Recipe, perfect for your next baking adventure!

Creative Variations to Try

Decadent Cocoa Coffee Cake with Streusel

 A slice of cocoa coffee cake with chocolate glaze and coffee beans.
A perfectly sliced cocoa coffee cake topped with chocolate glaze, served with coffee beans.

Elevate your classic cocoa coffee cake by adding a crumbly streusel topping. This blend of brown sugar, cinnamon, and butter creates a crunchy contrast to the moist cake beneath. Sprinkle the streusel generously over the batter before baking for a deliciously sweet and textured topping.

To take it up a notch, toss in some chopped nuts like pecans or walnuts for added crunch. This variation pairs perfectly with a hot cup of coffee on chilly mornings.

Vegan Cocoa Coffee Cake

Who says a cocoa coffee cake can’t be vegan? With a few simple swaps, you can enjoy this indulgent treat without using any animal products. Replace dairy with almond milk or oat milk, and use applesauce or flaxseed meal as an egg substitute.

To keep the texture moist and fluffy, incorporate coconut oil instead of butter. The result? A rich and flavorful cake that’s perfect for plant-based diets and anyone looking for a healthier option.

Gluten-Free Cocoa Coffee Cake

For those avoiding gluten, a gluten-free cocoa coffee cake is a must-try! Substitute all-purpose flour with a gluten-free baking blend or almond flour for a nutty twist. Be sure to check that all your ingredients, including baking powder and cocoa powder, are certified gluten-free.

Adding xanthan gum can improve the cake’s structure, ensuring it doesn’t crumble when sliced. This variation is so good, no one will guess it’s gluten-free!

Spiked Cocoa Coffee Cake

Want to give your cocoa coffee cake a fun, adult twist? Add a splash of coffee liqueur or rum to the batter for an extra depth of flavor. Just a tablespoon or two is enough to transform the cake into a sophisticated dessert that’s perfect for dinner parties or celebrations.

You can also drizzle the finished cake with a coffee liqueur glaze or a boozy chocolate ganache for a finishing touch. This variation pairs wonderfully with a creamy espresso martini.

For more fun and flavorful dessert ideas, check out our Strawberry Shortcake Parfait Recipe for another crowd-pleasing treat!

FAQs

Can I Use Coffee Instead of Cocoa Powder in Cake?

No, coffee cannot replace cocoa powder in a cake recipe. While coffee enhances the flavor of cocoa in a cocoa coffee cake, it doesn’t have the structure, color, or flavor profile needed to act as a substitute. Cocoa powder provides the rich chocolatey base, whereas coffee adds depth and balance. Instead, you can incorporate coffee alongside cocoa to elevate the overall taste.

How to Store Chocolate Coffee Cake?

To keep your chocolate coffee cake fresh and moist, store it in an airtight container at room temperature for up to three days. If you live in a warmer climate or want to extend its shelf life, refrigerate the cake. Wrap it tightly with plastic wrap to prevent it from drying out, and it will stay delicious for up to a week. For long-term storage, freeze individual slices in freezer-safe bags and thaw them overnight in the fridge before serving.

Can You Decorate a Coffee Cake?

Absolutely! Decorating a cocoa coffee cake is a great way to make it extra special. You can keep it simple by dusting powdered sugar or cocoa powder on top for a rustic look. If you want something more elaborate, drizzle chocolate ganache or coffee glaze over the cake. Adding chocolate shavings, nuts, or fresh berries can also enhance both the flavor and presentation.

How Long Does Chocolate Coffee Cake Last?

When stored properly, a chocolate coffee cake can last up to three days at room temperature and about a week in the refrigerator. If you need to store it longer, freezing is your best option. Frozen cake can retain its quality for up to three months—just make sure it’s wrapped tightly to prevent freezer burn. Always thaw it thoroughly before enjoying.

Conclusion

You now have everything you need to bake the perfect cocoa coffee cake—from understanding its irresistible flavor combination to mastering expert baking tips and trying out creative variations. Whether you’re making it for a cozy morning treat or an elegant dessert, this cake is sure to impress.

Give it a try, experiment with toppings or mix-ins, and make it your own! Don’t forget to explore our other delicious recipes, like the Braided Chocolate Chip Brioche, for even more baking inspiration.

Print
clock clock iconcutlery cutlery iconflag flag iconfolder folder iconinstagram instagram iconpinterest pinterest iconfacebook facebook iconprint print iconsquares squares iconheart heart iconheart solid heart solid icon
A slice of cocoa coffee cake with chocolate glaze and coffee beans.

Perfect Cocoa Coffee Cake


  • Author: Emily
  • Total Time: 50 minutes
  • Yield: 8 servings 1x

Description

A moist and flavorful cocoa coffee cake with the perfect balance of rich chocolate and aromatic coffee, ideal for breakfast, brunch, or dessert. This easy recipe is packed with expert tips to ensure a tender, delicious treat every time.


Ingredients

Scale
  • 1 ½ cups all-purpose flour
  • ½ cup Dutch-processed cocoa powder
  • 1 tsp baking powder
  • ½ tsp baking soda
  • ¼ tsp salt
  • 1 cup granulated sugar
  • ½ cup unsalted butter, softened
  • 2 large eggs, at room temperature
  • ½ cup strong brewed coffee, cooled
  • ½ cup sour cream or Greek yogurt
  • 1 tsp pure vanilla extract
  • Optional: ½ cup chocolate chips


Instructions

  1. Preheat your oven to 350°F (175°C) and grease a 9-inch round or square cake pan. Line the bottom with parchment paper for easy removal.
  2. In a medium bowl, whisk together the flour, cocoa powder, baking powder, baking soda, and salt. Set aside.
  3. In a large bowl, cream the butter and sugar together using a hand or stand mixer until light and fluffy, about 2–3 minutes.
  4. Add the eggs one at a time, beating well after each addition. Mix in the vanilla extract.
  5. Alternate adding the dry ingredients and the wet ingredients (coffee and sour cream) to the butter mixture, beginning and ending with the dry ingredients. Mix until just combined.
  6. Fold in the chocolate chips, if using, for an extra touch of richness.
  7. Pour the batter into the prepared pan and smooth the top with a spatula.
  8. Bake for 30–35 minutes, or until a toothpick inserted into the center comes out clean.
  9. Allow the cake to cool in the pan for 10–15 minutes, then transfer it to a wire rack to cool completely.
  10. Dust with powdered sugar or drizzle with chocolate glaze before serving, if desired.

Notes

  • For extra moisture, you can substitute buttermilk for the sour cream.
  • If you don’t have brewed coffee, mix 1 tsp instant coffee granules with ½ cup hot water as a substitute.
  • This cake pairs wonderfully with a dollop of whipped cream or a scoop of vanilla ice cream.

Secrets to the Best Braided Chocolate Chip Brioche Recipe

Looking for the perfect braided chocolate chip brioche recipe? You’ve come to the right place! This rich, buttery bread is swirled with gooey chocolate chips and braided for an elegant touch. Whether it’s for breakfast, dessert, or a special occasion, this recipe guarantees bakery-quality results right in your own kitchen.

Why You’ll Love This Braided Chocolate Chip Brioche Recipe

A Perfectly Fluffy Texture

The hallmark of a good braided chocolate chip brioche recipe is its soft, pillowy texture. Brioche dough is enriched with butter, eggs, and milk, giving it a rich, airy crumb that practically melts in your mouth. Unlike traditional bread, brioche feels almost like a cross between bread and cake, making it indulgent but not overly sweet.

The braiding technique also ensures that the bread bakes evenly, creating light and fluffy layers that pull apart beautifully. Whether you’re serving it as a breakfast treat or an afternoon snack, the texture alone will win you over.

Sweet Chocolate Chip Surprises in Every Bite

There’s nothing like biting into a warm slice of braided chocolate chip brioche and discovering sweet, melted chocolate chips scattered throughout. The recipe uses semi-sweet or dark chocolate chips to balance the richness of the bread, creating a flavor profile that’s both indulgent and satisfying.

For a unique twist, consider using mini chocolate chips for a more even distribution or white chocolate chips for a sweeter option.

Versatility for Any Occasion

This braided chocolate chip brioche recipe is as versatile as it is delicious. Serve it plain, toasted with a pat of butter, or even turned into French toast for a luxurious breakfast. It’s also perfect for special occasions like brunches, holiday gatherings, or even as a thoughtful homemade gift.

Want to take it up a notch? Pair it with coffee, tea, or a dollop of whipped cream for a dessert-like experience. No matter how you serve it, this brioche is sure to impress!

Beginner-Friendly Yet Impressive

While the intricate braiding might look intimidating, this braided chocolate chip brioche recipe is actually beginner-friendly. The step-by-step instructions break down the process, making it easy to follow even if you’ve never baked brioche before.

The dough is forgiving and easy to handle, and the braiding process is surprisingly straightforward. Plus, the finished loaf looks so stunning that no one will guess how simple it was to make. It’s the kind of recipe that boosts your confidence in the kitchen!

Ingredients for Braided Chocolate Chip Brioche

Essential Ingredients for the Perfect Brioche

The success of a braided chocolate chip brioche recipe lies in its high-quality, rich ingredients. Here’s what you’ll need:

Ingredients for braided chocolate chip brioche recipe including flour, eggs, chocolate chips, and yeast.
All the essential ingredients for making braided chocolate chip brioche, neatly arranged for preparation.
  • All-purpose flour or bread flour: Provides structure and elasticity to the dough.
  • Active dry yeast or instant yeast: Ensures the dough rises properly.
  • Sugar and salt: Balances sweetness and enhances the flavor.
  • Butter and eggs: Create the signature richness of brioche.
  • Chocolate chips: Add bursts of sweetness to every bite.

Opt for fresh, high-quality ingredients for the best results. Fresh yeast and premium chocolate chips make a noticeable difference!

Choosing the Right Chocolate Chips

For this braided chocolate chip brioche recipe, semi-sweet chocolate chips are ideal as they balance the bread’s richness. Dark chocolate chips work well for a more intense flavor, while milk chocolate adds extra sweetness.

Avoid overly large chunks of chocolate to prevent them from sinking to the bottom of the loaf.

Substitutions for Dietary Preferences

This recipe can be easily adapted for dietary needs:

  • Dairy-free: Replace butter with plant-based butter and use almond or oat milk instead of regular milk.
  • Gluten-free: Swap all-purpose flour with a gluten-free flour blend, ensuring it contains xanthan gum for elasticity.
  • Low sugar: Reduce the sugar content or substitute with a sugar alternative like erythritol.

Experiment with substitutions to make this brioche fit your lifestyle without compromising flavor!

The Role of Vanilla and Citrus Zest

Vanilla extract and citrus zest, such as orange or lemon, are optional but highly recommended for elevating the flavor. While not part of the traditional braided chocolate chip brioche recipe, they add a refreshing twist that complements the sweetness of the chocolate chips.

Simply mix a teaspoon of vanilla or a pinch of zest into the dough during the wet ingredient stage. These small additions make your brioche unforgettable!

Step-by-Step Guide to Prepare the Brioche Dough

Hands braiding three strands of brioche dough with chocolate chips.
Step-by-step braiding of chocolate chip brioche dough on a floured surface.

Mixing the Dough for Braided Chocolate Chip Brioche

The foundation of a perfect braided chocolate chip brioche recipe lies in mixing the dough just right. Start by combining the dry ingredients, including flour, sugar, salt, and yeast, in a large mixing bowl. Gradually add the wet ingredients—warm milk, eggs, and softened butter—while mixing continuously.

It’s essential to ensure the liquid ingredients are warm, not hot, to properly activate the yeast without killing it. Knead the dough for about 10 minutes until it’s smooth and slightly sticky. If you’re using a stand mixer, set it to medium speed with a dough hook attachment for the best results.

Proofing the Dough to Perfection

Proofing is a crucial step in any braided chocolate chip brioche recipe. After kneading, place the dough in a lightly oiled bowl and cover it with plastic wrap or a damp kitchen towel. Let it rest in a warm, draft-free spot for about 1 to 2 hours, or until it doubles in size.

To create a warm environment, you can place the bowl in a slightly preheated oven (turned off) or near a sunny window. If your kitchen is cold, consider proofing the dough in an oven with just the oven light turned on.

Incorporating Chocolate Chips into the Dough

Once the dough has risen, it’s time to add the chocolate chips. Gently punch down the dough to release excess air, then knead the chocolate chips into it. Be careful not to overwork the dough, as this can cause the chocolate chips to melt prematurely.

For even distribution, sprinkle the chocolate chips across the dough as you fold and knead. If you’re feeling adventurous, you can also add a handful of chopped nuts or dried fruits for a unique twist to your braided chocolate chip brioche recipe.

How to Shape and Braid the Brioche

Sliced braided chocolate chip brioche recipe on a serving tray with coffee and butter.
A plated braided chocolate chip brioche loaf, sliced to reveal its fluffy interior with melted chocolate chips.

Dividing and braiding the dough is where the magic happens. Divide the dough into three equal portions, rolling each into a long strand, about 12–14 inches in length. Place the strands side by side on a baking sheet lined with parchment paper.

Begin braiding by crossing the right strand over the center, followed by the left strand over the new center. Repeat this pattern until the braid is complete, tucking the ends underneath for a neat finish. Brush the braid with an egg wash for a glossy, golden crust.

For more bread-shaping tips, check out our garlic bread rolls recipe for additional inspiration.

Troubleshooting and Tips for Braided Chocolate Chip Brioche Recipe

Common Mistakes and How to Avoid Them

Even with the best intentions, mistakes can happen when making a braided chocolate chip brioche recipe. One common issue is the dough not rising properly during proofing. This is often due to inactive yeast or a cold environment. To fix this, ensure your yeast is fresh and your proofing area is warm but not too hot.

Another challenge is uneven braiding, which can result in parts of the bread being underbaked. To avoid this, roll each strand of dough evenly and braid them with gentle tension. If the dough tears, patch it lightly and avoid overworking it.

Tips for Keeping Brioche Moist and Fresh

Brioche is best enjoyed fresh, but keeping it moist can be tricky. Store your braided chocolate chip brioche in an airtight container at room temperature for up to three days. To prevent dryness, wrap it tightly in plastic wrap before placing it in a container.

If you plan to keep it longer, freezing is the best option. Slice the brioche first and wrap each piece individually before placing them in a freezer-safe bag. To reheat, warm slices in the oven or toaster at 325°F for a few minutes to restore their soft, fluffy texture.

Make-Ahead and Freezing Tips

This braided chocolate chip brioche recipe is perfect for busy schedules because the dough can be prepared ahead of time. After the first rise, place the dough in an airtight container and refrigerate it overnight. Chilled dough is easier to handle and braid, and it develops a deeper flavor during the extended resting period.

You can also freeze the fully braided and unbaked brioche. Simply wrap the braided loaf in plastic wrap and freeze it for up to two weeks. When ready to bake, thaw the brioche in the refrigerator overnight, let it come to room temperature, and then bake as directed.

Creative Ways to Serve Braided Chocolate Chip Brioche

While this braided chocolate chip brioche recipe is delicious on its own, there are many creative ways to enjoy it:

  1. French Toast: Slice the brioche into thick pieces and turn it into decadent French toast.
  2. Bread Pudding: Use day-old brioche to make a rich and custardy bread pudding.
  3. Ice Cream Sandwiches: Slice the brioche and sandwich your favorite ice cream between two slices for a fun dessert.
  4. Toast with Toppings: Toast slices lightly and top with Nutella, fresh fruit, or cream cheese for a quick snack.

FAQs About Braided Chocolate Chip Brioche Recipe

How do you keep brioche from drying out?

To keep your braided chocolate chip brioche moist, store it in an airtight container or wrap it tightly in plastic wrap. Avoid leaving it uncovered, as exposure to air causes the bread to dry out quickly. If you’re storing it for more than a couple of days, consider freezing the brioche to maintain its texture and flavor. Simply slice the loaf, wrap each piece individually, and place them in a freezer-safe bag. To reheat, warm it in the oven at 325°F for a few minutes or toast individual slices.

Does brioche burn easily?

Yes, brioche can burn easily because of its high sugar and butter content, which causes it to brown quickly. To avoid burning, bake your braided chocolate chip brioche at the recommended temperature, and check it frequently during the last few minutes of baking. If the top starts to brown too quickly, loosely cover it with aluminum foil. This simple step ensures an evenly baked loaf with a golden crust rather than a burnt one.

How long can brioche dough sit in the fridge?

Brioche dough can sit in the fridge for up to 24 hours. Chilling the dough not only slows down the yeast activity, allowing for a more developed flavor, but it also makes the dough easier to handle and braid. After refrigeration, let the dough come to room temperature for about 30 minutes before shaping or baking. This ensures an even rise and the best texture for your braided chocolate chip brioche recipe.

When to stop mixing brioche?

You should stop mixing brioche dough when it’s smooth, elastic, and slightly sticky. A great way to check if it’s ready is by performing the “windowpane test.” Take a small piece of dough and stretch it gently between your fingers. If it forms a thin, translucent sheet without tearing, the gluten is well-developed, and your dough is ready. Over-mixing can cause the dough to become too tough, so be sure to stop as soon as it reaches this stage.

Conclusion

Mastering the braided chocolate chip brioche recipe is a rewarding experience that brings bakery-quality bread right to your kitchen. From understanding the key ingredients and proofing the dough to troubleshooting common mistakes, you now have everything you need to create a perfectly fluffy, chocolate-filled loaf. Whether you’re serving it fresh or experimenting with creative ways to enjoy it, this recipe is sure to impress.

Print
clock clock iconcutlery cutlery iconflag flag iconfolder folder iconinstagram instagram iconpinterest pinterest iconfacebook facebook iconprint print iconsquares squares iconheart heart iconheart solid heart solid icon
Sliced braided chocolate chip brioche on a serving tray with coffee and butter.

Braided Chocolate Chip Brioche Recipe


  • Author: Emily
  • Total Time: 2 hours 50 minutes
  • Yield: 1 braided loaf (810 slices) 1x

Description

This rich and buttery braided chocolate chip brioche recipe is the perfect combination of soft, pillowy bread and bursts of melted chocolate chips. Whether for breakfast, brunch, or dessert, this braided loaf is as impressive as it is delicious.


Ingredients

Scale
  • 3 1/2 cups all-purpose flour
  • 1/4 cup granulated sugar
  • 2 1/4 teaspoons active dry yeast (1 packet)
  • 1 teaspoon salt
  • 1/2 cup warm milk (110°F)
  • 3 large eggs (2 for dough, 1 for egg wash)
  • 1/2 cup unsalted butter, softened
  • 1 cup semi-sweet chocolate chips
  • 1 teaspoon vanilla extract (optional)


Instructions

  1. In a large mixing bowl, combine flour, sugar, salt, and yeast.
  2. Gradually add warm milk, two eggs, and vanilla extract (if using) to the dry ingredients. Mix until a dough forms.
  3. Add softened butter, one tablespoon at a time, kneading until fully incorporated. Knead the dough for 8-10 minutes, until smooth and slightly sticky.
  4. Place the dough in a lightly greased bowl, cover it with plastic wrap, and let it rise in a warm spot for 1-2 hours or until it doubles in size.
  5. Once risen, punch down the dough and knead in the chocolate chips evenly.
  6. Divide the dough into three equal portions and roll each into a long strand, about 12-14 inches in length.
  7. Lay the strands side by side and braid them together, pinching the ends to seal.
  8. Place the braided loaf on a parchment-lined baking sheet, cover, and let it rise for another 30 minutes.
  9. Preheat the oven to 350°F (175°C). Brush the braided loaf with an egg wash made from 1 beaten egg and a tablespoon of water.
  10. Bake for 25-30 minutes, or until golden brown and the loaf sounds hollow when tapped.
  11. Let the brioche cool slightly before slicing and serving.

Notes

  • For a Dairy-Free Option: Substitute butter with plant-based butter and use almond or oat milk.
  • Storage Tip: Wrap the brioche tightly in plastic wrap and store at room temperature for up to 3 days. For longer storage, slice and freeze in individual portions.
  • Reheating: Warm slices in the oven at 325°F for 5-7 minutes to restore their softness and flavor.
  • Optional Add-Ins: Add orange zest or a pinch of cinnamon for an extra layer of flavor.

7 Easy Steps to Make the Perfect Strawberry Shortcake Parfait

Who can resist a strawberry shortcake parfait? This no-bake dessert layers juicy strawberries, fluffy whipped cream, and soft cake for a sweet treat that’s as easy to make as it is to devour. Whether it’s a hot summer day or a cozy celebration, this parfait’s got you covered!

Print
clock clock iconcutlery cutlery iconflag flag iconfolder folder iconinstagram instagram iconpinterest pinterest iconfacebook facebook iconprint print iconsquares squares iconheart heart iconheart solid heart solid icon
A beautifully layered strawberry shortcake parfait with fresh strawberries and whipped cream in a glass.

How to Make the Perfect Strawberry Shortcake Parfait


  • Author: Emily
  • Total Time: 15 minutes
  • Yield: 4 servings 1x

Description

This strawberry shortcake parfait is a no-bake dessert that layers juicy strawberries, soft cake, and fluffy whipped cream into a delightful treat. Ready in just minutes, it’s perfect for breakfast, brunch, or a quick sweet snack.


Ingredients

Scale
  • 2 cups fresh strawberries (washed, hulled, and sliced)
  • 2 cups shortcake or pound cake (cut into small cubes)
  • 1 cup whipped cream (store-bought or homemade)
  • 1 tablespoon granulated sugar (optional, for macerating strawberries)
  • 1 teaspoon vanilla extract (optional, for whipped cream)
  • Garnishes: whole strawberries, mint leaves, or chocolate shavings (optional)

Instructions

  1. Wash the strawberries thoroughly, pat them dry, and slice them evenly. If desired, toss the slices with sugar to enhance their sweetness. Let them sit for 5 minutes to release their natural juices.
  2. Cut the shortcake or pound cake into small, bite-sized cubes for easy layering.
  3. If making whipped cream from scratch, whip 1 cup of heavy cream with 1-2 tablespoons of sugar and vanilla extract until soft peaks form.
  4. In a clear glass or jar, start by adding a layer of cake cubes as the base.
  5. Add a layer of sliced strawberries on top of the cake, followed by a generous spoonful of whipped cream.
  6. Repeat the layers until the glass is full, ending with a dollop of whipped cream on top.
  7. Garnish with a whole strawberry, mint leaf, or chocolate shavings for a decorative touch.

Notes

  • To make this recipe dairy-free, substitute whipped cream with coconut cream and use a dairy-free cake.
  • For a healthier option, use Greek yogurt instead of whipped cream and reduce or omit the sugar.
  • Prepare the parfaits just before serving to maintain the fresh texture of the cake and fruit.
  • This recipe is highly customizable—add nuts, granola, or even a drizzle of caramel for extra flavor.

Why Strawberry Shortcake Parfait is the Ultimate Dessert

The Perfect Balance of Flavors

A strawberry shortcake parfait isn’t just any dessert—it’s a carefully crafted balance of sweetness, freshness, and creaminess. The juicy strawberries bring natural sweetness and a hint of tang, while the soft, crumbly cake adds richness and texture. Topping it all off is the fluffy whipped cream, which ties everything together like a dream.

This dessert satisfies every craving, whether you’re in the mood for something fruity, creamy, or indulgent. Unlike heavier treats, its light and airy layers make it perfect for any time of the day.

A No-Bake Summer Treat

On hot summer days, the last thing you want is to turn on the oven. That’s why a strawberry shortcake parfait is your go-to dessert! This no-bake treat is quick to assemble and keeps you cool while delivering maximum flavor.

With just a few simple ingredients strawberries, cake, and whipped cream—you can create a visually stunning dessert in minutes. Plus, it’s great for last-minute gatherings when you want to impress without breaking a sweat. For more tips on summer desserts, check out this guide to no-bake recipes.

Versatility in Presentation

One of the best things about a strawberry shortcake parfait is its versatility. You can serve it in elegant glasses for a fancy dinner party, pack it into mason jars for a picnic, or simply layer it in bowls for a quick family dessert.

You can even adjust the portion sizes mini parfaits are perfect for kids, while larger servings are great for when you’re treating yourself. No matter how you serve it, this dessert looks as good as it tastes.

Perfect for Any Occasion

Whether you’re celebrating a birthday, hosting a brunch, or craving a solo indulgence, a strawberry shortcake parfait fits the bill. It’s fancy enough for special occasions but simple enough to whip up for everyday enjoyment.

Because it’s so easy to customize, you can make it feel right at home on any menu. Add some chocolate shavings for a romantic twist, or sprinkle in granola for a breakfast-inspired treat. This dessert is truly as flexible as your imagination.

Ingredients You’ll Need for Strawberry Shortcake Parfait

Ingredients for strawberry shortcake parfait including strawberries, whipped cream, and shortcake on a cutting board.
An overhead view of the ingredients for a strawberry shortcake parfait, ready for layering.

Fresh, Juicy Strawberries

To make the perfect strawberry shortcake parfait, fresh strawberries are essential. Look for ripe, bright red berries with a sweet aroma. Wash them thoroughly, remove the green tops, and slice them evenly for layering. For an extra burst of sweetness, toss the slices with a teaspoon of sugar or a splash of orange juice.

The Ideal Cake for Layering

The cake forms the base of your strawberry shortcake parfait. Shortcake is the traditional choice, but you can also use pound cake or sponge cake for a lighter texture. Store-bought options work well if you’re short on time, but homemade cake brings extra flavor to the dessert. For gluten-free parfaits, substitute with gluten-free cake or biscuits.

Rich and Creamy Whipped Cream

Whipped cream adds a luscious layer to your strawberry shortcake parfait. You can make it from scratch by whipping heavy cream with a touch of sugar and vanilla extract until soft peaks form. If you prefer a time-saving option, store-bought whipped cream works just as well. For a healthier twist, swap in Greek yogurt or coconut cream.

Optional Add-Ins for Creativity

While the classic ingredients shine on their own, you can add extra layers for a unique twist on the strawberry shortcake parfait. Crushed graham crackers or granola bring a satisfying crunch, while chocolate shavings or caramel drizzle add indulgence. For a tangy contrast, consider adding a dollop of lemon curd between the layers.

Step-by-Step Guide to Making Strawberry Shortcake Parfait

Preparing the Strawberries

Start by preparing the star of the strawberry shortcake parfait: the strawberries. Wash them thoroughly under cold water, pat them dry, and remove the green tops. Slice them evenly to create beautiful, uniform layers. For added sweetness, sprinkle the slices with a teaspoon of sugar or drizzle them with honey. Allow the strawberries to sit for a few minutes so they release their natural juices, which will enhance the parfait’s overall flavor.

Cutting and Preparing the Cake

Your choice of cake plays a big role in how your strawberry shortcake parfait turns out. If you’re using shortcake, pound cake, or sponge cake, cut it into small cubes or tear it into bite-sized pieces. This ensures each bite of the parfait includes the perfect blend of flavors and textures.

For those short on time, store-bought cake works wonderfully, but homemade cake takes this dessert to the next level. If you’d like to try a complementary recipe, check out our Gluten-Free Mozzarella Sticks Recipe for a savory pairing idea!

Layering the Parfait

Layering a strawberry shortcake parfait with fresh strawberries, whipped cream, and cake.
Step-by-step layering of a strawberry shortcake parfait for a visually appealing dessert.

Now comes the fun part—layering your strawberry shortcake parfait! Use a glass or jar to show off the dessert’s vibrant colors and textures. Start with a base layer of cake cubes, followed by a generous spoonful of sliced strawberries. Add a layer of whipped cream to create a creamy contrast, then repeat the layers until the glass is full.

Make sure to end with a whipped cream topping for a polished finish. For an extra decorative touch, top the parfait with a whole strawberry, a mint leaf, or even some crushed graham crackers.

Pro Tips for Perfect Parfait Assembly

To ensure your strawberry shortcake parfait looks as good as it tastes, keep these tips in mind:

  1. Use even layers: Balance each ingredient to avoid overpowering the parfait with too much cream or cake.
  2. Chill before serving: Let the parfait rest in the fridge for 15-20 minutes to enhance the flavors and firm up the layers.
  3. Serve immediately: While these parfaits can be prepped in advance, they’re best enjoyed fresh for maximum crunch and flavor.
  4. Customize to taste: Add chocolate chips, crushed nuts, or a drizzle of caramel for a personalized twist.

Variations of Strawberry Shortcake Parfait

Three variations of strawberry shortcake parfaits: classic, chocolate, and mixed berry.
Three creative variations of strawberry shortcake parfaits, perfect for any occasion.

Dairy-Free Strawberry Shortcake Parfait

If you’re looking for a dairy-free version of the strawberry shortcake parfait, don’t worry it’s easy to adapt! Swap the whipped cream for coconut cream or a dairy-free whipped topping. For the cake layer, use a dairy-free shortcake or sponge cake made with plant-based milk.

This version is just as creamy and delicious as the classic but caters to those with dietary restrictions. For an added flavor twist, sprinkle in a touch of cinnamon or nutmeg to the coconut cream before layering!

Low-Sugar or Keto-Friendly Options

For a healthier take on the strawberry shortcake parfait, you can reduce the sugar without sacrificing flavor. Replace traditional cake with a low-carb almond flour cake, and use a sugar-free whipped cream alternative. Sweeten the strawberries naturally with a sugar substitute like stevia or monk fruit.

This version is perfect for those watching their sugar intake but still craving a sweet and refreshing dessert. Plus, it’s an excellent choice for anyone following a keto diet!

Mixed Berry Shortcake Parfait

Why stick to just strawberries? Create a vibrant mixed berry shortcake parfait by adding blueberries, raspberries, or blackberries to the layers. The combination of berries not only adds a pop of color but also enhances the flavor with a mix of sweet and tart notes.

This variation is perfect for summer picnics or festive gatherings, as the colorful presentation is bound to impress your guests. Pair it with a dollop of lemon or vanilla yogurt for a refreshing twist.

Chocolate Strawberry Shortcake Parfait

For a decadent dessert, transform your strawberry shortcake parfait into a chocolate lover’s dream. Add a layer of chocolate ganache or drizzle melted chocolate between the layers. Alternatively, use a chocolate cake base instead of the classic shortcake.

To make it even more indulgent, sprinkle some mini chocolate chips or shaved dark chocolate on top. This variation is perfect for date nights or when you’re in the mood for something extra luxurious.

FAQs About Strawberry Shortcake Parfait

What is a traditional parfait made of?

A traditional parfait is a layered dessert made with yogurt or whipped cream, fresh fruit, and granola or cake pieces. Each layer offers a balance of textures and flavors, making parfaits both visually appealing and delicious. When creating a strawberry shortcake parfait, the layers are typically strawberries, shortcake, and whipped cream for a classic twist.

What is the difference between strawberry cake and strawberry shortcake?

While both desserts feature strawberries, they differ in preparation and texture. Strawberry cake is a fully baked dessert, often layered with strawberry-flavored frosting and sponge or butter cake. In contrast, strawberry shortcake combines fresh strawberries, whipped cream, and soft, crumbly shortcake or biscuit layers. A strawberry shortcake parfait captures the essence of strawberry shortcake but presents it in a layered, glass-style dessert for easy assembly and serving.

What does strawberry parfait taste like?

A strawberry shortcake parfait offers a delightful blend of sweet and tangy flavors. The fresh strawberries provide a natural sweetness, while the shortcake adds a buttery richness. Combined with fluffy whipped cream, the parfait delivers a creamy, refreshing treat with layers of soft cake and juicy fruit. It’s like enjoying summer in every bite!

What is in the middle of a strawberry shortcake?

The middle of a strawberry shortcake traditionally features a generous layer of fresh strawberries and lightly sweetened whipped cream sandwiched between two layers of shortcake. In a strawberry shortcake parfait, this combination is layered repeatedly in a glass, creating a visually stunning dessert that’s just as delicious as its plated counterpart.

Conclusion

A strawberry shortcake parfait is the ultimate dessert, combining layers of soft cake, juicy strawberries, and fluffy whipped cream in a single serving. Whether you’re making it dairy-free, keto-friendly, or adding a twist with chocolate or mixed berries, this versatile dessert is perfect for any occasion. Plus, it’s quick, easy, and customizable to suit your tastes.

Now it’s your turn to make this irresistible dessert. Grab your favorite ingredients, get creative with the layers, and enjoy every delicious spoonful!

Irresistible Gluten Free Mozzarella Sticks in 30 Minutes

Print
clock clock iconcutlery cutlery iconflag flag iconfolder folder iconinstagram instagram iconpinterest pinterest iconfacebook facebook iconprint print iconsquares squares iconheart heart iconheart solid heart solid icon
Plated gluten free mozzarella sticks with marinara sauce.

Irresistible Gluten Free Mozzarella Sticks in 30 Minutes


  • Author: Emily
  • Total Time: 30 minutes
  • Yield: 20 mozzarella sticks (serves 4-6) 1x

Description

Crispy on the outside and gooey on the inside, these gluten free mozzarella sticks are the ultimate appetizer or snack! Quick, easy, and made with simple ingredients, this recipe ensures everyone, even those avoiding gluten, can enjoy these cheesy bites of deliciousness.


Ingredients

Scale
  • 10 mozzarella cheese sticks (halved, if needed)
  • 1/2 cup gluten-free flour
  • 1/4 teaspoon garlic powder
  • 1/4 teaspoon onion powder
  • 1/4 teaspoon salt
  • 2 large eggs (beaten)
  • 1 cup gluten-free breadcrumbs (panko-style preferred)
  • Cooking spray or vegetable oil (for frying or air frying)
  • Marinara sauce (for dipping, optional)

Instructions

  1. Slice the mozzarella sticks in half if necessary, then freeze them for at least 20 minutes to firm up.
  2. Prepare a dredging station with three shallow bowls: one for gluten-free flour mixed with garlic powder, onion powder, and salt; one for beaten eggs; and one for gluten-free breadcrumbs.
  3. Roll each cheese stick in the seasoned flour, ensuring it’s fully coated. Next, dip it into the egg wash, and finally, roll it in breadcrumbs. For an extra crispy coating, repeat the egg wash and breadcrumb steps.
  4. Place the breaded sticks on a parchment-lined tray and freeze for another 20 minutes to set the coating.
  5. For Air Fryer: Preheat to 375°F (190°C). Spray the basket lightly with oil and arrange the sticks in a single layer. Air fry for 6-8 minutes, flipping halfway through.
  6. For Oven: Preheat to 400°F (200°C). Arrange the sticks on a wire rack placed over a baking sheet. Bake for 10-12 minutes or until golden brown.
  7. For Frying: Heat 1 inch of oil in a skillet over medium heat. Fry the sticks in small batches for 1-2 minutes per side, then drain on paper towels.
  8. Serve hot with marinara sauce or your favorite dipping sauce.

Notes

  • Double-Coating Tip: Double-coating the sticks with egg wash and breadcrumbs ensures a crispier crust and prevents the cheese from oozing out.
  • Make Ahead: Breaded sticks can be frozen for up to 3 months. Cook directly from frozen when needed.
  • Dipping Sauces: Experiment with ranch, garlic aioli, or buffalo sauce for variety.

Who says gluten free mozzarella sticks can’t be as good ! if not better than the traditional ones? With a perfectly crispy coating and a melty, cheesy center, this quick and easy recipe is bound to become your favorite. Whether you’re hosting a party or snacking solo, these sticks deliver big flavor without the gluten!

Why You’ll Love These Gluten Free Mozzarella Sticks

Perfect for Parties, Snacks, or Game Nights

There’s something magical about a plate of gluten free mozzarella sticks—golden and crispy on the outside, gooey and cheesy on the inside. These sticks are the ultimate crowd-pleaser, whether you’re hosting a party, serving appetizers for game night, or enjoying a casual snack at home. They’re so versatile that they’ll quickly become your go-to recipe for any occasion.

What makes them even better? They’re gluten-free, meaning everyone, including those with dietary restrictions, can indulge without worry. Pair them with your favorite dipping sauces like marinara or ranch, and you’ve got a dish that’ll have your guests asking for seconds or thirds!

Quick, Easy, and Beginner-Friendly

Gluten free mozzarella sticks may sound like a fancy recipe, but don’t let that fool you it’s surprisingly simple to make. With just a few ingredients and steps, you’ll have a plate of crispy, cheesy perfection in no time.

The process is straightforward: coat mozzarella sticks in gluten-free flour, dip them in an egg wash, and roll them in gluten-free breadcrumbs. Fry or bake them to golden perfection, and you’re done! Even if you’re a beginner in the kitchen, this recipe ensures success.

For added convenience, this dish comes together in just 30 minutes, making it ideal for when you’re short on time but still want something delicious.

Family-Approved Gluten-Free Goodness

If you’ve got picky eaters at home, you’ll be happy to know that these gluten free mozzarella sticks are a hit with both kids and adults. The crispy coating and gooey cheese inside make them irresistible, while their bite-sized shape makes them fun to eat.

This recipe is also an excellent way to introduce gluten-free snacks to your family. They won’t even notice the difference because the taste and texture are just as good—if not better—than traditional mozzarella sticks. For a fun twist, let the kids help with breading the sticks. It’s a mess, but it’s also a memory-maker!

Made with Pantry Staple

The best part about making gluten free mozzarella sticks? You probably already have most of the ingredients in your kitchen! Common pantry staples like gluten-free breadcrumbs, gluten-free flour, and mozzarella cheese are all you need to get started.

When choosing breadcrumbs, opt for trusted brands like Ian’s Gluten Free Breadcrumbs, which deliver a perfect crunch without compromising on flavor. Mozzarella sticks from the store or freshly cut mozzarella blocks will both work for this recipe.

Additionally, you can customize the recipe to suit your preferences. Don’t have breadcrumbs? Swap them for almond flour or crushed gluten-free crackers. This flexibility ensures you can always whip up a batch of these delicious sticks whenever the craving hits!

Ingredients and Substitutions for Gluten Free Mozzarella Sticks

The Key Ingredients for Success

To make gluten free mozzarella sticks at home, you’ll need a few simple ingredients that ensure the perfect crispy crust and gooey cheese filling. Here’s what you’ll need:

Ingredients for gluten free mozzarella sticks on a wooden cutting board.
An overhead shot of the essential ingredients for gluten free mozzarella sticks.
  • Mozzarella cheese sticks: Pre-packaged cheese sticks are convenient and melt perfectly, but you can also cut a block of mozzarella into stick shapes.
  • Gluten-free flour: Helps the breading stick to the cheese. Almond flour can be used for a grain-free option.
  • Gluten-free breadcrumbs: These create that signature crispy coating. Opt for seasoned breadcrumbs or panko-style crumbs for extra crunch.
  • Eggs: Essential for binding the breadcrumbs to the cheese.
  • Seasonings: Garlic powder, onion powder, and a pinch of salt enhance the flavor of the breading.

Each ingredient serves a specific role in creating the ideal texture and flavor, so don’t skip any!

Ingredient Substitutions and Alternatives

If you don’t have all the ingredients on hand, don’t worry! This recipe is flexible. Here are some handy substitutions:

  • Breadcrumbs: Swap gluten-free breadcrumbs for crushed gluten-free crackers or cornflakes for added texture.
  • Flour: Use cornstarch or tapioca flour as a replacement if you don’t have gluten-free flour.
  • Cheese: Experiment with different types of cheese sticks, like Colby Jack or pepper jack, for a flavorful twist.

The recipe works beautifully with these alternatives, ensuring that everyone can enjoy gluten free mozzarella sticks regardless of what’s in their pantry.

Choosing the Best Gluten-Free Breadcrumbs

Not all gluten-free breadcrumbs are created equal, so choosing the right one is key to achieving a crispy texture. Some popular options include:

  • Ian’s Gluten Free Breadcrumbs: A trusted brand known for its panko-style crumbs.
  • 4C Gluten Free Crumbs: Light and airy, perfect for frying or baking.

Tools You’ll Need

Making gluten free mozzarella sticks requires basic kitchen tools, most of which you probably already own:

  • Shallow bowls: Perfect for dredging the cheese sticks in flour, egg, and breadcrumbs.
  • Baking tray: Essential for chilling the breaded sticks before cooking.
  • Air fryer or deep fryer: An air fryer is great for a healthier option, while a deep fryer delivers ultimate crispiness.
  • Tongs: Handy for flipping or removing the sticks while frying.

Step-by-Step Guide to Making Gluten Free Mozzarella Sticks

Step-by-step breading process for gluten free mozzarella sticks.
Close-up of the breading process: mozzarella stick being dipped in egg wash and breadcrumbs.

Preparing the Ingredients

The secret to perfect gluten free mozzarella sticks lies in the preparation. Start by cutting mozzarella cheese sticks into halves (if needed) to make them easier to handle. If you’re using a block of mozzarella, slice it into uniform stick shapes about 3-4 inches long.

Next, set up your dredging station. You’ll need three shallow bowls: one for gluten-free flour, one for beaten eggs, and one for gluten-free breadcrumbs. Season the flour and breadcrumbs with garlic powder, onion powder, salt, and pepper for an extra burst of flavor.

Finally, line a baking tray with parchment paper to prevent sticking and make cleanup easier. Trust me, these little steps save time and effort!

The Bread-Crumbing Process

Creating a crispy coating is all about layering. To start, roll each cheese stick in the seasoned flour, ensuring it’s evenly coated. This step helps the egg mixture stick better.

Then, dip the floured stick into the egg wash, letting any excess drip off. Finally, roll it in gluten-free breadcrumbs until completely covered. For extra crunch, repeat the egg and breadcrumb steps once more.

Place the breaded sticks on your prepared tray and refrigerate for at least 20 minutes. This chilling step is crucial—it firms up the coating and prevents the cheese from oozing out during cooking.

Cooking Methods: Air Fryer, Oven, or Frying Pan

Once your gluten free mozzarella sticks are prepped, it’s time to cook them! Here are three popular methods to choose from:

  • Air Fryer: Preheat the air fryer to 375°F (190°C). Lightly spray the basket with oil to prevent sticking. Arrange the sticks in a single layer, ensuring they don’t touch. Cook for 6-8 minutes, flipping halfway through, until golden and crispy.
  • Oven: Preheat your oven to 400°F (200°C). Place the sticks on a wire rack over a baking sheet for even cooking. Bake for 10-12 minutes or until golden brown.
  • Frying Pan: Heat about 1 inch of oil in a frying pan over medium heat. Test the oil by dropping in a breadcrumb—if it sizzles, it’s ready. Fry the sticks in small batches for 1-2 minutes per side, then drain on paper towels.

Each method has its perks: the air fryer is healthier, the oven is hands-off, and frying delivers the ultimate crispiness. Choose what works best for you!

Troubleshooting Common Issues

Making gluten free mozzarella sticks isn’t without its challenges, but don’t worry—most issues are easy to fix.

  • Cheese Leaking Out: If the cheese starts to ooze while cooking, it usually means the breading wasn’t thick enough or the sticks weren’t chilled long enough. Double-coat the sticks and chill them for at least 20 minutes before cooking.
  • Breading Falling Off: This happens when the coating doesn’t stick properly. Make sure each layer (flour, egg, and breadcrumbs) is applied evenly.
  • Not Crispy Enough: If your sticks aren’t as crispy as you’d like, try using panko-style gluten-free breadcrumbs or cooking them a bit longer in the air fryer or oven.

Serving Suggestions and Storage Tips

Plated gluten free mozzarella sticks with marinara sauce.
Freshly baked gluten free mozzarella sticks served with marinara sauce and garnished with parsley.

The Best Dipping Sauces

Gluten free mozzarella sticks are fantastic on their own, but pairing them with the right dipping sauce elevates them to the next level. Classic marinara sauce is always a hit, with its tangy and savory flavor complementing the cheesy goodness. If you prefer something creamy, ranch dressing or garlic aioli are excellent choices.

For a spicier kick, serve them with buffalo sauce or a sriracha mayo blend. Want something a little different? Try a homemade pesto or a sweet-and-spicy chili sauce to surprise your taste buds. Offering a variety of dipping options ensures there’s something for everyone to enjoy!

How to Keep Mozzarella Sticks Warm and Crispy

Serving gluten free mozzarella sticks fresh out of the fryer or oven ensures they stay crispy, but what if you need to keep them warm for a gathering?

The best solution is to place the cooked sticks on a wire rack set over a baking sheet and keep them in an oven preheated to 200°F (93°C). This prevents them from becoming soggy while staying perfectly warm. Avoid covering them with foil, as this traps steam and softens the crust.

If you’re using an air fryer, you can reheat the sticks at 350°F (175°C) for a couple of minutes to restore their crunch before serving.

Storing and Freezing Tips

If you have leftovers (unlikely, but it happens!), gluten free mozzarella sticks can be stored and reheated easily. Place any cooled leftovers in an airtight container and refrigerate for up to three days. To reheat, use an air fryer or oven at 375°F (190°C) until crispy again.

Want to prepare them in advance? You can freeze breaded but uncooked mozzarella sticks for up to three months. Arrange them in a single layer on a baking sheet, freeze until solid, and then transfer them to a freezer-safe bag or container. This way, you’ll always have a quick snack ready to cook.

Creative Ways to Use Leftovers

Leftover gluten free mozzarella sticks don’t have to go to waste—they can be repurposed into other tasty dishes! For instance:

  • Chop them up and toss them into a fresh salad for a crispy, cheesy topping.
  • Add them to a sandwich or wrap for extra texture and flavor.
  • Use them as a unique pizza topping by slicing them into rounds and placing them on a gluten-free crust.
  • Create a fun mozzarella stick casserole by layering them with marinara sauce, pasta, and shredded cheese, then baking until bubbly.

FAQs About Gluten Free Mozzarella Sticks

Are the mozzarella sticks gluten-free?

Yes, this recipe for gluten free mozzarella sticks is completely gluten-free! By using gluten-free breadcrumbs and gluten-free flour, these mozzarella sticks are safe for anyone following a gluten-free diet. Always double-check your ingredient labels to ensure they are certified gluten-free, as cross-contamination can occur during manufacturing.

How do you keep mozzarella sticks from falling apart?

To prevent your gluten free mozzarella sticks from falling apart, it’s important to follow a few simple steps:

  1. Double-coat the cheese sticks: Dipping them twice in egg wash and breadcrumbs creates a sturdy coating that stays intact during cooking.
  2. Chill before cooking: Refrigerating the breaded sticks for at least 20 minutes helps the coating set, minimizing the chances of it falling off.
  3. Handle carefully: Use tongs to gently flip or remove the sticks during cooking to keep the coating intact.

With these tips, your mozzarella sticks will turn out perfectly crispy every time!

Are mozzarella cheese sticks low FODMAP?

Yes, mozzarella cheese sticks are generally considered low FODMAP because mozzarella is low in lactose, which makes it easier to digest for those with FODMAP sensitivities. However, you should always monitor portion sizes, as individual tolerance levels vary. To keep your gluten free mozzarella sticks low FODMAP, ensure that your breadcrumbs and other ingredients are also FODMAP-friendly.

Is Happy Farms mozzarella cheese gluten-free?

Yes, Happy Farms mozzarella cheese is gluten-free, making it an excellent option for your gluten free mozzarella sticks. However, it’s always a good idea to read the label and check for any potential changes to ingredients or manufacturing processes. When in doubt, look for a gluten-free certification on the packaging to ensure it meets your dietary needs.

Conclusion

These gluten free mozzarella sticks are the perfect combination of crispy and gooey, offering a classic snack that everyone can enjoy. From choosing the best gluten-free breadcrumbs to mastering the double-coating process, you now have all the tips and tricks to create mozzarella sticks that rival any restaurant’s version. Whether you’re serving them as an appetizer, snack, or party dish, these cheesy bites are sure to be a hit.

7 Secrets to Perfect Skillet Chicken Thighs with Schmaltzy Tomatoes

Sometimes, the simplest recipes are the most satisfying. Skillet chicken thighs with schmaltzy tomatoes is proof of that! Juicy, flavorful chicken thighs meet slow-cooked tomatoes that melt into a rich, velvety sauce, all made in a single pan. The secret weapon? Schmaltz a touch of rendered chicken fat that takes the flavor to a whole new level.

Why Skillet Chicken Thighs with Schmaltzy Tomatoes Are a Game-Changer

What Makes This Recipe Special?

Skillet chicken thighs with schmaltzy tomatoes isn’t just a meal it’s a flavor-packed experience that strikes the perfect balance between simplicity and sophistication. The rich, golden crust on the chicken thighs pairs beautifully with the buttery, jam-like texture of the tomatoes. This dish is all about elevating humble ingredients into something unforgettable.

What’s more, it’s a one-skillet recipe, which means fewer dishes to wash and more time to savor your meal. Whether you’re cooking for your family or impressing guests, this recipe delivers bold flavors with minimal effort. It’s comfort food with a gourmet twist, proving that good cooking doesn’t have to be complicated.

The Role of Schmaltz in Cooking

If you’ve never cooked with schmaltz before, you’re in for a treat. Schmaltz, or rendered chicken fat, is the secret ingredient that gives skillet chicken thighs with schmaltzy tomatoes its luxurious, deep flavor. As the chicken thighs sear in the skillet, their fat renders, transforming into a golden liquid that infuses the tomatoes with richness.

Not only does schmaltz enhance the sauce’s texture, but it also locks in the chicken’s natural juices, keeping every bite moist and flavorful. For those new to using schmaltz, it’s a versatile ingredient that can be used in everything from roasting vegetables to frying eggs.

The Appeal of One-Skillet Recipes

Who doesn’t love a recipe that’s as practical as it is delicious? With skillet chicken thighs with schmaltzy tomatoes, you’ll cook everything in one pan, making it perfect for busy weeknights. From browning the chicken thighs to simmering the tomatoes, every step builds flavor in the same skillet.

One-skillet meals also save time on cleanup and help retain all the delicious juices and caramelized bits. The result? A dish that’s rich, cohesive, and bursting with layers of flavor. Plus, fewer dishes mean more time to enjoy the meal with your loved ones.

Why Chicken Thighs Are the Star

When it comes to chicken, thighs reign supreme in this recipe. Unlike leaner cuts like chicken breasts, thighs stay tender and juicy even after cooking. The bone-in, skin-on variety is especially ideal for skillet chicken thighs with schmaltzy tomatoes because the skin crisps up beautifully while the bone helps the meat cook evenly.

Chicken thighs also have a natural richness that pairs perfectly with the tartness of the tomatoes and the indulgence of schmaltz. So, if you’re looking for a cut of meat that’s forgiving, flavorful, and easy to cook, chicken thighs are the way to go.

Ingredients You’ll Need for Skillet Chicken Thighs with Schmaltzy Tomatoes

Ingredients for skillet chicken thighs with schmaltzy tomatoes, including chicken thighs, fresh tomatoes, garlic, and herbs.
Everything you need to make skillet chicken thighs with schmaltzy tomatoes, from fresh produce to juicy chicken thighs.

The Role of Chicken Thighs

Chicken thighs are the star of this dish, bringing a perfect balance of flavor and texture to skillet chicken thighs with schmaltzy tomatoes. Bone-in, skin-on thighs create the crispy skin you crave while ensuring the meat remains juicy during cooking. Unlike chicken breasts, thighs are forgiving and retain moisture even if slightly overcooked.

Pro tip: Look for high-quality chicken thighs with minimal added moisture or sodium to let the natural flavors shine. For more chicken recipe inspiration, check out this guide on garlic parmesan chicken.

Tomatoes: Schmaltzy and Sweet

The tomatoes in this dish serve as the flavorful backbone, transforming into a luscious, jammy sauce. Ripe, fresh varieties like cherry or Roma tomatoes work best for their sweetness and vibrant color. When paired with rendered chicken fat, or schmaltz, they develop a rich, buttery flavor that elevates the entire dish.

Don’t have fresh tomatoes? No problem! Use high-quality canned diced tomatoes as a substitute, but drain them well to prevent a watery sauce.

Seasonings and Aromatics

This dish thrives on simplicity. The aromatics—garlic and onions—meld beautifully with the schmaltz and tomatoes, creating a depth of flavor that’s hard to resist. Seasonings like freshly cracked black pepper, kosher salt, and a pinch of red pepper flakes provide balance, while fresh herbs like thyme or parsley add brightness.

Adjust seasoning to taste as you go; remember, the schmaltz amplifies the flavors, so less is often more!

Optional Add-Ins for Extra Flavor

Take your skillet chicken thighs with schmaltzy tomatoes to the next level with these optional ingredients:

  • White wine or chicken broth: Adds acidity and enhances the sauce’s complexity.
  • Lemon zest or juice: Brings a refreshing brightness to the dish.
  • Red pepper flakes: For those who love a bit of heat, a pinch of flakes adds a spicy kick.

These extras aren’t essential, but they allow you to customize the dish to your taste, making it even more special.

Step-by-Step Guide to Cooking Skillet Chicken Thighs with Schmaltzy Tomatoes

Step 1: Prepping the Chicken Thighs

Preparation is key to nailing skillet chicken thighs with schmaltzy tomatoes. Start by patting the chicken thighs dry with paper towels—this step is essential for achieving that irresistible crispy skin. Next, generously season both sides of the thighs with salt and freshly cracked black pepper. If you like a little heat, a sprinkle of red pepper flakes can add a subtle kick.

Remember, seasoning early helps the flavors penetrate the meat while ensuring a flavorful crust. Meanwhile, let the chicken sit at room temperature for about 20 minutes to ensure even cooking later.

Step 2: Searing the Chicken

Chicken thighs searing in a cast iron skillet with bubbling schmaltz and sautéed garlic.
Golden-brown chicken thighs crisping up in a cast iron skillet with bubbling schmaltz and aromatics.

Heat a large cast iron skillet over medium-high heat and add a small amount of olive oil. Once the skillet is hot and shimmering, place the chicken thighs skin-side down. Resist the urge to move them around—let them cook undisturbed for 6–8 minutes to develop that golden, crispy crust.

You’ll know it’s time to flip when the chicken releases naturally from the skillet. After flipping, sear the other side for 4–5 minutes. By this point, the rendered fat from the chicken creates the schmaltz that gives this dish its signature flavor.

Step 3: Making the Schmaltzy Tomato Sauce

Once the chicken thighs are golden brown, remove them from the skillet and set them aside. In the same skillet, drain excess fat, leaving just enough schmaltz to coat the bottom. Add minced garlic and diced onions, sautéing until fragrant and softened.

Next, toss in the tomatoes. Stir occasionally, letting them cook down into a thick, jammy sauce. If you want to elevate the sauce, consider adding a splash of white wine or chicken broth to deglaze the pan and capture those delicious browned bits. Season with a pinch of salt and pepper, adjusting to taste.

Step 4: Combining and Finishin

Nestle the seared chicken thighs back into the skillet, ensuring the skin stays above the tomato sauce to keep it crispy. Reduce the heat to low, cover the skillet, and let the dish simmer for about 10 minutes. This step ensures the chicken cooks through while soaking up the rich flavors of the schmaltzy tomatoes.

For the finishing touch, garnish with freshly chopped parsley or thyme for a pop of color and added flavor. Serve the skillet chicken thighs with schmaltzy tomatoes straight from the pan for a rustic, family-style presentation.

Tips for Perfect Skillet Chicken Thighs with Schmaltzy Tomatoes

The Secret to Crispy Chicken Thighs

Achieving perfectly crispy chicken thighs is all about technique. To make your skillet chicken thighs with schmaltzy tomatoes stand out, start by ensuring the skin is as dry as possible before cooking. Patting it dry with paper towels helps the skin crisp up rather than steam.

Next, use medium-high heat when searing the thighs in a cast iron skillet. This allows the skin to render its fat slowly, creating the golden, crackling crust we all love. Remember, patience is key—don’t move the chicken until the skin releases naturally from the pan.

Balancing the Flavors of Schmaltzy Tomatoes

The sauce is the heart of skillet chicken thighs with schmaltzy tomatoes. To create a balanced flavor, it’s essential to start with ripe, sweet tomatoes. If your tomatoes taste too acidic, a small pinch of sugar can work wonders.

Adding aromatics like garlic and onions enhances the sauce’s depth, while a splash of white wine or chicken broth adds brightness. Herbs such as thyme or parsley bring freshness, creating a well-rounded sauce that complements the richness of the chicken.

Troubleshooting Common Mistakes

Even the best recipes can go sideways if you’re not careful. Avoid these common pitfalls when preparing skillet chicken thighs with schmaltzy tomatoes:

  • Overcrowding the skillet: This traps moisture and prevents the chicken from crisping. Use a large skillet or cook in batches if necessary.
  • Skipping the rest period: After removing the chicken from the skillet, let it rest for a few minutes. This helps retain its juices and prevents it from drying out.
  • Using low-quality tomatoes: Bland or underripe tomatoes can result in a lackluster sauce. Opt for fresh, ripe tomatoes or high-quality canned options for the best results.

Serving Suggestions for Schmaltzy Chicken Thighs

Skillet chicken thighs with schmaltzy tomatoes pairs beautifully with a variety of sides. Here are a few ideas:

Skillet chicken thighs with schmaltzy tomatoes garnished with parsley and served with crusty bread.
A rustic serving of skillet chicken thighs with schmaltzy tomatoes, complete with fresh herbs and bread.
  • Crusty bread: Perfect for soaking up the rich, tomatoey sauce.
  • Garlic mashed potatoes: A creamy complement to the bold flavors of the dish.
  • Steamed rice or quinoa: A simple, neutral base that lets the chicken and sauce shine.
  • Roasted vegetables: For a complete, balanced meal, serve the chicken with roasted carrots, asparagus, or zucchini.

FAQs

How does Gordon Ramsay cook chicken thighs?

Gordon Ramsay emphasizes achieving crispy skin and juicy meat when cooking chicken thighs. He begins by seasoning the thighs generously with salt and freshly cracked black pepper. Using a hot, oven-safe skillet, he sears the chicken skin-side down in a small amount of olive oil until golden and crispy.

After flipping the chicken, he adds aromatics like garlic, fresh thyme, and butter to the pan. To finish, he places the skillet in a preheated oven at 375°F, allowing the chicken to cook evenly while soaking up the flavors of the aromatics. This method creates a dish similar to skillet chicken thighs with schmaltzy tomatoes, focusing on crispy skin and bold flavors.

What cooking method is best for chicken thighs?

The best method for cooking chicken thighs depends on your goal. For maximum flavor and crispy skin, pan-searing in a skillet is ideal. This technique locks in juices while creating a golden crust. For even cooking with minimal effort, oven-roasting is a great option. It’s particularly effective when you’re cooking larger batches.

For skillet chicken thighs with schmaltzy tomatoes, combining searing and simmering in one pan is the best approach. It ensures the chicken thighs are flavorful and tender while infusing the schmaltzy tomato sauce with richness.

How to get more flavor in chicken thighs?

To make chicken thighs even more flavorful, focus on seasoning, cooking techniques, and additional ingredients:

  • Season generously: Salt, pepper, and spices like smoked paprika or garlic powder enhance the natural flavor of chicken.
  • Marinate: A simple marinade with olive oil, lemon juice, garlic, and herbs adds depth.
  • Cook with schmaltz: Using rendered chicken fat, as in skillet chicken thighs with schmaltzy tomatoes, amplifies the dish’s richness.
  • Use aromatics and herbs: Ingredients like garlic, onions, thyme, and parsley infuse the chicken and sauce with savory, herbaceous notes.

The key is to layer flavors throughout the cooking process for the most satisfying result.

Is it better to bake or pan-sear chicken thighs?

Both methods have their advantages, but the choice depends on the dish you’re preparing. Pan-searing is ideal for creating crispy skin and caramelized flavors, making it perfect for recipes like skillet chicken thighs with schmaltzy tomatoes. Baking, on the other hand, is a hands-off method that ensures even cooking and works well for larger quantities.

For this recipe, pan-searing the chicken thighs first helps render the fat, creating the schmaltz that enhances the tomato sauce. Simmering the chicken in the skillet afterward locks in moisture and melds all the flavors together.

Conclusion

Skillet chicken thighs with schmaltzy tomatoes is a dish that checks all the boxes—rich, flavorful, and incredibly easy to make. The crispy, golden chicken thighs combined with a luscious tomato sauce infused with schmaltz create a meal that feels indulgent yet approachable.

Now it’s your turn! Grab your skillet, gather your ingredients, and bring this recipe to life. And don’t forget to pair it with a side of crusty bread or creamy mashed potatoes for a complete and satisfying meal. If you’re looking for more inspiration, check out our other delicious one-skillet recipes to keep the creativity flowing in your kitchen!

Easy Black Pepper Angus Steak Recipe in 30 Minutes

There’s something magical about a perfectly cooked steak. Add freshly cracked black pepper, a touch of garlic, and buttery richness, and you’ve got yourself a winner black pepper Angus steak. This dish brings out the best in Angus beef, known for its exceptional marbling and tenderness, making every bite a savory delight.

What Makes Black Pepper Angus Steak Special?

A Flavorful Twist on Classic Steak

Black pepper Angus steak cooking in a cast iron skillet with butter
A sizzling black pepper Angus steak cooking in a cast iron skillet with butter and garlic.

Steak is already a favorite for its rich, savory flavor, but black pepper Angus steak takes it to another level. The boldness of freshly cracked black pepper complements the natural tenderness of premium Angus beef, creating a flavor profile that’s both simple and sophisticated. Unlike heavily marinated steaks, this dish highlights the steak’s quality, letting the natural juices and buttery finish shine.

The secret lies in the contrast of textures the slightly crisp, peppery crust giving way to a juicy, melt-in-your-mouth center. This perfect balance makes black pepper Angus steak a go-to choice for steak lovers who crave something bold yet refined. Whether it’s for a special occasion or just a regular weeknight treat, this dish never fails to impress.

Ingredients That Bring It All Together

Every great dish starts with the right ingredients, and black pepper Angus steak is no exception. At its core, this recipe is all about simplicity using a handful of quality items to create unforgettable flavors. Here’s what you’ll need:

  • Angus beef steak: Known for its marbling and tenderness, Angus beef ensures a juicy and flavorful bite. Ribeye or sirloin cuts work perfectly.
  • Freshly cracked black pepper: The bold, slightly spicy kick of fresh black pepper elevates the dish and creates a beautiful crust.
  • Garlic and soy sauce: These pantry staples add depth and a touch of umami to the steak.
  • Unsalted butter: Melts into a rich sauce, enhancing the natural flavor of the beef.

A tip: Always use fresh ingredients, especially the black pepper, for maximum flavor. If you’re curious about why fresh pepper is so important, this article on how to choose quality black pepper dives deeper into the subject.

The Key to Tender Angus Steak

When it comes to black pepper Angus steak, the secret to its tenderness is the cut and preparation of the beef. Angus beef is prized for its marbling, which helps retain moisture during cooking, resulting in a juicy, flavorful steak. But even the best steak can turn tough if overcooked or mishandled!

To keep your steak tender:

  • Always let it come to room temperature before cooking. Cold steaks can cook unevenly, leaving the center underdone and the outside overcooked.
  • Use a meat thermometer to ensure you hit the perfect doneness (130°F for medium-rare).
  • Let the steak rest for at least 5 minutes after cooking. This allows the juices to redistribute, ensuring every bite is succulent.

By paying attention to these details, you’ll ensure that your black pepper Angus steak is as tender and delicious as it looks.

Quick and Simple Prep for Busy Cooks

One of the best things about black pepper Angus steak is how quick and easy it is to prepare. You don’t need any fancy tools or hours of prep time just a skillet, a few pantry staples, and a love for bold flavors.

Here’s how to make the prep process as smooth as possible:

  1. Pat your steak dry: Removing excess moisture ensures the pepper and seasoning stick to the surface, creating that signature crust.
  2. Season generously: Don’t skimp on the black pepper! A good coating creates the steak’s rich, flavorful exterior.
  3. Preheat your skillet: Use a cast iron skillet if possible. Its even heat distribution is perfect for getting that golden-brown sear.

Step-by-Step Black Pepper Angus Steak Recipe

Ingredients

Every successful dish begins with the right ingredients, and the black pepper Angus steak is no exception. Here’s what you’ll need:

  • Angus beef steaks (8 oz each) – Known for their marbling and tenderness, Angus beef is the perfect choice for this recipe.
  • Freshly cracked black pepper – Adds bold flavor and a crunchy crust to the steak.
  • Olive oil – Helps create a golden-brown sear.
  • Garlic (minced) – Infuses the dish with aromatic depth.
  • Soy sauce and Worcestershire sauce – Provide a touch of umami and balance to the bold flavors.
  • Unsalted butter – Elevates the steak with a luxurious, buttery finish.

For an even more detailed breakdown of how to select high-quality steak, check out this guide to choosing the perfect beef cut.

Preparation: Getting Ready for Success

Before cooking, setting up properly ensures your black pepper Angus steak is as flawless as it can be:

Seasoning Angus steak with freshly cracked black pepper
Freshly cracked black pepper adds bold flavor to the Angus steak during preparation.
  1. Pat your steak dry: This simple step helps the seasoning stick and creates a beautiful crust.
  2. Generously season with salt and black pepper: Don’t hold back—the more evenly you coat the steak, the better the flavor.
  3. Preheat your skillet or grill: A hot surface is key to achieving that perfect sear.
  4. Mise en place: Gather all your ingredients to avoid scrambling mid-cooking.

Tip: If time allows, let the steak sit at room temperature for 20–30 minutes before cooking. This step ensures even cooking from edge to center.

Cooking Instructions

  1. Heat the skillet: Place a cast iron skillet over high heat and add olive oil. Wait until the oil shimmers, signaling it’s hot enough.
  2. Sear the steak: Lay the steak in the pan, pressing it gently for maximum contact. Sear for 2–3 minutes per side to form a golden-brown crust.
  3. Add aromatics: Toss in minced garlic, soy sauce, and Worcestershire sauce. Swirl them around to create a flavorful glaze.
  4. Butter baste: Lower the heat slightly and add butter to the pan. Use a spoon to continually baste the steak with the melted butter for added richness.
  5. Check for doneness: Use a meat thermometer 130°F for medium-rare is ideal.
  6. Rest the steak: Transfer it to a cutting board and let it rest for 5 minutes. This step ensures all the juices stay locked in.

Serving Suggestions

  • Pair your black pepper Angus steak with creamy mashed potatoes or roasted vegetables for a classic meal.
  • Feeling adventurous? Serve it over a bed of garlic butter rice. You can explore this one-pot rice hack for an easy pairing.
  • Don’t forget a crisp green salad or a side of crusty bread to soak up the rich, buttery sauce.

Tips for Perfect Black Pepper Angus Steak

The Right Way to Season Steak

Seasoning is the foundation of any great steak, and for black pepper Angus steak, it’s especially crucial. A generous coating of freshly cracked black pepper isn’t just for flavor—it creates a crust that locks in the juices while giving the steak its signature bold kick.

When seasoning:

  • Use coarsely ground black pepper rather than pre-ground pepper for maximum flavor and texture.
  • Don’t add salt too early, as it can draw out moisture from the steak. Instead, salt it just before cooking.
  • Pat the steak dry before seasoning to help the pepper adhere better.

By taking a few extra steps with your seasoning, your black pepper Angus steak will have a perfect balance of spicy crust and juicy interior.

The Perfect Sear: Temperature is Key

Achieving a beautiful sear is what gives your steak that golden-brown crust and smoky, caramelized flavor. The trick? High heat and a steady hand.

  1. Use a cast iron skillet: It retains heat better than most pans and creates an even sear.
  2. Preheat until smoking: Wait for the skillet to lightly smoke before adding the steak. This ensures the surface is hot enough to lock in the juices.
  3. Don’t overcrowd the pan: If you’re cooking multiple steaks, leave space between them. Overcrowding lowers the temperature and can lead to steaming rather than searing.

Transition tip: “Remember, the sizzle when the steak hits the pan is a sign you’re doing it right!”

Common Mistakes to Avoid

Even the most delicious recipes can go wrong with simple missteps. Avoid these pitfalls when preparing your black pepper Angus steak:

  • Overcooking the steak: Use a meat thermometer to hit the perfect doneness (130°F for medium-rare).
  • Skipping the rest period: Always rest your steak for at least 5 minutes after cooking. This prevents the juices from spilling out when you slice it.
  • Using too much oil: A light coating is enough, as too much can interfere with the crust formation.

By steering clear of these common mistakes, you’ll get a tender, flavorful steak every time.

Variations for Dietary Preferences

One of the best things about black pepper Angus steak is its versatility. With a few tweaks, you can adapt this dish to suit different diets or flavor preferences:

Plated black pepper Angus steak with roasted vegetables and garlic butter
A plated black pepper Angus steak with a juicy medium-rare interior, served with roasted vegetables and garlic butter.
  • Dairy-free: Skip the butter and use olive oil or ghee for basting.
  • Low-sodium: Substitute regular soy sauce with a low-sodium option or tamari.
  • Gluten-free: Tamari is also a great gluten-free alternative to soy sauce.
  • Add a spicy kick: Sprinkle a pinch of cayenne or red pepper flakes with the black pepper for an extra layer of heat.

For more ideas on customizing recipes, check out our Garlic Parmesan Chicken and Potatoes for inspiration.

FAQs

What is black pepper Angus steak?

Black pepper Angus steak is a savory, flavorful dish featuring premium Angus beef seasoned with freshly cracked black pepper. The black pepper creates a spicy crust that enhances the natural richness of the steak, while the tender Angus beef provides a juicy, melt-in-your-mouth texture. Often paired with simple ingredients like garlic, soy sauce, and butter, this steak is a restaurant-quality dish you can easily make at home. It’s perfect for anyone who loves bold, peppery flavors with a gourmet twist.

What is in the black pepper Angus steak at Panda Express?

The black pepper Angus steak at Panda Express is a signature stir-fry dish that combines tender Angus beef slices with crisp vegetables like bell peppers and onions. It’s coated in a savory black pepper sauce that has a slightly sweet and tangy kick, making it a favorite on their menu. If you’re looking to recreate the dish at home, you can use similar ingredients and add a splash of soy sauce for an extra umami punch.

What is the best way to cook Angus steak?

The best way to cook Angus steak is to sear it in a hot cast iron skillet. Here’s a simple step-by-step:

  1. Bring the steak to room temperature: This ensures even cooking.
  2. Season generously: Use freshly cracked black pepper and salt for a flavorful crust.
  3. Preheat your skillet: Heat it until it’s smoking slightly for a perfect sear.
  4. Sear each side for 2–3 minutes: This creates a golden-brown crust.
  5. Check for doneness: Use a meat thermometer (130°F for medium-rare).
  6. Rest the steak: Let it sit for 5 minutes to lock in the juices.

For added richness, you can baste the steak with butter during the last minute of cooking

Is Black Angus good for steak?

Yes, Black Angus beef is an excellent choice for steak. It’s prized for its superior marbling, which makes the meat tender, juicy, and full of flavor. The marbling ensures that the steak stays moist during cooking, making it ideal for dishes like black pepper Angus steak. Whether you prefer ribeye, sirloin, or tenderloin cuts, Black Angus delivers a premium steak experience every time.

Conclusion

Black pepper Angus steak is more than just a recipe—it’s a celebration of bold flavors and quality ingredients. From the peppery crust to the juicy, tender Angus beef, every bite is a testament to how simple ingredients can create a gourmet dish. You’ve learned what makes this steak special, the secrets to achieving the perfect sear, and tips for customizing it to suit your tastes.

Whether you’re making this dish for a weeknight dinner or a special occasion, it’s a guaranteed hit. Remember, the key lies in using freshly cracked black pepper, a hot skillet, and high-quality Angus beef. By following these steps, you’ll create a steak that rivals any steakhouse meal.

So, why wait? Grab your skillet, season your Angus steak, and experience the magic of black pepper Angus steak right in your own kitchen. Don’t forget to explore more delicious recipes on our site for inspiration and ideas to elevate your cooking!

The Best Rice Hack Recipe You’ll Try This Week!

Rice hack recipe can make cooking rice perfectly so much easier! This ultimate guide shares simple tips to transform your meals with minimal effort. Whether you’re new to cooking or a seasoned pro, these hacks are time-saving, useful, and absolutely delicious.

The Secret to Perfectly Fluffy Rice Every Time

Cooking rice doesn’t have to be tricky or intimidating it’s simpler than you think with a few go-to techniques. This Rice Hack Recipe will help you get perfectly fluffy rice, whether you’re using the classic stovetop method, a rice cooker, or even your oven. From easy tips like the finger method to avoiding sticky rice disasters, you’ll learn how to save time and improve every meal. Ready to elevate your rice game? Let’s dive in!

How to Cook Rice with the Finger Method

If you’re not into fiddling with measuring cups, the finger method is your new best friend. It’s an incredibly easy and reliable way to cook rice, especially for jasmine or basmati varieties. Here’s how it works:

Using the finger method to measure water for cooking rice.
The finger method is an easy way to measure water for perfect rice.
  1. Rinse your rice thoroughly. This washes off extra starch that can make your rice clumpy or sticky. Just give it a few rinses until the water runs clear.
  2. Measure water with your finger. Place your fingertip on the surface of the rice, then add water until it reaches the first knuckle of your index finger.
  3. Cook and steam. Bring the rice to a boil, cover it, and lower the heat. Once it’s done, let it steam for about 10 minutes to finish cooking.

Pro Tip: The finger method works best with long-grain rice, but for short-grain or sticky rice, you might need to stick with exact measurements for the perfect texture.

How to Avoid Sticky Rice

Nobody likes clumpy, mushy rice—unless you’re making sticky rice on purpose! Thankfully, a few simple steps can help you avoid this common cooking mishap:

  • Rinse it well. Washing your rice thoroughly is key. It removes the excess starch that makes rice clump together.
  • Get the water ratio right. For most rice types, a 1:1.5 ratio (1 cup of rice to 1.5 cups of water) works like a charm.
  • Fluff it up. After steaming, fluff the rice gently with a fork instead of stirring, which can crush the grains.

If you accidentally overdo it and end up with sticky rice, don’t worry! Spread it out on a plate or baking sheet to cool and dry a bit. It might not be perfect, but it’s a quick save for most dishes.

Rice Cooker Hacks for Effortless Cooking

A rice cooker is a game-changer if you’re looking for consistency and ease. With just a little creativity, you can take your rice from basic to bold:

  • Infuse flavor as it cooks. Swap water for chicken or veggie broth, or toss in garlic cloves, a bay leaf, or even a dash of soy sauce for added depth.
  • Use the delay timer. Most rice cookers let you set a start time, so you can have fresh, hot rice ready exactly when you need it.
  • Get creative with rice blends. Mix jasmine rice with wild rice or quinoa for interesting textures and flavors.

If you’re new to rice cookers, experiment with these tips and discover how versatile this appliance can be!

Alternative Ways to Cook Rice

No rice cooker? No problem! Here are a few other methods that work just as well:

  1. Oven-Baked Rice:
    • Combine your rice, boiling water, and a pinch of salt in an oven-safe dish. Cover tightly with foil and bake at 350°F for 30 minutes. This method is super low-maintenance and always delivers evenly cooked rice.
  2. Instant Pot Rice:
    • Use the “Rice” setting, or go with a 1:1 ratio of rice to water. Cook for 5 minutes, then let the pressure release naturally for 5 minutes before fluffing.
  3. Microwave Rice:
    • Mix rice and water in a microwave-safe bowl, cover loosely, and microwave on high for about 10 minutes. Stir halfway through for even cooking.

Each method has its perks, so try them out to see which one fits your cooking style best!

Flavorful Rice Hacks to Elevate Any Meal

Rice doesn’t have to play second fiddle on your plate it can be so much more than a bland side dish. With a few clever tweaks, you can transform this humble grain into something vibrant, delicious, and even the star of the meal.

Infuse Bold Flavors Right from the Start

The easiest way to upgrade plain rice is to replace water with something more flavorful. Broth, coconut milk, or even tomato juice can work wonders.

  • Broth: Use chicken, beef, or veggie broth instead of water. For example, jasmine rice cooked in chicken broth becomes rich and savory, perfect for pairing with roasted meats or stir-fries.
  • Coconut Milk: If you’re making a tropical-inspired dish, swap out water for coconut milk. A pinch of sugar and a squeeze of lime can bring out its creamy, slightly sweet flavor.
  • Tomato Juice: For a Spanish-style rice, cook it in tomato juice with a sprinkle of cumin and paprika. It’s vibrant, smoky, and pairs beautifully with tacos or grilled veggies.

One-Pot Wonders: Easy Dinners, Big Flavor

If you’re short on time but still want a flavorful dinner, one-pot rice recipes are a lifesaver. The best part? The rice soaks up all the seasonings, so every bite is packed with flavor.

Rice Hack Recipe: One-pot rice dish with chicken and vegetables.
A vibrant one-pot rice dish with vegetables and chicken, ready to serve.

Quick Recipe: Chicken and Rice Casserole

  1. Sauté onions, peppers, and garlic in a large pot or Dutch oven.
  2. Add diced chicken, uncooked rice, broth, and seasonings like paprika, thyme, or turmeric.
  3. Cover and let it simmer until the rice is tender. Finish with a sprinkle of fresh herbs for a pop of color and flavor.

For something with a little spice, check out Cajun Sausage and Rice Tips. This smoky, zesty dish shows how rice can easily carry bold flavors while still being comforting and hearty.

Give Leftover Rice a Makeover

Don’t toss your leftover rice! It’s a blank canvas for creating quick, delicious dishes. Here are a few ideas to breathe new life into yesterday’s grains:

  • Fried Rice: Heat up your rice with soy sauce, sesame oil, scrambled eggs, and your favorite veggies or protein. Add pineapple chunks and shrimp for a sweet-and-savory tropical twist.
  • Rice Pancakes: Combine cooked rice with an egg, breadcrumbs, and shredded cheese to make a batter. Fry in a pan until golden for a crispy, satisfying snack.
  • Stuffed Peppers: Mix leftover rice with ground beef, beans, and spices, then stuff it into bell peppers. Bake until tender for a cozy, flavorful dinner.

Boost Nutrition Without Losing Flavor

Rice is great on its own, but why not use it as a base to sneak in extra nutrients? Here are a few ways to make your rice dishes healthier and heartier:

  • Mix in Quinoa or Lentils: Combining rice with quinoa or lentils adds protein, fiber, and a nice textural contrast. It’s perfect for grain bowls or hearty salads.
  • Incorporate Veggies: Toss in finely chopped spinach, kale, or grated carrots while the rice cooks. They’ll blend right in, giving you a nutrient boost without extra work.
  • Try Brown or Wild Rice: Switch things up by using brown or wild rice instead of white. They’re higher in fiber and have a nutty flavor that pairs beautifully with roasted vegetables or savory stews.

Quick and Creative Rice Hacks for Leftovers

Leftover rice doesn’t have to sit in your fridge feeling forgotten—it’s actually a goldmine for quick, creative dishes! Whether you’re looking for snacks, desserts, or easy lunches, this Rice Hack Recipe will inspire you to transform yesterday’s rice into something fresh, exciting, and delicious. Let’s get started!

Turn Leftover Rice into Delicious Snacks

Leftover rice is the perfect base for quick, satisfying snacks that are as versatile as they are delicious. Whether you’re hosting friends or just need a midday bite, these ideas come together in no time:

Rice Hack Recipe: Crispy rice fritters with dipping sauce.
Golden-brown rice fritters served with a dipping sauce for a quick snack.
  • Rice Balls (Onigiri): Mix your rice with a splash of soy sauce or furikake (a Japanese seasoning blend). Shape it into balls or triangles and fill them with goodies like tuna, avocado, or pickled veggies. These are perfect for lunchboxes or snacks on the go!
  • Crispy Rice Fritters: Combine your rice with shredded cheese, breadcrumbs, and an egg to form a batter. Shape into small patties, then fry until golden and crispy. Serve with a dipping sauce like garlic aioli or sweet chili for a flavor-packed treat.

These snacks are so easy to make that you might find yourself cooking extra rice just to have leftovers!

Turn Leftover Rice into Sweet Treats

If you’ve never tried using rice for desserts, you’re in for a treat! With a little creativity, you can transform plain rice into indulgent sweets that feel like a total upgrade:

  • Rice Pudding: Simmer leftover rice with milk, sugar, and a splash of vanilla. Top with cinnamon, nutmeg, or even a handful of raisins for a cozy, creamy dessert that’s a total classic.
  • Mango Sticky Rice: Take your rice on a tropical vacation! Simmer it with coconut milk and sugar, then pair it with fresh mango slices for a Thai-inspired dessert that’s sweet, creamy, and refreshing.

Make Quick Lunches with Leftover Rice

Leftover rice makes an ideal base for quick and satisfying lunches that are both light and filling. These ideas are perfect for busy days when you need something delicious but easy:

  • Lettuce Wraps: Mix your rice with chopped veggies, soy sauce, and your favorite protein (like tofu or grilled chicken). Spoon it into crisp lettuce leaves and drizzle with hoisin or peanut sauce for a flavorful, handheld meal.
  • Buddha Bowls: Start with a base of rice and top with roasted vegetables, a boiled egg, and a dollop of hummus or tahini dressing. Sprinkle on some seeds or nuts for a bit of crunch, and you’ve got a colorful, nutrient-packed lunch in minutes.

With these ideas, lunch doesn’t have to be boring and leftover rice will always have a purpose.

Save Leftover Rice for Later

If you’re not ready to use your rice right away, don’t worry it’s easy to save it for future meals. Proper storage and reheating are key to making sure your rice tastes as good as when you first cooked it:

  • Freezing Leftover Rice: Spread the rice out on a baking sheet to cool completely, then transfer it to an airtight container or freezer bag. Frozen rice reheats beautifully in the microwave—just add a splash of water to bring back its moisture.
  • Make-Ahead Portions: Divide leftover rice into individual portions and store them in the fridge. These pre-measured servings are perfect for meal prepping or quick dinners during the week.

Budget-Friendly Rice Hacks for Every Pantry

Rice isn’t just a pantry staple it’s a budget-friendly hero in the kitchen. Affordable, versatile, and endlessly adaptable, rice can stretch meals, add variety, and help you whip up flavorful dishes without spending a fortune. With this Rice Hack Recipe, you’ll learn how to make the most of this humble ingredient while keeping your meals both delicious and cost-effective.

Stretch Your Meals with Rice

When you need to feed a crowd (or stretch your grocery budget), rice is the perfect solution. It makes dishes more filling and helps you get the most out of every ingredient.

  • Add Rice to Soups and Stews: Toss cooked rice into soups, stews, or even chili. It thickens the dish, makes it heartier, and helps stretch your ingredients further without sacrificing flavor.
  • Bulk Up Meat Dishes: Mix cooked rice with ground beef, turkey, or even beans to create meatloaf, meatballs, or stuffed peppers. It reduces the amount of meat you need while keeping the dish satisfying and flavorful.

Make Your Own Rice Mixes

Forget the boxed rice mixes from the store—they’re expensive and often loaded with sodium and preservatives. Making your own at home is not only cheaper but also healthier.

  • DIY Flavored Rice Mixes: Combine uncooked rice with dried herbs, bouillon powder, and spices like garlic powder, paprika, or turmeric. Store your mix in an airtight container, and cook it with water or broth whenever you need a quick, flavorful side dish.
  • Add Texture with Other Grains: Mix rice with grains like quinoa, barley, or bulgur for a more interesting texture and extra nutrients. This combo works especially well in grain bowls or as a hearty base for salads.

Stock Up for Emergency Meals

Rice’s long shelf life makes it a pantry essential for emergency meals or last-minute dinners. With just a few other staples, you can turn rice into something quick, comforting, and nutritious.

  • Store It Right: Keep uncooked rice in an airtight container in a cool, dry spot. White rice can last for years, while brown rice (which has more natural oils) should be used within six months or stored in the freezer to keep it fresh longer.
  • Pair It with Pantry Staples: Combine rice with canned beans, frozen veggies, or jarred sauces for an easy meal when you’re running low on fresh ingredients. For example, black beans, rice, and salsa make a quick, flavorful dish with almost no effort.

Use Rice for Budget-Friendly Meal Prep

Rice is a meal prep MVP, helping you save money and time throughout the week. It’s flexible enough to pair with just about anything, so your meals never get boring.

  • Cook in Bulk: Make a big batch of rice at the start of the week and portion it out into containers. Pair it with different proteins, veggies, and sauces to keep things fresh and interesting.
  • Mix Up the Flavors: Start with a plain base and change up the seasonings or toppings for each meal. Add soy sauce and sesame oil for an Asian-inspired bowl, or mix in tomato paste, garlic, and oregano for a Mediterranean twist.

FAQs About Rice Hacks

What is the Rice Hack Recipe method?

The Rice Hack Recipe method is all about simple, clever tricks that make cooking rice foolproof and more enjoyable whether you’re a kitchen newbie or a seasoned pro. Think techniques like the finger method to measure water without tools, pre-cooking and freezing rice for busy days, or swapping water for broth to instantly boost flavor. These rice hacks save time, reduce waste, and help you make consistently delicious rice every time.

What is the 5-5-5 rule for rice?

The 5-5-5 rule is a game-changing technique for cooking rice in an Instant Pot:

  1. Cook the rice on high pressure for 5 minutes.
  2. Let it naturally release pressure for another 5 minutes.
  3. Do a quick pressure release for the remaining time.

This method guarantees perfectly fluffy, evenly cooked rice without any guesswork, making it a favorite for those who love efficiency and great results.

What is the 123 rice rule?

The 123 rice rule is an easy guideline for cooking rice on the stovetop:

  • 1 cup of rice
  • 2 cups of water
  • 3 teaspoons of salt or seasoning (optional, based on your taste)

It’s perfect for beginners and works well with most long-grain rice varieties. If you’re diving into rice hack recipes, this rule is a handy go-to for achieving that perfect balance of moisture and texture.

Does the rice finger trick always work?

The rice finger trick—measuring water by placing your finger on top of the rice and filling the pot up to your first knuckle—is a tried-and-true hack, but it’s not foolproof for every type of rice. It works best with long-grain or medium-grain rice, like jasmine or basmati, where water absorption is consistent.

For short-grain rice, sticky rice, or recipes that need precise ratios, you might want to pair the finger trick with a more exact method, like the 123 rice rule, to get the best results.

Conclusion

Cooking perfect rice doesn’t have to be complicated. With the tips and tricks from this rice hack recipe guide, you’ll turn this pantry staple into the star of your meals. Whether you’re using the finger method, making flavorful one-pot dishes, or transforming leftovers into creative snacks and desserts, rice will become your go-to ingredient for versatile and budget-friendly cooking.

Print
clock clock iconcutlery cutlery iconflag flag iconfolder folder iconinstagram instagram iconpinterest pinterest iconfacebook facebook iconprint print iconsquares squares iconheart heart iconheart solid heart solid icon
Bowl of perfectly fluffy rice garnished with fresh herbs.

Perfectly Fluffy Rice Hack Recipe


  • Author: Emily
  • Total Time: 23 minutes
  • Yield: 4 servings 1x

Description

Learn how to cook perfectly fluffy rice every time with this foolproof rice hack recipe. Using simple methods and tips, you’ll achieve delicious, evenly cooked rice that’s ready to pair with any meal.


Ingredients

Scale
  • 1 cup jasmine or basmati rice (or any long-grain rice)
  • 1 ½ cups water or broth (for added flavor)
  • ½ teaspoon salt (optional, depending on the broth used)
  • 1 teaspoon butter or oil (optional for richer flavor)

Instructions

  1. Rinse the rice thoroughly: Place the rice in a fine-mesh strainer and rinse under cold water until the water runs clear. This removes excess starch, preventing stickiness.
  2. Measure the water: Use the 123 rice rule (1 cup of rice, 2 cups of water for short-grain, or 1 ½ cups water for long-grain rice). You can also use the finger method: place your fingertip on top of the rice, and the water level should reach the first knuckle.
  3. Combine ingredients: In a medium pot, add the rinsed rice, water or broth, salt, and butter or oil (if using). Stir gently to combine.
  4. Bring to a boil: Place the pot over medium heat and bring the mixture to a rolling boil.
  5. Simmer and cover: Reduce the heat to low, cover the pot with a tight-fitting lid, and let it simmer for 15–18 minutes (depending on rice type). Avoid lifting the lid during this time.
  6. Rest the rice: Once the rice has absorbed all the liquid, remove the pot from the heat and let it sit, covered, for 5 minutes.
  7. Fluff and serve: Use a fork to gently fluff the rice, separating the grains. Serve hot as a side dish or use it as a base for other recipes.

Notes

  • For added flavor, replace water with chicken, vegetable, or beef broth.
  • To prevent rice from sticking, add a splash of oil before cooking.
  • This recipe works best for jasmine or basmati rice but can be adjusted for brown rice (increase cooking time to 40 minutes and water to 2 cups).
  • Leftover rice can be frozen for up to 2 months and reheated with a splash of water in the microwave.