One-Pot French Onion Chicken and Rice Recipe for Families

If you’re looking to wow your taste buds, try our french onion chicken and rice recipe. This scrumptious, one-pot marvel blends savory onions, juicy chicken, and hearty rice into a satisfying meal simply perfect for any day. Moreover, it’s a quick fix for busy schedules that truly impresses!

Introduction and Essential Ingredients

Discovering the Allure of a One-Pot Meal

One-pot meals are a real game changer, especially when you need a dish that’s quick and comforting. With our french onion chicken and rice recipe, you get tender chicken, sweet caramelized onions, and soft rice all in one pan. First, you enjoy the ease of cleanup; next, you relish the rich layers of flavor. Moreover, this one-pot marvel adapts well to various tweaks, making it ideal for busy weeknights or relaxed family dinners.

Unveiling the Star Components

When preparing a french onion chicken and rice recipe, every ingredient shines in its own way. First, sear the chicken to lock in its juices, then slowly caramelize the onions to create a deep, sweet base. Additionally, choose the right rice fluffy grains absorb flavors wonderfully. Furthermore, simple additions like garlic and herbs enhance the dish, turning a basic meal into a comforting, one-pan dinner.

The Role of French Onion Chicken and Rice Recipe in Your Dinner Routine

You’ll soon find that a french onion chicken and rice recipe can easily become a staple in your dinner rotation. It’s not only hearty but also a breeze to prepare, saving you time without skimping on taste. Moreover, its comforting nature makes it perfect for cool evenings or whenever you crave a home-cooked meal. In addition, its versatility lets you mix in extra veggies or spices. So, whether you’re planning a quick weeknight dinner or a family feast, this dish is sure to delight your taste buds.

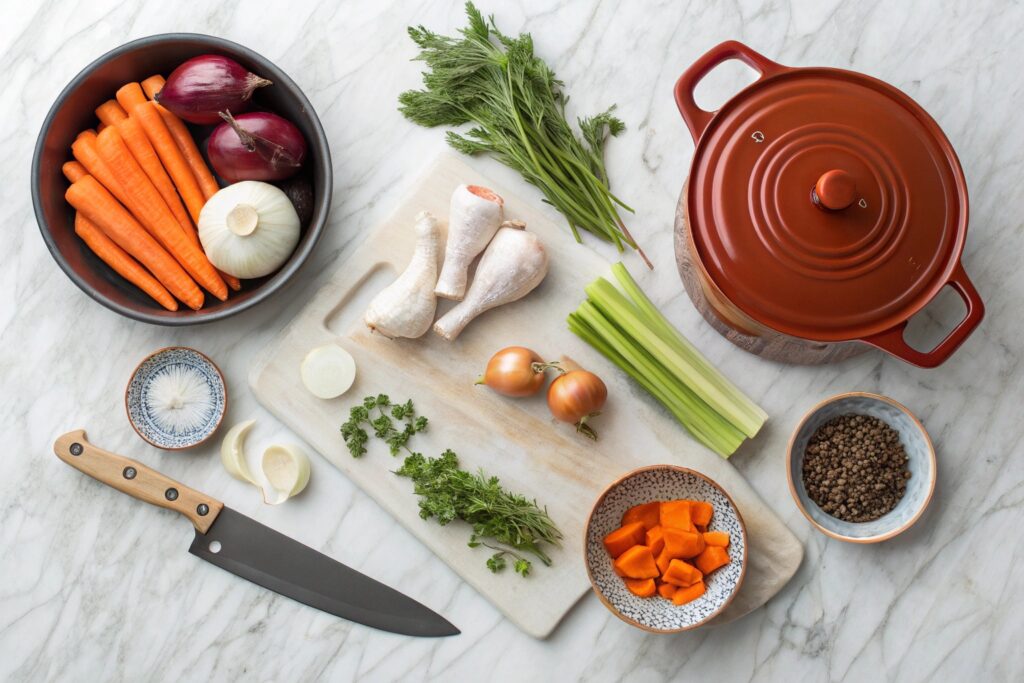
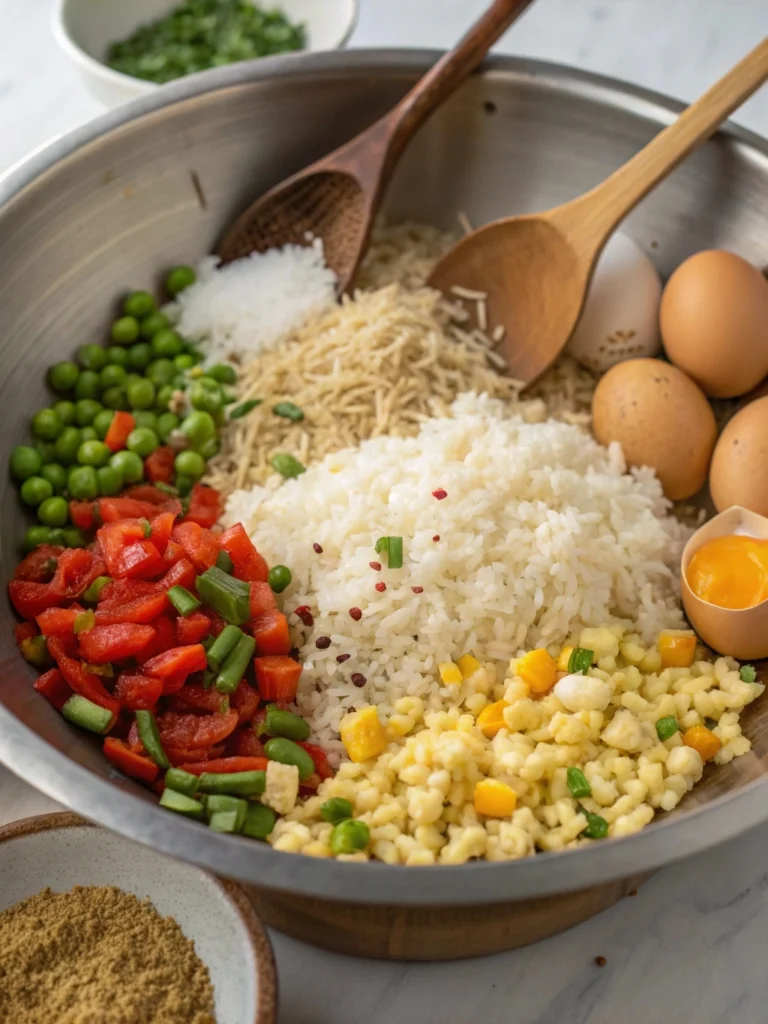
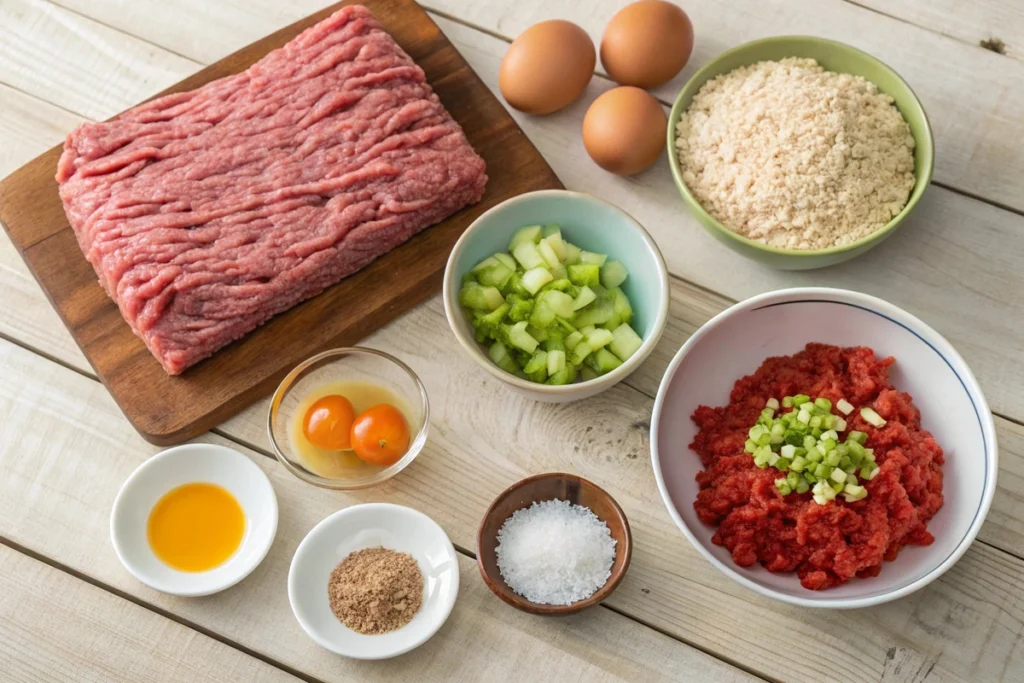
Sourcing and Preparing Quality Ingredients

To craft the best french onion chicken and rice recipe, start with fresh, quality ingredients. First, choose chicken that’s fresh and firm onions that promise great flavor. Next, pick a type of rice that suits your texture preference white or brown, both work nicely. Additionally, use simple herbs like thyme and rosemary for a gentle, savory lift. In short, spending a bit more time on your ingredients ensures every bite is bursting with flavor.

Crafting a Flavorful Foundation with Caramelized Onions

Caramelizing onions for french onion chicken and rice recipe.
Sliced onions slowly caramelizing to enhance flavor.

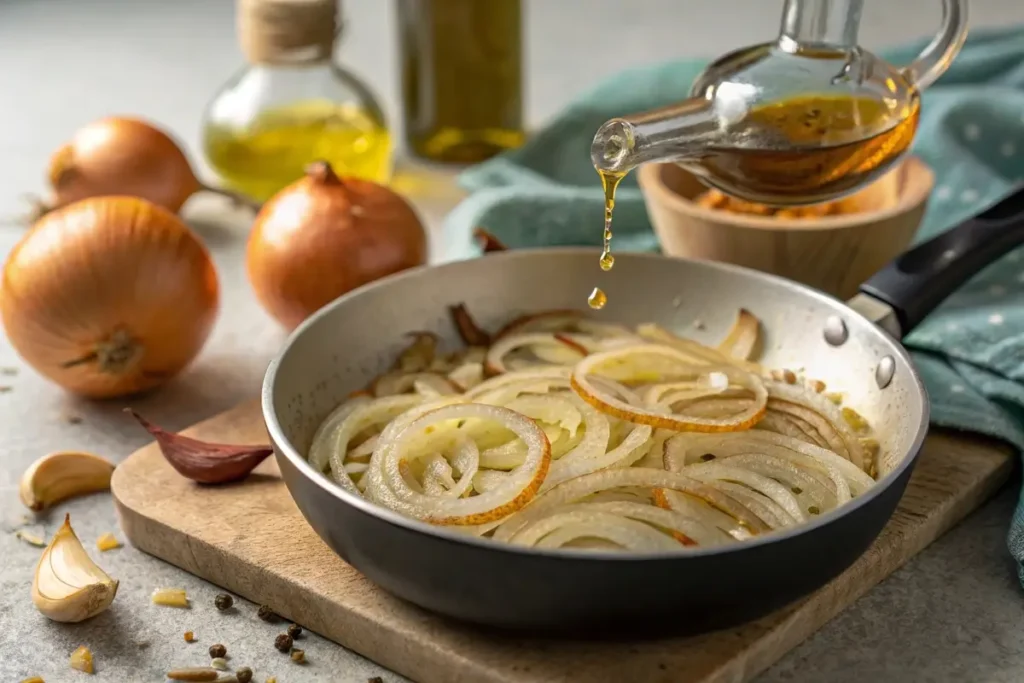
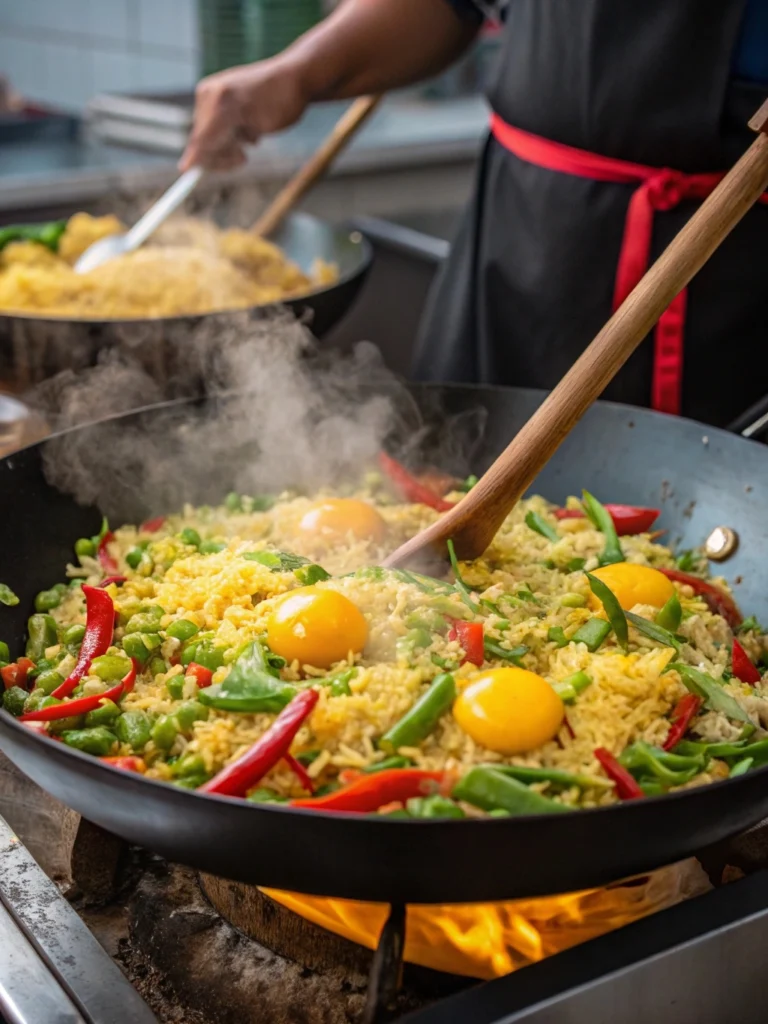
In our french onion chicken and rice recipe, caramelized onions set the stage for a rich flavor profile. First, slice your onions thinly and sauté them in a bit of olive oil over medium heat. As they slowly turn golden, you’ll notice their natural sweetness emerge, which, in turn, enhances the overall taste. Moreover, this process lays a perfect base for this one-pot meal recipe.

Browning the Chicken for Maximum Juiciness

Browning chicken for french onion chicken and rice recipe.
Golden-brown chicken being seared to perfection.

Next, browning the chicken is key to locking in its natural juices and creating a savory crust. In our french onion chicken and rice recipe, pat your chicken dry and sear it in a hot pan until each side turns a lovely golden brown.

Integrating Rice and Aromatic Enhancers in a Single Pot

Then, incorporate the rice along with aromatic enhancers like garlic, thyme, and rosemary to enrich your dish. In our french onion chicken and rice recipe, mix the rice gently so that it soaks up the juices from both the chicken and caramelized onions. Additionally, add the right amount of broth to create a cohesive, hearty chicken and rice skillet.

Simmering to Perfection and Final Flavor Adjustments

Finally, allow the dish to simmer so that all the ingredients meld together beautifully. In our french onion chicken and rice recipe, this simmering stage is crucial; it helps all the flavors to blend seamlessly. Moreover, as the dish simmers, taste and adjust the seasoning with salt, pepper, or extra herbs.

Creative Twists and Customization Tips

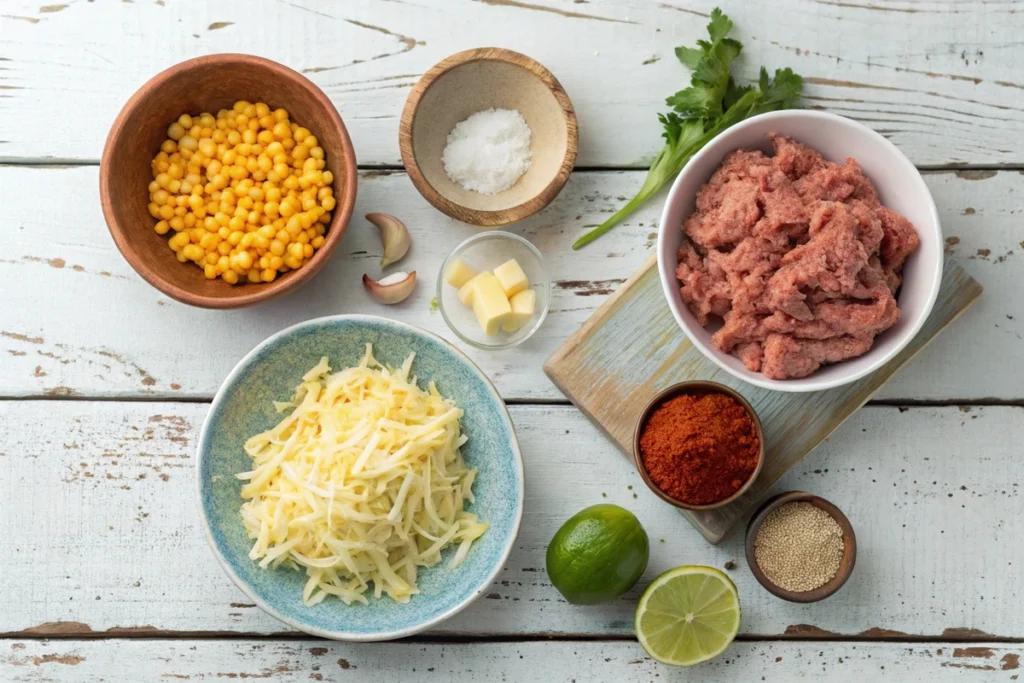
Adding Seasonal Vegetables for Vibrant Variety

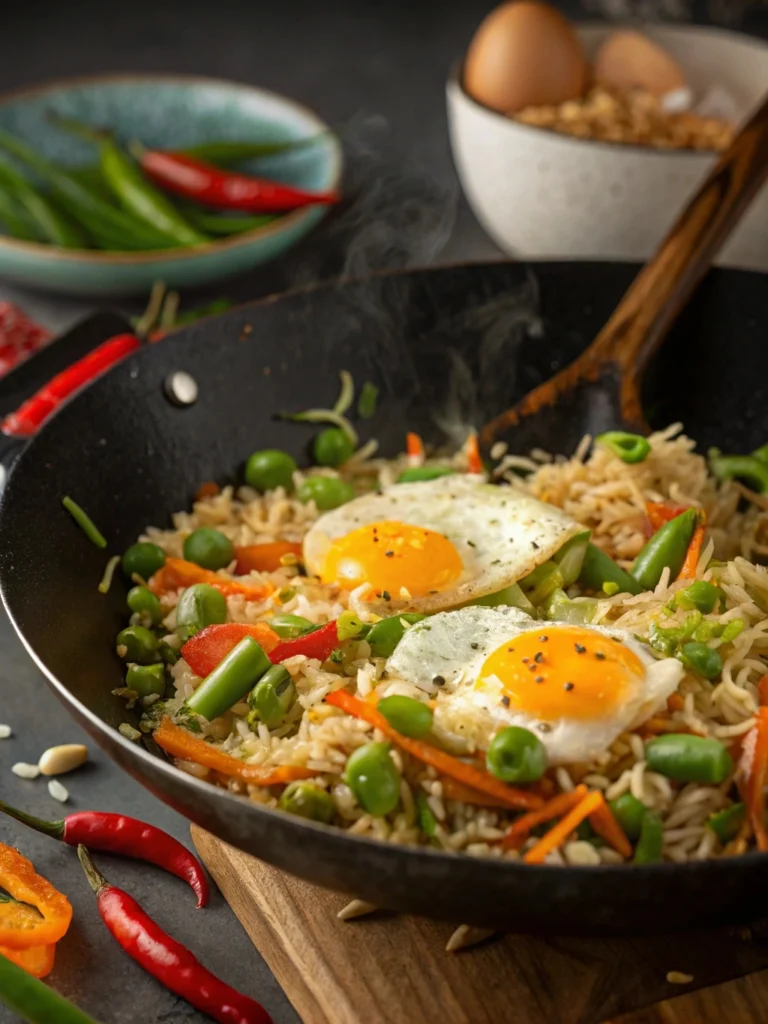
When you prepare the french onion chicken and rice recipe, adding seasonal vegetables can brighten up your dish. First, try tossing in diced bell peppers, zucchini, or even spinach to boost both color and nutrition.

Experimenting with Herbs, Spices, and Gourmet Accents

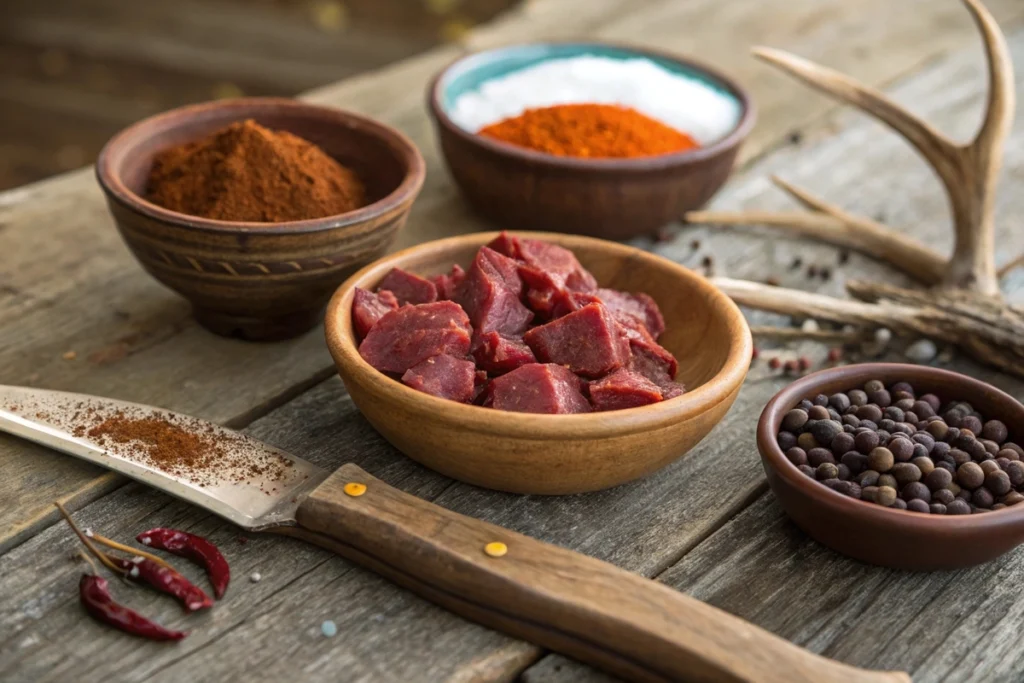
Next, you can experiment with herbs and spices to give your french onion chicken and rice recipe a unique twist. For example, a pinch of smoked paprika can enhance the flavors subtly. Additionally, a sprinkle of fresh basil or oregano can introduce a new layer of aroma, making this one-pot meal both comforting and exciting.

Elevating Texture with Crunchy and Creamy Elements

Furthermore, elevating the texture of your dish can make it even more appealing. For instance, consider garnishing your french onion chicken and rice recipe with a handful of toasted almonds or a dollop of sour cream. These additions create a pleasing contrast between crunchy and creamy, enriching the overall experience of this hearty chicken and rice dinner.

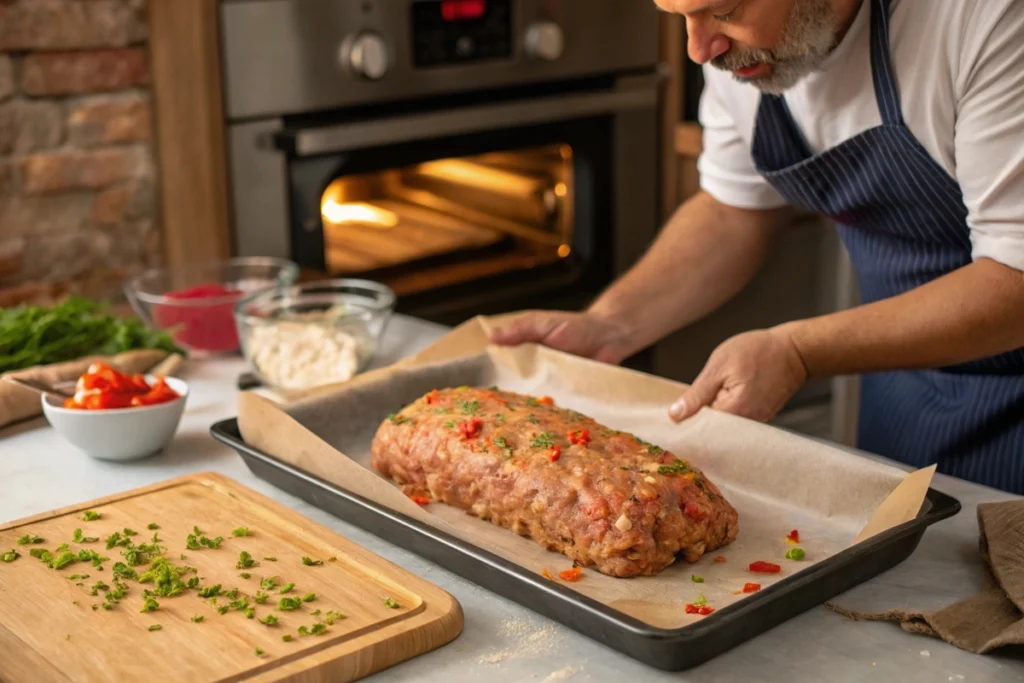
Adjusting Techniques for Different Cooking Appliances

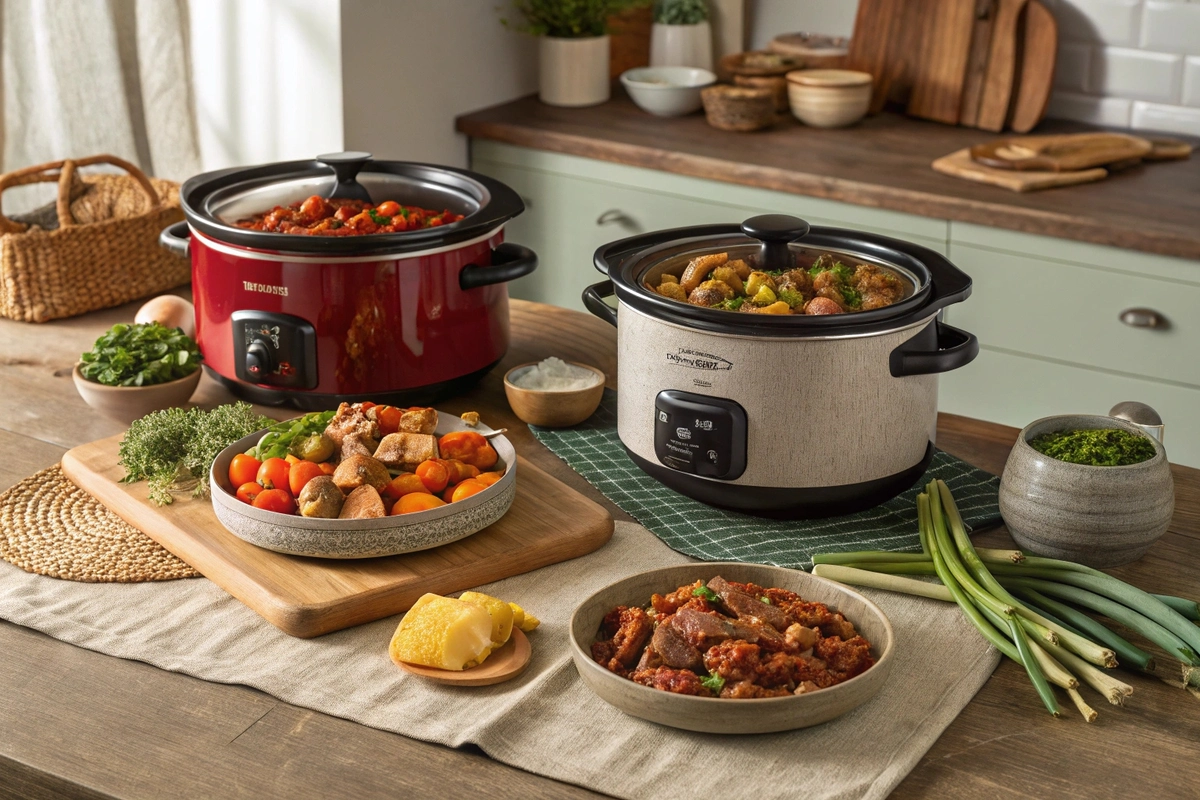
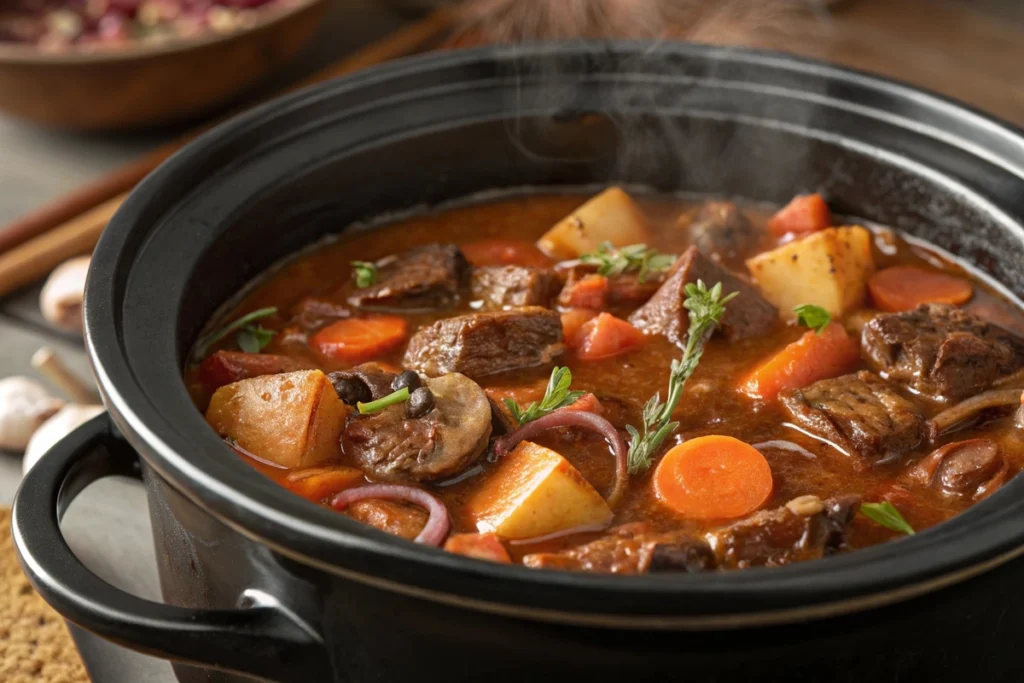
Lastly, you may want to adjust your cooking techniques depending on your kitchen tools. Whether you’re using an Instant Pot, a slow cooker, or a traditional oven, your french onion chicken and rice recipe adapts well. For example, slow cooking over low heat allows the flavors to deepen, whereas pressure cooking saves time while still delivering a delicious meal.

Serving, Presentation, and Nutritional Insights

Plated french onion chicken and rice recipe dish.
An inviting presentation of a one-pot french onion chicken and rice recipe.

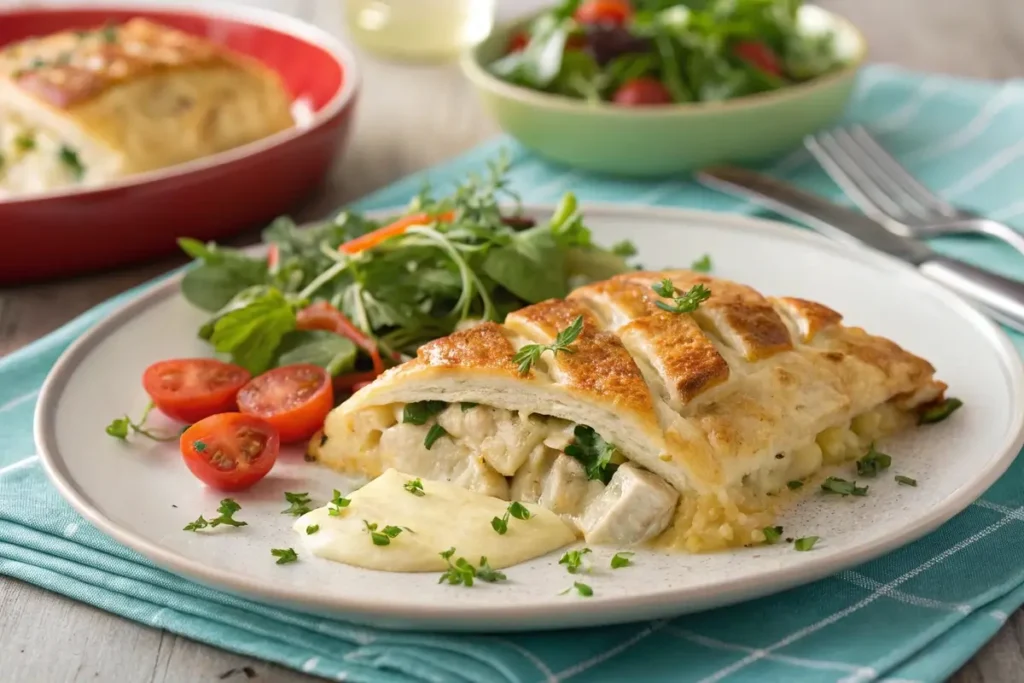
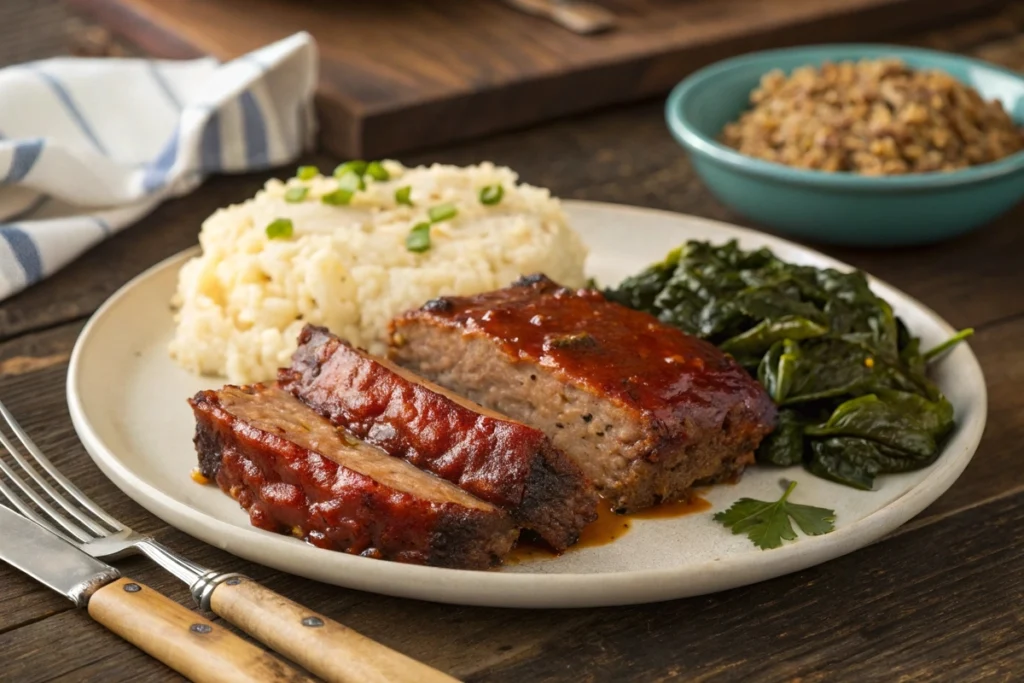
Inspiring Plating Ideas for a Home-Cooked Masterpiece

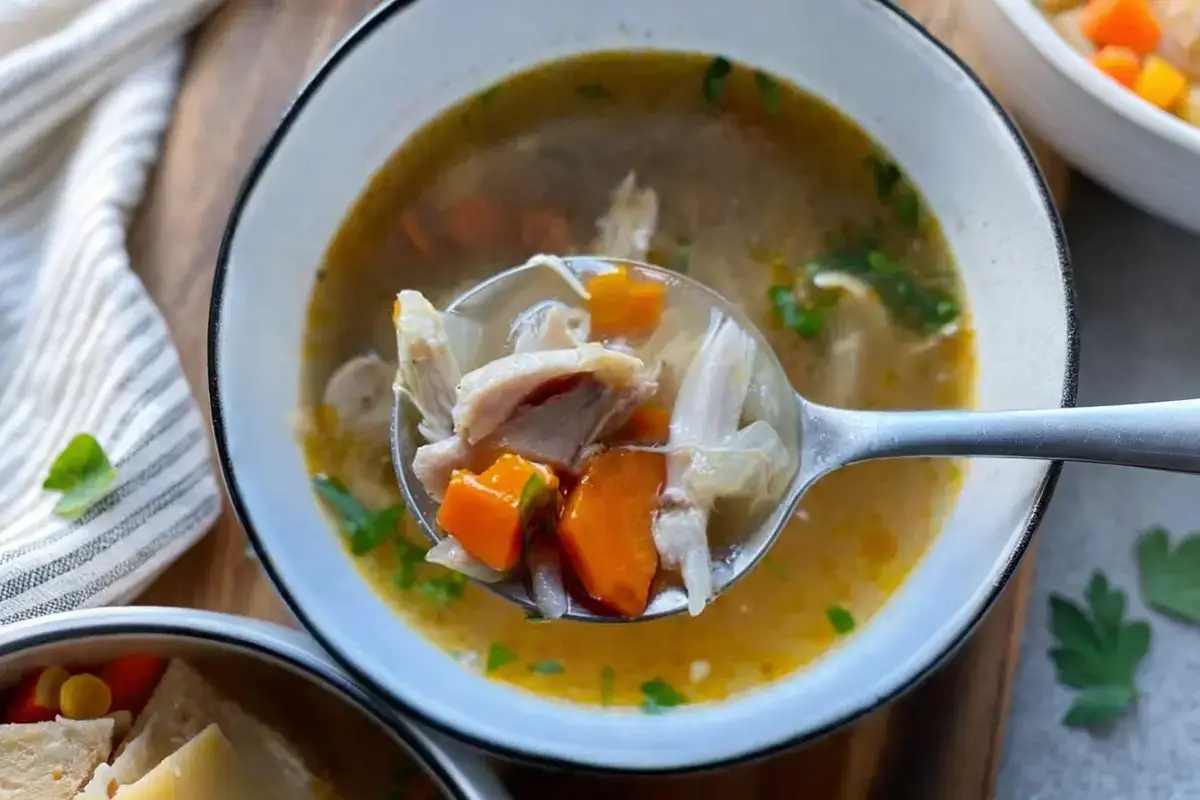
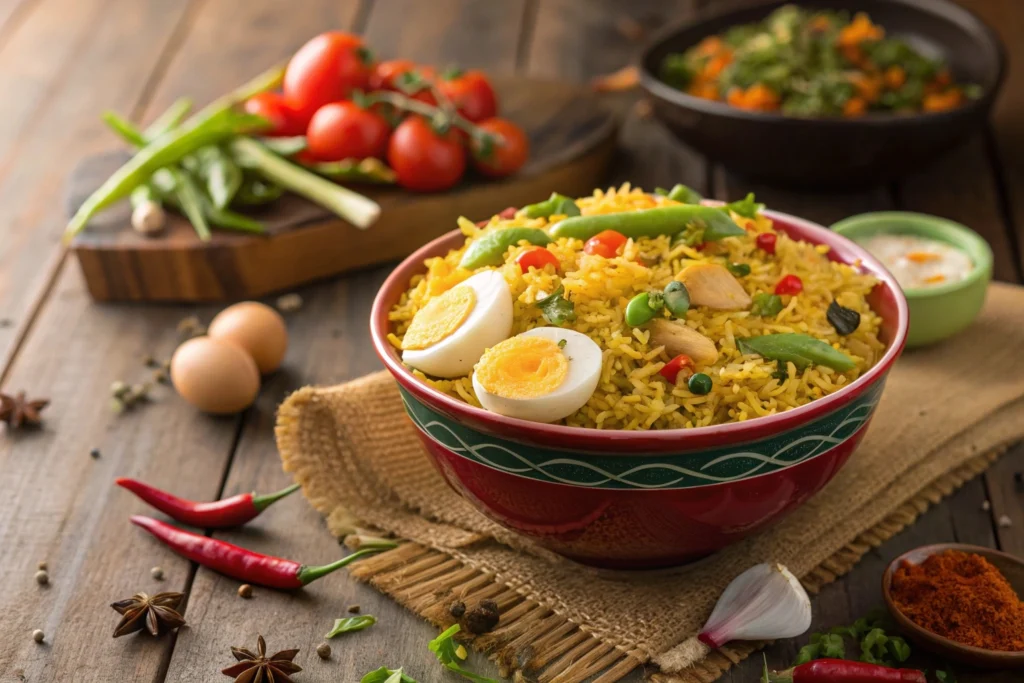
Once your french onion chicken and rice recipe is ready, presentation becomes key. First, use a wide, shallow bowl to display the vibrant colors of your dish. Moreover, garnish with a sprinkle of fresh parsley or thyme to add a pop of green. Additionally, arrange the chicken and rice neatly, so every bite looks as delightful as it tastes. In short, a creative plate not only enhances appeal but also elevates your dining experience.

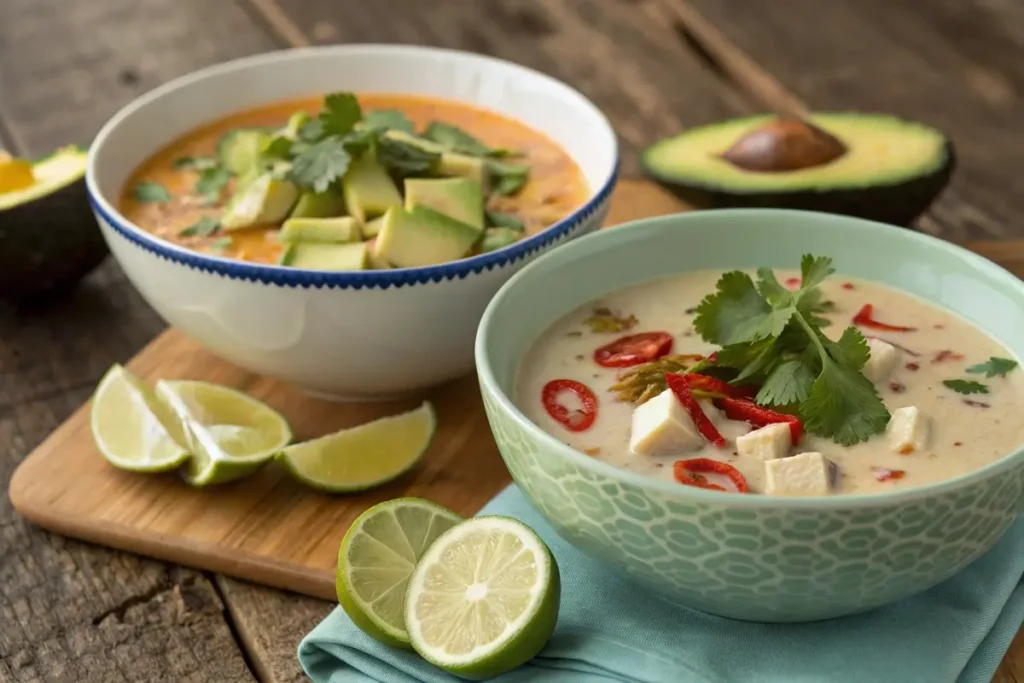
Pairing the Dish with Complementary Sides

Next, consider pairing your french onion chicken and rice recipe with sides that boost its flavor. For instance, a crisp green salad or a side of roasted vegetables works wonderfully. Furthermore, a slice of crusty bread can be perfect for soaking up the delicious juices. Also, you might try a light soup or a tangy coleslaw to add contrast. In essence, the right sides can transform a simple meal into a complete and satisfying dinner.

Unpacking the Nutritional Benefits of a One-Pot Meal

In addition, one-pot meals like this french onion chicken and rice recipe offer balanced nutrition. First, the lean chicken provides protein, while the rice delivers wholesome carbohydrates. Moreover, the caramelized onions and added herbs pack vitamins and antioxidants. Consequently, you enjoy a dish that is not only hearty and flavorful but also supports a healthy diet. Therefore, you can feel good about serving this comforting meal to your family.

Best Practices for Leftover Storage and Reheating

Finally, proper storage ensures your french onion chicken and rice recipe stays fresh for later. First, let the dish cool, then transfer it into an airtight container. Additionally, when reheating, use a low heat setting to maintain its texture and flavor. Furthermore, consider adding a splash of broth or water to revive the dish if it seems dry. In summary, these steps will help you enjoy every bite, even as leftovers.

Frequently Asked Questions (FAQs)

What are the 4 ingredients in French onion chicken?

In a classic french onion chicken and rice recipe, the four essential ingredients typically include tender chicken, sweetly caramelized onions, a rich broth, and a blend of savory herbs. These elements work together to create a dish full of depth and comforting flavor.

What can I add to chicken and rice for flavor?

To enhance your french onion chicken and rice recipe, you can add garlic, fresh herbs like thyme or rosemary, and even a splash of white wine. Moreover, including vegetables such as bell peppers, mushrooms, or carrots introduces extra texture and brightness to the dish.

What to serve with French onion chicken?

When serving your french onion chicken and rice recipe, consider pairing it with a crisp green salad, crusty bread, or steamed vegetables. Additionally, a light soup or tangy coleslaw can provide a delightful contrast that elevates the overall meal experience.

Why do French people eat French onion soup?

French onion soup is a cherished tradition in France, celebrated for its deep, caramelized flavors and comforting warmth. The soup’s rich taste, enhanced with melted cheese and croutons, reflects a cultural love for robust, home-style dishes—a passion that also inspires the flavors found in a french onion chicken and rice recipe.

Conclusion

Your french onion chicken and rice recipe combines tender chicken, sweet onions, and hearty rice into one delightful, one-pot meal. By following these easy steps and tips, you can create a satisfying dinner that bursts with flavor and warmth. Enjoy every bite, and feel free to experiment to make the dish uniquely yours!

Print
clock clock iconcutlery cutlery iconflag flag iconfolder folder iconinstagram instagram iconpinterest pinterest iconfacebook facebook iconprint print iconsquares squares iconheart heart iconheart solid heart solid icon
Plated french onion chicken and rice recipe dish.

French Onion Chicken and Rice Recipe


  • Author: Emily
  • Total Time: 45 minutes
  • Yield: 46 servings 1x

Ingredients

Scale

  • 2 lbs chicken thighs or breasts, cut into pieces
  • 2 large onions, thinly sliced
  • 3 cloves garlic, minced
  • 1.5 cups long-grain white rice (or brown rice)
  • 3 cups chicken broth
  • 2 tablespoons olive oil
  • 1 tablespoon butter
  • 23 sprigs fresh thyme (or 1 teaspoon dried thyme)
  • 1 sprig fresh rosemary (or 1/2 teaspoon dried rosemary)
  • Salt, to taste
  • Black pepper, to taste
  • 1/4 cup white wine (optional)
  • 1 bell pepper, diced (optional) or a handful of spinach
  • Fresh parsley, chopped (for garnish)

Instructions

  1. Preheat a large pot or Dutch oven over medium heat.
  2. Add olive oil and butter; then add the sliced onions.
  3. Sauté the onions until they turn golden and caramelized, about 10 minutes.
  4. Stir in the minced garlic and cook for an additional minute.
  5. Season the chicken pieces with salt and pepper, then add them to the pot.
  6. Brown the chicken on all sides until golden and slightly crispy.
  7. If using white wine, pour it in to deglaze the pan, scraping up the browned bits.
  8. Stir in the rice, ensuring it is evenly coated with the onion mixture.
  9. Pour in the chicken broth, add thyme and rosemary, and bring to a simmer.
  10. Cover the pot, reduce the heat, and cook for 25-30 minutes until the rice is tender and the chicken is fully cooked.
  11. If adding vegetables like bell peppers or spinach, stir them in 5 minutes before the end of cooking.
  12. Taste and adjust seasoning as needed.
  13. Garnish with fresh parsley before serving.

How to Make Chicken Drumstick Soup in 45 Minutes (Soul-Warming & Effortless)

Chicken Drumstick Soup the easiest way to build rich, homemade flavor without babysitting the pot. Here’s the deal: Simmer bone-in drumsticks with garlic, herbs, and veggies for 45 minutes, and let those legs work their collagen magic. Want silky broth? Don’t skip the sear—it’s the golden ticket to depth.

Why chicken drumstick soup is a Weeknight Game-Changer

Craving comfort food that doesn’t tie you to the stove all day? Chicken drumstick soup delivers hearty flavor in a fraction of the time. But how? Let’s unpack why this dish is a secret weapon for busy cooks.

The Magic of Bone-In Chicken for Rich Broth

You know that silky, collagen-rich broth that takes hours to simmer? Here’s the twist: bone-in drumsticks work faster. As they cook, marrow and connective tissues melt into the liquid, creating depth without an all-day wait. For example, compared to boneless breasts, drumsticks add a meaty richness that’s downright luxurious. Meanwhile, veggies like carrots and celery soften just enough to soak up the savory flavors. Pro tip: Sear the drumsticks first for a caramelized edge your taste buds will thank you!

How Drumsticks Save Time Without Sacrificing Flavor

Think quick meals mean bland results? Chicken drumstick soup begs to differ. Thanks to their higher fat content, drumsticks stay juicy even during shorter cook times. On the other hand, leaner cuts can turn rubbery if rushed. Plus, their curved shape makes them easy to fish out once tender—no fussing with shredding. Not to mention, one-pot cooking means fewer dishes (and more Netflix time). Still skeptical? Try swapping drumsticks into your go-to soup recipe you’ll taste the difference.

Budget-Friendly Comfort Food Your Family Will Crave

Let’s face it: eating well shouldn’t cost a fortune. Luckily, drumsticks are cheaper than most cuts, yet pack more flavor. For instance, a $5 pack can feed four, especially when stretched with affordable staples like potatoes or noodles. And since this soup freezes beautifully, you can batch-cook it for those “I’m too tired to cook” nights. Fun fact: A study by the USDA found that bone-in poultry reduces food waste by using parts often discarded. Win-win!

Health Benefits You Won’t Want to Miss

Chicken drumstick soup isn’t just tasty it’s a nutrient powerhouse. Between the protein from the meat, vitamins from the veggies, and collagen from the bones, it’s a meal that fuels and heals. Research shows collagen supports joint health, while garlic and thyme add immune-boosting perks. Even better, it’s naturally gluten-free and low in sodium if you control the seasoning. So, whether you’re fighting a cold or just need a cozy reset, this soup’s got your back.

Gathering Your Ingredients and Tools

Ingredients for easy chicken drumstick soup recipe
Everything you need for a quick, hearty meal.

Great chicken drumstick soup starts with the right foundation. But don’t worry this isn’t a scavenger hunt. With a handful of pantry staples and a few trusty tools, you’ll be simmering success in no time. Let’s break down what you’ll need (and why!).

Essential Staples for a Balanced Broth

Every spoonful of chicken drumstick soup hinges on its broth. Start with bone-in drumsticks their marrow and connective tissues melt into the liquid, creating a collagen-rich base that’s both silky and satisfying. Next, grab aromatic veggies: onions, carrots, and celery form the “holy trinity” of flavor. Don’t forget garlic (for depth) and herbs like thyme or bay leaves (for earthy notes). Pro tip: Use low-sodium broth if you’re watching salt, but water works too the drumsticks pack enough punch on their own!

Optional Add-Ins to Customize Your chicken drumstick soup

Here’s where you make it yours. For example, toss in diced potatoes or egg noodles for heartiness, or add kale for a green boost. On the other hand, if you’re craving spice, a dash of cayenne or smoked paprika wakes things up. And if you’re short on fresh herbs, dried work in a pinch just use half the amount.

Must-Have Kitchen Gear for Speedy Cooking

You don’t need fancy gadgets, but a few basics streamline the process. A Dutch oven distributes heat evenly, preventing burnt bits while searing drumsticks. Meanwhile, a sharp chef’s knife makes quick work of chopping veggies no wrestling with celery stalks.

Prepping Like a Pro: Time-Saving Hacks

First, chop veggies in bulk and store them pre-portioned in the fridge. That way, you’re ready to toss them in whenever soup cravings strike. Second, sear drumsticks in batches if your pot is small this ensures crispy skin without overcrowding. And here’s a game-changer: Freeze leftover broth in ice cube trays for future recipes. Not only does this cut waste, but it also lets you add instant flavor to grains or sauces.

Mastering the 45-Minute Magic

Step-by-step guide to making chicken drumstick soup
Sear, simmer, and serve—effortless comfort food

Think chicken drumstick soup needs hours to shine? Think again. With a few smart tricks, you’ll coax out deep flavors and tender meat in under an hour. Let’s dive into the step-by-step secrets that make this dish a weeknight legend.

Searing Drumsticks for Maximum Flavor Depth

First, pat those bone-in drumsticks dry this ensures a golden sear, not a sad steam. Heat oil in your Dutch oven, then lay the chicken skin-side down. As they sizzle, the Maillard reaction works its umami magic, creating crispy bits that’ll infuse the broth with richness. Pro tip: Don’t crowd the pot! Cook in batches if needed. Once browned, set the drumsticks aside. Fun fact: Those caramelized bits at the bottom? They’re liquid gold for your soup base.

Building Layers of Flavor in Your Broth

Next, toss diced onions into the same pot. As they soften, add minced garlic and a pinch of salt this draws out moisture, speeding up the cooking. Then, stir in chopped carrots and celery, letting them mingle with the fond (those tasty browned bits). For depth, deglaze with a splash of broth or white wine, scraping up every last flavor-packed crumb. Finally, return the drumsticks to the pot, cover with liquid, and let the collagen-rich broth work its charm.

When to Add Veggies for Perfect Texture

Timing is everything. Root veggies like potatoes or parsnips go in early to soften fully. On the other hand, delicate greens (spinach, kale) wilt quickly toss them in during the last 5 minutes. Not sure? Taste as you go! For example, if you prefer al dente carrots, add them halfway through. And if you’re using noodles, cook them separately to avoid mush. Pro move: Stir in frozen peas at the end for a pop of color and freshness.

Finishing Touches: Herbs, Seasoning, and Serving

Here’s where your soup sings. Fish out the drumsticks, shred the meat, and discard bones. Then, stir the meat back into the pot. Add a squeeze of lemon for brightness or a dash of hot sauce for heat. Don’t forget fresh herbs like parsley or dill they add a vibrant finish.

Creative Twists to Keep It Exciting

Chicken drumstick soup is like a blank canvas ready for your personal flair. Whether you’re craving global flavors or dietary tweaks, these twists ensure boredom never bubbles up. Let’s explore how to reinvent this classic while keeping its comfort food soul intact.

Global Inspirations: Mexican vs. Asian Variations

Mexican and Asian chicken drumstick soup variations
Customize your soup with bold flavors

For instance, swap thyme for cumin and lime, then toss in black beans and corn for a Tex-Mex twist. On the other hand, stir in coconut milk, ginger, and a splash of soy sauce for an Asian-inspired broth that’s equal parts creamy and zingy. Not sure where to start? Garnish with fresh cilantro or crispy fried shallots they’re instant flavor upgrades. Pro tip: Add a spoonful of miso paste for umami depth without overpowering the bone-in drumsticks.

Creamy vs. Clear Broth: Which Suits Your Mood?

Prefer silky soups? Stir in a splash of heavy cream or blend cooked potatoes into the broth for velvety richness. Alternatively, keep it light with a crystal-clear base perfect for showcasing tender veggies and herbs. Craving both? Serve the soup clear, then let guests swirl in cream or chili oil. Either way, the collagen-rich broth stays the star.

Meal Prep Secrets for Freezer-Friendly Batches

First, cool the soup completely before portioning it into airtight containers. For best results, leave a bit of space at the top broth expands as it freezes. Then, label with the date (it keeps for 3 months!). When reheating, thaw overnight in the fridge or warm gently on the stove. Pro move: Freeze shredded drumstick meat separately for adding to salads or wraps later.

Pairing Ideas: Breads, Salads, and More

Crunchy bread is a no-brainer, but why stop there? Try pairing your chicken drumstick soup with a crisp apple-walnut salad for contrast, or cheesy garlic bread for indulgence.

FAQ: Your Chicken Drumstick Soup Questions Answered

Are drumsticks good for broth?

Absolutely! Bone-in drumsticks are broth superstars. As they simmer, collagen from the bones and connective tissues melts into the liquid, creating a rich, silky broth that’s far more flavorful than broth made from boneless cuts. Pro tip: For extra depth, roast the drumsticks first to caramelize the skin and bones.

Is chicken drumstick soup good for health?

Yes! Chicken drumstick soup is packed with protein, vitamins (like B12 and A), and minerals (zinc, iron). The collagen-rich broth supports joint health, while garlic and herbs add immune-boosting perks. However, go easy on added salt if you’re watching sodium.

How long should I boil chicken drumsticks?

Simmer them for 25–30 minutes. This tenderizes the meat without overcooking it. To check, pierce a drumstick with a fork if the meat slides off easily, it’s done. Note: Boiling too long can make veggies mushy, so add them halfway through.

What cut of chicken is best for chicken drumstick soup?

Bone-in drumsticks or thighs are ideal. Their higher fat content keeps the meat juicy, and the bones enrich the broth. While breast meat works, it’s leaner and can dry out. For maximum flavor, stick with drumsticks!

Conclusion: Your New Go-To Comfort Food

Chicken drumstick soup isn’t just a meal—it’s a 45-minute hug in a bowl. With bone-in drumsticks delivering deep flavor, budget-friendly ingredients, and endless customization options, this recipe solves weeknight dinners and chilly-day cravings alike. Whether you’re boosting immunity, meal-prepping, or just craving comfort food, this soup’s got your back.

Print
clock clock iconcutlery cutlery iconflag flag iconfolder folder iconinstagram instagram iconpinterest pinterest iconfacebook facebook iconprint print iconsquares squares iconheart heart iconheart solid heart solid icon
Homemade chicken drumstick soup with bone-in drumsticks and veggies in Dutch oven

Chicken Drumstick Soup (45-Minute Comfort Bowl)


  • Author: Emily
  • Total Time: 45 minutes
  • Yield: 6 servings 1x

Ingredients

Scale
  • 6 bone-in chicken drumsticks (skin-on for extra flavor)
  • 2 tbsp olive oil
  • 1 large onion, diced
  • 3 garlic cloves, minced
  • 3 carrots, peeled and sliced
  • 3 celery stalks, chopped
  • 6 cups low-sodium chicken broth
  • 2 bay leaves
  • 1 tsp dried thyme (or 3 sprigs fresh)
  • Salt and black pepper to taste
  • 1/4 cup fresh parsley, chopped
  • Optional: 1 lemon (zested for garnish)

Instructions

  • Sear the Drumsticks: Heat olive oil in a Dutch oven over medium-high heat. Pat drumsticks dry, season with salt and pepper, then sear for 3-4 minutes per side until golden. Remove and set aside.
  • Sauté Veggies: In the same pot, add onion, garlic, carrots, and celery. Cook for 5 minutes, scraping up browned bits from the bottom.
  • Simmer: Return drumsticks to the pot. Pour in broth, add bay leaves and thyme. Bring to a boil, then reduce heat to low. Cover and simmer for 25 minutes.
  • Shred Meat: Remove drumsticks, shred meat off the bones (discard bones), and return meat to the pot.
  • Finish: Stir in parsley. Taste and adjust salt/pepper. For brightness, add lemon zest before serving.

Easy 30-Min Chicken and Cheese Jalousie Recipe for Dinners

Today, you can whip up a sensational chicken and cheese jalousie recipe that marries succulent chicken with velvety cheese and flaky pastry. Additionally, this recipe is a game-changer for weeknights. Thus, roll up your sleeves, dive into this flavorful journey, and savor every comforting, delicious bite now.

Introduction and Background

What Is a Chicken and Cheese Jalousie Recipe?

A chicken and cheese jalousie recipe is a delightful dish that brings together tender chicken, rich melted cheese, and a light, flaky pastry. In this recipe, you layer the ingredients so they bake into crisp, golden folds. For example, each bite offers a mix of savory and buttery flavors. Moreover, this dish is perfect for those who enjoy quick chicken dinner recipes without compromising taste.

The Culinary Story Behind Jalousie

The jalousie technique has an interesting past. Originally, it comes from classic French pastry methods, which emphasize creating delicate layers. For instance, you can explore traditional pastry techniques on BBC Good Food. In addition, many modern cooks have adapted these methods to create innovative dishes, including our chicken and cheese jalousie recipe. Therefore, understanding its history adds a special touch to your cooking experience, making each bite more meaningful.

Why You Should Try This 30-Minute Meal

You’ll love this recipe because it’s both fast and flavorful. In just 30 minutes, you can prepare a meal that combines succulent chicken with melted cheese and a crisp pastry. Furthermore, it fits perfectly into your busy weeknight schedule. Therefore, if you’re looking for an easy chicken dinner recipe that delivers gourmet taste without the hassle, this dish is a must-try.

What to Expect from This Recipe Guide

In this guide, you will get a clear, step-by-step approach to creating the perfect chicken and cheese jalousie recipe. For example, we start with ingredient preparation, then move on to assembling the layers, and finally guide you through the baking process. Meanwhile, you’ll discover useful tips and creative serving ideas. Thus, by following these steps, you can easily enjoy a delicious, homemade meal that brightens any dinner table.

Ingredients and Preparation

Sourcing the Freshest Ingredients

Fresh ingredients for chicken and cheese jalousie recipe
A selection of fresh chicken, cheese, herbs, and pastry sheets arranged neatly.

Your success with this chicken and cheese jalousie recipe starts with using the best ingredients. First, pick fresh chicken, quality cheese, and premium pastry components. In addition, visit your local market or specialty store for seasonal produce.

Preparing Your Chicken and Cheese

Before you cook, proper preparation is key for this chicken and cheese jalousie recipe. First, marinate your chicken with a pinch of salt and pepper, then slice it evenly for consistent cooking. Moreover, select cheeses that melt smoothly to add richness. Thus, these simple steps ensure your dish turns out balanced and flavorful, making your meal even more enjoyable.

Essential Kitchen Tools and Equipment

Using the correct tools can make your chicken and cheese jalousie recipe a breeze. You will need a reliable oven, a sturdy baking tray, and a pastry brush for that perfect finish.

Pre-Cooking Setup and Organization

Before you start, organizing your workspace is crucial. Preheat your oven and arrange all your ingredients neatly. In addition, setting up in advance reduces stress and ensures that every step flows smoothly. Therefore, with a good pre-cooking setup, you can follow the chicken and cheese jalousie recipe easily and enjoy a stress-free cooking experience.

Step-by-Step Cooking Process

Step-by-step assembly of chicken and cheese jalousie recipe.
An instructional image showing the layering of chicken, cheese, and pastry.

Step 1: Preheating and Initial Setup

Before you begin your chicken and cheese jalousie recipe, preheat your oven to 375°F. Meanwhile, gather all your ingredients and tools so that nothing is left behind. In addition, make sure your baking tray is clean and ready. Therefore, a proper setup ensures that every step flows smoothly and that your dish bakes evenly.

Step 2: Assembling the Layers

Next, arrange your ingredients with care. First, place the sliced chicken evenly on your tray; then, add a layer of cheese and a crisp sheet of pastry. For example, spreading the cheese evenly ensures each bite is flavorful. However, take your time to create distinct layers because this careful assembly is key to the perfect chicken and cheese jalousie recipe. In addition, a neat arrangement makes the final dish even more appealing.

Step 3: Baking to Golden Perfection

After you assemble the layers, slide the dish into the preheated oven. Meanwhile, monitor the progress closely. For instance, you should see the pastry turning a light, golden color as it bakes. In addition, adjusting the temperature if needed helps maintain a moist center while crisping the top. Thus, these steps guarantee that your chicken and cheese jalousie recipe emerges from the oven with a delightful texture and aroma.

Step 4: Finishing Touches and Plating

Once baking is complete, allow the dish to rest for a few minutes. Then, add a final garnish such as a sprinkle of fresh herbs or a light drizzle of olive oil. Moreover, carefully plate the dish so that each layer is visible and inviting. On the other hand, if you prefer extra crunch, consider adding a small side salad to enhance the meal. Therefore, these finishing touches elevate your chicken and cheese jalousie recipe into a visually stunning and delicious dinner.

Expert Tips, Variations, and Serving Suggestions

Finished chicken and cheese jalousie recipe plated elegantlyvvvvvvv
A beautifully plated chicken and cheese jalousie dish garnished with fresh herbs.

Creative Variations to Personalize Your Recipe

One of the joys of a chicken and cheese jalousie recipe is its flexibility. For instance, you might swap one type of cheese for another or add fresh herbs to enhance the flavor. Moreover, you can experiment with different vegetables like spinach or bell peppers to give your dish a vibrant twist.

Common Pitfalls and How to Avoid Them

Even though the chicken and cheese jalousie recipe is straightforward, a few common pitfalls can occur if you’re not careful. For example, overbaking the pastry may make it too dry, while under-seasoning the chicken might leave the dish bland. However, you can prevent these issues by checking the oven frequently and adjusting the seasoning as needed.

Perfect Pairings for a Complete Meal

To elevate your chicken and cheese jalousie recipe, consider pairing it with complementary side dishes. For example, a fresh green salad or a light vegetable soup can add a refreshing contrast to the rich flavors of the dish. In addition, a serving of roasted vegetables or a crisp cucumber slaw works well to complete your meal.

Nutritional Insights and Health Benefits

A thoughtfully prepared chicken and cheese jalousie recipe can be both delicious and nutritious. Chicken, being a lean protein, provides essential amino acids, while cheese contributes valuable calcium and vitamins. In addition, when you use fresh ingredients and moderate portions, the dish supports a balanced diet. However, remember to include a variety of vegetables to boost the meal’s overall nutritional value.

Chicken and Cheese Jalousie Recipe
plated chicken and cheese jalousie dish

FAQs

What is a jalousie pastry?

A jalousie pastry is a thin, flaky, and layered dough that forms a delicate, crisp exterior. In the chicken and cheese jalousie recipe, this pastry plays a key role by encasing the juicy filling while adding texture. Moreover, its design mimics elegant window shutters, which gives the dish a unique, stylish look.

Do chicken and cheese go together?

Absolutely, chicken and cheese are a classic combination. In the chicken and cheese jalousie recipe, the mild flavor of chicken perfectly complements the rich, melting cheese. Furthermore, the balance between the savory protein and the creamy dairy creates a dish that is both satisfying and versatile, suitable for any meal occasion.

What does jalousie mean in cooking?

In cooking, the term “jalousie” refers to a technique of preparing layered pastry that results in a light and airy texture. For instance, in our chicken and cheese jalousie recipe, this method ensures that the pastry remains crisp on the outside while soft and flavorful on the inside. Additionally, this style highlights the craftsmanship involved in creating each delicate layer.

What is the most difficult pastry to make?

The difficulty of making a pastry often depends on its technique. Many find laminated doughs like puff pastry to be the most challenging due to the precise folding and temperature control required. However, with practice and patience, even the pastry used in the chicken and cheese jalousie recipe becomes manageable. Thus, while some pastries are more complex, you can master this recipe with time and effort.

Conclusion

In summary, your journey with the chicken and cheese jalousie recipe has shown that with quality ingredients, clear steps, and a touch of creativity, you can easily create a memorable meal. You now understand the art behind jalousie pastry, why chicken and cheese are a winning pair, and how to bring it all together in a delightful dish.

Print
clock clock iconcutlery cutlery iconflag flag iconfolder folder iconinstagram instagram iconpinterest pinterest iconfacebook facebook iconprint print iconsquares squares iconheart heart iconheart solid heart solid icon
Finished chicken and cheese jalousie recipe plated elegantlyvvvvvvv

Chicken and Cheese Jalousie Recipe


  • Author: Emily
  • Total Time: 30 minutes
  • Yield: 2 servings 1x

Ingredients

Scale


    1. 2 boneless, skinless chicken breasts
    2. 1 cup shredded cheese (mozzarella, cheddar, or your favorite blend)
    3. 1 sheet ready-made jalousie pastry (or puff pastry)
    4. 1 tablespoon olive oil
    5. Salt, to taste
    6. Pepper, to taste
    7. 1 teaspoon dried oregano (optional)
    8. 1 teaspoon paprika (optional)
    9. Fresh herbs (parsley or basil) for garnish


Instructions


  1. Preheat your oven to 375°F (190°C).
  2. Season the chicken breasts with salt, pepper, oregano, and paprika.
  3. Heat olive oil in a skillet over medium-high heat, then sear the chicken for 2 minutes per side until lightly browned.
  4. Remove the chicken from the skillet and let it rest for a few minutes.
  5. On a lightly floured surface, roll out the jalousie pastry.
  6. Place the chicken in the center of the pastry and evenly sprinkle the shredded cheese over it.
  7. Carefully fold the pastry over the chicken, ensuring the edges are well sealed.
  8. Transfer the wrapped chicken onto a baking tray lined with parchment paper.
  9. Bake for 20 minutes, or until the pastry turns golden and crispy.
  10. Remove from the oven, garnish with fresh herbs, and let it rest for 5 minutes before serving.

Chipped Beef & Dumplings with Potatoes – Easy Recipe!

If you love hearty, old-fashioned meals, you’re in for a treat! This chipped beef flour dumplings potatoes recipe is the perfect blend of creamy, savory, and oh-so-satisfying flavors. Picture soft dumplings swimming in a rich, velvety sauce, paired with buttery potatoes—pure comfort on a plate! Ready to dig in?

Ingredients & Substitutions

Ingredients for chipped beef flour dumplings potatoes recipe.
All the ingredients needed to make this comforting dish.

A delicious dish starts with the right ingredients! This chipped beef flour dumplings potatoes recipe brings together simple yet flavorful components to create a rich, comforting meal. Below, we’ll cover the must-have ingredients, possible substitutions, and ways to tweak the recipe to fit different diets and preferences.

Essential Ingredients for Chipped Beef & Dumplings

For a classic, hearty flavor, you’ll need a few key ingredients:

  • Chipped beef – This dried, salted beef is the star of the dish. It adds a deep, savory taste that pairs perfectly with creamy sauces. Look for it in jars or vacuum-sealed packs in the deli or canned meat section.
  • Flour dumplings – Soft, pillowy dumplings soak up the creamy sauce, adding a satisfying texture. They’re made from flour, baking powder, salt, butter, and milk, creating a tender bite.
  • Potatoes – Starchy Russet or Yukon Gold potatoes work best, as they hold their shape while becoming wonderfully tender.
  • Butter and flour – These form the base of the roux, which thickens the sauce and gives it a smooth, velvety texture.
  • Milk or cream – Whole milk, half-and-half, or heavy cream makes the sauce rich and indulgent.
  • Seasonings – A pinch of black pepper, garlic powder, and a touch of mustard powder enhance the dish’s flavor.

Alternative Ingredients & Dietary Adjustments

Need to adjust the recipe to fit your diet? No problem! Here are some swaps:

  • Gluten-free dumplings – Replace all-purpose flour with a gluten-free blend to keep the texture soft while avoiding gluten.
  • Low-sodium version – Since chipped beef is naturally salty, rinse it under warm water before cooking to remove excess salt. Use unsalted butter and low-sodium broth to further control the salt level.
  • Dairy-free option – Swap butter for plant-based margarine and use oat or almond milk instead of dairy. The sauce may be slightly thinner, so add a teaspoon of cornstarch to help thicken it.
  • Extra protein – Love a heartier dish? Stir in cooked bacon bits or shredded chicken for even more flavor.

Where to Buy the Best Chipped Beef

Since chipped beef isn’t always available in every grocery store, here’s where to look:

  • Local grocery stores – Check the deli section or canned meat aisle.
  • Butcher shops – Some specialty butchers carry high-quality dried beef.
  • Online retailers – Stores like Amazon or gourmet food shops often sell jarred chipped beef with different flavor variations.

If you can’t find chipped beef, thinly sliced dried pastrami or corned beef makes a great substitute!

Additional Flavors & Enhancements

Want to make this dish even more special? Try these flavorful add-ins:

  • Cheesy upgrade – Stir in grated sharp cheddar or Parmesan for extra richness.
  • Spicy twist – A dash of paprika or cayenne pepper adds a little heat.
  • Fresh herbs – Sprinkle chopped parsley or chives on top for a fresh finish.
  • Tangy kick – A splash of Worcestershire sauce or Dijon mustard enhances the umami flavors.

Step-by-Step Cooking Instructions

Making this chipped beef flour dumplings potatoes recipe is easier than you think! With a few simple steps, you’ll create a rich, creamy sauce, tender dumplings, and perfectly cooked potatoes. Follow these detailed instructions for the best results.

Preparing the Chipped Beef

Before you start, it’s important to reduce the saltiness of chipped beef, as it’s often quite salty. Here’s what to do:

  1. Rinse the beef – Place the chipped beef in a colander and rinse it under warm water for about 30 seconds to remove excess salt.
  2. Pat dry and slice – Use a paper towel to blot dry, then slice into thin strips or bite-sized pieces.
  3. Sauté for flavor – Heat a tablespoon of butter in a skillet over medium heat. Add the beef and cook for 2-3 minutes, stirring occasionally. This enhances the savory taste.

Making the Creamy Sauce

The creamy white sauce is what brings everything together in this dish! Follow these steps for a smooth, velvety texture:

Dumplings simmering in creamy chipped beef sauce.
Fluffy dumplings steaming in a rich, velvety chipped beef sauce.
  1. Make a roux – In the same skillet, melt 2 tablespoons of butter over medium-low heat. Stir in 2 tablespoons of flour and whisk continuously for 1-2 minutes until golden.
  2. Add the milk – Slowly pour in 2 cups of warm milk, whisking constantly to prevent lumps.
  3. Season to taste – Stir in a pinch of black pepper, garlic powder, and mustard powder for extra depth.
  4. Simmer until thickened – Let the sauce cook for 3-5 minutes, stirring occasionally, until it reaches a smooth, creamy consistency.

Pro Tip: Want to add an extra layer of flavor? Mix in ½ cup of shredded cheddar for a cheesy twist!

Cooking the Flour Dumplings

Dumplings add a soft, pillowy texture to this dish, making it even more satisfying. Here’s how to make them:

  1. Prepare the dough – In a bowl, mix 1 cup of flour, 1 teaspoon of baking powder, and ½ teaspoon of salt. Cut in 1 tablespoon of butter until crumbly.
  2. Add the liquid – Pour in ½ cup of milk and stir until a soft dough forms. Be careful not to overmix!
  3. Shape and drop – Scoop small portions (about 1 tablespoon each) and drop them directly into the simmering sauce.
  4. Cover and steam – Reduce heat to low, cover the skillet, and let the dumplings steam for 10-12 minutes until cooked through.

Bringing It All Together with Potatoes

Now that your chipped beef and dumplings are ready, it’s time to prepare the potatoes:

  1. Peel and chop – Use Russet or Yukon Gold potatoes, peeling them if desired, then cut into 1-inch cubes.
  2. Boil until tender – Place the potatoes in a pot of salted water and boil for 10-12 minutes until fork-tender.
  3. Drain and mix – Drain the potatoes and gently stir them into the creamy chipped beef and dumplings mixture.
  4. Final seasoning – Taste and adjust seasoning with salt, pepper, or fresh herbs like parsley for a finishing touch.

Serving Suggestions & Storage Tips

Now that your chipped beef flour dumplings potatoes recipe is ready, it’s time to serve it in the best possible way! Whether you’re enjoying it fresh or saving leftovers for later, the right approach will enhance the flavor and texture. Below, we’ll cover serving ideas, side dishes, reheating tips, and how to store leftovers properly.

Served chipped beef flour dumplings potatoes with side dishes.
A warm and hearty meal, served with fresh sides for the perfect balance.

Best Ways to Serve Chipped Beef & Dumplings

This dish is rich, creamy, and comforting, making it a standout meal on its own. However, pairing it with the right sides can balance the flavors and add variety to your plate. Here are some great serving ideas:

  • Classic presentation – Serve it in a deep bowl, allowing the creamy sauce to coat the dumplings and potatoes perfectly. Garnish with fresh parsley or chives for a pop of color.
  • With a crunchy contrast – A simple side salad with vinaigrette or a serving of steamed green beans adds freshness and balances the richness.
  • For a Southern twist – Pair with buttered cornbread or warm biscuits to soak up every bit of the flavorful sauce.
  • Lighter option – If you want to cut the heaviness, serve with roasted Brussels sprouts, sautéed spinach, or steamed asparagus.

Storing & Reheating Leftovers

If you have leftovers, you’re in luck! This dish stores well and can be enjoyed later with just a few simple steps.

How to Store Leftovers:

  1. Cool before storing – Let the dish cool to room temperature before placing it in a container.
  2. Use airtight containers – Store in a sealed container to prevent drying out.
  3. Refrigerate for up to 3 days – Keep it in the fridge for up to 72 hours for the best taste.
  4. Freeze for longer storage – If you need to keep it longer, freeze portions in freezer-safe bags or containers for up to 3 months.

How to Reheat:

  • Stovetop method (best for texture): Heat in a saucepan over low heat, adding a splash of milk or broth to revive the sauce. Stir gently until warmed through.
  • Microwave option (quick but needs care): Place a portion in a microwave-safe dish, cover it, and heat in 30-second intervals, stirring in between.
  • Oven method (best for large batches): Preheat the oven to 300°F (150°C), place leftovers in an oven-safe dish, and cover with foil. Bake for 15-20 minutes until warm.

Preventing Texture Changes in Leftovers

While this dish tastes amazing fresh, it can change texture after refrigeration. Here’s how to maintain its best quality:

  • Dumplings can get dense – To keep them soft, add a few tablespoons of broth or milk when reheating.
  • Sauce may thicken too much – If the sauce looks too thick, stir in a bit of warm milk or water before reheating.
  • Potatoes can absorb liquid – If they become dry, mash them slightly and mix with extra sauce for a smoother texture.

Making This Dish Ahead of Time

Want to make your chipped beef flour dumplings potatoes recipe ahead for busy nights? Here’s how you can prepare it in advance without losing freshness:

  1. Cook the chipped beef and sauce separately – The sauce thickens over time, so making it ahead and storing it separately prevents it from becoming too thick.
  2. Prep dumpling dough but don’t cook it yet – You can mix the dough a few hours before cooking, but store it covered in the fridge until ready to drop into the sauce.
  3. Partially cook potatoes – If you want to cut down on cooking time, boil the potatoes halfway, then drain and store them in an airtight container in the fridge.
  4. Combine and finish cooking when ready – Reheat the sauce, bring it to a simmer, drop in the dumplings, and add the potatoes just before serving.

Final Thoughts on Serving & Storing This Classic Dish

This chipped beef flour dumplings potatoes recipe is a hearty, old-fashioned favorite that can be easily adjusted to fit any meal plan. Whether you’re serving it fresh, making it ahead, or reheating leftovers, following these tips ensures a delicious, satisfying meal every time.

FAQs

Here are answers to some common questions about making the perfect chipped beef flour dumplings potatoes recipe.

How do you make chipped beef less salty?

Chipped beef is naturally salty due to the curing process, but you can easily adjust its saltiness. The best way is to rinse it under warm water for 30 seconds before cooking. For an even milder taste, soak it in a bowl of warm water for 5-10 minutes, then pat it dry before using. If you’re still concerned about salt levels, pair it with low-sodium broth or unsalted butter in the recipe.

Can I make this recipe without dairy?

Yes! You can make a dairy-free version of this chipped beef flour dumplings potatoes recipe by swapping out a few ingredients:

  • Butter → Use plant-based margarine or olive oil.
  • Milk → Try unsweetened oat milk, almond milk, or coconut milk for a creamy texture.
  • Heavy cream → Use canned coconut cream or cashew cream for a rich alternative.

Just keep in mind that non-dairy substitutes may slightly alter the flavor, but they’ll still result in a delicious, creamy dish.

Can I freeze chipped beef and dumplings?

Yes, but with some precautions! Here’s how to freeze and reheat this dish properly:

  • Freeze the sauce separately – The creamy chipped beef sauce freezes well in an airtight container for up to 3 months.
  • Dumplings don’t freeze well – They tend to get dense when thawed, so it’s best to make them fresh when reheating.
  • Reheating tips – Thaw the sauce overnight in the fridge, then reheat it slowly on the stovetop. Add fresh dumplings and potatoes when serving for the best texture.

What are the best side dishes to serve with this recipe?

This dish is rich and creamy, so pairing it with a lighter side can balance the flavors. Some great options include:

  • Steamed or roasted vegetables – Green beans, carrots, or Brussels sprouts add freshness.
  • Simple salads – A light mixed greens salad with vinaigrette helps cut through the richness.
  • Crusty bread or biscuits – Perfect for soaking up every last drop of the delicious sauce.
  • Pickled vegetables – If you like a tangy contrast, serve with pickles or sauerkraut.

Conclusion

This chipped beef flour dumplings potatoes recipe is the ultimate comfort food, bringing together tender dumplings, creamy chipped beef sauce, and hearty potatoes in one satisfying dish. Whether you’re making it fresh, saving leftovers, or tweaking it to fit your dietary needs, this meal is easy to customize and always delicious. Try it for your next cozy family dinner, and don’t forget to experiment with flavors and sides to make it your own!

Easy Anjappar Style Egg Fried Rice Recipe for Flavor Lovers

Print
clock clock iconcutlery cutlery iconflag flag iconfolder folder iconinstagram instagram iconpinterest pinterest iconfacebook facebook iconprint print iconsquares squares iconheart heart iconheart solid heart solid icon
Final plated anjappar style egg fried rice recipe garnished with herbs

Anjappar Style Egg Fried Rice Recipe


  • Author: Emily
  • Total Time: 30 minutes
  • Yield: 4 servings 1x

Description


Enjoy a restaurant-quality dish at home with this anjappar style egg fried rice recipe. Packed with vibrant spices, tender eggs, and crisp vegetables, this easy-to-make meal is perfect for a quick dinner or a flavorful lunch treat.


Ingredients

Scale


  • 2 cups cooked long-grain rice (preferably chilled)
  • 3 large eggs, lightly beaten
  • 1 medium carrot, finely diced
  • 1/2 cup green peas (fresh or frozen)
  • 1 small onion, finely chopped
  • 2 scallions, sliced
  • 2 garlic cloves, minced
  • 1-inch ginger, grated
  • 1/2 teaspoon turmeric powder
  • 1/2 teaspoon cumin seeds
  • 1/2 teaspoon red chili powder (optional, for heat)
  • Salt, to taste
  • 2 tablespoons vegetable oil
  • 1 tablespoon soy sauce (optional)
  • Fresh cilantro leaves, for garnishing

Instructions


  1. Prepare the rice: Ensure the rice is pre-cooked and chilled to avoid mushiness during stir-frying.
  2. Beat the eggs: In a bowl, whisk the eggs with a pinch of salt until lightly frothy.
  3. Heat the wok: Place a large wok or deep skillet over medium-high heat and add the vegetable oil.
  4. Sauté aromatics: Add cumin seeds to the hot oil. Once they start to sizzle, stir in the chopped onion, garlic, and grated ginger. Sauté for 1-2 minutes until fragrant.
  5. Cook the eggs: Pour in the beaten eggs and scramble until just set. Remove the eggs from the wok and set aside.
  6. Sauté vegetables: In the same wok, add the diced carrot and green peas. Stir-fry for about 3-4 minutes until the vegetables are tender but still crisp.
  7. Combine ingredients: Add the chilled rice to the vegetables. Stir well to mix and ensure the rice heats evenly.
  8. Season the dish: Sprinkle in turmeric, red chili powder, and salt. Drizzle the soy sauce over the rice, if using, and mix thoroughly.
  9. Reincorporate the eggs: Gently fold the scrambled eggs back into the rice mixture.
  10. Final touches: Stir in sliced scallions and adjust the seasoning if necessary. Garnish with fresh cilantro leaves before serving.

Discovering a Unique Culinary Experience

What Makes This Recipe Special?

When you try my anjappar style egg fried rice recipe, you’ll quickly notice its unique blend of vibrant spices and fresh veggies. This authentic dish combines the charm of a classic restaurant style egg fried rice with a simple, home-cooked twist. Moreover, each bite delivers a burst of flavor that’s both comforting and exciting. Therefore, you can enjoy a meal that feels indulgent yet is surprisingly easy to make.

The Origins and Inspiration

This recipe draws inspiration from traditional South Indian cuisine and the renowned Anjappar restaurants. In fact, the anjappar style egg fried rice recipe is a modern take on an age-old method of preparing rice, eggs, and spices. For more background on authentic techniques,

What You Will Learn

By following this guide, you’ll discover how to create an exquisite anjappar style egg fried rice recipe step by step. You will learn simple methods for preparing each ingredient, such as cooking long-grain rice to perfection and achieving the ideal scrambled eggs. Furthermore, the instructions cover tips on sautéing vegetables and mixing in traditional Indian spices. Thus, you gain a clear understanding of each step, ensuring you replicate the authentic taste with ease.

Why You Should Try It Today

You deserve a meal that’s both delightful and quick to prepare. With my anjappar style egg fried rice recipe, you can whip up a dish that’s as pleasing to the eye as it is to the palate. Moreover, this recipe offers flexibility—you can adjust the spices and add your favorite veggies, making it perfect for any occasion. So why wait? Embrace this culinary adventure, and soon, you’ll be enjoying a dish that’s both satisfying and full of flavor.

Ingredients and Essential Preparations

Vibrant bowl of anjappar style egg fried rice recipe on a rustic table
A delicious, restaurant-quality egg fried rice dish

Must-Have Ingredients for an Authentic Dish

For a perfect anjappar style egg fried rice recipe, you will need a mix of fresh and quality ingredients. First, ensure you have long-grain rice, fresh eggs, crisp vegetables, and a variety of spices. Additionally, traditional Indian spices like turmeric and cumin bring that extra kick. Moreover, each component works together to create a dish that feels like a true restaurant style egg fried rice. Thus, choosing the right ingredients is key to success.

Sourcing the Best Ingredients

When you shop for the ingredients, always opt for the freshest options available. For instance, local markets often have the best produce and spices. Furthermore, using high-quality ingredients ensures your anjappar style egg fried rice recipe stands out with authentic taste and vibrant colors.

Prepping Your Kitchen and Ingredients

Before you start cooking, take a moment to prep your kitchen. First, wash and chop all vegetables into bite-sized pieces. Next, cook your rice ahead of time until it’s just right—neither too sticky nor too firm. Additionally, beat the eggs lightly, and keep your spices handy. By preparing these elements in advance, you will find that making your anjappar style egg fried rice recipe becomes a smooth and enjoyable process.

Essential Tools and Equipment

To make your cooking experience hassle-free, gather all necessary kitchen tools. You will need a large wok or a deep skillet to stir-fry the ingredients evenly. In addition, a reliable spatula and a set of measuring spoons help maintain accuracy. Moreover, having a good knife for chopping vegetables is essential. With the right equipment on hand, you can easily whip up a delicious anjappar style egg fried rice recipe that looks as good as it tastes.

Step-by-Step Cooking Instructions

Chef stirring a wok for anjappar style egg fried rice recipe"
Stir-frying vegetables and spices in a wok

Step 1 – Preparing the Rice and Eggs

To start your anjappar style egg fried rice recipe, you first need to prepare the rice and eggs. First, cook the rice until it is soft yet firm, and let it cool down; this ensures that the rice does not become mushy later. Next, beat the eggs lightly, so they mix well during cooking. Moreover, preparing these basics lays a strong foundation for a dish that bursts with flavor.

Step 2 – Sautéing Vegetables and Spices

After you have the rice and eggs ready, it’s time to sauté your vegetables and spices. Begin by heating a large wok and adding a bit of oil. Then, toss in chopped vegetables like carrots, peas, and scallions, ensuring they soften evenly. Additionally, stir in traditional Indian spices, such as turmeric and cumin, to enhance the taste of your anjappar style egg fried rice recipe. Thus, every ingredient gets the chance to blend beautifully.

Step 3 – Combining All Ingredients

Close-up of sizzling vegetables and eggs in a wok
A close-up view of the fresh ingredients cooking.

Now, combine your prepared rice, eggs, and sautéed vegetables. In a large pan, gently mix the ingredients so that each grain of rice is coated with spices and flavors. Also, carefully add the eggs, ensuring they mingle well with the vegetables and rice. Furthermore, stir continuously and evenly; therefore, you achieve a well-blended dish that truly reflects the essence of a delicious anjappar style egg fried rice recipe.

Step 4 – Final Touches and Garnishing

Combining rice, eggs, and vegetables in a bowl
All components of the dish are being combined.

Finally, add the finishing touches to your dish. Sprinkle a little extra spice and garnish with fresh herbs to elevate your anjappar style egg fried rice recipe. Moreover, adjust the seasoning as needed, so that the flavor meets your taste perfectly. In addition, if you need more ideas, consider checking out another relevant recipe article on our site for more cooking tips. Thus, your dish not only looks appealing but also tastes amazing.

Tips, Variations, and Troubleshooting

Enhancing Flavor with Expert Tips

When you cook your anjappar style egg fried rice recipe, adding a few expert tips can really elevate the dish. For example, you might use a pinch of extra cumin or a splash of lemon juice to brighten the flavors. Moreover, stirring continuously helps the spices blend well. Thus, you achieve a perfect balance that makes your dish pop.

Creative Variations for Different Diets

You can easily adapt the anjappar style egg fried rice recipe to suit different diets. For instance, if you’re vegetarian, try adding extra tofu or beans for protein. In addition, you might experiment with other veggies such as bell peppers or broccoli. However, remember to adjust the spices accordingly, so the dish still packs a flavorful punch.

Troubleshooting Common Issues

At times, you might face minor issues while preparing your anjappar style egg fried rice recipe. If the rice turns out too sticky, rinse it under cold water next time to remove excess starch. Furthermore, if the flavor seems bland, consider increasing the amount of spices gradually. Therefore, by tweaking these small details, you can easily fix any issues and enjoy a perfect dish every time.

Presentation and Serving Suggestions

Final plated anjappar style egg fried rice recipe garnished with herbs
The delicious finished dish, ready to serve.

Lastly, presentation matters when you serve your anjappar style egg fried rice recipe. For example, garnish your dish with fresh herbs like cilantro or a few sliced scallions. In addition, serve it in a warm bowl to keep it inviting. Moreover, pairing it with a side of simple salad or a light soup can enhance the overall meal experience. Thus, you not only enjoy great taste but also a visually appealing dish.

FAQs

What is an anjappar style egg fried rice recipe?
This recipe is a unique take on traditional fried rice inspired by the flavors of Anjappar restaurants. It blends well-cooked rice, scrambled eggs, and a mix of fresh vegetables with Indian spices to create a dish that is both satisfying and easy to make. Essentially, you get a home-cooked meal with a restaurant twist.

Can I substitute ingredients in the anjappar style egg fried rice recipe?
Absolutely, you can customize this recipe to fit your taste and dietary needs. For example, if you prefer a vegetarian version, simply replace the eggs with tofu or add extra vegetables. However, make sure that any substitutions still complement the signature blend of spices to maintain the authentic flavor.

How long does it take to make the anjappar style egg fried rice recipe?
Typically, you can have this dish ready in about 30 minutes if you have all your ingredients prepped. Moreover, the recipe is designed to be quick and efficient, so even on busy days, you can enjoy a delicious, restaurant-quality meal without spending hours in the kitchen.

Can I prepare the anjappar style egg fried rice recipe ahead of time?
Yes, you can prepare parts of the recipe in advance. For instance, you can cook the rice and chop the vegetables ahead of time, then combine everything when you’re ready to serve. However, for the best texture and flavor, it’s recommended to enjoy the dish fresh whenever possible.

Conclusion

In summary, you now have all the details you need to create a mouth-watering anjappar style egg fried rice recipe. From selecting the right ingredients to mastering each step, this guide has provided clear and actionable tips to ensure your dish turns out perfectly every time. Enjoy experimenting with flavors, and don’t hesitate to make this recipe your own.

Best-Ever Deer Camp Venison Chili Recipe (Ready in 1 Hour)

Let’s face it: not all camp meals hit the mark. But this deer camp venison chili recipe? Oh, it’s a bullseye. Packed with fire-roasted tomatoescumin-kissed broth, and meat so tender it’ll make your crew forget they’re eating wild game. Best part? You’ll whip it up in 60 minutes flat—no fancy gear, no frills. Trust us, this chili isn’t just food; it’s campfire camaraderie in a bowl. Grab your spoon and dig in.

Why This Venison Chili is Perfect for Deer Camp

Nothing beats a hearty, smoky chili after a day in the woods. This deer camp venison chili recipe isn’t just filling it’s designed for hunters who crave comfort without the hassle. Let’s break down why it’s a campfire must-have, whether you’re feeding a crew or refueling solo.

Quick Prep for Busy Hunters

You’ve spent hours tracking deer, so dinner shouldn’t feel like another chore. Thankfully, this chili cooks in 1 hour with minimal prep. Here’s the kicker: brown your ground venison while chopping onions and garlic—no fancy techniques needed. In addition, it’s a one-pot meal, meaning less cleanup and more time swapping stories around the fire. Pro tip: Pre-measure spices at home to save time.

Bold Flavors That Complement Wild Game

Venison’s rich, earthy taste can steal the show—if you balance it right. That’s why this recipe leans on smoked paprika, cumin, and a dash of cocoa powder for depth. On the other hand, if you’re wary of gamey flavors, a splash of apple cider vinegar brightens the dish. For example, one tester said, “It’s like Texas chili met a campfire and they became best friends.”

Campfire or Stovetop Flexibility

No campfire? No problem. While this deer camp venison chili recipe shines in a Dutch oven over flames, your stovetop works just fine.

Feed a Hungry Crowd Affordably

Let’s face it: feeding hunters is like fueling a small army. Luckily, venison is cheaper (and leaner) than beef if you process your own harvest. Plus, this recipe stretches with beans and tomatoes no one leaves hungry. In fact, one batch serves 8, and leftovers freeze perfectly.

Ingredients for a Hearty Wild Game Chili

Ingredients for venison chili: ground deer meat, spices, beans, tomatoes
Quality venison and spices create bold, campfire-ready flavors.

Great deer camp venison chili recipe starts with the right ingredients. Let’s break down what you’ll need to turn ground venison into a smoky, satisfying meal that’ll warm your crew from the inside out.

Choosing Quality Venison (Fresh or Frozen)

Fresh or frozen? Here’s the deal: Fresh venison delivers the best flavor, but frozen works if you’re thawing last season’s harvest. However, avoid meat with a strong gamey odor it’s a sign of poor processing.

Essential Spices for Smoky Depth

Don’t skimp on spices—they’re the soul of your deer camp venison chili recipeStart with chili powder (2 tbsp), smoked paprika (1 tbsp), and cumin (1 tsp) for that campfire-kissed flavorOn the other hand, if you’re out of cumin, coriander makes a bright substitute. Fun fact: A pinch of cocoa powder deepens the richness without sweetness.

Beans, Tomatoes, and Secret Add-Ins

Beans or no beans? That’s your call. Kidney beans add bulk, but purists might skip them. Either way, fire-roasted tomatoes are non-negotiable their charred sweetness balances venison’s boldnessWant a pro twist? Stir in a bottle of dark beer or a dash of coffee for earthy complexityBonus tip: If your crew loves heat, toss in a diced jalapeño (seeds included!).

Toppings to Elevate Your Bowl

Here’s where the magic happensSet out a toppings bar with shredded cheddar, sour cream, and diced onions. For a crunch, crush tortilla chips or add our campfire skillet cornbread on the side. Trust us: A squeeze of lime cuts through the richness, making every bite as fresh as a morning in the woods.

Step-by-Step Venison Chili Instructions

Ready to turn that ground venison into a campfire masterpiece? Let’s dive into this deer camp venison chili recipe with foolproof steps. No fancy skills needed—just a pot, a spoon, and a hunger for hearty flavors.

H3: Browning Venison for Maximum Flavor

First things first: Heat oil in your Dutch oven or pot. Add ground venison and break it into crumbles. Why? Searing locks in juiciness and tames any gamey undertonesMeanwhile, toss in diced onions and garlic their sweetness balances the meat’s richness.

Layering Spices and Simmering Basics

Now, the fun part: Sprinkle chili powder, smoked paprika, and cumin over the meat. Stir well to coat every bite—this builds depth fast. Next, pour in crushed tomatoes, broth, and a splash of beer (trust us, it’s worth it). Then, let it bubble gently for 30 minutes. Remember: Low and slow avoids burnt spices.

Adjusting Heat and Thickness

Is your chili too thin? Mash a handful of beans or simmer uncovered for 10 minutes. Prefer it fiery? Add cayenne or diced jalapeños. On the other hand, if it’s too thick, splash in broth or water. Either way, taste as you go seasoning is your secret weapon.

Serving Suggestions for Campfire Nights

Finally, ladle that smoky chili into bowls and let your crew go wild with toppings. Think: shredded cheese, avocado slices, or a dollop of sour cream.

Pro Tips for Perfect Deer Camp Chili

Want to turn your deer camp venison chili recipe from good to legendaryThese pro tips—straight from seasoned hunters and chefs will help you dodge pitfalls and boost flavor.

Serving deer camp venison chili recipe with toppings and cornbread
Top your chili with cheese, jalapeños, and pair with cornbread!

Make-Ahead and Freezing Strategies

Got a big hunt coming up? Prep this chili ahead! Simply cook it fully, cool it, and freeze in airtight containers for up to 3 months. When reheating, add a splash of broth to revive the smoky richnessBonus: Frozen chili tastes even better spices meld like old friends around a campfire.

Tenderizing Tough Cuts of Venison

Tough meat? No sweatMarinate tougher cuts (like neck or shank) in beer or apple cider vinegar for 2 hours before cooking. Alternatively, simmer the chili longer on low heat collagen breaks down, turning chewy bites into buttery goodnessPro tip: Coffee in the braising liquid adds deep, earthy notes without bitterness.

Swapping Venison for Other Wild Game

Out of venison? Elk, bear, or even duck work in this deer camp venison chili recipeJust remember: Leaner meats (like elk) need extra oil, while fatty game (like bear) may require draining.

Avoiding Common Chili Mistakes

First-timer jitters? Skip these blunders:

  1. Overseasoning early: Salt lightly at first—you can add more later.
  2. Undercooking spices: Toast chili powder in oil for 1 minute to unlock boldness.
  3. Overcrowding the pot: Brown meat in batches for better caramelization.
    Above all, taste as you go. After all, you’re the boss of your broth.

FAQs About Deer Camp Venison Chili

How to Make My Chili Thicker?

If your deer camp venison chili recipe feels too thin, simmer it uncovered for 10–15 minutes to reduce liquid. For faster results, mix 1 tablespoon cornstarch with 2 tablespoons cold water, then stir it into the chili. Alternatively, mash a handful of beans or add a sprinkle of masa harina (corn flour) for a gluten-free fix.

Why Is Deer Meat Not Sold in Stores?

In most U.S. states, wild venison can’t be sold commercially due to hunting regulations and food safety laws. However, farm-raised venison is available at specialty markets though it’s pricier. That’s why many hunters process their own deer for recipes like this hearty venison chili.

How to Thicken Chili That’s Too Watery?

Beyond simmering or cornstarch, crushed tortilla chips or instant potato flakes work wonders. For example, stir in ¼ cup crushed chips—they’ll soften and thicken the broth while adding a subtle corn flavor. Just remember: Add thickeners slowly to avoid overdoing it.

Can You Eat Chili After 5 Days?

Yes, if stored properly. Keep your chili in an airtight container in the fridge, and it’ll stay safe for up to 5 days. However, always reheat it to 165°F to kill bacteria. When in doubt, freeze leftovers within 3 days for best quality.

Conclusion

Your deer camp venison chili recipe is more than just a meal—it’s a campfire tradition that blends smoky spices, tender wild game, and simplicity. Whether you’re cooking over flames or your stovetop, this 1-hour chili delivers hearty comfort without the fuss.

Remember these key takeaways:

  • Use fresh or thawed venison for the best flavor.
  • Adjust thickness and heat to your crew’s taste.
  • Freeze leftovers for quick meals during hunting season.

Top 10 High Protein Crock Pot Recipes for Busy Weeknights

Who doesn’t love coming home to a kitchen filled with the aroma of high protein crock pot recipes ? Imagine tender, juicy chicken or savory beef stew waiting for you after a long day! With these meals, not only do you save time, but you also fuel your body with nutrients. Plus, they’re easy enough for even beginners to whip up

Why Choose High Protein Crock Pot Recipes?

Choosing high protein crock pot recipes can transform your meal prep routine by combining convenience with nutrition. These meals not only save time but also provide the energy and nutrients your body needs to thrive, whether you’re aiming for muscle growth or simply maintaining a balanced diet. Let’s explore why these recipes deserve a spot in your kitchen.

Benefits of Slow Cooker Meals

Slow cooker meals are more than just a convenient option; they’re a game-changer for busy lifestyles. By allowing ingredients to simmer gently over hours, slow cookers lock in flavors and retain essential nutrients, making them healthier alternatives to fast-cooking methods. Moreover, they reduce hands-on cooking time, giving you extra hours in the day to focus on what truly matters. However, it’s important to note that while slow cookers simplify life, they require thoughtful preparation to ensure the best results.

Time-Saving Tips for Preparing High Protein Crock Pot Recipes

To make the most of your slow cooker, consider planning ahead. For instance, chop vegetables and marinate proteins the night before so everything is ready when you wake up. Additionally, batch cooking making double portions and freezing leftovers can save even more time in the long run. In fact, many people find this method particularly helpful during hectic weeks. Thus, investing in quality storage containers ensures your meals stay fresh and flavorful.

For those looking for inspiration, check out trusted culinary blogs like Food For Fitness, which offers a wide variety of high-protein slow cooker options. Their collection includes dishes like Slow Cooker Beef Bourguignon and Chicken Satay, proving that healthy eating doesn’t have to be boring.

Selecting Quality Ingredients for Your Dishes

Garlic balsamic chicken being prepared in a crock pot.
Simple steps for a mouthwatering meal.

When preparing high protein crock pot recipes, selecting top-notch ingredients makes all the difference. Opt for lean cuts of meat such as chicken breast or grass-fed beef, and pair them with nutrient-rich vegetables like spinach or bell peppers. On the other hand, don’t overlook plant-based proteins like lentils or chickpeas, which add variety and texture to your meals. Furthermore, using fresh herbs and spices enhances flavor without adding unnecessary calories.

Enhancing Flavor Profiles with Aromatic Spices

Adding depth to your high protein crock pot recipes starts with experimenting with aromatic spices. Consider blends like cumin, turmeric, or smoked paprika to create layers of flavor that tantalize the taste buds. In addition, incorporating fresh herbs like cilantro or parsley at the end of cooking provides a burst of freshness. Therefore, playing around with different combinations allows you to personalize each dish according to your preferences, ensuring every bite is as satisfying as the last.

Exploring Our Top 10 High Protein Crock Pot Recipes

Beef bourguignon stew cooking in a crock pot.
A classic French-inspired dish made easy.

When it comes to high protein crock pot recipes, variety is key. Whether you’re a fan of comforting stews, spicy curries, or zesty tacos, there’s something for everyone. Below, we’ve curated a list of our top picks that combine convenience with flavor, ensuring your weeknight dinners are both satisfying and nutritious.

Slow Cooker Marry Me Chicken

Start your journey with this crowd-pleaser: Slow Cooker Marry Me Chicken. This dish features tender chicken breasts marinated in a tangy sauce, making it perfect for family meals. In addition to being delicious, it’s packed with protein, helping you meet your daily nutritional goals. For those who love experimenting with flavors, try adding fresh herbs like rosemary or thyme to enhance the taste further.

Beef Bourguignon Stew – A Classic Twist

If you’re looking for a hearty option, look no further than Beef Bourguignon Stew. This French-inspired recipe combines tender beef chunks with red wine, mushrooms, and onions for a rich, savory experience. While it may sound complicated, the slow cooker does all the hard work for you. Moreover, its high protein content makes it ideal for muscle recovery or simply staying full longer.

Slow Cooker Red Thai Curry – Spicy and Flavorful

Switch things up with an international twist: Slow Cooker Red Thai Curry. Packed with aromatic spices and coconut milk, this dish delivers a burst of flavor while keeping you energized throughout the day. However, if you prefer milder options, reduce the amount of chili paste used in the recipe. On the other hand, adding extra tofu or shrimp can boost the protein content even further.

White Chicken Chili – Comfort in a Bowl

End this section with a comforting favorite: White Chicken Chili. With its creamy texture and smoky undertones, this recipe is sure to become a staple in your rotation. Not only is it easy to prepare, but it also provides a generous serving of protein thanks to the inclusion of chicken and beans. Therefore, it’s great for busy nights when you need a quick yet wholesome meal

Enhancing Flavor Profiles in Your High Protein Crock Pot Recipes

Creating delicious and nutritious meals starts with mastering the art of enhancing flavor profiles. Whether you’re a seasoned chef or a beginner, these tips will help you take your high protein crock pot recipes to the next level.

Choosing the Right Spices for Your Dishes

Selecting the appropriate spices is crucial when preparing high protein crock pot recipes. For instance, using cumin and paprika can add depth to Mexican-inspired dishes, while turmeric and curry powder bring an exotic twist to Indian-style stews. In addition, fresh herbs like cilantro or parsley provide a pop of color and freshness that complements any dish. Therefore, experimenting with different spice combinations allows you to personalize each meal according to your taste preferences.

Balancing Ingredients for Optimal Taste

White chicken chili served with cornbread.
Comfort food at its finest.

Balancing ingredients ensures your high protein crock pot recipes are not only nutritious but also flavorful. Consider pairing lean proteins like chicken breast or tofu with nutrient-rich vegetables such as spinach, carrots, or bell peppers. Moreover, adding a splash of citrus juice or vinegar at the end of cooking can brighten up the flavors without overpowering them. On the other hand, too much seasoning might mask the natural taste of the ingredients, so it’s important to strike the right balance.

Incorporating Aromatics for Extra Depth

Aromatics play a significant role in elevating the taste of your meals. Garlic, onions, and ginger are staples in many cuisines and add layers of complexity to your high protein crock pot recipes. For example, sautéing these aromatics before adding them to the slow cooker enhances their flavor profile and creates a richer base for your dish. Thus, taking the extra step to prepare your aromatics beforehand pays off in terms of taste and satisfaction.

Adding Texture with Nuts and Seeds

To make your high protein crock pot recipes even more satisfying, consider incorporating nuts and seeds for added texture. Almonds, walnuts, or pumpkin seeds not only boost the nutritional value but also add crunch to otherwise soft textures. Additionally, they pair well with both savory and sweet dishes, offering versatility in your meal planning. However, be mindful of allergies when introducing new ingredients to your family’s diet.

Common Mistakes to Avoid When Cooking High Protein Crock Pot Recipes

Even the most experienced cooks can make mistakes when preparing high protein crock pot recipes. By being aware of these common pitfalls, you can ensure your meals turn out perfectly every time. Let’s dive into some tips to help you avoid these errors.

Overcooking Vegetables in Your Slow Cooker

One of the biggest issues people face is overcooking vegetables, which can leave them mushy and unappetizing. To prevent this, try adding harder vegetables like carrots or potatoes during the last hour of cooking instead of at the beginning. In addition, consider partially precooking them to speed up the process while maintaining their texture. Thus, planning ahead ensures your veggies remain crisp and flavorful.

Underseasoning Your High Protein Crock Pot Recipes

Underseasoning is another frequent mistake that can ruin an otherwise delicious meal. Since flavors tend to mellow out over long cooking times, it’s essential to season generously at the start. For example, use a blend of spices and herbs to create layers of taste that develop as the dish simmers. However, remember to taste periodically and adjust seasoning as needed to achieve the desired flavor profile.

Choosing the Wrong Cooking Setting

Selecting the wrong cooking setting can also impact the quality of your high protein crock pot recipes. While the low setting works well for tender cuts of meat, tougher cuts benefit from higher heat to break down connective tissues more effectively. Moreover, switching between settings midway through cooking may affect the final outcome, so choose wisely based on your ingredients and desired results.

Neglecting Cleanup and Maintenance

Finally, neglecting cleanup and maintenance can shorten the lifespan of your slow cooker. After each use, allow the appliance to cool completely before washing, and inspect the seal regularly to ensure it remains intact. Additionally, storing your slow cooker properly helps preserve its functionality for years to come. Therefore, taking good care of your equipment ensures consistent performance and reliable results with every recipe.

FAQs

What are the benefits of slow cooker meals?

Slow cooker meals offer numerous advantages that make them a favorite for many home cooks. For starters, they encourage eating at home, which can save money and promote healthier eating habits. Additionally, the extended cooking times allow flavors to meld beautifully, creating richer tastes in your high protein crock pot recipes. The lower temperatures used by slow cookers also reduce the risk of burning or overcooking food, ensuring tender results every time . Plus, because slow cookers use less energy than conventional ovens, they’re an eco-friendly choice.

How do you eat high protein meals?

Eating high protein meals involves incorporating lean meats like chicken breast, turkey, or fish into your diet, along with plant-based options such as beans, lentils, and tofu. When preparing these ingredients, consider using a slow cooker to lock in nutrients and flavor while saving time. For instance, high protein crock pot recipes like beef bourguignon or chicken chili provide both convenience and nutritional value. Remember to balance your protein intake with healthy fats and carbohydrates for a well-rounded diet.

How much faster does a Crock-Pot cook on high?

A Crock-Pot set to “high” generally cooks about twice as fast as it would on the “low” setting. While the exact speed depends on the recipe and appliance model, switching to high can cut cooking times significantly, making it ideal for last-minute meal prep. However, keep in mind that some recipes may lose their depth of flavor if cooked too quickly, so plan accordingly based on your schedule and preferences.

Is Crock-Pot cooking healthy?

Yes, Crock-Pot cooking is considered healthy due to its ability to retain nutrients during the cooking process. The slow, steady heat allows foods to cook gently without losing essential vitamins and minerals. Moreover, slow cookers often require minimal added fats or oils, helping you prepare low-calorie, nutrient-dense meals. By choosing high protein crock pot recipes and pairing them with fresh vegetables, you can create balanced dishes that support your health goals.

Conclusion

In summary, high protein crock pot recipes offer a practical solution for busy individuals seeking nutritious and delicious meals. From enhancing flavor profiles through extended cooking times to simplifying meal prep with minimal effort, slow cookers bring convenience and variety to your kitchen. By avoiding common mistakes, selecting quality ingredients, and experimenting with spices, you can craft meals that fuel your body and satisfy your taste buds. Whether you’re aiming for muscle-building proteins or simply healthier eating, these recipes have something for everyone. So why not give them a try today?

The Best Creole Meatloaf Recipe – 5 Easy Steps to Perfection

There’s something magical about the rich, smoky aroma of a classic meatloaf recipe Creole baking in the oven. The mix of ground beef, bell peppers, and Cajun spices fills the kitchen with warmth and nostalgia. Whether you’re a seasoned cook or a first-timer, this dish is bound to impress.

1. What Makes Creole Meatloaf Special?

Creole cuisine is all about big flavors, bold spices, and rich textures. A classic meatloaf recipe Creole embodies this tradition, combining juicy ground beef, aromatic vegetables, and a perfectly seasoned glaze. Unlike traditional meatloaf, this dish packs a spicy kick with its signature Creole seasoning and zesty tomato-based topping. But what exactly sets it apart? Let’s break it down!

The Unique Flavors of Creole Cuisine

Creole cooking is a beautiful blend of French, Spanish, African, and Caribbean influences, creating a cuisine that’s both vibrant and deeply flavorful. The secret to these bold flavors lies in the seasoning. A proper meatloaf recipe Creole isn’t complete without a signature spice mix featuring paprika, garlic powder, onion powder, cayenne, oregano, and thyme.

Another key component? The Holy Trinity of Creole cooking onion, bell pepper, and celery. This aromatic trio builds a rich foundation, adding sweetness, earthiness, and depth to the meatloaf. Unlike a standard meatloaf that leans on basic salt and pepper, Creole-style meatloaf boasts a warm, smoky, and slightly spicy bite in every forkful.

Pro Tip: Want to intensify the flavors? Let the meat mixture sit for at least 30 minutes before baking, allowing the seasonings to fully infuse the meat!

Key Ingredients for Authentic Creole Meatloaf

To achieve that authentic Southern taste, you’ll need the right ingredients. Here’s what makes this meatloaf recipe Creole stand out:

Ingredients for Creole meatloaf, including beef, pork, spices, and vegetables
Gather all the fresh ingredients to make the best Creole meatloaf
  • Ground beef & pork – A mix of beef and pork creates the best balance of flavor and tenderness.
  • Holy Trinity (onion, bell peppers, celery) – Essential for depth and aroma.
  • Creole seasoning – The heart and soul of the dish, adding smoky, savory, and spicy elements.
  • Breadcrumbs & eggs – Help bind everything together while keeping the texture light and moist.
  • Tomato-based glaze – A tangy mix of ketchup, Worcestershire sauce, and hot sauce, brushed on for extra flavor and caramelization.

Using fresh, high-quality ingredients is key to achieving the deep, rich taste Creole cuisine is known for.

How to Choose the Best Ingredients

Selecting the right ingredients can make or break your meatloaf recipe Creole. Here’s what to look for:

  1. Meat – Use 80/20 ground beef for a good balance of fat and flavor. Leaner meat can make the loaf dry.
  2. Bell Peppers – Red, green, or a mix of both adds sweetness and crunch.
  3. Spices – Freshly ground spices deliver the best flavor—pre-ground versions lose their potency over time.
  4. Breadcrumbs – Opt for panko breadcrumbs for a lighter texture, or use crushed saltine crackers for extra flavor.

For a healthier option, swap ground beef for ground turkey and use almond flour instead of breadcrumbs.

Creole vs. Cajun Meatloaf – What’s the Difference?

People often mix up Creole and Cajun cooking, but there are key differences:

FeatureCreole MeatloafCajun Meatloaf
SpicesPaprika, cayenne, garlic, oreganoHeavy on black pepper, cayenne, and smoked paprika
Base FlavorRich, often tomato-basedRustic, earthier, sometimes smokier
Cooking StyleMore refined, influenced by European techniquesSimpler, using bold, spicy flavors

2. Step-by-Step: How to Make the Best Creole Meatloaf

Making a delicious meatloaf recipe Creole is easier than you think! With the right ingredients and a few simple steps, you’ll have a juicy, flavorful meatloaf that’s perfect for any meal. This guide will walk you through the entire process, from preparing the ingredients to baking and serving.

Step 1: Preparing the Ingredients

Before you start mixing, it’s essential to prep your ingredients for the best results. The secret to a perfect meatloaf recipe Creole lies in using fresh vegetables, quality meat, and bold seasoning.

  • Dice the Holy Trinity – Finely chop onions, bell peppers, and celery to ensure they blend seamlessly into the meat mixture.
  • Mix your spices – If using homemade Creole seasoning, combine paprika, cayenne, garlic powder, onion powder, thyme, and oregano for an authentic taste.
  • Choose the right meat – A blend of ground beef and pork adds richness and moisture. Aim for 80/20 beef for a tender texture.
  • Prep your binding ingredients – Lightly beat the eggs and soak breadcrumbs in milk to keep the meatloaf juicy.

Pro Tip: Let your chopped vegetables sit in a paper towel for a few minutes to remove excess moisture. This prevents a soggy meatloaf!

Step 2: Mixing the Meatloaf Base

Once your ingredients are ready, it’s time to create the perfectly seasoned meatloaf mixture.

  1. In a large bowl, combine the ground beef, pork, breadcrumbs, eggs, Worcestershire sauce, and Creole seasoning.
  2. Gently mix the ingredients with your hands or a wooden spoon. Overmixing can make the meatloaf dense and tough, so keep it light!
  3. Add the diced Holy Trinity vegetables and continue folding until evenly distributed.
  4. Form the mixture into a loaf shape on a parchment-lined baking sheet.

Want a spicier kick? Add extra cayenne pepper or a splash of hot sauce for more heat!

Step 3: Shaping and Baking the Meatloaf

Now that your meatloaf recipe Creole is perfectly mixed, it’s time to shape and bake it to perfection.

Shaping a seasoned Creole meatloaf before baking
Shaping the Creole meatloaf for perfect baking results
  • Shape the meatloaf into a firm but not compacted loaf. You can use a loaf pan for even cooking or free-form it on a baking sheet for more crispy edges.
  • Bake at 375°F (190°C) for about 45 minutes. This ensures a golden crust while keeping the inside tender.
  • Halfway through baking, drain any excess grease from the pan to prevent a soggy bottom.

Step 4: Preparing the Zesty Creole Glaze

A great meatloaf recipe Creole wouldn’t be complete without a rich, tangy glaze. This simple homemade glaze enhances the flavors and creates a caramelized topping.

Creole Meatloaf Glaze Recipe:

  • ½ cup ketchup
  • 2 tablespoons brown sugar
  • 1 teaspoon Worcestershire sauce
  • ½ teaspoon Creole seasoning
  • 1 teaspoon hot sauce (optional for extra spice)

How to Apply:

  • Mix all ingredients in a small bowl until smooth.
  • Brush half of the glaze over the meatloaf after 30 minutes of baking.
  • Add the remaining glaze in the last 10 minutes for a sticky, flavorful finish.

Love bold flavors? Try adding a dash of honey or molasses for a slightly sweet twist!

Step 5: Resting and Serving

Patience is key! Letting your meatloaf recipe Creole rest ensures maximum juiciness.

  • Remove from the oven and let the meatloaf sit for 10 minutes before slicing. This allows the juices to redistribute, preventing dryness.
  • Slice into thick, hearty portions and serve with mashed potatoes, Cajun rice, or sautéed greens.
  • Garnish with fresh parsley or extra Creole seasoning for added color and flavor.

Want to elevate your meal? Serve alongside Cajun Sausage and Rice for a complete Southern-inspired dinner!

3. Pro Tips for the Perfect Creole Meatloaf

A great meatloaf recipe Creole isn’t just about following the steps—it’s also about mastering the little details that take it from good to amazing. Whether you want a juicier texture, a spicier kick, or a foolproof glaze, these pro tips will elevate your Creole meatloaf to the next level.

Secret #1: Keep It Moist and Tender

One of the biggest mistakes people make with meatloaf is ending up with a dry, tough loaf. However, there are several easy ways to keep your meatloaf recipe Creole juicy and tender:

  • Use a mix of ground meats – Combining ground beef and pork (or even turkey) creates a softer texture because pork has more fat than beef alone.
  • Don’t skip the milk and breadcrumbs – Breadcrumbs soaked in milk or broth add moisture, preventing a crumbly, dry loaf.
  • Add grated vegetables – Onions, bell peppers, and celery release natural juices, keeping the meatloaf soft and flavorful.

Pro Tip: If you’re worried about a dry meatloaf, cover it loosely with foil while baking, then uncover it in the last 15 minutes to caramelize the glaze.

Secret #2: Don’t Overmix the Meat

It might seem like a good idea to mix your meat thoroughly, but overworking the mixture can result in a dense, chewy meatloaf.

Here’s how to mix without overdoing it:

  1. Use your hands – Gently fold the ingredients together instead of pressing them too hard.
  2. Mix just until combined – Stop once everything is evenly blended.
  3. Chill before shaping – Let the mixture sit in the fridge for 10–15 minutes before forming the loaf. This helps it hold its shape without becoming compacted.

Overmixing compresses the meat, making it tough rather than tender. Instead, aim for a light, airy texture by mixing gently but thoroughly.

Secret #3: Let It Rest Before Slicing

If you’ve ever sliced into a fresh meatloaf only to see all the juices run out, you know why resting is important. Cutting into hot meatloaf too soon can cause it to lose moisture, leaving it dry and crumbly.

To ensure your meatloaf recipe Creole stays moist and flavorful:

  • Let it rest for at least 10 minutes after removing it from the oven.
  • Cover it loosely with foil to trap heat while allowing the juices to redistribute.
  • Slice it with a sharp knife to prevent tearing or crumbling.

Taking this extra step will make a huge difference in how juicy and tender your final dish turns out!

Secret #4: Elevate the Glaze

A good glaze adds sweetness, tang, and spice, making the top of the meatloaf irresistibly caramelized. However, instead of using plain ketchup, try these glaze upgrades:

  • Honey & Worcestershire Sauce – Adds depth and a rich umami flavor.
  • Creole Mustard & Brown Sugar – Gives a sweet yet spicy kick.
  • Hot Sauce & Molasses – Creates a smoky, spicy contrast.

For the best results, apply the glaze in two layers:

  1. Halfway through baking – This allows it to soak into the meat.
  2. At the last 10 minutes – Creates a beautiful, glossy finish.

4. Serving Ideas & Delicious Pairings

A well-made meatloaf recipe Creole is flavorful on its own, but the right side dishes and variations can elevate it to a whole new level. Whether you’re serving it for a weeknight dinner, a holiday meal, or a family gathering, these delicious pairings will complement the rich, bold flavors of Creole-style meatloaf.

Best Side Dishes for Creole Meatloaf

Pairing your meatloaf recipe Creole with the right side dishes enhances its flavors and creates a balanced meal. Here are some of the best sides to serve alongside your meatloaf:

A complete Creole meatloaf dinner with mashed potatoes and greens
Serve your Creole meatloaf with classic Southern side dishes
  • Cajun Rice – A spicy, seasoned rice dish with bell peppers, onions, and a touch of heat to complement the meatloaf’s Creole flavors.
  • Garlic Mashed Potatoes – Creamy and buttery mashed potatoes provide a smooth, comforting contrast to the meatloaf’s bold spices.
  • Collard Greens – A Southern classic! Slow-cooked greens with smoked ham or bacon add a rich, savory depth.
  • Cornbread – Slightly sweet and crumbly, cornbread pairs beautifully with the zesty tomato glaze of the meatloaf.
  • Roasted Okra or Green Beans – Adds a light, crispy texture to balance out the richness of the dish.

Alternative Variations

Want to customize your meatloaf recipe Creole to fit different tastes or dietary needs? Try these fun and easy variations:

  • Spicy Creole Meatloaf – Increase the cayenne pepper and add diced jalapeños for an extra fiery kick.
  • Turkey Creole Meatloaf – Swap ground beef and pork for ground turkey to create a lighter, leaner version while still keeping the bold flavors.
  • Keto Creole Meatloaf – Use almond flour instead of breadcrumbs and replace the sugar in the glaze with a sugar-free alternative to keep it low-carb.
  • Stuffed Creole Meatloaf – Add a center layer of cheese, sautéed mushrooms, or andouille sausage for a delicious surprise inside each slice.

Each of these variations keeps the heart of Creole flavors alive while allowing for personalization based on dietary preferences.

How to Store & Reheat Meatloaf

If you’ve made a large batch of meatloaf recipe Creole, you’ll want to store and reheat it properly to keep it moist and flavorful.

Storing Meatloaf:

  • Refrigerator: Store slices in an airtight container for up to 4 days.
  • Freezer: Wrap individual slices in plastic wrap and foil, then freeze for up to 3 months.

Reheating Meatloaf:

  • Oven (Best Method): Wrap in foil and heat at 300°F (150°C) for 15–20 minutes to keep it juicy.
  • Microwave: Heat in 30-second intervals, adding a splash of broth if needed.
  • Stovetop: Sear slices in a hot skillet for a slightly crispy edge while keeping the inside tender.

Proper storage and reheating preserve the texture and taste, so your leftovers taste just as good as the first serving!

How to Turn Leftovers into a New Meal

Leftover meatloaf recipe Creole can easily be repurposed into new and exciting dishes. Instead of reheating the same slice, try these creative leftover ideas:

  • Creole Meatloaf Sandwich – Slice the meatloaf and serve it on a buttery toasted bun with lettuce, tomato, and a drizzle of Creole mustard.
  • Meatloaf Tacos – Crumble leftover meatloaf and serve in warm tortillas with shredded cabbage, salsa, and a spicy aioli drizzle.
  • Stuffed Peppers – Chop up meatloaf and mix it with rice, then stuff into bell peppers and bake for a delicious one-pan meal.
  • Meatloaf Hash – Sauté diced meatloaf with potatoes, onions, and bell peppers for a hearty breakfast hash.

FAQs About Creole Meatloaf

What is Creole Meatloaf?

Creole meatloaf is a Southern-inspired twist on classic meatloaf, infused with bold spices, the “Holy Trinity” of vegetables (onion, bell pepper, celery), and a rich, tangy tomato glaze. Unlike traditional meatloaf, which relies on simple seasonings, a meatloaf recipe Creole is packed with Creole seasoning, giving it a zesty, slightly smoky, and mildly spicy flavor. This dish embodies the vibrant influences of French, Spanish, African, and Caribbean cuisines, making it a staple in Louisiana cooking.

What is the Secret to Moist Meatloaf?

A dry meatloaf is a common mistake, but there are several key techniques to keeping your meatloaf recipe Creole juicy and tender:

  1. Use a mix of meats – A combination of ground beef and pork (or even turkey) provides the best texture and fat content.
  2. Don’t skip the binderBreadcrumbs soaked in milk help retain moisture and prevent crumbling.
  3. Incorporate vegetables – The Holy Trinity (onions, bell peppers, celery) adds natural juiciness and depth of flavor.
  4. Avoid overmixing – Gently combine ingredients to keep the meatloaf light and airy.
  5. Let it rest – Allowing your meatloaf to sit for at least 10 minutes before slicing ensures the juices redistribute, keeping each bite moist and flavorful.

Following these tips will guarantee a tender, succulent meatloaf every time!

What Ethnicity Made Meatloaf?

Meatloaf has European origins, with roots tracing back to German, Scandinavian, and Dutch cuisines. These cultures had a long tradition of using ground meat, breadcrumbs, and seasonings to create flavorful, economical dishes. When immigrants brought their recipes to America, meatloaf evolved into a classic comfort food, with regional variations like Southern, Creole, and Cajun meatloaf adding distinct spice blends and flavors.

The Creole variation stands out because of its Louisiana influence, blending French, Spanish, and African culinary traditions into a dish that’s rich, bold, and unique.

What is the Basic Meatloaf Formula?

The foundation of any great meatloaf follows a simple 1:½:1:¼ formula:

  • 1 pound of ground meat (beef, pork, or turkey)
  • ½ cup of breadcrumbs (or crushed crackers)
  • 1 egg (for binding)
  • ¼ cup of liquid (milk, broth, or tomato sauce)

For a meatloaf recipe Creole, you’d also incorporate:

  • Creole seasoning (paprika, garlic powder, cayenne, thyme)
  • The Holy Trinity (onion, bell pepper, celery)
  • A tomato-based Creole glaze

Conclusion: Try This Flavor-Packed Creole Meatloaf Today!

This meatloaf recipe Creole delivers rich, bold flavors, tender texture, and a perfectly caramelized glaze, making it a standout Southern dish. By following these easy steps, pro tips, and serving suggestions, you can create a delicious homemade meatloaf that’s both comforting and full of Creole flair.

Print
clock clock iconcutlery cutlery iconflag flag iconfolder folder iconinstagram instagram iconpinterest pinterest iconfacebook facebook iconprint print iconsquares squares iconheart heart iconheart solid heart solid icon
A complete Creole meatloaf dinner with mashed potatoes and greens

The Best Creole Meatloaf Recipe – 5 Easy Steps to Perfection


  • Author: Emily
  • Total Time: 1 hour 5 minutes
  • Yield: 6 servings 1x

Description

This meatloaf recipe Creole is a rich and flavorful twist on the classic comfort dish. Infused with Creole seasoning, the Holy Trinity of vegetables (onion, bell pepper, celery), and a tangy tomato-based glaze, this meatloaf is juicy, tender, and packed with bold Southern flavors. Perfect for a weeknight dinner or a special gathering, this dish pairs beautifully with mashed potatoes, Cajun rice, or cornbread.


Ingredients

Scale

Meatloaf Base:

  • 1 lb ground beef (80/20 for best texture)
  • ½ lb ground pork (for extra juiciness)
  • ½ cup breadcrumbs (or crushed saltine crackers)
  • ½ cup whole milk (for moisture)
  • 2 large eggs (lightly beaten)
  • 1 small onion, finely diced
  • ½ green bell pepper, finely diced
  • ½ red bell pepper, finely diced
  • 1 stalk celery, finely diced
  • 2 cloves garlic, minced
  • 2 tbsp Creole seasoning (store-bought or homemade)
  • 1 tbsp Worcestershire sauce
  • 1 tsp smoked paprika
  • ½ tsp cayenne pepper (adjust for heat preference)
  • 1 tbsp parsley, chopped (optional)
  • ½ tsp salt (adjust to taste)
  • ½ tsp black pepper

Creole Glaze:

  • ½ cup ketchup
  • 2 tbsp brown sugar
  • 1 tsp Worcestershire sauce
  • 1 tsp Creole mustard (or Dijon mustard)
  • 1 tsp hot sauce (optional for extra heat)
  • ½ tsp Creole seasoning

Instructions

Step 1: Prepare the Ingredients

  1. Preheat your oven to 375°F (190°C) and line a baking sheet with parchment paper or lightly grease a loaf pan.
  2. In a small bowl, combine breadcrumbs and milk, letting them soak for 5 minutes to add moisture to the meatloaf.

Step 2: Mix the Meatloaf Base

  1. In a large mixing bowl, combine ground beef, ground pork, soaked breadcrumbs, eggs, Worcestershire sauce, and all seasonings.
  2. Add in the diced onion, bell peppers, celery, and minced garlic.
  3. Using clean hands or a wooden spoon, gently mix the ingredients until just combined. Do not overmix, or the meatloaf will become dense.

Step 3: Shape & Bake

  1. Shape the mixture into a loaf shape and place it on the prepared baking sheet. Alternatively, press it into a greased loaf pan.
  2. Bake for 30 minutes, uncovered.

Step 4: Make the Creole Glaze

  1. While the meatloaf bakes, mix ketchup, brown sugar, Worcestershire sauce, mustard, hot sauce, and Creole seasoning in a bowl.

Step 5: Glaze & Finish Baking

  1. After 30 minutes of baking, remove the meatloaf from the oven and brush half of the glaze over the top.
  2. Return it to the oven and bake for another 15–20 minutes until the glaze caramelizes and the internal temperature reaches 160°F (71°C).
  3. In the last 5 minutes of baking, add the remaining glaze for a richer flavor.

Step 6: Rest & Serve

  1. Remove the meatloaf from the oven and let it rest for 10 minutes before slicing. This helps retain moisture.
  2. Slice and serve with your favorite Southern sides like Cajun rice, mashed potatoes, or cornbread.

Notes

  • For a spicier version: Increase cayenne pepper or add diced jalapeños to the mix.
  • For a leaner option: Swap ground pork for ground turkey and use low-fat milk.
  • For a keto-friendly version: Replace breadcrumbs with almond flour.
  • Storage: Store leftovers in an airtight container in the fridge for up to 4 days. Reheat in the oven at 300°F (150°C) for best results.
  • Freezing: Wrap slices in plastic wrap and foil before freezing for up to 3 months.


Easy Mexican Ground Chicken & Corn Recipe in 30 Min

Look, I’m not here to sell you a ~culinary journey~. This ground chicken Mexican corn recipe is for hungry humans who want bold flavor without babysitting a stove. Crispy-edged chicken? Check. Sweet-and-smoky corn? Double-check. A one-pan cleanup? Mic drop. Pro tip: Wear stretchy pants. Things might get greedy.

Why You’ll Love This Recipe

Craving a meal that’s quick, tasty, and doesn’t dirty every dish in your kitchen? This ground chicken Mexican corn recipe checks all the boxes and then some. Let’s break down why it’ll become your new weeknight obsession.

Perfect for Busy Weeknights

Let’s face it: nobody wants to babysit a stove after a long day. Good news this 30-minute meal cooks in one pan, which means less time scrubbing and more time relaxing. For example, while the ground chicken browns, you can prep toppings like creamy avocado or crisp lettuce. Plus, leftovers reheat like a dream (more on that later). In short, it’s the ultimate ”I’m tired, but I still want flavor” solution.

Balanced Flavor & Nutritio

Unlike greasy takeout, this dish packs lean protein from ground chicken and fiber from sweet corn. Think smoky paprika, earthy cumin, and a squeeze of lime to brighten things up. Want a pro tip? Toss in a handful of black beans for an extra fiber boost. Best part? It’s hearty without weighing you down perfect for post-dinner energy.

Customizable for Dietary Needs

Whether you’re gluten-free, dairy-free, or just picky, this recipe bends to your needs. For instance:

  • Swap regular tortillas for corn tortillas (gluten-free!).
  • Skip the cheese and add smashed avocado for creaminess.
  • Prefer heat? Throw in diced jalapeños or a dash of hot sauce.
    Bottom line: Your kitchen, your rules.

Budget-Friendly & Meal-Prep Ready

Ground chicken and frozen corn are wallet-friendly staples, making this dish kind to your grocery budgetEven better, it’s a meal-prep superstar. Here’s how: Double the batch, portion into containers, and freeze. When cravings strike, reheat it for tacos, salads, or even stuffed peppers. Pro tip: Add a splash of broth while reheating to keep the chicken juicy.

Ingredients & Substitutions

Let’s break down what you’ll need (and how to tweak it) for this ground chicken Mexican corn recipeWhether you’re raiding your pantry or adapting for dietary needs, we’ve got you covered.

Ingredients for Mexican ground chicken corn recipe
Simple pantry staples like chili powder, cumin, and lime create bold flavor.

Essential Ingredients for Authentic Flavor

First things first: The soul of this dish lies in three key players. Ground chicken (thighs for richness or breast for leaner bites) brings protein, while fresh or frozen corn adds sweetness. Don’t skip the spicessmoked paprikacumin, and chili powder create that smoky, earthy backbone. For brightness, a squeeze of lime juice and handful of cilantro are non-negotiable.

Optional Add-Ins for Extra Zing

Want to level up? Toss in pantry staples or leftovers for flair. For example:

  • Black beans (drained and rinsed) for fiber and texture.
  • Diced bell peppers or onions sautéed with the chicken.
  • Cotija cheese crumbles or crema for creamy richness.
    Feeling adventurous? Stir in a spoonful of chipotle in adobo—just a dab adds smoky heat.

Ingredient Swaps for Allergies/Diets

No stress if you’re missing something. This ground chicken Mexican corn recipe is a chameleon:

  • Dairy-free? Skip the cheese and use avocado or cashew cream.
  • Low-carb? Swap corn for zucchini or cauliflower rice.
  • Ground turkey or beef work if chicken’s not your vibe (just adjust cooking time).
    Craving crunch? Serve in lettuce wraps instead of tortillas.

Tools You’ll Need

You don’t need fancy gear, but these tools make life easier:

  • large skillet (cast-iron for better browning).
  • Wooden spoon to break up the chicken without scratching pans.
  • Citrus juicer (because hand-squeezing limes is messy).

Step-by-Step Cooking Guide

Ready to transform simple ingredients into a showstopping ground chicken Mexican corn recipeFollow these foolproof steps—no chef skills required.

Prep Your Ingredients (5 Minutes)

First, dice 1 small onion and mince 2 garlic clovesMeanwhile, if using frozen corn, thaw 1.5 cups in a colander under cold water. Pro tip: Pat the corn dry with a paper towel to avoid a soggy skillet. Got fresh corn? Char it briefly in a dry pan for smoky depth.

Cook the Ground Chicken (10 Minutes)

 Cooking ground chicken and spices in skillet
auté onions and spices to build the recipe’s smoky-sweet base.

Heat 1 tbsp oil in a large skillet over medium-high. Add 1 lb ground chicken, breaking it into crumbles with a wooden spoon. Cook until no pink remains (5-7 minutes). Drain excess fat, but leave a bit for flavor. Season lightly with salt here—trust me, the spices come next!

Build the Flavor Base (8 Minutes)

Toss in the onions and garlic, sautéing until golden (2-3 minutes). Sprinkle 1 tsp chili powder1 tsp cumin, and ½ tsp smoked paprika over the mix. Stir to coat everything in those earthy, smoky spices. Then, add the corn and 2 tbsp lime juice, cooking until the kernels soften (3-4 minutes). Want more heat? Now’s the time to add diced jalapeños!

Finish & Serve (7 Minutes)

Remove the skillet from heat. Fold in ¼ cup chopped cilantro and ½ cup crumbled cotija cheese (optional). Serve immediately with warm tortillas, lime wedges, and avocado slices. Leftovers? Store in an airtight container for up to 3 days.

Serving Ideas & Pro Tips

Your ground chicken Mexican corn recipe is ready now let’s make it shine! From creative twists to foolproof storage hacks, here’s how to maximize flavor and minimize fuss.

Ground chicken corn tacos with avocado and lime
Stuff tacos, salads, or nachos with this versatile skillet mix.

Creative Ways to Serve

Don’t just stop at tacos! This dish is a meal-prep superstar that morphs into new meals effortlessly. For example:

  • Stuff bell peppers with the mix, top with cheese, and bake at 375°F for 15 minutes.
  • Toss it into lettuce wraps with a drizzle of crema for a low-carb lunch.
  • Layer it over tortilla chips with melted cheese for 10-minute nachosCraving something fresh? Mix leftovers into a salad with crunchy romaine and zesty lime dressing.

Meal Prep & Storage Hacks

Want to save time? Cook a double batch and freeze portions for lazy days. Here’s how:

  1. Let the mixture cool completely.
  2. Divide into airtight containers or freezer bags (squeeze out excess air).
  3. Label with the date it keeps for 3 months.
    When reheating, add a splash of broth or water to revive moisture. Pro tip: Freeze individual servings for solo meals!

Spice Level Adjustments

Not everyone loves fiery heat—and that’s okay! Tailor the spice level to your crowd:

  • Mild: Skip chili powder and use smoked paprika for depth without burn.
  • Medium: Add 1 diced jalapeño (seeds removed) to the skillet.
  • Extra hot: Stir in 1 tsp chipotle powder or a dash of hot sauce.
    Test as you go you can always add heat, but you can’t take it away!

Pairing with Sides & Drinks

Round out your meal with sides that complement the smoky-sweet flavors:

  • Cilantro-lime rice: Our 5-minute version balances richness.
  • Grilled zucchini: Toss slices with olive oil and chili powder.
  • Classic margarita: A tart cocktail cuts through the spices.

FAQs

Can I use ground turkey instead of ground chicken in this recipe?

Absolutely! Ground turkey works perfectly—just add 1 tbsp olive oil while cooking to keep it moist. The smoky spices and sweet corn pair beautifully with turkey, making it a leaner (but just as tasty) twist on this ground chicken Mexican corn recipe.

How do I make this dish spicier?

Want more heat? Toss in diced jalapeños while sautéing the onions, or stir in ½ tsp cayenne pepper with the spices. For a finishing kick, drizzle with hot sauce or sprinkle crushed red pepper flakes before serving.

Can I use fresh corn instead of frozen?

Yes! Fresh corn adds a sweet, summery crunch. Cut kernels off 2 ears of corn and char them in the skillet for 2-3 minutes before adding the chicken. Pro tip: Save the cobs for making homemade corn broth (a zero-waste win!).

How long does this recipe last in the fridge?

Store leftovers in an airtight container for up to 3 daysTo reheat, warm it in a skillet with a splash of broth or water to keep the ground chicken juicy. Avoid microwaving—it can dry out the spices.

Conclusion

In short, this ground chicken Mexican corn recipe is your ticket to a 30-minute dinner that’s bold, flexible, and anything but boring. Whether you’re craving tacos, salads, or nachos, the smoky-sweet combo of ground chicken, charred corn, and zesty lime will keep your taste buds dancing. Don’t forget: Double the batch for effortless meal prep, tweak the spice level to your mood, and pair it with sides like cilantro-lime rice for a full fiesta. Ready to cook? Grab that skillet, and let’s get sizzling!

Print
clock clock iconcutlery cutlery iconflag flag iconfolder folder iconinstagram instagram iconpinterest pinterest iconfacebook facebook iconprint print iconsquares squares iconheart heart iconheart solid heart solid icon
Easy ground chicken Mexican corn recipe in skillet with lime and cotija cheese

Easy Ground Chicken Mexican Corn Recipe (30-Minute One-Pan Dinner!)


  • Author: Emily
  • Total Time: 30 minutes
  • Yield: 4 servings

Description

Whip up this smoky, zesty ground chicken Mexican corn recipe in one pan! Perfectly balanced with sweet corn, bold spices, and fresh lime, it’s ideal for tacos, salads, or a standalone skillet meal.


Ingredients

  • 1 lb ground chicken (thigh or breast)

  • 1.5 cups corn kernels (fresh, frozen, or canned)

  • 1 small onion, diced

  • 2 garlic cloves, minced

  • 1 tbsp olive oil

  • 1 tsp chili powder

  • 1 tsp ground cumin

  • ½ tsp smoked paprika

  • Juice of 1 lime (about 2 tbsp)

  • ¼ cup fresh cilantro, chopped

  • Salt and pepper to taste

  • Optional: ½ cup black beans (drained), ¼ cup cotija cheese, avocado slices, jalapeños

Instructions

  • Prep Ingredients: Dice the onion, mince the garlic, and thaw frozen corn (if using).
  • Cook Chicken: Heat olive oil in a large skillet over medium-high. Add ground chicken, breaking it into crumbles. Cook until no pink remains (5-7 minutes). Drain excess fat.
  • Sauté Aromatics: Add onion and garlic to the skillet. Sauté until softened (2-3 minutes).
  • Add Spices: Stir in chili powder, cumin, smoked paprika, and a pinch of salt. Toast for 1 minute until fragrant.
  • Mix in Corn: Add corn (and black beans, if using). Cook for 3-4 minutes until corn is tender.
  • Finish with Lime & Herbs: Remove from heat. Stir in lime juice and cilantro. Taste and adjust seasoning.
  • Serve: Top with cotija cheese, avocado, or jalapeños. Serve with tortillas, rice, or over greens.

Pellet Grill Mastery: 4 Recipes for Perfect BBQ (2025 Guide)

Let’s cut to the chase: pellet grills recipes are the Swiss Army knives of BBQ. Why? They smoke, grill, bake, and roast all while you sip a cold drink. Forget dry burgers or uneven heat; these recipes deliver restaurant-quality results in your backyard. From peppery beef ribs to herb-crusted salmon, we’re sharing secrets to elevate your grill game. Ready to ditch the guesswork and embrace pellet grill mastery? Let’s get smokin’!

Why Pellet grill recipes Are a Game-Changer for BBQ

If you’ve ever struggled with erratic temperatures or babysitting a smoky fire, pellet grill recipes might just become your new best friend. These versatile cookers blend the rich flavors of traditional smoking with the convenience of modern tech. Let’s dive into why they’re revolutionizing backyard BBQs and how you can harness their power.

How Pellet grill recipes Work: Smoke, Sear, and Simplicity

Think of a Pellet grill recipes as your BBQ sous chef. Instead of charcoal, it burns wood pellets compressed sawdust infused with flavors like hickory or cherry. An electric auger feeds pellets into a firepot, while a digital controller keeps temperatures steady. Translation? Set it, forget it, and let low-and-slow BBQ magic happen. Whether you’re smoking brisket overnight or searing steaks at 500°F, this gadget adapts.

Flavor Boost: Choosing the Right Wood Pellets

Here’s the secret: pellet grill recipes live or die by your wood choice. Hickory adds bold, bacon-like depth to beef, while applewood gives poultry a sweet, mellow kiss. For pork ribs, try pecan its nutty notes balance spicy rubs perfectly. But wait don’t mix too many flavors! Stick to one or two woods per cook to avoid muddying the taste.

Pellet grill recipes vs. Traditional Smokers: Key Differences

Sure, charcoal purists swear by their offset smokers, but let’s face it: pellet grills are the lazy genius of BBQ. Unlike traditional setups, they automate temperature control, so you won’t sweat over fluctuating heat. On the other hand, charcoal smokers deliver heavier smoke flavor ideal for competition-style ribs. But for weeknight dinners? Pellet grills save time without skimping on taste. Bottom line: If you crave set-and-forget convenience with solid smoke infusion, pellets win.

Pro Tips for Your First Pellet Grill Cook

Ready to dive into pellet grill recipes? Start simple: beer-can chicken or smoked sausages. Preheat your grill for 15 minutes to avoid temperature swings, and always use a meat probe. Wait don’t peek! Every lid lift adds 10 minutes to your cook time. For crispy skin on poultry, crank the heat to 375°F for the last 20 minutes. Remember: Even if you’re new, these grills forgive mistakes. Just keep pellets dry, and you’ll nail that smoky flavor every time.

4 Must-Try Recipes for Your Pellet Grill

Ready to turn your Pellet grill recipes into a flavor factory? From smoky classics to surprises like wood-fired desserts, these pellet grill recipes are guaranteed to wow. Whether you’re feeding a crowd or just craving BBQ therapy, let’s fire up 4 dishes that’ll make your taste buds sing.

Smoked Brisket: The Ultimate Crowd-Pleaser

Nothing says low-and-slow mastery like a melt-in-your-mouth brisket. Start with a 12-pound cut, slather it with mustard, and coat it in a bold coffee-chili rub. Smoke at 225°F for 14 hours using hickory pellets, spritzing with apple juice every hour.

Seasoning beef brisket with coffee rub for pellet grilling.
Pro tip: Use hickory pellets for bold brisket flavor.

Juicy Pulled Pork with Carolina-Inspired Slaw

Pork shoulder is the MVP of pellet grill recipes forgiving, affordable, and oh-so-tender. Rub it with paprika and brown sugar, then smoke at 250°F with applewood pellets for 10 hours. Shred it, then pile it on buns with a vinegar-based slaw.

Crispy Beer-Can Chicken in 90 Minutes

Who says pellet grills can’t handle weeknights? Season a whole chicken with garlic powder and thyme, then balance it on a half-full beer can. Smoke at 325°F with cherry pellets for 1.5 hours. Result: Crispy skin, juicy meat, and zero fuss. Serve with grilled corn or our Ensalada De Pollo for a full feast.

Vegetarian Delights: Smoked Portobello Burgers

Pellet grill recipes aren’t just for meat lovers. Marinate portobello caps in balsamic, olive oil, and rosemary, then smoke at 180°F for 45 minutes. Pile them on ciabatta with goat cheese and arugula. Craving more veggies? Try smoking cauliflower steaks or halloumi perfect for Meatless Mondays!

Mastering Techniques for Flawless Results

Think you’ve nailed pellet grill recipes? Wait until you unlock these pro tricks. Whether you’re chasing bark-covered brisket or crispy-skinned chicken, mastering a few techniques can turn “good enough” into “restaurant-quality BBQ.” Let’s break down the secrets to smoke, sizzle, and success.

Low-and-Slow vs. High Heat: When to Use Each

Pellet grills shine because they handle both patience and speed. Low-and-slow (225–250°F) is perfect for tough cuts like pork shoulder or ribs—think 8+ hours of smoky tenderness. On the flip side, crank it to 450°F for searing steaks or grilling veggies in minutes. Pro move: Use reverse searing for thick cuts. Smoke first, then blast with high heat to finish.

Avoiding Common Mistakes: Pellet Grill Pitfalls

Even the best pellet grill recipes can flop if you skip these fixes. First, never let pellets sit in a damp hopper they’ll clump and jam the auger. Second, resist peeking! Every lid lift drops the temp, adding 10+ minutes to your cook. Lastly, don’t drown meat in sauce too early. Brush it on during the last 30 minutes to prevent burning. Remember: A meat thermometer is your best friend.

Pro Tips for Intense Smoke Flavor

Want that deep, campfire-like smoke? Start with dry pellets (store them in airtight containers). Next, try a smoke tube for extra flavor during shorter cooks perfect for cheeses or nuts. Finally, brine poultry overnight. A simple mix of salt, sugar, and herbs keeps chicken juicy and helps smoke penetrate. Bonus: Cold-smoke cream cheese for a killer appetizer.

Maintenance Tips for Long-Lasting Performance

Treat your grill right, and it’ll return the favor. After each cook, vacuum ash from the firepot to prevent flare-ups. Every 20 hours, clean grease from the drip tray (trust us, future-you will thank present-you). Seasonally, inspect seals and lubricate hinges.

Beyond Meat: Unexpected Pellet Grill Creations

Who says pellet grill recipes are just for ribs and brisket? Think outside the smoker! From sweet treats to global feasts, your grill can handle it all. Let’s explore four creative ways to surprise your guests and maybe even yourself.

Smoked Desserts: Bourbon-Pecan Peach Cobbler

Smoked peach cobbler in cast iron skillet on pellet grill.
Yes, you can smoke dessert on a pellet grill!

Yes, you read that right dessert on a pellet grill! Toss peaches, brown sugar, and a splash of bourbon in a cast-iron skillet. Top with pecan streusel, then smoke at 275°F for 45 minutes using applewood pellets. Result? A caramelized, smoky-sweet masterpiece. Serve with vanilla ice cream, and thank me later.

Breakfast on the Grill: Smoked Bacon & Eggs

Why let the oven have all the fun? Lay bacon strips on a grill mat, cold-smoke at 180°F for 30 minutes, then crank the heat to 350°F to crisp them up. Crack eggs into a cast-iron pan and let the grill work its magic. Pro tip: Add smoked paprika to your scrambled eggs for extra flair.

Global Flavors: Korean BBQ Short Ribs (Galbi)

Wood pellet flavor guide for pellet grill recipes.
Pair hickory, apple, or pecan with your proteins.

Take your pellet grill recipes on a world tour with Korean galbi. Marinate beef short ribs in soy sauce, pear puree, and gochujang (Korean chili paste) overnight. Smoke with oak pellets at 225°F for 3 hours, then glaze with honey. Serve with kimchi and steamed rice for a fusion feast.

Smoked Appetizers: Goat Cheese-Stuffed Peppers

Impress your crowd with smoky starters. Halve mini sweet peppers, stuff them with herbed goat cheese, and smoke at 200°F for 1 hour. The low heat lets the cheese soften without melting, while cherry pellets add a fruity whisper. Pair with a drizzle of balsamic reduction easy, elegant, and utterly addictive.

FAQs About Pellet Grill Recipes

What’s good to cook on a pellet grill?

Pellet grills excel at low-and-slow BBQ classics like brisket, ribs, and pulled pork, but they’re also fantastic for crispy chicken, smoked salmon, and even desserts like cobblers. For veggies, try smoked portobello mushrooms or grilled corn. Essentially, if it can be smoked, baked, or grilled, your pellet grill can handle it!

What are the downsides of a pellet grill?

While pellet grill recipes are wildly convenient, these cookers require electricity, so they’re not ideal for off-grid adventures. Pellets can also cost more than charcoal over time, and some purists argue traditional smokers deliver a heavier smoke flavor. However, the set-and-forget ease often outweighs these trade-offs for most home cooks.

What should I make first on my pellet grill?

Start with beer-can chicken or smoked sausages—they’re forgiving and quick. These recipes let you practice temperature control without risking a pricey cut of meat. Once you nail the basics, graduate to low-and-slow staples like pork shoulder or baby back ribs.

What is the easiest thing to smoke on a pellet grill?

Pork shoulder (for pulled pork) is the ultimate beginner-friendly smoke. Rub it with salt and paprika, set your grill to 225°F, and let it cook undisturbed for 8–10 hours. No wrapping, no spritzing just juicy, smoky meat ready for sandwiches or tacos.

Conclusion: Elevate Your BBQ Game with Confidence

By now, you’ve seen how pellet grill recipes can transform your backyard cooking from smoky brisket to unexpected hits like bourbon-peach cobbler. Whether you’re a weekend warrior or a seasoned grill master, these versatile cookers offer precision, flavor, and endless creativity. Remember: Start simple, experiment boldly, and let the grill do the heavy lifting. Ready to fire it up? Your next BBQ masterpiece is just a pellet hopper away.

Print
clock clock iconcutlery cutlery iconflag flag iconfolder folder iconinstagram instagram iconpinterest pinterest iconfacebook facebook iconprint print iconsquares squares iconheart heart iconheart solid heart solid icon
Seasoning beef brisket with coffee rub for pellet grilling.

Pellet Grill Mastery: 4 Recipes for Perfect BBQ (2025 Guide)


  • Author: Emily
  • Yield: Serves 1215 1x

Description

Master the art of low-and-slow BBQ with this melt-in-your-mouth smoked brisket. Infused with a bold coffee-chili rub and hickory smoke, this recipe delivers a tender, juicy center and a caramelized bark that’ll make you the hero of any cookout.


Ingredients

Scale
  • 1 whole beef brisket (1214 lbs, untrimmed)
  • ¼ cup yellow mustard (binder)
  • ½ cup coarse kosher salt
  • ½ cup freshly ground black pepper
  • ¼ cup chili powder
  • ¼ cup dark brown sugar
  • 2 tbsp finely ground coffee
  • 1 tbsp garlic powder
  • 1 tbsp onion powder
  • 1 tsp cayenne pepper (optional, for heat)
  • 2 cups apple juice (for spritzing)

Instructions

  • Trim the brisket: Remove excess fat, leaving a ¼-inch layer on the fat cap.
  • Apply binder: Coat all sides of the brisket with yellow mustard.
  • Make the rub: Mix salt, pepper, chili powder, brown sugar, coffee, garlic powder, onion powder, and cayenne.
  • Season generously: Sprinkle the rub evenly over the brisket, pressing it into the meat.
  • Preheat pellet grill: Set to 225°F using hickory pellets. Add a water pan to the grill for moisture.
  • Smoke the brisket: Place brisket fat-side up on the grill. Insert a meat probe into the thickest part.
  • Spritz hourly: After 3 hours, spritz with apple juice every 60 minutes to keep the surface moist.
  • Wrap at 165°F: Once the internal temp hits 165°F, wrap the brisket tightly in butcher paper.
  • Finish cooking: Return to the grill until the internal temp reaches 203°F (about 12–14 hours total).
  • Rest and slice: Let rest in a cooler for 2 hours, then slice against the grain.

Notes

  1. Bark tip: Avoid wrapping too early—wait until the bark is deep mahogany.
  2. Pellet choice: Hickory adds boldness, but oak works for a milder flavor