Imagine a chilly evening that calls for something warm and cozy. You enter the kitchen, and the smell of simmering broth greets you. It reminds you of family gatherings filled with laughter and delicious meals.
It’s the perfect moment for a tasty tortellini soup with meat. This soup is more than a meal; it’s a warm hug that brings back happy memories. With tender tortellini, savory meat, and fresh veggies, it makes your home feel welcoming and your heart full.
Table of Contents
Introduction to Tortellini Soup
Tortellini soup is a delightful dish that combines rich flavors and comforting textures. It comes from Italy and features small, ring-shaped pasta filled with meat or cheese. The pasta swims in a savory broth, making each spoonful warm and inviting.
This soup is a favorite for meals with family and friends. It wraps you in warmth, making it a cozy choice for any time.
What is Tortellini Soup?
This dish is made with tortellini, tiny pasta pockets filled with ingredients like ground meat or cheese. The filling adds a depth of flavor. When simmered in a flavorful broth, it becomes a hearty and rich meal.
This combination of pasta and broth makes it a great meal option all year round.
Why Choose Tortellini Soup?
Homemade tortellini soup is a great meal choice for many reasons. You can customize it with your favorite ingredients. Adding fresh vegetables, spices, and herbs can enhance the taste.
It’s perfect for cold evenings or when you need a nourishing meal. Using fresh ingredients makes it healthy and delicious.

Ingredients for the Best Tortellini Soup with Meat
Making the perfect meaty tortellini soup means picking the right ingredients. It’s all about rich flavors and satisfying tastes. You’ll need some key items and a few extra add-ins to make it even better.
Essential Ingredients
- Tortellini: Pick meat-filled or cheese tortellini for extra taste. Traditional ones make your soup more authentic.
- Broth: Use chicken or vegetable broth as the base. It adds richness and depth to your soup.
- Vegetables: Add diced carrots, celery, and onions. They bring nutrients and a great flavor.
- Spices: Spice up your soup with garlic, bay leaves, salt, and pepper. These spices make it deeply flavorful.
Optional Add-Ins for Extra Flavor
- Fresh herbs: Basil, thyme, or parsley add a bright touch to your soup.
- Garlic: Minced garlic boosts the flavor and aroma of your soup.
- Spinach: Adding fresh or frozen spinach brings color and extra nutrients.
- Diced tomatoes: Diced tomatoes add a sweet touch and balance the broth’s richness.

Step-by-Step Guide to Homemade Tortellini Soup
Making homemade tortellini soup is fun and easy. This guide will help you make a delicious soup. Start by preparing the meat, then cook the vegetables. Blend everything for a comforting bowl of soup.
Preparing the Meat
Choose your favorite meat ground beef, sausage, or chicken. Cook it in a large pot over medium heat until it’s brown. Season with salt, pepper, and spices to add flavor.
Make sure the meat is well-cooked and crumbled. This helps the flavor spread evenly in your soup.
Cooking the Vegetables
After cooking the meat, sauté the vegetables. Use onions, garlic, carrots, and celery. Heat olive oil in the pot and add the onions and garlic first.
Sauté until they’re soft and smell good. Then, add the carrots and celery. Let them cook until they start to soften. This step boosts the flavor of your soup.
Bringing it All Together
Combine the cooked meat and vegetables. Add your broth—chicken or vegetable broth works great. Then, add the tortellini.
Let it simmer for 5 to 7 minutes until the tortellini is tender. Finish with fresh herbs for extra flavor. Your homemade tortellini soup is now ready to warm your heart and home.
for more inspiration Spice Up Your Dinner with This Easy Dish: Salsa Chicken Tacos

Tips for Making Hearty Tortellini Soup
Making a comforting tortellini soup is more than just a recipe. It’s about adjusting the soup’s thickness and storing it right. These tips will help your tortellini soup with meat turn out great every time.
Adjusting the Thickness
Do you like your soup brothier or thicker? If it’s too thick, add more broth or water. For a thicker soup, let it simmer uncovered to reduce liquid. The right texture makes your soup even better.
Storing and Reheating Your Soup
Storing your tortellini soup is easy. Cool it down first, then put it in an airtight container. This keeps it fresh for days. When reheating, use low heat to avoid mushy pasta. These steps will make your soup just as good the next time.
Conclusion
Now that you’ve explored the delightful world of tortellini soup with meat, it’s time to embrace its simplicity and heartiness. This easy tortellini soup with meat offers not just a satisfying meal but also an inviting experience perfect for sharing with loved ones. Whether you stick to the basics or venture into creative variations, this dish is customizable to suit your preferences.
Feel free to substitute ingredients or experiment with new flavors. Adding your favorite vegetables or spices can elevate your tortellini soup with meat into a unique creation each time you prepare it. The warm, comforting bowl of soup you serve can foster togetherness among family and friends, making every meal a little more special.
So gather your ingredients, and get cooking. Your journey into the world of tortellini soup with meat awaits, promising delightful aromas and delicious tastes that will leave everyone wanting more.
FAQ
What makes tortellini soup with meat so special?
Tortellini soup with meat is a cozy dish. It has tender pasta filled with meat in a tasty broth. It’s a warm meal perfect for cold days. The mix of flavors and textures makes it a favorite among families.
Can I use store-bought tortellini for my homemade soup?
Yes, you can! Using store-bought tortellini saves time. It still makes your tortellini soup delicious and hearty.
How can I customize my tortellini soup recipe?
You can make your tortellini soup your own. Add veggies like spinach, kale, or diced tomatoes. Try different spices and herbs. You can also change the meat type to make it your own.
What type of broth should I use for the best tortellini soup with meat?
Choose chicken or vegetable broth for flavor. Homemade broth is best, but store-bought works well too. It makes your soup easy to make.
How do I store leftover tortellini soup?
Keep leftover soup in an airtight container in the fridge for 3-4 days. If it gets too thick, add a bit of broth or water to thin it out.
Can I freeze tortellini soup for later use?
Yes, you can freeze it! But freeze it without the tortellini. After thawing, add fresh tortellini for a tasty soup.
Is tortellini soup a healthy meal option?
Yes, it can be! Use lots of veggies and lean meat. Homemade broth and fresh ingredients make it nutritious and comforting.
Print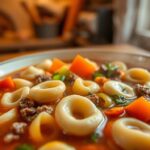
Perfect Tortellini Soup with Meat
- Total Time: 35 minutes
- Yield: 4–6 servings 1x
Description
This hearty and flavorful tortellini soup with meat is the ultimate comfort food. With tender meat-filled tortellini, a rich broth, and a medley of vegetables, it’s perfect for warming up on a chilly evening. Easy to prepare and bursting with flavor, this soup is a family favorite!
Ingredients
- 1 lb ground beef, Italian sausage, or shredded chicken
- 1 tablespoon olive oil
- 1 small onion, diced
- 2 cloves garlic, minced
- 2 carrots, diced
- 2 celery stalks, diced
- 6 cups chicken or vegetable broth
- 1 (14.5 oz) can diced tomatoes (optional)
- 1 teaspoon salt
- ½ teaspoon black pepper
- 1 teaspoon Italian seasoning (or a mix of basil, thyme, and oregano)
- 1 bay leaf
- 1 package (9 oz) refrigerated or frozen meat or cheese tortellini
- 2 cups fresh spinach (optional)
- ¼ cup fresh parsley or basil, chopped (for garnish)
- Grated Parmesan cheese (for serving)
Instructions
- Cook the Meat: In a large pot, heat olive oil over medium heat. Add the ground beef, sausage, or shredded chicken. Cook until browned, breaking it up with a spoon. Drain excess fat if needed.
- Sauté the Vegetables: Add diced onion and minced garlic to the pot. Sauté for 2-3 minutes until fragrant. Stir in carrots and celery, cooking for another 3-4 minutes until they start to soften.
- Add Broth and Seasonings: Pour in the broth and diced tomatoes (if using). Stir in salt, pepper, Italian seasoning, and the bay leaf. Bring to a gentle simmer.
- Simmer the Soup: Let the soup simmer for 10-15 minutes, allowing the flavors to develop and the vegetables to become tender.
- Cook the Tortellini: Add the tortellini to the pot and cook according to package instructions (usually 5-7 minutes) until they are tender.
- Add Greens (Optional): Stir in fresh spinach and let it wilt for about 1-2 minutes.
- Finish and Serve: Remove the bay leaf. Taste and adjust seasoning if needed. Serve hot, garnished with fresh parsley or basil and a sprinkle of Parmesan cheese.