Secrets to the Best Braided Chocolate Chip Brioche Recipe

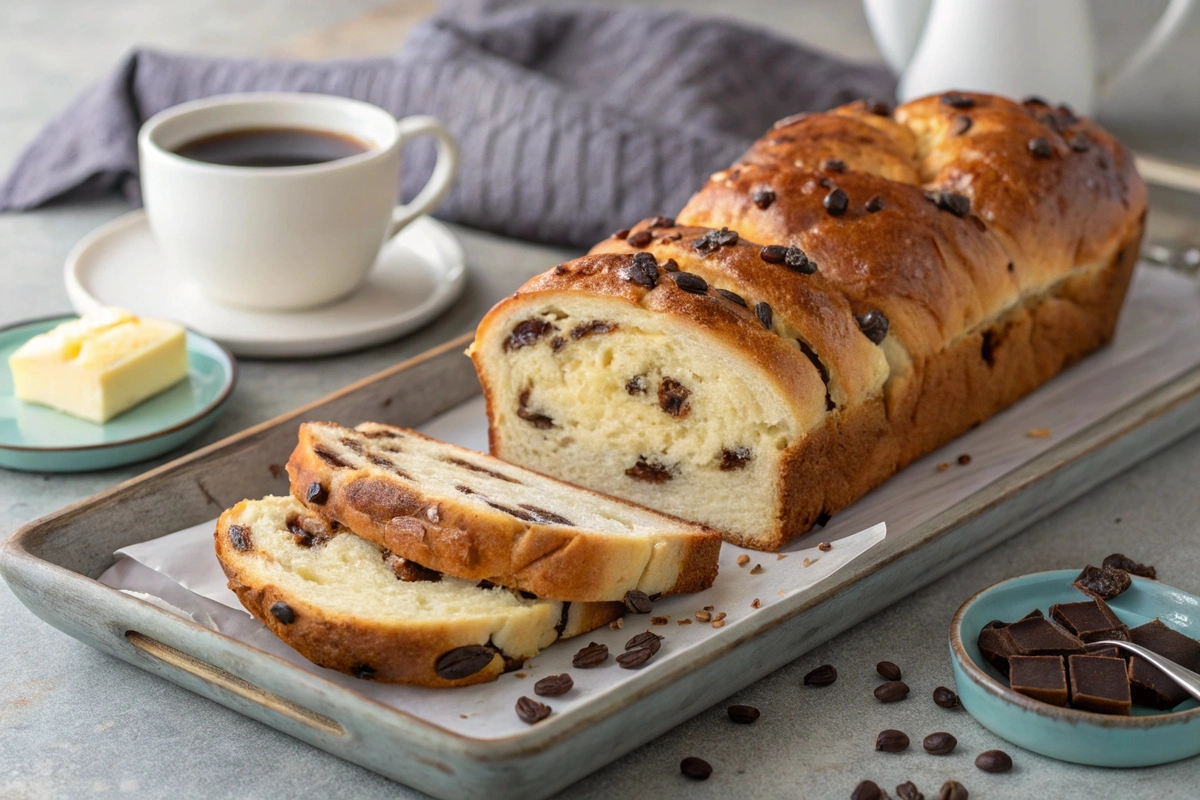
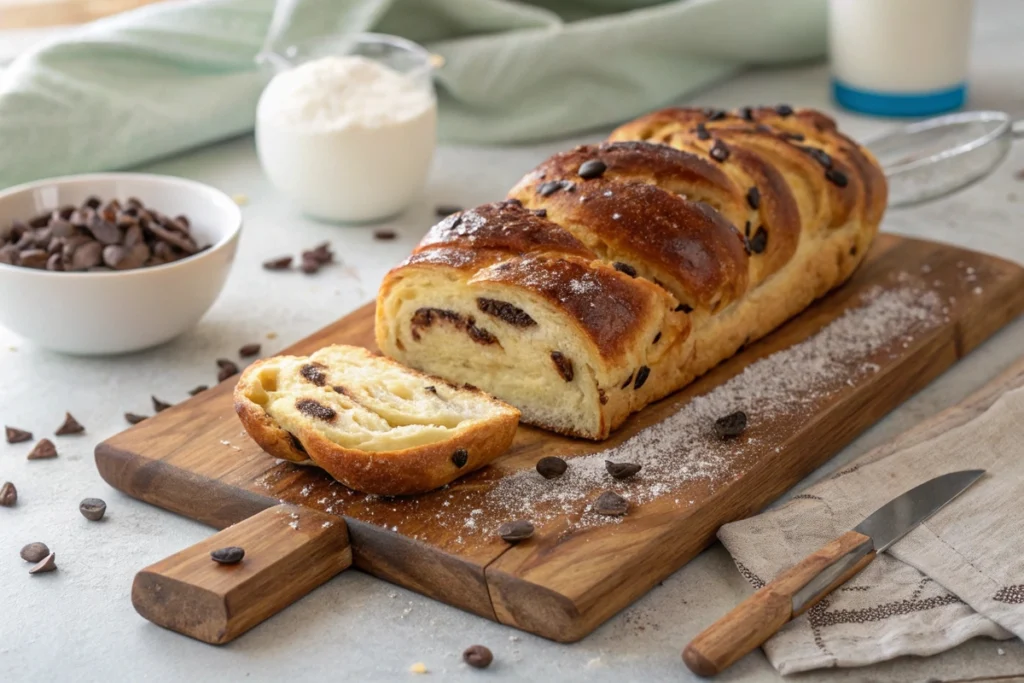
Looking for the perfect braided chocolate chip brioche recipe? You’ve come to the right place! This rich, buttery bread is swirled with gooey chocolate chips and braided for an elegant touch. Whether it’s for breakfast, dessert, or a special occasion, this recipe guarantees bakery-quality results right in your own kitchen.

Why You’ll Love This Braided Chocolate Chip Brioche Recipe

A Perfectly Fluffy Texture

The hallmark of a good braided chocolate chip brioche recipe is its soft, pillowy texture. Brioche dough is enriched with butter, eggs, and milk, giving it a rich, airy crumb that practically melts in your mouth. Unlike traditional bread, brioche feels almost like a cross between bread and cake, making it indulgent but not overly sweet.

The braiding technique also ensures that the bread bakes evenly, creating light and fluffy layers that pull apart beautifully. Whether you’re serving it as a breakfast treat or an afternoon snack, the texture alone will win you over.

Sweet Chocolate Chip Surprises in Every Bite

There’s nothing like biting into a warm slice of braided chocolate chip brioche and discovering sweet, melted chocolate chips scattered throughout. The recipe uses semi-sweet or dark chocolate chips to balance the richness of the bread, creating a flavor profile that’s both indulgent and satisfying.

For a unique twist, consider using mini chocolate chips for a more even distribution or white chocolate chips for a sweeter option.

Versatility for Any Occasion

This braided chocolate chip brioche recipe is as versatile as it is delicious. Serve it plain, toasted with a pat of butter, or even turned into French toast for a luxurious breakfast. It’s also perfect for special occasions like brunches, holiday gatherings, or even as a thoughtful homemade gift.

Want to take it up a notch? Pair it with coffee, tea, or a dollop of whipped cream for a dessert-like experience. No matter how you serve it, this brioche is sure to impress!

Beginner-Friendly Yet Impressive

While the intricate braiding might look intimidating, this braided chocolate chip brioche recipe is actually beginner-friendly. The step-by-step instructions break down the process, making it easy to follow even if you’ve never baked brioche before.

The dough is forgiving and easy to handle, and the braiding process is surprisingly straightforward. Plus, the finished loaf looks so stunning that no one will guess how simple it was to make. It’s the kind of recipe that boosts your confidence in the kitchen!

Ingredients for Braided Chocolate Chip Brioche

Essential Ingredients for the Perfect Brioche

The success of a braided chocolate chip brioche recipe lies in its high-quality, rich ingredients. Here’s what you’ll need:

Ingredients for braided chocolate chip brioche recipe including flour, eggs, chocolate chips, and yeast.
All the essential ingredients for making braided chocolate chip brioche, neatly arranged for preparation.
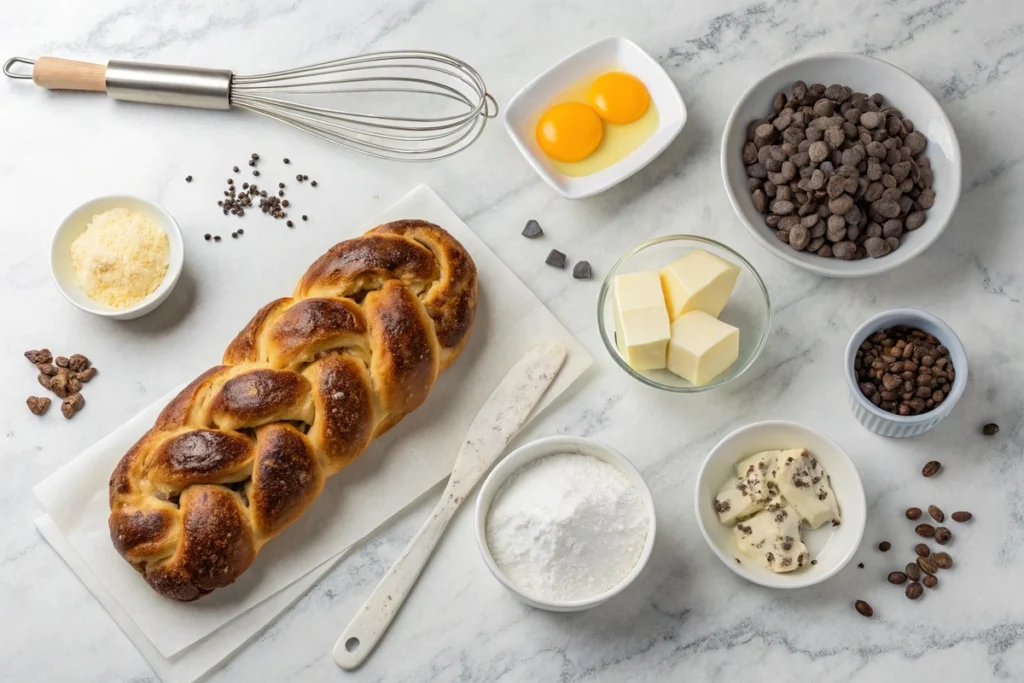
  • All-purpose flour or bread flour: Provides structure and elasticity to the dough.
  • Active dry yeast or instant yeast: Ensures the dough rises properly.
  • Sugar and salt: Balances sweetness and enhances the flavor.
  • Butter and eggs: Create the signature richness of brioche.
  • Chocolate chips: Add bursts of sweetness to every bite.

Opt for fresh, high-quality ingredients for the best results. Fresh yeast and premium chocolate chips make a noticeable difference!

Choosing the Right Chocolate Chips

For this braided chocolate chip brioche recipe, semi-sweet chocolate chips are ideal as they balance the bread’s richness. Dark chocolate chips work well for a more intense flavor, while milk chocolate adds extra sweetness.

Avoid overly large chunks of chocolate to prevent them from sinking to the bottom of the loaf.

Substitutions for Dietary Preferences

This recipe can be easily adapted for dietary needs:

  • Dairy-free: Replace butter with plant-based butter and use almond or oat milk instead of regular milk.
  • Gluten-free: Swap all-purpose flour with a gluten-free flour blend, ensuring it contains xanthan gum for elasticity.
  • Low sugar: Reduce the sugar content or substitute with a sugar alternative like erythritol.

Experiment with substitutions to make this brioche fit your lifestyle without compromising flavor!

The Role of Vanilla and Citrus Zest

Vanilla extract and citrus zest, such as orange or lemon, are optional but highly recommended for elevating the flavor. While not part of the traditional braided chocolate chip brioche recipe, they add a refreshing twist that complements the sweetness of the chocolate chips.

Simply mix a teaspoon of vanilla or a pinch of zest into the dough during the wet ingredient stage. These small additions make your brioche unforgettable!

Step-by-Step Guide to Prepare the Brioche Dough

Hands braiding three strands of brioche dough with chocolate chips.
Step-by-step braiding of chocolate chip brioche dough on a floured surface.

Mixing the Dough for Braided Chocolate Chip Brioche

The foundation of a perfect braided chocolate chip brioche recipe lies in mixing the dough just right. Start by combining the dry ingredients, including flour, sugar, salt, and yeast, in a large mixing bowl. Gradually add the wet ingredients—warm milk, eggs, and softened butter—while mixing continuously.

It’s essential to ensure the liquid ingredients are warm, not hot, to properly activate the yeast without killing it. Knead the dough for about 10 minutes until it’s smooth and slightly sticky. If you’re using a stand mixer, set it to medium speed with a dough hook attachment for the best results.

Proofing the Dough to Perfection

Proofing is a crucial step in any braided chocolate chip brioche recipe. After kneading, place the dough in a lightly oiled bowl and cover it with plastic wrap or a damp kitchen towel. Let it rest in a warm, draft-free spot for about 1 to 2 hours, or until it doubles in size.

To create a warm environment, you can place the bowl in a slightly preheated oven (turned off) or near a sunny window. If your kitchen is cold, consider proofing the dough in an oven with just the oven light turned on.

Incorporating Chocolate Chips into the Dough

Once the dough has risen, it’s time to add the chocolate chips. Gently punch down the dough to release excess air, then knead the chocolate chips into it. Be careful not to overwork the dough, as this can cause the chocolate chips to melt prematurely.

For even distribution, sprinkle the chocolate chips across the dough as you fold and knead. If you’re feeling adventurous, you can also add a handful of chopped nuts or dried fruits for a unique twist to your braided chocolate chip brioche recipe.

How to Shape and Braid the Brioche

Sliced braided chocolate chip brioche recipe on a serving tray with coffee and butter.
A plated braided chocolate chip brioche loaf, sliced to reveal its fluffy interior with melted chocolate chips.

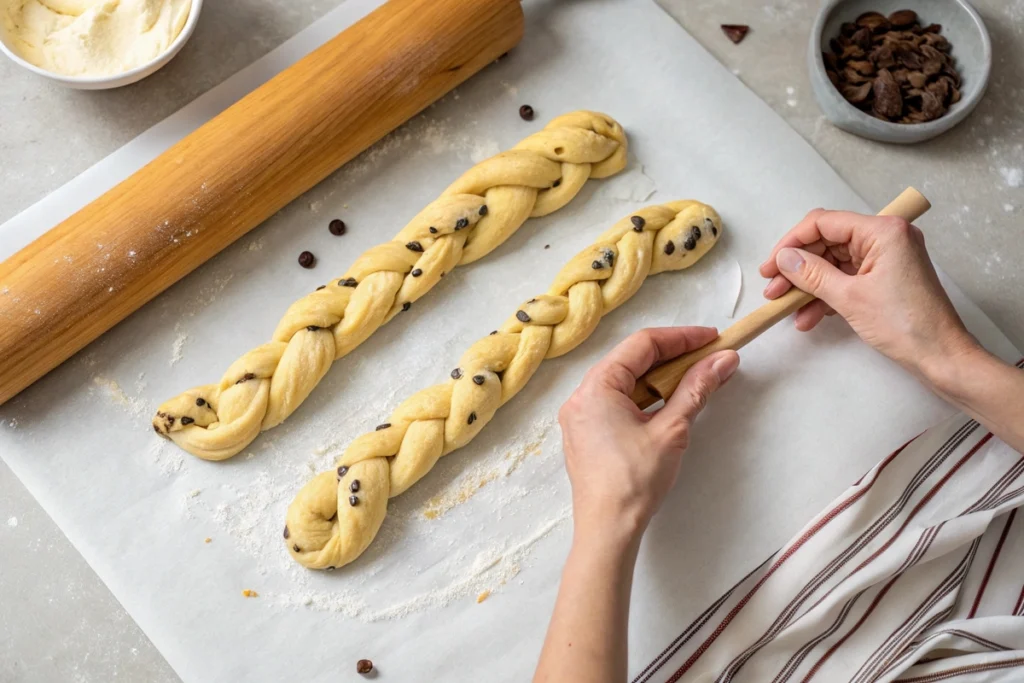
Dividing and braiding the dough is where the magic happens. Divide the dough into three equal portions, rolling each into a long strand, about 12–14 inches in length. Place the strands side by side on a baking sheet lined with parchment paper.

Begin braiding by crossing the right strand over the center, followed by the left strand over the new center. Repeat this pattern until the braid is complete, tucking the ends underneath for a neat finish. Brush the braid with an egg wash for a glossy, golden crust.

For more bread-shaping tips, check out our garlic bread rolls recipe for additional inspiration.

Troubleshooting and Tips for Braided Chocolate Chip Brioche Recipe

Common Mistakes and How to Avoid Them

Even with the best intentions, mistakes can happen when making a braided chocolate chip brioche recipe. One common issue is the dough not rising properly during proofing. This is often due to inactive yeast or a cold environment. To fix this, ensure your yeast is fresh and your proofing area is warm but not too hot.

Another challenge is uneven braiding, which can result in parts of the bread being underbaked. To avoid this, roll each strand of dough evenly and braid them with gentle tension. If the dough tears, patch it lightly and avoid overworking it.

Tips for Keeping Brioche Moist and Fresh

Brioche is best enjoyed fresh, but keeping it moist can be tricky. Store your braided chocolate chip brioche in an airtight container at room temperature for up to three days. To prevent dryness, wrap it tightly in plastic wrap before placing it in a container.

If you plan to keep it longer, freezing is the best option. Slice the brioche first and wrap each piece individually before placing them in a freezer-safe bag. To reheat, warm slices in the oven or toaster at 325°F for a few minutes to restore their soft, fluffy texture.

Make-Ahead and Freezing Tips

This braided chocolate chip brioche recipe is perfect for busy schedules because the dough can be prepared ahead of time. After the first rise, place the dough in an airtight container and refrigerate it overnight. Chilled dough is easier to handle and braid, and it develops a deeper flavor during the extended resting period.

You can also freeze the fully braided and unbaked brioche. Simply wrap the braided loaf in plastic wrap and freeze it for up to two weeks. When ready to bake, thaw the brioche in the refrigerator overnight, let it come to room temperature, and then bake as directed.

Creative Ways to Serve Braided Chocolate Chip Brioche

While this braided chocolate chip brioche recipe is delicious on its own, there are many creative ways to enjoy it:

  1. French Toast: Slice the brioche into thick pieces and turn it into decadent French toast.
  2. Bread Pudding: Use day-old brioche to make a rich and custardy bread pudding.
  3. Ice Cream Sandwiches: Slice the brioche and sandwich your favorite ice cream between two slices for a fun dessert.
  4. Toast with Toppings: Toast slices lightly and top with Nutella, fresh fruit, or cream cheese for a quick snack.

FAQs About Braided Chocolate Chip Brioche Recipe

How do you keep brioche from drying out?

To keep your braided chocolate chip brioche moist, store it in an airtight container or wrap it tightly in plastic wrap. Avoid leaving it uncovered, as exposure to air causes the bread to dry out quickly. If you’re storing it for more than a couple of days, consider freezing the brioche to maintain its texture and flavor. Simply slice the loaf, wrap each piece individually, and place them in a freezer-safe bag. To reheat, warm it in the oven at 325°F for a few minutes or toast individual slices.

Does brioche burn easily?

Yes, brioche can burn easily because of its high sugar and butter content, which causes it to brown quickly. To avoid burning, bake your braided chocolate chip brioche at the recommended temperature, and check it frequently during the last few minutes of baking. If the top starts to brown too quickly, loosely cover it with aluminum foil. This simple step ensures an evenly baked loaf with a golden crust rather than a burnt one.

How long can brioche dough sit in the fridge?

Brioche dough can sit in the fridge for up to 24 hours. Chilling the dough not only slows down the yeast activity, allowing for a more developed flavor, but it also makes the dough easier to handle and braid. After refrigeration, let the dough come to room temperature for about 30 minutes before shaping or baking. This ensures an even rise and the best texture for your braided chocolate chip brioche recipe.

When to stop mixing brioche?

You should stop mixing brioche dough when it’s smooth, elastic, and slightly sticky. A great way to check if it’s ready is by performing the “windowpane test.” Take a small piece of dough and stretch it gently between your fingers. If it forms a thin, translucent sheet without tearing, the gluten is well-developed, and your dough is ready. Over-mixing can cause the dough to become too tough, so be sure to stop as soon as it reaches this stage.

Conclusion

Mastering the braided chocolate chip brioche recipe is a rewarding experience that brings bakery-quality bread right to your kitchen. From understanding the key ingredients and proofing the dough to troubleshooting common mistakes, you now have everything you need to create a perfectly fluffy, chocolate-filled loaf. Whether you’re serving it fresh or experimenting with creative ways to enjoy it, this recipe is sure to impress.

Print
clock clock iconcutlery cutlery iconflag flag iconfolder folder iconinstagram instagram iconpinterest pinterest iconfacebook facebook iconprint print iconsquares squares iconheart heart iconheart solid heart solid icon
Sliced braided chocolate chip brioche on a serving tray with coffee and butter.

Braided Chocolate Chip Brioche Recipe


  • Author: Emily
  • Total Time: 2 hours 50 minutes
  • Yield: 1 braided loaf (810 slices) 1x

Description

This rich and buttery braided chocolate chip brioche recipe is the perfect combination of soft, pillowy bread and bursts of melted chocolate chips. Whether for breakfast, brunch, or dessert, this braided loaf is as impressive as it is delicious.


Ingredients

Scale
  • 3 1/2 cups all-purpose flour
  • 1/4 cup granulated sugar
  • 2 1/4 teaspoons active dry yeast (1 packet)
  • 1 teaspoon salt
  • 1/2 cup warm milk (110°F)
  • 3 large eggs (2 for dough, 1 for egg wash)
  • 1/2 cup unsalted butter, softened
  • 1 cup semi-sweet chocolate chips
  • 1 teaspoon vanilla extract (optional)


Instructions

  1. In a large mixing bowl, combine flour, sugar, salt, and yeast.
  2. Gradually add warm milk, two eggs, and vanilla extract (if using) to the dry ingredients. Mix until a dough forms.
  3. Add softened butter, one tablespoon at a time, kneading until fully incorporated. Knead the dough for 8-10 minutes, until smooth and slightly sticky.
  4. Place the dough in a lightly greased bowl, cover it with plastic wrap, and let it rise in a warm spot for 1-2 hours or until it doubles in size.
  5. Once risen, punch down the dough and knead in the chocolate chips evenly.
  6. Divide the dough into three equal portions and roll each into a long strand, about 12-14 inches in length.
  7. Lay the strands side by side and braid them together, pinching the ends to seal.
  8. Place the braided loaf on a parchment-lined baking sheet, cover, and let it rise for another 30 minutes.
  9. Preheat the oven to 350°F (175°C). Brush the braided loaf with an egg wash made from 1 beaten egg and a tablespoon of water.
  10. Bake for 25-30 minutes, or until golden brown and the loaf sounds hollow when tapped.
  11. Let the brioche cool slightly before slicing and serving.

Notes

  • For a Dairy-Free Option: Substitute butter with plant-based butter and use almond or oat milk.
  • Storage Tip: Wrap the brioche tightly in plastic wrap and store at room temperature for up to 3 days. For longer storage, slice and freeze in individual portions.
  • Reheating: Warm slices in the oven at 325°F for 5-7 minutes to restore their softness and flavor.
  • Optional Add-Ins: Add orange zest or a pinch of cinnamon for an extra layer of flavor.

7 Easy Steps to Make the Perfect Strawberry Shortcake Parfait

Who can resist a strawberry shortcake parfait? This no-bake dessert layers juicy strawberries, fluffy whipped cream, and soft cake for a sweet treat that’s as easy to make as it is to devour. Whether it’s a hot summer day or a cozy celebration, this parfait’s got you covered!

Print
clock clock iconcutlery cutlery iconflag flag iconfolder folder iconinstagram instagram iconpinterest pinterest iconfacebook facebook iconprint print iconsquares squares iconheart heart iconheart solid heart solid icon
A beautifully layered strawberry shortcake parfait with fresh strawberries and whipped cream in a glass.

How to Make the Perfect Strawberry Shortcake Parfait


  • Author: Emily
  • Total Time: 15 minutes
  • Yield: 4 servings 1x

Description

This strawberry shortcake parfait is a no-bake dessert that layers juicy strawberries, soft cake, and fluffy whipped cream into a delightful treat. Ready in just minutes, it’s perfect for breakfast, brunch, or a quick sweet snack.


Ingredients

Scale
  • 2 cups fresh strawberries (washed, hulled, and sliced)
  • 2 cups shortcake or pound cake (cut into small cubes)
  • 1 cup whipped cream (store-bought or homemade)
  • 1 tablespoon granulated sugar (optional, for macerating strawberries)
  • 1 teaspoon vanilla extract (optional, for whipped cream)
  • Garnishes: whole strawberries, mint leaves, or chocolate shavings (optional)

Instructions

  1. Wash the strawberries thoroughly, pat them dry, and slice them evenly. If desired, toss the slices with sugar to enhance their sweetness. Let them sit for 5 minutes to release their natural juices.
  2. Cut the shortcake or pound cake into small, bite-sized cubes for easy layering.
  3. If making whipped cream from scratch, whip 1 cup of heavy cream with 1-2 tablespoons of sugar and vanilla extract until soft peaks form.
  4. In a clear glass or jar, start by adding a layer of cake cubes as the base.
  5. Add a layer of sliced strawberries on top of the cake, followed by a generous spoonful of whipped cream.
  6. Repeat the layers until the glass is full, ending with a dollop of whipped cream on top.
  7. Garnish with a whole strawberry, mint leaf, or chocolate shavings for a decorative touch.

Notes

  • To make this recipe dairy-free, substitute whipped cream with coconut cream and use a dairy-free cake.
  • For a healthier option, use Greek yogurt instead of whipped cream and reduce or omit the sugar.
  • Prepare the parfaits just before serving to maintain the fresh texture of the cake and fruit.
  • This recipe is highly customizable—add nuts, granola, or even a drizzle of caramel for extra flavor.

Why Strawberry Shortcake Parfait is the Ultimate Dessert

The Perfect Balance of Flavors

A strawberry shortcake parfait isn’t just any dessert—it’s a carefully crafted balance of sweetness, freshness, and creaminess. The juicy strawberries bring natural sweetness and a hint of tang, while the soft, crumbly cake adds richness and texture. Topping it all off is the fluffy whipped cream, which ties everything together like a dream.

This dessert satisfies every craving, whether you’re in the mood for something fruity, creamy, or indulgent. Unlike heavier treats, its light and airy layers make it perfect for any time of the day.

A No-Bake Summer Treat

On hot summer days, the last thing you want is to turn on the oven. That’s why a strawberry shortcake parfait is your go-to dessert! This no-bake treat is quick to assemble and keeps you cool while delivering maximum flavor.

With just a few simple ingredients strawberries, cake, and whipped cream—you can create a visually stunning dessert in minutes. Plus, it’s great for last-minute gatherings when you want to impress without breaking a sweat. For more tips on summer desserts, check out this guide to no-bake recipes.

Versatility in Presentation

One of the best things about a strawberry shortcake parfait is its versatility. You can serve it in elegant glasses for a fancy dinner party, pack it into mason jars for a picnic, or simply layer it in bowls for a quick family dessert.

You can even adjust the portion sizes mini parfaits are perfect for kids, while larger servings are great for when you’re treating yourself. No matter how you serve it, this dessert looks as good as it tastes.

Perfect for Any Occasion

Whether you’re celebrating a birthday, hosting a brunch, or craving a solo indulgence, a strawberry shortcake parfait fits the bill. It’s fancy enough for special occasions but simple enough to whip up for everyday enjoyment.

Because it’s so easy to customize, you can make it feel right at home on any menu. Add some chocolate shavings for a romantic twist, or sprinkle in granola for a breakfast-inspired treat. This dessert is truly as flexible as your imagination.

Ingredients You’ll Need for Strawberry Shortcake Parfait

Ingredients for strawberry shortcake parfait including strawberries, whipped cream, and shortcake on a cutting board.
An overhead view of the ingredients for a strawberry shortcake parfait, ready for layering.

Fresh, Juicy Strawberries

To make the perfect strawberry shortcake parfait, fresh strawberries are essential. Look for ripe, bright red berries with a sweet aroma. Wash them thoroughly, remove the green tops, and slice them evenly for layering. For an extra burst of sweetness, toss the slices with a teaspoon of sugar or a splash of orange juice.

The Ideal Cake for Layering

The cake forms the base of your strawberry shortcake parfait. Shortcake is the traditional choice, but you can also use pound cake or sponge cake for a lighter texture. Store-bought options work well if you’re short on time, but homemade cake brings extra flavor to the dessert. For gluten-free parfaits, substitute with gluten-free cake or biscuits.

Rich and Creamy Whipped Cream

Whipped cream adds a luscious layer to your strawberry shortcake parfait. You can make it from scratch by whipping heavy cream with a touch of sugar and vanilla extract until soft peaks form. If you prefer a time-saving option, store-bought whipped cream works just as well. For a healthier twist, swap in Greek yogurt or coconut cream.

Optional Add-Ins for Creativity

While the classic ingredients shine on their own, you can add extra layers for a unique twist on the strawberry shortcake parfait. Crushed graham crackers or granola bring a satisfying crunch, while chocolate shavings or caramel drizzle add indulgence. For a tangy contrast, consider adding a dollop of lemon curd between the layers.

Step-by-Step Guide to Making Strawberry Shortcake Parfait

Preparing the Strawberries

Start by preparing the star of the strawberry shortcake parfait: the strawberries. Wash them thoroughly under cold water, pat them dry, and remove the green tops. Slice them evenly to create beautiful, uniform layers. For added sweetness, sprinkle the slices with a teaspoon of sugar or drizzle them with honey. Allow the strawberries to sit for a few minutes so they release their natural juices, which will enhance the parfait’s overall flavor.

Cutting and Preparing the Cake

Your choice of cake plays a big role in how your strawberry shortcake parfait turns out. If you’re using shortcake, pound cake, or sponge cake, cut it into small cubes or tear it into bite-sized pieces. This ensures each bite of the parfait includes the perfect blend of flavors and textures.

For those short on time, store-bought cake works wonderfully, but homemade cake takes this dessert to the next level. If you’d like to try a complementary recipe, check out our Gluten-Free Mozzarella Sticks Recipe for a savory pairing idea!

Layering the Parfait

Layering a strawberry shortcake parfait with fresh strawberries, whipped cream, and cake.
Step-by-step layering of a strawberry shortcake parfait for a visually appealing dessert.

Now comes the fun part—layering your strawberry shortcake parfait! Use a glass or jar to show off the dessert’s vibrant colors and textures. Start with a base layer of cake cubes, followed by a generous spoonful of sliced strawberries. Add a layer of whipped cream to create a creamy contrast, then repeat the layers until the glass is full.

Make sure to end with a whipped cream topping for a polished finish. For an extra decorative touch, top the parfait with a whole strawberry, a mint leaf, or even some crushed graham crackers.

Pro Tips for Perfect Parfait Assembly

To ensure your strawberry shortcake parfait looks as good as it tastes, keep these tips in mind:

  1. Use even layers: Balance each ingredient to avoid overpowering the parfait with too much cream or cake.
  2. Chill before serving: Let the parfait rest in the fridge for 15-20 minutes to enhance the flavors and firm up the layers.
  3. Serve immediately: While these parfaits can be prepped in advance, they’re best enjoyed fresh for maximum crunch and flavor.
  4. Customize to taste: Add chocolate chips, crushed nuts, or a drizzle of caramel for a personalized twist.

Variations of Strawberry Shortcake Parfait

Three variations of strawberry shortcake parfaits: classic, chocolate, and mixed berry.
Three creative variations of strawberry shortcake parfaits, perfect for any occasion.

Dairy-Free Strawberry Shortcake Parfait

If you’re looking for a dairy-free version of the strawberry shortcake parfait, don’t worry it’s easy to adapt! Swap the whipped cream for coconut cream or a dairy-free whipped topping. For the cake layer, use a dairy-free shortcake or sponge cake made with plant-based milk.

This version is just as creamy and delicious as the classic but caters to those with dietary restrictions. For an added flavor twist, sprinkle in a touch of cinnamon or nutmeg to the coconut cream before layering!

Low-Sugar or Keto-Friendly Options

For a healthier take on the strawberry shortcake parfait, you can reduce the sugar without sacrificing flavor. Replace traditional cake with a low-carb almond flour cake, and use a sugar-free whipped cream alternative. Sweeten the strawberries naturally with a sugar substitute like stevia or monk fruit.

This version is perfect for those watching their sugar intake but still craving a sweet and refreshing dessert. Plus, it’s an excellent choice for anyone following a keto diet!

Mixed Berry Shortcake Parfait

Why stick to just strawberries? Create a vibrant mixed berry shortcake parfait by adding blueberries, raspberries, or blackberries to the layers. The combination of berries not only adds a pop of color but also enhances the flavor with a mix of sweet and tart notes.

This variation is perfect for summer picnics or festive gatherings, as the colorful presentation is bound to impress your guests. Pair it with a dollop of lemon or vanilla yogurt for a refreshing twist.

Chocolate Strawberry Shortcake Parfait

For a decadent dessert, transform your strawberry shortcake parfait into a chocolate lover’s dream. Add a layer of chocolate ganache or drizzle melted chocolate between the layers. Alternatively, use a chocolate cake base instead of the classic shortcake.

To make it even more indulgent, sprinkle some mini chocolate chips or shaved dark chocolate on top. This variation is perfect for date nights or when you’re in the mood for something extra luxurious.

FAQs About Strawberry Shortcake Parfait

What is a traditional parfait made of?

A traditional parfait is a layered dessert made with yogurt or whipped cream, fresh fruit, and granola or cake pieces. Each layer offers a balance of textures and flavors, making parfaits both visually appealing and delicious. When creating a strawberry shortcake parfait, the layers are typically strawberries, shortcake, and whipped cream for a classic twist.

What is the difference between strawberry cake and strawberry shortcake?

While both desserts feature strawberries, they differ in preparation and texture. Strawberry cake is a fully baked dessert, often layered with strawberry-flavored frosting and sponge or butter cake. In contrast, strawberry shortcake combines fresh strawberries, whipped cream, and soft, crumbly shortcake or biscuit layers. A strawberry shortcake parfait captures the essence of strawberry shortcake but presents it in a layered, glass-style dessert for easy assembly and serving.

What does strawberry parfait taste like?

A strawberry shortcake parfait offers a delightful blend of sweet and tangy flavors. The fresh strawberries provide a natural sweetness, while the shortcake adds a buttery richness. Combined with fluffy whipped cream, the parfait delivers a creamy, refreshing treat with layers of soft cake and juicy fruit. It’s like enjoying summer in every bite!

What is in the middle of a strawberry shortcake?

The middle of a strawberry shortcake traditionally features a generous layer of fresh strawberries and lightly sweetened whipped cream sandwiched between two layers of shortcake. In a strawberry shortcake parfait, this combination is layered repeatedly in a glass, creating a visually stunning dessert that’s just as delicious as its plated counterpart.

Conclusion

A strawberry shortcake parfait is the ultimate dessert, combining layers of soft cake, juicy strawberries, and fluffy whipped cream in a single serving. Whether you’re making it dairy-free, keto-friendly, or adding a twist with chocolate or mixed berries, this versatile dessert is perfect for any occasion. Plus, it’s quick, easy, and customizable to suit your tastes.

Now it’s your turn to make this irresistible dessert. Grab your favorite ingredients, get creative with the layers, and enjoy every delicious spoonful!

Irresistible Gluten Free Mozzarella Sticks in 30 Minutes

Print
clock clock iconcutlery cutlery iconflag flag iconfolder folder iconinstagram instagram iconpinterest pinterest iconfacebook facebook iconprint print iconsquares squares iconheart heart iconheart solid heart solid icon
Plated gluten free mozzarella sticks with marinara sauce.

Irresistible Gluten Free Mozzarella Sticks in 30 Minutes


  • Author: Emily
  • Total Time: 30 minutes
  • Yield: 20 mozzarella sticks (serves 4-6) 1x

Description

Crispy on the outside and gooey on the inside, these gluten free mozzarella sticks are the ultimate appetizer or snack! Quick, easy, and made with simple ingredients, this recipe ensures everyone, even those avoiding gluten, can enjoy these cheesy bites of deliciousness.


Ingredients

Scale
  • 10 mozzarella cheese sticks (halved, if needed)
  • 1/2 cup gluten-free flour
  • 1/4 teaspoon garlic powder
  • 1/4 teaspoon onion powder
  • 1/4 teaspoon salt
  • 2 large eggs (beaten)
  • 1 cup gluten-free breadcrumbs (panko-style preferred)
  • Cooking spray or vegetable oil (for frying or air frying)
  • Marinara sauce (for dipping, optional)

Instructions

  1. Slice the mozzarella sticks in half if necessary, then freeze them for at least 20 minutes to firm up.
  2. Prepare a dredging station with three shallow bowls: one for gluten-free flour mixed with garlic powder, onion powder, and salt; one for beaten eggs; and one for gluten-free breadcrumbs.
  3. Roll each cheese stick in the seasoned flour, ensuring it’s fully coated. Next, dip it into the egg wash, and finally, roll it in breadcrumbs. For an extra crispy coating, repeat the egg wash and breadcrumb steps.
  4. Place the breaded sticks on a parchment-lined tray and freeze for another 20 minutes to set the coating.
  5. For Air Fryer: Preheat to 375°F (190°C). Spray the basket lightly with oil and arrange the sticks in a single layer. Air fry for 6-8 minutes, flipping halfway through.
  6. For Oven: Preheat to 400°F (200°C). Arrange the sticks on a wire rack placed over a baking sheet. Bake for 10-12 minutes or until golden brown.
  7. For Frying: Heat 1 inch of oil in a skillet over medium heat. Fry the sticks in small batches for 1-2 minutes per side, then drain on paper towels.
  8. Serve hot with marinara sauce or your favorite dipping sauce.

Notes

  • Double-Coating Tip: Double-coating the sticks with egg wash and breadcrumbs ensures a crispier crust and prevents the cheese from oozing out.
  • Make Ahead: Breaded sticks can be frozen for up to 3 months. Cook directly from frozen when needed.
  • Dipping Sauces: Experiment with ranch, garlic aioli, or buffalo sauce for variety.

Who says gluten free mozzarella sticks can’t be as good ! if not better than the traditional ones? With a perfectly crispy coating and a melty, cheesy center, this quick and easy recipe is bound to become your favorite. Whether you’re hosting a party or snacking solo, these sticks deliver big flavor without the gluten!

Why You’ll Love These Gluten Free Mozzarella Sticks

Perfect for Parties, Snacks, or Game Nights

There’s something magical about a plate of gluten free mozzarella sticks—golden and crispy on the outside, gooey and cheesy on the inside. These sticks are the ultimate crowd-pleaser, whether you’re hosting a party, serving appetizers for game night, or enjoying a casual snack at home. They’re so versatile that they’ll quickly become your go-to recipe for any occasion.

What makes them even better? They’re gluten-free, meaning everyone, including those with dietary restrictions, can indulge without worry. Pair them with your favorite dipping sauces like marinara or ranch, and you’ve got a dish that’ll have your guests asking for seconds or thirds!

Quick, Easy, and Beginner-Friendly

Gluten free mozzarella sticks may sound like a fancy recipe, but don’t let that fool you it’s surprisingly simple to make. With just a few ingredients and steps, you’ll have a plate of crispy, cheesy perfection in no time.

The process is straightforward: coat mozzarella sticks in gluten-free flour, dip them in an egg wash, and roll them in gluten-free breadcrumbs. Fry or bake them to golden perfection, and you’re done! Even if you’re a beginner in the kitchen, this recipe ensures success.

For added convenience, this dish comes together in just 30 minutes, making it ideal for when you’re short on time but still want something delicious.

Family-Approved Gluten-Free Goodness

If you’ve got picky eaters at home, you’ll be happy to know that these gluten free mozzarella sticks are a hit with both kids and adults. The crispy coating and gooey cheese inside make them irresistible, while their bite-sized shape makes them fun to eat.

This recipe is also an excellent way to introduce gluten-free snacks to your family. They won’t even notice the difference because the taste and texture are just as good—if not better—than traditional mozzarella sticks. For a fun twist, let the kids help with breading the sticks. It’s a mess, but it’s also a memory-maker!

Made with Pantry Staple

The best part about making gluten free mozzarella sticks? You probably already have most of the ingredients in your kitchen! Common pantry staples like gluten-free breadcrumbs, gluten-free flour, and mozzarella cheese are all you need to get started.

When choosing breadcrumbs, opt for trusted brands like Ian’s Gluten Free Breadcrumbs, which deliver a perfect crunch without compromising on flavor. Mozzarella sticks from the store or freshly cut mozzarella blocks will both work for this recipe.

Additionally, you can customize the recipe to suit your preferences. Don’t have breadcrumbs? Swap them for almond flour or crushed gluten-free crackers. This flexibility ensures you can always whip up a batch of these delicious sticks whenever the craving hits!

Ingredients and Substitutions for Gluten Free Mozzarella Sticks

The Key Ingredients for Success

To make gluten free mozzarella sticks at home, you’ll need a few simple ingredients that ensure the perfect crispy crust and gooey cheese filling. Here’s what you’ll need:

Ingredients for gluten free mozzarella sticks on a wooden cutting board.
An overhead shot of the essential ingredients for gluten free mozzarella sticks.
  • Mozzarella cheese sticks: Pre-packaged cheese sticks are convenient and melt perfectly, but you can also cut a block of mozzarella into stick shapes.
  • Gluten-free flour: Helps the breading stick to the cheese. Almond flour can be used for a grain-free option.
  • Gluten-free breadcrumbs: These create that signature crispy coating. Opt for seasoned breadcrumbs or panko-style crumbs for extra crunch.
  • Eggs: Essential for binding the breadcrumbs to the cheese.
  • Seasonings: Garlic powder, onion powder, and a pinch of salt enhance the flavor of the breading.

Each ingredient serves a specific role in creating the ideal texture and flavor, so don’t skip any!

Ingredient Substitutions and Alternatives

If you don’t have all the ingredients on hand, don’t worry! This recipe is flexible. Here are some handy substitutions:

  • Breadcrumbs: Swap gluten-free breadcrumbs for crushed gluten-free crackers or cornflakes for added texture.
  • Flour: Use cornstarch or tapioca flour as a replacement if you don’t have gluten-free flour.
  • Cheese: Experiment with different types of cheese sticks, like Colby Jack or pepper jack, for a flavorful twist.

The recipe works beautifully with these alternatives, ensuring that everyone can enjoy gluten free mozzarella sticks regardless of what’s in their pantry.

Choosing the Best Gluten-Free Breadcrumbs

Not all gluten-free breadcrumbs are created equal, so choosing the right one is key to achieving a crispy texture. Some popular options include:

  • Ian’s Gluten Free Breadcrumbs: A trusted brand known for its panko-style crumbs.
  • 4C Gluten Free Crumbs: Light and airy, perfect for frying or baking.

Tools You’ll Need

Making gluten free mozzarella sticks requires basic kitchen tools, most of which you probably already own:

  • Shallow bowls: Perfect for dredging the cheese sticks in flour, egg, and breadcrumbs.
  • Baking tray: Essential for chilling the breaded sticks before cooking.
  • Air fryer or deep fryer: An air fryer is great for a healthier option, while a deep fryer delivers ultimate crispiness.
  • Tongs: Handy for flipping or removing the sticks while frying.

Step-by-Step Guide to Making Gluten Free Mozzarella Sticks

Step-by-step breading process for gluten free mozzarella sticks.
Close-up of the breading process: mozzarella stick being dipped in egg wash and breadcrumbs.

Preparing the Ingredients

The secret to perfect gluten free mozzarella sticks lies in the preparation. Start by cutting mozzarella cheese sticks into halves (if needed) to make them easier to handle. If you’re using a block of mozzarella, slice it into uniform stick shapes about 3-4 inches long.

Next, set up your dredging station. You’ll need three shallow bowls: one for gluten-free flour, one for beaten eggs, and one for gluten-free breadcrumbs. Season the flour and breadcrumbs with garlic powder, onion powder, salt, and pepper for an extra burst of flavor.

Finally, line a baking tray with parchment paper to prevent sticking and make cleanup easier. Trust me, these little steps save time and effort!

The Bread-Crumbing Process

Creating a crispy coating is all about layering. To start, roll each cheese stick in the seasoned flour, ensuring it’s evenly coated. This step helps the egg mixture stick better.

Then, dip the floured stick into the egg wash, letting any excess drip off. Finally, roll it in gluten-free breadcrumbs until completely covered. For extra crunch, repeat the egg and breadcrumb steps once more.

Place the breaded sticks on your prepared tray and refrigerate for at least 20 minutes. This chilling step is crucial—it firms up the coating and prevents the cheese from oozing out during cooking.

Cooking Methods: Air Fryer, Oven, or Frying Pan

Once your gluten free mozzarella sticks are prepped, it’s time to cook them! Here are three popular methods to choose from:

  • Air Fryer: Preheat the air fryer to 375°F (190°C). Lightly spray the basket with oil to prevent sticking. Arrange the sticks in a single layer, ensuring they don’t touch. Cook for 6-8 minutes, flipping halfway through, until golden and crispy.
  • Oven: Preheat your oven to 400°F (200°C). Place the sticks on a wire rack over a baking sheet for even cooking. Bake for 10-12 minutes or until golden brown.
  • Frying Pan: Heat about 1 inch of oil in a frying pan over medium heat. Test the oil by dropping in a breadcrumb—if it sizzles, it’s ready. Fry the sticks in small batches for 1-2 minutes per side, then drain on paper towels.

Each method has its perks: the air fryer is healthier, the oven is hands-off, and frying delivers the ultimate crispiness. Choose what works best for you!

Troubleshooting Common Issues

Making gluten free mozzarella sticks isn’t without its challenges, but don’t worry—most issues are easy to fix.

  • Cheese Leaking Out: If the cheese starts to ooze while cooking, it usually means the breading wasn’t thick enough or the sticks weren’t chilled long enough. Double-coat the sticks and chill them for at least 20 minutes before cooking.
  • Breading Falling Off: This happens when the coating doesn’t stick properly. Make sure each layer (flour, egg, and breadcrumbs) is applied evenly.
  • Not Crispy Enough: If your sticks aren’t as crispy as you’d like, try using panko-style gluten-free breadcrumbs or cooking them a bit longer in the air fryer or oven.

Serving Suggestions and Storage Tips

Plated gluten free mozzarella sticks with marinara sauce.
Freshly baked gluten free mozzarella sticks served with marinara sauce and garnished with parsley.

The Best Dipping Sauces

Gluten free mozzarella sticks are fantastic on their own, but pairing them with the right dipping sauce elevates them to the next level. Classic marinara sauce is always a hit, with its tangy and savory flavor complementing the cheesy goodness. If you prefer something creamy, ranch dressing or garlic aioli are excellent choices.

For a spicier kick, serve them with buffalo sauce or a sriracha mayo blend. Want something a little different? Try a homemade pesto or a sweet-and-spicy chili sauce to surprise your taste buds. Offering a variety of dipping options ensures there’s something for everyone to enjoy!

How to Keep Mozzarella Sticks Warm and Crispy

Serving gluten free mozzarella sticks fresh out of the fryer or oven ensures they stay crispy, but what if you need to keep them warm for a gathering?

The best solution is to place the cooked sticks on a wire rack set over a baking sheet and keep them in an oven preheated to 200°F (93°C). This prevents them from becoming soggy while staying perfectly warm. Avoid covering them with foil, as this traps steam and softens the crust.

If you’re using an air fryer, you can reheat the sticks at 350°F (175°C) for a couple of minutes to restore their crunch before serving.

Storing and Freezing Tips

If you have leftovers (unlikely, but it happens!), gluten free mozzarella sticks can be stored and reheated easily. Place any cooled leftovers in an airtight container and refrigerate for up to three days. To reheat, use an air fryer or oven at 375°F (190°C) until crispy again.

Want to prepare them in advance? You can freeze breaded but uncooked mozzarella sticks for up to three months. Arrange them in a single layer on a baking sheet, freeze until solid, and then transfer them to a freezer-safe bag or container. This way, you’ll always have a quick snack ready to cook.

Creative Ways to Use Leftovers

Leftover gluten free mozzarella sticks don’t have to go to waste—they can be repurposed into other tasty dishes! For instance:

  • Chop them up and toss them into a fresh salad for a crispy, cheesy topping.
  • Add them to a sandwich or wrap for extra texture and flavor.
  • Use them as a unique pizza topping by slicing them into rounds and placing them on a gluten-free crust.
  • Create a fun mozzarella stick casserole by layering them with marinara sauce, pasta, and shredded cheese, then baking until bubbly.

FAQs About Gluten Free Mozzarella Sticks

Are the mozzarella sticks gluten-free?

Yes, this recipe for gluten free mozzarella sticks is completely gluten-free! By using gluten-free breadcrumbs and gluten-free flour, these mozzarella sticks are safe for anyone following a gluten-free diet. Always double-check your ingredient labels to ensure they are certified gluten-free, as cross-contamination can occur during manufacturing.

How do you keep mozzarella sticks from falling apart?

To prevent your gluten free mozzarella sticks from falling apart, it’s important to follow a few simple steps:

  1. Double-coat the cheese sticks: Dipping them twice in egg wash and breadcrumbs creates a sturdy coating that stays intact during cooking.
  2. Chill before cooking: Refrigerating the breaded sticks for at least 20 minutes helps the coating set, minimizing the chances of it falling off.
  3. Handle carefully: Use tongs to gently flip or remove the sticks during cooking to keep the coating intact.

With these tips, your mozzarella sticks will turn out perfectly crispy every time!

Are mozzarella cheese sticks low FODMAP?

Yes, mozzarella cheese sticks are generally considered low FODMAP because mozzarella is low in lactose, which makes it easier to digest for those with FODMAP sensitivities. However, you should always monitor portion sizes, as individual tolerance levels vary. To keep your gluten free mozzarella sticks low FODMAP, ensure that your breadcrumbs and other ingredients are also FODMAP-friendly.

Is Happy Farms mozzarella cheese gluten-free?

Yes, Happy Farms mozzarella cheese is gluten-free, making it an excellent option for your gluten free mozzarella sticks. However, it’s always a good idea to read the label and check for any potential changes to ingredients or manufacturing processes. When in doubt, look for a gluten-free certification on the packaging to ensure it meets your dietary needs.

Conclusion

These gluten free mozzarella sticks are the perfect combination of crispy and gooey, offering a classic snack that everyone can enjoy. From choosing the best gluten-free breadcrumbs to mastering the double-coating process, you now have all the tips and tricks to create mozzarella sticks that rival any restaurant’s version. Whether you’re serving them as an appetizer, snack, or party dish, these cheesy bites are sure to be a hit.