7 Secrets to Perfect Skillet Chicken Thighs with Schmaltzy Tomatoes

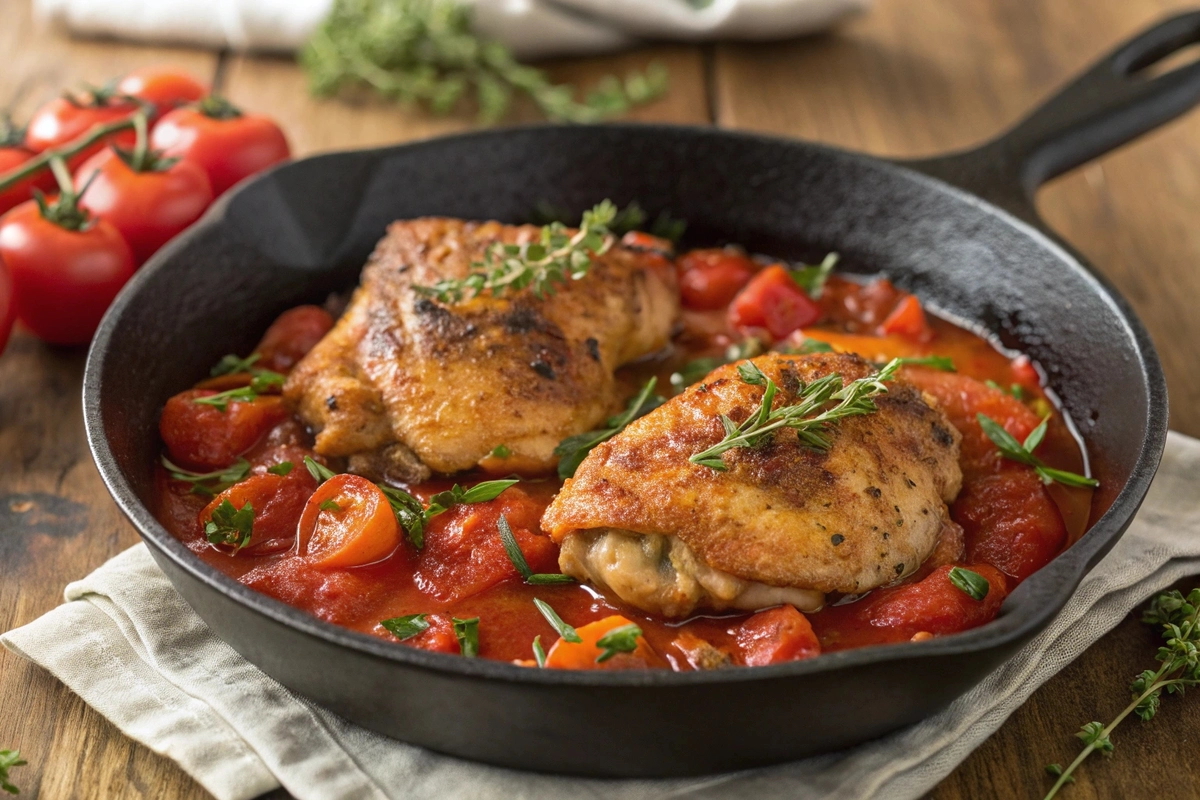
Sometimes, the simplest recipes are the most satisfying. Skillet chicken thighs with schmaltzy tomatoes is proof of that! Juicy, flavorful chicken thighs meet slow-cooked tomatoes that melt into a rich, velvety sauce, all made in a single pan. The secret weapon? Schmaltz a touch of rendered chicken fat that takes the flavor to a whole new level.

Why Skillet Chicken Thighs with Schmaltzy Tomatoes Are a Game-Changer

What Makes This Recipe Special?

Skillet chicken thighs with schmaltzy tomatoes isn’t just a meal it’s a flavor-packed experience that strikes the perfect balance between simplicity and sophistication. The rich, golden crust on the chicken thighs pairs beautifully with the buttery, jam-like texture of the tomatoes. This dish is all about elevating humble ingredients into something unforgettable.

What’s more, it’s a one-skillet recipe, which means fewer dishes to wash and more time to savor your meal. Whether you’re cooking for your family or impressing guests, this recipe delivers bold flavors with minimal effort. It’s comfort food with a gourmet twist, proving that good cooking doesn’t have to be complicated.

The Role of Schmaltz in Cooking

If you’ve never cooked with schmaltz before, you’re in for a treat. Schmaltz, or rendered chicken fat, is the secret ingredient that gives skillet chicken thighs with schmaltzy tomatoes its luxurious, deep flavor. As the chicken thighs sear in the skillet, their fat renders, transforming into a golden liquid that infuses the tomatoes with richness.

Not only does schmaltz enhance the sauce’s texture, but it also locks in the chicken’s natural juices, keeping every bite moist and flavorful. For those new to using schmaltz, it’s a versatile ingredient that can be used in everything from roasting vegetables to frying eggs.

The Appeal of One-Skillet Recipes

Who doesn’t love a recipe that’s as practical as it is delicious? With skillet chicken thighs with schmaltzy tomatoes, you’ll cook everything in one pan, making it perfect for busy weeknights. From browning the chicken thighs to simmering the tomatoes, every step builds flavor in the same skillet.

One-skillet meals also save time on cleanup and help retain all the delicious juices and caramelized bits. The result? A dish that’s rich, cohesive, and bursting with layers of flavor. Plus, fewer dishes mean more time to enjoy the meal with your loved ones.

Why Chicken Thighs Are the Star

When it comes to chicken, thighs reign supreme in this recipe. Unlike leaner cuts like chicken breasts, thighs stay tender and juicy even after cooking. The bone-in, skin-on variety is especially ideal for skillet chicken thighs with schmaltzy tomatoes because the skin crisps up beautifully while the bone helps the meat cook evenly.

Chicken thighs also have a natural richness that pairs perfectly with the tartness of the tomatoes and the indulgence of schmaltz. So, if you’re looking for a cut of meat that’s forgiving, flavorful, and easy to cook, chicken thighs are the way to go.

Ingredients You’ll Need for Skillet Chicken Thighs with Schmaltzy Tomatoes

Ingredients for skillet chicken thighs with schmaltzy tomatoes, including chicken thighs, fresh tomatoes, garlic, and herbs.
Everything you need to make skillet chicken thighs with schmaltzy tomatoes, from fresh produce to juicy chicken thighs.

The Role of Chicken Thighs

Chicken thighs are the star of this dish, bringing a perfect balance of flavor and texture to skillet chicken thighs with schmaltzy tomatoes. Bone-in, skin-on thighs create the crispy skin you crave while ensuring the meat remains juicy during cooking. Unlike chicken breasts, thighs are forgiving and retain moisture even if slightly overcooked.

Pro tip: Look for high-quality chicken thighs with minimal added moisture or sodium to let the natural flavors shine. For more chicken recipe inspiration, check out this guide on garlic parmesan chicken.

Tomatoes: Schmaltzy and Sweet

The tomatoes in this dish serve as the flavorful backbone, transforming into a luscious, jammy sauce. Ripe, fresh varieties like cherry or Roma tomatoes work best for their sweetness and vibrant color. When paired with rendered chicken fat, or schmaltz, they develop a rich, buttery flavor that elevates the entire dish.

Don’t have fresh tomatoes? No problem! Use high-quality canned diced tomatoes as a substitute, but drain them well to prevent a watery sauce.

Seasonings and Aromatics

This dish thrives on simplicity. The aromatics—garlic and onions—meld beautifully with the schmaltz and tomatoes, creating a depth of flavor that’s hard to resist. Seasonings like freshly cracked black pepper, kosher salt, and a pinch of red pepper flakes provide balance, while fresh herbs like thyme or parsley add brightness.

Adjust seasoning to taste as you go; remember, the schmaltz amplifies the flavors, so less is often more!

Optional Add-Ins for Extra Flavor

Take your skillet chicken thighs with schmaltzy tomatoes to the next level with these optional ingredients:

  • White wine or chicken broth: Adds acidity and enhances the sauce’s complexity.
  • Lemon zest or juice: Brings a refreshing brightness to the dish.
  • Red pepper flakes: For those who love a bit of heat, a pinch of flakes adds a spicy kick.

These extras aren’t essential, but they allow you to customize the dish to your taste, making it even more special.

Step-by-Step Guide to Cooking Skillet Chicken Thighs with Schmaltzy Tomatoes

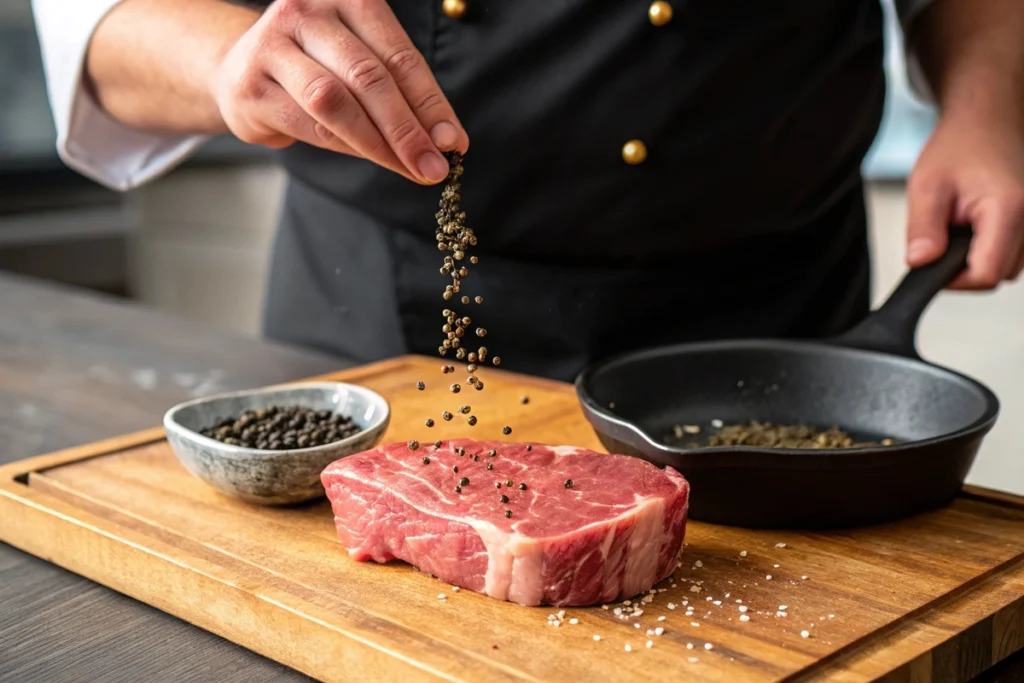
Step 1: Prepping the Chicken Thighs

Preparation is key to nailing skillet chicken thighs with schmaltzy tomatoes. Start by patting the chicken thighs dry with paper towels—this step is essential for achieving that irresistible crispy skin. Next, generously season both sides of the thighs with salt and freshly cracked black pepper. If you like a little heat, a sprinkle of red pepper flakes can add a subtle kick.

Remember, seasoning early helps the flavors penetrate the meat while ensuring a flavorful crust. Meanwhile, let the chicken sit at room temperature for about 20 minutes to ensure even cooking later.

Step 2: Searing the Chicken

Chicken thighs searing in a cast iron skillet with bubbling schmaltz and sautéed garlic.
Golden-brown chicken thighs crisping up in a cast iron skillet with bubbling schmaltz and aromatics.

Heat a large cast iron skillet over medium-high heat and add a small amount of olive oil. Once the skillet is hot and shimmering, place the chicken thighs skin-side down. Resist the urge to move them around—let them cook undisturbed for 6–8 minutes to develop that golden, crispy crust.

You’ll know it’s time to flip when the chicken releases naturally from the skillet. After flipping, sear the other side for 4–5 minutes. By this point, the rendered fat from the chicken creates the schmaltz that gives this dish its signature flavor.

Step 3: Making the Schmaltzy Tomato Sauce

Once the chicken thighs are golden brown, remove them from the skillet and set them aside. In the same skillet, drain excess fat, leaving just enough schmaltz to coat the bottom. Add minced garlic and diced onions, sautéing until fragrant and softened.

Next, toss in the tomatoes. Stir occasionally, letting them cook down into a thick, jammy sauce. If you want to elevate the sauce, consider adding a splash of white wine or chicken broth to deglaze the pan and capture those delicious browned bits. Season with a pinch of salt and pepper, adjusting to taste.

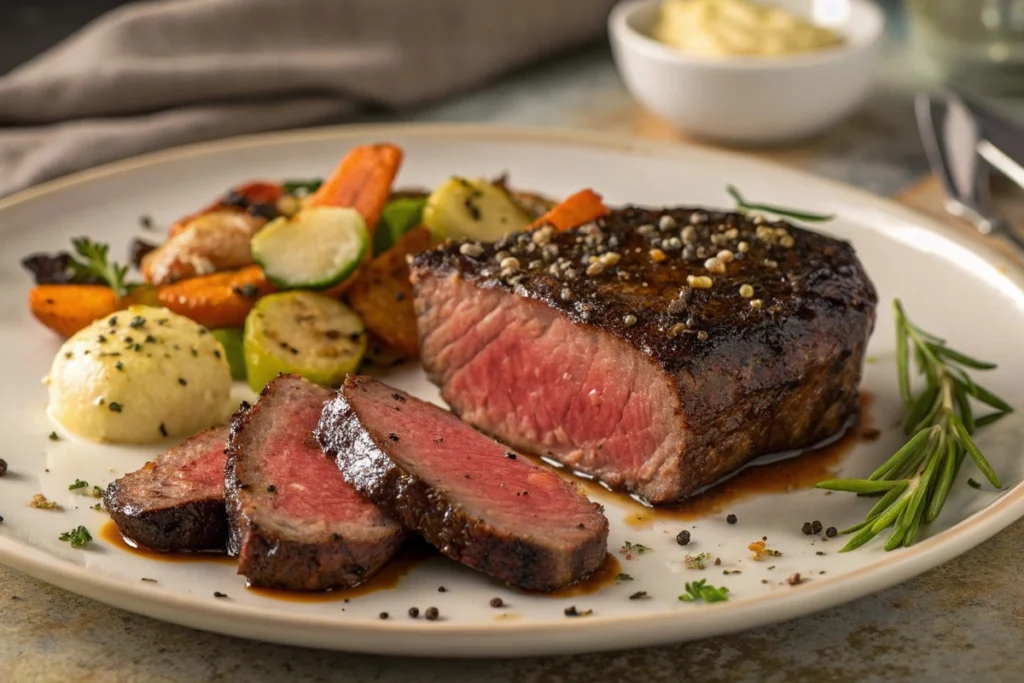
Step 4: Combining and Finishin

Nestle the seared chicken thighs back into the skillet, ensuring the skin stays above the tomato sauce to keep it crispy. Reduce the heat to low, cover the skillet, and let the dish simmer for about 10 minutes. This step ensures the chicken cooks through while soaking up the rich flavors of the schmaltzy tomatoes.

For the finishing touch, garnish with freshly chopped parsley or thyme for a pop of color and added flavor. Serve the skillet chicken thighs with schmaltzy tomatoes straight from the pan for a rustic, family-style presentation.

Tips for Perfect Skillet Chicken Thighs with Schmaltzy Tomatoes

The Secret to Crispy Chicken Thighs

Achieving perfectly crispy chicken thighs is all about technique. To make your skillet chicken thighs with schmaltzy tomatoes stand out, start by ensuring the skin is as dry as possible before cooking. Patting it dry with paper towels helps the skin crisp up rather than steam.

Next, use medium-high heat when searing the thighs in a cast iron skillet. This allows the skin to render its fat slowly, creating the golden, crackling crust we all love. Remember, patience is key—don’t move the chicken until the skin releases naturally from the pan.

Balancing the Flavors of Schmaltzy Tomatoes

The sauce is the heart of skillet chicken thighs with schmaltzy tomatoes. To create a balanced flavor, it’s essential to start with ripe, sweet tomatoes. If your tomatoes taste too acidic, a small pinch of sugar can work wonders.

Adding aromatics like garlic and onions enhances the sauce’s depth, while a splash of white wine or chicken broth adds brightness. Herbs such as thyme or parsley bring freshness, creating a well-rounded sauce that complements the richness of the chicken.

Troubleshooting Common Mistakes

Even the best recipes can go sideways if you’re not careful. Avoid these common pitfalls when preparing skillet chicken thighs with schmaltzy tomatoes:

  • Overcrowding the skillet: This traps moisture and prevents the chicken from crisping. Use a large skillet or cook in batches if necessary.
  • Skipping the rest period: After removing the chicken from the skillet, let it rest for a few minutes. This helps retain its juices and prevents it from drying out.
  • Using low-quality tomatoes: Bland or underripe tomatoes can result in a lackluster sauce. Opt for fresh, ripe tomatoes or high-quality canned options for the best results.

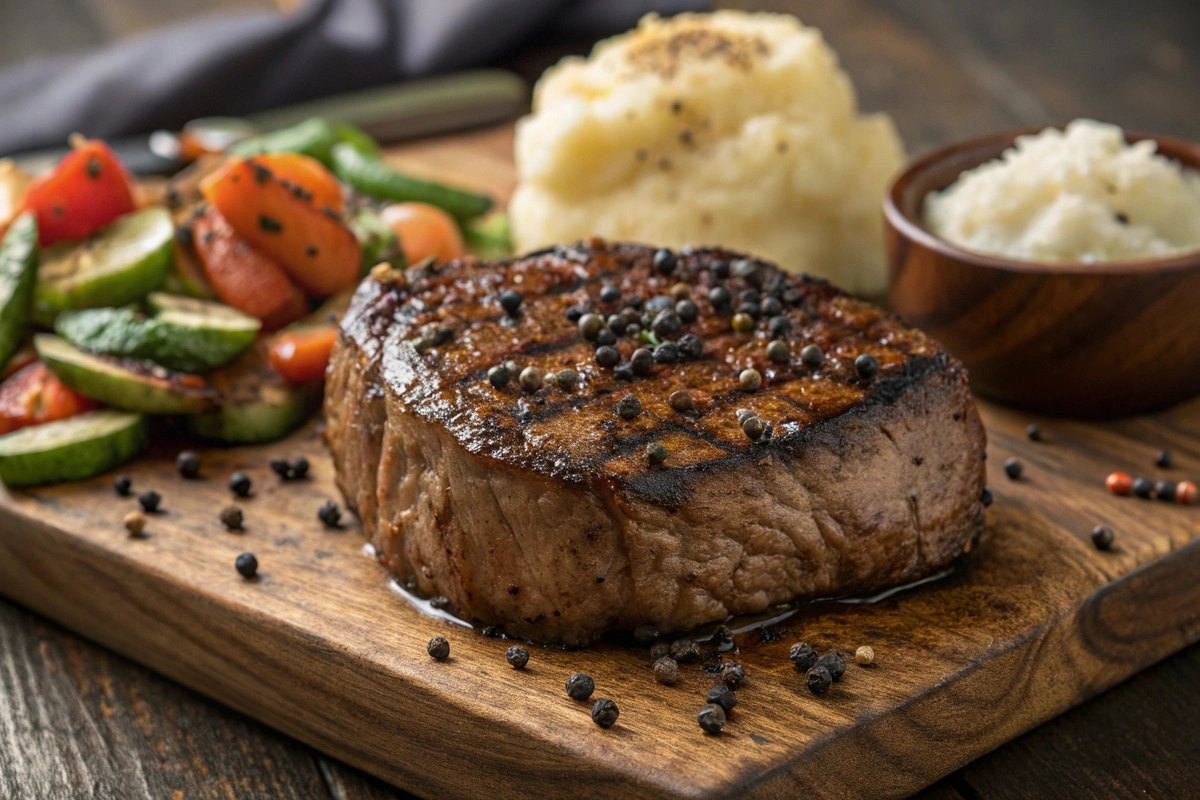
Serving Suggestions for Schmaltzy Chicken Thighs

Skillet chicken thighs with schmaltzy tomatoes pairs beautifully with a variety of sides. Here are a few ideas:

Skillet chicken thighs with schmaltzy tomatoes garnished with parsley and served with crusty bread.
A rustic serving of skillet chicken thighs with schmaltzy tomatoes, complete with fresh herbs and bread.
  • Crusty bread: Perfect for soaking up the rich, tomatoey sauce.
  • Garlic mashed potatoes: A creamy complement to the bold flavors of the dish.
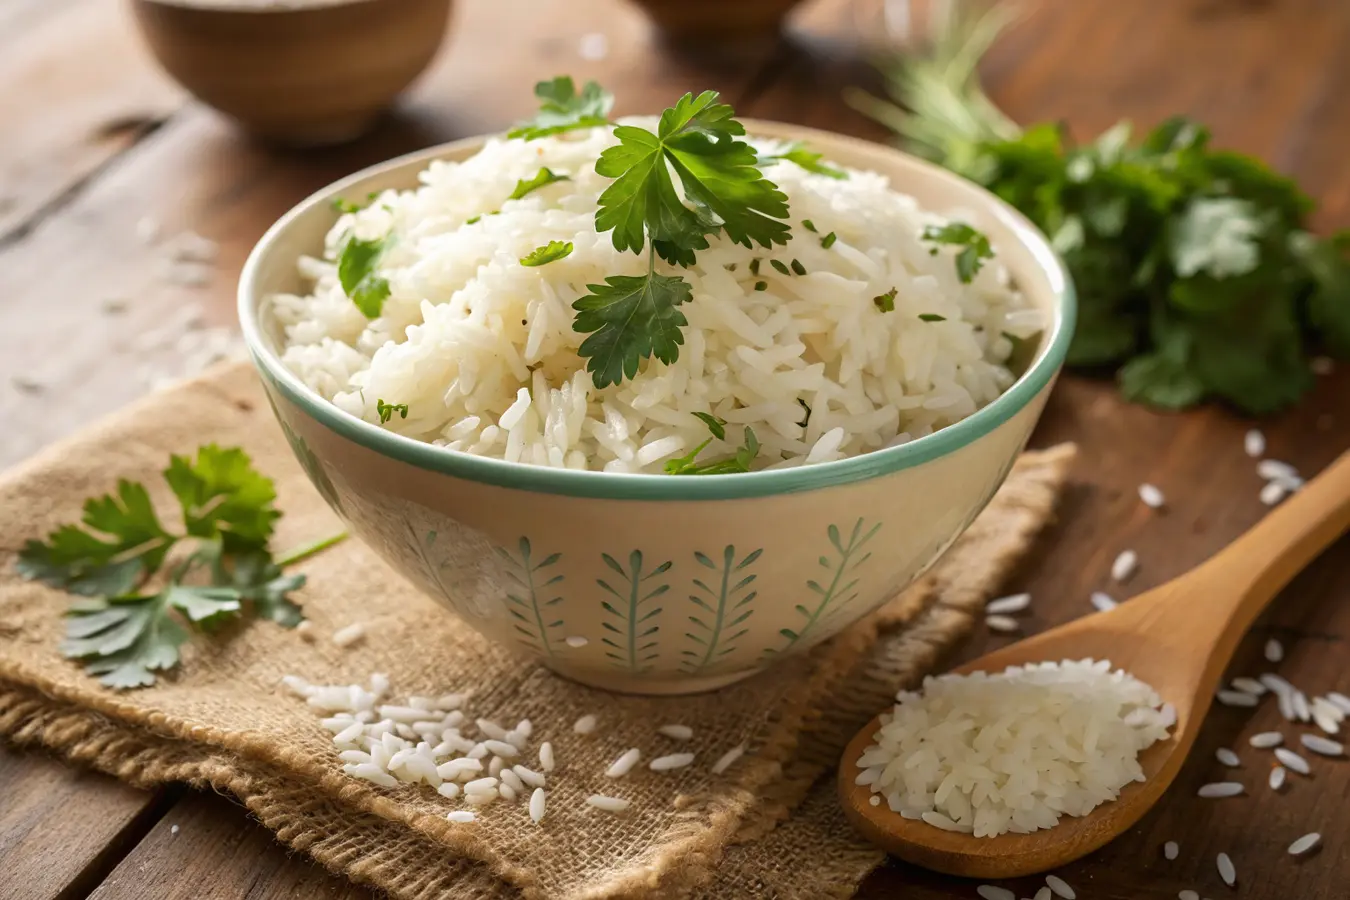
  • Steamed rice or quinoa: A simple, neutral base that lets the chicken and sauce shine.
  • Roasted vegetables: For a complete, balanced meal, serve the chicken with roasted carrots, asparagus, or zucchini.

FAQs

How does Gordon Ramsay cook chicken thighs?

Gordon Ramsay emphasizes achieving crispy skin and juicy meat when cooking chicken thighs. He begins by seasoning the thighs generously with salt and freshly cracked black pepper. Using a hot, oven-safe skillet, he sears the chicken skin-side down in a small amount of olive oil until golden and crispy.

After flipping the chicken, he adds aromatics like garlic, fresh thyme, and butter to the pan. To finish, he places the skillet in a preheated oven at 375°F, allowing the chicken to cook evenly while soaking up the flavors of the aromatics. This method creates a dish similar to skillet chicken thighs with schmaltzy tomatoes, focusing on crispy skin and bold flavors.

What cooking method is best for chicken thighs?

The best method for cooking chicken thighs depends on your goal. For maximum flavor and crispy skin, pan-searing in a skillet is ideal. This technique locks in juices while creating a golden crust. For even cooking with minimal effort, oven-roasting is a great option. It’s particularly effective when you’re cooking larger batches.

For skillet chicken thighs with schmaltzy tomatoes, combining searing and simmering in one pan is the best approach. It ensures the chicken thighs are flavorful and tender while infusing the schmaltzy tomato sauce with richness.

How to get more flavor in chicken thighs?

To make chicken thighs even more flavorful, focus on seasoning, cooking techniques, and additional ingredients:

  • Season generously: Salt, pepper, and spices like smoked paprika or garlic powder enhance the natural flavor of chicken.
  • Marinate: A simple marinade with olive oil, lemon juice, garlic, and herbs adds depth.
  • Cook with schmaltz: Using rendered chicken fat, as in skillet chicken thighs with schmaltzy tomatoes, amplifies the dish’s richness.
  • Use aromatics and herbs: Ingredients like garlic, onions, thyme, and parsley infuse the chicken and sauce with savory, herbaceous notes.

The key is to layer flavors throughout the cooking process for the most satisfying result.

Is it better to bake or pan-sear chicken thighs?

Both methods have their advantages, but the choice depends on the dish you’re preparing. Pan-searing is ideal for creating crispy skin and caramelized flavors, making it perfect for recipes like skillet chicken thighs with schmaltzy tomatoes. Baking, on the other hand, is a hands-off method that ensures even cooking and works well for larger quantities.

For this recipe, pan-searing the chicken thighs first helps render the fat, creating the schmaltz that enhances the tomato sauce. Simmering the chicken in the skillet afterward locks in moisture and melds all the flavors together.

Conclusion

Skillet chicken thighs with schmaltzy tomatoes is a dish that checks all the boxes—rich, flavorful, and incredibly easy to make. The crispy, golden chicken thighs combined with a luscious tomato sauce infused with schmaltz create a meal that feels indulgent yet approachable.

Now it’s your turn! Grab your skillet, gather your ingredients, and bring this recipe to life. And don’t forget to pair it with a side of crusty bread or creamy mashed potatoes for a complete and satisfying meal. If you’re looking for more inspiration, check out our other delicious one-skillet recipes to keep the creativity flowing in your kitchen!

Easy Black Pepper Angus Steak Recipe in 30 Minutes

There’s something magical about a perfectly cooked steak. Add freshly cracked black pepper, a touch of garlic, and buttery richness, and you’ve got yourself a winner black pepper Angus steak. This dish brings out the best in Angus beef, known for its exceptional marbling and tenderness, making every bite a savory delight.

What Makes Black Pepper Angus Steak Special?

A Flavorful Twist on Classic Steak

Black pepper Angus steak cooking in a cast iron skillet with butter
A sizzling black pepper Angus steak cooking in a cast iron skillet with butter and garlic.

Steak is already a favorite for its rich, savory flavor, but black pepper Angus steak takes it to another level. The boldness of freshly cracked black pepper complements the natural tenderness of premium Angus beef, creating a flavor profile that’s both simple and sophisticated. Unlike heavily marinated steaks, this dish highlights the steak’s quality, letting the natural juices and buttery finish shine.

The secret lies in the contrast of textures the slightly crisp, peppery crust giving way to a juicy, melt-in-your-mouth center. This perfect balance makes black pepper Angus steak a go-to choice for steak lovers who crave something bold yet refined. Whether it’s for a special occasion or just a regular weeknight treat, this dish never fails to impress.

Ingredients That Bring It All Together

Every great dish starts with the right ingredients, and black pepper Angus steak is no exception. At its core, this recipe is all about simplicity using a handful of quality items to create unforgettable flavors. Here’s what you’ll need:

  • Angus beef steak: Known for its marbling and tenderness, Angus beef ensures a juicy and flavorful bite. Ribeye or sirloin cuts work perfectly.
  • Freshly cracked black pepper: The bold, slightly spicy kick of fresh black pepper elevates the dish and creates a beautiful crust.
  • Garlic and soy sauce: These pantry staples add depth and a touch of umami to the steak.
  • Unsalted butter: Melts into a rich sauce, enhancing the natural flavor of the beef.

A tip: Always use fresh ingredients, especially the black pepper, for maximum flavor. If you’re curious about why fresh pepper is so important, this article on how to choose quality black pepper dives deeper into the subject.

The Key to Tender Angus Steak

When it comes to black pepper Angus steak, the secret to its tenderness is the cut and preparation of the beef. Angus beef is prized for its marbling, which helps retain moisture during cooking, resulting in a juicy, flavorful steak. But even the best steak can turn tough if overcooked or mishandled!

To keep your steak tender:

  • Always let it come to room temperature before cooking. Cold steaks can cook unevenly, leaving the center underdone and the outside overcooked.
  • Use a meat thermometer to ensure you hit the perfect doneness (130°F for medium-rare).
  • Let the steak rest for at least 5 minutes after cooking. This allows the juices to redistribute, ensuring every bite is succulent.

By paying attention to these details, you’ll ensure that your black pepper Angus steak is as tender and delicious as it looks.

Quick and Simple Prep for Busy Cooks

One of the best things about black pepper Angus steak is how quick and easy it is to prepare. You don’t need any fancy tools or hours of prep time just a skillet, a few pantry staples, and a love for bold flavors.

Here’s how to make the prep process as smooth as possible:

  1. Pat your steak dry: Removing excess moisture ensures the pepper and seasoning stick to the surface, creating that signature crust.
  2. Season generously: Don’t skimp on the black pepper! A good coating creates the steak’s rich, flavorful exterior.
  3. Preheat your skillet: Use a cast iron skillet if possible. Its even heat distribution is perfect for getting that golden-brown sear.

Step-by-Step Black Pepper Angus Steak Recipe

Ingredients

Every successful dish begins with the right ingredients, and the black pepper Angus steak is no exception. Here’s what you’ll need:

  • Angus beef steaks (8 oz each) – Known for their marbling and tenderness, Angus beef is the perfect choice for this recipe.
  • Freshly cracked black pepper – Adds bold flavor and a crunchy crust to the steak.
  • Olive oil – Helps create a golden-brown sear.
  • Garlic (minced) – Infuses the dish with aromatic depth.
  • Soy sauce and Worcestershire sauce – Provide a touch of umami and balance to the bold flavors.
  • Unsalted butter – Elevates the steak with a luxurious, buttery finish.

For an even more detailed breakdown of how to select high-quality steak, check out this guide to choosing the perfect beef cut.

Preparation: Getting Ready for Success

Before cooking, setting up properly ensures your black pepper Angus steak is as flawless as it can be:

Seasoning Angus steak with freshly cracked black pepper
Freshly cracked black pepper adds bold flavor to the Angus steak during preparation.
  1. Pat your steak dry: This simple step helps the seasoning stick and creates a beautiful crust.
  2. Generously season with salt and black pepper: Don’t hold back—the more evenly you coat the steak, the better the flavor.
  3. Preheat your skillet or grill: A hot surface is key to achieving that perfect sear.
  4. Mise en place: Gather all your ingredients to avoid scrambling mid-cooking.

Tip: If time allows, let the steak sit at room temperature for 20–30 minutes before cooking. This step ensures even cooking from edge to center.

Cooking Instructions

  1. Heat the skillet: Place a cast iron skillet over high heat and add olive oil. Wait until the oil shimmers, signaling it’s hot enough.
  2. Sear the steak: Lay the steak in the pan, pressing it gently for maximum contact. Sear for 2–3 minutes per side to form a golden-brown crust.
  3. Add aromatics: Toss in minced garlic, soy sauce, and Worcestershire sauce. Swirl them around to create a flavorful glaze.
  4. Butter baste: Lower the heat slightly and add butter to the pan. Use a spoon to continually baste the steak with the melted butter for added richness.
  5. Check for doneness: Use a meat thermometer 130°F for medium-rare is ideal.
  6. Rest the steak: Transfer it to a cutting board and let it rest for 5 minutes. This step ensures all the juices stay locked in.

Serving Suggestions

  • Pair your black pepper Angus steak with creamy mashed potatoes or roasted vegetables for a classic meal.
  • Feeling adventurous? Serve it over a bed of garlic butter rice. You can explore this one-pot rice hack for an easy pairing.
  • Don’t forget a crisp green salad or a side of crusty bread to soak up the rich, buttery sauce.

Tips for Perfect Black Pepper Angus Steak

The Right Way to Season Steak

Seasoning is the foundation of any great steak, and for black pepper Angus steak, it’s especially crucial. A generous coating of freshly cracked black pepper isn’t just for flavor—it creates a crust that locks in the juices while giving the steak its signature bold kick.

When seasoning:

  • Use coarsely ground black pepper rather than pre-ground pepper for maximum flavor and texture.
  • Don’t add salt too early, as it can draw out moisture from the steak. Instead, salt it just before cooking.
  • Pat the steak dry before seasoning to help the pepper adhere better.

By taking a few extra steps with your seasoning, your black pepper Angus steak will have a perfect balance of spicy crust and juicy interior.

The Perfect Sear: Temperature is Key

Achieving a beautiful sear is what gives your steak that golden-brown crust and smoky, caramelized flavor. The trick? High heat and a steady hand.

  1. Use a cast iron skillet: It retains heat better than most pans and creates an even sear.
  2. Preheat until smoking: Wait for the skillet to lightly smoke before adding the steak. This ensures the surface is hot enough to lock in the juices.
  3. Don’t overcrowd the pan: If you’re cooking multiple steaks, leave space between them. Overcrowding lowers the temperature and can lead to steaming rather than searing.

Transition tip: “Remember, the sizzle when the steak hits the pan is a sign you’re doing it right!”

Common Mistakes to Avoid

Even the most delicious recipes can go wrong with simple missteps. Avoid these pitfalls when preparing your black pepper Angus steak:

  • Overcooking the steak: Use a meat thermometer to hit the perfect doneness (130°F for medium-rare).
  • Skipping the rest period: Always rest your steak for at least 5 minutes after cooking. This prevents the juices from spilling out when you slice it.
  • Using too much oil: A light coating is enough, as too much can interfere with the crust formation.

By steering clear of these common mistakes, you’ll get a tender, flavorful steak every time.

Variations for Dietary Preferences

One of the best things about black pepper Angus steak is its versatility. With a few tweaks, you can adapt this dish to suit different diets or flavor preferences:

Plated black pepper Angus steak with roasted vegetables and garlic butter
A plated black pepper Angus steak with a juicy medium-rare interior, served with roasted vegetables and garlic butter.
  • Dairy-free: Skip the butter and use olive oil or ghee for basting.
  • Low-sodium: Substitute regular soy sauce with a low-sodium option or tamari.
  • Gluten-free: Tamari is also a great gluten-free alternative to soy sauce.
  • Add a spicy kick: Sprinkle a pinch of cayenne or red pepper flakes with the black pepper for an extra layer of heat.

For more ideas on customizing recipes, check out our Garlic Parmesan Chicken and Potatoes for inspiration.

FAQs

What is black pepper Angus steak?

Black pepper Angus steak is a savory, flavorful dish featuring premium Angus beef seasoned with freshly cracked black pepper. The black pepper creates a spicy crust that enhances the natural richness of the steak, while the tender Angus beef provides a juicy, melt-in-your-mouth texture. Often paired with simple ingredients like garlic, soy sauce, and butter, this steak is a restaurant-quality dish you can easily make at home. It’s perfect for anyone who loves bold, peppery flavors with a gourmet twist.

What is in the black pepper Angus steak at Panda Express?

The black pepper Angus steak at Panda Express is a signature stir-fry dish that combines tender Angus beef slices with crisp vegetables like bell peppers and onions. It’s coated in a savory black pepper sauce that has a slightly sweet and tangy kick, making it a favorite on their menu. If you’re looking to recreate the dish at home, you can use similar ingredients and add a splash of soy sauce for an extra umami punch.

What is the best way to cook Angus steak?

The best way to cook Angus steak is to sear it in a hot cast iron skillet. Here’s a simple step-by-step:

  1. Bring the steak to room temperature: This ensures even cooking.
  2. Season generously: Use freshly cracked black pepper and salt for a flavorful crust.
  3. Preheat your skillet: Heat it until it’s smoking slightly for a perfect sear.
  4. Sear each side for 2–3 minutes: This creates a golden-brown crust.
  5. Check for doneness: Use a meat thermometer (130°F for medium-rare).
  6. Rest the steak: Let it sit for 5 minutes to lock in the juices.

For added richness, you can baste the steak with butter during the last minute of cooking

Is Black Angus good for steak?

Yes, Black Angus beef is an excellent choice for steak. It’s prized for its superior marbling, which makes the meat tender, juicy, and full of flavor. The marbling ensures that the steak stays moist during cooking, making it ideal for dishes like black pepper Angus steak. Whether you prefer ribeye, sirloin, or tenderloin cuts, Black Angus delivers a premium steak experience every time.

Conclusion

Black pepper Angus steak is more than just a recipe—it’s a celebration of bold flavors and quality ingredients. From the peppery crust to the juicy, tender Angus beef, every bite is a testament to how simple ingredients can create a gourmet dish. You’ve learned what makes this steak special, the secrets to achieving the perfect sear, and tips for customizing it to suit your tastes.

Whether you’re making this dish for a weeknight dinner or a special occasion, it’s a guaranteed hit. Remember, the key lies in using freshly cracked black pepper, a hot skillet, and high-quality Angus beef. By following these steps, you’ll create a steak that rivals any steakhouse meal.

So, why wait? Grab your skillet, season your Angus steak, and experience the magic of black pepper Angus steak right in your own kitchen. Don’t forget to explore more delicious recipes on our site for inspiration and ideas to elevate your cooking!

The Best Rice Hack Recipe You’ll Try This Week!

Rice hack recipe can make cooking rice perfectly so much easier! This ultimate guide shares simple tips to transform your meals with minimal effort. Whether you’re new to cooking or a seasoned pro, these hacks are time-saving, useful, and absolutely delicious.

The Secret to Perfectly Fluffy Rice Every Time

Cooking rice doesn’t have to be tricky or intimidating it’s simpler than you think with a few go-to techniques. This Rice Hack Recipe will help you get perfectly fluffy rice, whether you’re using the classic stovetop method, a rice cooker, or even your oven. From easy tips like the finger method to avoiding sticky rice disasters, you’ll learn how to save time and improve every meal. Ready to elevate your rice game? Let’s dive in!

How to Cook Rice with the Finger Method

If you’re not into fiddling with measuring cups, the finger method is your new best friend. It’s an incredibly easy and reliable way to cook rice, especially for jasmine or basmati varieties. Here’s how it works:

Using the finger method to measure water for cooking rice.
The finger method is an easy way to measure water for perfect rice.
  1. Rinse your rice thoroughly. This washes off extra starch that can make your rice clumpy or sticky. Just give it a few rinses until the water runs clear.
  2. Measure water with your finger. Place your fingertip on the surface of the rice, then add water until it reaches the first knuckle of your index finger.
  3. Cook and steam. Bring the rice to a boil, cover it, and lower the heat. Once it’s done, let it steam for about 10 minutes to finish cooking.

Pro Tip: The finger method works best with long-grain rice, but for short-grain or sticky rice, you might need to stick with exact measurements for the perfect texture.

How to Avoid Sticky Rice

Nobody likes clumpy, mushy rice—unless you’re making sticky rice on purpose! Thankfully, a few simple steps can help you avoid this common cooking mishap:

  • Rinse it well. Washing your rice thoroughly is key. It removes the excess starch that makes rice clump together.
  • Get the water ratio right. For most rice types, a 1:1.5 ratio (1 cup of rice to 1.5 cups of water) works like a charm.
  • Fluff it up. After steaming, fluff the rice gently with a fork instead of stirring, which can crush the grains.

If you accidentally overdo it and end up with sticky rice, don’t worry! Spread it out on a plate or baking sheet to cool and dry a bit. It might not be perfect, but it’s a quick save for most dishes.

Rice Cooker Hacks for Effortless Cooking

A rice cooker is a game-changer if you’re looking for consistency and ease. With just a little creativity, you can take your rice from basic to bold:

  • Infuse flavor as it cooks. Swap water for chicken or veggie broth, or toss in garlic cloves, a bay leaf, or even a dash of soy sauce for added depth.
  • Use the delay timer. Most rice cookers let you set a start time, so you can have fresh, hot rice ready exactly when you need it.
  • Get creative with rice blends. Mix jasmine rice with wild rice or quinoa for interesting textures and flavors.

If you’re new to rice cookers, experiment with these tips and discover how versatile this appliance can be!

Alternative Ways to Cook Rice

No rice cooker? No problem! Here are a few other methods that work just as well:

  1. Oven-Baked Rice:
    • Combine your rice, boiling water, and a pinch of salt in an oven-safe dish. Cover tightly with foil and bake at 350°F for 30 minutes. This method is super low-maintenance and always delivers evenly cooked rice.
  2. Instant Pot Rice:
    • Use the “Rice” setting, or go with a 1:1 ratio of rice to water. Cook for 5 minutes, then let the pressure release naturally for 5 minutes before fluffing.
  3. Microwave Rice:
    • Mix rice and water in a microwave-safe bowl, cover loosely, and microwave on high for about 10 minutes. Stir halfway through for even cooking.

Each method has its perks, so try them out to see which one fits your cooking style best!

Flavorful Rice Hacks to Elevate Any Meal

Rice doesn’t have to play second fiddle on your plate it can be so much more than a bland side dish. With a few clever tweaks, you can transform this humble grain into something vibrant, delicious, and even the star of the meal.

Infuse Bold Flavors Right from the Start

The easiest way to upgrade plain rice is to replace water with something more flavorful. Broth, coconut milk, or even tomato juice can work wonders.

  • Broth: Use chicken, beef, or veggie broth instead of water. For example, jasmine rice cooked in chicken broth becomes rich and savory, perfect for pairing with roasted meats or stir-fries.
  • Coconut Milk: If you’re making a tropical-inspired dish, swap out water for coconut milk. A pinch of sugar and a squeeze of lime can bring out its creamy, slightly sweet flavor.
  • Tomato Juice: For a Spanish-style rice, cook it in tomato juice with a sprinkle of cumin and paprika. It’s vibrant, smoky, and pairs beautifully with tacos or grilled veggies.

One-Pot Wonders: Easy Dinners, Big Flavor

If you’re short on time but still want a flavorful dinner, one-pot rice recipes are a lifesaver. The best part? The rice soaks up all the seasonings, so every bite is packed with flavor.

Rice Hack Recipe: One-pot rice dish with chicken and vegetables.
A vibrant one-pot rice dish with vegetables and chicken, ready to serve.

Quick Recipe: Chicken and Rice Casserole

  1. Sauté onions, peppers, and garlic in a large pot or Dutch oven.
  2. Add diced chicken, uncooked rice, broth, and seasonings like paprika, thyme, or turmeric.
  3. Cover and let it simmer until the rice is tender. Finish with a sprinkle of fresh herbs for a pop of color and flavor.

For something with a little spice, check out Cajun Sausage and Rice Tips. This smoky, zesty dish shows how rice can easily carry bold flavors while still being comforting and hearty.

Give Leftover Rice a Makeover

Don’t toss your leftover rice! It’s a blank canvas for creating quick, delicious dishes. Here are a few ideas to breathe new life into yesterday’s grains:

  • Fried Rice: Heat up your rice with soy sauce, sesame oil, scrambled eggs, and your favorite veggies or protein. Add pineapple chunks and shrimp for a sweet-and-savory tropical twist.
  • Rice Pancakes: Combine cooked rice with an egg, breadcrumbs, and shredded cheese to make a batter. Fry in a pan until golden for a crispy, satisfying snack.
  • Stuffed Peppers: Mix leftover rice with ground beef, beans, and spices, then stuff it into bell peppers. Bake until tender for a cozy, flavorful dinner.

Boost Nutrition Without Losing Flavor

Rice is great on its own, but why not use it as a base to sneak in extra nutrients? Here are a few ways to make your rice dishes healthier and heartier:

  • Mix in Quinoa or Lentils: Combining rice with quinoa or lentils adds protein, fiber, and a nice textural contrast. It’s perfect for grain bowls or hearty salads.
  • Incorporate Veggies: Toss in finely chopped spinach, kale, or grated carrots while the rice cooks. They’ll blend right in, giving you a nutrient boost without extra work.
  • Try Brown or Wild Rice: Switch things up by using brown or wild rice instead of white. They’re higher in fiber and have a nutty flavor that pairs beautifully with roasted vegetables or savory stews.

Quick and Creative Rice Hacks for Leftovers

Leftover rice doesn’t have to sit in your fridge feeling forgotten—it’s actually a goldmine for quick, creative dishes! Whether you’re looking for snacks, desserts, or easy lunches, this Rice Hack Recipe will inspire you to transform yesterday’s rice into something fresh, exciting, and delicious. Let’s get started!

Turn Leftover Rice into Delicious Snacks

Leftover rice is the perfect base for quick, satisfying snacks that are as versatile as they are delicious. Whether you’re hosting friends or just need a midday bite, these ideas come together in no time:

Rice Hack Recipe: Crispy rice fritters with dipping sauce.
Golden-brown rice fritters served with a dipping sauce for a quick snack.
  • Rice Balls (Onigiri): Mix your rice with a splash of soy sauce or furikake (a Japanese seasoning blend). Shape it into balls or triangles and fill them with goodies like tuna, avocado, or pickled veggies. These are perfect for lunchboxes or snacks on the go!
  • Crispy Rice Fritters: Combine your rice with shredded cheese, breadcrumbs, and an egg to form a batter. Shape into small patties, then fry until golden and crispy. Serve with a dipping sauce like garlic aioli or sweet chili for a flavor-packed treat.

These snacks are so easy to make that you might find yourself cooking extra rice just to have leftovers!

Turn Leftover Rice into Sweet Treats

If you’ve never tried using rice for desserts, you’re in for a treat! With a little creativity, you can transform plain rice into indulgent sweets that feel like a total upgrade:

  • Rice Pudding: Simmer leftover rice with milk, sugar, and a splash of vanilla. Top with cinnamon, nutmeg, or even a handful of raisins for a cozy, creamy dessert that’s a total classic.
  • Mango Sticky Rice: Take your rice on a tropical vacation! Simmer it with coconut milk and sugar, then pair it with fresh mango slices for a Thai-inspired dessert that’s sweet, creamy, and refreshing.

Make Quick Lunches with Leftover Rice

Leftover rice makes an ideal base for quick and satisfying lunches that are both light and filling. These ideas are perfect for busy days when you need something delicious but easy:

  • Lettuce Wraps: Mix your rice with chopped veggies, soy sauce, and your favorite protein (like tofu or grilled chicken). Spoon it into crisp lettuce leaves and drizzle with hoisin or peanut sauce for a flavorful, handheld meal.
  • Buddha Bowls: Start with a base of rice and top with roasted vegetables, a boiled egg, and a dollop of hummus or tahini dressing. Sprinkle on some seeds or nuts for a bit of crunch, and you’ve got a colorful, nutrient-packed lunch in minutes.

With these ideas, lunch doesn’t have to be boring and leftover rice will always have a purpose.

Save Leftover Rice for Later

If you’re not ready to use your rice right away, don’t worry it’s easy to save it for future meals. Proper storage and reheating are key to making sure your rice tastes as good as when you first cooked it:

  • Freezing Leftover Rice: Spread the rice out on a baking sheet to cool completely, then transfer it to an airtight container or freezer bag. Frozen rice reheats beautifully in the microwave—just add a splash of water to bring back its moisture.
  • Make-Ahead Portions: Divide leftover rice into individual portions and store them in the fridge. These pre-measured servings are perfect for meal prepping or quick dinners during the week.

Budget-Friendly Rice Hacks for Every Pantry

Rice isn’t just a pantry staple it’s a budget-friendly hero in the kitchen. Affordable, versatile, and endlessly adaptable, rice can stretch meals, add variety, and help you whip up flavorful dishes without spending a fortune. With this Rice Hack Recipe, you’ll learn how to make the most of this humble ingredient while keeping your meals both delicious and cost-effective.

Stretch Your Meals with Rice

When you need to feed a crowd (or stretch your grocery budget), rice is the perfect solution. It makes dishes more filling and helps you get the most out of every ingredient.

  • Add Rice to Soups and Stews: Toss cooked rice into soups, stews, or even chili. It thickens the dish, makes it heartier, and helps stretch your ingredients further without sacrificing flavor.
  • Bulk Up Meat Dishes: Mix cooked rice with ground beef, turkey, or even beans to create meatloaf, meatballs, or stuffed peppers. It reduces the amount of meat you need while keeping the dish satisfying and flavorful.

Make Your Own Rice Mixes

Forget the boxed rice mixes from the store—they’re expensive and often loaded with sodium and preservatives. Making your own at home is not only cheaper but also healthier.

  • DIY Flavored Rice Mixes: Combine uncooked rice with dried herbs, bouillon powder, and spices like garlic powder, paprika, or turmeric. Store your mix in an airtight container, and cook it with water or broth whenever you need a quick, flavorful side dish.
  • Add Texture with Other Grains: Mix rice with grains like quinoa, barley, or bulgur for a more interesting texture and extra nutrients. This combo works especially well in grain bowls or as a hearty base for salads.

Stock Up for Emergency Meals

Rice’s long shelf life makes it a pantry essential for emergency meals or last-minute dinners. With just a few other staples, you can turn rice into something quick, comforting, and nutritious.

  • Store It Right: Keep uncooked rice in an airtight container in a cool, dry spot. White rice can last for years, while brown rice (which has more natural oils) should be used within six months or stored in the freezer to keep it fresh longer.
  • Pair It with Pantry Staples: Combine rice with canned beans, frozen veggies, or jarred sauces for an easy meal when you’re running low on fresh ingredients. For example, black beans, rice, and salsa make a quick, flavorful dish with almost no effort.

Use Rice for Budget-Friendly Meal Prep

Rice is a meal prep MVP, helping you save money and time throughout the week. It’s flexible enough to pair with just about anything, so your meals never get boring.

  • Cook in Bulk: Make a big batch of rice at the start of the week and portion it out into containers. Pair it with different proteins, veggies, and sauces to keep things fresh and interesting.
  • Mix Up the Flavors: Start with a plain base and change up the seasonings or toppings for each meal. Add soy sauce and sesame oil for an Asian-inspired bowl, or mix in tomato paste, garlic, and oregano for a Mediterranean twist.

FAQs About Rice Hacks

What is the Rice Hack Recipe method?

The Rice Hack Recipe method is all about simple, clever tricks that make cooking rice foolproof and more enjoyable whether you’re a kitchen newbie or a seasoned pro. Think techniques like the finger method to measure water without tools, pre-cooking and freezing rice for busy days, or swapping water for broth to instantly boost flavor. These rice hacks save time, reduce waste, and help you make consistently delicious rice every time.

What is the 5-5-5 rule for rice?

The 5-5-5 rule is a game-changing technique for cooking rice in an Instant Pot:

  1. Cook the rice on high pressure for 5 minutes.
  2. Let it naturally release pressure for another 5 minutes.
  3. Do a quick pressure release for the remaining time.

This method guarantees perfectly fluffy, evenly cooked rice without any guesswork, making it a favorite for those who love efficiency and great results.

What is the 123 rice rule?

The 123 rice rule is an easy guideline for cooking rice on the stovetop:

  • 1 cup of rice
  • 2 cups of water
  • 3 teaspoons of salt or seasoning (optional, based on your taste)

It’s perfect for beginners and works well with most long-grain rice varieties. If you’re diving into rice hack recipes, this rule is a handy go-to for achieving that perfect balance of moisture and texture.

Does the rice finger trick always work?

The rice finger trick—measuring water by placing your finger on top of the rice and filling the pot up to your first knuckle—is a tried-and-true hack, but it’s not foolproof for every type of rice. It works best with long-grain or medium-grain rice, like jasmine or basmati, where water absorption is consistent.

For short-grain rice, sticky rice, or recipes that need precise ratios, you might want to pair the finger trick with a more exact method, like the 123 rice rule, to get the best results.

Conclusion

Cooking perfect rice doesn’t have to be complicated. With the tips and tricks from this rice hack recipe guide, you’ll turn this pantry staple into the star of your meals. Whether you’re using the finger method, making flavorful one-pot dishes, or transforming leftovers into creative snacks and desserts, rice will become your go-to ingredient for versatile and budget-friendly cooking.

Print
clock clock iconcutlery cutlery iconflag flag iconfolder folder iconinstagram instagram iconpinterest pinterest iconfacebook facebook iconprint print iconsquares squares iconheart heart iconheart solid heart solid icon
Bowl of perfectly fluffy rice garnished with fresh herbs.

Perfectly Fluffy Rice Hack Recipe


  • Author: Emily
  • Total Time: 23 minutes
  • Yield: 4 servings 1x

Description

Learn how to cook perfectly fluffy rice every time with this foolproof rice hack recipe. Using simple methods and tips, you’ll achieve delicious, evenly cooked rice that’s ready to pair with any meal.


Ingredients

Scale
  • 1 cup jasmine or basmati rice (or any long-grain rice)
  • 1 ½ cups water or broth (for added flavor)
  • ½ teaspoon salt (optional, depending on the broth used)
  • 1 teaspoon butter or oil (optional for richer flavor)

Instructions

  1. Rinse the rice thoroughly: Place the rice in a fine-mesh strainer and rinse under cold water until the water runs clear. This removes excess starch, preventing stickiness.
  2. Measure the water: Use the 123 rice rule (1 cup of rice, 2 cups of water for short-grain, or 1 ½ cups water for long-grain rice). You can also use the finger method: place your fingertip on top of the rice, and the water level should reach the first knuckle.
  3. Combine ingredients: In a medium pot, add the rinsed rice, water or broth, salt, and butter or oil (if using). Stir gently to combine.
  4. Bring to a boil: Place the pot over medium heat and bring the mixture to a rolling boil.
  5. Simmer and cover: Reduce the heat to low, cover the pot with a tight-fitting lid, and let it simmer for 15–18 minutes (depending on rice type). Avoid lifting the lid during this time.
  6. Rest the rice: Once the rice has absorbed all the liquid, remove the pot from the heat and let it sit, covered, for 5 minutes.
  7. Fluff and serve: Use a fork to gently fluff the rice, separating the grains. Serve hot as a side dish or use it as a base for other recipes.

Notes

  • For added flavor, replace water with chicken, vegetable, or beef broth.
  • To prevent rice from sticking, add a splash of oil before cooking.
  • This recipe works best for jasmine or basmati rice but can be adjusted for brown rice (increase cooking time to 40 minutes and water to 2 cups).
  • Leftover rice can be frozen for up to 2 months and reheated with a splash of water in the microwave.