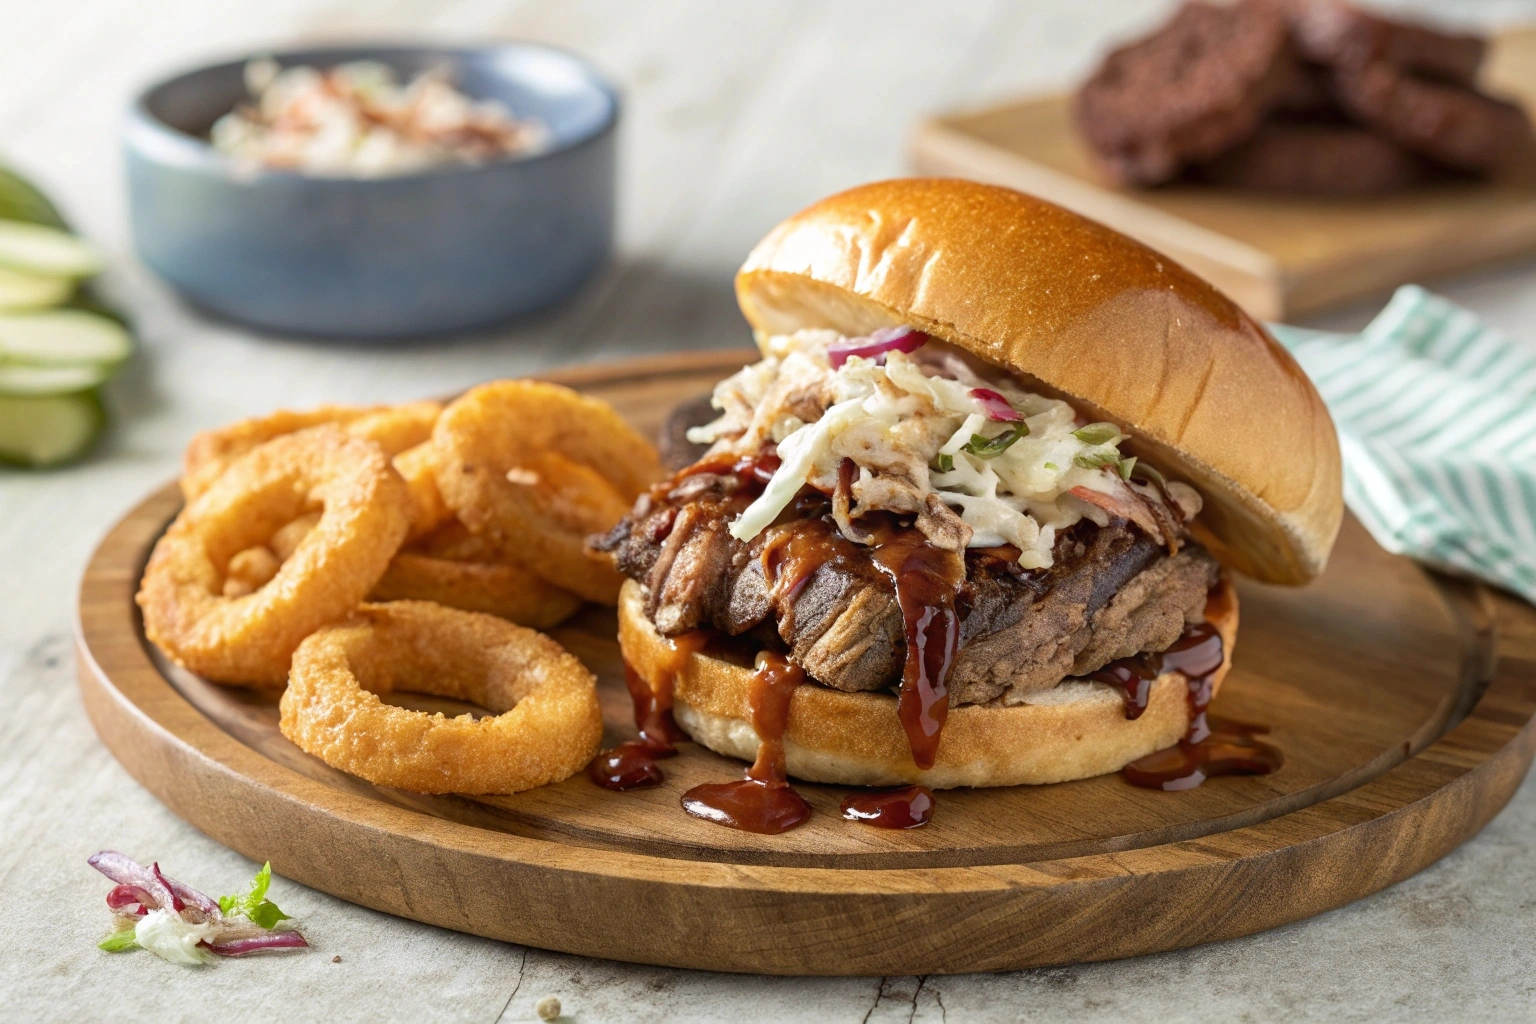
If you’ve never experienced the magic of a homemade beef brisket sandwich, you’re in for a treat. Juicy brisket, perfectly seasoned and slow-cooked to perfection, meets crisp, toasted bread and your choice of bold toppings. It’s a little smoky, a little tangy, and completely irresistible. Best of all, it’s easier to make than you might think. Whether for a casual dinner or a weekend feast, this sandwich always delivers.
Table of Contents
What Makes a Perfect Beef Brisket Sandwich?
Understanding the Art of Beef Brisket
A beef brisket sandwich is only as good as the brisket itself. Brisket is a flavorful cut of beef that becomes tender and juicy when cooked low and slow. To achieve the best results, choose between the point cut, which is fattier and perfect for shredding, or the flat cut, which is leaner and slices beautifully.
Seasoning is key! Whether you prefer a dry rub with paprika, garlic powder, and brown sugar or a marinade packed with smoky and savory flavors, seasoning sets the stage for a mouthwatering sandwich. Slow cooking or smoking for hours creates the ideal melt-in-your-mouth texture, making the brisket irresistible.
Building the Foundation: The Right Bread
The bread is just as important as the brisket in a beef brisket sandwich. Soft yet sturdy bread, like brioche buns, ciabatta rolls, or sourdough slices, is ideal. These options soak up the flavorful juices without becoming soggy.
For added texture, lightly toast the bread before assembling the sandwich. A golden, crispy surface provides the perfect contrast to the tender brisket. To learn more about choosing the best bread for sandwiches, check out this bread guide.
The Secret to Juicy Brisket
One of the secrets to a perfect beef brisket sandwich is ensuring the brisket stays moist and flavorful. Start by letting the cooked brisket rest for at least 20 minutes before slicing. This step locks in the juices, preventing dryness.
When slicing brisket, always cut against the grain for maximum tenderness. Thin slices are ideal for sandwiches, as they allow the brisket to layer evenly. If you’re using leftovers, reheat the brisket gently with a splash of beef broth or barbecue sauce to restore its juiciness.
Toppings That Elevate the Flavor
Toppings are the finishing touch that can make or break a beef brisket sandwich. For a classic option, pair the brisket with coleslaw for crunch and tanginess. Prefer a smoky twist? Add caramelized onions and pickles for a flavor-packed bite.
If you’re feeling adventurous, consider toppings like crispy fried onions, sliced jalapeños, or a drizzle of horseradish aioli. These bold additions enhance the sandwich’s overall flavor without overpowering the tender brisket. Don’t forget a generous slathering of barbecue sauce for that perfect balance of smoky, sweet, and tangy!
Ingredients You’ll Need for the Ultimate Beef Brisket Sandwich
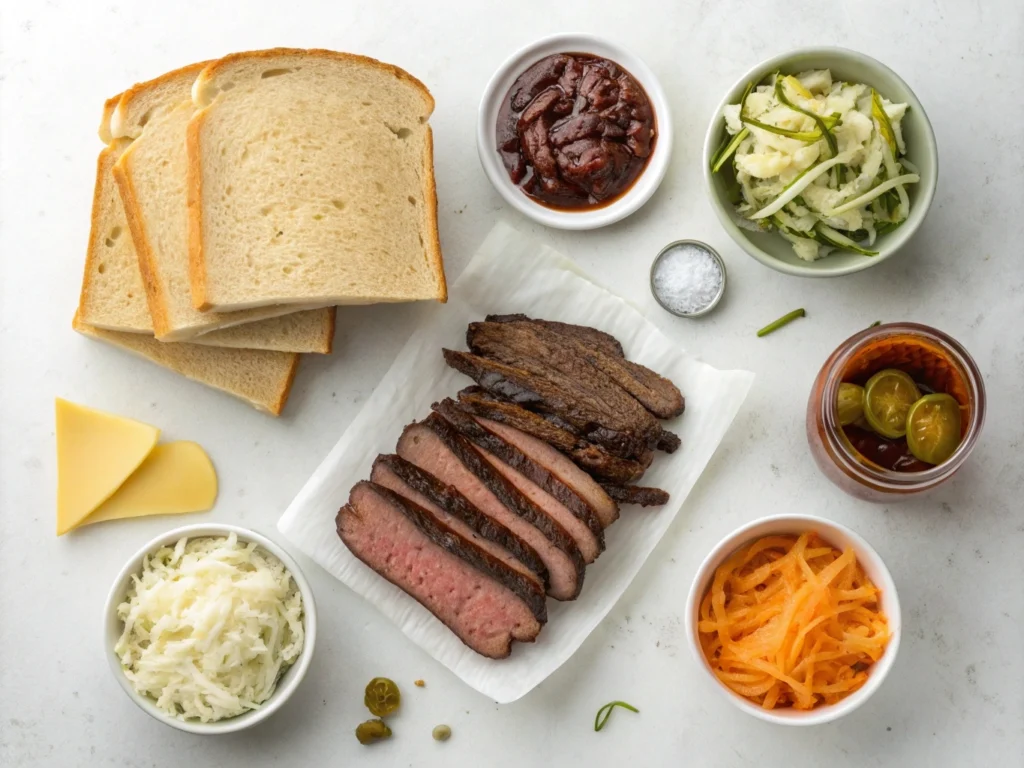
Selecting the Perfect Brisket
The heart of a beef brisket sandwich lies in the brisket itself. Choosing the right cut can make all the difference. For a tender, juicy sandwich, opt for point cut brisket, which is fattier and perfect for shredding. Alternatively, flat cut brisket offers a leaner option that slices beautifully and is ideal for stacking in a sandwich.
When shopping, look for brisket with good marbling to ensure the meat stays moist during cooking. If you’re short on time, pre-cooked brisket or leftovers can still produce a fantastic sandwich.
Must-Have Condiments and Sauces
A beef brisket sandwich wouldn’t be complete without the right condiments and sauces. Barbecue sauce is a classic choice, offering smoky and tangy notes that complement the brisket’s deep flavor. For a lighter, tangy twist, try a mustard-based sauce or horseradish aioli.
Choosing Fresh, Flavorful Ingredients
Fresh ingredients elevate the flavor profile of a beef brisket sandwich. Opt for crisp, vibrant vegetables like lettuce, tomatoes, or even thinly sliced red onions. Fresh herbs such as parsley or cilantro can add a burst of freshness to balance the sandwich’s richness.
Don’t forget cheese! Cheddar, Swiss, or provolone are excellent choices that melt beautifully over the warm brisket, enhancing its overall flavor.
Essential Equipment for Success
Making the perfect beef brisket sandwich is easier when you have the right tools. Use a meat thermometer to ensure your brisket is cooked to perfection, a carving knife for clean, even slices, and a griddle pan for toasting bread.
These tools not only save time but also guarantee consistency, allowing you to create sandwiches that look and taste like they came straight from a deli.
Step-by-Step Guide to Crafting a Beef Brisket Sandwich
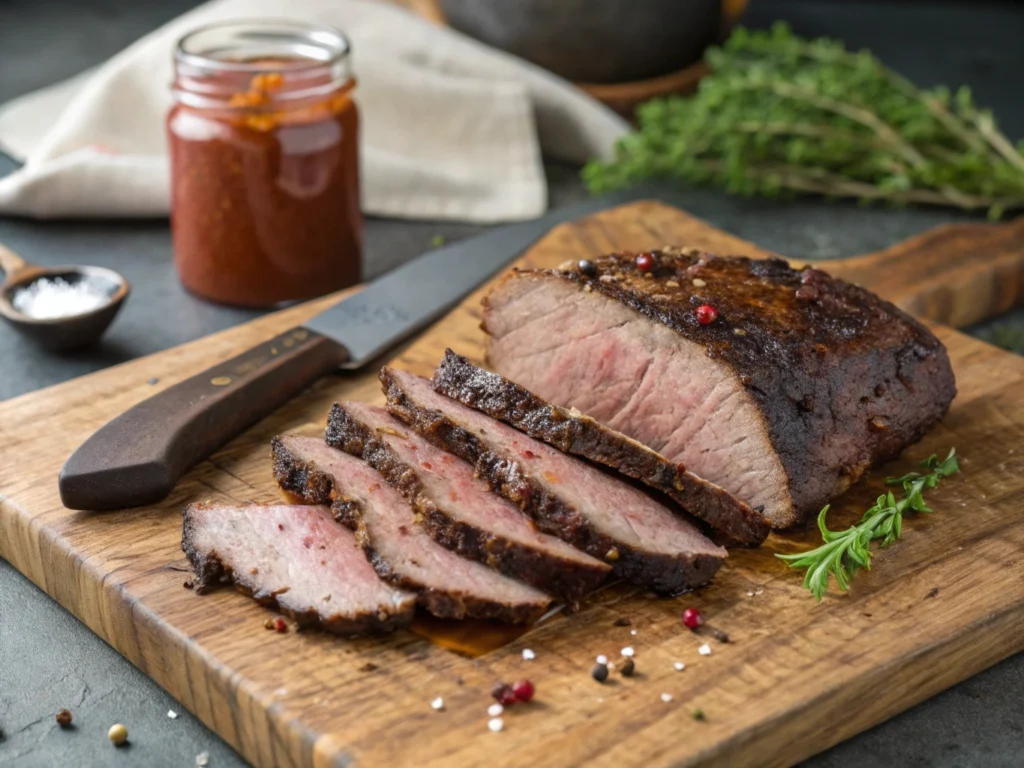
Step 1: Preparing the Brisket
The foundation of any great beef brisket sandwich starts with the brisket itself. Begin by seasoning the brisket generously with your favorite spice rub. A mix of paprika, garlic powder, salt, and brown sugar works beautifully to enhance the natural flavors.
For cooking, slow and steady wins the race. Whether you’re smoking the brisket with hickory wood for a smoky flavor or slow-cooking it in a Dutch oven, aim for a low temperature over several hours. This process ensures tender, juicy meat that will melt in your mouth. Don’t forget to let the brisket rest for 20 minutes before slicing to lock in all the juices.
Step 2: Toasting the Bread
While the brisket rests, it’s time to prep the bread. A beef brisket sandwich deserves bread that’s not only delicious but also sturdy enough to hold the fillings. Choose brioche buns, ciabatta rolls, or sourdough slices, and lightly butter them on the cut sides.
Toast the bread on a griddle or in a skillet until golden brown. The crispy exterior provides a satisfying contrast to the tender brisket while also preventing the bread from becoming soggy when layered with sauce.
Step 3: Assembling the Sandwich
Now comes the fun part—assembling your beef brisket sandwich. Start by spreading your favorite sauce on both slices of bread. Layer the brisket slices evenly, adding just enough for a hearty bite without overwhelming the sandwich.
For toppings, classic options like coleslaw and pickles add crunch and tang, while caramelized onions bring a hint of sweetness. Prefer a spicy twist? Add sliced jalapeños or a dash of hot sauce. Don’t hesitate to get creative with your combinations!
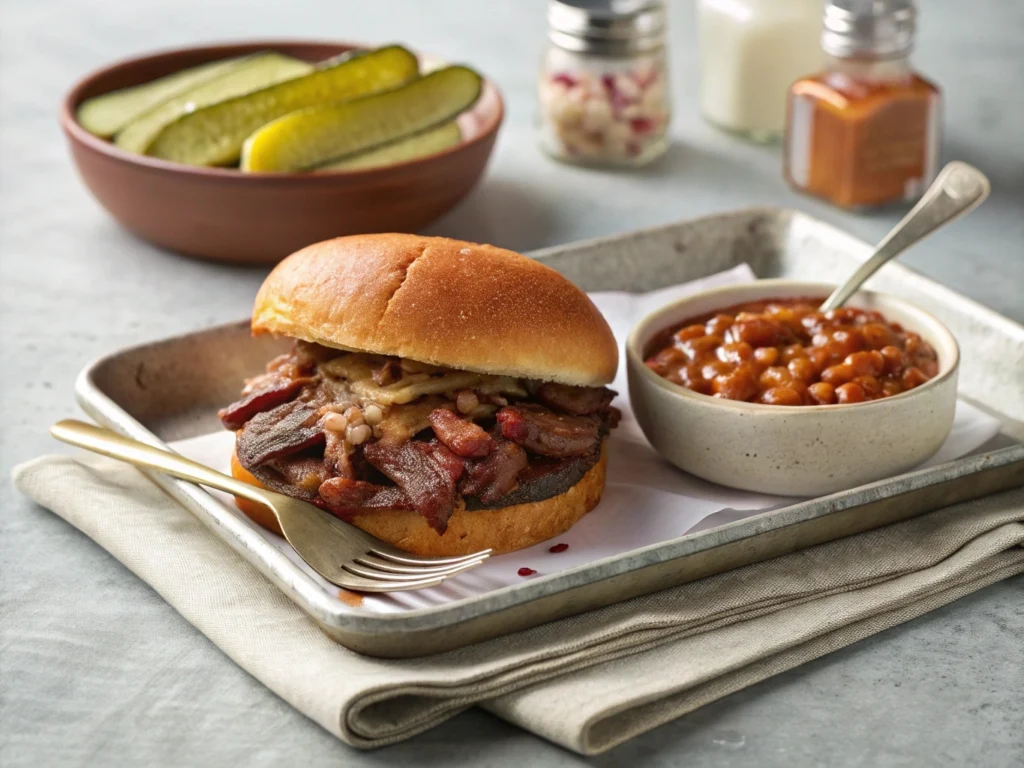
Step 4: Serving Suggestions
A beef brisket sandwich isn’t complete without the perfect sides. Serve your masterpiece with classic barbecue accompaniments like coleslaw, baked beans, or potato salad. For a more indulgent option, pair it with crispy onion rings or loaded fries.
For drinks, a craft beer or a refreshing glass of iced tea complements the smoky flavors beautifully. Whether you’re hosting a backyard barbecue or enjoying a quiet dinner, this sandwich is guaranteed to satisfy.
For more delicious recipes that pair well with your sandwich, check out our garlic bread rolls recipe!
Step-by-Step Guide to Crafting a Beef Brisket Sandwich
Step 1: Preparing the Brisket
The foundation of any great beef brisket sandwich starts with the brisket itself. Begin by seasoning the brisket generously with your favorite spice rub. A mix of paprika, garlic powder, salt, and brown sugar works beautifully to enhance the natural flavors.
For cooking, slow and steady wins the race. Whether you’re smoking the brisket with hickory wood for a smoky flavor or slow-cooking it in a Dutch oven, aim for a low temperature over several hours. This process ensures tender, juicy meat that will melt in your mouth. Don’t forget to let the brisket rest for 20 minutes before slicing to lock in all the juices.
Step 2: Toasting the Bread
While the brisket rests, it’s time to prep the bread. A beef brisket sandwich deserves bread that’s not only delicious but also sturdy enough to hold the fillings. Choose brioche buns, ciabatta rolls, or sourdough slices, and lightly butter them on the cut sides.
Toast the bread on a griddle or in a skillet until golden brown. The crispy exterior provides a satisfying contrast to the tender brisket while also preventing the bread from becoming soggy when layered with sauce.
Step 3: Assembling the Sandwich
Now comes the fun part—assembling your beef brisket sandwich. Start by spreading your favorite sauce on both slices of bread. Layer the brisket slices evenly, adding just enough for a hearty bite without overwhelming the sandwich.
For toppings, classic options like coleslaw and pickles add crunch and tang, while caramelized onions bring a hint of sweetness. Prefer a spicy twist? Add sliced jalapeños or a dash of hot sauce. Don’t hesitate to get creative with your combinations!
Step 4: Serving Suggestion
A beef brisket sandwich isn’t complete without the perfect sides. Serve your masterpiece with classic barbecue accompaniments like coleslaw, baked beans, or potato salad. For a more indulgent option, pair it with crispy onion rings or loaded fries.
For drinks, a craft beer or a refreshing glass of iced tea complements the smoky flavors beautifully. Whether you’re hosting a backyard barbecue or enjoying a quiet dinner, this sandwich is guaranteed to satisfy.
FAQs
What Goes Well with a Brisket Sandwich?
A beef brisket sandwich pairs wonderfully with classic barbecue sides like coleslaw, baked beans, or potato salad. These sides provide a balance of flavors and textures, complementing the smoky richness of the brisket. For a crunchier option, try pairing the sandwich with crispy onion rings or sweet potato fries. Looking for something lighter? A fresh green salad or roasted vegetables works perfectly to cut through the sandwich’s richness.
What Sauce is Good for a Brisket Sandwich?
The sauce you choose can transform your beef brisket sandwich. Barbecue sauce is a classic choice, offering a smoky, tangy kick that enhances the brisket’s flavors. For something different, consider mustard-based sauces or a creamy horseradish aioli for a bold and zesty twist. If you enjoy heat, chipotle or sriracha mayo can add a spicy punch. Whichever you choose, the sauce should complement, not overpower, the tender brisket.
What Cheese Goes with Beef Brisket?
Cheese can take a beef brisket sandwich to the next level by adding creaminess and depth. Popular choices include cheddar, for its sharp, tangy flavor, and Swiss, which melts beautifully and adds a mild nuttiness. If you prefer a bolder option, go with provolone or pepper jack, which offers a hint of spice. Melted cheese not only enhances the overall flavor but also adds a satisfying, gooey texture to each bite.
What Tastes Good with Beef Brisket?
Beef brisket is incredibly versatile and pairs well with a variety of flavors. Sweet options like honey-glazed carrots or cornbread complement the brisket’s smoky notes. Savory sides, such as roasted potatoes or sautéed greens, provide hearty companions to the meat. For beverages, a cold craft beer or a glass of iced tea makes an excellent match, while desserts like fruit cobbler or pecan pie round out the meal beautifully.
Conclusion
A beef brisket sandwich is more than just a meal—it’s a culinary experience that combines tender, smoky meat, perfectly toasted bread, and your choice of bold toppings and sauces. Throughout this guide, you’ve learned how to select the best ingredients, prepare brisket to perfection, and create variations to suit every palate.