5 Secrets for the Best Tacos de Lengua You’ll Ever Taste

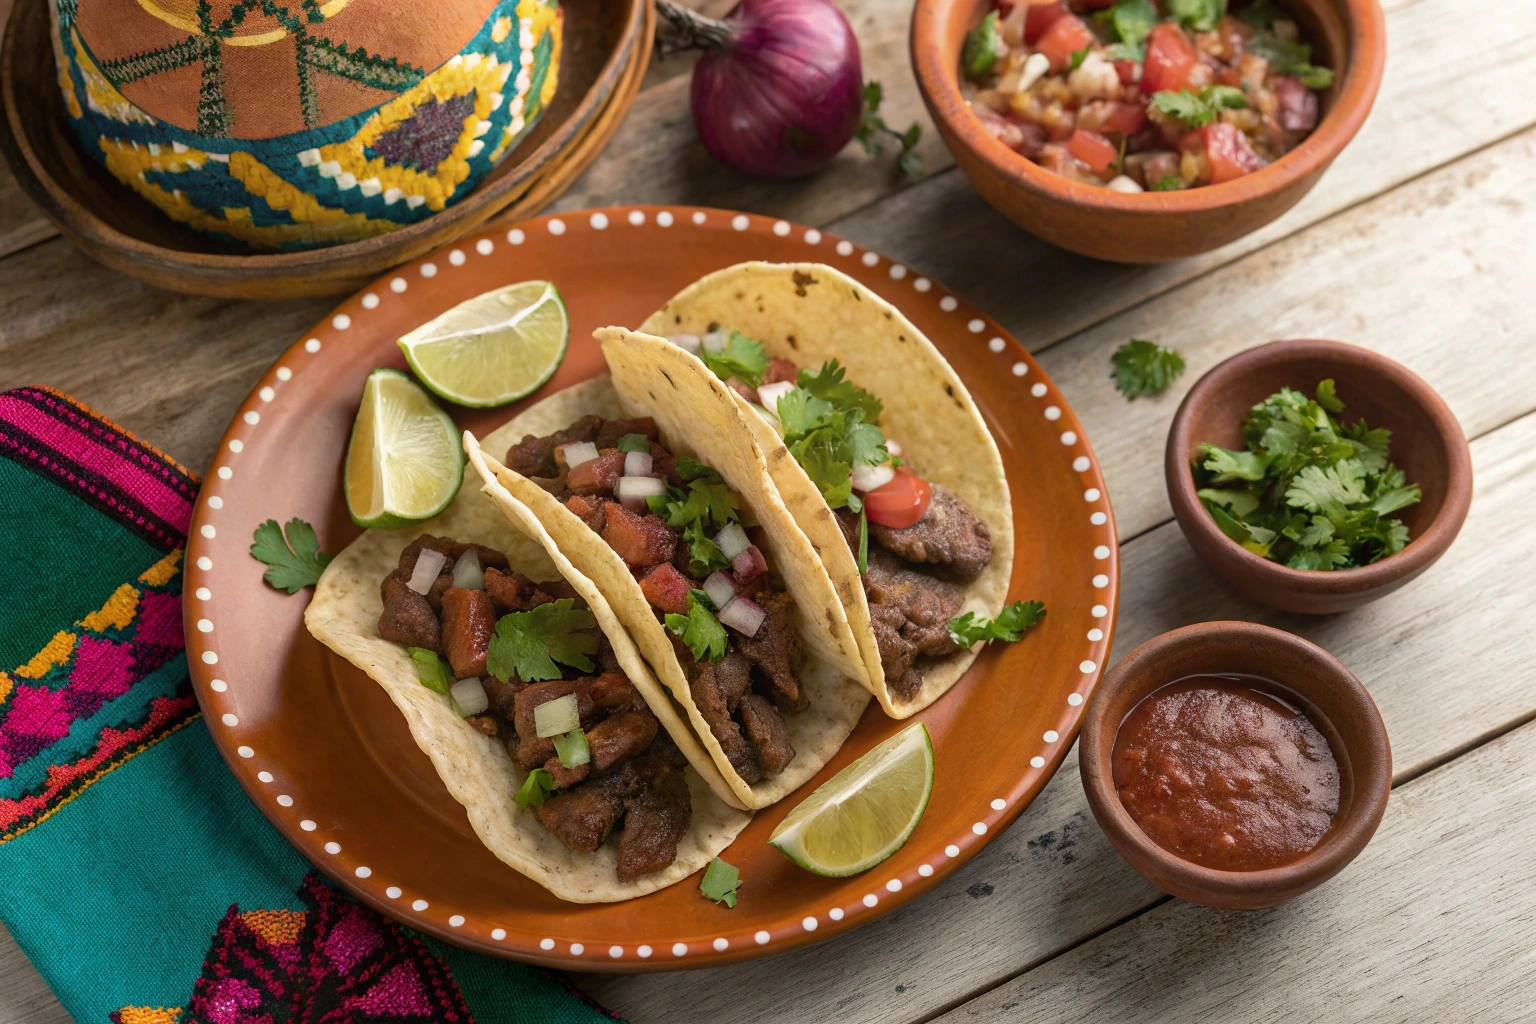
When it comes to authentic Mexican cuisine, nothing beats the bold flavors and rich history of tacos de lengua. This isn’t just a taco; it’s a culinary tradition passed down through generations. Slow-cooked beef tongue, infused with fragrant spices, is the star here delicately tender and full of savory goodness.

The beauty of tacos de lengua lies in their simplicity. It’s not about flashy ingredients; it’s about letting the natural flavors shine. Serve them with warm tortillas, fresh lime, and your favorite toppings, and you’ve got a meal that feels both humble and indulgent. Whether you’re hosting a fiesta or craving something unique for dinner, these tacos are sure to wow your taste buds. Let’s get cooking you’re going to love this!

Secret 1: Choosing the Best Beef Tongue

Selecting the right beef tongue is the foundation of crafting unforgettable tacos de lengua. The quality of the meat directly impacts its flavor, tenderness, and overall success in your recipe. Let’s break it down step by step.

What to Look for When Buying Beef Tongue

When shopping for beef tongue, look for one that’s fresh and firm, with no discoloration or unpleasant odors. A good beef tongue should have a smooth surface, a consistent pinkish-brown color, and feel slightly moist to the touch. If possible, source your tongue from a butcher or a market specializing in fresh meat, as they often carry higher-quality cuts.

While packaged beef tongue is convenient, fresh options from trusted sources tend to yield better results. For those new to cooking beef tongue, don’t hesitate to ask your butcher for tips on preparation. This ensures you’re starting with the best possible base for your tacos de lengua.

Why Quality Matters

High-quality beef tongue isn’t just about taste it’s also about texture. A fresh, well-chosen tongue will cook evenly, resulting in a tender, melt-in-your-mouth experience. On the other hand, a subpar cut may have tough sections or an off-putting flavor, which could ruin your tacos.

Moreover, premium-quality meat absorbs seasonings better, giving your tacos de lengua a rich depth of flavor. Choosing wisely at this stage ensures the rest of your cooking process is smooth and stress-free.

Storage Tips

If you’re not cooking the tongue immediately, proper storage is key to maintaining its quality. Keep it in the coldest part of your refrigerator, ideally in a sealed container or vacuum-sealed bag. Beef tongue can stay fresh for up to three days in the fridge.

For longer storage, freezing is a great option. Wrap the tongue tightly in plastic wrap and then place it in a freezer-safe bag. Be sure to label it with the date, as frozen beef tongue is best used within three months. Thaw it slowly in the refrigerator when you’re ready to cook.

Trusted Sources for Beef Tongue

For the freshest beef tongue, consider shopping at local Mexican markets or specialty butcher shops. Some online retailers, such as Heritage Foods, also offer high-quality beef tongue that can be delivered straight to your door. These sources often prioritize sustainable practices and provide detailed information about their products, ensuring you know exactly what you’re getting.

When sourcing your ingredients, remember that the extra effort to find a premium cut will elevate your tacos de lengua from good to unforgettable.

Secret 2: Preparing the Beef Tongue

Stockpot with beef tongue and aromatics for tacos de lengua.
Beef tongue simmering with garlic, onions, and spices for flavorful tacos.

To make truly exceptional tacos de lengua, preparation is key. From cleaning to brining, the way you handle the tongue sets the stage for a flavorful and tender dish. Let’s walk through the essential steps.

Cleaning the Beef Tongue Properly

Before cooking, the beef tongue needs to be thoroughly cleaned. Rinse it under cold water, scrubbing away any surface debris. Pay close attention to the nooks and crannies, as this ensures your tacos de lengua have a clean, fresh taste. If your tongue has been frozen, let it thaw completely in the refrigerator before cleaning.

For an extra step, soak the tongue in cold water with a splash of vinegar for 30 minutes to remove any lingering odors. This quick trick can make a big difference in the final flavor!

Optional Pre-Brining

Brining the tongue is a fantastic way to infuse flavor and ensure tenderness. Combine water, salt, garlic, bay leaves, and a handful of peppercorns in a large container to create a simple brine. Submerge the tongue in the mixture and refrigerate it for 4–12 hours.

Although this step isn’t essential, it enhances the meat’s ability to absorb seasonings during cooking, resulting in unforgettable tacos de lengua.

Tools You’ll Need

A few basic tools make preparing beef tongue much easier. Here’s what you’ll need:

  • Stockpot: Large enough to accommodate the tongue and aromatics.
  • Sharp Knife: Crucial for peeling and slicing the cooked tongue.
  • Cutting Board: A sturdy surface for preparation.
  • Tongs: To handle the tongue while it’s hot.

Having these tools on hand simplifies the preparation process and ensures that your cooking experience is hassle-free.

Ready for the Next Step

Now that your beef tongue is cleaned and prepped, you’re ready to move on to cooking it to tender perfection. In the next section, we’ll explore how to achieve that ideal texture and flavor through slow cooking and pressure cooking techniques. Stay tuned for more!

Secret 3: Cooking the Beef Tongue to Perfection

Cooking beef tongue may seem intimidating, but with the right techniques, you can achieve tender, flavorful results perfect for tacos de lengua. Here’s how to do it step by step.

The Slow Cooking Method

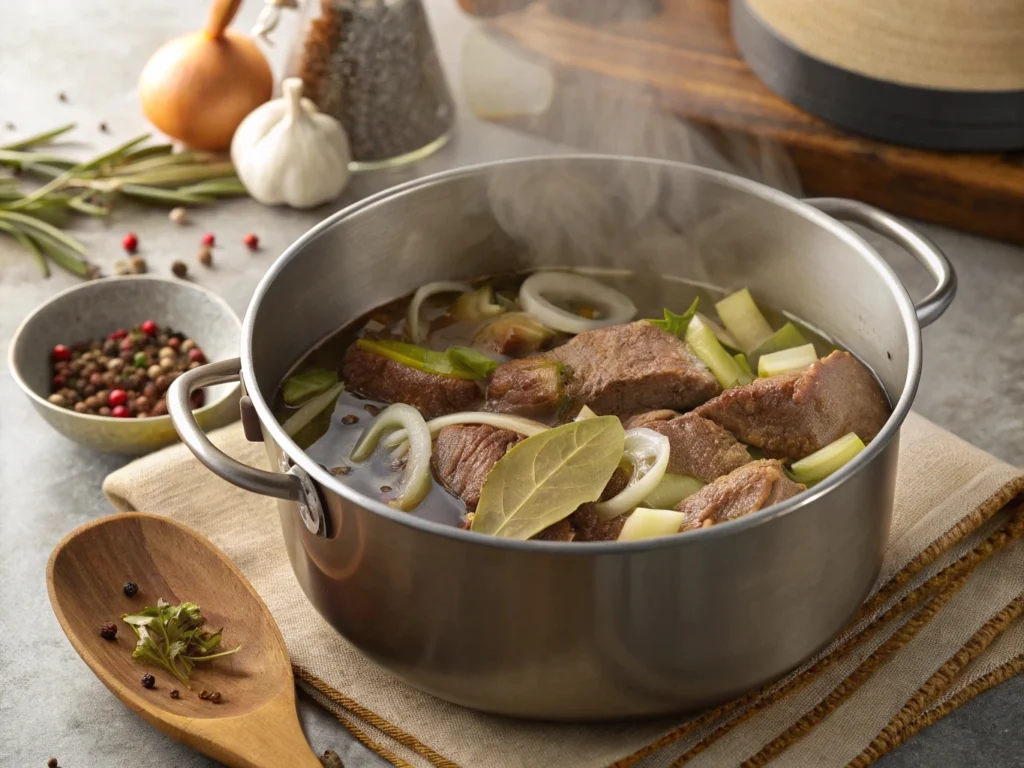
Slow cooking is one of the best ways to make beef tongue tender and packed with flavor. Start by placing the cleaned tongue in a large stockpot. Add aromatics like garlic cloves, onion, bay leaves, and peppercorns. Cover it with water, bring it to a boil, and then reduce to a simmer.

Let the tongue cook gently for about 3–4 hours, or until a knife easily pierces the thickest part. The slow cooking process allows the collagen in the tongue to break down, resulting in the melt-in-your-mouth texture that makes tacos de lengua so delicious.

Pressure Cooking for Quick Results

If you’re short on time, a pressure cooker is your best friend. It delivers tender beef tongue in a fraction of the time. Place the tongue and aromatics in the pressure cooker, add enough water to cover, and cook at high pressure for 60–75 minutes.

Once the cooking is complete, allow the pressure to release naturally before opening the lid. The result is just as flavorful as slow cooking but much faster—perfect for busy weeknights when you’re craving authentic tacos de lengua.

Aromatics and Seasonings

The beauty of beef tongue lies in how well it absorbs flavors. To enhance your tacos de lengua, include aromatic ingredients like garlic, onion, and fresh herbs during cooking. For extra depth, consider adding a teaspoon of cumin or a dried chili for subtle heat.

These seasonings infuse the meat with rich, complex flavors, ensuring every bite of your tacos is bursting with authenticity. Keep the seasonings simple to let the natural flavor of the tongue shine.

For additional inspiration, explore our guide to seasoning essentials for meats. It’s packed with tips for taking your dishes to the next level.

Secret 4: Peeling and Slicing the Beef Tongue

Peeling cooked beef tongue for tacos de lengua.
Removing the outer layer of cooked beef tongue to reveal tender meat.

Once your beef tongue is perfectly cooked, the next step is preparing it for your tacos de lengua. Peeling and slicing may sound tricky, but with these tips, it’s straightforward and stress-free.

How to Peel the Beef Tongue Easily

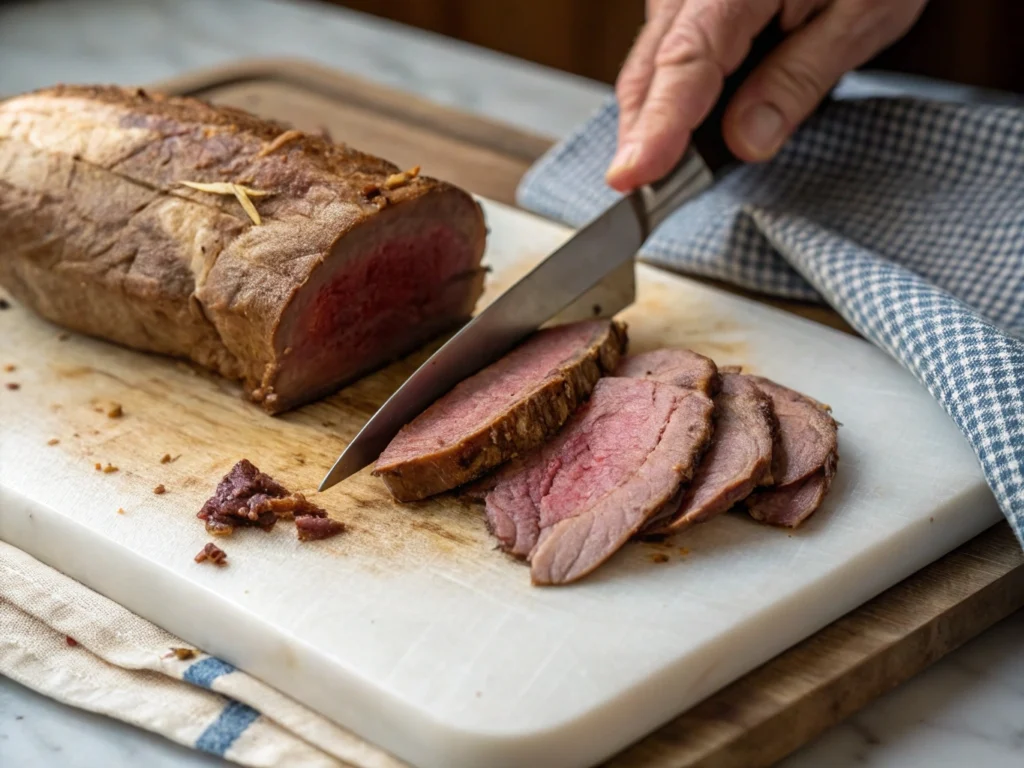
Peeling the beef tongue is much easier while it’s still warm. After removing it from the pot or pressure cooker, let it cool slightly—just enough so you can handle it without burning your hands.

Using a sharp knife, make a small slit in the thick outer skin. From there, the skin should peel away easily, much like removing a jacket. Be sure to discard all the tough, leathery outer layer to reveal the tender meat underneath. This step is crucial to ensure your tacos de lengua have the perfect texture.

Slicing for Tacos

Once peeled, it’s time to slice the tongue. For traditional tacos de lengua, thin slices are ideal. Aim for slices about ¼ inch thick, as these are easy to layer into tortillas and hold toppings well.

If you prefer diced meat, you can cut the slices into small cubes after slicing. This option works especially well if you want your tacos to have a more uniform texture with each bite.

Pro Tips for Dicing

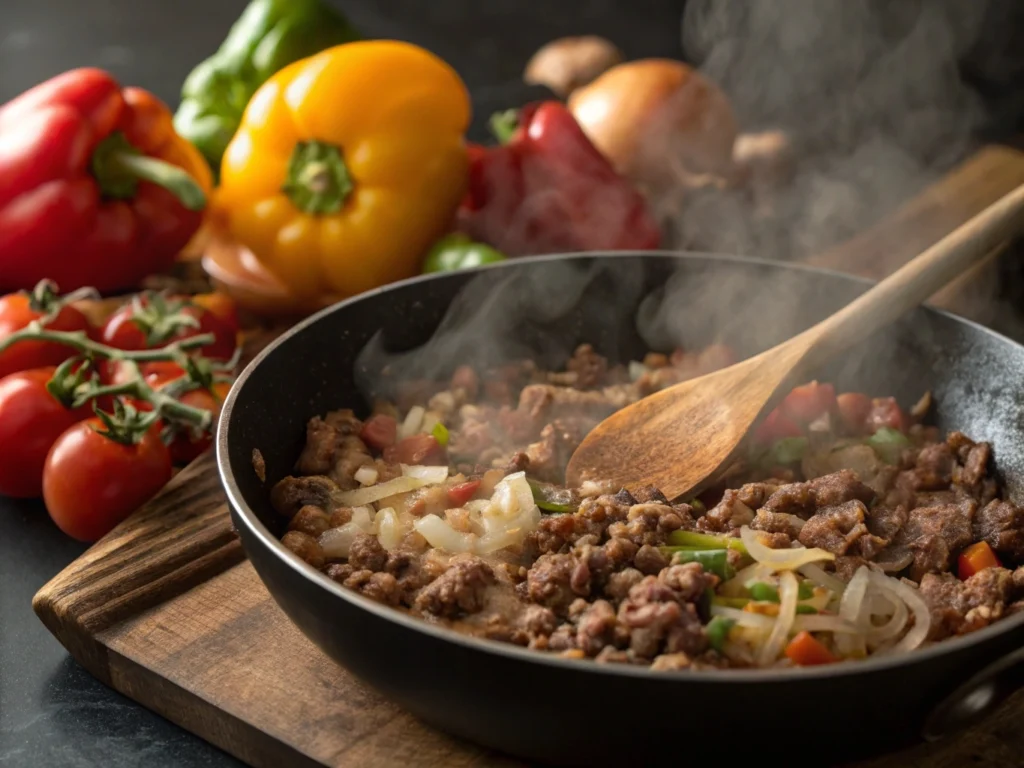
For those who enjoy tacos with a chunkier filling, dicing the tongue is an excellent choice. Once you’ve sliced the tongue into manageable pieces, dice it into small, bite-sized cubes. A sharp knife will help you achieve clean, even cuts.

Lightly sautéing the diced tongue in a hot skillet with a splash of oil can add a touch of crispness and amplify the flavors. This step is optional but highly recommended if you want to take your tacos de lengua to the next level.

To elevate your taco night further, try pairing your tacos de lengua with a fresh homemade salsa.

Secret 5: Perfecting the Toppings and Tortillas

To truly elevate your tacos de lengua, the toppings and tortillas must be just as delicious as the meat itself. These finishing touches bring everything together and add layers of flavor and texture.

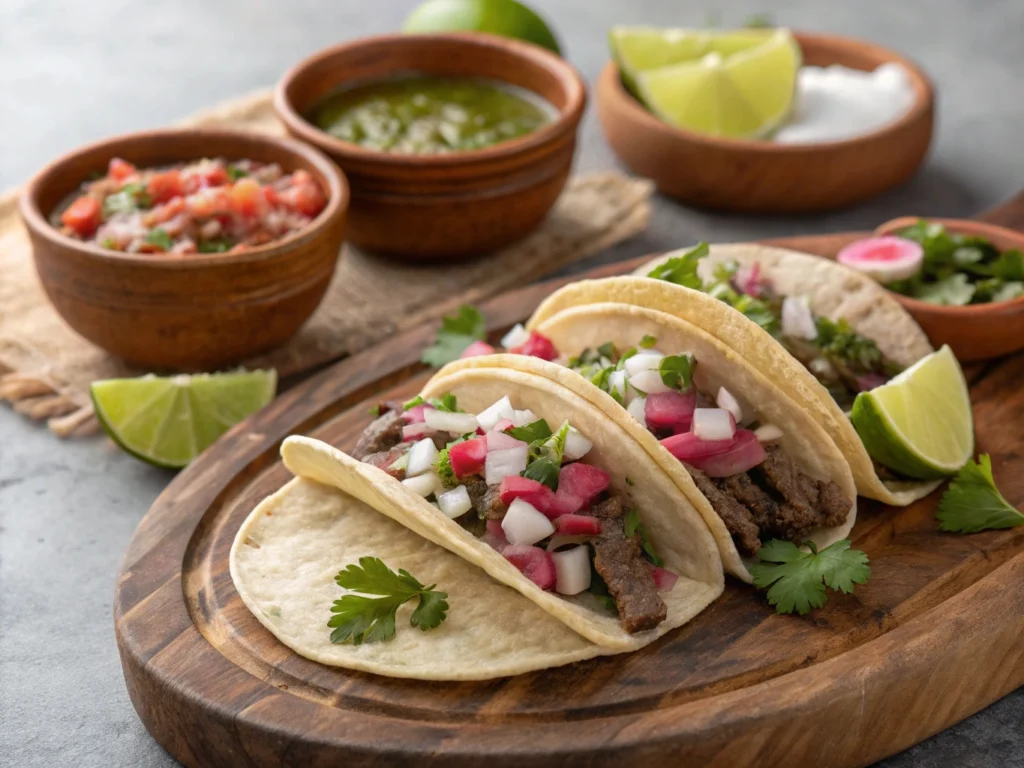
Essential Toppings for Authentic Tacos

The beauty of tacos de lengua lies in their simplicity. The traditional toppings—fresh cilantro, diced onion, and a squeeze of lime enhance the flavor of the tender beef tongue without overpowering it.

For an extra burst of flavor, try adding salsa verde or a smoky chipotle sauce. Both options pair beautifully with the savory meat. If you like a bit of crunch, thinly sliced radishes make an excellent addition.

Homemade vs. Store-Bought Tortillas

While store-bought tortillas are convenient, homemade corn tortillas make a world of difference in flavor and texture. They’re softer, fresher, and have a subtle sweetness that perfectly complements the rich beef tongue.

If you’re using store-bought tortillas, warm them up on a hot skillet or over an open flame to bring out their natural flavors.

How to Warm Your Tortillas

Warming your tortillas is a crucial step that’s often overlooked. A warm tortilla is pliable, enhances the toppings, and prevents tearing.

  • Stove-Top Method: Heat a skillet over medium-high heat and toast each tortilla for about 30 seconds on each side until warm and slightly charred.
  • Microwave Method: Wrap tortillas in a damp paper towel and microwave for 20–30 seconds.
  • Oven Method: Stack tortillas, wrap them in foil, and warm them in a 350°F oven for 10 minutes.

These methods ensure your tacos de lengua have the perfect base to hold all those delicious toppings.

Pairing Toppings for Maximum Flavor

To add variety, consider mixing traditional and modern toppings. For instance, pair the classic cilantro and onions with creamy guacamole or crumbled queso fresco. If you love spicy food, pickled jalapeños or a drizzle of hot sauce can take your tacos to the next level.

Experimenting with combinations allows you to create your own signature version of tacos de lengua. Don’t be afraid to get creative you might just discover your new favorite taco topping!

Bringing It All Together

Assembled tacos de lengua with toppings and salsa verde.
Ready-to-serve tacos de lengua topped with cilantro, onions, and radishes.

With tender beef tongue, freshly prepared tortillas, and a medley of toppings, your tacos de lengua are ready to shine. Assemble your tacos with care, layering each component thoughtfully, and enjoy every bite of this authentic Mexican classic.

FAQs

What kind of meat is lengua?

Lengua is the Spanish word for beef tongue, a flavorful and tender cut of meat. It’s highly prized in many cuisines, especially in Mexican cooking, for its rich texture and ability to absorb seasonings. When cooked correctly, beef tongue becomes incredibly tender and is perfect for making tacos de lengua, where the meat is sliced or diced and served in tortillas with traditional toppings like cilantro, onion, and lime.

What is the meaning of tacos de lengua?

Tacos de lengua translates to “tongue tacos” in English. These tacos feature beef tongue as the main ingredient, prepared by slow-cooking or pressure-cooking the tongue until it’s tender and flavorful. The meat is then peeled, sliced, and served in corn tortillas with classic toppings. This dish is a staple in Mexican cuisine and is beloved for its melt-in-your-mouth texture and savory taste.

How do you make a taco tongue?

To make beef tongue for tacos de lengua, start by cleaning the tongue thoroughly. Then, cook it either by simmering it in a pot with water, garlic, onion, bay leaves, and peppercorns for 3–4 hours or by using a pressure cooker for faster results. Once cooked, peel off the tough outer skin, slice or dice the meat, and season it to your liking. Serve the tongue in warm tortillas, topped with cilantro, onion, lime, and salsa for an authentic and delicious taco experience.

Are lengua tacos good for you?

Yes, lengua tacos can be a nutritious option when enjoyed as part of a balanced diet. Beef tongue is rich in protein, B vitamins, and minerals like zinc and iron, which are essential for energy and immune function. However, it’s also higher in fat, so portion control is important if you’re watching your calorie intake. When paired with fresh toppings like cilantro and onions and served in moderate portions, tacos de lengua can be both satisfying and nourishing.

Conclusion

Tacos de lengua aren’t just a meal they’re a journey into the heart of authentic Mexican cuisine. From selecting the freshest beef tongue to preparing it with care and serving it in warm tortillas with flavorful toppings, every step is an opportunity to create something truly special.

So, roll up your sleeves and dive into making your own tacos de lengua. With this guide, you’ll be able to create a dish that’s not only rich in flavor but also steeped in tradition. Share your culinary adventure with friends and family, and don’t forget to enjoy every bite of this classic taco masterpiece!

Classic Cowboy Casserole: An Easy Family Dinner

Introduction to Cowboy Casserole

When life gets busy, and you’re craving something warm and comforting, cowboy casserole steps in as the perfect solution. This classic dish is a blend of simplicity, hearty flavors, and customizable ingredients that make it a favorite among families. Whether you’re whipping it up for a quick weeknight dinner or preparing for a cozy weekend meal, this casserole has everything you need to satisfy hungry appetites.

Cowboy casserole is a one-pan wonder, combining tender ground beef, creamy sauces, and colorful vegetables, all topped with golden, crispy tater tots. Its appeal lies in its versatility you can adjust the recipe to match your family’s preferences or what you have in your pantry. For instance, if you prefer a spicier kick, you can easily add diced jalapeños or a pinch of chili powder. On the other hand, a milder version with simple seasoning and classic ingredients works just as well.

This dish isn’t just about convenience it’s also about bringing people together. Casseroles like this one have been staples in home kitchens for decades, providing a sense of nostalgia and comfort. If you’re a fan of hearty dishes like shepherd’s pie or tater tot casserole, you’ll appreciate the unique twist cowboy casserole brings to the table.

Why Choose Cowboy Casserole?

There are plenty of reasons to love this recipe:

  1. Easy to Make: With simple steps and common ingredients, it’s perfect even for beginner cooks.
  2. Family-Friendly: Its mild, savory flavors appeal to both kids and adults.
  3. Customizable: You can swap out ingredients to suit your tastes or dietary needs.
  4. Budget-Friendly: Most components are affordable and likely already in your kitchen.

In addition, cowboy casserole is incredibly forgiving. If you’re short on one ingredient, there’s almost always an alternative that works just as well. For example, if you’re out of tater tots, you can use hash browns or sliced potatoes instead.

A Recipe Rooted in Tradition

The origins of cowboy casserole are inspired by the hearty meals of the American West, where simplicity and sustenance were key. While the dish has evolved over time, its roots remain in creating a flavorful, filling meal that’s easy to prepare. Today, it’s a staple in many households, offering a nostalgic nod to comfort food while embracing modern conveniences.

This casserole is more than just a recipe; it’s an opportunity to get creative in the kitchen and enjoy a dish that feels like home. Ready to get started? Let’s dive into the ingredients and how they come together to create this delicious meal.

Core Ingredients and Their Roles

Ingredients for cowboy casserole laid out on a wooden table.
Essential ingredients for a hearty cowboy casserole, ready to prepare.

The success of a cowboy casserole lies in its simple yet flavorful ingredients. Each component plays an essential role, coming together to create a dish that’s comforting, hearty, and downright irresistible. Let’s explore the key ingredients and why they’re crucial to this recipe.

1. Meat: The Hearty Foundation

Ground beef is the traditional protein in cowboy casserole, providing a savory and rich base. Its robust flavor complements the creamy and cheesy elements perfectly.

  • Why Ground Beef?
    Ground beef is not only flavorful but also easy to cook and budget-friendly. Its natural fats add depth to the dish, ensuring a satisfying bite in every forkful.
  • Substitutions to Consider
    If ground beef isn’t your preference, there are plenty of alternatives:
    • Ground Turkey or Chicken: These are leaner options that still offer a tasty foundation.
    • Plant-Based Meat: Ideal for vegetarians, these substitutes mimic the texture and flavor of ground beef.
    • Sautéed Mushrooms: A vegetarian-friendly choice that brings an earthy richness to the casserole.

2. Vegetables: Adding Flavor and Nutrition

Vegetables in this recipe don’t just add color; they bring vital nutrients and textures that balance the richness of the meat and sauce.

  • Essential Vegetables
    • Onions: Sautéed onions lay the flavor groundwork, enhancing the savory profile of the casserole.
    • Corn: A touch of sweetness from canned or frozen corn contrasts beautifully with the savory elements.
  • Optional Additions
    Feel free to get creative with your vegetables. Some great options include:
    • Frozen or Canned Veggies: Green beans, peas, or carrots.
    • Fresh Produce: Spinach, zucchini, or diced bell peppers for a vibrant twist.
  • Pro Tip: If using frozen vegetables, thaw and drain them to prevent excess liquid from making the casserole soggy.

3. Sauce and Creamy Component

The sauce is the glue that binds all the flavors together, making every bite creamy and indulgent.

  • Condensed Soups
    • Cream of Mushroom Soup: A classic choice, it provides a savory and slightly earthy flavor.
    • Alternatives: Cream of chicken or cream of celery soup works well, depending on your taste.
  • Dairy Additions
    • Sour cream or yogurt enhances the creaminess while adding a tangy note.
    • Milk or half-and-half helps achieve the desired consistency.
  • Homemade Option
    For those who prefer to skip the canned soups, a homemade sauce made with butter, flour, milk, and parmesan is an excellent substitute.

4. Cheese: The Flavor Booster

No casserole is complete without cheese, and cowboy casserole is no exception.

  • Primary Choice
    • Cheddar cheese adds sharpness and creaminess, melting beautifully into the layers.
  • Creative Variations
    • Mozzarella for a gooey texture.
    • Monterey Jack for a mild, creamy flavor.
    • Parmesan for a salty, nutty finish.

Pro Tip: Layer some cheese between the filling and tater tots for extra flavor in every bite.

5. Tater Tot Topping: The Crispy Crown

The golden, crispy tater tots are what make cowboy casserole stand out from other dishes.

  • Why Tater Tots?
    They create a crunchy contrast to the creamy filling, making the dish more satisfying.
  • Substitutes for Tater Tots
    • Hash browns, sliced potatoes, or even mashed potatoes can work in a pinch.
    • Cornbread or biscuit dough offers a fun, alternative topping for a unique spin.

6. Flavor Boosters and Add-Ins

Adding a few extras can elevate your cowboy casserole to new heights.

  • Seasonings
    Onion powder, garlic powder, black pepper, and paprika are essentials. For more depth, try taco seasoning, ranch mix, or chili powder.
  • Optional Garnishes
    • Crispy bacon bits for smoky flavor.
    • Fresh chives or parsley for a pop of color and freshness.
    • Jalapeños or green chilies for a hint of spice.

With these ingredients and their variations, you have endless possibilities to customize your cowboy casserole while ensuring it remains a crowd-pleaser. In the next section, we’ll walk through the cooking process, step-by-step, to bring all these flavors together seamlessly.

Step-by-Step Cooking Instructions

Ground beef and onions sautéing in a skillet with a wooden spoon.
Step 2: Sauté ground beef and onions, creating the flavorful base for the casserole

Making cowboy casserole is a straightforward process, but with a few helpful tips, you’ll get the perfect balance of creamy, cheesy filling and crispy, golden topping. Follow these simple steps to create a dish that’s sure to impress.

1. Preparation

Preparation is key to ensuring your cooking process is smooth and stress-free.

  1. Preheat the Oven
    Begin by preheating your oven to 375°F (190°C). A properly heated oven ensures the casserole bakes evenly and the tater tots crisp up perfectly.
  2. Prepare the Ingredients
    • Thaw your tater tots slightly if they’re frozen; this helps them cook evenly.
    • Dice your onions, measure out your seasonings, and shred the cheese ahead of time.
  3. Optional Bacon Prep
    If you’re adding bacon for extra flavor, cook it until crispy, then crumble it into small pieces. Save some of the rendered fat for sautéing the onions for added depth.

Pro Tip: Organizing your ingredients before cooking not only saves time but also prevents the stress of searching for items mid-recipe.

2. Cook the Meat

The base of any good cowboy casserole starts with perfectly browned meat.

  1. Heat the Skillet
    Place a large skillet over medium heat. Add a drizzle of oil or a bit of bacon fat for added flavor.
  2. Brown the Ground Meat
    Add the ground beef (or your chosen protein) and cook until fully browned, breaking it apart with a wooden spoon as it cooks. This step ensures even cooking and a crumbly texture.
  3. Sauté Aromatics
    Toss in the diced onions and minced garlic. Cook until the onions are translucent and the garlic is fragrant—this usually takes about 2-3 minutes.

Note: If there’s excess grease in the skillet, drain it carefully to avoid a greasy filling.

3. Combine the Filling

This step ties together the rich flavors of your casserole.

  1. Add the Creamy Components
    Stir in the cream of mushroom soup, sour cream (or yogurt), and milk. Mix thoroughly to create a smooth, creamy base.
  2. Season Generously
    Add salt, pepper, and your chosen seasonings (paprika, chili powder, or ranch seasoning). Taste as you go to adjust the flavor to your liking.
  3. Incorporate Vegetables
    Fold in the corn, peas, or any other vegetables you’re using. This not only adds a pop of color but also balances the richness of the dish.
  4. Optional Cheese Layer
    Stir half of the shredded cheese into the filling for an extra burst of flavor in every bite.

Pro Tip: For a spicier kick, add diced jalapeños or green chilies at this stage.

4. Assemble the Casserole

Cowboy casserole pre-baked with creamy filling, cheese, and arranged tater tots.
The casserole is ready for the oven, with creamy filling and neatly arranged tater tots.

Now it’s time to bring everything together in your baking dish.

  1. Layer the Filling
    Spread the meat and vegetable mixture evenly across the bottom of a 9×13 baking dish.
  2. Add the Cheese
    Sprinkle a generous layer of cheese over the filling. This ensures every bite is cheesy and satisfying.
  3. Arrange the Tater Tots
    Place the tater tots on top in a single, even layer. For the best presentation, arrange them neatly in rows, but you can also scatter them for a rustic look.

Pro Tip: Use slightly thawed tater tots to achieve maximum crispiness during baking.

5. Bake and Finish

The final step is where all the magic happens!

  1. Bake the Casserole
    Place the baking dish in the preheated oven and bake for 30-45 minutes. You’ll know it’s ready when the tater tots are golden brown and the filling is bubbling around the edges.
  2. Broil for Extra Crispiness
    If you prefer an extra-crispy topping, turn on the broiler for the last 3-5 minutes. However, keep a close eye to avoid burning.
  3. Rest and Garnish
    Allow the casserole to rest for about 5 minutes before serving. This helps the filling set and makes it easier to scoop. Garnish with fresh chives, parsley, or crumbled bacon for a finishing touch.

Enjoy Your Homemade Cowboy Casserole!
You’ve just created a comforting, crowd-pleasing dish that’s perfect for any occasion, Now we’ll explore variations and adaptations to make this recipe even more versatile.

Cooking Variations and Adaptations

One of the best things about cowboy casserole is its versatility. You can tweak the recipe to suit different tastes, dietary needs, or available ingredients. Whether you’re looking to make it healthier, spicier, or more convenient, there’s an option for everyone. Let’s explore some creative ways to adapt this dish.

1. Slow Cooker Cowboy Casserole

If you prefer a hands-off approach, the slow cooker is your best friend.

  • How to Adapt:
    • Layer the ingredients in the slow cooker, starting with the meat mixture, followed by cheese and tater tots.
    • Cook on low for 5-6 hours or high for 2-3 hours, until the filling is bubbling and the tater tots are golden.
    • To achieve a crispier topping, transfer the casserole to an oven-safe dish and broil it for a few minutes after slow cooking.
  • Why Choose This Method?
    A slow cooker allows the flavors to meld beautifully, and it’s perfect if you need to prep the meal ahead of time.

2. Make-Ahead and Freezing Options

Planning meals in advance? This casserole is a great candidate for meal prep.

  • Make-Ahead Instructions:
    • Assemble the casserole as directed but don’t bake it.
    • Cover the dish tightly with plastic wrap and aluminum foil, then store it in the refrigerator for up to 24 hours.
  • Freezing the Casserole:
    • Assemble the casserole in a freezer-safe dish, wrap it securely, and freeze for up to 3 months.
    • Thaw in the refrigerator overnight before baking, or bake directly from frozen, adding extra time to the cooking process.
  • Pro Tip: Label the dish with the date and baking instructions to make it easy to prepare later.

3. Healthy Swaps and Modifications

If you want a lighter version of cowboy casserole, there are simple adjustments you can make without sacrificing flavor.

  • Lean Proteins: Use ground turkey or chicken instead of beef.
  • Low-Fat Dairy: Opt for low-fat sour cream, cheese, and milk to reduce calories.
  • More Veggies: Replace some of the tater tots with a layer of thinly sliced zucchini or sweet potatoes for added nutrition.
  • Homemade Sauce: Skip the condensed soups and make a lighter, homemade sauce using unsweetened almond milk and flour.

These substitutions ensure the dish remains flavorful while catering to a healthier lifestyle.

Looking for more quick and easy dinner options? Check out these Easy Dinner Ideas for Two.

4. Adding a Spicy Twist

If you love bold flavors, there are plenty of ways to turn up the heat.

  • Spicy Ingredients:
    • Add diced jalapeños or green chilies to the meat mixture.
    • Sprinkle cayenne pepper or crushed red pepper flakes into the seasoning mix.
    • Drizzle hot sauce over the casserole before serving.
  • Cheese with a Kick: Use pepper jack or habanero cheddar cheese for a fiery twist.

This variation is perfect for those who enjoy a little spice with their comfort food.

5. Topping Alternatives

Tater tots are iconic, but there are other options if you’re looking to switch things up.

  • Hash Browns: Shredded or diced hash browns offer a similar crispy topping.
  • Mashed Potatoes: Spread a layer of creamy mashed potatoes over the filling for a shepherd’s pie vibe.
  • Cornbread: Top the casserole with a layer of cornbread batter for a sweet and savory combination.
  • Biscuits: Use canned or homemade biscuit dough for a fun, flaky topping.

Each topping brings a unique texture and flavor, allowing you to personalize the dish even further.

Why Customize Your Cowboy Casserole?

Adapting recipes to your needs not only makes cooking more enjoyable but also ensures the meal feels personal and exciting. Whether you’re meal prepping, exploring new flavors, or catering to dietary preferences, these variations make cowboy casserole a versatile, go-to dish for any occasion.

Serving and Storage Tips

Once your cowboy casserole is baked to golden perfection, the next step is serving it in a way that enhances its flavors and ensures everyone enjoys a delicious, satisfying meal. Additionally, knowing how to store and reheat leftovers can make your life easier and your dish even more versatile.

1. Serving Suggestions

Cowboy casserole is a hearty dish that pairs well with a variety of sides to create a well-rounded meal.

A portion of cowboy casserole served with parsley garnish.
A warm and inviting serving of cowboy casserole, perfect for dinner.
  • Classic Pairings:
    • A simple green salad with a tangy vinaigrette provides a refreshing contrast to the casserole’s richness.
    • Steamed or roasted vegetables, such as broccoli or carrots, add color and nutrients to the plate.
    • Buttery dinner rolls or garlic bread are perfect for soaking up every bit of the creamy filling.
  • Garnish for Extra Flavor:
    • Sprinkle fresh herbs like chives, parsley, or cilantro over the casserole just before serving for a pop of freshness.
    • Add a dollop of sour cream or a drizzle of hot sauce for those who like a bit of tang or spice.

Pro Tip: Serve the casserole directly from the baking dish to keep it warm and minimize cleanup. Using a cast-iron skillet can also double as a serving dish for a rustic presentation.

Pair your cowboy casserole with a classic side like this Old-Fashioned Baked Macaroni and Cheese for a truly comforting meal.

2. Storing Leftovers

If you’re lucky enough to have leftovers, cowboy casserole stores beautifully, making it an ideal meal for the days ahead.

  • Refrigeration:
    • Transfer the casserole to an airtight container or cover the baking dish tightly with foil or plastic wrap.
    • Store in the refrigerator for up to 3-4 days.
  • Freezing for Later:
    • Divide the leftovers into individual portions and store them in freezer-safe containers or resealable bags.
    • Label each container with the date for easy reference.
    • Freeze for up to 3 months without compromising on flavor or texture.

Pro Tip: To prevent freezer burn, make sure there’s minimal air in the containers or bags before sealing.

3. Reheating Tips

Proper reheating ensures that your casserole retains its creamy texture and crispy topping.

  • In the Oven:
    • Preheat your oven to 350°F (175°C).
    • Place the casserole in an oven-safe dish, cover with foil to prevent drying out, and heat for 20-25 minutes, or until warmed through.
    • For crispy tater tots, remove the foil during the last 5 minutes of reheating.
  • In the Microwave:
    • For smaller portions, transfer to a microwave-safe plate and cover lightly with a damp paper towel.
    • Heat on medium power for 2-3 minutes, checking and stirring halfway to ensure even heating.
  • Directly from Frozen:
    • If reheating from frozen, bake in the oven at 375°F (190°C) for about 50-60 minutes, covering with foil for the first half of the time.

Pro Tip: Add a small splash of milk or cream to the filling before reheating to keep it moist and creamy.

Why Proper Storage and Reheating Matter

Taking the time to store and reheat your casserole correctly not only saves time but also preserves the flavors and textures that make this dish so special. By following these tips, you can enjoy cowboy casserole fresh from the oven or as a delicious leftover meal that tastes just as good as the first day.

Next, let’s address some common questions about this dish to help you troubleshoot or customize your casserole even further.

FAQs About Cowboy Casserole

To ensure your cowboy casserole turns out perfect every time, here are answers to some commonly asked questions. Whether you’re a first-time cook or a seasoned pro, these tips and clarifications will help you make the most of this comforting dish.

1. Can I make cowboy casserole vegetarian?

Yes! Cowboy casserole is highly adaptable for vegetarians.

  • Meat Substitutes: Use plant-based ground meat, crumbled tofu, or sautéed mushrooms to replace the ground beef.
  • Add Protein: Incorporate beans such as black beans, kidney beans, or lentils for an extra protein boost.
  • Use Vegetable Broth: If making a homemade sauce, substitute chicken or beef broth with vegetable broth.

This variation maintains the hearty, satisfying qualities of the dish while catering to a vegetarian diet.

2. How do I make the tater tots extra crispy?

Achieving a perfectly crispy topping is easier than you think!

  • Thaw the Tater Tots: Allow them to thaw slightly before baking. This helps them crisp up faster in the oven.
  • Use a Hot Oven: Baking at 375°F (190°C) or even 400°F (204°C) ensures the tater tots become golden and crunchy.
  • Broil at the End: For the ultimate crispness, broil the casserole for 3-5 minutes once it’s fully cooked. However, watch closely to prevent burning.

3. Can I add extra heat to my casserole?

Absolutely! Adding spice is an excellent way to customize the flavor profile.

  • Spicy Ingredients: Diced jalapeños, green chilies, or even a splash of hot sauce can be mixed into the filling.
  • Seasoning Options: Chili powder, cayenne pepper, or a pinch of crushed red pepper flakes will add a subtle heat.
  • Cheese with a Kick: Use pepper jack or a spicy cheddar cheese to infuse some spice.

Adjust the spice level to suit your taste, ensuring it remains enjoyable for everyone at the table.

4. How far in advance can I prepare cowboy casserole?

You can make the casserole ahead of time, making it a convenient option for busy schedules.

  • Assemble Ahead: Prepare the casserole and refrigerate it (unbaked) for up to 24 hours. Cover tightly with plastic wrap or aluminum foil to keep it fresh.
  • Freeze for Later: Assemble the dish and freeze it for up to 3 months. Thaw overnight in the fridge before baking or bake directly from frozen, adding additional cooking time.

These options are perfect for meal prepping or hosting gatherings without last-minute stress.

5. What are some alternative toppings for cowboy casserole?

While tater tots are a classic choice, there are plenty of delicious alternatives.

  • Hash Browns: Use shredded or diced hash browns for a similar crispy texture.
  • Mashed Potatoes: Spread a layer of creamy mashed potatoes for a shepherd’s pie-inspired twist.
  • Cornbread: A layer of cornbread batter adds a sweet and savory element.
  • Biscuits: Use canned or homemade biscuit dough for a flaky topping.

These variations allow you to tailor the dish to different preferences while keeping its comfort-food charm.

6. How long does cowboy casserole take to bake?

Typically, the casserole takes about 30-45 minutes to bake at 375°F (190°C).

  • When It’s Ready: The filling should be bubbling, and the tater tots should be golden brown.
  • For Crispy Topping: You can broil the dish for a few minutes at the end for an extra crunch.

If baking from frozen, extend the cooking time by 15-20 minutes, checking periodically for doneness.

7. Can I customize the vegetables in the casserole?

Yes, the vegetables are one of the most flexible parts of this recipe.

  • Classic Choices: Onions and corn are staples.
  • Additional Options: Peas, carrots, green beans, zucchini, or bell peppers work well.
  • Fresh vs. Frozen: Fresh veggies add a bright flavor, while frozen options are convenient and work just as well.

Mix and match based on your preferences or what’s in your pantry to make the casserole your own.

8. How should I serve cowboy casserole at a party or potluck?

Cowboy casserole is a crowd-pleaser, making it an excellent choice for gatherings.

  • Use a Cast-Iron Skillet: This keeps the casserole warm and looks great on the table.
  • Add Garnishes: Sprinkle fresh herbs, crumbled bacon, or shredded cheese on top just before serving for a polished presentation.
  • Pair with Sides: Serve with a side salad, bread rolls, or steamed veggies to complete the meal.

Conclusion

Cowboy casserole is the ultimate comfort food, a dish that’s hearty, versatile, and loved by all. Its combination of creamy filling, crispy tater tots, and cheesy goodness makes it perfect for weeknight dinners, potlucks, or any time you need a satisfying meal. Whether you stick to the classic recipe or customize it with your favorite ingredients, this casserole is sure to become a staple in your kitchen.

We’d love to hear how your cowboy casserole turned out! Share your thoughts, variations, or favorite toppings in the comments below. And don’t forget to explore other casserole recipes for even more cozy meal inspiration.

how many teaspoons in an ounce ? Find Out Fast!

Let’s face it conversions like how many teaspoons in an ounce can feel as puzzling as deciphering Grandma’s handwritten recipe cards. But don’t let a little math intimidate you! Whether you’re whipping up a luscious dessert or crafting a flavorful sauce, knowing this simple measurement is a game-changer. Did you know that 1 ounce equals exactly 6 teaspoons? With this guide, you’ll learn not only the conversion but also why it matters for dry vs. liquid ingredients. Say goodbye to the days of guessing and hello to perfectly balanced dishes. From baking to cooking, we’ve got your back because even the tiniest measurements make the biggest difference in flavor!

Understanding the Basics of Ounces and Teaspoons

What Is an Ounce? Exploring Its Importance in Cooking

An ounce is one of the most commonly used units in cooking and baking. But did you know there are two types of ounces fluid ounces for liquids and dry ounces for solids? While they share the same name, they measure very different things. A fluid ounce refers to volume, while a dry ounce measures weight, which is why they aren’t interchangeable in recipes.

In the kitchen, using precise measurements like how many teaspoons in an ounce ensures that your dishes turn out as expected. For instance, when making a vinaigrette, the right balance of oil and vinegar depends on accurate liquid measurements. That’s where understanding ounces becomes invaluable—it’s the difference between a perfectly seasoned dish and one that falls flat.

What Is a Teaspoon? A Small Yet Mighty Unit

A teaspoon may be small, but its impact in the kitchen is huge. It’s a standard unit of measurement for ingredients like spices, baking powder, and even liquids in smaller quantities. When you see “tsp” in a recipe, it’s shorthand for teaspoon, a tool every cook relies on to measure precision amounts.

If you’ve ever wondered, how many teaspoons in an ounce? the answer is straightforward—there are 6 teaspoons in 1 fluid ounce. This simple conversion makes it easy to scale recipes or adjust flavors without guessing. Think of a teaspoon as your secret weapon for ensuring every pinch of salt or splash of vanilla extract is just right.

The Relationship Between Ounces and Teaspoons

When converting ounces to teaspoons, it helps to understand their relationship. A single fluid ounce equals exactly 6 teaspoons. This fixed ratio is a lifesaver when measuring small quantities of liquids like lemon juice for a marinade or soy sauce for a stir-fry.

However, keep in mind that this ratio applies specifically to fluid ounces. For dry ingredients, factors like density and texture come into play. For example, a dry ounce of sugar may measure differently in teaspoons compared to a dry ounce of flour. To avoid missteps, always consider the type of ingredient you’re working with.

For a deeper dive into accurate conversions, this measurement guide from AllRecipes offers helpful tips on getting it right every time.

Why Conversions Differ for Dry and Liquid Ingredients

Conversions between dry and liquid ingredients can be tricky, but they’re crucial for accurate results. Liquids like milk or water have consistent density, so 1 fluid ounce = 6 teaspoons. Dry ingredients, on the other hand, vary significantly in weight and volume.

For instance, how many teaspoons in an ounce of flour? The answer depends on how tightly the flour is packed. In contrast, 1 ounce of granulated sugar, which is denser, will require fewer teaspoons. This is why recipes often specify “packed” or “leveled” measurements to ensure accuracy.

To simplify conversions, consider using a kitchen scale for dry ingredients. It’s a foolproof way to measure precisely, ensuring your cookies turn out chewy and your sauces stay perfectly thick.

How to Convert Ounces to Teaspoons with Confidence

The Exact Formula for Ounces to Teaspoons

Close-up of measuring spoons for teaspoon and tablespoon conversions.
A tablespoon and teaspoon set for easy conversions.

Converting measurements in the kitchen doesn’t have to be stressful. For liquids, the formula is straightforward: 1 ounce = 6 teaspoons. Whether you’re mixing salad dressings or crafting a cocktail, this simple rule will save you time and ensure accuracy. For instance, if a recipe calls for 2 ounces of syrup, you’ll know it’s equivalent to 12 teaspoons.

But why is this conversion so important? Precision ensures your recipes taste as intended. A dish can go from balanced to overpowering with even a small mistake, especially in baking or flavor-intensive recipes. Understanding how many teaspoons in an ounce gives you confidence in the kitchen!

Practical Tips for Accurate Measurements

Kitchen scale and measuring spoons for precise ingredient measurements.
A kitchen scale and measuring spoons ensure accuracy in cooking.

Accurate measurements are key to delicious recipes, but it’s easy to slip up. Here are some tips to avoid common mistakes:

  • Use a liquid measuring cup for wet ingredients and a dry measuring spoon for powders or solids.
  • Level off the teaspoon with the back of a knife for precise amounts.
  • Double-check the unit—fluid ounces and dry ounces measure differently.

If you’re looking for a practical recipe to try this with, check out our guide on 2-Ingredient Banana Bread for an easy way to practice these conversions!

Common Mistakes to Avoid During Measurement

Even experienced cooks can fall into measurement traps. One frequent mistake is not understanding the distinction between fluid ounces and dry ounces. For example, measuring 1 ounce of honey in a dry measuring cup might leave you with more than you intended due to the density of the liquid.

Another error? Eye-balling! While it may seem convenient, guesswork can lead to inconsistencies. Remember, the conversion of how many teaspoons in an ounce only holds true when tools are used correctly.

Quick Reference Conversion Chart

Sometimes, having a handy chart can simplify your cooking process. Here’s an easy-to-follow guide:

OuncesTeaspoonsTablespoons
162
2124
3186

Bookmark this chart, and you’ll never need to pause mid-recipe to calculate conversions again. By understanding how many teaspoons in an ounce, you’re one step closer to cooking like a pro!

When and Why You’ll Need These Conversions

Perfecting Recipes with Accurate Measurements

Precision is the key to cooking and baking success. Imagine preparing a delicate custard or a creamy sauce where even a slight deviation in measurements can throw off the entire dish. Understanding how many teaspoons in an ounce lets you follow recipes with confidence.

For example, recipes for vinaigrettes or glazes often require a tablespoon or two of liquid, which translates to specific teaspoon measurements. Knowing that 1 ounce equals 6 teaspoons ensures that each dish turns out balanced and flavorful. Accuracy isn’t just for professionals—it’s for anyone aiming to elevate their cooking game.

Adjusting Serving Sizes with Ease

Scaling recipes up or down often involves converting measurements. Whether you’re doubling a recipe to feed a crowd or halving it for a small dinner, understanding conversions like how many teaspoons in an ounce becomes invaluable.

Let’s say you’re doubling a soup recipe that calls for 1 fluid ounce of seasoning. Instead of guessing, you’ll know that means 12 teaspoons making adjustments quick and effortless. By using precise conversions, you avoid the risk of under-seasoning or overpowering the flavors, which is crucial when cooking for a group.

If you’re interested in scaling recipes for two, explore our guide on Easy Dinner Ideas for Two for inspiration.

Making Do Without Measuring Tools

We’ve all been there mid-recipe and no measuring tools in sight. Luckily, knowing how many teaspoons in an ounce allows you to improvise with everyday items.

For example, if a recipe calls for 1 ounce of vanilla extract, you can use a standard teaspoon and measure out exactly 6 teaspoons. Similarly, a tablespoon (which equals 3 teaspoons) can help you convert quickly. While precise tools are best, these simple tricks can keep your cooking on track when tools aren’t available.

Practical Uses in Everyday Cooking

Conversions like how many teaspoons in an ounce aren’t just for special recipes; they’re useful in everyday cooking too. From measuring honey for a morning smoothie to portioning soy sauce for a stir-fry, these conversions simplify your routine.

Consider baking, where measurements are especially unforgiving. A recipe that calls for 3 ounces of sugar translates to 18 teaspoons. Without this conversion knowledge, it’s easy to add too little or too much, leading to inconsistent results. By mastering this skill, you’ll feel more at ease in the kitchen.

Differences Between Fluid Ounces and Dry Ounces

What Are Fluid Ounces?

Fluid ounces measure volume and are commonly used for liquids like water, milk, and oil. If you’ve ever poured juice into a measuring cup, you’ve worked with fluid ounces. When converting how many teaspoons in an ounce, the calculation is straightforward for liquids: 1 fluid ounce equals 6 teaspoons.

This simplicity is one reason why fluid ounces are a go-to measurement in recipes for dressings, syrups, and beverages. By ensuring you use liquid-specific tools, such as clear measuring cups with volume markings, you’ll achieve accurate results every time.

What Are Dry Ounces

Unlike fluid ounces, dry ounces measure weight rather than volume. They’re often used for dry ingredients like sugar, flour, or spices. This difference can create confusion, especially when a recipe calls for “1 ounce” without specifying whether it’s dry or fluid.

For instance, how many teaspoons in an ounce of flour? The answer depends on the ingredient’s density and how it’s measured. A loosely packed teaspoon of flour may differ greatly from a packed one, making a kitchen scale a reliable option for such ingredients.

Why Fluid and Dry Ounces Aren’t Interchangeable

The key distinction between fluid and dry ounces lies in how they measure different properties: volume versus weight. This difference is why you can’t directly swap them in recipes. For example, 1 fluid ounce of milk is equivalent to 6 teaspoons, but 1 dry ounce of sugar might only fill about 4.5 teaspoons, depending on its granule size.

Understanding these differences prevents measurement errors that can alter a dish’s texture and flavor. When in doubt, consult your recipe carefully to see if it specifies the type of ounce required.

Conversion Tools to Simplify Measurements

 Smartphone with a kitchen conversion app and measuring tools.
Use apps to simplify conversions like teaspoons in an ounce.

If you often cook or bake, investing in reliable conversion tools can make your life easier. Measuring spoons, liquid measuring cups, and digital kitchen scales are invaluable for precise cooking. For instance, a scale can help you determine the exact weight of a dry ingredient when you’re unsure how many teaspoons in an ounce.

Additionally, several smartphone apps can provide instant conversions, making it simple to switch between teaspoons, ounces, and even grams. Whether you’re measuring ingredients for a creamy pasta dish or a sweet dessert, these tools ensure accuracy and eliminate guesswork.

Advanced Tips for Kitchen Conversions

Substituting Ingredients Without Compromising Flavor

Cooking isn’t always about following a recipe word for word—it’s about adapting! If you’re out of an ingredient, knowing how many teaspoons in an ounce can help you substitute seamlessly. For instance, if you’re replacing sugar with honey in a recipe, remember that 1 ounce of honey equals 6 teaspoons. Adjusting for the sweetness and liquid content ensures your dish remains balanced.

Similarly, consider swapping oil with melted butter. Both measure similarly in fluid ounces, so understanding these conversions can save you a trip to the store while keeping your dish on track.

Converting Between Metric and Imperial Systems

Navigating between metric and imperial measurements can be tricky, but it’s essential for global recipes. For example, how many teaspoons in an ounce might translate into milliliters for metric users: 1 teaspoon equals approximately 5 milliliters, meaning 1 fluid ounce equals about 30 milliliters.

Let’s say a European dessert recipe calls for 50 milliliters of liquid. By converting to teaspoons (10 teaspoons), you can stick with familiar tools while recreating international flavors. Metric-imperial conversions make it easier to try recipes from around the world!

How to Store Measuring Tools for Longevity

Caring for your kitchen tools ensures they provide accurate measurements for years. Measuring spoons and cups are small but mighty, especially when you need to calculate how many teaspoons in an ounce.

Here are some tips for storing them properly:

  • Keep them dry: Avoid leaving tools damp, as moisture can lead to rust or warping.
  • Organize by size: Hang measuring spoons on hooks or stack cups neatly to prevent misplacement.
  • Clean promptly: Sticky ingredients like honey can leave residue, so wash tools immediately after use.

Proper storage not only keeps your tools functional but also helps you cook with confidence every time.

Recommended Resources for Conversion Accuracy

Even the most seasoned cooks need a little help sometimes. Bookmarking resources or apps for quick conversions can simplify your cooking process. Websites like USDA FoodData Central provide reliable ingredient measurements, while apps like Kitchen Conversion simplify figuring out how many teaspoons in an ounce.

FAQs

How many teaspoons does it take to make 1 oz?

It takes 6 teaspoons to make 1 fluid ounce. This measurement applies to liquid ingredients, such as water, milk, or vanilla extract. For dry ingredients, the number of teaspoons may vary slightly depending on the ingredient’s density. Understanding how many teaspoons in an ounce ensures you measure accurately, whether you’re baking a cake or mixing a marinade.

Does 2 tablespoons equal 1 oz?

Yes, 2 tablespoons equal 1 fluid ounce. Since each tablespoon contains 3 teaspoons, this also means that 1 fluid ounce equals 6 teaspoons. This conversion is especially handy when scaling recipes or substituting measurements with different tools.

How many dry teaspoons are in an oz?

The number of dry teaspoons in an ounce depends on the ingredient’s weight and volume. For instance, 1 dry ounce of sugar may equal about 4.5 teaspoons, while 1 ounce of flour might take up more volume. If you’re unsure, using a kitchen scale can help you determine precise amounts. Remember, when working with liquids, 1 fluid ounce equals 6 teaspoons.

Does 4 teaspoons equal 1 oz?

No, 4 teaspoons do not equal 1 ounce. A fluid ounce is equal to 6 teaspoons, so 4 teaspoons would fall short of a full ounce. This distinction is crucial when measuring ingredients to ensure your recipes turn out just right.

Conclusion

Knowing how many teaspoons in an ounce is a small but essential skill that can elevate your cooking and baking. Whether you’re working with liquid or dry ingredients, understanding the nuances of measurements ensures accuracy and consistency in your dishes.

In this guide, you’ve learned that 1 fluid ounce equals 6 teaspoons, and we’ve explored how this conversion applies to everyday cooking scenarios. From scaling recipes to substituting ingredients, mastering these conversions saves time and guarantees delicious results.

With the tips and charts provided, you can confidently navigate your kitchen, whether you’re making a simple salad dressing or tackling a complex baking project. Keep this guide handy, and remember: precision is the secret ingredient to culinary success!

Now it’s your turn try out these conversions in your next recipe and let us know how it went. For more tips, tricks, and delicious ideas, explore other recipes on our website!