The Ultimate Pickle Pie Pizza: A Sweet, Spicy, and Tart Delight

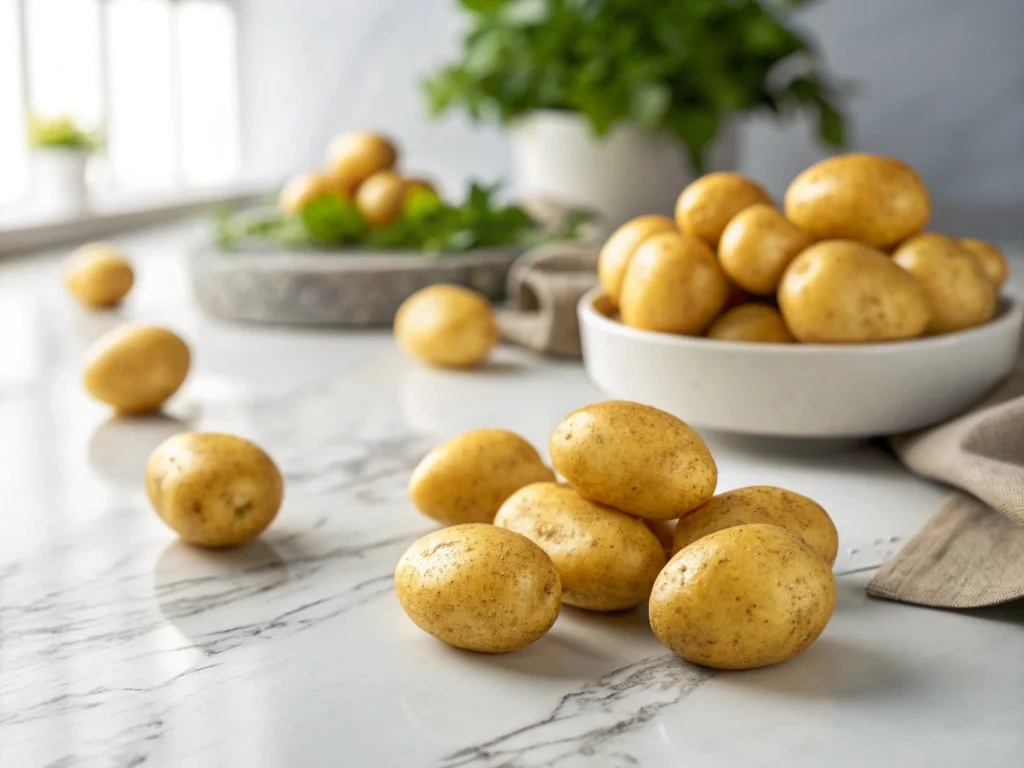
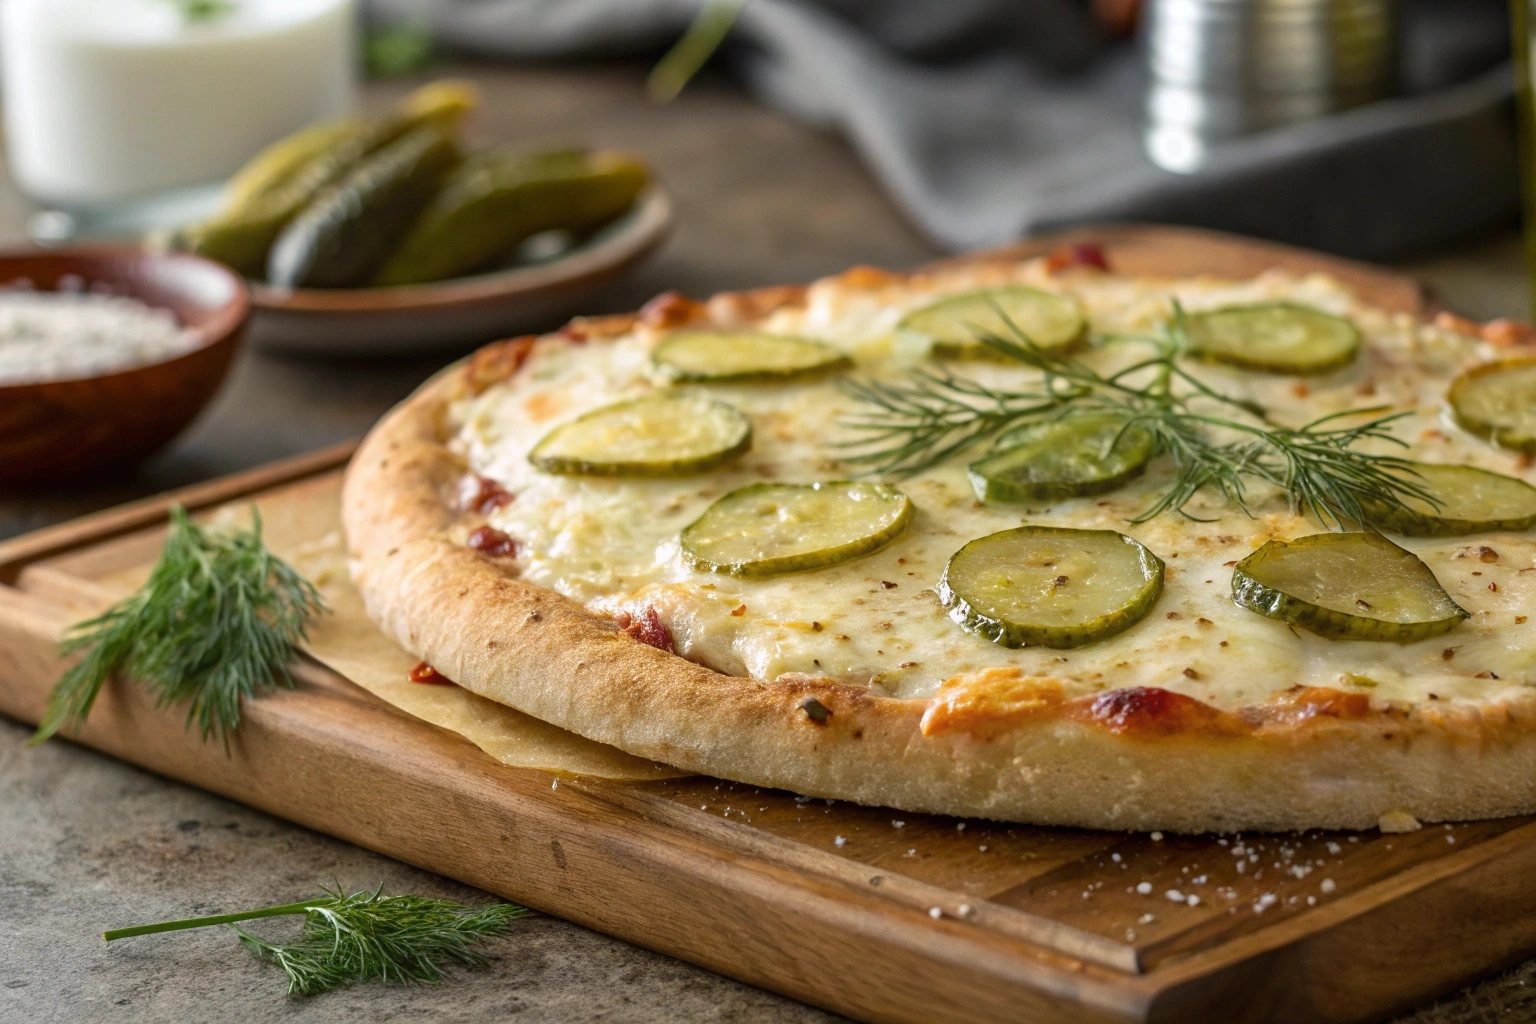
Are you looking for an exciting dish that blends tangy, creamy, and savory flavors all in one bite? If so, you have come to the right place. This in-depth guide reveals how to create a unique Pickle Pie Pizza that replaces traditional tomato sauce with a smooth garlic-dill mixture and sprinkles on crunchy pickles for a bright kick. Indeed, this briny twist has gone from a novelty item at gourmet pizzerias to an at-home phenomenon. Therefore, get ready to learn every detail you need to craft this bold pizza variant in your own kitchen. By the time you finish reading, you will be ready to gather your ingredients and enjoy a memorable meal that appeals to both pickle lovers and those seeking a daring culinary adventure.

Why You Should Try This pickle pie pizza

Pickle Pie Pizza may sound unconventional. However, it has continued to gain a devoted following thanks to popular spots like QC Pizza, which introduced the “Kinda Big Dill,” and chef Ann Kim’s inventive pie. Thus, social media enthusiasts and food bloggers alike began raving about this tangy delight. On the other hand, some pizza purists expressed uncertainty at first. Eventually, many discovered that pairing the crunch of dill chips with gooey cheese and creamy sauce results in a harmonious balance of flavors.

In addition, the tanginess can cut through the richness of cheese, making each slice feel surprisingly light on the palate. Beyond the novelty factor, this Pickle Pie Pizza has practical advantages. For instance, you do not need to cook a separate tomato sauce, saving both time and effort. Moreover, the recipe can be customized to accommodate a broad range of dietary preferences. Therefore, if you are ready to depart from the norm and embark on a flavor-filled journey, keep reading for a comprehensive walkthrough.

The Inspiration and Evolution of pickle pie pizza

Where the Idea Originated

You might think that placing pickles on a pizza was a random invention, but it actually emerged from creative chefs who sought ways to stand out in a crowded dining scene. Because the pizza market is highly competitive, adding tangy dill slices offered a fresh point of differentiation. Viral social media posts showcased these pies, helping them gain traction among open-minded foodies. Therefore, what began as a niche concept rapidly evolved into a mainstream dish that continues to surprise first-timers.

Personal Anecdote: The First Bite

I remember the first time I tasted this tangy creation at a small pizzeria in Minnesota. I had always been a fan of pickles, so I was intrigued but cautious when reading “garlic-dill sauce” on the menu. However, the first bite introduced me to an incredible pop of flavor: the brine from the pickles melded seamlessly with the rich cheese and delicate crust. Thus, I found myself finishing slice after slice with no regret. Indeed, that memorable experience is what inspired me to replicate the dish at home and refine the recipe for anyone else eager to savor this intriguing combination.

Why the Flavors Work So Well

  • Tangy and Crisp: The sharp taste and crunchy texture of pickles provide a lively contrast to smooth cheese.
  • Creaminess: A garlic-dill sauce adds velvety richness in place of tomato-based sauce, bringing balance to the bite.
  • Savory Punch: Low-moisture mozzarella, Parmesan, or Fontina supplies that salty note pizza lovers crave.
  • Customizable: You can control how tangy or spicy you want the dish by picking different pickle varieties, adding red pepper flakes, or drizzling sweet honey.

On the other hand, those who prefer a bolder flavor can experiment with hot dill pickles or smoked cheeses. Therefore, there is plenty of room to tailor your pizza to match personal preferences.

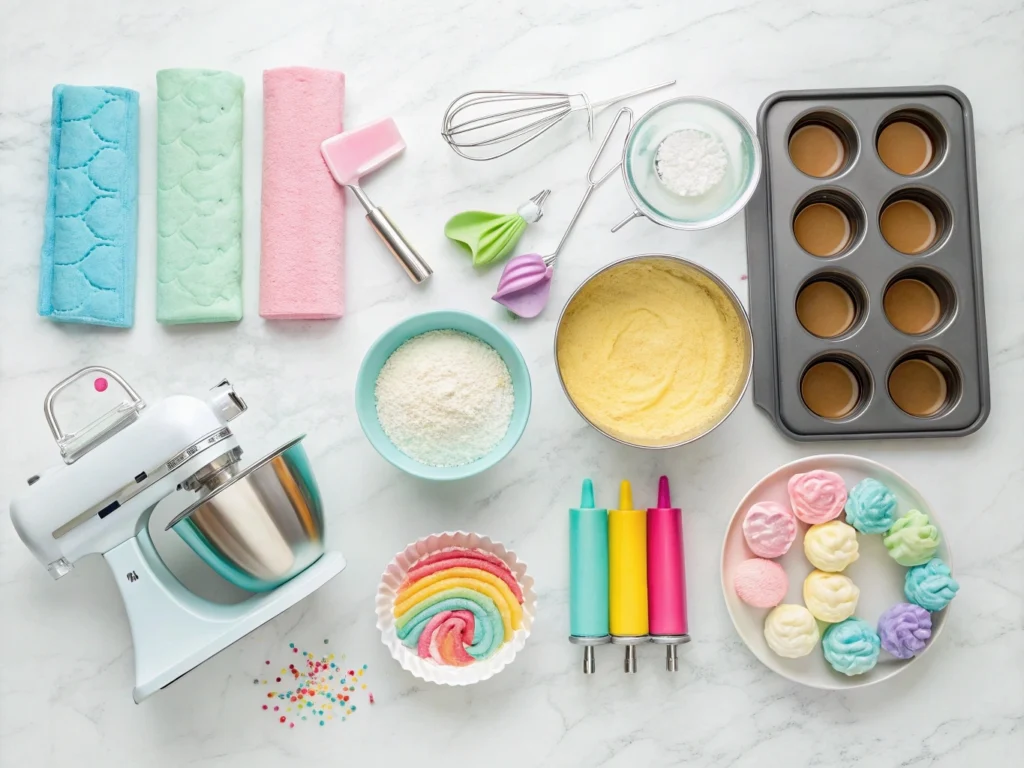
Core Components and Their Functions

Dough ingredients ready for homemade pizza
Gather your simple crust ingredients

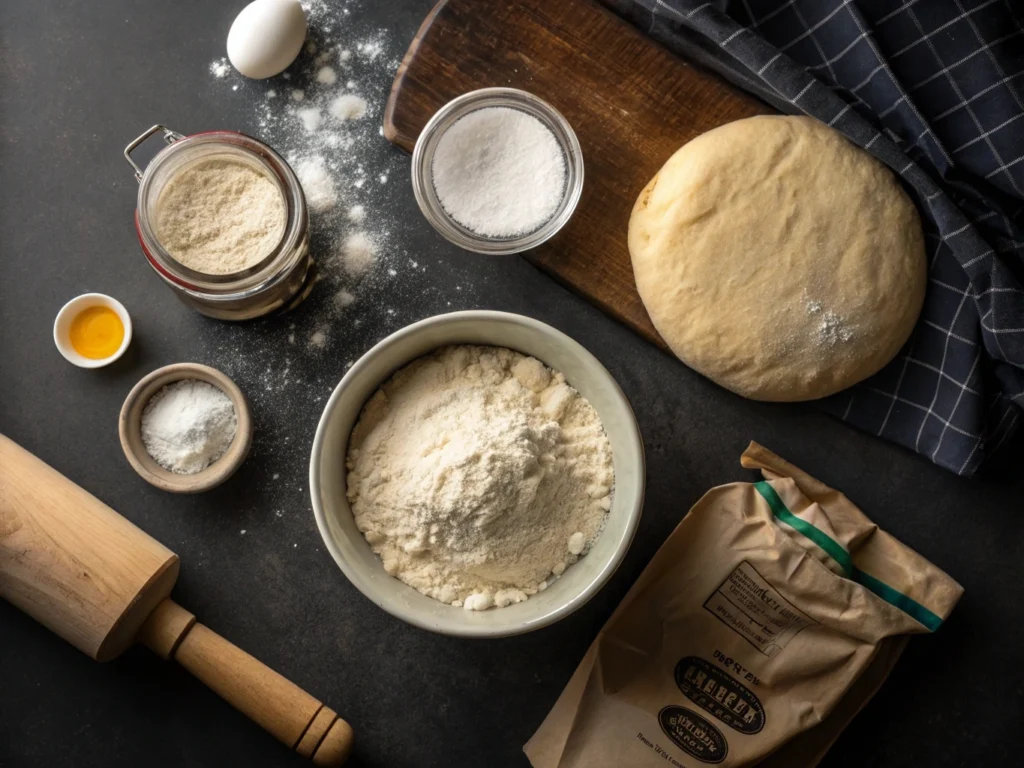
You do not need to be a gourmet chef to prepare this dish, especially once you know each element’s role. Thus, feel free to swap or tweak ingredients to suit your taste.

IngredientPurposeNotes/Variations
Crust OptionsForms the sturdy base for your toppings– Homemade thin crust for freshness and a crisp bottom – Store-bought dough for speed – Puff pastry for a flaky, rich bite
Garlic-Dill SauceReplaces tomato sauce with a tangy, creamy layer– Blend of sour cream, mayo, dill, garlic powder, pickle juice, salt, and pepper – Use your favorite ranch if you need a shortcut
PicklesAdds brightness and crunchy texture– Thinly sliced dill chips – Spicy pickles if you want extra heat – Pat them dry to prevent sogginess
CheeseProvides the classic gooey, savory pizza element– Low-moisture mozzarella – Parmesan or Fontina for a sharper bite – Smoked cheddar for a deeper flavor
Optional ToppingsAllows you to personalize flavor and texture– Kettle chips, hot honey, fresh chives – Ham, Canadian bacon, or ground beef for protein

Helpful Details About Your Key Ingredients

Crust Possibilities

  • Homemade Dough
    If you have an extra half-hour, a simple dough with flour, yeast (or sometimes no yeast), water, and salt can be quick and rewarding. Indeed, kneading dough can be therapeutic, and you can control the thickness or chewiness of your crust.
  • Store-Bought Dough
    Pre-made dough saves time. It also ensures consistent results for beginners who might find yeast intimidating. However, let the dough rest at room temperature for about 20 minutes before shaping. Therefore, it becomes more pliable.
  • Puff Pastry
    Are you in the mood for something different? In that case, puff pastry offers a flaky texture reminiscent of a cross between a classic pizza and a savory tart. Just be mindful of potential grease from the butter layers.

Sauce Secrets

Creamy garlic-dill sauce with fresh dill and garlic
A tangy, flavorful spread for your pickle pie pizza

A garlic-dill sauce stands at the heart of this recipe. Thus, it is worth getting it right:

  1. Sour Cream and Mayonnaise
    These add richness and a silky feel. However, you can switch to Greek yogurt for a lighter option if desired.
  2. Pickle Juice
    This brine not only thins the sauce but also infuses it with a punch of tang. On the other hand, you can reduce or omit it if you want milder acidity.
  3. Fresh or Dried Dill
    Dill is essential for that signature pickle flavor. If you have access to fresh dill, chop it finely and taste as you go, since fresh herbs can vary in intensity.
  4. Spices
    Garlic powder provides savory warmth. Meanwhile, a pinch of onion powder or smoked paprika can offer an extra layer of complexity. Therefore, do not be afraid to experiment in small amounts.

Choosing the Right Pickles

  • Thin Slices
    Slicing your pickles too thick could overwhelm each bite and make your Pickle Pie Pizza soggy. Consequently, thin slices create a balanced crunch that pairs well with the melted cheese.
  • Spicy vs. Mild
    If you prefer a more intense flavor, look for brands like Mt. Olive Hot ‘N’ Spicy or Grillo’s Hot Pickles, both known for delivering a kick.
  • Drying Them Properly
    Patting your pickles with a paper towel is key. Therefore, you reduce moisture and help ensure a crisp crust.

Cheese Varieties

While mozzarella remains a go-to, you might also consider combining cheeses. For instance, half mozzarella and half Fontina can give you a layered flavor. In addition, sprinkling a little Parmesan over the top can yield a lovely golden crust in the oven.
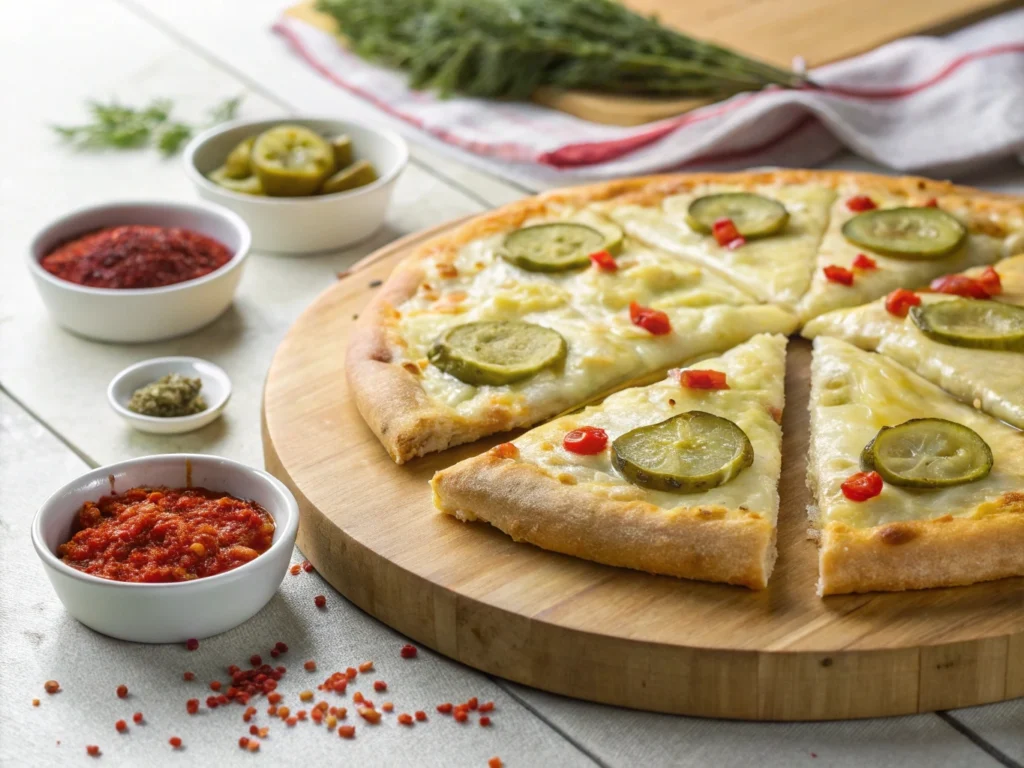
Potential Toppings

  • Textural Elements: Crumbled kettle chips add a salty crunch.
  • Colorful Herbs: Fresh chives or scallions bring a pop of green.
  • Sweet Contrast: Drizzling hot honey can offset any strong tang.
  • Protein: If you want added heft, diced ham or bacon bits can round out the meal.

Step-by-Step Preparation: From Dough to Delicious

 Pickle pie pizza assembly with sauce, cheese, and pickles
Layering simple ingredients for remarkable flavor

It is always easier to tackle a new recipe when you break it down into steps. Therefore, follow this timeline, and you will soon have a steaming, tangy pie on your table.

1. Gather Your Tools and Preheat

  1. Crank Up the Heat
    Set your oven to 500°F (or its highest setting). A piping-hot oven helps achieve a crisp crust. In addition, if you own a pizza stone or steel, place it inside to preheat.
  2. Prepare a Peel or Baking Sheet
    Dust a pizza peel or a large cutting board with cornmeal, or use parchment paper to prevent sticking. However, if you do not have these on hand, a flat baking sheet can serve as a makeshift peel.

2. Whisk the Sauce

  • Combine in a Bowl
    Mix sour cream, mayonnaise, pickle juice, dill, garlic powder, salt, and pepper. Because you want a smooth blend, whisk until there are no lumps.
  • Taste and Adjust
    If it tastes too briny, add a bit more mayo. On the other hand, if you need more zip, add a few more drops of pickle juice or a pinch of acid like lemon juice.
  • Refrigerate
    Chilling the sauce for about 10–15 minutes can help the flavors meld. Thus, you end up with a more cohesive taste.

3. Shape the Crust

  1. Room-Temperature Dough
    If using store-bought dough, let it rest out of the fridge for 20 minutes. This makes it easier to stretch.
  2. Roll It Out
    Flour your work surface. Then, use a rolling pin or stretch the dough with your hands to a diameter of 12–14 inches, depending on how thin you prefer your crust.
  3. Transfer
    Place the shaped dough onto the dusted peel or your chosen parchment paper. Therefore, you avoid the dough sticking and forming holes when you move it to the oven.

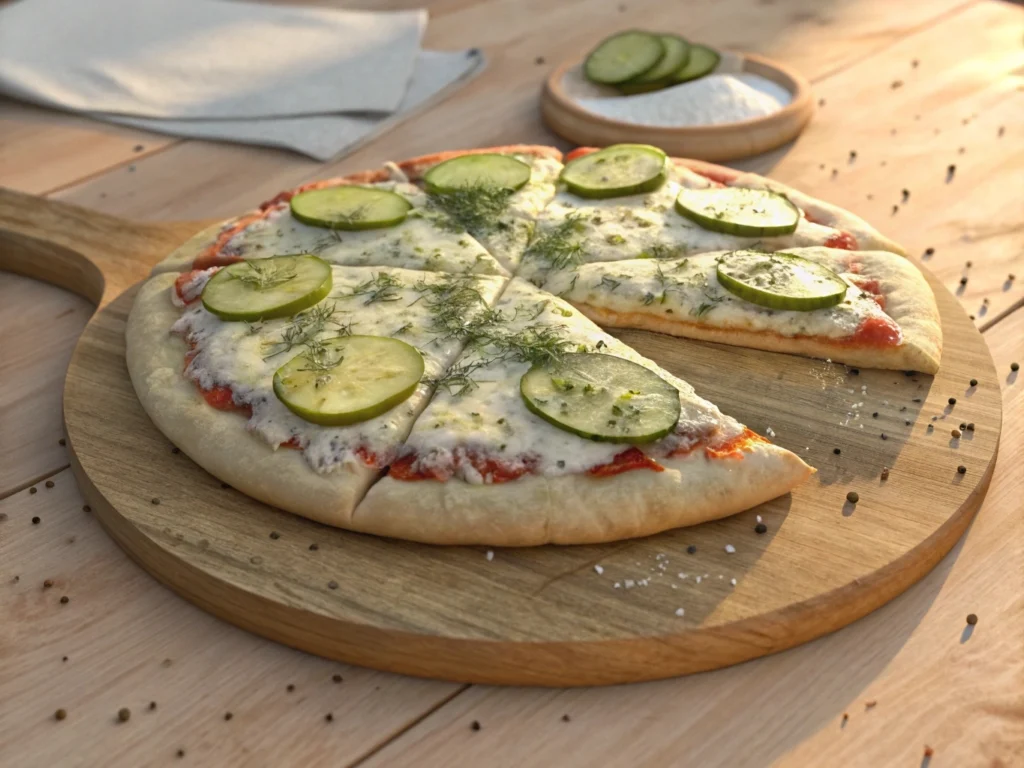
4. Spread the Sauce and Layer Toppings

  1. Sauce Base
    Use a spoon to add the garlic-dill sauce, leaving about 1 inch of uncovered crust around the edge.
  2. Cheese
    Distribute your cheese of choice over the sauce. In addition, consider sprinkling a small handful of cheese over the exposed crust if you like a browned edge.
  3. Pickle Placement
    Arrange your dill slices evenly. In addition, some people place a few pickles under the cheese for a layered effect.
  4. Optional Additions
    • Red pepper flakes
    • Kettle chips
    • Cooked ground beef or diced ham

5. Slide into the Oven

  1. Transfer to Stone or Steel
    Carefully slide the pizza off your peel or baking sheet onto the preheated surface. Alternatively, you can place it on a hot baking tray if that is your only option.
  2. Baking Time
    Keep a close eye on your Pickle Pie Pizza. Generally, it will be done in about 11–13 minutes. However, ovens vary, so watch for bubbling cheese and a golden crust.
  3. Optional Broil
    For extra browning, turn the broiler on for the final 1–2 minutes. Thus, you get a crisp, slightly charred edge. Be vigilant, though, because the crust can burn quickly under intense heat.

6. Final Touches

  1. Drizzle or Dust
    Once your Pickle Pie Pizza is out of the oven, you may drizzle hot honey or sprinkle chopped chives, fresh dill, or grated Parmesan on top. Consequently, these final accents heighten color and flavor.
  2. Rest and Slice
    Let the Pickle Pie Pizza sit for about 3–5 minutes. That way, the cheese can set. Then, slice into wedges and serve.

Serving Suggestions and Approximate Nutrition

Sliced pickle pie pizza with garnish bowls
Elevate each slice with extra zest

Serving the Finished Pie

  • Main Course or Shareable
    This tangy creation can be an impressive centerpiece at a casual dinner party or a fun family meal. Therefore, serve large slices for an entrée or cut them smaller for an appetizer.
  • Suggested Sides
    Because the Pickle Pie Pizza is quite rich and tangy, you might pair it with a light salad or crisp veggie dish. In addition, consider a coleslaw that includes chopped pickles for a double dose of brine.

Nutritional Overview

Exact calorie counts differ based on the crust, toppings, and cheese amounts you use. However, here is a ballpark per average slice of a 12-inch pizza:

  • Calories: 300–350
  • Fat: ~10–15g
  • Carbs: ~35–40g
  • Protein: 12–15g
  • Sodium: Higher than some pizzas (due to pickles and cheese), so be mindful if you watch salt intake.

For precise calculations, you could use a reliable nutrition database, such as MyFitnessPal or the USDA FoodData Central. Thus, you can adjust ingredient amounts to fit dietary needs.

Troubleshooting and Variations

Even the most experienced cook can run into issues. Therefore, here are a few ways to overcome common hurdles.

Common Pitfalls

  1. Soggy Crust
    • Insufficiently preheated oven or stone
    • Using thick pickle slices or not drying them
    • Overloading sauce or cheese
  2. Overly Tangy
    • Use fewer pickles or try bread-and-butter pickles
    • Reduce the pickle juice in your sauce
    • Balance the acidity with a sweet drizzle, such as honey or a mild barbecue sauce
  3. Underseasoned Sauce
    • Be sure to taste your sauce and adjust salt or dill
    • Enhance flavors with a pinch of onion powder or a dash of chili flakes

Ingredient Swaps

  • Gluten-Free Crust: Many brands now offer GF doughs, or you can make your own using a mix of rice flour, tapioca starch, and other binders.
  • Vegan Cheese: Plant-based cheeses have come a long way in texture and taste. In addition, vegan mayo can replace standard mayo in the sauce.
  • Protein Boost: Cooked chicken, bacon, or ground beef can turn your pizza into a hearty meal. On the other hand, tofu or vegan sausage works for those avoiding meat.

Creative Flavor Boosts

  • Add Fresh Herbs: Toss some basil or oregano over the baked pizza for extra aroma.
  • Spicy Twist: Scatter pickled jalapeños or banana peppers on top.
  • Sweet & Salty: Drizzle maple syrup if you prefer a sweeter note, balancing the brine from the pickles.

Beyond Pizza: More Pickle-Focused Creations

If you love the briny flavor that pickles bring, you will be excited to know there are numerous ways to incorporate them into your cooking routine. Therefore, explore the following ideas to satisfy your tangy cravings.

  1. Fried Pickles with Creamy Dip
    • Lightly bread dill slices and fry them for a crunchy snack.
    • Serve with ranch dressing or the leftover garlic-dill sauce.
  2. Cheeseburger Pizza with Pickle Relish
    • Merge two fast-food favorites by adding ground beef, cheddar, and a special sauce that includes relish.
    • Consider toasting sesame seeds on the crust for a hamburger bun vibe.
  3. Creamy Pickle Slaw
    • Stir chopped pickles into a coleslaw mix.
    • Dress with a blend of mayonnaise, vinegar, sugar, and dill for a tangy, crunchy side.
  4. Chicago-Style Hot Dogs
    • Pile on mustard, onions, tomatoes, a pickle spear, and sport peppers.
    • Avoid adding ketchup if you want an authentic approach, but feel free to adapt to your taste.
  5. Pickle-Brined Fried Chicken
    • Let your chicken soak in pickle juice for a few hours or overnight.
    • Coat and fry as usual for a tender, flavorful bite.

In-Depth Tips for Perfecting Your Pickle Pie Pizza

Although we have covered the main steps, a few extra pointers can help you achieve pizzeria-quality results at home:

  1. Use High-Heat Methods
    Because you want a crust that is both airy and crisp, baking at a very high temperature is essential. Thus, do not hesitate to crank your oven to its highest safe setting.
  2. Top Variation
    Think of the cheese as a shield for the dough. Adding pickles on top of the cheese can help them roast slightly, but tucking a few under can keep them juicy. Consequently, you get multiple layers of texture in each bite.
  3. Timing the Bake
    If you add more toppings like meat or extra cheese, the pizza might need a bit more time. However, remain vigilant since high-heat baking can go from perfect to burnt in less than a minute.
  4. Test Small Batches
    If you are uncertain about certain flavors, try making a personal-size pizza or even a flatbread. That way, you can test if you like the ratio of sauce to pickles before committing to a full pie.
  5. Don’t Drown the Crust
    Spread the sauce lightly. Therefore, you avoid overwhelming the pizza with too much moisture. You can always serve extra sauce on the side for dipping.

Flavor Pairings and Serving Occasions

Balanced Beverages

  • Crisp Lager: Beer with a clean finish pairs well with tangy bites.
  • Light White Wine: Sauvignon Blanc or Pinot Grigio can highlight the pickle’s acidity without clashing.
  • Sparkling Water: A citrus-infused sparkling water can also cleanse your palate between slices.

Festive Events and Gatherings

  • Game Day: Combine this pizza with fried pickles or buffalo wings for a memorable sports-watching spread.
  • Pickle-Themed Parties: Yes, they exist! Serve pickle dips, relishes, and chips for a complete brine-inspired table.
  • Casual Dinners: Because the recipe is so straightforward, it can become your go-to quick dinner when you crave something different yet comforting.

Expanding Your Pickle Horizons

Although we have focused on how pickles enhance pizza, do not stop there. Indeed, pickles can elevate everything from sandwiches to soups. Thus, consider these ideas the next time you find yourself craving the tang of vinegar and dill:

  1. Pickle-Infused Salad Dressings
    Substitute part of the vinegar or lemon juice in your standard vinaigrette with pickle brine for a bright twist.
  2. Pickle Salsa
    Chop pickles, onions, tomatoes, and jalapeños. Then, mix them with lime juice and a dash of cilantro. Serve this mix with tortilla chips for a tangy alternative to pico de gallo.
  3. Pickle Pasta Salad
    Stir chopped pickles into a creamy macaroni salad. On the other hand, you can slice them into a cold orzo salad with a light, dill-forward dressing.
  4. Pickle Martinis
    Mix gin or vodka with pickle juice in place of olive brine. Garnish with a pickle spear instead of an olive.

Each of these ideas builds on the same love of tangy flavors that draw people to pickled ingredients. Therefore, if you find yourself unable to get enough of that briny taste, you can keep exploring new uses with ease.

Frequently Asked Questions

1. Can I Use Sweet Gherkins on This Pizza?

Yes, you absolutely can. In fact, many people enjoy the sweeter bite as it reduces overall tang. Therefore, if you find standard dill too sharp, try bread-and-butter pickles or gherkins. Just be sure to monitor the sauce, as you may need less pickle juice to avoid an overly sweet result.

2. What If I Do Not Have a Pizza Stone or Steel?

A regular baking sheet works fine. However, you should preheat it in the oven for a few minutes before placing your dough on top. Thus, you can mimic the effect of a hot stone and get a crisp bottom. If sticking is a concern, line the sheet with parchment paper for an easy cleanup.

3. How Do I Keep My Pizza from Becoming Oversalted?

Pickles and cheese both contribute saltiness. On the other hand, you can choose low-sodium cheese varieties and rinse your pickles if you want to reduce sodium. Alternatively, limit the extra salt in your sauce or consider balancing with a sweet drizzle at the end.

4. Can I Freeze Leftover Pizza?

While it is possible to freeze leftover slices, the pickles may become softer upon thawing. Therefore, if your schedule allows, freeze just the dough and sauce separately. Then, add fresh pickles on baking day. However, if you must freeze the entire pizza, reheat it in a hot oven or air fryer for best texture.

5. How Should I Reheat Leftovers?

Reheating in a conventional or toaster oven at 375°F is a safe bet. Let it heat for around 5–7 minutes until the cheese is melted and the crust is crisp. Indeed, try to avoid microwaving, since it can result in a chewy, less appealing texture.

6. Are There Any Healthy Tweaks I Can Make?

Use Greek yogurt instead of mayo or sour cream in the sauce. Also, opt for whole-grain or cauliflower crust if you want more fiber and nutrients. Finally, load up on veggies like onions, peppers, or mushrooms to increase the nutritional profile.

7. Do I Need Fresh Dill for the Sauce?

No, dried dill works well and often has a concentrated flavor. Therefore, start with a teaspoon or two, and then adjust based on your taste. If you do have fresh dill, chop it finely, and note that you might need a bit more than dried to achieve the same flavor.

Conclusion

By now, you have learned how to make a memorable tangy pizza that combines creamy garlic-dill sauce, crisp pickles, and melty cheese on a perfectly crisp crust. In addition, you have discovered how easy it is to swap ingredients and tailor the recipe to your dietary needs. Therefore, there is no reason to let skepticism hold you back from experiencing a lively twist on everyone’s favorite comfort food.

Easy Unicorn Cake Recipe: Step-by-Step Guide with Rainbow Buttercream

If you’ve ever dreamed of baking a unicorn cake that looks like it stepped right out of a fairytale, you’re in the right place. This mythical dessert has become one of the most popular treats for birthdays, baby showers, and celebrations of all kinds. In addition, it’s surprisingly manageable to create, provided you have the right tools, ingredients, and a bit of patience. Throughout this guide, you’ll learn not only how to build and decorate a stunning unicorn cake but also why it’s worth the effort, how to make it taste as good as it looks, and what you can do to personalize it for any special occasion. Therefore, get ready to discover everything you need to know from the origins of whimsical cakes to the final finishing touches so you can create your own magical cake at home.

1. Why a Magical Unicorn Cake Reigns Supreme

Origins and Popularity of Whimsical Cakes

Unicorn cake might feel like a modern social media creation, yet whimsical cakes have been around for decades in various forms. However, it wasn’t until the surge of visually driven platforms like Instagram and Pinterest that these rainbow-hued, fairy-tale desserts truly exploded in popularity. You’ve probably seen photos of tall, pastel-colored cakes crowned with gilded horns and playful ears while scrolling through your feed. On the other hand, you might have wondered whether making such a masterpiece at home is feasible. Rest assured, this cake trend endures because it’s not only eye-catching but also incredibly fun to customize.

Moreover, you’ll find whimsical cakes featured in bakeries around the globe, each adding its own unique twist be it sparkly sprinkles, edible flowers, or even multi-flavored layers. Thus, if you want to add a touch of enchantment to your next celebration, a unicorn cake is the perfect showstopper.

Perfect Occasions for This Fairy-Tale Dessert

You might assume a fairy-tale dessert is only suitable for children’s birthday parties. In reality, grown-ups also adore these vibrant creations for baby showers, bridal parties, and even just-because moments. Therefore, if you’re hosting a celebration where you’d like a cake that wows your guests at first glance, you can’t go wrong with this whimsical creation. In addition, you can match your color scheme by adjusting the frosting shades or customizing the fillings.

For instance, if your theme is pastel pink and mint, you can incorporate those specific colors into your cake layers or mane decorations. On the other hand, you can go big and bold with neon hues if you’re aiming for an eye-popping party centerpiece.

Healthier vs. Indulgent Approaches

Although rainbow-colored desserts are usually associated with sweetness and sugar, you do have options if you’re looking for a less indulgent version. In fact, some bakers reduce the sugar in the sponge or opt for a lightly sweetened whipped cream in place of a standard buttercream. However, because the visual impact remains the cake’s highlight, a certain amount of color and frosting is typically expected. That said, you can still experiment with fruit-based fillings, lower-sugar sprinkles, or even vegan and gluten-free versions to suit various dietary preferences.

Many professional cake decorators also use fruit extracts—like strawberry or lemon—to infuse a delicate twist into each layer. Hence, you get bursts of flavor without necessarily relying on pure sugar. Ultimately, it’s all about striking a balance that fits your event’s style and your guests’ palates.

Setting the Stage for Fun

One of the biggest joys of creating a unicorn cake is the sense of excitement it brings to your kitchen. Children and adults alike often find themselves smiling as they watch bright colors swirl into batter or as they pick out sparkly decorations. Furthermore, setting up a decorating station, especially when little helpers are around, can transform the process into a mini party before the actual celebration even begins.

If you’re new to cake decorating, don’t worry. You’ll find that each step is simpler than you might imagine particularly once you break it down into prepping, baking, frosting, and final touches. Therefore, as you embark on this journey, remember to enjoy each stage, and don’t be afraid to get creative with colors and decorations.

2. Essential Tools and Ingredients for Your Whimsical Creation

Flat lay of tools and ingredients for baking a unicorn cake
Essential equipment and colorful batters for your unicorn cake

Before you can make the perfect unicorn cake, it’s vital to gather the proper equipment and ingredients. In addition, you’ll want to consider a few extras like edible glitters or special piping tips that will give your cake that extra pop of magic. For more whimsical dessert ideas, check out Fairy Bread recipe.

Must-Have Baking Equipment

While the term “must-have” can feel strict, a few specific tools truly make your life easier:

  1. Cake Pans: Choose three 6-inch pans or two 8-inch pans, depending on how tall you want your cake. Using multiple pans ensures even baking and consistent layer sizes.
  2. Mixer (Stand or Handheld): Creaming butter, mixing batter, and whipping frosting is far simpler when you have a reliable mixer.
  3. Spatulas and Bench Scraper: An offset spatula helps you spread frosting evenly, while a bench scraper can smooth the cake’s sides.
  4. Piping Bags and Tips: Star tips (like a 1M) and round tips (like #4) are key for creating the unicorn’s mane and small decorative details.
  5. Optional Tools: If you plan on making edible images for the eyes, an edible ink printer is handy. A fondant mold or shaped cutters for ears can also save time.

With these items on hand, you’ll be better prepared to craft a cake that looks professional and because you have the right tools, you’ll reduce the risk of stress or last-minute improvisations.

Key Ingredients for Vibrant Layers

An enchanting unicorn cake typically features multiple colors inside, so consider using a white velvet or basic white cake recipe. This style of batter takes food coloring beautifully. To achieve bright and consistent hues, invest in high-quality gel colorings (rather than liquid).

  • Cake Flour (or All-Purpose): Delivers a soft crumb.
  • Butter or Oil: Brings moisture and flavor.
  • Eggs: Bind the batter. For an eggless version, you can experiment with applesauce or a commercial egg replacer.
  • Sugar: Standard granulated sugar or a sugar substitute if you’re going for a lighter approach.
  • High-Quality Gel Food Colors: We recommend Wilton’s Gel Icing Colors or Americolor’s line for vibrant, fade-resistant shades.

In addition, keep basic staples like baking powder, salt, and vanilla extract around. Once you gather these items, you’ll notice how each ingredient contributes to a fluffy, colorful, and delicious final product.

Choosing the Right Sprinkles and Decorations

If you want a fairy-tale dessert with a confetti-like appearance, you might include sprinkles directly in the cake batter—commonly known as a “funfetti” cake. Therefore, opt for sprinkles designed to hold their shape during baking so you end up with those adorable specks of color in each bite.

Beyond the batter, decorations such as edible glitter, sugar pearls, and metallic dragees can further enhance your cake’s whimsical look. However, be mindful that not all glitter labeled “non-toxic” is truly edible. In fact, some are for display only and should be removed before serving. Consequently, check labels or buy from well-reviewed baking suppliers to ensure everything on your cake is safe to eat.

Crafting Edible Horns and Ears

The horn and ears are perhaps the most iconic aspects of a unicorn cake. You can craft these using:

  • Fondant: Roll it into a cone shape for the horn, twist two pieces together for that spiral effect, then let it dry. Make leaf-like ear shapes, fold, and add pink accents.
  • Isomalt or Chocolate: Use a premade mold to form horns and ears. This method often results in a glossier finish.
  • Painting Gold: For a metallic effect, coat your horn with edible gold dust or spray.

Because these elements must stand upright, you can insert a thin dowel or cake pop stick into the horn to anchor it. In addition, you might attach the ears to toothpicks or dried spaghetti for added stability.

Flavor Profile and Variations

Vanilla is the classic go-to for a unicorn cake because it pairs beautifully with sweet frostings and doesn’t clash with bold colors. However, you can also layer in fruit jams, chocolate ganache, or even a tangy lemon curd for extra complexity. On the other hand, if you’re a chocoholic, you could make your interior layers chocolate and simply color white frosting in bright hues.

Moreover, alternate layers can offer a taste surprise without compromising the rainbow effect. For instance, a lemon layer can be pastel yellow, a strawberry layer can be soft pink, and a vanilla layer can be tinted sky blue. Thus, each bite delivers a different burst of flavor while still looking cohesive once sliced.

Looking for more ways to use up overripe ingredients? Try our 2-banana bread recipe for another quick and delightful homemade dessert.

3. Step-by-Step Unicorn Cake Construction

Once you have your tools and ingredients ready, it’s time for the main event: building your unicorn cake from the ground up. Thus, prepare your kitchen and get ready for a rewarding baking adventure.

Preparing and Coloring the Batter

 Mixing vibrant food coloring into separate bowls of cake batter
Adding pops of pink, blue, and yellow to the batter
  1. Mix Your Base: Begin with your preferred white or vanilla cake batter. Cream butter and sugar until fluffy, then add eggs (or egg substitute), followed by your dry ingredients.
  2. Divide the Batter: Separate it into multiple bowls—one for each color you plan to use. Add a few drops of gel food coloring into each bowl, stirring gently but thoroughly.
  3. Achieving Vivid Tones: Add color gradually. You can always add more, but it’s hard to tone down an overly saturated color. In addition, test a small spoonful of batter on a white plate to gauge the final shade.
  4. Layering the Colors: If you’re going for distinct layers, pour each color into its own cake pan. Alternatively, if you want a tie-dye effect, swirl different colors together in one pan.

However, make sure not to over-mix once your colors are added, as this can toughen the cake. In addition, be cautious about color overlaps if you want crisp divisions.

Baking and Cooling Techniques

  1. Oven Temperature: Most unicorn cake recipes bake at around 335ºF. This slightly lower temperature (compared to 350ºF) ensures the cake rises evenly and the color remains vibrant.
  2. Baking Time: Typically 30–35 minutes, but use the toothpick test: insert it into the center, and if it comes out clean or with a few moist crumbs, your cake is done.
  3. Preventing Domes: Tap the pans gently on your counter before baking. On the other hand, some bakers place damp strips around the cake pans to keep the tops level.
  4. Cooling: Let the cakes rest in the pans for about 10 minutes, then invert them onto a rack to cool completely. In addition, you can wrap them in plastic and freeze for an hour or refrigerate overnight for easier frosting later.

Filling and Stacking Your Cake Layers

Stacked, multi-colored cake layers with crumb coat in progress
Building the base for a perfectly frosted unicorn cake

After cooling, level the tops using a serrated knife or cake leveler if needed. This step is crucial for stability.

  1. First Layer and Filling: Place the bottom layer on a cake board or stand. Spread a thin layer of frosting or your chosen filling (e.g., jam, ganache).
  2. Adding the Second Layer: Carefully center it over the bottom layer. Press gently to ensure adhesion. Therefore, you avoid leaning or sliding.
  3. Repeat for Additional Layers: Depending on how tall you want your unicorn cake, continue stacking.
  4. Crumb Coat: Apply a thin layer of frosting around the sides and top. This catches stray crumbs. Chill the cake for 10–30 minutes to allow the crumb coat to set.

Smoothing the Outside Frosting

  1. Final Frosting Layer: Use a larger offset spatula or bench scraper to smooth buttercream around the cake. You don’t have to get it perfect—whimsical designs often look great with a bit of texture.
  2. Achieving Clean Edges: Hold the scraper at a slight angle, turning the cake stand as you go.
  3. Optional Drip: For a stylish effect, drip a thin chocolate ganache or colored glaze around the top edge. However, do this only after the final frosting has chilled, so the drip sets properly.

Because neatness can elevate the final look, take your time here. On the other hand, if you prefer a rustic vibe, slight imperfections can add charm.

Securing the Horn and Ears

  1. Horn Placement: Insert the dowel or cake pop stick–supported horn into the top center. Gently push until stable.
  2. Ear Placement: Tuck the ears on either side of the horn, ensuring they’re evenly spaced. In addition, you might secure them with extra frosting or toothpicks if needed.
  3. Double-Check Angles: Step back and view the cake from different angles to confirm everything looks balanced.

This moment often brings your cake to life, therefore enjoy seeing your hard work come together.

4. Decorating Your Magical Unicorn Cake with a Rainbow Mane

Fully decorated unicorn cake with pastel mane, horn, and eyes
Adding the final touches to your majestic unicorn design

Now comes the truly creative part. You’ll transform a simple frosted cake into a whimsical creation by piping colorful swirls, adding sparkle, and giving your unicorn its signature face.

Colorful Buttercream Swirls and Rosettes

  1. Multiple Frosting Shades: Divide your buttercream into small bowls, tinting each bowl with a different color. Pastel pink, soft lavender, bright turquoise—whatever suits your theme.
  2. Piping Bag Setup: You can either place each color in its own piping bag or try the wrap method (placing stripes of color on plastic wrap, rolling it into a log, then inserting into a single bag).
  3. Rosette Techniques: A 1M star tip works wonderfully for rosettes. In addition, varying the size of the rosettes can add dimension.

Be liberal with your transition words—first, swirl pink rosettes along the unicorn’s “forelock,” then fill in with purple and yellow. Finally, step back to ensure your color distribution looks balanced before continuing.

Piping Techniques for Mane and Forelock

If you’re new to piping:

  1. Grip and Angle: Hold the bag at a 90-degree angle for rosettes. Squeeze from the top, guiding with your other hand near the tip for control.
  2. Star or Drop Flowers: Switch tips if you want smaller star shapes or drop flowers.
  3. Layering: Build up sections so the mane has a luxurious, voluminous appearance. For instance, you might add an extra swirl of pink in a gap or a pop of teal for contrast.

However, be careful not to overdo it you still want to see each color distinctly.

Adding the Eyes and Facial Expressions

  1. Edible Printed Eyes: If you have an edible ink printer, print large eyes with eyelashes. Cut them out carefully and place them toward the lower half of the cake.
  2. Buttercream or Fondant Eyes: Alternatively, use black buttercream or fondant. For eyelashes, a small round piping tip (#2 or #3) is ideal.
  3. Extra Details: If you want added personality, pipe tiny hearts or stars near the corners of the eyes. In addition, consider rosy cheeks with a dab of pink icing.

Remember, the eyes bring character to your cake, so step back and adjust their placement until you’re pleased with the expression.

Finishing Touches and Sparkles

To elevate the fairy-tale dessert aspect:

  • Edible Glitter: Dust the mane, horn, and even the edges of the ears for subtle sparkle.
  • Sugar Pearls and Dragees: Press them into the frosting for extra texture.
  • Luster Spray: A quick spritz of pearl or gold can unify the entire design.

Therefore, if you want a statement piece, don’t hesitate to combine two or three finishing elements. Just be sure everything is labeled as food-safe.

Optional Personalization Ideas

Your unicorn cake can go beyond the classic pink-and-gold theme:

  • Galaxy or Mermaid Twist: Switch to blues, purples, and aqua for an otherworldly vibe.
  • Fresh Flowers: Add edible blooms for a whimsical meets rustic-chic style.
  • Flavor Fillings: Incorporate a fruit puree or caramel drizzle between layers for contrast in flavor.

On the other hand, keep in mind that simpler designs can also be stunning if you stick to a clean color palette. Thus, adapt your cake’s appearance to match your event.

5. Bonus Tips, Storage, and Serving Suggestions for a Whimsical Unicorn Cake

Even the most enchanting unicorn cake needs proper planning for storage, transport, and serving. Therefore, these final steps ensure your cake remains picture-perfect until it’s time to slice.

Managing Temperature for Your Magical Rainbow Cake

  • Room Temperature: If you’re serving within a few hours, you can leave the cake out (assuming your buttercream is stable).
  • Refrigeration: For hot climates or overnight storage, place your cake in the fridge. On the other hand, allow it to warm up at room temperature for about an hour or two before serving, so the buttercream softens nicely.
  • Extreme Heat: If you’re dealing with a summer party, keep an eye on melting decorations. Thus, consider a venue with air conditioning or ensure the cake stays chilled until the last possible moment.

Make-Ahead Strategies

  • Baking and Freezing: You can bake cake layers weeks ahead of time. Wrap them tightly in plastic and store them in the freezer for up to 6 months.
  • Buttercream Storage: Prepare your frosting a week in advance and refrigerate it in an airtight container. In addition, re-whip after bringing it to room temperature for a fluffier texture.
  • Decoration Prep: Fondant horns and ears can be made a few days early. This waiting time lets them harden for easier placement.

Because these strategies ease the burden of doing everything in one day, they’re invaluable if you want a stress-free experience.

Transporting a Fairy-Tale Dessert Safely

Should you need to move your cake to another venue:

  1. Sturdy Base: Use a thick cake board or drum that won’t flex.
  2. Cake Box: A box slightly larger than your cake helps protect the sides.
  3. Non-Slip Mat: Place a silicone mat or even a damp dishcloth underneath the cake board inside your car to prevent shifting.
  4. Car Temperature: However, be mindful of direct sunlight. Air conditioning can help maintain stability.

Thus, you’ll arrive with your cake intact and ready to steal the spotlight.

Enhancing the Presentation

You might not think beyond the cake itself, yet the overall display can elevate your unicorn cake to new heights:

  • Cake Stand or Decorative Platter: Choose one that complements your color scheme.
  • Coordinated Décor: Confetti, balloons, or a table runner in similar shades ties the theme together.
  • Photography Tips: Position the cake near a window with natural light. In addition, consider a clean background so your colorful design truly shines.

Moreover, a few simple steps in styling can turn your cake reveal into a memorable moment.

Serving Size and Nutrition Notes

  • Portions: A three-layer 6-inch cake can serve about 8–12 people, while an 8-inch version can feed 15–20, depending on slice thickness.
  • Calorie Count: Expect a standard buttercream-based unicorn cake to be indulgent, though you can reduce sugar or use lighter frostings to make it more health-conscious.
  • Allergies: Consider nut-free, gluten-free, or dairy-free substitutions if needed. On the other hand, always double-check labels for decorations like dragees or edible glitter.

Thus, with these factors in mind, your guests can enjoy the cake without unwelcome surprises.

6. FAQs about unicorn cake

Can I make a unicorn cake without food coloring?

Absolutely. You can opt for natural dyes such as beetroot powder or matcha. However, you could also embrace a minimalist white-and-gold unicorn theme by skipping the artificial colors altogether. This style still delivers a magical look while keeping the ingredients simpler.

Which frosting is best for a unicorn-themed cake?

Buttercream is the most popular choice due to its rich flavor and smooth texture. On the other hand, you could use stabilized whipped cream or cream cheese frosting if you want something lighter or tangier. Whichever you choose, test a small batch to confirm it holds shape during piping.

How far in advance can I bake and decorate my rainbow cake layers?

You can bake and freeze your cake layers weeks in advance, which is perfect for busy schedules. Decorating is best done one to two days before your event so the frosting remains fresh. In addition, store the finished cake in the fridge if your kitchen is warm.

What if my fondant horn won’t stay upright?

Use a wooden dowel or cake pop stick inserted through the center of the horn for structural support. In addition, you can chill the horn slightly to let it firm up before placing it on the cake. This approach provides extra stability, preventing any topple disasters.

Conclusion

Creating a unicorn cake that’s truly awe-inspiring may seem intimidating at first. However, when you break it down step by step starting from your batter and tools, moving through color selection and frosting, then adding those enchanting details like a golden horn and pastel mane—you’ll find that it’s a wonderfully achievable project. Therefore, don’t hesitate to experiment with flavors, color palettes, and finishing touches to make your cake as unique as you are.

The Ultimate Guide to Yukon Gold Potatoes

Have you ever wondered why some mashed potatoes taste so creamy and flavorful without needing loads of extra butter? Yukon Gold potatoes may be the secret. In this guide, you will learn about their history, best cooking methods, and why they are prized by cooks everywhere. Moreover, you will discover an easy recipe for silky mashed potatoes that will impress your family and friends. Let’s dive in!

Why Yukon Gold potatoes Deserve the Spotlight

Have you ever bitten into a potato dish that practically melted in your mouth, leaving a slightly sweet and buttery impression behind? If so, there is a good chance it featured the famed Yukon Gold variety. While it is easy to think of potatoes as a simple staple, these spuds have many nuances. Thus, understanding why they shine can help you elevate your cooking game, no matter your level of expertise.

Yukon Gold potatoes, in particular, have a reputation for being one of the most flavorful, visually appealing, and adaptable varieties available. On the one hand, many conventional potatoes require heavy seasoning to bring out their best side. On the other hand, Yukon Golds already have a nuanced taste that requires minimal enhancement. However, you can still jazz them up with herbs, cheeses, or sauces for an elevated meal.

What Are Yukon Gold Potatoes?

History and Origins of Yukon Gold potatoes

The story of this golden-fleshed variety begins in Ontario, Canada. In the 1960s, agricultural scientists set out to develop a new type of potato that combined the best traits of both wild South American yellow potatoes and North American white potatoes. Their goal was to create a high-yielding, disease-resistant cultivar with a distinctive color and taste. After years of careful cross-breeding and testing, Yukon Gold potatoes were finally introduced to the market.

They are now widely grown in multiple regions, including Idaho in the United States. In fact, because they quickly gained popularity, you will frequently find them at local supermarkets, farmers’ markets, and even in the gardens of avid home growers who appreciate how relatively straightforward these potatoes can be to cultivate. Meanwhile, the shorter harvest window from around August to February makes them slightly more seasonal compared to other varieties that may be available year-round. However, this timing adds to their allure, encouraging many people to look forward to the period when Yukon Golds are at peak freshness.

Defining Characteristics

Close-up of raw Yukon Gold potatoes with rosy pink eyes
Notice the rosy pink eyes and vibrant yellow skin of these Yukon Golds.

Appearance

One of the first things you will notice about Yukon Gold potatoes is their thin, smooth skin. While some potatoes have robust, thick exteriors, these golden beauties have a more delicate surface. Their skin often has subtle rosy pink eyes, giving them a distinctive look that stands out from the moment you spot them in the produce aisle. Beneath that thin skin lies vibrant yellow flesh, which is a strong visual indicator of their naturally buttery taste.

Texture

Yukon Golds are frequently described as possessing a texture that sits halfway between the dryness of a starchy Russet and the firm, waxy nature of red potatoes. In other words, they strike the perfect balance. Thus, you can count on them to hold their shape in stews or braises without falling apart, while still offering a creamy consistency when mashed. This versatility is one of their primary selling points.

Natural Flavor

Another distinctive trait is the noticeable buttery sweetness that comes through, even before you add any seasoning. Therefore, a simple preparation—like roasting or boiling—often yields a delicious outcome without the need for heavy sauce or added fats. Nevertheless, people who enjoy customizing flavors with extra herbs, garlic, or cheeses will find that Yukon Golds serve as a delightful canvas for various culinary experiments.

Seasonal Availability and Cost

You can usually find these potatoes from late summer through winter. However, keep in mind that availability can vary by region, and some grocers maintain stocks all year. Because they are in high demand and have a slightly shorter harvest season, Yukon Golds often cost a bit more than typical white or red potatoes. Yet, they usually remain less expensive than specialty varieties like fingerlings or certain heirloom types. If you are on a tight budget, watch for seasonal sales or consider growing your own if you have access to a garden plot.

Why Choose These Yukon Gold potatoes?

Balance of Starch and Moisture

Yukon Gold potatoes offer a medium starch content, which is crucial for achieving a texture that is not too mealy yet not overly firm. In contrast, Russets contain higher starch levels, which gives them that fluffy quality many people enjoy in baked potatoes. On the other hand, red potatoes have a waxier, firmer feel. Meanwhile, Yukon Golds land comfortably in the middle, ensuring they can be used in an incredible array of recipes.

Because they have more moisture than Russets, Yukon Golds do not dry out as easily when baked or roasted. Therefore, you can slice or dice them for soups and stews, confident that they will maintain their structure. They also make exceptionally creamy mashed potatoes, which we will discuss in more detail later.

Naturally Buttery Taste

One of the prime reasons people gravitate to Yukon Golds is their buttery flavor, which is slightly sweet. This subtle sweetness interacts beautifully with savory ingredients like garlic, onions, and herbs. Thus, it is no wonder professional chefs often showcase them in dishes where the potato is meant to shine, such as pommes purée (a silky, French-style mashed potato) or a rustic potato soup where flavor depth is essential.

In addition, the golden color plays a psychological role by reinforcing that impression of creaminess and richness, even before you take a bite. On the other hand, white potatoes may lack that visual cue and can appear more neutral in presentation.

Versatility in the Kitchen

A big advantage of these tubers is their ability to adapt to different cooking methods:

  • Roasting: Thanks to their light skin, you can roast them with olive oil, salt, pepper, and maybe some rosemary to create a side dish that is crispy on the outside yet soft on the inside.
  • Mashing: Their moderate starch content ensures a creamy consistency without turning gummy, which is a risk if you use ultra-starchy varieties and over-mix them.
  • Stews and Soups: Because they hold up without disintegrating, Yukon Golds are excellent for simmering over longer periods in broths or sauces.
  • Steaming: This method helps them stay moist and flavorful while retaining more nutrients than boiling might.

However, they are not ideal for making French fries. Since these golden spuds carry more water than some varieties, achieving that crisp exterior can be trickier without specific techniques. Nevertheless, they excel in almost every other cooking method you can think of.

Where to Buy and How to Store Yukon Gold potatoes

Where to Purchase

Yukon Golds are fairly common, so you will likely find them in large grocery stores, specialty supermarkets, health food stores, and even online retailers. Look for labels or signage that specifically read “Yukon Gold” or identify them by their distinctive yellow flesh. Furthermore, you can sometimes purchase them in bulk bins if you only need a few. Alternatively, they are sold in 5- or 10-pound bags that are perfect if you plan to cook multiple potato-centric meals in a week.

In addition, farmers’ markets often have fresh, locally grown Yukon Golds when they are in season, which can provide an even more flavorful product. If you are the gardening type, you might consider buying seed potatoes and planting them in your backyard. Growing your own can be rewarding, but it does require proper soil, space, and diligence in pest management.

Selecting Quality Potatoes

When choosing your potatoes, inspect them carefully for any signs of damage. Therefore, avoid those with bruises, cuts, or soft spots. Additionally, watch out for any greenish hue, which indicates the presence of solanine—a substance that can impart bitterness and cause discomfort if consumed in large quantities. A few small green patches can be trimmed away, but if half the potato is green, you are better off discarding it.

Storing Your Yukon Gold potatoes

Proper storage helps ensure your potatoes remain fresh and flavorful. Since Yukon Golds have a slightly higher sugar content than some other varieties, they can start to turn sweet or grow sprout eyes if kept in poor conditions.

  • Cool, Dark Place: Aim for a temperature range of 40 to 50°F. Storing them in a paper or perforated plastic bag allows for airflow and prevents moisture buildup.
  • Avoid Light: Exposure to sunlight triggers the production of solanine, turning potatoes green and causing a bitter taste. Keep them in a cupboard, pantry, or refrigerator crisper.
  • Keep Away from Onions: Onions and potatoes release gases that can accelerate spoilage when they are placed together.
  • Use Within Several Weeks: Yukon Golds do not last quite as long as Russets, so plan your meals accordingly.

Cooking Methods and Best Practices

Preparation Tips

Before you start cooking, give the potatoes a light scrub to remove any lingering dirt. However, do not wash them far in advance, as moisture can lead to premature sprouting or rot during storage. The thin skin means you can opt to peel them for a more refined texture or leave the peels on for extra fiber and nutrients. In addition, consider cutting them into uniform pieces. This consistency ensures even cooking whether you are steaming, boiling, or roasting.

Ideal Cooking Approaches

Steaming Yukon Gold potato chunks in a kitchen pot
Steaming is an excellent method to retain flavor and nutrients.
  1. Steaming: Steaming is a gentle way to cook the potatoes without submerging them in water. Therefore, they retain more minerals and vitamins, not to mention a more intense flavor.
  2. Boiling: If a steamer is not available, boiling Yukon Golds in salted water is an excellent fallback. Just be sure not to overboil them or they may become waterlogged, diluting that subtle sweetness.
  3. Baking: Consider baking your potatoes if you want a hands-off approach. Brush them with a little oil, prick with a fork, and pop them in the oven. The thin skin becomes slightly crispy, but not as thick as a typical Russet’s.
  4. Roasting: Toss cubes or wedges of these spuds with olive oil, herbs, salt, and pepper, then roast at around 400 to 425°F. Their natural sugars caramelize at the edges, resulting in a deliciously crisp outer layer and a creamy interior.
  5. In Soups and Stews: Yukon Golds shine in slow-cooked dishes because they do not break down rapidly. Whether you are preparing a hearty beef stew or a vegetarian chowder, they will hold their shape yet remain tender.

Texture and Flavor Insights

Thanks to their moderate starch content and higher moisture, Yukon Golds often require less added cream or butter compared to drier varieties. In addition, their sweet, vegetal notes form a beautiful partnership with aromatic herbs like rosemary, thyme, or chives. On the other hand, if you prefer a smoky flavor, consider adding bacon bits or smoked paprika, which can accentuate their natural richness.

Mashed Potatoes: A Buttery Recipe to Try

Creamy mashed Yukon Gold potatoes garnished with butter and chives
Rich and velvety mashed Yukon Golds, perfect for any meal.

Now that we have explored why these spuds are so special, let us dive into a recipe that showcases them in one of the most comforting forms: mashed potatoes.

Ingredients

  • 2 pounds of Yukon Gold potatoes, peeled or unpeeled, cut into 1-inch chunks
  • 3 tablespoons of butter (salted or unsalted)
  • 2 cloves garlic, minced (or 1 tablespoon of roasted garlic for a sweeter note)
  • ½ cup heavy cream (you can also use half-and-half or whole milk)
  • 1 teaspoon fine sea salt (plus additional to taste)
  • Chopped chives (optional garnish)

Tip: If you want a tangy twist, keep some sour cream on hand. Meanwhile, roasted garlic can add a sweet, complex flavor that elevates the dish even further.

Step-by-Step Instructions

  1. Steam the Potatoes
    Place the potato chunks in a steamer basket over boiling water. Cover and steam for about 15 to 20 minutes. Test a piece with a fork—it should slide in easily. If you prefer boiling, place the chunks in lightly salted water and cook for the same duration, being careful not to overdo it.
  2. Heat Butter and Garlic
    Meanwhile, melt the butter in a small saucepan over low heat. Therefore, add the minced garlic and stir gently for about 1 minute or until fragrant. Avoid browning the garlic, as it can turn bitter.
  3. Add Cream
    Stir in the heavy cream (or your chosen dairy) along with the salt. Let the mixture warm through, but do not allow it to boil. This step helps ensure that you are not shocking the potatoes with cold ingredients later.
  4. Mash or Rice
    Drain the potatoes (if you boiled them) or remove the steamer basket. Transfer the hot chunks to a large bowl. Consequently, use a ricer or food mill for the smoothest, most luxurious texture. If you prefer a more rustic style, grab a hand masher and go to town. However, do not use a blender or food processor, as that can make the potatoes gummy.
  5. Combine and Garnish
    Slowly pour in the warm butter-cream mixture, stirring gently until everything is well combined. Taste to check if you need more salt. Finally, top with fresh chives if you want a pop of color and mild onion-like flavor. Serve immediately, or keep them warm in a covered dish until mealtime.

Helpful Tips and Variations

  • Avoid Overworking: It is crucial not to mix the potatoes too aggressively, which can release extra starch and yield a gluey texture.
  • Roasted Garlic Variation: If you have a bit of extra time, wrap a head of garlic in foil with a drizzle of oil, roast at 400°F for about 30 to 40 minutes, and squeeze the softened cloves into your mashed potatoes. Consequently, it adds a sweet complexity that raw garlic cannot match.
  • Make-Ahead Option: Mashed potatoes can be prepared up to two days in advance. Cool them, cover them tightly, and store them in the refrigerator. Reheat gently on the stove with a splash of milk to bring them back to creamy perfection.
  • Serving Suggestions: Pair them with meatloaf, roasted chicken, or a vegetarian main dish like grilled mushrooms for an easy yet satisfying meal. If you want a festive flair for the holidays, add some sour cream or Parmesan cheese to the mix.

Comparing to Russet Potatoes

Many people wonder whether Yukon Golds can substitute for Russets or vice versa. Indeed, there is no single answer; it often depends on the dish you want to create.

  • Moisture Content: Russets are drier, making them ideal for baked potatoes with that characteristic fluffy center. Yukon Golds contain more water, so they turn out creamier when mashed.
  • Flavor Profile: While Russets have an earthier, more neutral taste, Yukon Golds possess a lightly sweet, buttery flavor. Therefore, you can often use fewer extra fats or seasonings when cooking with them.
  • Best Uses: Russets make excellent fries and crispy roasted wedges if that is your preference. Yukon Golds can crisp up, but they truly excel in recipes that need a moist, tender potato—like soups, stews, or mashes.
  • Gnocchi Consideration: Some cooks swear by Russets for making light, airy gnocchi because of their low moisture content. On the other hand, Yukon Golds can yield a slightly denser dumpling, which some people prefer for heartier sauces.

In short, choose Yukon Golds when you want an inherently flavorful, creamy texture in your dish, and opt for Russets if you are aiming for fluffy bakes or crispy fries. Nevertheless, there is ample room for experimentation, especially if you love exploring new textures and flavors in the kitchen.

Nutritional Information for Yukon Gold Potatoes

Similarities with Russets

Despite their differences in moisture and flavor, Yukon Golds and Russets have strikingly similar nutritional profiles. Both varieties are:

  • Naturally Fat-Free, Sodium-Free, and Cholesterol-Free
  • High in Carbohydrates, making them a solid source of energy
  • Loaded with Potassium: A medium-sized potato typically offers more potassium than a banana.
  • Rich in Vitamin C: This nutrient contributes to immune function and overall health.

Vitamins, Minerals, and Fiber

A medium 5.3-ounce potato with the skin on provides roughly 2 grams of fiber and about 3 grams of protein, in addition to the carbohydrates that form the bulk of its caloric content. Therefore, if you are seeking a balanced diet, these spuds can be a valuable component, particularly when combined with protein sources like beans, poultry, or fish. To explore more detailed nutritional data, you might check out the USDA Nutrient Database, which provides extensive information on the macro- and micronutrient compositions of many foods.

Healthy Cooking Tips

Although potatoes themselves are quite nutritious, the preparation method can significantly influence their health factor. Therefore, try these strategies:

  • Go Easy on the Added Fats: Use smaller amounts of butter or oil, and focus on flavoring with herbs, spices, and low-sodium broths.
  • Incorporate the Skin: Leaving the skin on adds extra fiber and some vitamins.
  • Portion Control: While potatoes can be part of a balanced meal, keep portion sizes in check to avoid excessive caloric intake.

Make Ahead, Storage, and Reheating

Storing Leftover Cooked Potatoes

Leftover cooked potatoes last about three days in the fridge. However, it is a good idea to store them in an airtight container, as exposure to air can dry them out or cause off flavors. For maximum freshness, try to use them within that three-day window.

Reheating Methods of Yukon Gold potatoes

  • Stovetop: If you have leftover mashed potatoes, add a spoonful or two of milk or water to a saucepan. Heat them over medium-low, stirring frequently to distribute the heat evenly.
  • Oven: Another option is to place mashed or roasted potatoes in a covered baking dish and warm them in a 350°F oven until heated through, typically 20 to 30 minutes depending on the quantity.
  • Microwave: For speed, the microwave can work for smaller portions. However, do so in short bursts, stirring each time to minimize hot spots and dryness.

Freezing Guidelines of Yukon Gold potatoes

Mashed Yukon Gold potatoes can be frozen for up to three months, but be aware that the texture may become slightly grainy once thawed. If you decide to freeze them, consider adding a bit more cream or butter to help maintain smoothness. On the other hand, if you freeze diced or cooked potato chunks, they may develop a mealy quality. Still, they can be acceptable for soups or stews after thawing since their consistency will be less noticeable in a broth.

Looking for another cheesy delight? Check out our Cheesy Chicken Sloppy Joe Recipes for an easy and satisfying meal option.

Conclusion

Yukon Gold potatoes Advantages

In summary, Yukon Gold potatoes excel in many dishes thanks to their moderate starch content, gorgeous yellow hue, and subtly sweet, buttery taste. Whether you want to create a simple side of roasted potatoes, a comforting pot of soup, or a luxurious bowl of mashed potatoes, this variety delivers both flavor and visual appeal. Additionally, their adaptability allows them to stand in for other potato types in many recipes, although each variety has its own specialty.

Share Your Experience

Have you tried making our mashed potato recipe, or are you planning on experimenting with these golden tubers for the first time? We would love to hear about your experiences, tips, or any creative twists you have discovered. Feel free to leave comments below or reach out on social media to share how Yukon Golds have transformed your dishes.

If you are interested in learning even more about potatoes, such as detailed recipe ideas or nutritional insights, visit the Idaho Potato Commission for additional trustworthy resources and inspiration. Moreover, do not forget to check your local farmers’ market or trusted grocery stores for the freshest batches of these golden spuds when they are in peak season.