The Best Philly Cheesesteak Seasoning Recipe At Home

Are you craving the rich, savory flavor of a classic Philly cheesesteak but live far from the city of brotherly love? If so, you are not alone. Many people across the country yearn for that perfect balance of steak, cheese, and aromatic spices. Therefore, creating your own Philly cheesesteak seasoning at home can be a wonderful way to capture that taste without booking a plane ticket. Personally, I remember the first time I bit into a Philly cheesesteak while visiting Philadelphia. The sizzling meat, gooey cheese, and perfectly seasoned onions left a lasting impression on my taste buds. However, finding a reliable seasoning blend outside of the region seemed tricky, so I decided to make my own.

In this guide, we will explore a homemade Philly cheesesteak seasoning recipe that brings bold flavor right to your kitchen. In addition, we will discuss how proper seasoning transforms the sandwich into a memorable meal rather than just a pile of meat and cheese. Thus, the real secret lies in the perfect blend of fragrant herbs, heat from pepper, and other everyday spices that amplify all the elements of a Philly cheesesteak.

By the end of this article, you will have a clear road map to creating your own seasoning, plus plenty of tips to customize it to your liking. Moreover, you will learn various ways to use it for not only cheesesteaks but also veggies, soups, snacks, and so much more. Ultimately, the goal here is simple: empower you to create a homemade seasoning that tastes amazing, remains free from unwanted additives, and stays fresh longer than many store-bought blends.

The Importance of Seasoning for a Philly Cheesesteak

The Flavor Profile

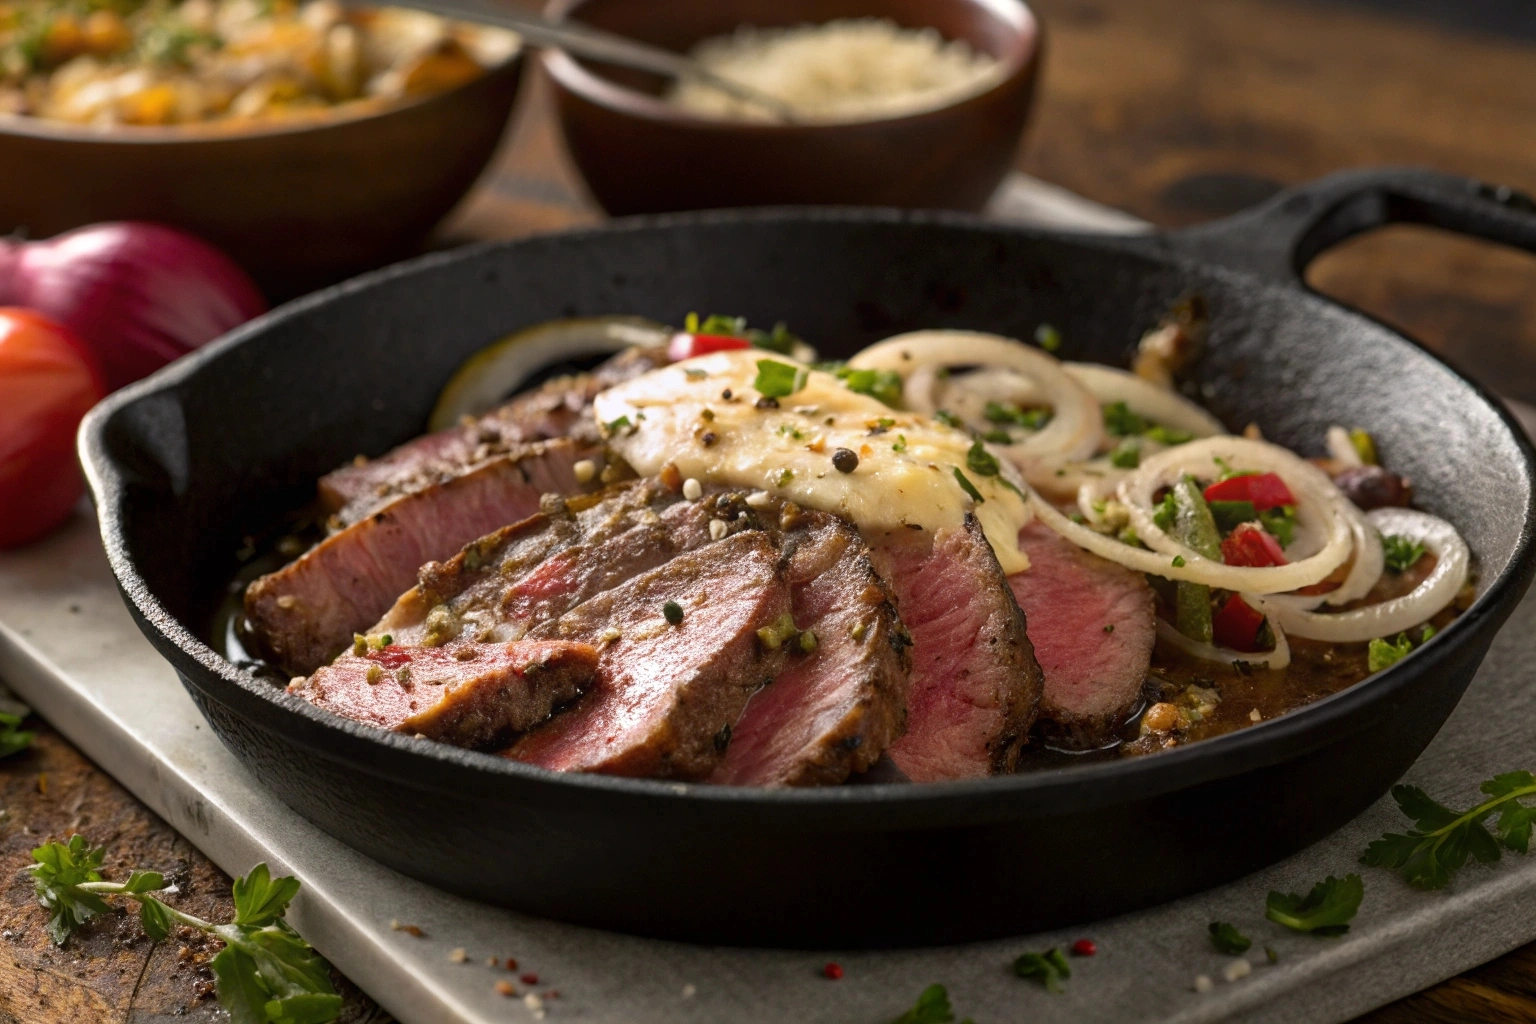
A Philly cheesesteak is more than just slices of beef and melted cheese piled into a roll. Indeed, the taste depends greatly on the seasonings used to highlight each component. Therefore, a well-balanced seasoning ensures the steak has depth, the cheese maintains its creamy richness, and the onions complement both instead of clashing. On the other hand, neglecting this aspect will leave your sandwich bland and one-dimensional. The carefully selected spices work together to create a savory, slightly herby flavor that merges seamlessly with the sweetness of caramelized onions.

Beyond the Meat

Although the steak is the star of the show, the seasoning also enhances the other parts of the sandwich. When applied to the onions and peppers, it intensifies their natural sweetness and adds just enough zing. In addition, when combined with melted cheese, the aromatic herbal notes create a balanced bite each time. If you choose to toast your bread, sprinkling a light layer of seasoning on the roll before placing it on a hot griddle can elevate the entire eating experience.

Why Homemade Is Better

Many store-bought spice blends contain additives like anti-caking agents or artificial flavors. Consequently, making your own seasoning blend allows you to avoid these unnecessary ingredients. Moreover, you gain the freedom to adjust levels of salt, heat, or herbs to satisfy your unique cravings. If you prefer milder flavors, reduce the red pepper flakes. If you love intense, savory notes, add more onion or garlic powder. Therefore, you can experiment at will and develop a seasoning that best suits your taste buds.

Flavor Development

The savory backbone of this seasoning comes from garlic and onion powders, which provide pungent, sweet notes. Meanwhile, thyme and parsley introduce gentle earthiness, rounding out the flavors. Black pepper and red pepper flakes add warmth and a bit of spice. Consequently, these layers create a satisfying harmony that tastes hearty without becoming overwhelmingly spicy. Furthermore, when you apply this blend during cooking, the heat of the pan activates fragrant compounds in the herbs, thus enhancing the overall aroma.

The Science of Spices

Spices release their oils and aromatic molecules when exposed to heat or moisture. Consequently, when you sprinkle this seasoning onto your steak and vegetables while they cook, you help these chemical compounds intermingle and bloom. In addition, the small granules adhere well to the surface of the meat, penetrating slightly deeper as the steam rises. Thus, each component of your sandwich receives an even layer of flavor.

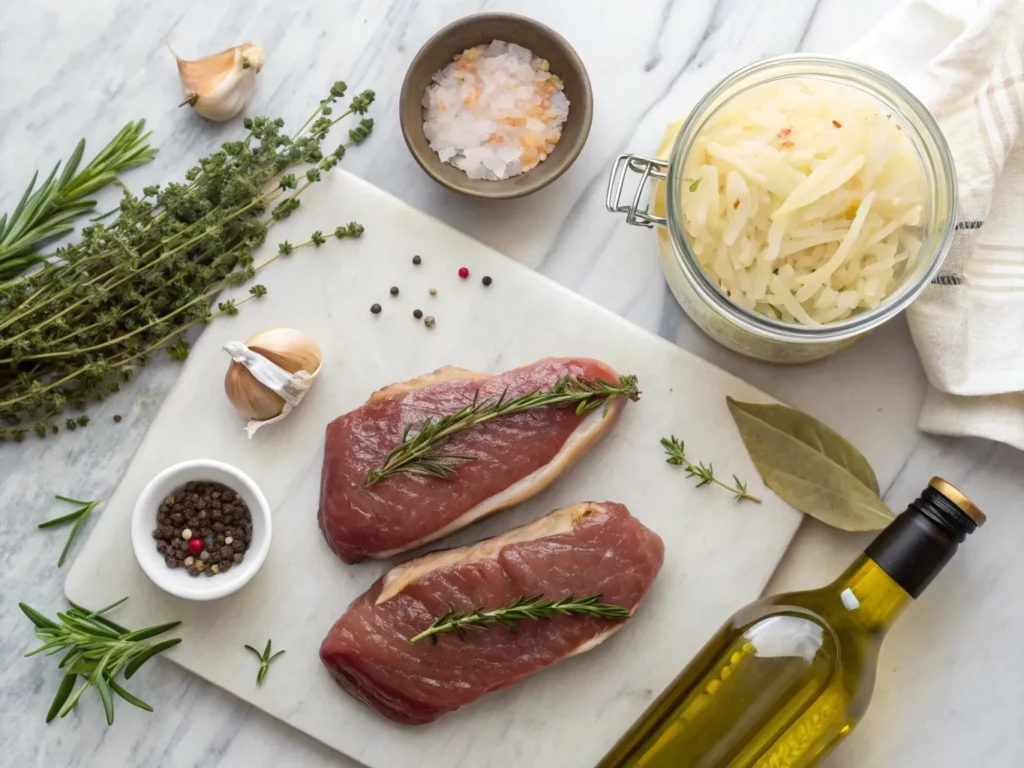
Ingredients: The Heart of the Seasoning

Overhead view of spices for Philly Cheesesteak Seasoning in small bowls.
Salt, herbs, and spices ready to become the perfect Philly cheesesteak blend.

Detailed List of Ingredients for Philly Cheesesteak Seasoning

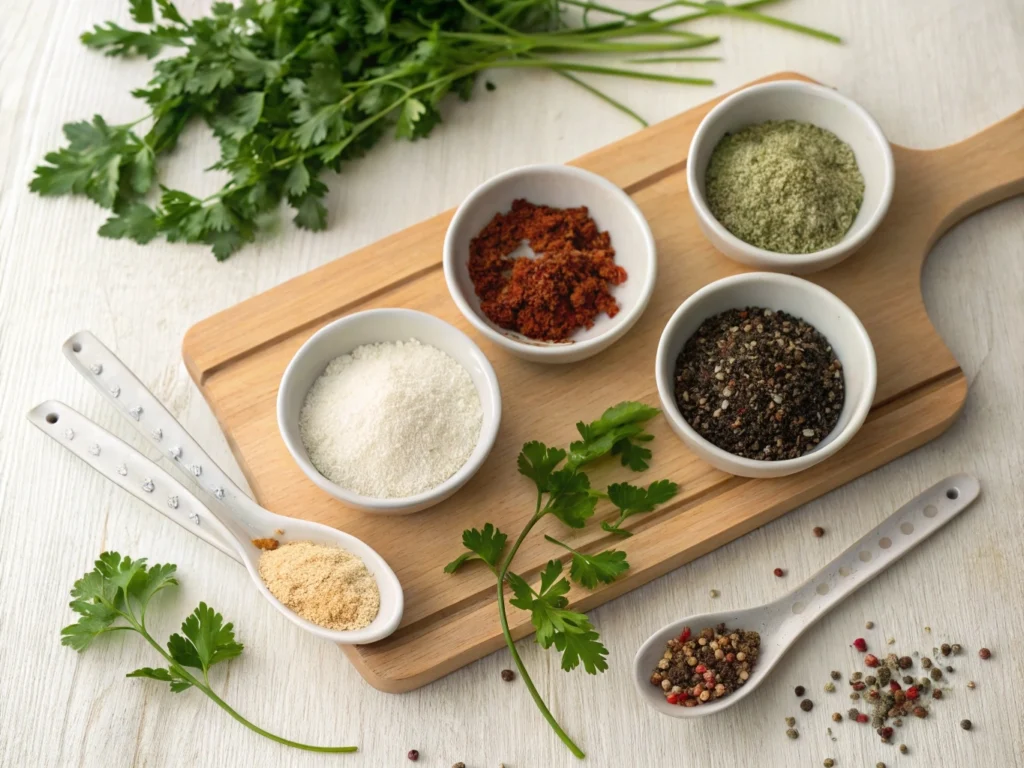
To create this Philly cheesesteak seasoning blend, you will need the following:

  • Salt (1 tablespoon)
  • Garlic powder (2 teaspoons)
  • Onion powder (2 teaspoons)
  • Dried thyme (2 teaspoons)
  • Dried parsley (2 teaspoons)
  • Ground black pepper (1 teaspoon)
  • Red pepper flakes (1 teaspoon)

Though these spices may seem ordinary, they form a powerful mix when combined in the right amounts. Moreover, these ingredients are typically found in most pantries, ensuring that you can whip up this blend at a moment’s notice.

Each Spice’s Role

  1. Salt: Salt is foundational because it helps bring out the natural flavors of the meat and other ingredients. Therefore, start with this essential base.
  2. Garlic Powder: This adds savory depth and a pungent kick. In addition, it complements onion powder by giving the seasoning a rounder, more robust taste.
  3. Onion Powder: Onion powder supplies a sweet and earthy element that underscores the sandwich’s iconic caramelized onions.
  4. Dried Thyme: Thyme adds a subtle, earthy, and slightly minty note. Consequently, it helps balance heavier flavors like beef and cheese.
  5. Dried Parsley: Parsley contributes a mild, fresh aroma, brightening the seasoning.
  6. Ground Black Pepper: Black pepper adds gentle heat and a comforting warmth. Thus, it works well alongside the sharper kick of red pepper flakes.
  7. Red Pepper Flakes: These supply an extra pop of spice and color. Nevertheless, you can reduce them or omit them if you want less heat.

Quality of Ingredients for the best Philly Cheesesteak Seasoning

Quality matters when it comes to spices. Therefore, choose vibrant, aromatic spices that are as fresh as possible. If your garlic powder or thyme smells faint or looks dull, it might be time to replace it. In addition, to save money and ensure freshness, you can buy spices in bulk from reputable sources. Many home cooks recommend shopping at Asian or Mexican markets, because prices often are lower and turnover is higher, meaning you are more likely to find fresher items. For more detailed insights on storing spices, you can check out spice storage tips.

Variations and Substitutions

On occasion, you might run out of one herb or decide you prefer a slightly different flavor. In such cases, feel free to substitute dried oregano for thyme if that suits your tastes. Or, you might swap paprika for red pepper flakes if you want a different kind of warmth. Moreover, you can experiment with coarsely ground black pepper for a bolder presence. The goal is to adapt this base recipe to your own liking.

Where to Buy

Your local supermarket likely carries the spices needed. However, if you want to explore a broader range of spice options, visit international markets or buy online from reliable brands with positive reviews. Many cooking enthusiasts also rely on well-known sites such as Serious Eats for advice on which spices pair well with specific types of meat. Regardless of where you purchase, remember that freshness is key to a standout seasoning blend.

Step-by-Step Guide to Making the Philly Cheesesteak Seasoning

Mixed herbs and spices in a bowl being whisked
Blending the spices evenly ensures consistent flavor in every bite.

Tools and Equipment

Before diving in, gather these items:

  • A medium bowl
  • Measuring spoons
  • A whisk or spoon
  • An airtight container (preferably glass or ceramic)

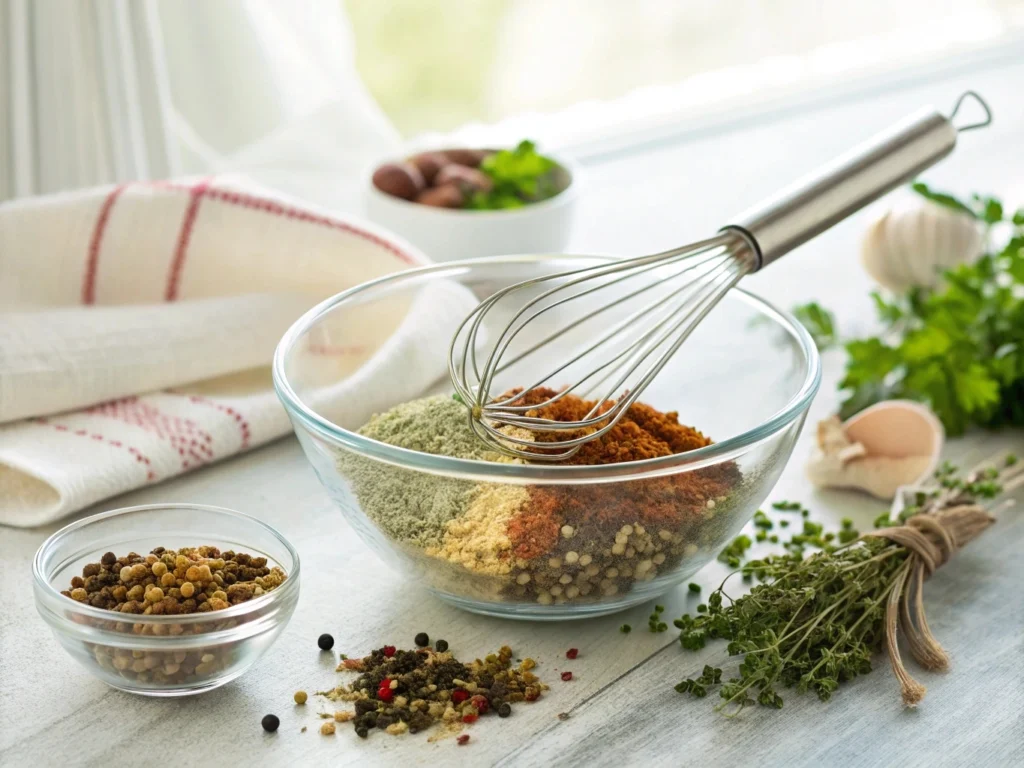
Detailed Instructions to make Philly Cheesesteak Seasoning

  1. Measure the Spices: First, collect each spice in its correct amount. As you measure, be sure to use level teaspoons or tablespoons for accuracy.
  2. Combine in a Bowl: Then, transfer all spices into a medium bowl.
  3. Whisk Gently: Next, whisk everything until it is evenly distributed. In addition, visually check to make sure the red pepper flakes and herbs are scattered throughout.
  4. Transfer to Storage: Carefully pour or spoon the mixture into an airtight container. Glass jars work best because they do not retain odors, and they protect the seasoning from light and moisture.

Visual Aids

If you like step-by-step visuals, you might find it helpful to take photos at each stage or watch a short demonstration. On the other hand, if you prefer a quick overview, the instructions above might suffice. Having a clear, concise approach usually helps keep your kitchen counters neat and tidy.

How to store Philly Cheesesteak Seasoning

Proper storage can extend the life of your seasoning. Therefore, place the jar in a cool, dark area such as a pantry or cupboard away from your stove. Heat and sunlight can degrade the quality of your spices over time. Moreover, be aware that some metal containers can react with certain spices and alter their flavor. Thus, a glass or ceramic container is often the best choice.

Labeling

Attach a small sticker or write on a label indicating the name of the blend and the date you made it. Consequently, this will help you keep track of freshness. While many ground spices remain usable for up to a year, they gradually lose flavor over time.

Tips for Maintaining Freshness

  • Check Expiration Dates: Before you begin, confirm the expiration dates of individual spices.
  • Shake the Container: Give the jar a gentle shake before each use to prevent clumping and keep the spices evenly mixed.
  • Use Clean Spoons: Always use clean, dry measuring spoons to avoid introducing moisture into the container.

How to Use This Philly Cheesesteak Seasoning

Sliced steak marinating with Philly Cheesesteak Seasoning.
Infusing sliced beef with a flavorful homemade blend.

On Steak

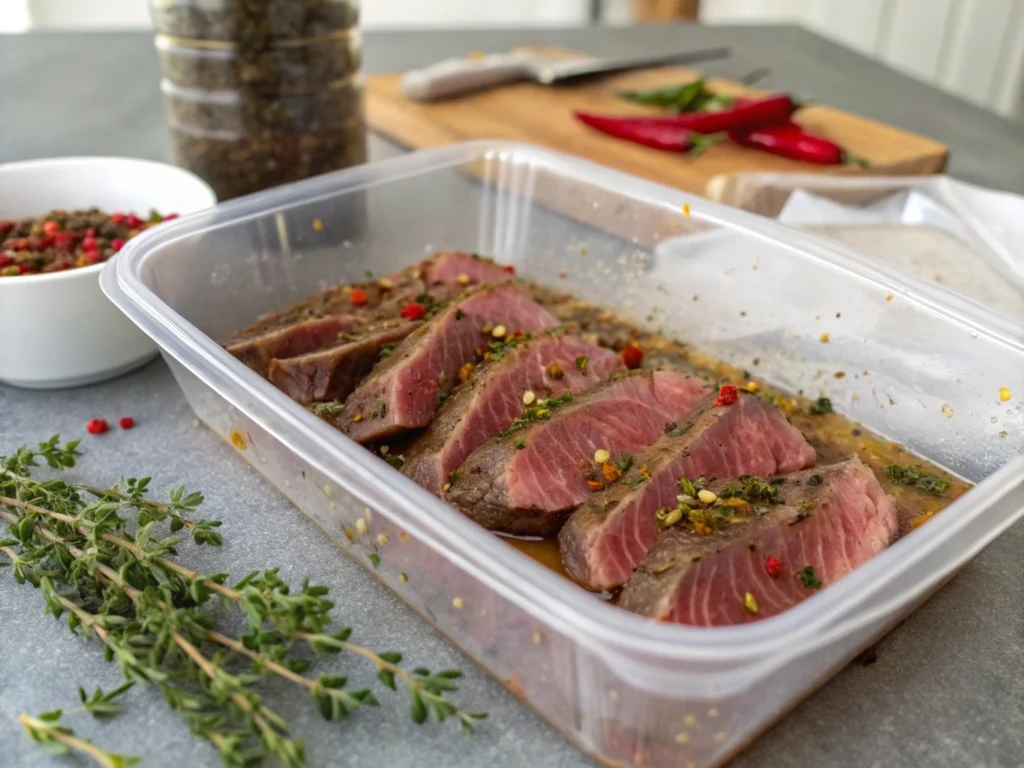
If you are crafting a classic Philly cheesesteak, this seasoning is a must. To begin, slice your steak thinly—many experts recommend ribeye for the most authentic taste, although sirloin also works well. Then, sprinkle about 2 to 3 tablespoons of seasoning per pound of meat. On the other hand, you can adjust the amount based on how intense you want the flavor to be. Rub it evenly over the slices, and let it sit for a few minutes before cooking. Consequently, the flavor will soak into the meat, resulting in a delicious end product.

Making a Marinade

For an even deeper infusion of flavor, consider turning your dry seasoning into a marinade. To do this, mix a few tablespoons of the spice blend with olive oil, then add a splash of lemon juice or a bit of vinegar if you like an extra tang. Therefore, the marinade will penetrate the beef more thoroughly. Place the seasoned steaks in a resealable plastic bag or a covered dish, then refrigerate. According to guidelines found on the National Chicken Council’s marinade tips, you can marinate meat anywhere from 30 minutes to overnight, depending on your schedule and the cut of meat. Similarly, these same guidelines apply to beef, though you might consider marinating it for at least an hour to build flavor.

Seasoning Other Meats

Although this blend is tailored for beef, it also works on other proteins. If you plan to grill pork chops, rub some seasoning on both sides before placing them on the grill. Furthermore, for chicken breasts, marinate them in this blend combined with olive oil and perhaps a little lime juice. Consequently, you get a robust flavor that pairs nicely with rice, potatoes, or grilled vegetables.

Enhancing Vegetables

Do not limit this seasoning to just meat. In fact, it can turn ordinary vegetables into savory delights. For instance, toss bell peppers and sliced onions in a tablespoon of the blend alongside a drizzle of oil before roasting. Thus, you can create a flavorful topping for sandwiches or a simple side dish. Another option is to sprinkle it on potatoes before baking or air-frying them, resulting in a crisp, seasoned crust.

Perfect for Soups and Stews

Adding a teaspoon or two of this seasoning to soups, stews, or chili can boost complexity. In addition, if you love one-pot meals, try making a Philly Cheesesteak Stew by combining tender beef chunks, onions, bell peppers, and a little cream cheese for richness. As it cooks, the seasoning will meld with the broth and vegetables, creating layers of comforting flavor. You can also adapt the seasoning to chicken-based soups for a satisfying twist.

Snacks and Sides

Besides main dishes, consider sprinkling this seasoning on snacks like popcorn or roasted nuts. The aromatic notes of thyme and parsley will surprise your taste buds in the best way possible. Furthermore, you can shake it over french fries or tater tots for an instant upgrade. On the other hand, if you want something more sophisticated, try blending a spoonful into softened butter. Then, spread that butter on crusty bread for a quick gourmet treat.

International Twists

Although Philly cheesesteaks are an American staple, the flavors in this seasoning pair well with other cuisines. For example, add it to fajita filling for a tasty Mexican-inspired dish, or sprinkle some on top of a pizza to give it a subtle herb-and-spice layer. Meanwhile, you could also experiment by mixing it into Italian-style sauces or meatballs for a fusion spin. Ultimately, the possibilities are endless.

Encouraging Experimentation

Remember, you are in control of the flavor. If you want more heat, add extra red pepper flakes or even a pinch of cayenne. If you prefer savory notes, increase the garlic and onion powders. Therefore, do not hesitate to tweak the seasoning until it suits your palate perfectly. Over time, you may discover new ways to integrate it into your favorite recipes.

Customizing Your Philly Cheesesteak Seasoning

Adjusting the Heat

If you love your Philly cheesesteaks fiery, increase the red pepper flakes or include a bit of cayenne pepper. Conversely, if you want a milder taste, reduce or omit the red pepper flakes entirely. Therefore, controlling the heat is simple with homemade blends.

Controlling Salt

Salt can be a contentious ingredient in any dish. Thus, if you are watching your sodium intake, you can cut the salt in half or use a salt-free alternative. Additionally, consider using kosher salt or sea salt for a slightly different taste and texture. On the other hand, if you find that you need more salt after cooking, you can add it gradually to avoid oversalting.

Adding Herbs

While thyme and parsley are mainstays, you can always incorporate oregano, basil, or rosemary for an herbal variation. Consequently, these additional herbs can shift the flavor profile and make the blend more versatile. For instance, rosemary might pair exceptionally well if you are using this seasoning for roasted potatoes or lamb.

Introducing Aromatics

Another idea is to bring in smoked paprika or dried chives for added complexity. Therefore, if you love smoky undertones, paprika is your friend. Meanwhile, dried chives can amplify onion flavors without being overpowering. Always keep in mind that a little goes a long way with these additions.

Exploring Different Flavor Profiles

Think about your favorite global cuisines. Then, pick the aspects you enjoy and see if you can weave them into your Philly cheesesteak blend. Whether it is a hint of cumin for some Middle Eastern flair or a sprinkle of coriander for a bright, citrusy note, you can elevate the seasoning into something truly unique.

Personal Preference Reigns Supreme

Ultimately, the beauty of a homemade blend lies in its adaptability. If you make a small batch first, you can test it out and fine-tune the proportions. Therefore, never hesitate to experiment until you find the exact flavor balance that keeps you coming back for more.

Recipes Using the Philly Cheesesteak Seasoning

Various meals prepared with Philly Cheesesteak Seasoning on a table
From classic sandwiches to flavorful meats, this seasoning does it all.

Classic Crockpot Philly Cheesesteaks

One of the easiest ways to enjoy a hearty meal is by making a crockpot Philly cheesesteak. First, slice your steak and onions, then place them in the crockpot. Next, sprinkle in a few tablespoons of your homemade seasoning. Add beef broth or water to help distribute the flavors. Then, let everything simmer on low for several hours until the meat becomes tender. Finally, assemble your sandwich with melty cheese and sautéed peppers on a soft roll.

Grilled Herb-Rubbed Pork Chops

For a lighter alternative to beef, rub pork chops with a few teaspoons of your Philly cheesesteak seasoning. Then, grill them over medium-high heat for about 4 to 5 minutes per side, depending on thickness. Meanwhile, you can prepare a side of roasted vegetables to round out the meal. Consequently, you will be amazed at how the herbs and spices elevate the flavor of everyday pork.

Easy Oven-Baked Chicken Bites

Cut boneless chicken breasts or thighs into bite-size pieces, then toss them in a bowl with olive oil and a generous sprinkle of your seasoning. Spread them out on a baking sheet lined with parchment paper and cook at 400°F (200°C) for about 15 to 20 minutes, or until the chicken reaches an internal temperature of 165°F (74°C). Therefore, you end up with succulent chicken bites perfect for dipping or adding to salads and wraps.

Philly Cheesesteak Stew

If you love hearty soups, this stew is a must-try. Brown pieces of beef in a large pot, then add onions, bell peppers, and a couple of tablespoons of your spice blend. Pour in beef broth or stock and let it simmer until the meat is tender. Toward the end of cooking, stir in a little cream cheese for an extra creamy texture that echoes the cheesesteak’s signature flavor. Consequently, you will have a comforting dish perfect for cold nights.

Sheet-Pan Cheesesteaks

For a simple, hands-off approach, slice your steak, onions, and bell peppers, then spread them on a sheet pan. Drizzle with oil, sprinkle the Philly cheesesteak seasoning over everything, and toss gently. Bake at 400°F (200°C) for roughly 15 minutes, checking to make sure the steak is cooked to your preferred doneness. Top with slices of provolone cheese for the last few minutes to let it melt. Finally, spoon the mixture onto toasted rolls and enjoy.

Marinade-Based Chicken Dish with Roasted Veggies

In a shallow dish, mix 2 tablespoons of your seasoning blend with ¼ cup olive oil. Then, add boneless chicken breasts or thighs, coating them evenly. Allow them to marinate for at least 30 minutes. Meanwhile, prepare a tray of chopped zucchini, bell peppers, and onions. Place the veggies on one side of a baking sheet. On the other side, arrange the marinated chicken. Roast at 375°F (190°C) for about 25 minutes or until the chicken is fully cooked. Consequently, this one-pan meal is both convenient and packed with flavor.

Conclusion

In summary, mastering a homemade Philly cheesesteak seasoning can transform your sandwiches, soups, and everyday meals. By combining fundamental pantry staples salt, garlic powder, onion powder, thyme, parsley, black pepper, and red pepper flakes you create a balanced mix that highlights the delicious essence of the classic sandwich. Moreover, you can adjust the salt, heat, and herbs to suit your personal taste. Therefore, I encourage you to try this seasoning in your own kitchen and discover new recipes that benefit from its savory goodness.

Have fun experimenting, and feel free to share photos or feedback. After all, cooking is a journey that becomes more enjoyable when you can tailor each recipe to your exact preference.

how to cook duck breast with sauerkraut In Under An Hour

Ever wondered how to create a restaurant-quality dish at home? How to cook duck breast with sauerkraut might sound intimidating, but trust me, it’s surprisingly easy! Picture this: crispy duck skin, tender, juicy meat, and tangy sauerkraut blending together in perfect harmony. This recipe combines elegance with comfort, bringing you the best of both worlds.

Ingredients for Duck Breast with Sauerkraut

 Ingredients for cooking duck breast with sauerkraut.
All the essential ingredients for making a flavorful duck and sauerkraut dish.

Essential Ingredients for Success

To master how to cook duck breast with sauerkraut, having the right ingredients is key. This dish combines simple yet bold flavors, and every ingredient plays a part in creating the perfect balance. Here’s what you’ll need:

  • Duck breasts: Choose fresh, high-quality duck breasts with a thick layer of fat for crispy skin.
  • Sauerkraut: Opt for traditional sauerkraut or a red cabbage version for added sweetness.
  • Seasonings: Salt, black pepper, thyme, and garlic for aromatic flavor.
  • Cooking fat: Butter or olive oil for searing the duck breast.
  • Optional add-ins: Apples, onions, or a splash of white wine to enhance the tangy sauerkraut.

Each ingredient complements the others, ensuring your dish turns out flavorful and balanced.

Selecting Quality Duck Breast

Choosing the right duck breast is crucial for this recipe. For a tender, juicy result, look for duck breasts with firm, plump meat and a smooth layer of fat. The fat is what renders into that irresistible crispy skin.

If you’re unsure where to start, consider sourcing your duck breast from a trusted local butcher or farmer’s market. For tips on selecting the freshest duck, check out this guide to choosing poultry.

Choosing the Right Sauerkraut

The sauerkraut you choose can elevate your dish, so don’t overlook it. Traditional sauerkraut is tangy and bold, but if you prefer something sweeter, try red cabbage sauerkraut. Look for brands with minimal preservatives for the best flavor.

You can also enhance store-bought sauerkraut with add-ins like caramelized onions, shredded apples, or even a touch of brown sugar. These additions create layers of flavor, complementing the richness of the duck.

Optional Add-Ins for Extra Flavor

While this dish shines on its own, a few creative add-ins can make it truly unforgettable. Here are some ideas:

  • Apples: Slice thinly and cook alongside sauerkraut for a sweet, fruity contrast.
  • Onions: Caramelize them in the rendered duck fat for a savory depth.
  • Wine or cider: Deglaze the pan with a splash of white wine or apple cider to enhance the tangy flavors.
  • Herbs: Add bay leaves or rosemary sprigs for an earthy aroma.

These small tweaks can help you customize the recipe to suit your personal preferences.

Preparing the Duck Breast

Scoring and Seasoning the Duck Breast

Scoring the duck breast for crispy skin.
Scoring the fat layer on a duck breast ensures crispy skin when cooked.

Mastering how to cook duck breast with sauerkraut begins with properly preparing the duck breast. Start by scoring the duck’s skin in a crosshatch pattern, being careful not to cut into the meat. This technique allows the fat to render effectively, resulting in a crispy, golden crust.

Season the duck generously with salt and freshly ground black pepper. For an aromatic twist, you can rub the skin with minced garlic or sprinkle it with dried thyme. These simple steps lay the foundation for a perfectly cooked duck breast that pairs beautifully with sauerkraut.

Searing the Duck for Crispy Skin

Searing duck breast in a skillet for crispy skin.
The secret to crispy skin is starting with a cold pan and rendering the fat slowly.

The next step in how to cook duck breast with sauerkraut is achieving crispy skin through proper searing. Place the scored and seasoned duck breast skin-side down in a cold, dry skillet. Starting in a cold pan ensures the fat renders slowly, creating a crispy texture without burning.

Cook over medium heat for about 6–8 minutes, pressing gently to ensure even contact with the pan. Once the skin is golden and crispy, flip the duck breast and cook the meat side for another 2–3 minutes. This process locks in moisture while creating a rich, caramelized flavor.

Cooking Duck Breast to the Perfect Temperature

Achieving the right internal temperature is essential when learning how to cook duck breast with sauerkraut. Use a meat thermometer to ensure your duck breast is cooked to perfection. For a medium-rare finish, aim for an internal temperature of 130–135°F (54–57°C).

After cooking, let the duck rest for 5–7 minutes. Resting allows the juices to redistribute, ensuring tender and juicy meat. Remember, overcooking can lead to a tough texture, so keep a close eye on the temperature.

What to Do with Rendered Duck Fat

Don’t let that flavorful duck fat go to waste! It’s a culinary treasure that can elevate many dishes. After searing, strain the rendered fat into a heat-safe container. Use it to sauté vegetables, roast potatoes, or even caramelize the sauerkraut for this recipe.

Adding caramelized sauerkraut cooked in duck fat creates a rich, savory flavor that perfectly complements the tender duck breast. This step takes your dish to the next level, enhancing its depth and complexity.

Cooking Sauerkraut with Duck

Preparing Sauerkraut for Cooking

To master how to cook duck breast with sauerkraut, preparing the sauerkraut correctly is essential. Start by deciding whether to drain or rinse your sauerkraut. Leaving it undrained gives a tangier flavor, while rinsing mellows the acidity. If you prefer a balance, lightly rinse and then press out excess liquid.

For added depth, sauté the sauerkraut with onions and garlic in a tablespoon of the rendered duck fat. This step softens the sauerkraut and infuses it with savory notes that complement the duck breast beautifully.

Enhancing Sauerkraut with Flavorful Add-Ins

While sauerkraut is flavorful on its own, a few additions can elevate it further. For instance:

  • Apples: Add thin slices for a subtle sweetness that balances the tang.
  • White wine or cider: Deglaze the pan with a splash to enhance the sauerkraut’s complexity.
  • Spices: Bay leaves or caraway seeds lend an earthy aroma.

These small touches create a layered dish that pairs seamlessly with the richness of the duck breast.

Cooking Sauerkraut with Rendered Duck Fat

One of the secrets to how to cook duck breast with sauerkraut is using rendered duck fat to caramelize the sauerkraut. After searing the duck, drain most of the fat, leaving about two tablespoons in the skillet.

Add the prepared sauerkraut, stirring to coat it evenly in the flavorful fat. Cook over medium heat for 5–7 minutes until lightly browned. This method creates a savory, slightly crispy sauerkraut that complements the tender duck breast.

Combining Duck Breast and Sauerkraut

Once the sauerkraut is ready, it’s time to bring the dish together. Place the cooked sauerkraut on a serving platter, creating a flavorful bed for the duck breast. Slice the rested duck breast into thin pieces and arrange them over the sauerkraut.

For an extra touch, drizzle any juices from the resting duck over the dish. This step not only enhances the flavor but also adds a visually appealing gloss to your presentation.

Suggestion for More Recipes

If you’re looking for another dish that balances rich and tangy flavors, check out The Ultimate Guide to Grilled Chicken Thigh Recipes

Serving Duck Breast with Sauerkraut

Plated duck breast with sauerkraut and roasted potatoes.
A restaurant-quality duck breast served with tangy sauerkraut and roasted potatoes.

Plating Like a Pro

When learning how to cook duck breast with sauerkraut, presentation matters just as much as flavor. Start by creating a bed of caramelized sauerkraut on your serving platter or individual plates. The rich, golden tones of the sauerkraut contrast beautifully with the rosy slices of duck breast.

Slice the rested duck breast thinly and arrange it neatly over the sauerkraut. Drizzle any remaining juices from the pan or resting plate over the top for added shine and flavor. Garnish with fresh thyme or a sprinkle of sea salt to elevate the visual appeal.

Side Dishes to Complement the Dish

To complete the meal, pair your duck and sauerkraut with sides that enhance the dish’s rich and tangy flavors. Here are some suggestions:

  • Roasted potatoes: Crispy and golden, they soak up the flavorful juices perfectly.
  • Buttered spaetzle: These soft, egg-based noodles are a traditional and comforting pairing.
  • Seasonal vegetables: Try honey-glazed carrots or sautéed green beans for a touch of sweetness.

These sides not only round out the meal but also create a balanced dining experience.

Wine Pairings for Duck and Sauerkraut

A great wine pairing can transform your dining experience. For this dish, opt for a wine that complements both the richness of the duck and the tanginess of the sauerkraut:

  • Dry Riesling: Its acidity mirrors the sauerkraut while cutting through the duck’s richness.
  • Pinot Noir: A light, fruity red wine that enhances the flavors of the duck without overpowering it.
  • Gewürztraminer: A slightly sweet white wine that balances the tangy and savory elements.

Serving the right wine adds an extra layer of sophistication to your meal.

Creative Leftover Ideas

If you have leftovers, don’t let them go to waste! The combination of duck and sauerkraut is versatile and can shine in other dishes:

  • Duck and sauerkraut sandwiches: Layer thin slices of duck and sauerkraut on crusty bread with a touch of mustard.
  • Savory crepes: Fill crepes with sauerkraut and duck, then drizzle with a light cream sauce.
  • Hearty salad: Toss leftover duck and sauerkraut with mixed greens and a Dijon vinaigrette for a quick, tangy salad.

For another rich and comforting dish, explore our Cube Steak in Crock Pot: Comfort Food Done Right

FAQs

What is the best way to cook duck breasts?

The best way to cook duck breasts is to start with a cold, dry pan to render the fat and achieve crispy skin. Place the duck breasts skin-side down and cook over medium heat for 6–8 minutes until the skin is golden and crispy. Flip the breast and cook the meat side for another 2–3 minutes. To ensure tender, juicy meat, use a meat thermometer to check for a medium-rare internal temperature of 130–135°F. Let the duck rest for 5–7 minutes before slicing. If you’re combining this with sauerkraut, resting the duck allows time to prepare the sauerkraut as a perfect pairing.

Do you have to drain sauerkraut before cooking?

You don’t always have to drain sauerkraut before cooking—it depends on your flavor preference. If you enjoy a tangier dish, use the sauerkraut straight from the jar or package. However, if you prefer a milder flavor, rinse it under cold water and press out the excess liquid. For recipes like how to cook duck breast with sauerkraut, you can lightly rinse the sauerkraut to balance the dish, especially if you’re adding sweet elements like apples or onions.

What is the preferred cooking method for duck?

Pan-searing is the preferred cooking method for duck breasts because it renders the fat, creating crispy skin while keeping the meat tender and juicy. After searing, you can finish the duck in the oven to ensure even cooking. For duck legs or whole ducks, braising or roasting is often better, as these methods break down tougher cuts and infuse them with flavor. When paired with sauerkraut, pan-searing works best to maintain the textural contrast between the rich duck and tangy sauerkraut.

Do you cook sauerkraut or not?

Yes, cooking sauerkraut enhances its flavor and texture, making it a perfect complement to richer dishes like duck breast. Sautéing sauerkraut with onions, garlic, or apples mellows its tanginess and creates a slightly caramelized, savory taste. Cooking sauerkraut in rendered duck fat takes it to another level, adding depth and richness to the dish. For recipes such as how to cook duck breast with sauerkraut, cooking is a step you don’t want to skip.

Conclusion

Cooking duck breast with sauerkraut might sound like a gourmet challenge, but it’s simpler than you think. By starting with high-quality ingredients, mastering techniques like scoring and searing, and adding flavorful enhancements like caramelized sauerkraut, you can create a dish that’s both elegant and comforting.

Throughout this guide, you’ve learned how to cook duck breast with sauerkraut step-by-step, from preparing the duck breast for perfect crispiness to balancing the tanginess of sauerkraut with sweet and savory add-ins. Whether you’re making this dish for a family dinner or a special occasion, it’s sure to impress.

Now it’s your turn to bring this recipe to life! Gather your ingredients, follow these easy steps, and treat yourself to a restaurant-quality meal right at home. Don’t forget to explore other recipes on our site for more culinary inspiration, and share your results with us.

How To Make 2 banana bread recipe

Got a couple of overripe bananas sitting on your counter? Don’t toss them just yet! With this easy 2 banana bread recipe, you can turn those spotty bananas into a moist, golden loaf that’s bursting with flavor. Whether you’re a seasoned baker or a kitchen newbie, this recipe is simple enough for anyone to whip up.

What makes it special? It only takes two bananas yes, just two! plus a few pantry staples you probably already have on hand. Perfect for a cozy breakfast, a midday snack, or even a sweet dessert, this banana bread has a tender crumb and just the right hint of sweetness.

Ingredients You’ll Need

 Ingredients for a 2 banana bread recipe on a counter.
All the ingredients you need for a quick banana bread recipe.

Pantry Staples for the Perfect Banana Bread

When it comes to baking a delicious 2 banana bread recipe, simplicity is key. Most of the ingredients are likely sitting in your pantry right now, waiting to be transformed into something extraordinary. Here’s what you’ll need:

  • 2 ripe bananas: The riper, the better! They add natural sweetness and moisture.
  • All-purpose flour: A versatile base for a tender crumb.
  • Granulated sugar: Just enough to balance the banana’s natural sweetness.
  • Eggs: These bind everything together and create structure.
  • Butter or oil: Butter adds richness, while oil makes the loaf extra moist.
  • Baking soda and salt: Baking soda helps the bread rise, and salt enhances flavor.

Feel free to tweak this recipe to suit your taste coconut sugar, whole wheat flour, or even a dairy-free butter alternative can work beautifully!

Tips for Choosing the Right Bananas

The key to a successful 2 banana bread recipe lies in the bananas. Overripe bananas are your best friends here those with brown speckles or even fully brown skins pack the most flavor and sweetness.

If your bananas aren’t ripe enough, don’t worry! There are quick fixes. Place them in a 300°F (150°C) oven for 15–20 minutes until the skins darken, or pop them into a paper bag with an apple overnight. These tricks speed up the ripening process, ensuring you always have perfect bananas for baking.

Substituting Ingredients Without Compromising Flavor

Sometimes, you might not have every ingredient on hand. Luckily, this 2 banana bread recipe is flexible:

  • No butter? Use equal parts coconut oil, vegetable oil, or even applesauce for a lighter loaf.
  • Out of eggs? Replace each egg with ¼ cup of mashed avocado, yogurt, or a flaxseed mixture (1 tablespoon ground flaxseed + 3 tablespoons water).
  • Prefer less sugar? Swap out granulated sugar for honey, maple syrup, or a sugar substitute like erythritol.

Experimenting with these swaps won’t just save a trip to the store it might even lead to a new favorite variation! For more substitution ideas, check out this guide to common baking swaps.

Optional Add-ins to Elevate Your Banana Bread

Although this 2 banana bread recipe shines in its simplicity, adding a twist can make it even more special. Consider mixing in:

  • Chocolate chips for a decadent touch.
  • Chopped walnuts or pecans for a nutty crunch.
  • Cinnamon or nutmeg to enhance the comforting flavors.
  • Dried fruits like raisins or cranberries for a chewy surprise.

Feel free to get creative! Whether you’re craving indulgence or keeping it simple, these add-ins can easily take your banana bread from classic to unforgettable.

Step-by-Step Guide: Making Banana Bread with 2 Bananas

Preparing Your Ingredients and Equipment

To begin your 2 banana bread recipe, ensure you’re fully prepared. Start by preheating your oven to 350°F (175°C) and greasing a standard loaf pan with butter or lining it with parchment paper. This prevents sticking and ensures easy removal.

Next, gather all your ingredients. Double-check that your bananas are overripe—this is the secret to achieving that sweet, moist texture. Also, measure your flour, sugar, and other staples accurately. Baking is all about precision, so consider using a kitchen scale for the best results.

Mixing the Wet Ingredients

Mixing the banana bread batter for a 2 banana recipe.
Mixing the batter for a moist and fluffy banana bread.

Grab a mixing bowl and mash the 2 ripe bananas with a fork or potato masher. Aim for a slightly lumpy texture it’ll blend better with the other ingredients. Add melted butter, sugar, and eggs, whisking until the mixture becomes creamy and smooth.

If you want to enhance the flavor, a teaspoon of vanilla extract works wonders. The aroma will already hint at the deliciousness to come!

Combining the Dry Ingredients

In a separate bowl, sift together the flour, baking soda, and a pinch of salt. Sifting helps avoid lumps and ensures an even distribution of leavening agents, which is critical for a light loaf.

Gradually fold the dry ingredients into the wet mixture. Use a spatula and a gentle motion to prevent overmixing, as this could make your banana bread dense instead of tender. The goal is a smooth batter with no visible streaks of flour.

Baking and Testing for Doneness

Banana bread loaf pan entering the oven.
The final step: baking your banana bread to perfection.

Pour the batter into your prepared loaf pan, spreading it evenly. Place it in the oven and bake for 50–60 minutes. Your kitchen will soon fill with the heavenly aroma of banana bread!

To test for doneness, insert a toothpick or skewer into the center of the loaf. If it comes out clean or with a few crumbs, it’s ready. Let the bread cool in the pan for 10 minutes before transferring it to a wire rack to cool completely.

Variations and Substitutions

Dietary Adaptations

The beauty of a 2 banana bread recipe lies in its flexibility. Whether you have dietary restrictions or simply prefer lighter ingredients, there are many ways to tweak the recipe without compromising taste.

  • Gluten-free option: Swap out all-purpose flour for a gluten-free flour blend. For best results, choose a blend that contains xanthan gum, which helps maintain the bread’s structure.
  • Vegan alternative: Replace the eggs with flax eggs (1 tablespoon ground flaxseed mixed with 3 tablespoons water per egg) and substitute melted butter with coconut oil or a neutral-flavored vegetable oil.
  • Lower sugar variation: Reduce the sugar by half and add a touch of honey or maple syrup for natural sweetness.

These adaptations not only accommodate dietary needs but also offer unique twists on a classic recipe.

Flavor Enhancements

While the classic 2 banana bread recipe is undeniably delicious, a few flavor upgrades can make it truly unforgettable.

  • Cinnamon or nutmeg: Add a teaspoon of ground cinnamon or a pinch of nutmeg for a warm, spiced flavor.
  • Vanilla or almond extract: A teaspoon of vanilla extract enhances the natural sweetness of bananas, while almond extract adds a subtle nutty note.
  • Citrus zest: Grate a bit of orange or lemon zest into the batter for a refreshing twist that balances the sweetness.

These simple additions elevate the flavor profile without requiring extra effort.

Creative Uses for Leftovers

Slices of banana bread served with coffee.
Enjoy a slice of banana bread with your morning coffee.

If you have extra slices of banana bread or want to give your 2 banana bread recipe a new life, there are plenty of creative ways to use leftovers:

  • French toast: Dip slices of banana bread into a mixture of eggs and milk, then fry until golden. The result is a decadent breakfast treat.
  • Bread pudding: Cube the leftover bread, mix it with a custard base, and bake until bubbly for a comforting dessert.
  • Croutons: Cut the bread into small cubes, toast them lightly, and use them as a topping for yogurt or ice cream.

Repurposing banana bread is a fun way to enjoy it in unexpected forms.

Add-ins for Extra Flair

For those who want to customize their 2 banana bread recipe, mix-ins can take it to the next level. Here are a few ideas:

  • Chocolate chips: A handful of semi-sweet or dark chocolate chips adds indulgence to every bite.
  • Nuts: Chopped walnuts, pecans, or almonds provide a satisfying crunch.
  • Dried fruits: Try raisins, dried cranberries, or even chopped dates for a chewy texture.
  • Swirls and spreads: Gently swirl peanut butter, Nutella, or cream cheese into the batter before baking for added richness.

These add-ins not only enhance the flavor but also make the recipe uniquely yours.

Suggestion for More Recipes

For more baking inspiration, check out the Sweet Potato Bread Recipe. It’s another easy and flavorful way to enjoy homemade treats!

Common Mistakes and Troubleshooting

Why Did My Banana Bread Turn Out Dry?

One common issue when making a 2 banana bread recipe is ending up with a dry loaf. This usually happens due to incorrect measurements or overbaking. For instance, using too much flour can absorb all the moisture, leaving your bread crumbly.

To prevent this, use the spoon-and-level method to measure flour—spoon it into the measuring cup and level it off with a knife. Additionally, keep an eye on your baking time. Start checking your banana bread about 10 minutes before the timer goes off to ensure it doesn’t bake longer than necessary.

My Banana Bread Didn’t Rise

A dense or flat loaf can be disappointing, but it’s a fixable problem. This issue often arises from inactive leavening agents or overmixing the batter. If your baking soda is past its expiration date, it won’t provide the lift your 2 banana bread recipe needs.

To test baking soda, add a pinch to a tablespoon of vinegar or lemon juice. If it fizzes, it’s good to go! Also, remember to fold the wet and dry ingredients gently. Overmixing the batter can knock out the air needed for a light, fluffy texture.

How to Fix a Dense Texture

If your banana bread feels too dense, the culprit might be an imbalance of wet and dry ingredients. Adding more bananas than the recipe calls for, for instance, can throw off the moisture ratio. Similarly, skipping the sifting step for flour might lead to uneven mixing, contributing to density.

The solution is simple: stick to the recipe and always sift your dry ingredients before combining. If you want a richer banana flavor without compromising texture, consider adding banana extract instead of extra fruit.

Avoiding Cracks on the Surface

Although cracks on the surface of banana bread are common, they can sometimes make the loaf look less appealing. These cracks are usually caused by an oven that’s too hot or unevenly preheated.

To avoid this, preheat your oven for at least 10–15 minutes to ensure an even temperature. If cracks still appear, embrace them—they’re often a sign of a well-baked loaf with a moist interior!

Suggestion for More Tips

Looking for more troubleshooting advice? Check out our detailed guide on baking sweet quick breads. It’s packed with practical tips to help you achieve perfect results every time.

FAQs

Can I Make Banana Bread With Only 2 Bananas?

Absolutely! A 2 banana bread recipe is specifically designed to work with just two ripe bananas. This recipe balances the natural sweetness and moisture from the bananas with other essential ingredients like flour, sugar, and eggs to create a perfectly moist and flavorful loaf. If your bananas are smaller, you can consider adding a touch of applesauce or yogurt for extra moisture.

What Makes Banana Bread Moist?

The secret to moist banana bread lies in using overripe bananas, which are naturally sweeter and more flavorful. Additionally, ingredients like butter or oil and eggs play a crucial role in keeping your 2 banana bread recipe tender and soft. Avoid overmixing the batter, as this can result in a dense loaf. Baking at the right temperature and testing for doneness with a toothpick also helps prevent dryness.

How Do I Store Banana Bread to Keep It Fresh?

To keep your 2 banana bread recipe fresh, let it cool completely before storing it. Wrap it tightly in plastic wrap or aluminum foil and place it in an airtight container. You can keep it at room temperature for 3–4 days or in the refrigerator for up to a week. For longer storage, freeze individual slices in a freezer-safe bag for up to three months.

Can I Add Chocolate Chips to My Banana Bread?

Yes, adding chocolate chips is a fantastic way to enhance your 2 banana bread recipe. Fold in about ½ cup of semi-sweet or dark chocolate chips into the batter for bursts of sweetness in every bite. Other options include white chocolate chips, peanut butter chips, or even a mix of all three for a unique twist.

Conclusion

Banana bread is a timeless favorite, and this 2 banana bread recipe proves that you don’t need a mountain of ingredients to create something truly delicious. By using just two ripe bananas and a few pantry staples, you can whip up a moist, flavorful loaf that’s perfect for breakfast, a snack, or dessert.

Throughout this guide, you’ve learned how to prepare your ingredients, troubleshoot common baking issues, and customize your banana bread with add-ins and variations. Whether you’re keeping it classic or experimenting with chocolate chips and nuts, this recipe is flexible enough to suit all tastes and occasions.

Now it’s time to preheat your oven, grab those ripe bananas, and get baking. Once you’ve mastered this simple yet satisfying recipe, you’ll never let bananas go to waste again. Don’t forget to share your creations and check out other recipes on our site for more inspiration!