Cube Steak in Crock Pot: Comfort Food Done Right

Are you searching for a reliable way to make cube steak in crock pot without ending up with tough, chewy meat? You’ve come to the right place. In this guide, you’ll learn how to transform an affordable beef cut into a tender, savory delight that comforts both your taste buds and your wallet. In addition, you’ll discover how to layer flavors, choose complementary sides, and avoid common mistakes that can ruin an otherwise perfect meal. By the time you finish reading, you’ll feel confident enough to whip up an impressive dinner for your family—even on the busiest weeknights.

1. Why You’ll Love This Slow Cooker Steak

Raw cube steak with seasonings beside a crock pot
Gather your steak and spices for a quick and flavorful slow cooker meal.

1.1 A Budget-Friendly Favorite

Cube steak is a wallet-friendly cut derived from tougher parts of the cow, such as the top round or sirloin tip. However, the mechanical tenderizing process that forms those signature “cube” markings helps break down some of the muscle fibers. As a result, you can enjoy a hearty beef meal without breaking the bank.

Nevertheless, many people avoid cube steak because they worry about it becoming chewy. In a crock pot, though, you can cook this cut at a gentle temperature for hours. Therefore, your beef will develop fork-tender texture while soaking up all the flavors you add. In addition, the extended cooking time works wonders for those looking to stretch their grocery dollars even further.

1.2 How Low-and-Slow Cooking Works

Slow cooking relies on low heat over a longer period. Thus, the connective tissues in beef gradually break down, yielding tender meat with minimal effort. This process especially benefits cuts like cube steak, which have more robust muscle fibers compared to premium steaks.

On the other hand, rushing the process by cranking the heat up often results in a tough, unpleasant dish. Therefore, letting the crock pot do its magic for six to eight hours on low ensures you’ll get a meal that practically melts in your mouth. Moreover, the crock pot locks in moisture, reducing the risk of dryness.

1.3 Key Benefits for Busy Schedules

Your time is precious, especially on weekdays. In addition, you might not always feel like cooking after a long day. Fortunately, cube steak in crock pot allows you to set it and forget it, freeing you to focus on work, errands, or family. There’s little risk of burning or scorching if you keep an eye on liquid levels.

Meanwhile, the slow cooker makes it easier to prepare side dishes. You can steam vegetables or whip up mashed potatoes during the last 20 minutes of your crock pot cycle. Thus, dinner can come together without any stressful last-minute scrambling.

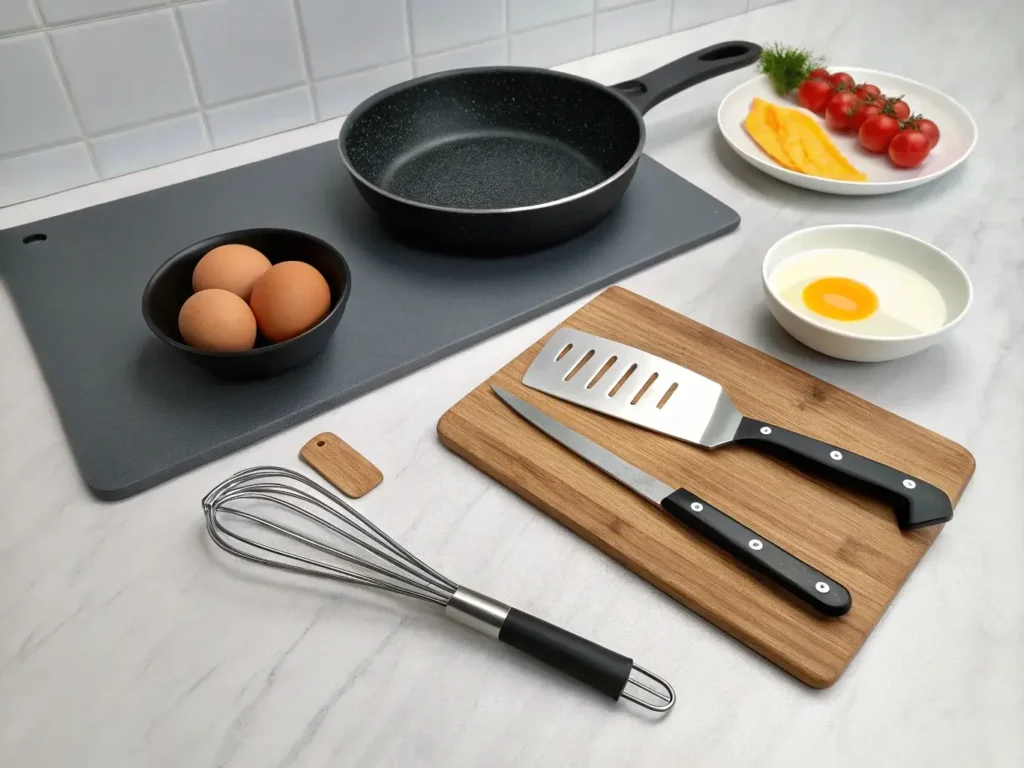
1.4 Choosing the Right Crock Pot Tools

Before you begin, make sure you have the correct equipment. A 5- to 6-quart crock pot is ideal for feeding four or more people. Additionally, keep a sturdy cutting board and a sharp knife on hand. You’ll also want tongs for quick handling of the steaks.

Furthermore, some people prefer to sear the meat in a separate skillet before transferring it to the slow cooker. This step is optional, yet it adds a delightful crust and deeper flavor. Therefore, you might also consider having a heavy-bottomed skillet ready if you decide to sear.

For safe handling and recommended internal temperatures of beef, visit the USDA Official Site. There, you’ll find guidelines on cooking temperatures that ensure your meals are both safe and delicious.

2. Prepping for the Perfect Crock Pot Steak

2.1 Marinating & Seasoning Strategy

 Brushing marinade onto cube steak before slow cooking
Enhance flavor by brushing a simple marinade onto your cube steak.

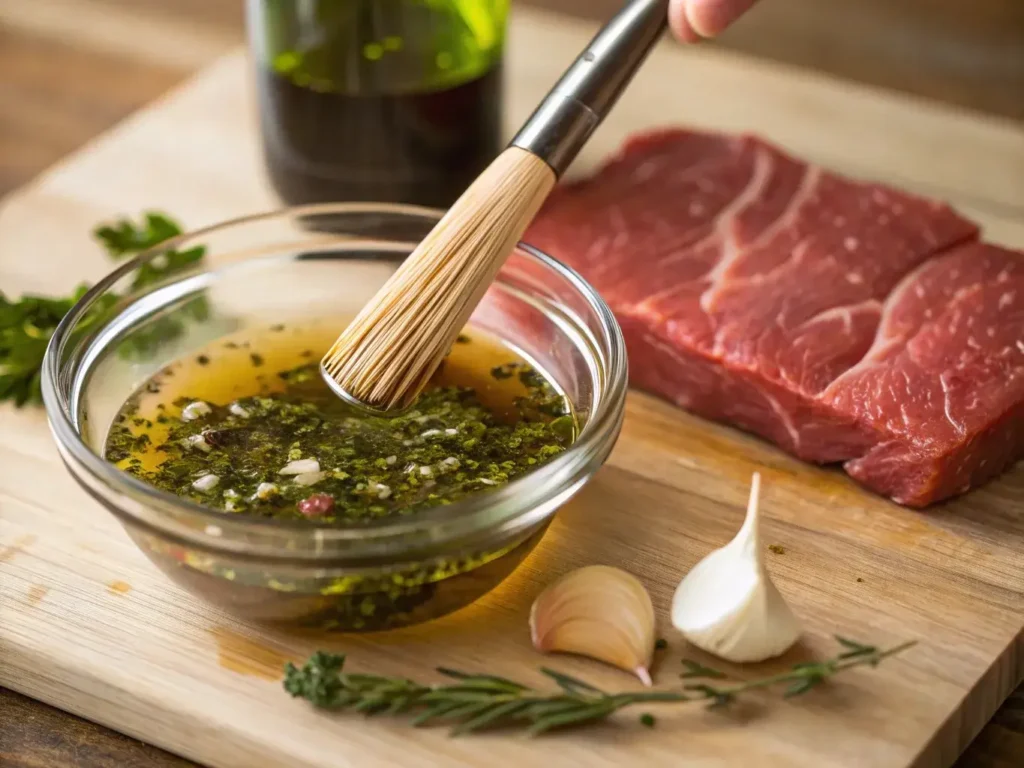
Before you toss your cube steak into the crock pot, you might wonder if marinating is worth the effort. Although marinating isn’t mandatory, it can be beneficial if you have the time. Therefore, consider a simple marinade of olive oil, garlic, Worcestershire sauce, and a pinch of salt. Let the meat rest for 30 minutes to an hour if possible.

When seasoning, keep it straightforward. A blend of salt, pepper, onion powder, and garlic powder is often enough. In addition, you can include dried herbs like thyme or rosemary for extra aroma. However, avoid over-salting at the start; you can always adjust seasoning after a few hours in the slow cooker.

Don’t miss How To Make The Ultimate Fajita Marinade In 5 Minutes

2.2 Optional Pre-Sear Tips

Searing cube steak before slow cooking is a game-changer for many home cooks. This step caramelizes the meat’s surface, locking in flavors and juices. However, searing isn’t required if you’re pressed for time. You can still achieve mouthwatering results by placing the seasoned steak directly into your crock pot.

If you decide to sear, heat a tablespoon of oil in a skillet over medium-high heat. Then, add each piece of steak and let it brown for about 1–2 minutes per side. On the other hand, do not overcrowd the pan. Doing so lowers the heat and prevents a proper sear.

2.3 Building Layers of Flavor

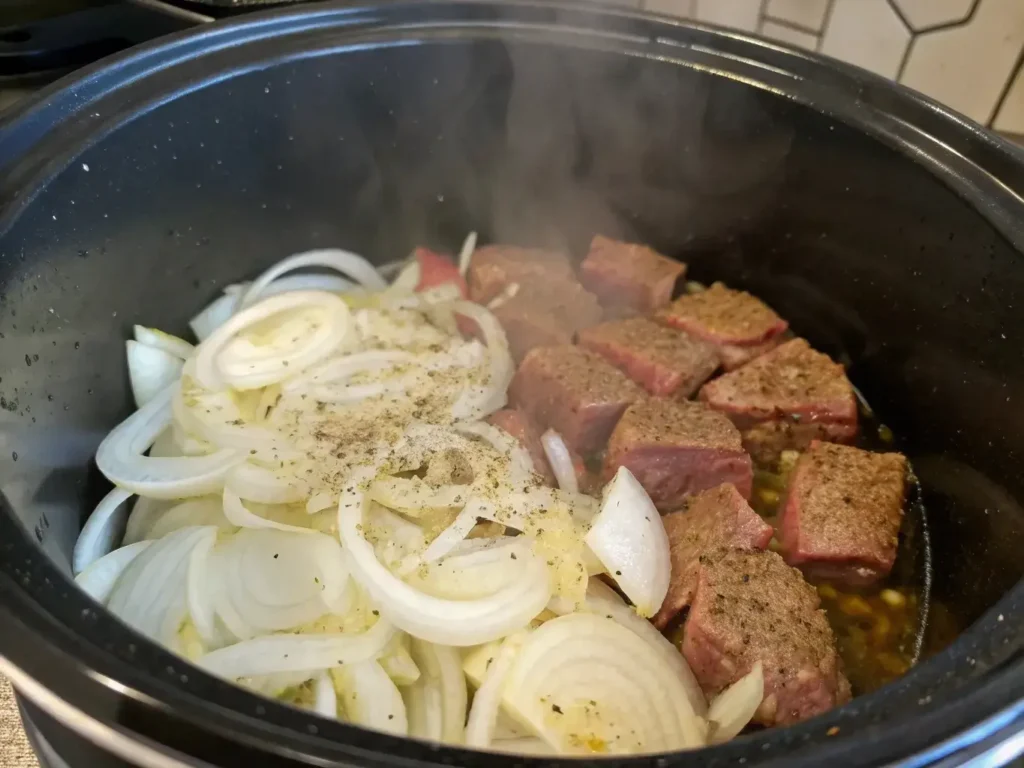
Layering your ingredients is another smart way to maximize flavor. You can start by placing onions or sliced mushrooms at the bottom of your crock pot. Thus, these vegetables infuse your steak with aromatic juices as they cook down. In addition, they help prevent your meat from scorching on the pot’s base.

You can also add a flavorful liquid or sauce. Consider using beef broth, mushroom soup, or even a packet of onion soup mix. Meanwhile, a dash of Worcestershire sauce or soy sauce can add a deeper dimension. Therefore, combine these liquids in a small bowl before pouring them over your steak.

2.4 Smart Ingredient Swaps

Not everyone has the same staples in their pantry. Hence, you might need alternatives. If you’re out of beef broth, for instance, you can substitute chicken broth or vegetable stock. On the other hand, if you want a thicker gravy, stir in a bit of cornstarch near the end.

For a creamier dish, some cooks swear by adding cream of mushroom or cream of celery soup. Feel free to customize your recipe to suit dietary preferences. For instance, use low-sodium broth if you’re watching your salt intake, or opt for gluten-free soup alternatives if you have sensitivities.

3. Step-by-Step Guide to a Savory Crock Pot Cube Steak

Layering onions and seasoned cube steak in crock pot
Place onions at the bottom, then add your seasoned cube steak for an aromatic base.

3.1 Gathering Your Ingredients

To create your easy cube steak recipe, keep a list of simple ingredients within arm’s reach:

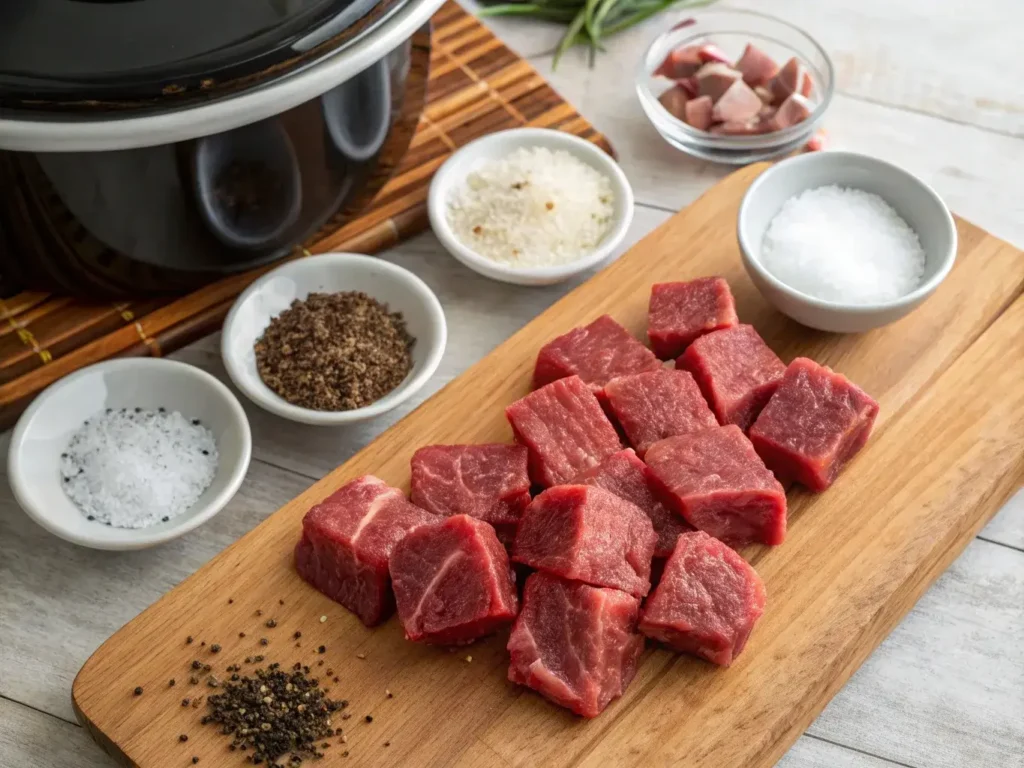
  • Cube steak (about 2 pounds, sliced into portions)
  • Salt and pepper (1 teaspoon each, or to taste)
  • Garlic powder (1 teaspoon)
  • Onion powder (1 teaspoon)
  • Oil (1 tablespoon, if searing)
  • Beef broth (1 cup, or substitute)
  • Sliced onions (1 medium onion)
  • Optional: sliced mushrooms, bell peppers, or diced carrots

In addition, measure these ingredients ahead of time to ensure you don’t miss anything. It’s easy to forget a spice or garnish when you’re juggling multiple tasks.

3.2 Layering for Maximum Tenderness

Start by lightly greasing the inside of your crock pot or using a liner. Then, spread your onions (or other vegetables) on the bottom. If you pre-seared your steaks, place them directly on top of this layer. Otherwise, add the raw, seasoned cube steak.

Next, whisk together your broth (or soup) with any seasonings you wish to use. Pour the mixture carefully over the meat. Therefore, the flavors will seep into each piece. Make sure the liquid covers the steaks about halfway. You can add more broth if necessary.

3.3 Monitoring Cook Times

Cooking cube steak in crock pot typically takes 6–8 hours on the low setting or 3–4 hours on high. However, times may vary based on your slow cooker’s brand and the thickness of your meat. Keep in mind that opening the lid often can release heat, thus extending your cook time.

If you’d like a quick check, lift the lid around the halfway mark. Gently pierce a steak with a fork to test tenderness. On the other hand, if it’s still tough, it likely needs more time. In addition, taste the liquid for seasoning. You can sprinkle in more salt, pepper, or dried herbs if needed.

3.4 Final Touches & Thickening Your Gravy

As your steak nears the end of its cook time, you can enhance its gravy consistency. One easy way is to remove a few tablespoons of the hot cooking liquid and whisk it together with cornstarch or flour. Then, return this slurry to the crock pot, stirring gently. Therefore, the sauce will thicken into a cozy gravy that coats each bite.

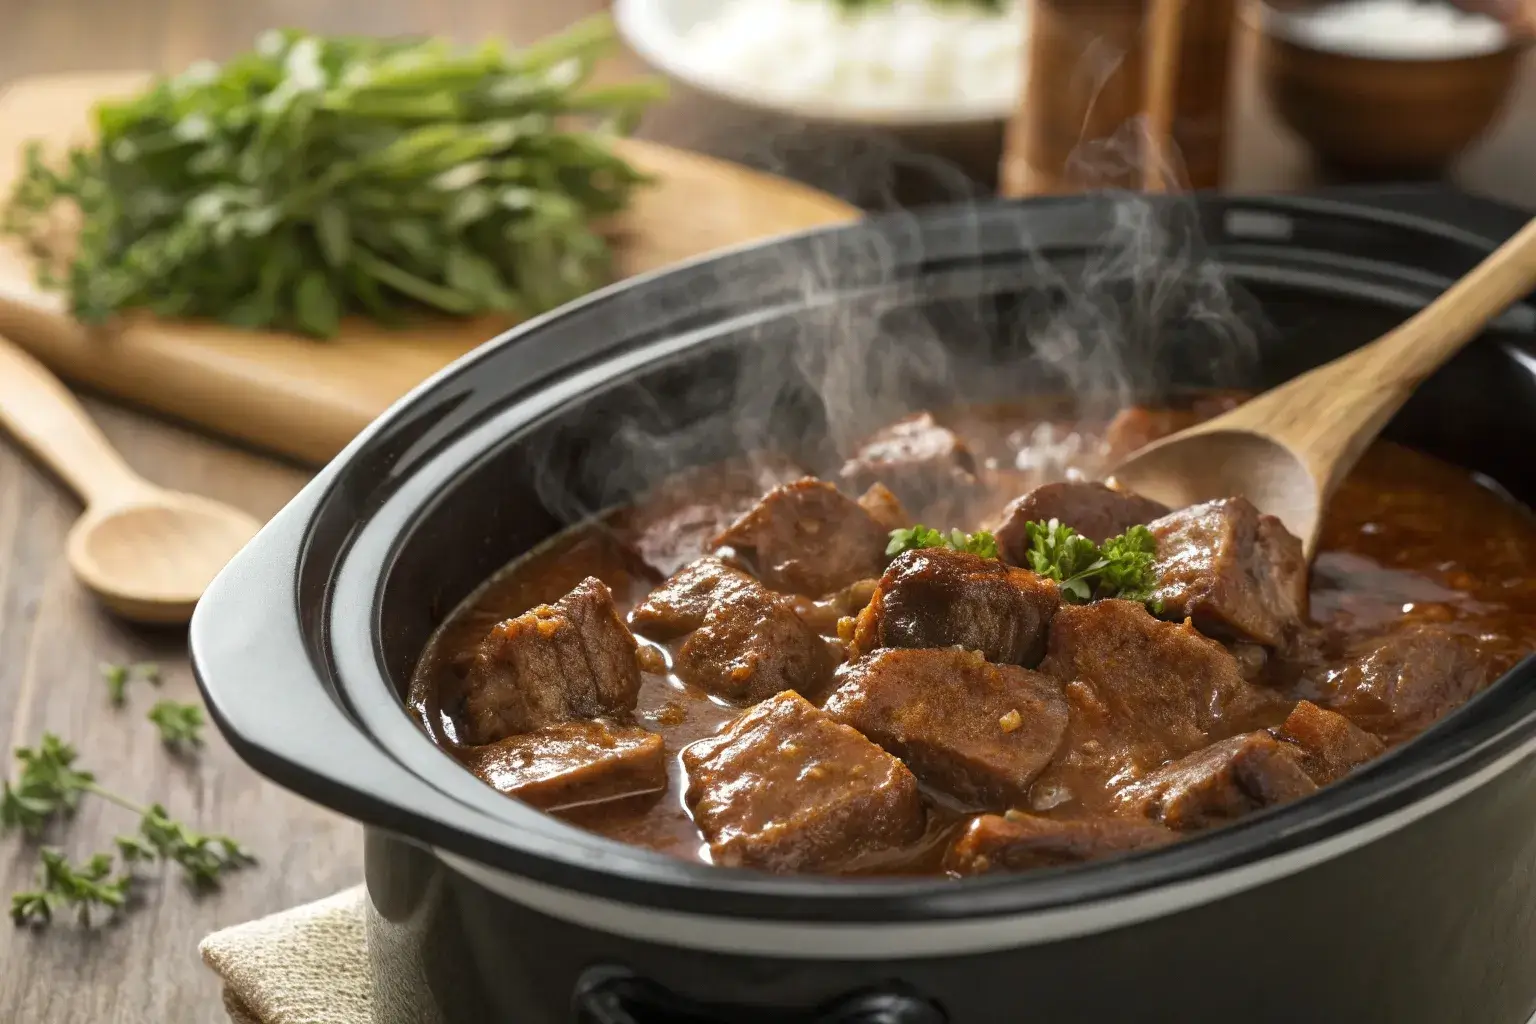
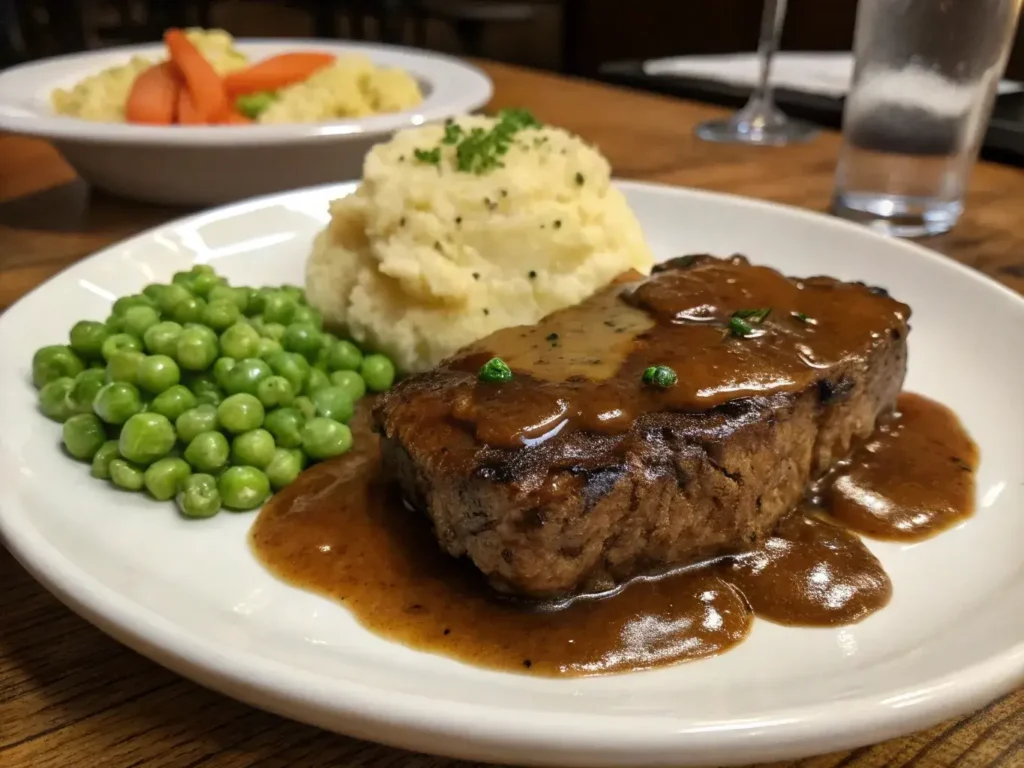
When your steak feels fork-tender, turn off the crock pot and let it rest for a few minutes. Meanwhile, you can finish preparing your side dishes. After resting, serve your tender slow cooker steak with a drizzle of gravy on top. Sprinkle chopped parsley or green onions for a fresh pop of color.

4. Creative Add-Ons & Side Dishes

Tender crock pot cube steak served with mashed potatoes and greens
Pair your tender cube steak with creamy mashed potatoes and fresh greens.

4.1 Classic Pairings Everyone Loves

For many people, mashed potatoes are the go-to side for cube steak in crock pot. The creamy potatoes contrast beautifully with the savory gravy. However, you can also opt for buttered egg noodles or fluffy white rice to soak up those tasty juices.

Additionally, bread rolls or crusty baguettes work wonders for sopping up leftover sauce. In fact, some families even prefer to serve cube steak with homemade biscuits. Regardless of your choice, make sure it complements the rich flavors of your slow cooker creation.

4.2 Going Beyond Basic Vegetables

Although onions and mushrooms are popular additions, don’t be afraid to branch out. For instance, you can add sliced bell peppers or zucchini toward the last hour of cooking. In addition, diced tomatoes lend a slight tang to your gravy.

If you prefer a sweet-and-savory contrast, try adding baby carrots. They’ll soften in the crock pot while absorbing the seasoning. On the other hand, root vegetables like parsnips or turnips can also be diced and placed in the pot. Therefore, you have many possibilities for personalizing the meal with your favorite produce.

4.3 Dietary Modifications & Tips

If you’re watching your sodium intake, opt for low-sodium beef broth and skip the soup mix. You can rely more on natural seasonings like fresh herbs, garlic, and onion. On the other hand, if you follow a gluten-free diet, check your soup labels carefully, or use cornstarch instead of flour.

Keto enthusiasts can still enjoy cube steak in crock pot by avoiding starchy sides. Serve your steak alongside cauliflower mash or zucchini noodles, which soak up the gravy just as well. Therefore, you can easily adapt this recipe to various eating styles without losing flavor or texture.

4.4 Storage & Reheating

After your meal, store leftover steaks in an airtight container with their gravy. Keep them refrigerated for up to three days. In addition, you may freeze the dish if you want to extend storage time. When reheating, add a splash of broth or water to maintain moisture.

For best results, use the stovetop over medium-low heat or place everything back in a crock pot on the warm setting. Microwave reheating can cause uneven warming, so stir frequently if you choose that method. Thus, a little extra attention ensures that the meat remains juicy and tender.

5. Common Pitfalls & Best Practices

5.1 Avoiding Tough Meat

Nothing ruins a meal faster than unyielding meat. Therefore, remember that low and slow is the secret. A short cooking duration or high heat will not properly break down the connective tissues. Keep your crock pot on low for the recommended time, and resist the urge to peek too often.

In addition, overcooking can be an issue if you leave the crock pot on for too long—especially on high. Hence, if your schedule demands more than eight hours, consider using an automatic timer feature that switches the cooker to a warm setting after a set time.

5.2 Balancing Liquids & Seasonings

Too much liquid can dilute the flavors of your meal. However, too little might cause your steak to dry out or even burn. Aim for enough liquid to cover roughly half the thickness of your meat. This ratio typically allows for evaporation while retaining enough moisture for braising.

Moreover, taste your sauce halfway through cooking. If it seems bland, add spices or a dash of hot sauce for an extra kick. On the other hand, if it tastes too salty, balance it out with a bit of water or unsalted broth.

5.3 When & How to Add Veggies

Sturdy vegetables like carrots or potatoes can handle the full cooking cycle. Therefore, place them at the bottom of the crock pot. Delicate vegetables like bell peppers or zucchini, however, might get mushy if cooked too long. Thus, add them in the final hour or so to preserve their texture.

If you choose to sear these veggies beforehand—especially onions and mushrooms—they’ll develop a delightful caramelization. Nevertheless, skipping this step won’t make or break the dish. You simply have different flavor profiles depending on your method.

5.4 Checking Doneness Without Overcooking

You can use a fork or a small knife to test for tenderness. If the meat flakes or cuts easily, it’s usually ready. Keep in mind that “doneness” for cube steak is more about texture than a specific internal temperature. However, the USDA recommends reaching a minimum internal temperature of 145°F (about 63°C) for beef safety.

Overcooking can cause the protein fibers to tighten again, resulting in dryness. Therefore, aim for that sweet spot where the steak is fully cooked but retains enough moisture. In addition, let your meat rest for a few minutes before serving to allow juices to redistribute.

FAQs

Q1: Why is my cube steak tough in the crock pot?

Often, cube steak becomes tough when it’s either cooked at too high a heat or not given enough time to break down connective tissues. Thus, cooking low and slow with enough liquid helps keep the meat tender. If you notice dryness, try adding more broth or sauce and extending the cook time slightly.

Q2: Does cube steak get tender the longer it cooks?

Yes, cube steak typically benefits from extended cook times in moist heat. Therefore, the low-and-slow method allows collagen and fibers to soften, which results in a melt-in-your-mouth texture. However, be mindful that cooking it too long on a high setting can lead to dryness.

Q3: How long does it take for steak to cook in a crock pot?

Generally, cube steak requires 6–8 hours on low or 3–4 hours on high. However, factors such as the thickness of the steaks, your specific slow cooker, and whether or not you seared the meat first can influence the exact timing. Check for tenderness around the halfway point and adjust as needed.

Q4: How do you cook cube steak without it getting tough?

You keep the heat gentle, use enough liquid, and let the steak simmer until fork-tender. On the other hand, pre-searing can lock in juices and add flavor. Also, adding vegetables and seasoning layers helps maintain moisture, preventing the meat from drying out during the cooking process.

Conclusion

Preparing cube steak in crock pot doesn’t have to be an intimidating experience. When done correctly, this simple method allows you to enjoy fork-tender meat with minimal fuss. By layering flavors, balancing liquids, and choosing the right add-ins, you’ll transform an affordable cut of beef into a hearty, mouthwatering meal. Furthermore, slow cooking fits perfectly into a busy lifestyle, letting you focus on other tasks while your dinner takes care of itself.

Perfect denver omelette with cheese and potatoes – Try Now

Are you craving a hearty breakfast that bursts with flavor in every bite? Look no further, because this denver omelette with cheese and potatoes delivers a savory, satisfying meal that you can whip up in no time. Whether you are brand-new to cooking eggs or you already consider yourself an omelette master, this recipe will help you create a fluffy, cheesy, and perfectly cooked dish. In this guide, you will learn not only how to prepare this beloved breakfast staple but also how to customize, serve, and troubleshoot it to fit any occasion.

1. Why Denver Omelette with Cheese & Potatoes Is Your Next Must-Try

A Brief History of This Cheesy Delight

The Denver omelette is thought to have evolved from the Western sandwich, which traditionally involved chopped ham, onions, and bell peppers. Over time, inventive cooks started mixing these ingredients with eggs. However, you might be wondering how cheese and potatoes came into play. Many home cooks soon realized that adding gooey cheese enhanced the omelette’s creaminess, while potatoes provided a hearty boost. Thus, the denver omelette with cheese and potatoes was born, offering a filling and flavorful twist on a breakfast classic.

In addition, historians believe that the “Denver” name became popularized out West, although the exact origin story remains a bit fuzzy. Despite this mystery, one thing is certain: the combination of soft eggs, melted cheese, tender potatoes, and crisp veggies will transport you to breakfast heaven.

Essential Kitchen Tools for Your Cheese and Potato Omelet

Kitchen tools on a countertop for making a Denver omelette
Gather your nonstick skillet, spatula, whisk, and knife for the perfect Denver omelette.

When it comes to making a fluffy omelette, having a few key kitchen tools will greatly improve your experience. Therefore, consider gathering these before you get started:

  • Nonstick skillet or well-seasoned cast-iron pan (8–10 inches)
  • Silicone or rubber spatula to gently lift and fold the omelette
  • Sharp chef’s knife or paring knife for dicing vegetables
  • Cutting board with a stable surface
  • Whisk or fork for beating the eggs

Moreover, you will want to make sure your workspace is tidy and well-organized because this will help you move smoothly through each step of the cooking process.

Choosing the Freshest Ingredients

You can’t create a great cheese and potato omelette without fresh, high-quality ingredients. Thus, if possible, purchase your eggs, cheese, and produce locally. Look for:

  • Eggs: The fresher, the better. Check the sell-by date and ensure there are no cracks.
  • Cheese: Sharp cheddar, pepper jack, or Swiss are popular choices. However, feel free to experiment with Gouda or feta for a different flavor profile.
  • Potatoes: Russet or Yukon Gold potatoes work best since they hold up well in the skillet.
  • Veggies: Bell peppers and onions are classic. On the other hand, you can also add mushrooms, spinach, or zucchini for variety.
  • Ham or Bacon (Optional): Use a good-quality deli ham or bacon, if desired, for that meaty touch.

According to the Egg Nutrition Center, eggs are a valuable source of high-quality protein and nutrients like vitamin D and choline, so you can feel good about enjoying them regularly.

Setting the Stage: Preparing Your Workspace

Before you start cooking, make sure you have everything laid out within arm’s reach. In addition, pre-measure your ingredients:

  • Dice your potatoes, peppers, and onions.
  • Grate your cheese.
  • Beat your eggs in a bowl with a dash of salt and pepper.

A clean and organized workspace not only makes the process more enjoyable but also helps ensure you don’t miss a crucial ingredient. Therefore, you’ll have a stress-free cooking experience from start to finish.

2. Key Steps for a Fluffy Denver Omelette with Cheese and Potatoes

Denver omelette ingredients including eggs, potatoes, peppers, onions, and cheese
Prepare these wholesome ingredients for a savory, cheese-stuffed omelette.

If you’re excited to cook an irresistible denver-style omelette with cheese and potatoes, then you’re in the right place. Below is a thorough process with time-saving tips and visuals in mind. Remember: This dish is easy to customize, so feel free to adjust the ratio of potatoes, cheese, and veggies according to your preference.

For another delicious breakfast recipe, check out our Sweet Potato Bread from Scratch to pair with your omelette!

Gathering & Measuring Your Ingredients

It’s essential to measure your ingredients accurately to achieve consistent results. Thus, consider the following standard quantities for one generous serving:

  • 3 large eggs
  • 1/2 cup diced potatoes (Yukon Gold or Russet)
  • 1/4 cup diced bell peppers (mixed colors for variety)
  • 1/4 cup diced onions (yellow, white, or red)
  • 1/4–1/2 cup shredded cheese (Cheddar, Gouda, or Swiss)
  • 2 tablespoons ham or bacon bits (optional)
  • 1 tablespoon cooking oil or butter
  • Salt and pepper to taste

In addition, keep an extra pinch of cheese on hand to sprinkle on top just before serving.

Cooking the Potatoes for Optimal Texture

Diced potatoes cooking in a skillet for a Denver omelette
Sauté diced potatoes for extra flavor and texture in your Denver omelette.

Most people underestimate the importance of properly cooking the potatoes. However, this step can make or break your omelette:

  1. Preheat your skillet over medium heat and add the oil or butter.
  2. Sauté diced potatoes for 5–7 minutes, stirring occasionally.
  3. Add a pinch of salt and pepper, plus any herbs you love (e.g., rosemary or thyme).
  4. Check tenderness by piercing a potato cube with a fork; it should go through easily, but the potatoes should still hold their shape.

Therefore, allow the potatoes to form a light golden crust for added flavor. If you like softer potatoes, add a splash of water and cover the pan briefly to steam them.

Building the Perfect Omelette Filling

Once the potatoes are partially cooked, it’s time to add your veggies and optional ham or bacon bits:

  1. Add bell peppers and onions to the same skillet. Cook for an additional 3–4 minutes until onions become translucent.
  2. Stir in ham or bacon bits (if using) and continue cooking for another minute.
  3. Season with a little more salt and pepper, tasting as you go.
  4. Remove the filling from the skillet and set aside in a small bowl.

Moreover, if you like a spicier kick, toss in diced jalapeños or a dash of chili flakes at this stage. This approach ensures maximum flavor infusion without overwhelming the rest of the omelette.

Mastering the Fold & Final Touches

Now for the fun part: cooking and folding the eggs into a fluffy masterpiece.

  1. Lower the heat to medium-low and coat the skillet with fresh oil or butter, ensuring it’s evenly distributed.
  2. Pour beaten eggs into the warm pan and let them settle for a few seconds.
  3. Use a silicone spatula to gently pull the edges of the eggs toward the center, allowing uncooked egg to flow underneath.
  4. Sprinkle half of your shredded cheese on the partially set eggs, followed by the potato and veggie mixture. Then add the remaining cheese on top.
  5. Fold one side of the omelette over the filling. Continue cooking for 1–2 minutes until the eggs are fully set but still soft.
  6. Slide the omelette onto your plate, seam-side down.

In addition, garnish with fresh herbs like chives or parsley. You can also drizzle hot sauce or salsa on top if you want even more flavor.

3. Variations of a Traditional Cheese and Potato Omelette

Everybody has different dietary preferences and taste buds. Therefore, customizing this omelette with cheese and potatoes ensures that you have the perfect breakfast, brunch, or even dinner.

Vegetarian Twist: Swap Out the Ham

On the other hand, if you skip the ham or bacon, you can still relish the classic flavors in your Denver omelette. Instead, consider adding:

  • Mushrooms for an earthy taste
  • Spinach for extra nutrients and color
  • Tofu crumbles if you want more protein without meat

Thus, vegetarian options don’t have to be boring. You simply need to experiment with ingredients that appeal to you.

Spicy Kick: Adding Jalapeños

If you love a tingle on your tongue, then jalapeños are the way to go. Chop them into small pieces and sauté them alongside the onions and peppers. You might also sprinkle in a little cayenne pepper or a few drops of your favorite hot sauce. Moreover, consider serving your omelette with a side of guacamole or spicy salsa to accentuate the heat.

Cheese Selection: Gouda, Cheddar & More

Although cheddar is traditionally used in many Denver-style omelettes, there are plenty of cheeses to explore:

  • Smoked Gouda: Subtle smokiness complements the potatoes.
  • Pepper Jack: Lends a bit of spice and melts beautifully.
  • Swiss: Offers a mild, nutty flavor.
  • Goat Cheese: Creamy tang pairs wonderfully with fresh vegetables.

Therefore, do not limit yourself to just one type of cheese. Mixing a couple of cheeses can yield a unique taste that sets your omelette apart from the rest.

Crispy vs. Soft: Potato Prep Methods

Not everyone likes their potatoes the same way. Therefore, if you prefer a crispier texture, you can par-cook the potatoes and then roast them in the oven with a bit of olive oil at 400°F (200°C) for about 10–15 minutes before adding them to the skillet. On the other hand, if you enjoy a softer bite, simply sauté them in the skillet until tender. Either method will work well; it’s all about personal taste.

4. Serving & Pairing Ideas

Denver omelette served with toast, avocado, and fresh fruit on a breakfast table
Serve your Denver omelette with toast, avocado, and fresh fruit for a complete breakfast.

Now that your denver omelette with cheese and potatoes is ready, you might be wondering how best to serve it. In addition, pairing the right side dishes and beverages can elevate your meal to a new level of deliciousness.

Classic Sides to Complement Your Omelette

Although an omelette is often a standalone breakfast, there are plenty of simple sides that enhance its flavors. For instance:

  • Toast or English muffins with a dab of butter or jam
  • Fresh fruit salad or a side of sliced avocado
  • Breakfast sausages or turkey bacon for extra protein
  • Crisp side salad with a light vinaigrette

These options balance the heartiness of the eggs and potatoes, ensuring a well-rounded meal that satisfies you without being overly heavy.

Beverage Pairings for Any Time of Day

Choosing the right drink can further accentuate the flavors in your omelette. Thus, consider these ideas:

  • Orange or grapefruit juice for a bright citrus complement
  • Coffee or tea if you prefer a warm morning pick-me-up
  • Iced tea or sparkling water on a hot day
  • Mimosa or Bloody Mary for a celebratory brunch vibe

On the other hand, if you are hosting a brunch gathering, offering a variety of drink choices will make your guests feel right at home.

Storing & Reheating Leftovers

Sometimes, you may cook more than you can finish. Therefore, you can store leftover omelette in an airtight container for up to two days in the fridge. To reheat:

  1. Microwave in 20-second increments, checking for warmth.
  2. Skillet reheat on low heat to maintain the texture.

In addition, if you want to keep the eggs from drying out, add a few drops of water or milk to the container before microwaving.

Elevating Presentation for Special Occasions

Although an omelette is a casual dish, a few presentation tricks can make it more appealing:

  • Garnish with fresh herbs like chives, parsley, or cilantro.
  • Drizzle with a vibrant sauce (salsa verde or chipotle crema) across the top.
  • Sprinkle colorful diced tomatoes or peppers for added visual pop.
  • Serve on a warmed plate to maintain optimal temperature.

Therefore, even a simple breakfast can feel like a restaurant-quality meal with a little extra attention to detail.

5. Pro Tips & Troubleshooting

Making a cheese and potato omelette sounds simple, but there are common pitfalls. Thus, these expert strategies will help you master the art of omelette-making.

Avoiding Overcooked Eggs

Eggs can overcook quickly, resulting in a rubbery texture. Therefore:

  • Use medium-low heat to allow gentle cooking.
  • Remove the omelette from the stovetop just as the eggs begin to firm up.
  • Remember that residual heat will continue cooking the eggs for a short period after you remove them from the heat.

Moreover, you can always put the lid on for a minute or two if you prefer a more thoroughly set top layer.

Keeping It Fluffy: Whisking Techniques

The key to a lofty omelette is aerating the eggs. Thus:

  • Whisk eggs vigorously for about 30 seconds.
  • Incorporate a splash of milk or water to keep the eggs light.
  • Avoid beating the eggs too far in advance. Mix them right before pouring into the skillet.

By following these steps, you’ll notice how your omelette remains tender without feeling dense or heavy.

Making It Healthier Without Sacrificing Taste

If you’re watching your calorie intake or simply want a more nutrient-dense meal, consider these adjustments:

  • Use egg whites or a mix of whole eggs and egg whites.
  • Swap butter for a small amount of olive oil.
  • Add more vegetables like spinach, kale, or broccoli.
  • Opt for reduced-fat cheese or a smaller quantity of full-fat cheese.

On the other hand, don’t skip flavor boosters like herbs, spices, and a dash of Parmesan sprinkled on top.

Common Mistakes & How to Fix Them

Despite your best efforts, mistakes can still happen. Therefore, here are a few common issues and solutions:

  • Eggs stuck to the pan: Make sure you properly grease the skillet and use a nonstick surface.
  • Omelette fell apart during the flip: Cook the eggs a bit longer so they set before flipping.
  • Under-seasoned dish: Taste as you go, adjusting salt, pepper, and other spices.
  • Potatoes too firm: Pre-cook the potatoes thoroughly or steam them slightly to ensure they become tender.

Should you encounter any of these issues, don’t worry. With a bit of practice, you’ll finesse the process and enjoy a perfectly layered omelette every time.

FAQs

Q1: What is the difference between an omelet and a Denver omelet?

A standard omelet can include any fillings you desire, whereas a Denver omelette traditionally features chopped ham, onions, bell peppers, and cheese. Denver omelette with cheese and potatoes adds a hearty spin on this classic by including diced potatoes, making it a more filling meal.

Q2: What ingredients are in a Denver omelet?

A classic Denver omelet usually includes eggs, ham, onions, and bell peppers, often topped with cheese. Some variations like ours also incorporate diced potatoes, mushrooms, or jalapeños for an extra flavor boost.

Q3: Why is it called a Denver omelet?

The exact origins are debated, but many believe it evolved from the “Western sandwich” popular in the 19th-century American West. It eventually became known as the Denver omelet, possibly because of the city’s role in popularizing or showcasing the dish at local restaurants.

Q4: What is the world famous omelette?

Many regions claim to have a “world famous omelette.” However, the French omelette and the Spanish tortilla (which contains potatoes and onions) are often seen as globally renowned classics. On the other hand, the denver omelette with cheese and potatoes remains a uniquely American favorite with its own loyal following.

Conclusion

Congratulations! You now have a comprehensive guide to making a perfect denver omelette with cheese and potatoes that’s both delicious and adaptable. By choosing fresh ingredients, cooking the potatoes properly, and mastering the folding technique, you can prepare a crowd-pleasing meal any time of day. Moreover, feel free to experiment with different cheeses, spices, and sides to suit your tastes.

How To Make Old Fashioned Baked Macaroni And Cheese

Ah, old fashioned baked macaroni and cheese it’s like a warm hug on a plate. This beloved classic has been bringing families together for generations, and for good reason. With its rich, gooey cheese sauce and irresistibly crisp topping, it’s a dish that never goes out of style.

What Is Old Fashioned Baked Macaroni and Cheese?

Old fashioned baked macaroni and cheese is more than just a recipe—it’s a culinary tradition. This dish, beloved for generations, combines simple ingredients like pasta, cheese, and breadcrumbs to create a rich and satisfying meal. It’s not just about the creamy, cheesy texture but also the crispy baked topping that adds depth and flavor to every bite. Let’s dive deeper into what makes this dish so special.

A Timeless Comfort Classic

At its core, old fashioned baked macaroni and cheese is the ultimate comfort food. Its creamy interior and golden crust create a perfect balance of textures that’s hard to resist. Unlike stovetop versions, this baked classic allows the cheese sauce to fully infuse the pasta while the breadcrumbs form a crunchy, flavorful layer on top.

What makes it truly timeless is its versatility. Whether served as a main dish or a hearty side, this recipe fits seamlessly into any meal. Families love it for its nostalgic appeal, and cooks adore it for its simplicity and reliable results.

The History Behind the Dish

The origins of old fashioned baked macaroni and cheese can be traced back to Europe, where pasta dishes were often baked with cheese for special occasions. When this idea made its way to America, it quickly became a household staple, celebrated for its affordability and satisfying taste.

Thomas Jefferson is credited with popularizing macaroni and cheese in the U.S. after discovering it during a trip to Europe. Over time, the dish evolved into the baked version we know and love today, particularly in Southern cooking, where it’s often enriched with eggs or unique spice blends.

For an in-depth history of macaroni and cheese, check out this Smithsonian Magazine article.

Why Choose Baked Over Stovetop?

While stovetop macaroni and cheese has its charm, the baked version offers distinct advantages. Baking creates a crispy topping that provides a satisfying crunch with every bite. It also allows the dish to set, giving it a casserole-like texture that makes it easy to serve at gatherings or special occasions.

Moreover, baking enhances the flavor of the cheese, creating a deeper, more complex taste. The gentle heat of the oven caramelizes the cheese slightly, adding an extra layer of richness that stovetop versions can’t replicate.

Ingredients That Make It Special

What sets old fashioned baked macaroni and cheese apart is its use of fresh, high-quality ingredients. A few essentials include:

  • Cheese: Sharp cheddar is the classic choice, but combining it with gouda or gruyere can elevate the flavor.
  • Milk and Cream: These form the base of the cheese sauce, adding a silky smooth texture.
  • Breadcrumbs: Panko or seasoned breadcrumbs create a crispy, golden topping that contrasts beautifully with the creamy pasta.

By focusing on fresh, wholesome ingredients, you ensure that every bite is packed with flavor and satisfaction.

Ingredients for Old Fashioned Baked Macaroni and Cheese

Ingredients for old fashioned baked macaroni and cheese on a countertop.
All the ingredients needed to make classic baked macaroni and cheese.

The key to perfect old fashioned baked macaroni and cheese is using fresh, high-quality ingredients. Each component plays a crucial role in creating the creamy texture and rich flavor that make this dish a timeless classic.

The Pasta: Choosing the Right Shape

To start, select pasta that holds sauce well. Elbow macaroni is the traditional choice because its curved shape allows the cheese sauce to coat every nook and cranny. However, you can also try shells, cavatappi, or penne for a fun twist. Cooking the pasta to al dente is essential, as it will finish cooking in the oven without becoming mushy.

Cheese: Mixing for Maximum Flavor

Cheese is the heart of old fashioned baked macaroni and cheese. Sharp cheddar provides a bold, tangy base, but blending it with milder options like Monterey Jack or gruyere adds depth. For a smoky touch, consider smoked gouda. Always shred the cheese yourself pre-shredded varieties often contain anti-caking agents that can affect the sauce’s creaminess.

Breadcrumbs: The Crispy Topping

A crunchy topping is what sets baked macaroni and cheese apart. Panko breadcrumbs are a popular choice because they create a light, crispy layer. For extra flavor, mix them with melted butter and a sprinkle of parmesan before sprinkling them over the pasta. This step ensures your topping browns beautifully in the oven.

Optional Add-Ins for Extra Flavor

For those who like to experiment, adding a pinch of mustard powder, cayenne pepper, or smoked paprika can enhance the cheese sauce. Crumbled bacon or caramelized onions can also bring a savory, gourmet touch to this classic dish. These small tweaks make your old fashioned baked macaroni and cheese stand out without overpowering its traditional appeal.

How to Make Old Fashioned Baked Macaroni and Cheese

Crafting the perfect old fashioned baked macaroni and cheese is easier than you think, especially with a step-by-step approach. This guide ensures that every bite is creamy, cheesy, and irresistibly delicious. Let’s walk through the process, breaking it down into simple, actionable steps.

Step 1: Preparing the Pasta

The first step in making old fashioned baked macaroni and cheese is to cook the pasta just right. Bring a pot of salted water to a boil, and add your chosen pasta—elbow macaroni is a classic choice. Cook it until it’s al dente, or slightly firm to the bite. This is important because the pasta will continue cooking in the oven.

Once cooked, drain the pasta and rinse it with cold water. This helps stop the cooking process and prevents the pasta from sticking together. Set it aside while you prepare the cheese sauce.

Step 2: Making the Cheese Sauce

 Cheese sauce being prepared for baked macaroni and cheese.
A creamy cheese sauce being whisked to perfection on the stovetop.

The cheese sauce is the heart of any old fashioned baked macaroni and cheese. Start by creating a roux, a thickening base made from butter and flour:

  1. Melt butter in a saucepan over medium heat.
  2. Whisk in the flour and cook for 1-2 minutes, stirring constantly to remove any raw flour taste.

Gradually add milk and cream, whisking to ensure a smooth, lump-free sauce. Let it simmer until slightly thickened. Then, stir in your shredded cheeses, a little at a time, until they’re fully melted and the sauce is creamy. A mix of sharp cheddar, gouda, and Monterey Jack creates an ideal balance of tangy and smooth flavors.

Step 3: Assembling the Dish

Mixing pasta with cheese sauce for baked macaroni and cheese.
Pasta is mixed with rich cheese sauce, ready for baking.

With the pasta and cheese sauce ready, it’s time to assemble your old fashioned baked macaroni and cheese:

  1. Preheat your oven to 375°F (190°C).
  2. Combine the cooked pasta and cheese sauce in a large mixing bowl, ensuring every piece is coated.
  3. Transfer the mixture to a greased baking dish, spreading it out evenly.

For a golden, crispy top, sprinkle breadcrumbs mixed with melted butter over the pasta. You can also add a little extra shredded cheese for a gooey layer beneath the crust.

Step 4: Baking to Perfection

The final step is baking your masterpiece. Place the dish in the preheated oven and bake uncovered for 20-25 minutes. You’ll know it’s ready when the top is golden brown and the cheese is bubbling around the edges. Let the dish rest for 5-10 minutes before serving to allow the flavors to settle.

For more cheesy and comforting recipes, check out our Cheesy Chicken Sloppy Joe Recipes for another family favorite that’s perfect for weeknight dinners.

Tips for Perfect Old Fashioned Baked Macaroni and Cheese

Creating old fashioned baked macaroni and cheese is an art, and a few thoughtful techniques can take your dish from good to outstanding. These tips ensure the best texture, flavor, and presentation every time.

Choosing the Right Cheese

The cheese you select directly impacts the flavor and creaminess of your old fashioned baked macaroni and cheese. Sharp cheddar is a must-have for its bold, tangy profile. However, mixing in cheeses like gruyere, which melts beautifully, or Monterey Jack for a milder finish, adds depth. Avoid processed cheeses, as they may lack the rich taste you’re aiming for. For a gourmet twist, try smoked gouda or a touch of parmesan in the sauce or topping.

Achieving the Perfect Texture

The texture of your dish can make or break the experience. For a creamy base, use equal parts milk and heavy cream. This combination prevents the sauce from becoming too runny or overly thick. When combining the sauce with the pasta, make sure each piece is fully coated. On the other hand, the topping should be crunchy and golden, providing a delightful contrast to the creamy pasta. Mixing breadcrumbs with melted butter before sprinkling them ensures even browning.

Preventing Dryness

A common issue with baked mac and cheese is dryness. To avoid this, ensure you have enough sauce to coat the pasta generously. Remember, the pasta absorbs moisture while baking, so a slightly looser sauce at the start is ideal. Covering the dish with foil for the first 10 minutes of baking can also lock in moisture, while removing the foil later allows the topping to crisp up.

Adding Unique Flavors

While traditional old fashioned baked macaroni and cheese is a classic for a reason, adding subtle extras can enhance its appeal. A pinch of mustard powder or nutmeg adds complexity to the cheese sauce. If you prefer a spicy kick, sprinkle cayenne pepper or crushed red pepper flakes. For a heartier dish, mix in cooked bacon, caramelized onions, or sautéed mushrooms.

Serving and Storing Old Fashioned Baked Macaroni and Cheese

A plate of old fashioned baked macaroni and cheese with sides.
A perfect serving of baked macaroni and cheese with fresh parsley.

After you’ve created your delicious old fashioned baked macaroni and cheese, it’s time to serve it and, if needed, store the leftovers properly. These tips will help you enjoy the dish at its best while ensuring no bite goes to waste.

How to Serve It Perfectly

Serve old fashioned baked macaroni and cheese immediately after letting it cool for about 5-10 minutes. This resting time allows the sauce to set slightly, making it easier to scoop and serve. Use a wide spatula to lift portions without breaking the crispy topping.

Pair this comforting dish with sides like roasted vegetables, a crisp green salad, or garlic bread. If you’re serving it as a main course, consider adding protein-rich sides like baked chicken or grilled sausages to balance the meal.

Making It Ahead of Time

If you’re preparing this dish for a gathering, you can make old fashioned baked macaroni and cheese ahead of time. Assemble the dish completely but don’t bake it. Cover it tightly with foil and refrigerate for up to 24 hours. When you’re ready to bake, let the dish sit at room temperature for about 20 minutes, then bake as directed, adding an extra 5-10 minutes to the baking time.

This method is especially handy for holidays or large gatherings, allowing you to focus on other tasks while ensuring your dish is freshly baked and perfectly warm when served.

Storing Leftovers

Leftovers of old fashioned baked macaroni and cheese can be just as delicious. To store, let the dish cool completely before transferring it to an airtight container. Refrigerate for up to 3-4 days. When reheating, add a splash of milk or cream to the dish to restore its creamy texture, as the pasta may absorb the sauce during storage. Cover with foil and reheat in the oven at 350°F (175°C) until warmed through, or use a microwave for smaller portions.

Can You Freeze It?

Yes, you can freeze old fashioned baked macaroni and cheese, but there are a few considerations to keep in mind. For best results, freeze the dish before baking. Assemble the pasta and sauce in a freezer-safe dish, cover it tightly with plastic wrap and foil, and freeze for up to 2 months.

When ready to bake, let it thaw in the refrigerator overnight, then bake as directed. While freezing is convenient, the texture of the pasta may change slightly upon reheating. To minimize this, slightly undercook the pasta before assembling the dish.

FAQs About Old Fashioned Baked Macaroni and Cheese

Why do you put egg in mac and cheese?

Adding an egg to old fashioned baked macaroni and cheese helps create a custard-like texture. The egg acts as a binding agent, giving the dish a firmer structure while still keeping it creamy. This is especially common in Southern-style recipes, where the egg contributes to the rich, velvety consistency of the cheese sauce. However, if you prefer a softer, more fluid sauce, you can skip the egg without compromising flavor.

What to add to macaroni and cheese to make it taste better?

To enhance the flavor of old fashioned baked macaroni and cheese, consider adding a few simple ingredients:

  • Spices: A pinch of garlic powder, onion powder, or smoked paprika can add depth.
  • Mustard Powder: This brings out the sharpness of the cheese.
  • Hot Sauce: A few dashes can add a subtle kick without overwhelming the dish.
  • Herbs: Fresh thyme or parsley can provide a hint of freshness. If you’re feeling adventurous, mix in caramelized onions, crispy bacon, or even sautéed mushrooms for added texture and taste.

What are the three best cheeses for mac and cheese?

The best cheese combinations for old fashioned baked macaroni and cheese balance flavor and meltability. Here are the top three choices:

  1. Sharp Cheddar: Provides a bold, tangy base.
  2. Gruyere: Adds creaminess and a slightly nutty flavor.
  3. Monterey Jack: Offers a mild, smooth texture that complements other cheeses. Blending these cheeses ensures your mac and cheese is rich, creamy, and bursting with flavor.

Why do people put mayo in mac and cheese?

Some people add mayo to old fashioned baked macaroni and cheese for extra creaminess and a slight tang. Mayonnaise, made from eggs and oil, enhances the sauce’s texture, making it thicker and silkier. While not a traditional ingredient, it’s a creative way to make the dish even more indulgent. If you’re open to experimenting, try adding a small amount and adjust to your taste.

Conclusion: Perfecting Old Fashioned Baked Macaroni and Cheese

Old fashioned baked macaroni and cheese is a dish that never goes out of style. With its creamy cheese sauce, perfectly cooked pasta, and golden breadcrumb topping, it’s the epitome of comfort food. From choosing the right cheeses to mastering the baking process, every step contributes to its irresistible charm.

Now it’s your turn to bring this iconic dish to life. Gather your ingredients, preheat the oven, and enjoy the process of creating a meal that’s as satisfying to make as it is to eat. Don’t forget to share your experience and explore more recipes for delicious inspiration.