How To Make Burrata Cheese At Home: A Step-by-Step Guide

If there’s one cheese that feels like a little luxury on your plate, it’s burrata cheese. This Italian masterpiece combines a soft mozzarella shell with a creamy center that spills out like a silky surprise when sliced. It’s versatile, too perfect in salads, as a pizza topping, or simply drizzled with olive oil.

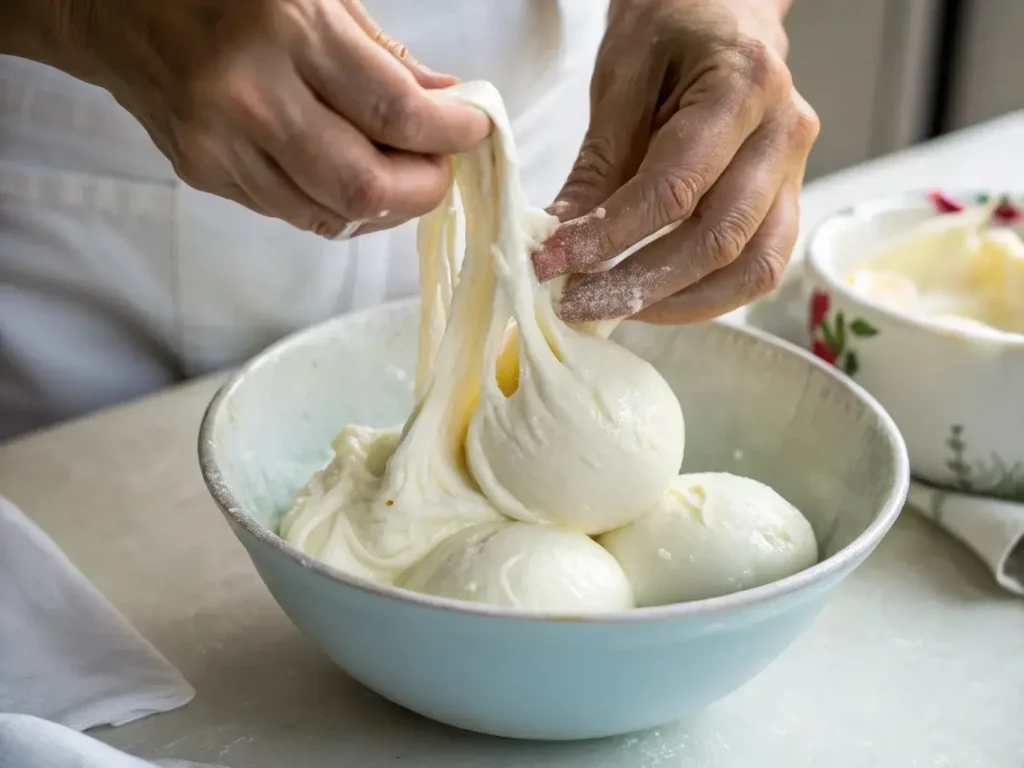
What makes burrata cheese so special isn’t just its taste; it’s also the joy of crafting it yourself. Imagine pulling mozzarella curds into a delicate pouch and filling it with fresh cream it’s an experience as satisfying as the cheese itself. In this guide, we’ll walk you through everything you need to know about making your own burrata cheese. Trust us, it’s easier than you think, and the results? Absolutely worth it.

What Is Burrata Cheese?

Understanding Burrata: The Basics

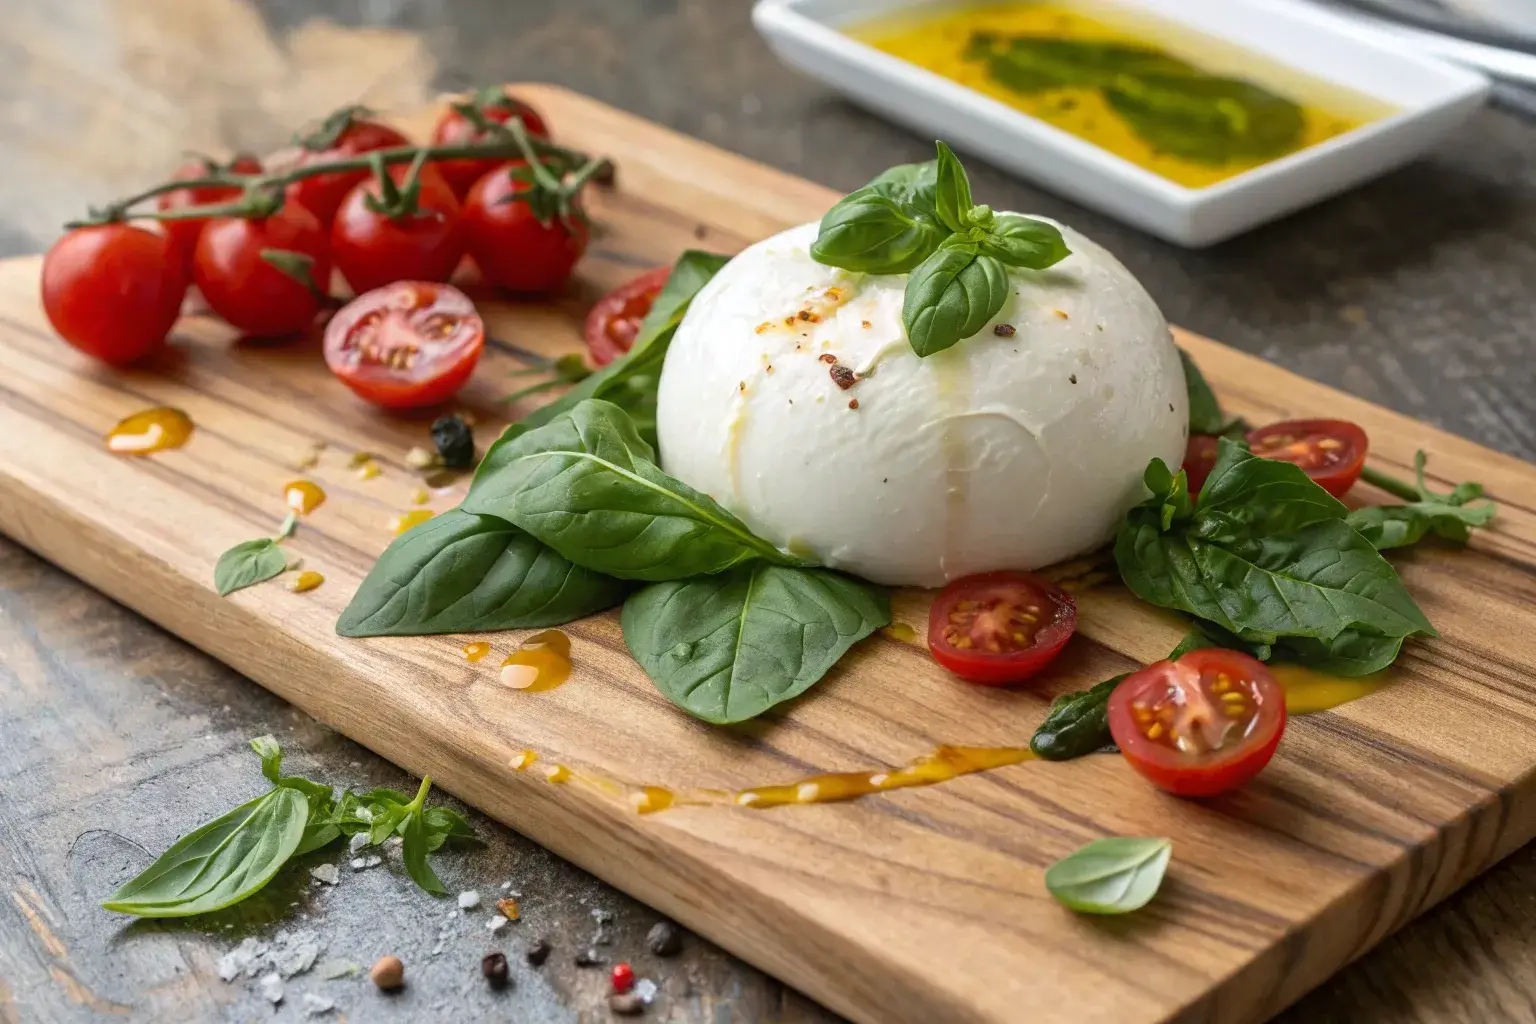
Burrata cheese is a fresh Italian cheese known for its creamy, indulgent texture. At first glance, it looks like a ball of fresh mozzarella, but inside lies the magic—a soft, velvety center made of cream and shredded curds. This combination creates a flavor that’s both mild and rich, making burrata cheese a favorite among cheese lovers worldwide.

Unlike aged cheeses, burrata is meant to be enjoyed fresh. Its delicate flavor and luxurious consistency make it perfect for pairing with simple, high-quality ingredients. Whether drizzled with olive oil, served with tomatoes, or spread over warm bread, it’s a versatile addition to any table.

Why Burrata Cheese Is So Special

What sets burrata cheese apart from other cheeses is its unique construction. The outer layer, made from fresh mozzarella, provides structure, while the creamy interior offers a delightful contrast in both texture and taste. When sliced open, the center flows out like a rich, savory filling, creating a visual and culinary treat.

Its versatility adds to its appeal. From elegant appetizers to hearty main dishes, burrata cheese can transform even the simplest ingredients into a gourmet experience. Additionally, its short shelf life highlights its freshness, making it a rare treat when enjoyed at its peak.

How Burrata Differs from Mozzarella

Hands stretching mozzarella curd for burrata cheese.
A key step in making burrata cheese: stretching curd.

Although burrata and mozzarella are closely related, they are far from identical. Mozzarella, a semi-soft cheese, has a firmer texture and is commonly used in cooking. On the other hand, burrata cheese combines mozzarella with cream, giving it a softer, more indulgent consistency.

Mozzarella is often melted on pizzas or sliced for sandwiches, while burrata shines as the centerpiece of dishes where its creamy texture can be showcased. For example, a fresh tomato and basil salad comes alive when paired with the richness of burrata cheese. For a detailed comparison, visit this guide to mozzarella and burrata.

The Perfect Occasions to Serve Burrata Cheese

Burrata cheese is an ideal choice for special occasions, casual gatherings, or everyday meals. Its versatility makes it a star in both simple and elaborate dishes. Serve it as a centerpiece for a charcuterie board, or pair it with crusty bread and roasted vegetables for an elegant appetizer.

In addition, it’s a seasonal favorite. During the summer, burrata cheese pairs beautifully with ripe tomatoes, peaches, or arugula salads. In cooler months, it complements hearty pastas or roasted root vegetables, adding a touch of creaminess to warming dishes. No matter the season, burrata is always a crowd-pleaser.

How to Make Burrata Cheese at Home

Ingredients You’ll Need

Making burrata cheese at home starts with the right ingredients. The essentials include:

  • Fresh mozzarella curds: These form the base of the cheese. You can purchase them from a specialty store or make them yourself.
  • Heavy cream: This creates the creamy, luscious filling known as stracciatella.
  • Whole milk: High-quality milk ensures a rich and smooth texture for the mozzarella.
  • Rennet: This enzyme is crucial for curdling milk and forming the cheese.
  • Salt: Enhances the flavor and preserves the cheese.

Each ingredient plays a vital role in achieving that perfect balance of firm outer shell and creamy center. For those seeking an extra layer of flavor, adding a dash of olive oil or herbs to the filling can create a personalized touch.

Equipment You’ll Need

To make burrata cheese, you don’t need professional tools—just some basic kitchen equipment:

  • Cheesecloth: Used to drain the whey and shape the curds.
  • Thermometer: Ensures precise temperatures during milk heating and curd formation.
  • Mixing bowls: For holding curds, cream, and whey.
  • Large pot: Used to heat milk and create the curds.
  • Slotted spoon: Ideal for handling curds without breaking them.

While these tools are simple, their role in the process is essential. For beginners, a basic setup is sufficient, but as you refine your technique, you may want to invest in specialized cheese-making tools.

Step-by-Step Burrata Recipe

 Milk in a pot with cheese-making tools for burrata.
Milk and tools prepared for homemade burrata cheese.
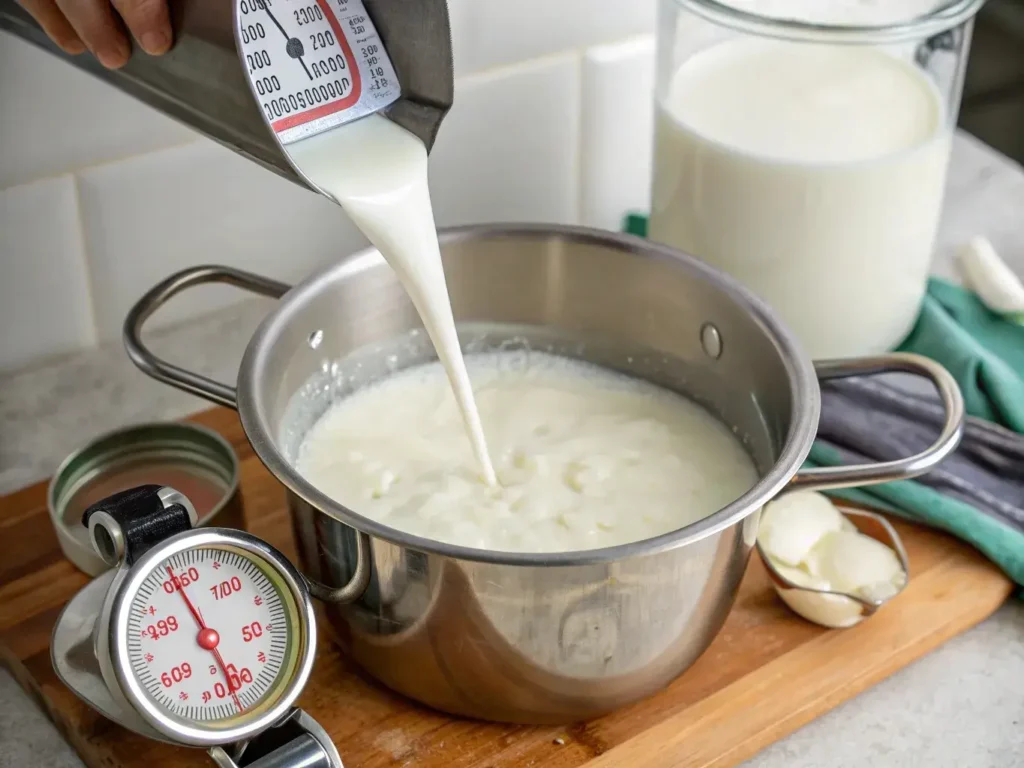
  1. Prepare the curds: Heat the milk to the required temperature (approximately 90°F), add rennet, and let it rest until curds form. This step creates the foundation for burrata cheese.
  2. Stretch the mozzarella: Once the curds are ready, stretch and knead them in warm water until smooth and pliable. This forms the outer shell.
  3. Make the filling: Mix shredded mozzarella with heavy cream to create the creamy stracciatella filling.
  4. Assemble the burrata: Shape the mozzarella into a pouch, fill it with the creamy mixture, and seal it carefully.
  5. Chill and enjoy: Let the finished burrata cool in salted water before serving.

Common Mistakes to Avoid

Making burrata cheese can be tricky, especially for beginners. Avoid these common pitfalls:

  • Overheating the milk: This can cause curds to break down, leading to a gritty texture. Use a thermometer to maintain the correct temperature.
  • Improper stretching: If the mozzarella isn’t stretched enough, the outer shell may tear during assembly.
  • Watery filling: Drain the mozzarella thoroughly before mixing it with cream to prevent a runny filling.
  • Skipping salt: Proper seasoning enhances the cheese’s natural flavor and ensures it’s not bland.

If you’re a fan of creamy cheeses, don’t miss our collection of Cottage Cheese Recipes for Wholesome Meals.

Creative Ways to Enjoy Burrata Cheese

Burrata as the Star of Salads

Burrata Cheese salad with tomatoes, greens, and balsamic glaze.
A fresh salad with creamy burrata, tomatoes, and balsamic glaze.

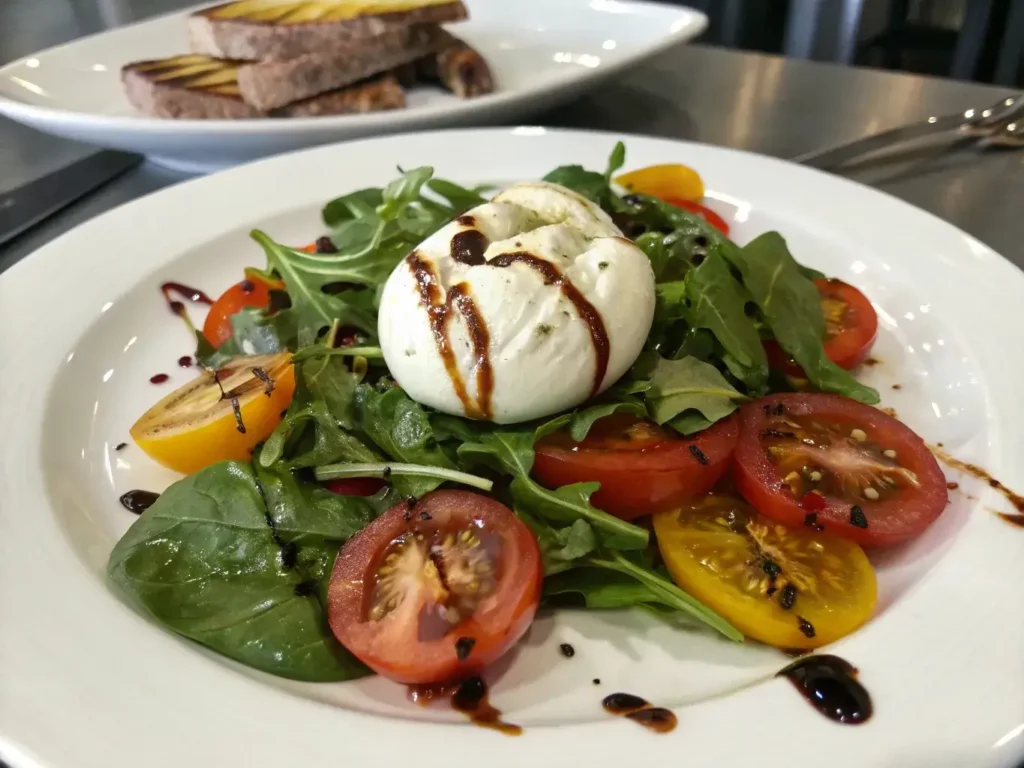
Burrata cheese shines brightest when paired with fresh, vibrant ingredients in salads. One classic pairing is with juicy, ripe tomatoes, fresh basil, and a drizzle of balsamic glaze a perfect match for the cheese’s creamy texture. For a seasonal twist, consider a peach and arugula salad topped with burrata, olive oil, and a sprinkle of sea salt.

During colder months, roasted vegetable salads with burrata add a warming and indulgent element. Think roasted beets or butternut squash tossed with mixed greens and finished with burrata. These combinations elevate simple ingredients to gourmet status, making burrata a versatile choice for salads all year round.

Using Burrata in Appetizers

When it comes to appetizers, burrata cheese is the ultimate crowd-pleaser. Its rich creaminess pairs beautifully with crusty bread or crackers. Serve it on a wooden board with sliced prosciutto, olives, and cherry tomatoes for an elegant yet easy antipasto.

Another idea is to use burrata as a topping for crostini. Spread a thin layer of garlic-infused olive oil on toasted bread, add a dollop of burrata, and finish with roasted cherry tomatoes or caramelized onions. These appetizers are simple to prepare but guaranteed to impress guests at any gathering.

Main Dishes Featuring Burrata Cheese

 Mini pizzas with burrata, basil, and tomatoes.
Hot and fresh mini pizzas topped with burrata and basil.

Burrata cheese isn’t just for appetizers—it can transform main dishes too. One of the simplest yet most luxurious ways to use burrata is as a pizza topping. Add it after the pizza is baked, letting its creamy center melt slightly over the hot crust.

For pasta lovers, burrata can replace heavy cream in sauces. Try tossing it with freshly cooked spaghetti, sautéed garlic, and a squeeze of lemon juice for a light yet decadent dish. It’s also a fantastic addition to risotto, lending creaminess without overpowering the delicate flavors of the dish.

Dessert Ideas with Burrata

While cheese in desserts might sound unusual, burrata cheese proves otherwise. Pair it with fresh fruit like figs, strawberries, or peaches, drizzled with honey or a balsamic reduction. This combination balances the richness of burrata with the natural sweetness of fruit.

For something more indulgent, use burrata in place of whipped cream alongside chocolate desserts. A dark chocolate cake or brownie served with a spoonful of burrata creates a unique flavor profile that’s both savory and sweet. Burrata in desserts is a surprising yet delightful twist on traditional pairings.

Tips for Serving and Storing Burrata Cheese

Best Practices for Serving Burrata Cheese

To truly enjoy the creamy decadence of burrata cheese, serving it correctly is essential. Always bring burrata to room temperature before serving; this ensures the creamy center is soft and at its most flavorful. Slice it gently to reveal the rich filling, allowing it to flow naturally over the plate.

Pair burrata cheese with simple ingredients that highlight its mild flavor. Drizzle it with high-quality olive oil and a sprinkle of flaky sea salt, or serve it with fresh bread and a side of ripe tomatoes. For a touch of sweetness, add a drizzle of honey or fig jam. The key is to keep the flavors balanced, so the burrata remains the star.

How to Store Fresh Burrata Cheese

Because burrata cheese is a fresh product, it has a short shelf life and requires careful storage. Keep it submerged in its liquid (usually whey or brine) and refrigerate it immediately after purchase. This helps maintain its moisture and creamy texture.

However, burrata is best enjoyed within 1-2 days of purchase. Beyond this, the quality begins to decline, and the creamy filling can lose its silky consistency. If you’re unable to finish it, try using the leftover burrata in recipes like pasta sauces or baked dishes, where its texture won’t be as noticeable.

Enhancing Burrata Cheese with Simple Additions

One of the easiest ways to elevate burrata cheese is by pairing it with complementary ingredients. For a classic Italian touch, top it with olive oil, fresh basil, and a splash of balsamic reduction. This simple combination enhances burrata’s creamy and slightly tangy profile.

For a more creative twist, sprinkle chopped pistachios or drizzle chili oil over burrata for a bold contrast. Pairing it with roasted vegetables, caramelized onions, or even grilled peaches can turn a simple dish into something extraordinary. These additions not only enhance the flavor but also bring texture and color to your presentation.

Common Mistakes to Avoid with Burrata Cheese

While burrata cheese is simple to serve, there are a few common mistakes to watch out for. First, avoid serving it too cold, as the creamy interior won’t reach its ideal texture. Always allow burrata to sit at room temperature for about 30 minutes before serving.

Additionally, don’t overwhelm burrata with overly strong flavors. Ingredients like spicy sauces or pungent dressings can mask its delicate taste. Instead, opt for light, fresh pairings that complement rather than compete with the cheese. Lastly, handle burrata gently to prevent tearing the outer shell, which can cause the filling to spill prematurely.

FAQs About Burrata Cheese

What is the difference between mozzarella and burrata?

While both mozzarella and burrata cheese originate from Italy, they are distinct in texture and composition. Mozzarella is a semi-soft cheese made from stretched curds, giving it a firm and elastic texture that’s perfect for melting or slicing.

On the other hand, burrata cheese has a soft mozzarella shell but is filled with a rich, creamy mixture of stracciatella and cream. This makes burrata much softer and more indulgent compared to mozzarella. While mozzarella is often used in cooking, burrata is best enjoyed fresh as its creamy interior is its defining feature.

How should burrata be eaten?

Burrata cheese is best eaten fresh and at room temperature to fully appreciate its creamy texture and delicate flavor. Start by slicing it gently to reveal the creamy center, allowing it to flow naturally. Pair burrata with simple ingredients like olive oil, sea salt, and crusty bread to highlight its richness.

For a more robust dish, you can serve it with fresh salads, ripe tomatoes, roasted vegetables, or even grilled peaches. Its versatility also makes it a great topping for pizzas or pastas. To create a sweet-savory balance, try pairing burrata with honey or balsamic glaze alongside fruit like figs or strawberries.

Is burrata a healthy cheese?

While burrata cheese is rich in protein and calcium, which are essential for strong muscles and bones, it’s also higher in fat and calories compared to other cheeses due to its creamy filling. A typical serving of burrata contains around 300 calories and 25 grams of fat, so moderation is key if you’re watching your intake.

That said, burrata can still be part of a balanced diet when paired with nutrient-rich ingredients like fresh vegetables, whole grains, or fruit. Enjoy it occasionally as a treat rather than a staple if you’re mindful of your health goals.

What is the closest cheese to burrata?

The closest cheese to burrata cheese is fresh mozzarella, as it forms the outer shell of burrata. However, mozzarella lacks the creamy interior that defines burrata. If you’re looking for a substitute with a similar texture and richness, consider ricotta or stracciatella, which can mimic burrata’s filling.

For a creative alternative, you can mix mozzarella and cream to achieve a similar flavor profile. While these substitutes can replicate some aspects of burrata, they won’t fully match its luxurious combination of firm and creamy textures.

Conclusion

Burrata cheese is more than just a culinary delight it’s an experience. With its firm mozzarella shell and luscious, creamy interior, it brings an indulgent touch to any dish, whether served fresh, paired with seasonal ingredients, or incorporated into main courses. From understanding its differences from mozzarella to learning how to serve and store it, this guide has covered everything you need to enjoy burrata to its fullest.

Whether you’re savoring it with a drizzle of olive oil and fresh tomatoes or experimenting with desserts and roasted vegetables, burrata offers endless possibilities. By making it at home, you can customize every detail and elevate your meals with this Italian classic. Now, it’s your turn to bring the magic of burrata cheese to your kitchen and table. Enjoy every creamy bite!

Sweet Potato Bread: How To Make It Perfect Every Time

Have you ever bitten into something so delicious you had to pause and savor it? That’s the magic of sweet potato bread. With its naturally sweet flavor and melt-in-your-mouth texture, this bread strikes the perfect balance between indulgent and nutritious. Made with real sweet potatoes, it’s packed with fiber, vitamins, and a touch of nostalgia.

But the best part? It’s incredibly simple to make. Whether you’re a seasoned baker or a total newbie, this guide will walk you through creating a loaf that’s moist, flavorful, and downright irresistible. From classic recipes to creative twists, you’ll find everything you need to make sweet potato bread your new go-to baked good. Let’s get baking your taste buds will thank you!

Why You’ll Love Baking with Sweet Potatoes

The Irresistible Taste of Sweet Potatoes in Bread

Sweet potato bread stands out for its naturally sweet and earthy flavor. The mashed sweet potatoes not only bring a subtle sweetness but also create a moist and tender crumb. Unlike banana or pumpkin bread, which rely on stronger flavors, sweet potato bread strikes a perfect balance between sweet and savory.

This unique combination makes it versatile—you can enjoy it as a light breakfast with butter or as a dessert with a drizzle of icing. The addition of spices like cinnamon and nutmeg enhances its taste, giving it a warm, comforting feel that’s hard to resist. If you’re looking for a baked good that’s both wholesome and delicious, sweet potato bread is your go-to option.

Health Benefits of Baking with Sweet Potatoes

Not only is sweet potato bread delicious, but it’s also packed with nutrients. Sweet potatoes are a powerhouse of vitamins and minerals, particularly vitamin A, which supports eye health, and vitamin C, which boosts your immune system. They’re also high in fiber, helping with digestion and keeping you full for longer.

By incorporating sweet potatoes into your bread, you’re not just baking a treat—you’re creating a nutrient-rich dish. To make it even healthier, you can use whole wheat flour and natural sweeteners like honey or maple syrup.

A Brief History of Sweet Potato Bread

Did you know that sweet potato bread has its roots in Southern cuisine? Sweet potatoes have been a staple ingredient in the South for centuries, often used in recipes that call for natural sweetness and heartiness. Historically, baking with sweet potato was a way to make use of leftover sweet potatoes, blending them into dough to create a comforting and satisfying loaf.

Over time, it evolved from a regional favorite into a widely loved baked good, appearing in kitchens across the country. Today, it’s celebrated for its versatility and ability to fit into both traditional and modern recipes. Whether you enjoy it plain or jazzed up with nuts and spices, sweet potato bread is a classic with a rich history.

The Best Occasions for Sweet Bread

Sweet potato bread is the ultimate multitasker. It’s perfect for breakfast when paired with a cup of coffee or tea. Add a little butter or cream cheese, and you’ve got a satisfying start to your day. For lunch or a midday snack, its hearty texture makes it a filling option, especially when combined with spreads like nut butter or honey.

And let’s not forget dessert! Warm up a slice and add a dollop of whipped cream or a sprinkle of powdered sugar for a simple yet indulgent treat. During the holiday season, it shines as a festive addition to your table, whether served as a side dish or a dessert. No matter the occasion, sweet potato bread fits right in.

Your Guide to Baking with Sweet Potatoes

Key Ingredients for Perfect Sweet Bread

 Mashed sweet potatoes in a bowl on a kitchen counter.
Mashed sweet potatoes, the key ingredient in sweet potato bread, ready for mixing.

Making sweet potato bread starts with gathering the right ingredients. At the heart of the recipe is mashed sweet potatoes, which provide natural sweetness, moisture, and a rich texture. You can use fresh sweet potatoes that are roasted or boiled, or opt for canned ones for convenience.

In addition to sweet potatoes, you’ll need all-purpose flour, baking powder, and spices like cinnamon and nutmeg to bring out warm, comforting flavors. For sweetness, brown sugar is a great choice, as it complements the earthy notes of the sweet potatoes. Eggs and butter ensure a soft crumb, while vanilla extract adds a subtle depth to the flavor. If you’re feeling adventurous, mix-ins like chopped pecans or chocolate chips can elevate your loaf.

For more delicious baking ideas, check out our guide to Quick and Easy Baking Recipes.

Step-by-Step Recipe for Sweet Potato Bread

Sweet potato bread batter being poured into a loaf pan.
Pouring sweet potato bread batter into a greased pan.

Making sweet potato bread is simpler than you might think! Start by preheating your oven to 350°F and greasing a standard loaf pan. In one bowl, mix your dry ingredients—flour, baking powder, cinnamon, and nutmeg. In another, whisk together the wet ingredients: mashed sweet potatoes, eggs, melted butter, and vanilla extract.

Next, slowly combine the wet and dry ingredients, stirring just until the batter comes together. Be careful not to overmix, as this can make your bread dense. Pour the batter into your prepared pan and smooth the top with a spatula. Bake for 50-60 minutes, or until a toothpick inserted into the center comes out clean. Let the bread cool completely before slicing.

For detailed baking tips, check out this comprehensive bread baking guide.

Common Mistakes to Avoid

Even the simplest recipes for sweet potato bread can go wrong if you’re not careful. One common mistake is using sweet potatoes that are too watery, which can lead to a soggy loaf. To avoid this, make sure to drain boiled sweet potatoes thoroughly or roast them for a drier texture.

Another issue is overmixing the batter. This can develop too much gluten, resulting in a dense and chewy bread instead of a light and tender crumb. Also, don’t forget to measure your ingredients accurately—too much flour can make the bread dry, while too little can cause it to collapse. Lastly, always test the bread for doneness before removing it from the oven to ensure it’s fully baked.

Tips for Storing Your Sweet Bread

Sweet potato bread is best enjoyed fresh, but it also stores well for later. To keep it moist, wrap the loaf tightly in plastic wrap or store it in an airtight container. It will stay fresh at room temperature for up to three days. For longer storage, refrigerate it for up to a week.

If you want to freeze your bread, slice it first for easy portioning. Wrap individual slices in plastic wrap and place them in a freezer-safe bag. This way, you can grab a slice or two whenever you need a quick snack. To reheat, simply pop a slice in the microwave for 20-30 seconds or warm it in the oven at 300°F for a few minutes.

Creative Ways to Customize Your Sweet Bread

Sweet potato bread mini loaves and muffins with cream cheese glaze.
Sweet potato bread muffins and mini loaves with a creamy glaze.

How to Make Gluten-Free Sweet Bread

For those avoiding gluten, sweet potato bread can easily be adapted to fit your dietary needs. By using alternative flours like almond, oat, or coconut flour, you can create a gluten-free version that’s just as moist and flavorful as the original. Keep in mind that gluten-free flours tend to absorb more liquid, so adjusting the wet ingredients, like adding an extra egg or a splash of milk, may be necessary.

Adding a teaspoon of xanthan gum can also help maintain the structure of the bread. This gluten-free option pairs wonderfully with a dollop of nut butter for a nutritious snack.

A Vegan Twist on Sweet Bread

Transforming sweet potato bread into a vegan-friendly recipe is surprisingly simple. Replace eggs with flaxseed or chia seed “eggs” (1 tablespoon of seeds mixed with 2.5 tablespoons of water per egg) to keep the bread moist and soft. Use plant-based milk, such as almond or oat milk, and swap out butter for coconut oil or vegan margarine.

To enhance the flavor, consider adding a touch of maple syrup or agave nectar. Vegan sweet potato bread is a great option for those seeking a plant-based treat without sacrificing taste or texture.

Turning Sweet Bread into a Savory Delight

If you’re looking for a unique twist, try turning sweet potato bread into a savory delight. By reducing the sugar and omitting the spices, you can create a bread that pairs perfectly with soups, salads, or even a hearty breakfast. Add ingredients like shredded cheese, chopped chives, or fresh rosemary to the batter for an extra burst of flavor.

For best results, balance the natural sweetness of the sweet potatoes with a pinch of salt and a touch of black pepper. This savory variation is ideal for those who prefer a more robust, less sugary loaf.

Sweet Potato Muffins and Mini Loaves

If you love the taste of sweet potato bread but want something more portable, consider making muffins or mini loaves. The batter works just as well for these smaller portions, and they bake faster usually in 18-22 minutes for muffins and 25-30 minutes for mini loaves.

These smaller treats are perfect for meal prepping, gifting during the holidays, or enjoying as a quick snack on the go. To make them extra special, sprinkle some chopped nuts or a streusel topping over the batter before baking.

Perfect Pairings for Sweet Bread

A slice of sweet potato bread with whipped cream and coffee.
A delightful slice of sweet potato bread served with whipped cream and coffee.

Classic Spreads for Sweet Potato Bread

Sweet potato bread is delicious on its own, but adding a spread can elevate it to a whole new level. Classic options like butter or cream cheese are always crowd-pleasers, enhancing the bread’s natural sweetness without overpowering it. For a richer flavor, try cinnamon honey butter or a dollop of mascarpone.

If you prefer something lighter, a thin layer of apple butter or a drizzle of maple syrup works beautifully. These simple additions complement the warm, earthy notes of sweet potato bread and make each bite more indulgent.

Drinks to Pair with Sweet Baked Goods

Pairing sweet potato bread with the right beverage can enhance your overall experience. Coffee and tea are popular choices, with spiced chai or cinnamon-infused coffee being particularly great matches for the bread’s warm spices. For a more decadent treat, enjoy it with hot cocoa topped with whipped cream.

During the warmer months, iced tea or a refreshing lemonade pairs well with a chilled slice of sweet potato bread. For brunch gatherings, consider serving it alongside mimosas or a lightly spiced mulled cider in colder seasons.

Sweet Potato Bread as a Dessert

Turn sweet potato bread into an irresistible dessert by adding a few finishing touches. A drizzle of cream cheese glaze or a light dusting of powdered sugar can transform the loaf into a show-stopping treat. To create a more decadent dish, top a warm slice with a scoop of vanilla ice cream and a sprinkle of chopped pecans.

For a unique twist, use sweet potato bread as a base for bread pudding. Cube the loaf, mix it with a custard base, and bake until golden for a comforting dessert that’s perfect for family dinners or holiday celebrations.

Creative Ways to Use Leftover Sweet Bread

If you find yourself with leftover sweet potato bread, don’t let it go to waste! One simple way to repurpose it is by turning it into French toast. The dense texture of the bread soaks up the egg mixture perfectly, creating a rich and flavorful breakfast option.

Another idea is to toast slices and use them as a base for open-faced sandwiches. For example, spread goat cheese on top and add caramelized onions for a savory snack. Alternatively, cube the bread and bake it into crunchy croutons for soups and salads, adding a unique sweet-savory contrast.

FAQs About Sweet Potato Bread

What are the benefits of sweet potato bread?

Sweet potato bread offers numerous health benefits thanks to its star ingredient: sweet potatoes. These nutrient-dense vegetables are packed with vitamins A and C, which support eye health and boost your immune system. Sweet potatoes are also rich in fiber, promoting healthy digestion and keeping you full for longer. Additionally, they contain antioxidants that can reduce inflammation and improve overall health.

By incorporating sweet potatoes into bread, you’re enjoying a baked good that’s not only delicious but also more nutritious than traditional options. Plus, the natural sweetness of sweet potatoes allows you to use less added sugar, making it a healthier choice.

Is potato bread good for you?

Potato-based breads, including sweet potato bread, are often a healthier alternative to regular white bread. The addition of sweet potatoes or potatoes enhances the bread’s nutritional profile by adding essential vitamins, minerals, and fiber. Compared to traditional white bread, potato bread tends to be lower in calories and higher in nutrients, making it a better choice for those looking to balance taste with health.

However, the overall nutritional value depends on the recipe and ingredients. To maximize the benefits, opt for recipes with whole-grain flours and minimal added sugars.

Is sweet potato bread good for diabetics?

Sweet potato bread can be a good option for diabetics when prepared with care. Sweet potatoes have a low glycemic index, meaning they release sugar into the bloodstream more slowly than other starchy foods. This makes them a better choice for managing blood sugar levels.

To make sweet potato bread more diabetic-friendly, reduce or eliminate added sugars, use whole-grain or almond flour, and add high-fiber ingredients like chia seeds or flaxseeds. Always consult with a healthcare professional to ensure the recipe aligns with your dietary needs.

Can I use sweet potatoes instead of flour?

While sweet potatoes cannot fully replace flour in baking, they can be used as a partial substitute or binding agent in certain recipes. In sweet potato bread, mashed sweet potatoes contribute moisture, sweetness, and a soft texture, allowing you to reduce the amount of flour needed.

For flourless baking, pair sweet potatoes with almond flour or oat flour to create a gluten-free option. This combination retains the structure of the bread while adding a nutritional boost. Experiment with ratios to find the perfect balance for your recipe.

Conclusion

Sweet potato bread is a versatile and nutritious treat that’s perfect for any occasion. Whether you’re looking for a healthier bread option, a diabetic-friendly recipe, or creative ways to incorporate sweet potatoes into your baking, this loaf delivers on all fronts. Packed with vitamins, fiber, and natural sweetness, it’s a delicious way to enjoy the benefits of sweet potatoes.

From classic recipes to innovative variations like gluten-free or savory loaves, there’s something for everyone. Pair it with your favorite spreads, serve it with a cup of coffee, or transform it into a dessert the possibilities are endless.

Dungeness Crab Legs: 7 Easy Recipes You’ll Love

Picture this: succulent Dungeness crab legs glistening with butter, the aroma of garlic and spices wafting through your kitchen. Hungry yet? It’s no wonder these West Coast treasures have captured the hearts of seafood lovers everywhere. Packed with flavor and surprisingly easy to prepare, they’re perfect for family dinners, date nights, or even a solo indulgence.

What makes Dungeness crab legs so special? Their rich, slightly sweet meat is like no other, offering a taste of the ocean in every bite. In this blog, you’ll learn foolproof methods to steam, boil, bake, and grill these beauties, along with irresistible recipes that are sure to impress. Let’s crack into it your next seafood masterpiece awaits!

Why Dungeness Crab Legs Are a Seafood Favorite

What Makes Dungeness Crab Legs Special?

Dungeness crab legs are celebrated for their sweet, tender meat and versatility in the kitchen. Unlike other types of crab, such as snow crab or king crab, Dungeness crabs offer a rich, buttery flavor that feels like a taste of the ocean. This makes them perfect for a wide range of dishes, from simple steamed legs to elaborate seafood boils.

In addition to their flavor, their slightly larger size makes them easier to crack and enjoy. Whether you’re new to seafood or a seasoned crab lover, Dungeness crab legs are a delight to cook and eat. Plus, they’re a sustainable seafood option, meaning you can indulge without guilt.

How to Choose the Best fresh crab legs

Selecting the right Dungeness crab legs is crucial to a successful meal. If you’re buying fresh crab, look for legs that are firm to the touch and smell faintly sweet. Avoid anything with a strong fishy odor, as that could indicate the crab isn’t fresh.

For frozen options, check the packaging for signs of freezer burn or excessive ice crystals, as these can impact the quality. Brands that freeze crabs right after harvesting often deliver the best results. If you’re unsure where to start, try visiting trusted seafood marketplaces like Seafood Watch for sustainable options.

The Nutritional Value of Crab Legs

If you’re searching for a nutritious yet indulgent seafood option, Dungeness crab legs fit the bill perfectly. Packed with high-quality protein, they’re an excellent source of essential amino acids that support muscle repair and overall health. They’re also low in calories, making them a smart choice for those watching their weight.

Beyond protein, Dungeness crab legs are rich in important nutrients like zinc, selenium, and vitamin B12. These nutrients not only boost your immune system but also promote healthy skin and energy levels. Compared to other protein sources, crab legs offer a leaner, more flavorful alternative.

The History of Crab in Cuisine

Did you know that fresh crab legs have been a favorite on the West Coast for centuries? Named after the fishing village of Dungeness in Washington State, these crabs have a deep history rooted in Native American and Pacific Northwest cuisine. Traditionally, they were steamed or roasted over open fires and enjoyed with minimal seasoning to highlight their natural flavor.

Today, their culinary popularity spans far beyond the Pacific. From creamy pastas to savory soups, This delicious seafood has become a global seafood staple, loved for their unique taste and texture.

Master the Art of Cooking Crab

How to Steam Crab for Best Results

Steaming succulent  Dungeness crab legs with garlic, butter, and lemon slices.
A pot of Dungeness crab legs steaming with garlic, butter, and lemon.

Steaming is one of the best ways to preserve the natural flavor of crab legs. This method keeps the meat moist and tender, while also retaining more nutrients compared to boiling. To steam Dungeness crab legs, you’ll need a large pot, a steamer basket, and about two cups of water. Add a splash of lemon juice or white wine for extra flavor.

Bring the water to a boil, place the crab legs in the steamer basket, and cover the pot tightly. Steam for 5-7 minutes, or until the legs are heated through.

Boiling Dungeness Crab Legs

 Seafood boil with Dungeness crab legs, shrimp, corn, and potatoes.
A classic seafood boil featuring Dungeness crab legs, corn, and shrimp.

If you’re craving Dungeness crab legs with a punch of seasoning, boiling is the way to go. This method allows you to infuse the crab meat with bold flavors, like garlic, Old Bay seasoning, or Cajun spices. Start by filling a large pot with water and adding your chosen seasonings. Bring the water to a rolling boil, then carefully add the crab legs.

Cook for 4-6 minutes, ensuring the legs are submerged in the seasoned water. However, avoid overcooking, as this can make the meat rubbery. Once done, drain the legs and serve with melted butter or your favorite dipping sauce.

What Makes Grilling Crab So Flavorful?

Grilled Dungeness crab legs on a barbecue grill.
Smoky grilled Dungeness crab legs, charred to perfection.

Grilling crab legs adds a smoky, charred flavor that pairs beautifully with their natural sweetness. This method is perfect for summer cookouts or when you want to try something different. To grill crab legs, preheat your grill to medium-high heat. Brush the legs lightly with olive oil or a marinade of garlic and herbs.

Place the crab legs directly on the grill grates and cook for about 5 minutes per side. The heat caramelizes the shell slightly, enhancing the overall taste. Grilled Dungeness crab legs are delicious on their own or served with a zesty lemon aioli.

Baking Crab Legs

Baking is a simple yet effective way to prepare Dungeness crab legs. This method is ideal if you want to cook large batches without standing over the stove. Preheat your oven to 375°F and line a baking sheet with foil. Arrange the crab legs in a single layer, then drizzle with garlic butter or sprinkle with your favorite seasoning.

Cover the legs with foil to lock in moisture and bake for 12-15 minutes. If you’re aiming for a golden finish, remove the foil in the last 3 minutes. Serve these baked Dungeness crab legs with roasted vegetables or a crusty loaf of bread for a satisfying meal.

7 Easy Recipes Featuring Dungeness Crab Legs

Garlic Butter Dungeness Crab Legs

Few things can rival the rich, savory flavor of garlic butter Dungeness crab legs. This recipe is not only simple but also a guaranteed crowd-pleaser. Start by melting unsalted butter in a saucepan and adding minced garlic. Let the mixture simmer for a minute to release the aroma, then brush it generously over pre-cooked crab legs.

Bake the crab legs at 375°F for 12-15 minutes, allowing the flavors to soak in. Serve them hot with an extra bowl of garlic butter for dipping. This dish pairs wonderfully with a side of crusty bread or roasted asparagus. For more quick and flavorful recipes, check out How To Make Shrimp Garlic Without Butter In 15 Minutes.

Crab Legs in a Seafood Boil

A seafood boil featuring Dungeness crab legs is a festive meal perfect for gatherings. This recipe combines crab legs with shrimp, potatoes, corn, and sausage for a complete one-pot feast. Begin by filling a large pot with water and adding Old Bay seasoning, lemon slices, and bay leaves.

Bring the water to a boil, then add the potatoes and sausage. After 10 minutes, toss in the corn and crab legs. Cook everything together for another 5-7 minutes until the crab is heated and the vegetables are tender. Drain the pot, spread the contents on a large tray, and sprinkle with more seasoning for added flavor. Don’t forget to serve with lemon wedges and melted butter!

Spicy Cajun Dungeness Crab Legs

If you love bold, zesty flavors, try this recipe for spicy Cajun Dungeness crab legs. The Cajun seasoning adds a delightful kick that perfectly complements the crab’s natural sweetness. To prepare, mix Cajun spices, paprika, garlic powder, and cayenne pepper with melted butter in a bowl.

Brush the mixture over the crab legs, then grill them over medium heat for about 5 minutes per side. Alternatively, you can bake them at 400°F for 10-12 minutes. Serve these spicy crab legs with a creamy dipping sauce or a side of coleslaw to balance the heat. They’re perfect for a casual dinner or game night snack.

Creamy Dungeness Crab Leg Pasta

Creamy crab pasta with parsley garnish.
A rich and creamy pasta dish with Dungeness crab meat.

Turn them into a luxurious pasta dish that’s sure to impress. Begin by cooking your favorite pasta fettuccine or linguine works well. In a large skillet, melt butter and sauté minced garlic until fragrant. Stir in heavy cream, Parmesan cheese, and a pinch of black pepper to create a creamy sauce.

Gently fold in the meat from Dungeness crab legs and cook until warmed through. Toss the pasta in the sauce, ensuring every strand is coated. Garnish with fresh parsley and a squeeze of lemon juice for a bright finish. This dish is elegant enough for a dinner party yet simple enough for a weeknight treat.

Tips and Tricks for Cooking Crab Legs

How to Properly Thaw Frozen Crab Legs

When working with frozen Dungeness crab legs, proper thawing is essential to ensure they retain their texture and flavor. The best method is to thaw them slowly in the refrigerator overnight. Simply place the crab legs in a sealed container or on a tray to catch any dripping water.

If you’re short on time, you can use the cold water method. Place the Dungeness crab legs in a sealed plastic bag and submerge them in a bowl of cold water. Change the water every 30 minutes until thawed. Avoid using hot water or microwaves, as they can cause uneven thawing and compromise the quality of the meat.

Essential Tools for Cooking and Eating Crab Legs

Cooking and enjoying Dungeness crab legs is much easier with the right tools. A large pot or steamer is a must for boiling or steaming, while a baking tray and foil come in handy for oven-based recipes. For grilling, invest in a pair of heat-resistant tongs to handle the legs safely.

When it’s time to eat, crab crackers and seafood scissors are invaluable for breaking through the shell without damaging the tender meat. On the other hand, if you prefer an eco-friendly option, consider using the back of a spoon or a butter knife as a substitute. Having small bowls for melted butter and dipping sauces can also elevate the dining experience.

Common Mistakes to Avoid

Cooking Dungeness crab legs can be simple, but there are a few pitfalls to steer clear of. One of the most common mistakes is overcooking, which can make the meat rubbery and dry. Remember, most store-bought crab legs are pre-cooked, so you’re merely reheating them.

Another error is skipping the thawing process for frozen crab legs. Cooking them directly from frozen can result in uneven heating, with some parts being overcooked while others remain cold. Finally, avoid underseasoning—while crab legs are naturally flavorful, a touch of garlic butter or Cajun spices can take them to the next level.

Enhancing the Flavor of Crab Legs

While Dungeness crab legs are delicious on their own, a few tweaks can elevate their taste. Start by experimenting with marinades—lemon, garlic, and parsley are classic options that complement the crab’s sweetness. For a spicy kick, try a Cajun or chili-lime seasoning.

Dipping sauces are another way to add variety. Melted butter is a staple, but you can also serve a tangy cocktail sauce or a creamy aioli. For an Asian-inspired twist, pair your crab legs with a soy-ginger dip. These small additions can transform your dish into a gourmet experience.

FAQs

What is the best way to cook Dungeness crab?

The best way to cook Dungeness crab legs largely depends on your preferences. Steaming is ideal if you want to preserve the crab’s natural flavor and texture. Boiling, on the other hand, allows you to infuse the crab with seasonings like Old Bay or garlic. Grilling and baking are also excellent methods for adding a smoky or buttery flavor. Whichever method you choose, ensure you don’t overcook the crab legs, as they only need to be reheated for 5-7 minutes if pre-cooked.

Are Dungeness crab legs already cooked?

Yes, most Dungeness crab legs you find in stores are already cooked and flash-frozen to preserve their quality. This means your primary goal is to reheat them rather than cook them from scratch. Always check the packaging to confirm, and avoid overcooking, as this can make the meat tough and dry. If you’re buying fresh crab legs, however, you’ll need to steam or boil them until the meat turns opaque and tender.

Is it better to steam or boil Dungeness crab legs?

Both methods are excellent for preparing Dungeness crab legs, but each has its advantages. Steaming is better for retaining the crab’s natural sweetness and delicate texture, as it uses minimal water. It’s also a quicker method with less risk of overcooking. Boiling, however, is great if you want to add flavors directly to the crab legs. By seasoning the water with spices, garlic, or lemon, you can infuse the meat with extra flavor. Choose steaming for pure crab flavor and boiling for seasoned results.

What should I season my crab legs with?

Seasoning your Dungeness crab legs enhances their already delicious taste. Classic options include melted butter with garlic or lemon, which highlight the crab’s natural sweetness. For a spicy twist, Cajun seasoning, paprika, or chili powder work wonders. You can also experiment with Asian-inspired flavors like soy sauce, ginger, and sesame oil. Don’t forget to pair the seasoned crab legs with dipping sauces such as garlic butter, cocktail sauce, or a tangy mustard dip for an extra layer of flavor.

Conclusion

Cooking Dungeness crab legs at home is easier than you might think and offers endless opportunities to enjoy this delicious seafood. Whether you prefer steaming, boiling, grilling, or baking, each method brings out unique flavors and textures. From simple garlic butter recipes to bold Cajun spices, you can customize your crab legs to suit any occasion.

We’ve explored everything from choosing the best Dungeness crab legs to essential cooking tips and flavor-enhancing tricks. Now it’s your turn to try these methods and recipes. Remember, the key is to avoid overcooking and to season the crab legs to your taste. Whether you’re hosting a seafood feast or treating yourself to a special meal, Dungeness crab legs are sure to impress.

how long to bake salmon at 350

Ever tried baking salmon and ended up with a dry, flavorless fillet? It’s frustrating, isn’t it? The secret to success lies in knowing exactly how long to bake salmon at 350. This sweet spot ensures your salmon turns out tender, moist, and absolutely delicious. In this blog, we’ll dive into everything you need to know from timing based on fillet thickness to foolproof tips for keeping your salmon juicy. Plus, we’ll share easy seasoning ideas that’ll have you craving seconds. Whether you’re a beginner or a seasoned home chef, this guide is your ultimate ticket to baked salmon perfection. So, let’s get started—because great meals begin with just a little know-how!

How Long to Bake Salmon at 350: Mastering the Basics

Factors That Affect Baking Time

A chef placing a seasoned salmon fillet in a preheated oven.
A salmon fillet going into a preheated oven for even cooking.

The question how long to bake salmon at 350 depends on a few key factors. First, the thickness of the fillet plays a crucial role. Thinner fillets (about 1 inch thick) bake in 12-15 minutes, while thicker cuts (over 1 inch) may require 15-20 minutes. Additionally, whether your salmon is fresh or frozen matters. Frozen salmon typically takes a few minutes longer unless it’s thawed beforehand.

Another factor is how you prepare the fish. Wrapping the salmon in foil or parchment paper not only locks in moisture but can also slightly reduce baking time. On the other hand, unwrapped salmon bakes evenly but may dry out faster. By understanding these factors, you can adjust your timing for perfect results every time.

To achieve perfectly baked salmon, it’s essential to match the baking time to the thickness of your fillet. Here’s a quick guide:

  • Thin fillets (1 inch or less): Bake for 12-15 minutes at 350°F.
  • Thick fillets (over 1 inch): Bake for 15-20 minutes at the same temperature.

For best results, check the internal temperature at the thickest part of the fillet. When the salmon reaches 145°F (63°C), it’s ready to enjoy. If you don’t have a thermometer, look for the flesh to flake easily with a fork—a sure sign it’s done.

Need more guidance? This detailed salmon baking guide offers additional tips for achieving a flawless bake.

The Benefits of Using Foil or Parchment Paper

Wrapping your salmon in foil or parchment paper can make a world of difference. This method traps steam as the fish cooks, which keeps it moist and tender. Additionally, using foil eliminates the need for oiling the baking sheet and makes cleanup effortless.

Foil-baked salmon also cooks more evenly, especially when paired with seasoning or marinade. Simply wrap the fish with lemon slices, garlic, and your favorite herbs for a flavorful, no-fuss meal. While foil is excellent for retaining moisture, leaving the salmon uncovered in the oven can create a slightly crispier texture on top. Therefore, choose your method based on your preference for tenderness or crispiness.

How to Check for Doneness

Knowing how long to bake salmon at 350 is important, but ensuring it’s cooked perfectly is just as crucial. To avoid overcooking, use a digital meat thermometer to check the internal temperature. When it hits 145°F, the salmon is safe to eat and beautifully flaky.

If you don’t have a thermometer, rely on visual and textural cues. The salmon should appear opaque throughout and separate easily into flakes with a fork. Additionally, the edges may have a slightly golden hue, while the center remains moist and vibrant in color. Keeping an eye on these signs ensures your salmon isn’t undercooked or dry.

Tips for Keeping Salmon Juicy While Baking at 350°F

Choosing High-Quality, Fresh Salmon

When baking salmon, freshness is crucial. High-quality salmon not only enhances the flavor but also helps keep it juicy. Look for salmon fillets that are bright in color, firm to the touch, and have no fishy odor. Wild-caught salmon, such as sockeye or coho, is a great choice for its rich flavor. If fresh salmon isn’t available, frozen fillets can be just as delicious just ensure they’re thawed completely before cooking to achieve even results.

Marinating to Lock in Moisture and Flavor

Salmon fillets marinating in olive oil, lemon, garlic, and herbs.
Salmon fillets soaking in a flavorful marinade of olive oil, lemon, and herbs.

A good marinade can take your baked salmon to the next level. A mix of olive oil, lemon juice, garlic, and herbs adds flavor while keeping the fish tender. Coat the fillets and let them sit for at least 30 minutes before baking. Marinades not only enhance taste but also help retain moisture as the salmon cooks. For more inspiration, check out this guide to marinades that pairs well with seafood.

Using the Right Baking Method

The baking method you choose can make all the difference in maintaining moisture. Wrapping the salmon in foil or parchment paper creates a steam pocket, locking in juices as it bakes. On the other hand, baking without a cover results in a slightly crispier texture but requires careful monitoring to avoid drying out. Whichever method you prefer, always preheat the oven to ensure even cooking.

Avoiding Common Mistakes

To keep your salmon juicy, avoid overcooking. Since the answer to how long to bake salmon at 350 depends on the thickness, use a meat thermometer to check the internal temperature. Aim for 145°F at the thickest part. Another mistake to avoid is skipping the resting step—letting the salmon rest for a few minutes before serving allows the juices to redistribute, enhancing its tenderness.

Enhancing the Flavor of Salmon When Baking at 350°F

Using Simple Seasonings to Elevate Taste

Sometimes, simplicity is key when baking salmon. A sprinkle of salt, freshly cracked black pepper, and a drizzle of olive oil can enhance the fish’s natural flavor. If you’re wondering how long to bake salmon at 350 with minimal seasoning, rest assured the time doesn’t change. Just ensure you evenly coat the fillets to lock in moisture and flavor. Add a squeeze of lemon juice before serving for a refreshing finish.

For those who enjoy experimenting, garlic powder, paprika, and dill are excellent additions to bring out the salmon’s rich taste. These pantry staples are both flavorful and budget-friendly, making them ideal for quick, everyday meals.

Experimenting with Marinades and Glazes

To take your baked salmon up a notch, consider marinades or glazes. For example, a honey and soy glaze combines sweetness and umami, creating a caramelized finish as the salmon bakes. The baking time remains the same—how long to bake salmon at 350 depends on the thickness of the fish, not the seasoning method. Brush the glaze onto the fillets about halfway through baking for best results.

Want something zesty? A marinade of lime juice, olive oil, minced garlic, and chili flakes adds a spicy twist to your salmon. Let the fillets soak for 30 minutes before baking to maximize the flavor infusion.

Adding Vegetables and Herbs for a Full Meal

A one-pan salmon dinner with roasted vegetables.
A complete salmon dinner baked with roasted vegetables for a healthy, easy meal.

Pairing salmon with vegetables and herbs on the same baking sheet creates a convenient, one-pan meal. Vegetables like asparagus, zucchini, or cherry tomatoes cook beautifully alongside salmon. However, it’s important to cut the vegetables into smaller pieces so they cook evenly within the same timeframe as the fish. Adding rosemary or thyme sprigs enhances the aroma while complementing the salmon’s taste.

If you’re curious about how long to bake salmon at 350 when paired with veggies, stick to the standard 15-20 minutes for thicker fillets. The vegetables will roast to tender perfection by the time your salmon is done.

Incorporating Global Flavors into Your Baked Salmon

Baking salmon at 350°F doesn’t mean sticking to traditional seasonings. For a Mediterranean flair, season your fillets with oregano, lemon zest, and a drizzle of olive oil. Alternatively, an Asian-inspired soy-ginger marinade can deliver bold flavors with minimal effort.

Curious about unique spice blends? Try using Cajun seasoning for a smoky kick or a mix of cumin and turmeric for an earthy, aromatic profile. The baking time remains consistent, so how long to bake salmon at 350 won’t change even as you explore new culinary horizons.

Pro Tip: For more creative ways to cook with fish, check out our shrimp garlic recipe without butter for a delightful seafood variation.

Avoiding Common Mistakes When Baking Salmon at 350°F

A meat thermometer checking the temperature of baked salmon.
A meat thermometer reading 145°F, ensuring the salmon is perfectly cooked.

Overcooking the Salmon

One of the most common errors when baking salmon is overcooking it. This mistake can turn a moist, flavorful dish into a dry and tough disappointment. To prevent this, always stick to the recommended baking times. If you’re wondering how long to bake salmon at 350, remember that thinner fillets (1 inch or less) need only 12-15 minutes, while thicker cuts require 15-20 minutes.

Using a digital thermometer helps you monitor the internal temperature, which should reach 145°F at the thickest part of the fillet. Checking the salmon a few minutes before the estimated cooking time ensures you don’t accidentally overdo it.

Forgetting to Preheat the Oven

Skipping the preheating step is another mistake that can affect your salmon’s texture. Baking salmon in a cold oven leads to uneven cooking, with some areas potentially overcooked while others remain underdone. Always preheat your oven to 350°F before placing the salmon inside. This ensures consistent heat and reliable results every time.

In addition, using a preheated oven reduces the risk of the salmon drying out since it minimizes the time the fish spends in the oven.

Neglecting to Rest the Salmon After Baking

Resting salmon after it’s baked might seem unnecessary, but it’s a critical step for retaining juices. When salmon is pulled straight out of the oven, the juices are still in motion. Allowing the fish to rest for 3-5 minutes helps redistribute these juices, resulting in a more tender and flavorful bite.

This step is especially important if you’ve seasoned or marinated the salmon, as the resting period helps those flavors settle into the fish.

Using the Wrong Baking Dish

The type of dish you use can also impact how your salmon turns out. Baking salmon on a flat, rimmed baking sheet allows for even air circulation, ensuring uniform cooking. On the other hand, a deep dish can trap steam, which might make the salmon overly soft rather than flaky.

For foil or parchment-wrapped salmon, any baking tray works, but for uncovered fillets, a shallow pan is best to achieve a balance of moisture and slight crispiness. Adjust the cooking time slightly based on the type of dish, but the general guideline of how long to bake salmon at 350 still applies.

By avoiding these common mistakes, you can ensure that your baked salmon turns out perfectly every time. For additional inspiration and foolproof recipes, visit our Grilled Chicken Thigh Recipes Guide. This guide is packed with practical cooking tips you can use across a variety of dishes.

Frequently Asked Questions About Baking Salmon at 350°F

Is It Better to Bake Salmon at 375°F or 400°F?

Both 375°F and 400°F are popular choices for baking salmon, and each has its benefits. Baking at 375°F allows for slightly longer cooking times, usually around 10-12 minutes, which helps prevent overcooking while still achieving a tender texture. On the other hand, 400°F is ideal for those who prefer a crispier finish, as the salmon cooks faster, typically in 8-10 minutes.

However, if you’re looking for consistent results with juicy, evenly cooked fillets, baking at 350°F is a fantastic option. While it takes longer—12-20 minutes depending on the fillet’s thickness—it’s more forgiving and perfect for retaining moisture.

How Long Does It Take to Grill Salmon at 350 Degrees?

Grilling salmon at 350°F is a great way to infuse a smoky flavor while still cooking the fish evenly. On the grill, salmon fillets usually take 8-12 minutes, depending on their thickness. Be sure to flip the fillets halfway through to ensure both sides cook evenly.

Using a meat thermometer is highly recommended, as grilled salmon should reach an internal temperature of 145°F. While grilling is faster than baking, learning how long to bake salmon at 350 is essential if you prefer a more controlled and consistent cooking method.

What Is the Best Temperature and Time to Cook Salmon?

The best temperature and time for cooking salmon depend on your desired outcome. For tender, flaky salmon, baking at 350°F for 12-20 minutes is ideal. If you prefer a crispier texture, 375°F or 400°F can be used, but the baking time will be shorter—8-12 minutes depending on the fillet’s thickness.

Regardless of the temperature, always ensure the salmon’s internal temperature reaches 145°F for safe consumption. This allows for perfectly cooked fish that retains its natural juices and flavors. Mastering how long to bake salmon at 350 gives you a reliable method for consistently delicious results.

Is 15 Minutes Long Enough to Cook Salmon?

Yes, 15 minutes is often enough to cook salmon, especially thinner fillets. At 350°F, fillets less than 1 inch thick typically bake perfectly within 12-15 minutes. Thicker cuts may require closer to 20 minutes to ensure the fish is fully cooked.

To avoid undercooking or overcooking, always check the internal temperature of the salmon. When it reaches 145°F, the salmon is ready to serve. This ensures it’s both safe to eat and deliciously flaky.

Conclusion: Mastering How to Bake Salmon at 350°F

Learning how long to bake salmon at 350 is the key to creating perfectly cooked, juicy salmon every time. From understanding factors like fillet thickness to experimenting with marinades and seasonings, you now have the tools to elevate your salmon dishes. Baking at 350°F provides a balance of tender texture and even cooking, making it an excellent choice for both beginners and seasoned home cooks.

Whether you’re keeping it simple with salt and pepper or exploring bold global flavors, baking salmon is a versatile and foolproof method. Remember to preheat your oven, use a meat thermometer to check for doneness, and let the fish rest for a few minutes after baking to lock in moisture.

Now it’s your turn to put these tips into action! Gather your favorite seasonings, preheat to 350°F, and enjoy the satisfaction of serving perfectly baked salmon. For more inspiration, check out our quick and easy recipes to round out your meal.