How to Make Milk Bar pumpkin pie recipe at Home

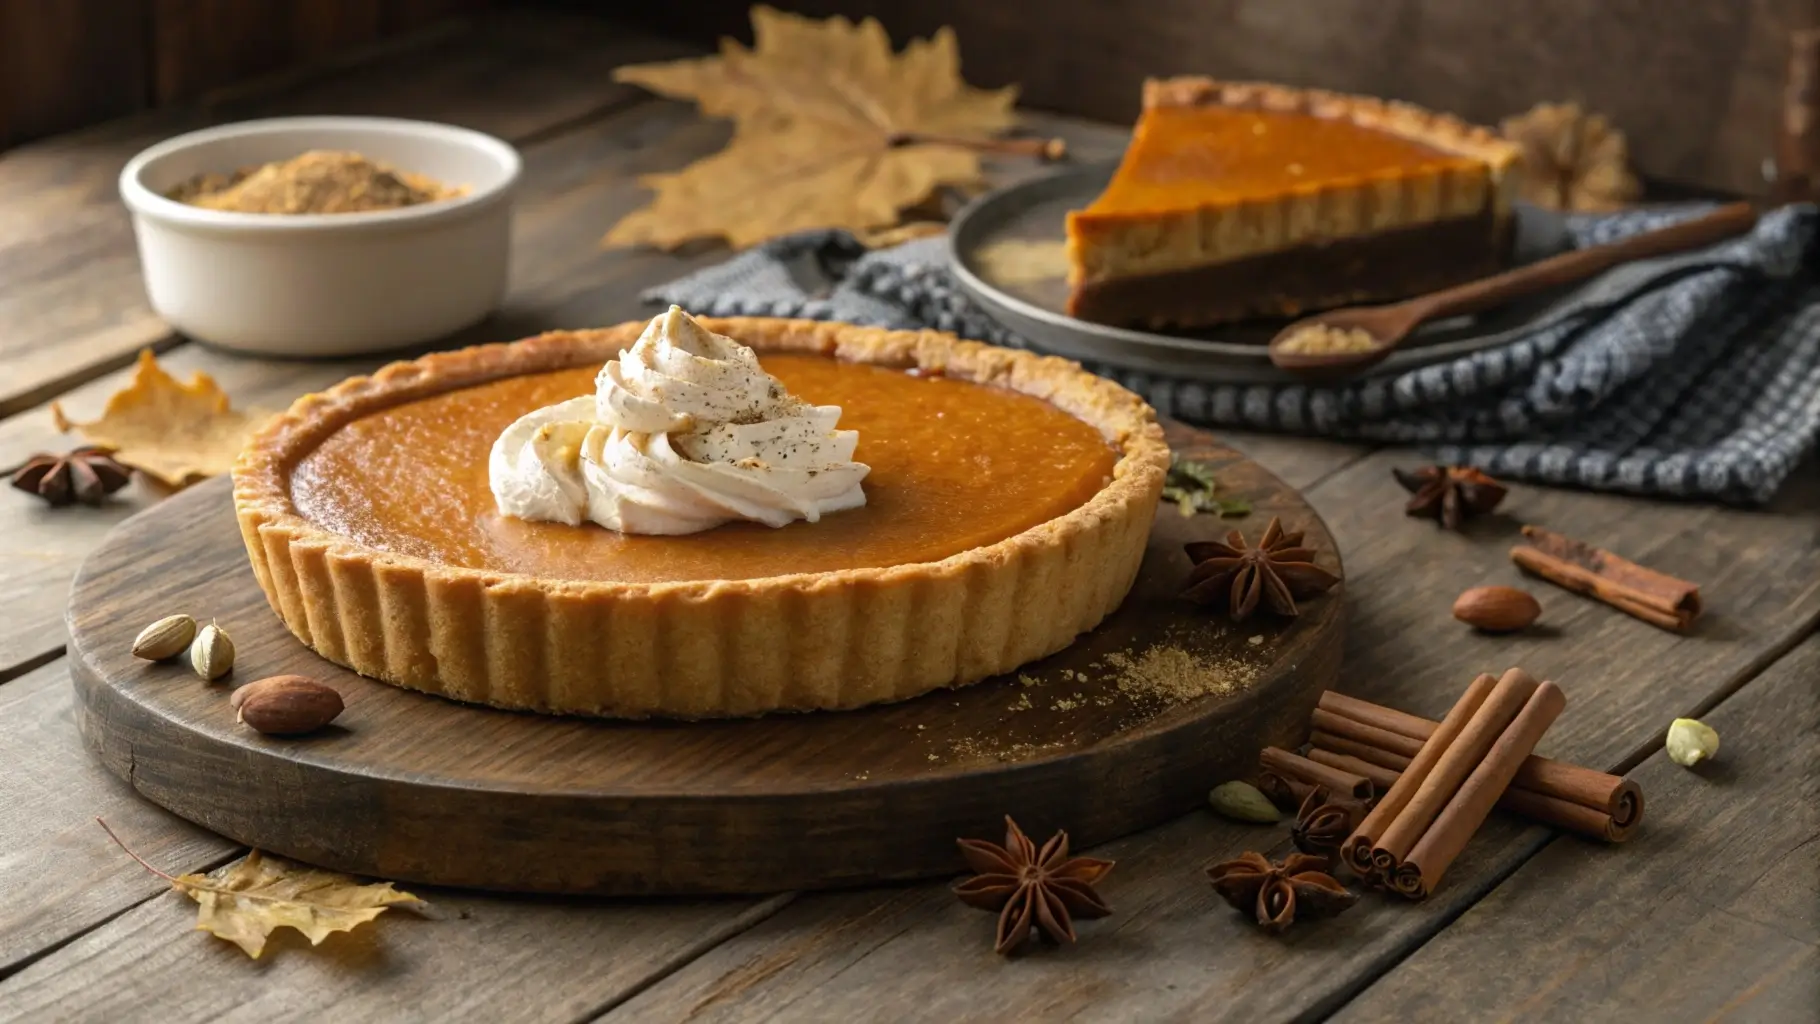
Get ready to fall in love with the Milk Bar pumpkin pie recipe, a dessert that’s as indulgent as it is memorable. With its signature graham cracker crust and perfectly spiced pumpkin filling, this pie has everything you could want in a fall treat. But here’s the kicker it’s ridiculously easy to make!

Whether you’re a seasoned baker or a total beginner, this recipe will guide you step by step, ensuring success every time. Plus, the unique Milk Bar touch transforms a traditional pie into something truly extraordinary. So, grab your apron, and let’s turn your kitchen into a bakery. This is more than just a recipe; it’s your ticket to creating a dessert everyone will rave about. Let’s get started!

The Ingredients You’ll Need for the Milk Bar Pumpkin Pie Recipe

Key Components of the Pumpkin Filling

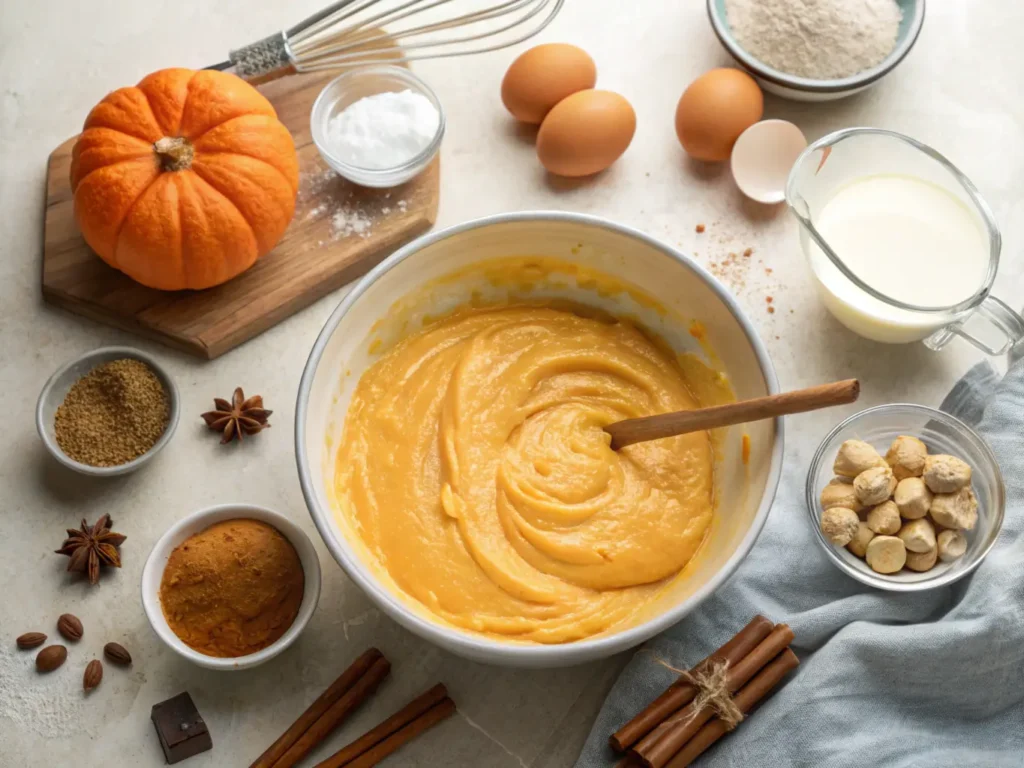
The heart of the Milk Bar pumpkin pie recipe lies in its rich and creamy pumpkin filling. To achieve that signature texture and flavor, you’ll need high-quality pumpkin puree. Whether you opt for canned or homemade, ensure it’s smooth and free of excess moisture this helps create the silky consistency Milk Bar is known for.

You’ll also need sweetened condensed milk, which adds sweetness and a creamy texture, along with eggs to help set the filling. Don’t forget the spices! A blend of cinnamon, nutmeg, ginger, and cloves provides that classic fall warmth. To enhance the depth of flavor, a pinch of salt balances the sweetness and brings out the earthy pumpkin notes.

Crafting the Perfect Graham Cracker Crust

Pressing Graham Cracker Crust into Pie Pan
Preparing the graham cracker crust for the Milk Bar pumpkin pie recipe.

What sets this recipe apart is its crunchy, buttery graham cracker crust. Unlike traditional pie crusts, this one doesn’t require rolling or precise cutting making it ideal for beginners. Start with finely crushed graham crackers, mix them with melted butter and a touch of sugar, and press the mixture into your pie pan.

To prevent the crust from becoming soggy, bake it briefly before adding the filling. This step ensures a crisp base that complements the creamy filling perfectly. For an in-depth guide to creating the best graham cracker crusts, check out this resource on mastering pie crusts.

Optional Toppings for Added Flavor

While the Milk Bar pumpkin pie recipe is exceptional on its own, toppings can elevate its appeal even further. A dollop of freshly whipped cream or a sprinkle of cinnamon adds a touch of elegance. If you’re feeling adventurous, consider a drizzle of salted caramel or a handful of candied pecans for extra texture and flavor.

For those who enjoy a contrast of temperatures, serving a slice with a scoop of vanilla ice cream is a game-changer. These additions not only enhance the visual presentation but also create a delightful balance of flavors and textures.

Ingredient Substitutions for the Milk Bar Pumpkin Pie

The beauty of the Milk Bar pumpkin pie recipe is its versatility. If you need a gluten-free option, substitute the graham crackers with gluten-free alternatives. For a dairy-free version, coconut milk can replace sweetened condensed milk, and plant-based butter works well in the crust.

Want to switch things up? Add a teaspoon of vanilla extract or orange zest to the filling for a unique twist. You can also experiment with spices—try cardamom or allspice to bring a fresh dimension to the classic pumpkin pie flavor. These customizations allow you to tailor the pie to your preferences while keeping the essence of the original recipe intact.

Step-by-Step Instructions

Preparing the Crust Like a Pro

The foundation of the Milk Bar pumpkin pie recipe starts with its unforgettable graham cracker crust. Begin by finely crushing your graham crackers—either by using a food processor for a quick solution or placing them in a sealed bag and crushing them with a rolling pin. Aim for a sandy texture with no large chunks, as this ensures an even crust.

Next, mix the graham cracker crumbs with melted butter and sugar until it resembles wet sand. This combination not only binds the crust but also provides the rich, buttery flavor that complements the filling. Press the mixture firmly into a pie pan, making sure the bottom and sides are evenly covered. To lock in that crispy texture, pre-bake the crust at 350°F (175°C) for about 10 minutes. This step is essential to avoid a soggy bottom when the filling is added later.

Mixing the Pumpkin Filling to Perfect the Milk Bar Recipe

The filling is the star of the Milk Bar pumpkin pie recipe, and getting it just right requires attention to detail. Start by whisking together your pumpkin puree, sweetened condensed milk, eggs, and spices in a large mixing bowl. For best results, use room-temperature ingredients—they blend more smoothly and create a silkier texture.

To elevate the flavor, add a pinch of salt and, optionally, a teaspoon of vanilla extract. For an extra hint of warmth, sprinkle a dash of allspice or cardamom. Mix until the filling is completely smooth, with no visible streaks of egg or spices. If you’d like more tips on achieving the perfect pumpkin pie consistency, check out this guide to pumpkin pie baking.

Baking Techniques for a Perfectly Cooked Pie

Baking the Milk Bar pumpkin pie recipe is where the magic happens, but timing is everything. Pour the prepared filling into the pre-baked crust, spreading it evenly with a spatula. Preheat your oven to 350°F (175°C), then place the pie on the middle rack to ensure even heat distribution.

Bake for about 45-50 minutes, checking the pie frequently toward the end. The filling should be mostly set, with just a slight jiggle in the center. Overbaking can cause cracks, so remove the pie as soon as it reaches this consistency. Let it cool on a wire rack to room temperature before refrigerating. This resting period allows the filling to firm up perfectly while developing its flavors.

Assembling and Finalizing the Milk Bar Pumpkin Pie Recipe

Now it’s time to bring all the components together into the perfect dessert. Once the pie has fully cooled, consider adding your choice of toppings for that final touch. Whipped cream is a classic option, but you can also drizzle caramel sauce or sprinkle a bit of crushed graham crackers on top for extra flair.

When serving, slice the pie using a warm, clean knife for smooth edges—wiping the blade between cuts helps maintain a neat presentation. Whether it’s for a family dinner or a festive holiday table, this pie is sure to impress everyone at the table.

For additional tips on crafting show-stopping desserts, check out The Best Kefir Sheet Cake Recipe.

Expert Tips for Mastering the Milk Bar Pumpkin Pie Recipe

Perfectly baked Milk Bar pumpkin pie with whipped cream
A perfectly baked pumpkin pie with a golden graham cracker crust, topped with whipped cream, surrounded by fall leaves and spices.

Avoiding Common Baking Mistakes

Even the best bakers sometimes encounter challenges, but with a few tips, you can avoid common pitfalls when making the Milk Bar pumpkin pie recipe. One frequent issue is a soggy crust. To prevent this, always pre-bake your graham cracker crust as outlined earlier—it creates a firm base that won’t absorb moisture from the filling.

Another common mistake is overmixing the filling. While it’s essential to combine all ingredients thoroughly, overmixing can introduce air bubbles that disrupt the pie’s smooth texture. Stir gently until just blended. Lastly, watch the oven closely during the last 10 minutes of baking. The filling should jiggle slightly in the center but not look runny. Overbaking can cause cracks, which, while harmless, can detract from the presentation.

Enhancing Flavor with Spices

The unique spice blend is what makes the Milk Bar pumpkin pie recipe so special. While the classic combination of cinnamon, nutmeg, ginger, and cloves works beautifully, don’t be afraid to experiment. For a deeper flavor, try adding cardamom or a hint of black pepper. These spices can elevate the richness of the pumpkin and create a more complex taste.

It’s also a good idea to toast your spices lightly before adding them to the filling. This simple step enhances their aroma and brings out their natural oils. If you’re unsure about measurements, start with small amounts and adjust to your taste.

Achieving a Creamy Texture in the Milk Bar Pumpkin Pie

The creamy consistency of the Milk Bar pumpkin pie recipe is a hallmark of its success. To replicate this at home, ensure your pumpkin puree is smooth and well-drained. Excess liquid can make the filling too runny and affect its ability to set properly.

Moreover, bake the pie at the correct temperature and avoid opening the oven door frequently it causes temperature fluctuations that can impact the texture. If you’re using a convection oven, consider lowering the temperature by 25°F to prevent overcooking. Let the pie cool completely before slicing, as this allows the filling to firm up for a clean cut.

Presenting the Milk Bar Pumpkin Pie for Stunning Results

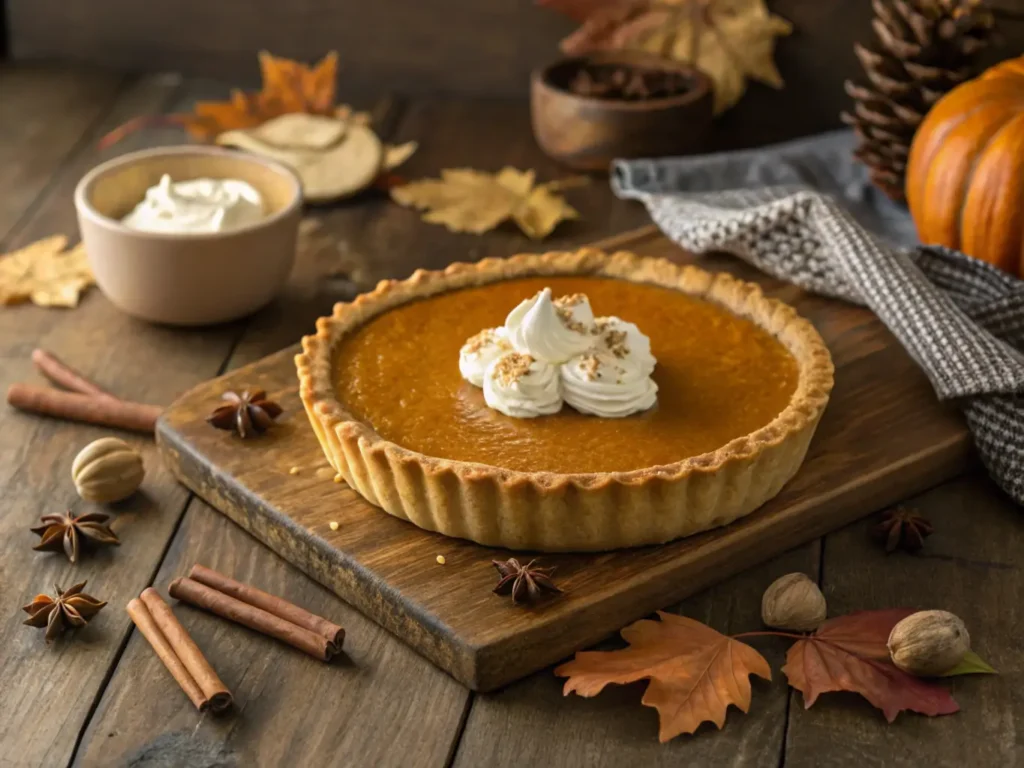
A beautifully presented dessert is always a showstopper, and the Milk Bar pumpkin pie recipe is no exception. For a classic look, garnish with a swirl of whipped cream and a sprinkle of ground cinnamon. If you want something more striking, consider adding caramel drizzle or a few candied pecans for texture.

Serving on a rustic wooden board or a decorative pie plate can elevate the presentation further. To make individual servings stand out, cut neat slices and plate them with a dollop of whipped cream or a scoop of vanilla ice cream. This creates a polished look that’s perfect for dinner parties or holiday celebrations.

Variations on the Classic Recipe

Gluten-Free Milk Bar Pumpkin Pie

For those avoiding gluten, the Milk Bar pumpkin pie recipe can easily be adapted to meet your needs without sacrificing flavor. Start by substituting the graham cracker crust with a gluten-free version. Many grocery stores carry gluten-free graham crackers, or you can use almond flour as a base for a nutty twist.

To keep the filling gluten-free, ensure that all spices and canned pumpkin puree are labeled gluten-free, as cross-contamination can sometimes occur. The steps remain the same, making this a straightforward variation that’s perfect for anyone with dietary restrictions. You’ll still enjoy the same creamy filling and spiced warmth in every bite.

Vegan Milk Bar Pumpkin Pie Recipe

The Milk Bar pumpkin pie recipe is surprisingly adaptable for vegan bakers! Replace the sweetened condensed milk with coconut cream and a touch of maple syrup for sweetness. Instead of eggs, you can use flaxseed meal mixed with water or a commercial egg replacer to help set the filling.

For the crust, swap butter for a plant-based alternative that mimics its richness. This vegan-friendly version retains the decadent flavors while accommodating a plant-based diet. With these changes, you’ll have a pie that’s every bit as indulgent and crowd-pleasing as the original.

Adding a Nutty Twist

If you’re looking to enhance the Milk Bar pumpkin pie recipe with a nutty flavor, consider incorporating crushed pecans or walnuts into the crust. Mix them with the graham cracker crumbs for added texture and a deeper taste profile. You can also sprinkle toasted nuts on top of the pie for a crunchy garnish.

Another option is to add a swirl of almond butter or peanut butter into the filling before baking. This unexpected twist pairs beautifully with the spiced pumpkin and creates a unique flavor that’s sure to impress your guests.

Incorporating Seasonal Flavors

The Milk Bar pumpkin pie recipe can be customized to highlight other seasonal flavors, making it versatile for year-round enjoyment. For a winter-inspired version, add a hint of orange zest and a splash of orange juice to the filling. This brightens the flavor and complements the warm spices.

In spring or summer, consider a coconut-pumpkin variation by adding coconut flakes to the crust and a touch of coconut extract to the filling. These seasonal tweaks allow you to enjoy this iconic dessert with a fresh twist, no matter the time of year.

Looking for more dessert ideas to suit various dietary needs? Check out How To Make Perfect Madeline Cookies Using Cream for inspiration that pairs perfectly with your Milk Bar pumpkin pie recipe.

Pairing Milk Bar Pumpkin Pie with Other Desserts

Drinks That Complement Pumpkin Pie

The Milk Bar pumpkin pie recipe is a showstopper on its own, but pairing it with the right drink can elevate your dessert experience. For a cozy fall vibe, serve it alongside a warm spiced chai latte or a classic pumpkin spice coffee. The spicy notes in these drinks complement the pie’s cinnamon and nutmeg flavors perfectly.

For something cooler, a chilled glass of apple cider or a pumpkin ale adds a refreshing contrast to the rich filling. If you’re hosting a dinner party, a lightly sweet dessert wine, such as Moscato or a late-harvest Riesling, creates a sophisticated pairing. These options enhance the pie’s flavors while adding variety to your dessert spread.

Sides to Serve Alongside Your Pie

If you’re planning a dessert buffet, consider pairing the Milk Bar pumpkin pie recipe with other fall-themed treats for a cohesive menu. A crisp apple crumble or a batch of chewy ginger cookies offers complementary flavors and textures.

For lighter options, roasted spiced nuts or a seasonal fruit salad can balance the richness of the pie. These additions make your dessert table more dynamic and give guests a variety of choices to satisfy their sweet cravings.

Combining with Ice Cream or Whipped Cream

Nothing enhances the Milk Bar pumpkin pie recipe like a scoop of creamy vanilla ice cream or a generous dollop of freshly whipped cream. The coolness of the ice cream provides a delightful contrast to the warm spices, while the whipped cream adds a light and airy texture.

For a creative twist, try pairing the pie with caramel or cinnamon ice cream to echo its autumn flavors. You can also add a sprinkle of nutmeg or cinnamon on top of the whipped cream for an extra touch of elegance.

Savory Pairings for the Milk Bar Pumpkin Pie Recipe

For those who prefer a balance of sweet and savory, consider serving the Milk Bar pumpkin pie recipe with a side of sharp cheddar cheese or a slice of smoky bacon. The savory elements create a striking contrast with the pie’s sweetness, making for a unique and memorable flavor combination.

Additionally, a sprinkle of flaky sea salt on top of the pie or a small serving of salted caramel sauce can enhance its complexity. These savory accents surprise and delight guests, turning a traditional dessert into a culinary adventure.

FAQ Section

Should I use regular or quick oats?

For the Milk Bar pumpkin pie recipe, regular oats are generally preferred because they retain more texture and provide a slightly chewy bite that complements the creamy filling. However, if you only have quick oats on hand, they can be used in a pinch. Quick oats will blend more easily, creating a finer consistency, but they might lack the hearty texture of regular oats. Whichever you choose, ensure the oats are fresh to achieve the best flavor.

This is my first time making caramel. What should I know?

Making caramel for the first time can seem daunting, but with a few tips, you’ll have it mastered. First, use a heavy-bottomed saucepan to ensure even heat distribution. Combine sugar and a small amount of water over medium heat, stirring gently until the sugar dissolves. Once it begins to bubble, stop stirring and let the mixture cook until it turns a golden amber color.

Keep a close eye on the caramel, as it can burn quickly. When it reaches the desired color, remove it from heat and carefully add cream or butter, whisking continuously to prevent splattering. Caramel adds a luscious touch to the Milk Bar pumpkin pie recipe, so it’s worth the effort to perfect this technique.

Can I make pumpkin puree at home?

Absolutely! Homemade pumpkin puree can elevate the Milk Bar pumpkin pie recipe with its fresh and natural flavor. To make it, start by selecting a small, sweet pumpkin like a sugar or pie pumpkin. Cut it in half, remove the seeds, and place the halves cut-side down on a baking sheet.

Bake at 375°F (190°C) for about 45-50 minutes, or until the flesh is tender. Scoop out the cooked pumpkin and blend it in a food processor until smooth. While canned pumpkin is convenient, homemade puree has a richer taste and can be frozen for later use.

Do I have to roast the pumpkin puree?

Roasting the pumpkin puree is not mandatory, but it significantly enhances the flavor. Roasting caramelizes the natural sugars in the pumpkin, creating a deeper, sweeter taste that pairs beautifully with the spices in the Milk Bar pumpkin pie recipe.

If you’re short on time, you can skip roasting and use canned pumpkin puree instead. Just make sure to choose a brand with no added sugars or flavors to keep the recipe authentic. If using homemade puree, roasting is worth the extra step for that extra layer of flavor.

Conclusion

The Milk Bar pumpkin pie recipe is a delightful fusion of creamy pumpkin filling, warm spices, and a buttery graham cracker crust that’s perfect for any occasion. Throughout this article, you’ve learned how to create this iconic dessert step by step, including tips for mastering the crust, perfecting the filling, and adding creative variations.

From pairing it with seasonal drinks and desserts to customizing the recipe for dietary needs, this pie offers endless possibilities to suit your taste and style. Whether you’re a seasoned baker or trying your hand at pie-making for the first time, this recipe is both approachable and rewarding.

Now it’s your turn to bring the Milk Bar pumpkin pie recipe to life in your kitchen. Gather your ingredients, follow the steps, and enjoy the satisfaction of baking a dessert that’s as delicious as it is memorable. Happy baking and don’t forget to savor every bite!

How To Make Perfect madeline cookies recipe using cream

Some desserts are a feast for the eyes, while others delight the taste buds but Madeleine cookies? They do both! This madeline cookies recipe using cream takes the elegance of this classic French pastry to new heights. The addition of cream adds a velvety richness and ensures the cookies stay moist and tender, while their golden hue and delicate hump make them a showstopper on any table.

Whether you’re preparing treats for a celebration or craving something special, these Madeleines deliver both flavor and charm. Plus, they’re surprisingly easy to make! With just a few simple ingredients and some pro tips, you’ll whip up a batch of these heavenly cookies in no time. So, grab your whisk and preheat your oven let’s transform your baking routine with these irresistible cream-infused Madeleines.

Essential Ingredients for a Madeline Cookies Recipe Using Cream

When preparing the perfect madeline cookies recipe using cream, starting with the right ingredients is essential. Each component plays a specific role in creating the soft, buttery texture and golden hue that makes Madeleines so iconic. Below, we’ll explore the key ingredients, optional flavor enhancers, the best type of cream to use, and the tools you’ll need for baking success.

The Key Ingredients for a Madeline Cookies Recipe Using Cream

To make these creamy Madeleines, you’ll need a handful of simple ingredients that come together harmoniously:

  1. All-purpose flour: This provides the structure of the cookies, ensuring they hold their shape while remaining soft.
  2. Sugar: Granulated sugar gives the cookies their subtle sweetness and helps achieve a lightly crisp crust.
  3. Eggs: Room-temperature eggs are crucial for a light, fluffy batter. They create the signature airy texture.
  4. Butter: Melted and slightly cooled butter adds richness, balancing the delicate flavors.
  5. Cream: The star ingredient! Adding cream makes the Madeleines moist and adds a velvety finish that sets this recipe apart.

Pro tip: Always use fresh, high-quality ingredients for the best flavor. While substitutions can work, sticking to these basics ensures an authentic result.

Optional Add-Ins for Your Madeline Cookies Recipe Using Cream

One of the joys of baking madeline cookies is the ability to personalize them. While the traditional recipe is divine, a few extra touches can make your cookies truly memorable:

  • Lemon zest or orange zest: Add a burst of citrus freshness.
  • Vanilla extract: A classic addition for a warm, comforting aroma.
  • Almond extract: Perfect for a subtle nutty undertone.
  • Chocolate chips: For a modern twist that pairs beautifully with the cream.

Experiment with these variations based on your mood or the occasion. For example, a pinch of cinnamon can transform your Madeleines into a cozy winter treat!

Selecting the Right Type of Cream

The cream you choose will directly impact the richness and texture of your madeline cookies recipe using cream. But which type is best? Here’s what you need to know:

  • Heavy cream: This is the most common choice and adds a luxurious depth of flavor.
  • Whipping cream: A slightly lighter option that still delivers creaminess.
  • Half-and-half: While not as rich, it works in a pinch and reduces fat content slightly.

Non-dairy creamers often lack the fat needed for the perfect texture, which is crucial for a successful madeline cookies recipe using cream. For more tips on selecting the best cream for baking, check out this guide on heavy and whipping creams.

Tools You’ll Need for a Madeline Cookies Recipe Using Cream

To create those iconic shell-shaped cookies, having the right tools on hand is key. While many items are already in your kitchen, a few specialty tools will make the process smoother:

  1. Madeleine tray: Essential for achieving the classic scalloped shape. Look for non-stick trays for easy release.
  2. Mixing bowl: A large bowl to combine ingredients without spillage.
  3. Whisk or hand mixer: Ensures a smooth, lump-free batter.
  4. Spatula: Ideal for folding the batter gently, which is critical for preserving its lightness.
  5. Piping bag (optional): Helps fill the molds neatly without mess.

If you don’t have a Madeleine tray, don’t worry! Mini muffin tins are a great alternative, though the shape will differ slightly. Focus on the flavor, and your cookies will still impress.

Preparing the Batter Like a Pro

Ingredients for baking lemon madeleines, including lemons, flour, eggs, and butter, displayed on a marble countertop.
The perfect combination of fresh ingredients for the best lemon madeleines.

Creating the batter is where the magic begins in your madeline cookies recipe using cream. This stage is crucial to achieving the light, airy texture that makes Madeleines so irresistible. Below, you’ll find everything you need to know about mixing, resting, and troubleshooting the batter, ensuring your cookies turn out perfect every time.

Mixing Ingredients for a Flawless Batter

To start, gather your ingredients and a large mixing bowl. Begin by whisking the eggs and sugar until the mixture becomes pale and fluffy—this step incorporates air, which is key for the light texture of Madeleine cookies. Gradually sift in the flour, folding gently to maintain the airiness.

Next, add the melted butter and cream. The cream is what gives this recipe its signature moistness, making the cookies rich and tender. Be cautious not to overmix, as this can deflate the batter and lead to dense cookies.

Pro tip: Use a spatula for folding instead of a whisk, as it helps combine the ingredients without knocking out the air.

Why Resting Batter is Crucial for a Madeline Cookies Recipe Using Cream

Resting the batter is a step many skip, but it’s vital for creating the iconic hump that Madeleines are known for. Once mixed, cover the bowl with plastic wrap and let it rest in the fridge for at least 30 minutes, though an hour is ideal.

During this time, the gluten in the flour relaxes, resulting in a softer texture. Additionally, the chilled batter hits the hot oven, creating the steam that forms the signature bump.

Common Mistakes to Avoid When Mixing

Even experienced bakers can encounter hiccups. To ensure your madeline cookies recipe using cream is a success, avoid these common mistakes:

  1. Overmixing the batter: This can cause the cookies to lose their light, spongy texture.
  2. Skipping the resting step: Without chilling, your Madeleines may lack their signature hump.
  3. Using cold butter or eggs: Room-temperature ingredients blend more easily and evenly.

By addressing these pitfalls, you’re already on your way to better baking!

Adapting the Recipe for Dietary Needs

While this madeline cookies recipe using cream is a classic, it’s easy to tweak for dietary preferences:

  • Gluten-free Madeleines: Substitute all-purpose flour with a 1:1 gluten-free baking mix.
  • Dairy-free option: Swap butter and cream with plant-based alternatives like coconut cream and vegan butter.
  • Low-sugar variation: Use a sugar substitute suitable for baking, such as erythritol.

These adjustments ensure everyone can enjoy these delightful cookies without compromising on flavor.

With the batter mixed and rested, you’re ready for the next step: baking these golden beauties to perfection. Stay tuned as we cover how to prepare your trays and achieve that perfect golden hue in the following section!

Baking the Perfect Madeline Cookies Recipe Using Cream

Now that your batter is prepared and rested, it’s time to bake these golden, buttery treats. This step is crucial to achieving the delicate texture and iconic hump of your madeline cookies recipe using cream. Follow these simple yet effective tips to bake Madeleines that are not only beautiful but also irresistibly delicious.

Preparing the Tray and Preheating the Oven

Before you begin, ensure your Madeleine tray is ready. Grease each mold generously with butter, and dust with a light coating of flour. This step prevents the cookies from sticking and helps achieve the golden crust they’re famous for.

While prepping the tray, preheat your oven to 375°F (190°C). A consistent, hot oven is critical for forming the signature hump on your Madeleines. Avoid opening the oven door too often during baking, as this can cause a drop in temperature, affecting the rise.

Pro Tip: For an even easier release, use a non-stick Madeleine tray. If you don’t have one, a mini muffin tin works well as an alternative.

Achieving the Signature Hump

The iconic hump is the hallmark of a well-baked Madeleine, and achieving it requires precision. Chilled batter hitting a hot oven creates steam, which gives the cookies their characteristic rise. Therefore, ensure your batter is still cold when spooning it into the molds.

Fill each mold about three-quarters full to allow room for the cookies to expand. If you’re unsure how much batter to use, try a piping bag for consistent portions. The high heat at the start of baking ensures the center rises quickly, creating the distinctive bump.

On the other hand, overfilling molds or using warm batter can result in flat cookies. Always aim for balance in your preparation.

Baking Times and Visual Cues

Bake the Madeleines for 10–12 minutes, keeping a close eye on them. The edges should turn a light golden brown while the center remains soft and slightly springy to the touch.

To test doneness, insert a toothpick into the center of one cookie. If it comes out clean, your Madeleines are ready! However, be cautious not to overbake, as this can dry them out and diminish their delicate flavor.

If you’re unsure, remove the tray slightly early, as the residual heat will continue to cook the cookies for a few moments.

Cooling and Removing Without Damage

Once baked, allow the Madeleines to cool in the tray for about 5 minutes. Trying to remove them too early can cause them to break, while leaving them too long may make them stick.

To release the cookies, gently tap the tray on a flat surface, or use a small offset spatula to ease them out. Transfer the Madeleines to a wire rack to cool completely. Cooling properly is important for maintaining their light, spongy texture.

For more dessert inspiration, check out our guide to Strawberry Cheesecake Cookies a delightful complement to your Madeleine baking adventure!

Decorating, Storing, and Serving Your Madeleines

A close-up of golden brown lemon madeleines with perfectly caramelized edges.
A closer look at the caramelized edges and rich texture of these lemon madeleines.

Once your madeline cookies recipe using cream is baked to perfection, it’s time to elevate these delightful treats even further. From adding elegant decorations to storing them properly, this section covers all the essentials to ensure your Madeleines remain fresh and visually stunning.

Decorating Ideas for Extra Elegance

Decorating Madeleines is a wonderful way to personalize these already stunning cookies. A simple dusting of powdered sugar is the classic choice, but there’s so much more you can do to make them shine:

  • Chocolate drizzle: Melt dark or white chocolate, and use a spoon to drizzle elegant patterns over your cookies. For added texture, sprinkle crushed nuts or edible glitter on top.
  • Cream glaze: Whisk together powdered sugar and heavy cream until smooth. Dip one end of each Madeleine into the glaze, letting the excess drip off for a polished look.
  • Citrus zest topping: Grate fresh lemon or orange zest over the cookies for a burst of bright flavor that pairs perfectly with the creamy base.

Pro Tip: If you’re hosting a party, consider using food coloring in your glaze to match the theme. Decorated Madeleines also make thoughtful edible gifts!

Best Ways to Serve a Madeline Cookies Recipe Using Cream

Madeline cookies are incredibly versatile and can be served in a variety of ways. Traditionally, they’re enjoyed with a cup of tea or coffee, making them a lovely addition to an afternoon gathering. However, you can also get creative with these ideas:

  • Pair them with dessert wine or champagne for a sophisticated finish to a dinner party.
  • Serve alongside fresh berries and whipped cream for a light, refreshing dessert.
  • Use them as an accompaniment to ice cream or custard for a rich, indulgent treat.

Whether you’re enjoying them solo or pairing them with other desserts, these Madeleines are sure to delight!

Storing Your Madeline Cookies Recipe Using Cream Properly

Proper storage is essential to maintaining the soft, buttery texture of your madeline cookies recipe using cream. After the cookies have completely cooled, store them in an airtight container to prevent them from drying out.

Here are some tips for keeping them fresh:

  • At room temperature: Stored correctly, Madeleines stay fresh for up to 3 days.
  • In the refrigerator: If you’ve used a glaze, refrigerate them in a sealed container for up to a week.
  • Freezing: For longer storage, wrap the cookies individually in plastic wrap and place them in a freezer bag. They can be frozen for up to 2 months and thaw beautifully at room temperature.

However, avoid stacking the cookies without parchment paper in between, as this can ruin their delicate texture.

Creative Ideas for Leftover Madeleines

Although Madeleines are delicious on their own, leftovers can easily be transformed into exciting new desserts:

  1. Trifles: Layer broken Madeleines with custard, whipped cream, and fresh fruit for an elegant trifle.
  2. Tiramisu twist: Substitute Madeleines for ladyfingers in a classic tiramisu recipe for a unique twist.
  3. Crumbs for toppings: Crush leftover cookies into fine crumbs to use as a topping for yogurt, parfaits, or even cheesecake.
  4. French toast Madeleines: Dip them in a mixture of egg and milk, then fry them lightly for a decadent breakfast treat.

If you’re looking for other creative dessert recipes, check out How To Create Cottage Cheese Snacks That Everyone Will Love

Tips and Tricks for Madeleine Success

Mastering the madeline cookies recipe using cream involves more than just following the steps it’s about understanding the nuances that make these cookies so special. In this section, we’ll dive into essential tips, troubleshooting advice, advanced techniques, and creative ways to experiment with flavors, ensuring your Madeleines are always a hit.

Troubleshooting Common Issues

Even with careful preparation, small hiccups can occur. Here are some common problems and how to fix them:

  • Flat cookies: This often happens if the batter wasn’t rested or if the oven temperature was too low. Always ensure your batter is chilled and your oven is preheated to the correct temperature.
  • Sticky Madeleines: If your cookies stick to the tray, it’s likely due to insufficient greasing or flouring. Next time, grease the molds generously and dust with a thin layer of flour.
  • Dry texture: Overbaking can dry out your cookies. Remove them from the oven as soon as the edges turn golden and the centers spring back when touched.

By addressing these common challenges, you’ll achieve perfectly fluffy and moist cookies every time.

Secrets to a Bakery-Style Madeline Cookies Recipe Using Cream

For Madeleines that look like they came straight from a French patisserie, keep these tips in mind:

  1. Chill the batter: Resting the batter not only enhances the flavor but also ensures the hump rises beautifully.
  2. Use quality molds: Non-stick Madeleine trays help create clean, defined edges.
  3. Precision in portions: Use a piping bag to fill each mold evenly, which helps with uniform baking.

Additionally, using fresh, high-quality ingredients—especially butter and cream—adds a richness that elevates your madeline cookies recipe using cream. These little details make a big difference!

How to Experiment with New Flavors

While the classic recipe is beloved, experimenting with flavors can add a unique twist to your Madeleines:

  • Herbal notes: Add a hint of lavender or rosemary for a sophisticated taste.
  • Spices: Cinnamon or nutmeg can bring a warm, cozy feel to your cookies.
  • Citrus infusions: Incorporate lemon or orange zest into the batter for a zesty kick.
  • Savory variations: For something truly unique, try a savory version with a touch of parmesan and herbs.

Don’t hesitate to get creative your personal flair can make these cookies even more memorable.

Incorporating Madeleines into Festive Occasions

Madeleines aren’t just cookies; they’re an experience, making them perfect for special events. Here are some ideas for using them during holidays and celebrations:

  • Holiday-themed Madeleines: Add festive sprinkles or a glaze in seasonal colors for a Christmas or Easter treat.
  • Wedding favors: Package a few Madeleines in decorative bags tied with ribbons as elegant party favors.
  • Afternoon tea spreads: Arrange Madeleines alongside scones, finger sandwiches, and tea for a delightful gathering.

These versatile cookies can easily adapt to any occasion, adding a touch of elegance and warmth.

Frequently Asked Questions About Madeline Cookies Using Cream

How to keep Madeleine moist?

Keeping your Madeleine cookies moist is all about proper storage and baking techniques. To start, avoid overbaking them; remove the cookies from the oven as soon as the edges turn golden and the centers spring back when touched. After cooling completely, store your Madeleine cookies using cream in an airtight container to prevent them from drying out. If you’ve added a glaze, refrigerate them to maintain freshness while preserving the delicate texture. For longer storage, you can freeze them individually wrapped in plastic wrap. When thawed at room temperature, they’ll still taste as soft and fresh as the day they were baked.

What can I use instead of a Madeleine tray?

While a Madeleine tray is ideal for achieving the classic scalloped shape, you can use a mini muffin tin as an alternative. The texture and flavor of your madeline cookies recipe using cream will remain the same, though the shape will differ. To mimic the traditional look as closely as possible, fill each muffin cup only halfway, and don’t forget to grease and flour the molds for easy release. If presentation matters for a special occasion, consider investing in an authentic Madeleine tray for future bakes.

Why are Madeleine cookies so good?

Madeleines are beloved for their soft, airy texture and buttery flavor. The addition of cream in this madeline cookies recipe using cream takes these classic cookies to the next level by adding richness and keeping them moist. Their delicate crust provides a satisfying contrast to the fluffy interior, making them a treat for both the eyes and the palate. Whether paired with tea, coffee, or enjoyed on their own, Madeleines offer a unique combination of simplicity and sophistication that few desserts can match.

Why does my Madeleine not have a bump?

The iconic hump on a Madeleine forms due to a temperature contrast between cold batter and a hot oven. If your Madeleines lack a bump, it’s likely due to skipping the resting step or not preheating the oven properly. Always chill your batter for at least 30 minutes, as this allows the gluten to relax and the butter to firm up, setting the stage for a proper rise. Additionally, ensure your oven is fully preheated to the recommended temperature before baking. If the hump still doesn’t appear, double-check the recipe measurements and try using a higher initial baking temperature for the first few minutes.

Conclusion

Congratulations! you’ve mastered the art of baking Madeline cookies using cream! From gathering quality ingredients and preparing the batter to achieving the perfect golden crust, every step contributes to creating these elegant French treats. Whether you’ve added a personal touch with creative decorations or stuck to the traditional powdered sugar finish, your Madeleines are sure to impress.

Remember, proper techniques like chilling the batter, greasing the molds, and preheating the oven are key to success. Additionally, with thoughtful storage and serving ideas, you can extend the joy of these cookies well beyond baking day. And don’t forget Madeleines are wonderfully versatile, making them a delightful addition to any occasion, from casual teas to festive celebrations.

So, grab your tray (or mini muffin tin) and whip up a batch of these buttery delights. With this madeline cookies recipe using cream, you’re all set to create a dessert that’s as beautiful as it is delicious.