How to Make the Perfect Matjesbrötchen Recipe at Home

Ever heard of matjesbrötchen? It’s the iconic German fish sandwich that’s as comforting as it is delicious. This matjesbrötchen recipe combines the melt-in-your-mouth tenderness of pickled matjes herring with the zesty crunch of fresh onions and pickles—all wrapped in a warm, crusty brötchen. The result? A taste explosion that’s equal parts fresh and savory! Whether you’re a seafood lover or just curious about Northern German cuisine, this recipe is an absolute must-try. And guess what? It’s easier than you think to whip up this restaurant-quality sandwich at home. Ready to impress your family, friends, or just treat yourself to something special? Let’s dive in and make your kitchen the tastiest spot in town.

What Is a matjesbrötchen recipe?

The History and Origin of Matjesbrötchen recipe

The matjesbrötchen recipe has deep roots in Northern Germany, where it’s been a beloved street food for decades. Originating in bustling harbor towns like Hamburg and Bremen, this sandwich was a quick, satisfying meal for fishermen and sailors. Over time, its popularity spread, becoming a staple at markets, festivals, and roadside eateries across the region. What sets the matjesbrötchen apart is its simplicity—made with just a few high-quality ingredients that highlight the natural flavor of the fish. This culinary tradition is more than just a sandwich; it’s a celebration of regional culture and the sea’s bounty.

What Makes Matjes Herring Special?

The star of any matjesbrötchen recipe is, of course, the matjes herring. But what makes it so unique? Unlike regular salted herring, matjes is young, lightly salted, and pickled, creating a buttery texture and delicate flavor. The fish is typically cured with a mix of salt, sugar, and spices, which helps preserve its natural oils while enhancing its mild taste. This process not only makes matjes tender but also easier to digest compared to other types of preserved fish. If you’re new to matjes, its subtle, savory flavor is sure to surprise and delight.

Traditional Ingredients of a Matjesbrötchen recipe

At its core, a matjesbrötchen recipe uses just a handful of ingredients, but each plays an essential role. The foundation is a crusty yet soft brötchen a German bread roll, which serves as the perfect vessel for the fillings. Next comes the matjes herring, complemented by thinly sliced onions, tangy pickles, and sometimes a dollop of creamy dill sauce. These toppings strike the perfect balance of salty, sweet, and tangy flavors. Optional extras like fresh herbs or a squeeze of lemon juice can elevate the dish even further, making it both refreshing and satisfying.

Why Matjesbrötchen Is a Must-Try

Why should you try a matjesbrötchen recipe? Because it’s a one-of-a-kind combination of flavors and textures that’s hard to resist. The soft roll contrasts beautifully with the tender fish, while the onions and pickles add crunch and a zingy finish. It’s the kind of dish that feels indulgent yet light, making it perfect for any occasion—whether as a hearty lunch or a quick snack on the go. Plus, it’s steeped in history and tradition, offering a taste of Northern Germany right in your own kitchen.

How to Make the Perfect Matjesbrötchen Recipe
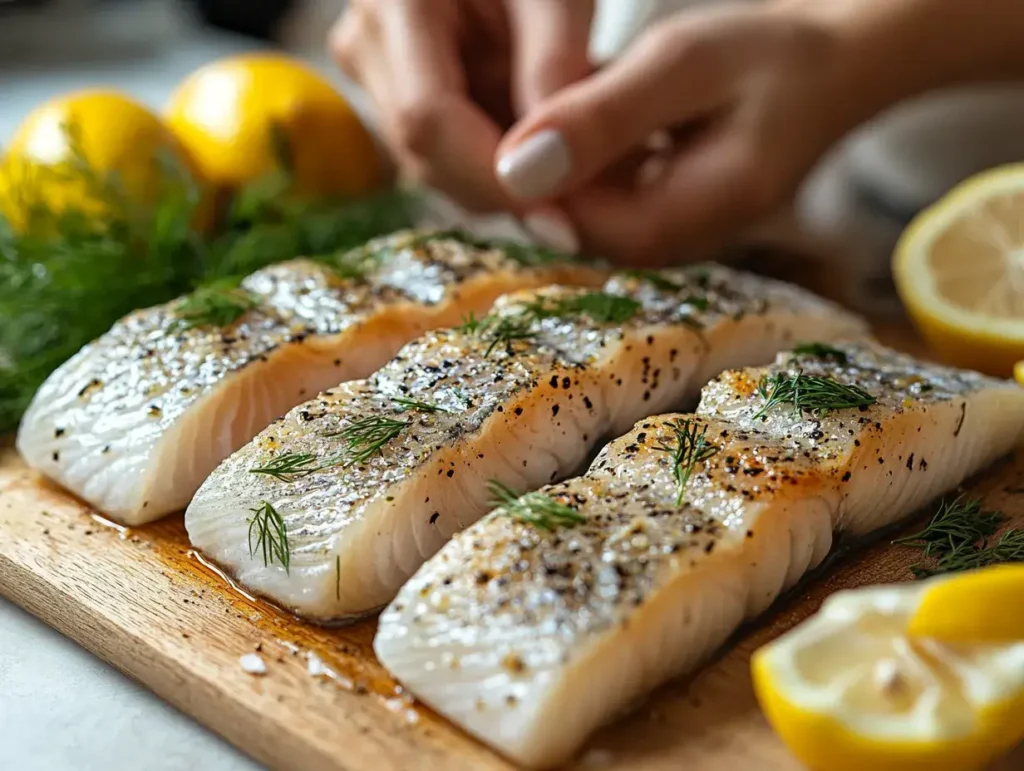
Fresh matjes herring fillets with dill, lemon slices, and seasoning on a wooden board
Fresh matjes herring fillets seasoned with herbs and lemon, ready for creating the perfect Matjesbrötchen

Ingredients You’ll Need

To craft the ultimate matjesbrötchen recipe, you’ll need a short list of fresh and flavorful ingredients. Start with high-quality matjes herring, the star of this dish, known for its buttery texture and mild, savory flavor. You’ll also need soft yet crusty brötchen (bread rolls), thinly sliced onions, tangy pickles, and optional garnishes like fresh dill or creamy dill sauce. Don’t forget a touch of lemon juice for a hint of brightness! These simple ingredients, when combined, create a sandwich that’s both satisfying and elegant.

Step-by-Step Instructions

Making a matjesbrötchen recipe is straightforward and quick, perfect for any level of cook. Begin by slicing your brötchen horizontally and lightly toasting it for a bit of crunch. Next, layer a generous portion of matjes herring on the bottom half. Add thinly sliced onions and pickles for texture and flavor. If you like, spread a dollop of dill sauce on the top half of the roll. Finally, close your sandwich, press lightly, and enjoy this delicious German classic.

Common Mistakes to Avoid

Even though the matjesbrötchen recipe is simple, a few common pitfalls can affect the final result. Avoid using stale bread, as it won’t provide the right balance of texture. Similarly, overloading the sandwich with too many toppings can overwhelm the delicate flavor of the matjes herring. When assembling, be sure to drain excess brine from the herring to prevent the bread from becoming soggy. These small adjustments make all the difference!

Tips for Making It Faster

Short on time? Try pre-slicing your onions and pickles and storing them in the fridge for quick assembly. You can also prepare a batch of dill sauce in advance, ensuring it’s ready whenever you need it. Opt for pre-sliced matjes herring from a trusted source, as it saves you the step of filleting. By prepping these elements ahead of time, you can enjoy a freshly made matjesbrötchen recipe in minutes.

Toppings and Variations for Matjesbrötchen recipe

Classic Toppings

A great matjesbrötchen recipe often features classic toppings that perfectly complement the delicate flavor of the matjes herring. Traditional choices include thinly sliced onions for their crisp bite, tangy pickles to balance the richness, and a sprinkle of fresh dill for a herbal note. Adding a drizzle of creamy dill sauce can elevate the sandwich’s flavor profile while keeping it authentic. These toppings are simple yet essential, as they create the perfect balance of texture and taste.

Creative Variations

If you’re feeling adventurous, there are countless ways to put a twist on the traditional matjesbrötchen recipe. Swap out the pickles for capers to add a briny punch, or try a spicy aioli instead of dill sauce for a modern kick. Adding sliced radishes or a handful of arugula can introduce a refreshing crunch and peppery flavor. For those who enjoy experimenting, pairing the sandwich with specialty bread, like sourdough or ciabatta, creates a unique spin while still honoring the dish’s origins.

Vegan and Vegetarian Alternatives

It’s possible to enjoy the essence of a matjesbrötchen recipe even if you follow a plant-based diet. Several vegan alternatives to matjes herring are available, often made from marinated eggplant or hearts of palm to mimic the texture and flavor of the fish. Pair these with the traditional toppings, such as onions, pickles, and dill, and you’ll have a satisfying sandwich. Vegan mayonnaise or plant-based yogurt can also serve as the base for a creamy dill sauce, ensuring you don’t miss out on the dish’s signature creaminess.

Pairing Matjesbrötchen recipe with Drinks

Pairing your matjesbrötchen recipe with the right drink enhances the overall experience. For a traditional touch, serve it with a crisp German pilsner or wheat beer, which complements the salty and tangy flavors of the sandwich. If you prefer non-alcoholic options, sparkling water with a slice of lemon or a cold herbal tea pairs beautifully. These choices cleanse the palate and highlight the freshness of the ingredients, making every bite even more enjoyable.

For more creative recipes, check out our Gipfeli recipe guide for a sweet and savory treat to complement your meal.

Serving and Storing Your Matjesbrötchen recipe

Matjesbrötchen with red onions, pickles, and sesame seed buns
Delicious Matjesbrötchen topped with red onions, pickles, and fresh parsley, served on sesame seed buns.

Best Ways to Serve Matjesbrötchen

Serving your matjesbrötchen recipe with thoughtful presentation can make it even more enjoyable. For an authentic experience, pair the sandwich with a side of crispy fries or a fresh green salad. Arrange the brötchen neatly on a wooden board, garnish with a sprig of dill, and add a wedge of lemon for a pop of color and extra zest. If you’re hosting a gathering, consider serving smaller, slider-sized portions for a fun and shareable appetizer. These little touches not only elevate the visual appeal but also enhance the overall dining experience.

How to Store Leftovers

While the matjesbrötchen recipe is best enjoyed fresh, leftovers can be stored with care to maintain their flavor. Remove any toppings like onions or pickles that might make the bread soggy. Wrap the sandwich tightly in plastic wrap or aluminum foil and place it in an airtight container in the refrigerator. Stored this way, it will stay fresh for up to 24 hours. When ready to enjoy, reassemble with fresh toppings for the best results.

Can You Freeze Matjesbrötchen?

Freezing a fully assembled matjesbrötchen isn’t recommended, as the bread and toppings might lose their texture. However, you can freeze the matjes herring separately in an airtight container for up to three months. To thaw, simply transfer it to the refrigerator overnight. Once thawed, you can quickly recreate the sandwich with fresh bread and garnishes, ensuring it tastes almost as good as when it was freshly made.

How Long Does It Stay Fresh?

The matjesbrötchen recipe relies on fresh ingredients, so it’s important to consume it quickly. As a rule of thumb, it’s best eaten within a few hours of preparation to preserve the bread’s softness and the fish’s delicate flavor. If stored properly in the fridge, as described earlier, it can be enjoyed the next day, though the texture of the bread might change slightly. Always check the freshness of the herring and other ingredients before consuming leftovers.

Tips for Exploring German Cuisine

Germany is renowned for its rich street food culture, and the matjesbrötchen recipe is just the beginning. Classics like bratwurst, currywurst, and pretzels are staples at festivals and food stalls across the country. Bratwurst, a flavorful sausage often served in a crusty roll, pairs beautifully with tangy mustard. Similarly, currywurst, a unique blend of sausage and curry ketchup, has its own cult following. Exploring these dishes alongside the matjesbrötchen allows you to fully appreciate the diversity of German street food.

Regional Variations of Brötchen Sandwiches

While the matjesbrötchen recipe is iconic in Northern Germany, other regions offer their own interpretations of brötchen sandwiches. In Bavaria, for example, leberkäse brötchen, made with thick slices of meatloaf-like sausage, is a popular choice. Meanwhile, in Berlin, you might find fish sandwiches featuring smoked salmon or pickled sprats. These regional twists highlight the versatility of brötchen as a base for delicious meals.

Where to Find Authentic German Ingredients

Finding authentic ingredients for your matjesbrötchen recipe doesn’t have to be challenging. Local European specialty stores often carry matjes herring, fresh bread rolls, and dill sauce. Online retailers are another great option, providing convenient access to high-quality ingredients. Some websites even offer pre-assembled kits, perfect for those new to German cooking. If you’re in Germany, visit a local market to experience the freshest offerings and pick up tips from the vendors.

Cooking with Matjes Beyond Brötchen

The matjes herring used in the matjesbrötchen recipe is incredibly versatile and can be used in various other dishes. Consider adding it to salads with boiled potatoes, fresh greens, and a light vinaigrette for a refreshing meal. It also works well in canapés, paired with rye bread and a dollop of sour cream for a simple yet elegant appetizer. With a little creativity, you can enjoy matjes in countless ways beyond the classic sandwich.

FAQs about Matjesbrötchen recipe

Can I use any type of herring for Matjesbrötchen?

While other types of herring can be used, authentic matjes herring is essential for capturing the true flavor of the matjesbrötchen recipe. Matjes herring is young, lightly salted, and pickled, giving it a tender texture and a delicate, slightly sweet flavor. Regular salted or smoked herring may work as substitutes, but they lack the signature mildness of matjes. If possible, stick to traditional matjes for an authentic experience.

Can I make Matjesbrötchen Recipe without pickles?

Yes, you can make a matjesbrötchen recipe without pickles, but it’s worth noting that pickles add an essential tangy contrast to the creamy and savory flavors of the sandwich. If you’re not a fan of pickles, consider substituting them with fresh cucumber slices or a mild pickle alternative, like sweet gherkins. These swaps can preserve the sandwich’s balance of textures and flavors.

What type of bread should I use for Matjesbrötchen Recipe?

The best bread for a matjesbrötchen recipe is a German brötchen—a crusty yet soft roll that complements the tender fish and flavorful toppings. If you can’t find authentic brötchen, Kaiser rolls or freshly baked ciabatta are great alternatives. The key is to choose a bread with a sturdy exterior and a soft interior to soak up the juices without falling apart.

Can Matjesbrötchen be made ahead of time?

Although it’s best to assemble and enjoy your matjesbrötchen recipe fresh, you can prepare some elements in advance to save time. Slice the onions and pickles, and store them in airtight containers. The matjes herring can also be kept chilled until needed. However, avoid assembling the sandwich too early, as the bread may become soggy. Instead, prepare the components and put everything together right before serving for optimal flavor and texture.

Conclusion

The matjesbrötchen recipe is a delightful way to explore the rich flavors of Northern German cuisine. By combining buttery matjes herring with crunchy onions, tangy pickles, and soft bread, you’ll create a sandwich that’s both simple and unforgettable. Throughout this guide, you’ve learned about its history, the importance of using authentic ingredients, and creative ways to customize and serve this iconic dish.

Whether you’re making it for a quick lunch, a dinner party, or to satisfy a craving for authentic German food, the matjesbrötchen recipe is sure to impress. With these tips, variations, and storage solutions, you’re equipped to enjoy this versatile dish in all its delicious forms. So, why not give it a try today and bring a taste of Germany into your home? Let us know how your matjesbrötchen turned out—we’d love to hear your thoughts and see your creations!


How To Make The Best Taco Soup Frios Recipe At Home

When life calls for something cozy yet bold, it’s time to whip up a taco soup frios recipe that’ll warm your soul and excite your taste buds. Imagine a bowl filled with hearty beans, juicy ground beef, and zesty taco spices, all simmered to perfection. Oh, and let’s not forget the toppings – shredded cheese, sour cream, and a sprinkle of fresh cilantro. Whether you’re feeding a crowd or just craving some comfort food, this recipe is the ultimate way to bring the bold flavors of tacos to your table in a new, satisfying form. With just a few simple ingredients and a little simmering magic, you’ll have a meal that’s perfect for any day of the week. So, grab your ladle and get ready – dinner just got a whole lot more exciting!

Ingredients for Taco Soup Frios

Essential Ingredients

To make the ultimate taco soup frios recipe, you’ll need a mix of simple yet flavorful ingredients. The base of this soup is built with tender ground beef (or ground turkey for a lighter option), hearty black beans, and sweet corn kernels. Add a can of diced tomatoes with green chilies to bring in that spicy, tangy kick taco lovers adore. Don’t forget the taco seasoning mix – it’s the secret to infusing the soup with those bold, smoky flavors. Finally, round it out with beef or chicken broth to create a rich, savory foundation.

When gathering your ingredients, make sure they’re fresh and high-quality. For example, opt for organic or no-salt-added beans to keep the sodium in check. The key to success? Keeping it simple and letting each ingredient shine in this delightful taco soup frios recipe.

Optional Additions

Want to add your own flair to this taco soup frios recipe? Consider throwing in some fresh diced jalapeños if you like things spicy or bell peppers for an extra crunch. For a creamier version, a dollop of cream cheese stirred in towards the end can elevate the texture and flavor. Feeling adventurous? Toss in some shredded zucchini or squash to sneak in a serving of veggies.

Another great addition is avocado – its smooth, buttery taste balances the spicy notes perfectly. Customizing this recipe lets you cater to your personal preferences while still keeping the essence of a classic taco soup frios recipe. For more ideas on ingredient swaps, check out this guide to customizing taco soups.

Key Spices and Herbs

Spices are where the magic happens in a taco soup frios recipe. Taco seasoning is essential, but layering additional flavors can take your dish from good to unforgettable. Try adding cumin for a smoky depth, smoked paprika for subtle heat, and a dash of garlic powder to amplify the savory notes. A pinch of onion powder works wonders too, especially if you’re skipping fresh onions.

Fresh herbs like cilantro bring brightness to the soup. If cilantro isn’t your thing, parsley can be a milder alternative. Spice it up or tone it down – this recipe is as flexible as it is flavorful. Just remember, a balanced spice mix ensures every bite of your taco soup frios is packed with bold, irresistible flavor.

Toppings to Elevate the Flavor

The toppings are where you get to have some fun with this taco soup frios recipe. Shredded cheddar cheese is a classic choice, melting into the warm soup and adding a gooey richness. A dollop of sour cream or Greek yogurt not only cools down the spice but also adds a creamy tang.

For crunch, sprinkle crushed tortilla chips or fry up some strips of fresh tortillas. And let’s not forget the garnishes – a squeeze of lime juice, diced avocado, and a handful of chopped cilantro or green onions can transform a simple bowl of taco soup into a masterpiece. These finishing touches turn this dish into a customizable experience that’s as fun to make as it is to eat!

Step-by-Step Instructions

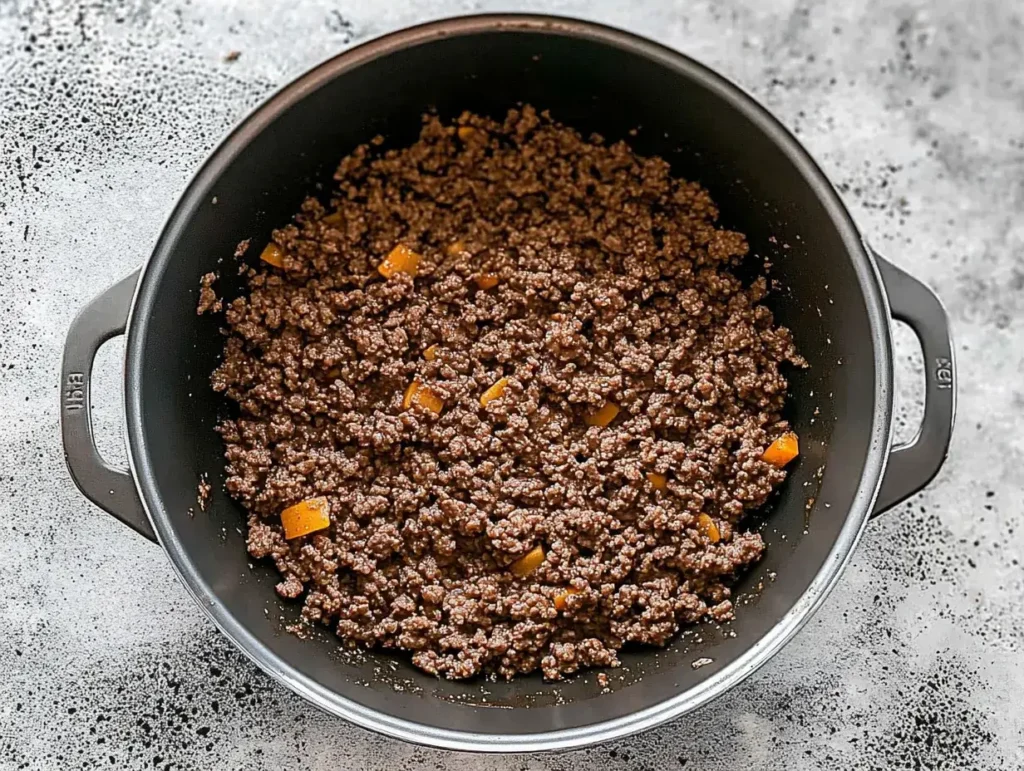
A pot of ground beef being cooked with diced peppers, forming the base of a taco soup frios recipe.
Ground beef and diced peppers cooking in a pot, creating the rich, flavorful base for the taco soup frios recipe.

Preparing the Ingredient

Before diving into the cooking process, it’s essential to prepare all your ingredients for the taco soup frios recipe. Start by rinsing and draining canned beans to reduce sodium content. Dice fresh vegetables like bell peppers and onions to ensure even cooking. If you’re using fresh ground beef or turkey, have it ready to go. This prep step keeps your cooking process smooth and ensures the final dish is packed with flavor.

Gather your spices, including taco seasoning, garlic powder, and smoked paprika. Having everything measured and ready will make the cooking experience easier and more enjoyable. Explore more easy cooking tips for flavorful dishes: The Best Leftover Rotisserie Chicken Recipes for Every Occasion

Cooking the Protein

Heat a drizzle of olive oil in a large pot over medium heat. Add your ground beef or turkey and cook it until it’s fully browned, breaking it up into smaller pieces as it cooks. Sprinkle in half of your taco seasoning during this step to infuse the meat with bold, savory flavors.

Once cooked, drain any excess grease to keep the soup from becoming overly rich. This step is crucial for creating the perfect balance in your taco soup frios recipe. Don’t rush – giving the meat time to develop a slight crust adds an extra layer of depth to your dish.

Building the Base

Now, it’s time to build the soup’s rich and flavorful base. Add your diced tomatoes (with green chilies for a bit of heat) and chicken or beef broth to the pot. Stir in the remaining taco seasoning, ensuring it’s well-distributed for a consistent flavor throughout.

Toss in your black beans, corn, and any additional vegetables you’ve prepped. Bring the mixture to a boil, then reduce the heat to a gentle simmer. Let it cook for about 15–20 minutes to allow the flavors to meld beautifully. This simmering step is where the magic of the taco soup frios recipe truly comes alive.

Simmering for Flavor

Patience is key here. While your taco soup frios recipe simmers, the spices and ingredients come together to create a harmonious blend of bold, comforting flavors. Stir occasionally to prevent sticking, and taste-test to adjust the seasoning if needed.

If you prefer a creamier texture, now’s the time to stir in a bit of cream cheese. It melts beautifully into the soup, adding a velvety finish without overpowering the other ingredients. Once the soup has thickened slightly and the vegetables are tender, it’s ready to serve.

Tips for the Perfect Taco Soup Frios

Balancing Flavors

Creating the perfect taco soup frios recipe means achieving a balance of bold and harmonious flavors. If your soup tastes a bit too acidic due to the tomatoes, a small pinch of sugar or a splash of cream can mellow it out. On the other hand, if the soup feels flat, try adding a squeeze of fresh lime juice or an extra dash of taco seasoning. These small adjustments can make a huge difference and ensure every bite is packed with flavor.

Remember, tasting as you go is crucial. A well-balanced soup is the secret to keeping everyone at the table coming back for seconds. And for more tips on enhancing soups, explore our guide to making soups more flavorful.

Thickening the Soup

If you prefer a heartier texture, there are a few easy ways to thicken your taco soup frios recipe. One popular method is to stir in a cornstarch slurry (a mix of cornstarch and water) during the simmering stage. Another option is to mash a portion of the beans before adding them to the pot – this naturally thickens the broth while maintaining the soup’s rich flavor.

Cheese lovers can stir in extra shredded cheese, which not only thickens the soup but also adds a creamy, indulgent texture. Don’t forget to let the soup simmer gently as you thicken it to avoid lumps and ensure even consistency.

Making It Healthier

The beauty of the taco soup frios recipe lies in its adaptability. For a lighter version, swap ground beef with lean ground turkey or even ground chicken. You can also reduce sodium by using low-sodium broth and rinsing canned beans thoroughly. Skipping the cream cheese or sour cream can help cut down on calories without sacrificing too much flavor.

Vegetable enthusiasts can bulk up the soup with zucchini, spinach, or diced carrots, turning it into a nutrient-packed meal. These small changes can make the dish more wholesome while still satisfying your cravings for bold taco-inspired flavors.

Storage and Reheating

Leftovers of your taco soup frios recipe can be just as delicious as the freshly made version – sometimes even better as the flavors meld together over time. Store your soup in an airtight container and refrigerate for up to 4 days. For longer storage, freeze individual portions in freezer-safe containers for up to 3 months.

When reheating, use a saucepan over medium heat to warm it evenly. Add a splash of broth or water if the soup has thickened too much in the fridge. Avoid overheating, as it can break down the texture of the ingredients. This ensures your reheated soup is just as delightful as it was on day one.

How to Serve Your Taco Soup Frios Recipe

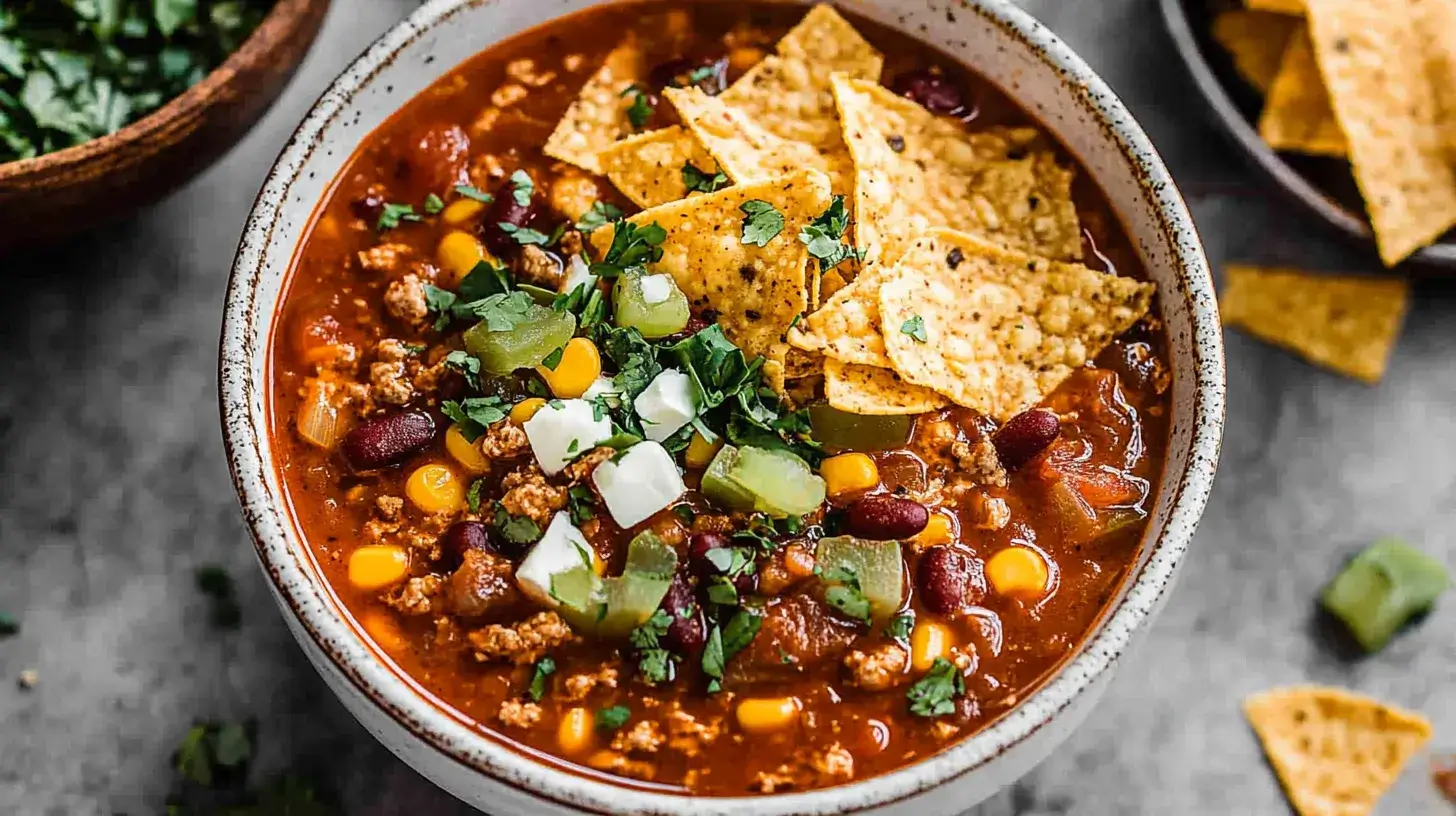
A fully garnished bowl of taco soup frios topped with sour cream, cheese, and tortilla chips.
A close-up of taco soup frios garnished with melted cheese, sour cream, tortilla chips, and fresh herbs for an irresistible presentation.

Pairing Taco Soup Frios

To complete your taco soup frios recipe, think about pairing it with dishes that complement its bold and zesty flavors. Warm, buttered cornbread is a classic option that adds a slightly sweet contrast to the spicy soup. If you’re looking for something lighter, a fresh, crisp side salad with a lime vinaigrette balances the hearty richness of the soup.

Another excellent pairing is tortilla chips or quesadillas – they’re perfect for dipping and add an extra crunch to your meal. These combinations elevate your dining experience, turning a simple soup into a memorable feast.

Family-Friendly Additions

One of the best parts of the taco soup frios recipe is how customizable it is, especially when serving a family with varying tastes. Set up a toppings bar with options like shredded cheese, diced avocado, sour cream, and chopped cilantro. Kids might enjoy milder toppings like plain tortilla chips or a sprinkle of cheese, while spice enthusiasts can load up on jalapeños or hot sauce.

You can also include a side of rice or mashed black beans for a more filling meal. These additions make your taco soup frios an interactive and fun experience that everyone can enjoy.

Drink Pairings

The right drink can enhance your taco soup frios recipe even further. For adults, a margarita or a michelada pairs wonderfully with the spicy, savory notes of the soup. The citrusy tang of these beverages complements the flavors beautifully.

For non-alcoholic options, sparkling water with a splash of lime or a chilled glass of horchata provides a refreshing contrast. These drinks not only quench your thirst but also highlight the bold, vibrant ingredients in the soup.

Seasonal Variations for Taco Soup Frios Recipe

Fall Favorites

As the leaves begin to change, so can your taco soup frios recipe. Adding a cup of pumpkin puree to the broth not only thickens the soup but also adds a subtle sweetness that pairs beautifully with taco spices. Garnish with toasted pumpkin seeds for an autumn-inspired twist that’ll have everyone asking for seconds.

Summer Freshness

Summer is the perfect time to incorporate fresh, seasonal produce into your taco soup frios recipe. Swap canned corn for grilled corn kernels to give the soup a smoky-sweet flavor. You can also top the soup with fresh pico de gallo for a bright, tangy contrast that celebrates the vibrant flavors of summer.

Winter Warmers

When the temperatures drop, your soup should rise to the occasion. Add roasted red peppers and a pinch of smoked paprika to deepen the flavor and make it even cozier. For an indulgent winter treat, serve the soup with a side of warm, cheesy quesadillas – the perfect combination for a chilly evening.

Spring Delights

Springtime calls for lighter, fresher versions of comfort food. Enhance your taco soup frios recipe with fresh herbs like cilantro and parsley, or add a handful of spinach or kale for a nutrient boost. These small tweaks brighten the soup and make it perfect for the season of renewal.

FAQs

What can I use to thicken taco soup?

To thicken your taco soup frios recipe, you can use a cornstarch slurry (equal parts cornstarch and water) or mash some of the beans to naturally thicken the broth. Adding cheese or cream cheese can also create a rich, creamy texture.

How long to reheat taco soup?

Reheat your taco soup frios recipe on the stove over medium heat for 5–7 minutes, stirring occasionally. If using a microwave, heat individual portions for 2–3 minutes, pausing to stir halfway through for even warming.

How do you cut the heat in taco soup?

You can reduce the spiciness of your taco soup frios recipe by adding dairy like sour cream, cream cheese, or Greek yogurt. Another option is to serve it with bread or tortilla chips to balance the heat.

Does taco soup have a lot of carbs?

The carb content of your taco soup frios recipe depends on the ingredients. Beans, corn, and tomatoes contribute to the carbs, but you can reduce them by using fewer beans or substituting with low-carb veggies like zucchini.

Can I freeze taco soup?

Yes, the taco soup frios recipe freezes beautifully! Store it in airtight containers and freeze for up to 3 months. Thaw overnight in the fridge and reheat on the stove or microwave when ready to serve.

Conclusion

The taco soup frios recipe is more than just a meal – it’s a celebration of bold flavors, hearty ingredients, and endless customization possibilities. From seasonal twists to unique toppings, this dish has something for everyone. Whether you’re cooking for a busy weeknight, hosting a gathering, or meal prepping for the week ahead, this recipe guarantees satisfaction every time.

With its rich spices, creamy textures, and vibrant toppings, taco soup frios is the ultimate comfort food that never goes out of style. Now that you’ve learned how to make it, customize it, and store it, you’re ready to create a bowl of taco-inspired happiness. So, grab your ladle and start cooking – a delicious, satisfying meal awaits!

How to Make Strawberry Cheesecake Cookies at Home

If you love cookies and cheesecake, get ready to have your dessert dreams come true! Strawberry cheesecake cookies are the ultimate hybrid treat, combining the rich, tangy taste of cheesecake with the chewy, buttery goodness of a classic cookie. Fresh strawberries add a pop of sweetness and a burst of color, making these cookies as gorgeous as they are delicious. Whether you’re a seasoned baker or just getting started, this recipe is foolproof and fun to make. Imagine a plate of these beauties at your next brunch or holiday gathering they’re guaranteed to be the star of the show. Ready to whip up some magic? Let’s dive into the world of strawberry cheesecake cookies!

What Are Strawberry Cheesecake Cookies?

A Unique Twist on Classic Cookies

Strawberry cheesecake cookies are not your average cookies. They’re a delightful combination of rich, tangy cream cheese, sweet strawberries, and buttery cookie dough. Unlike traditional cookies that might lean on chocolate chips or nuts for flavor, these cookies stand out with their cheesecake-inspired goodness. The graham cracker crumbs woven into the dough provide that unmistakable cheesecake crust vibe, while the strawberry pieces add a fruity, colorful twist.

But here’s the kicker: they’re not just pretty to look at. These cookies offer a perfect balance of sweet and tangy flavors that’s bound to leave your taste buds dancing. Whether you’re a cheesecake lover or simply looking for something unique, strawberry cheesecake cookies promise to be a showstopper.

The Inspiration Behind Strawberry Cheesecake Cookies

Have you ever thought, “I wish I could have cheesecake in a cookie”? That’s exactly how strawberry cheesecake cookies came to life. This hybrid dessert takes the best of two worlds classic cheesecake and chewy cookies and fuses them into one irresistible treat. They’ve gained popularity in recent years, especially during summer months when fresh strawberries are abundant.

If you’re curious about more innovative dessert ideas, check out Buzzfeed’s roundup of hybrid desserts for inspiration. These unique creations are proof that there’s no limit to dessert creativity!

Why You’ll Love These Cookies

There are cookies, and then there are strawberry cheesecake cookies. What makes these so special? First, they’re incredibly versatile. Perfect for holidays, birthdays, or even an indulgent weekday treat, these cookies fit any occasion. Second, they’re visually stunning imagine vibrant strawberry pieces peeking through a golden, chewy cookie. And most importantly, they taste amazing.

Each bite delivers the creamy tang of cheesecake, the buttery richness of cookies, and the natural sweetness of strawberries. Plus, they’re surprisingly easy to whip up, even if you’re new to baking. Whether you’re serving them with coffee, milk, or just on their own, these cookies are bound to be the star of any dessert spread.

How These Cookies Differ from Traditional Desserts

Unlike a slice of cheesecake that requires a fork and plate, strawberry cheesecake cookies are handheld perfection. They bring together the creamy texture of cheesecake and the chewy satisfaction of cookies into one portable, easy-to-enjoy package.

Compared to traditional chocolate chip cookies, these stand out with their bold flavor profile. The graham cracker crumbs give a subtle crunch reminiscent of a cheesecake crust, while the diced strawberries add bursts of freshness. Moreover, these cookies don’t need the lengthy preparation time or precision of a full cheesecake, making them a convenient choice for home bakers.

If you’re looking for a dessert that’s both familiar and unique, strawberry cheesecake cookies hit the sweet spot. They’re proof that you don’t have to choose between your favorite desserts you can enjoy the best of both worlds in every bite.

Ingredients You’ll Need

Key Ingredients for the Perfect Strawberry Cheesecake Cookies

To make the best strawberry cheesecake cookies, you’ll need a handful of simple yet essential ingredients that deliver big flavors. The star of the show is cream cheese, which adds that classic cheesecake tang and keeps the cookies moist. Fresh, juicy strawberries are another key player, bringing natural sweetness and vibrant color to every bite. For that authentic cheesecake crust flavor, graham cracker crumbs are a must—trust me, they make all the difference!

Other staples include all-purpose flour, sugar, butter, eggs, vanilla extract, and a pinch of salt. These pantry essentials come together to create the perfect base for these irresistible cookies. Want to make them even more indulgent? A handful of white chocolate chips can take things up a notch!

Substitutions and Alternatives

No fresh strawberries on hand? No problem! You can use frozen strawberries, but make sure to thaw and pat them dry to avoid adding excess moisture to your dough. For those looking to reduce dairy, there are plant-based cream cheese alternatives that work well in this recipe.

Not a fan of graham crackers? Crushed digestive biscuits or even vanilla wafers can substitute beautifully. And if you’re feeling adventurous, try mixing in some freeze-dried strawberries—they pack a concentrated flavor punch without extra moisture. With these options, you can tweak strawberry cheesecake cookies to suit your taste and pantry!

Tools to Make Your Baking Easier

Having the right tools can make baking strawberry cheesecake cookies a breeze. A sturdy mixing bowl and a hand or stand mixer are essential for combining the cream cheese, butter, and sugar until fluffy. A cookie scoop ensures uniform cookie sizes, helping them bake evenly.

To prevent sticking, line your baking sheets with parchment paper or silicone mats. And don’t forget a cooling rack—it’s vital for allowing your cookies to set without becoming soggy on the bottom. These tools might seem basic, but they make the process smoother and more enjoyable.

Tips for Choosing the Best Ingredients for Strawberry Cheesecake Cookies

Quality ingredients make all the difference when baking strawberry cheesecake cookies. Opt for full-fat cream cheese to achieve the creamiest texture. When picking strawberries, choose ripe, red ones that are firm but juicy—they’ll hold up better in the dough and provide the best flavor.

For graham crackers, look for fresh, crisp varieties without any stale aroma. Lastly, don’t skimp on vanilla extract. A high-quality pure vanilla extract enhances the overall flavor, making your cookies truly unforgettable. With these tips, you’re all set to bake cookies that taste as amazing as they look.

Step-by-Step Guide to Making Strawberry Cheesecake Cookies

Preparing Your Ingredients and Workspace

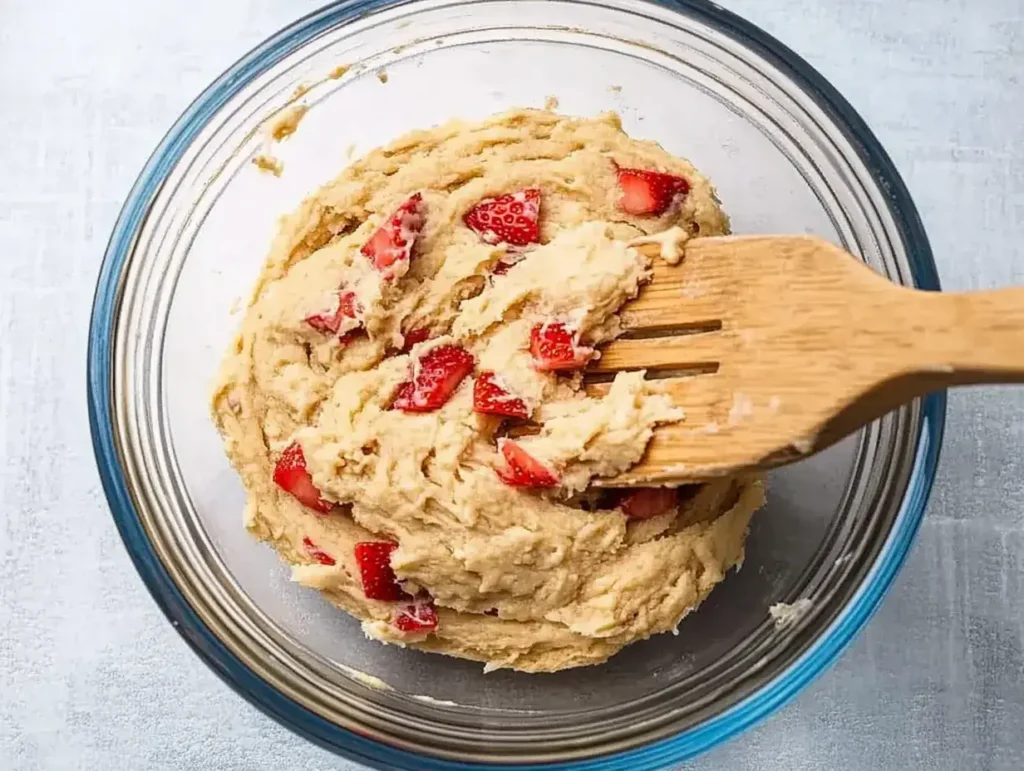
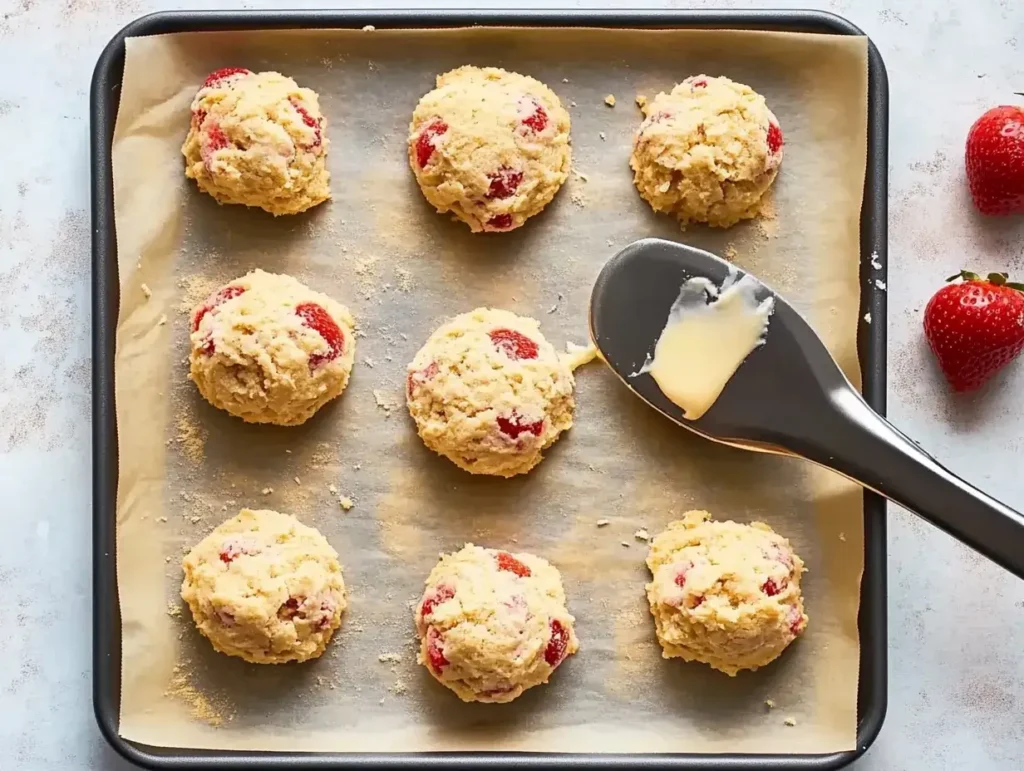
Mixing bowl with creamy dough and fresh strawberry on the side for strawberry cheesecake cookies.
A creamy dough mixed for strawberry cheesecake cookies with fresh strawberry on the side.

Before diving into making strawberry cheesecake cookies, it’s essential to set yourself up for success. Start by gathering all your ingredients and tools. Measure out your cream cheese, butter, sugar, and graham crackers, ensuring you have everything at room temperature. This helps the dough mix smoothly without lumps.

Prep your fresh strawberries by washing, drying, and dicing them into small pieces. To avoid soggy cookies, pat the strawberry pieces dry with a paper towel. Meanwhile, preheat your oven to 350°F (175°C) and line your baking sheets with parchment paper. A little preparation now makes the whole process so much easier later on!

Mixing the Dough Like a Pro

To create the perfect base for your strawberry cheesecake cookies, cream together the softened butter, cream cheese, and sugar until the mixture is light and fluffy. This step is crucial as it ensures your cookies bake up soft and tender. Next, add your eggs and vanilla extract, mixing until fully combined.

In a separate bowl, whisk together the dry ingredients: flour, graham cracker crumbs, baking powder, and a pinch of salt. Gradually add the dry mixture to the wet ingredients, mixing just until combined. Finally, gently fold in the diced strawberries, being careful not to overmix. Overmixing can break down the berries, releasing too much juice and affecting the dough’s texture.

Tips for Chilling the Dough

Chilling the dough is a game-changer when it comes to making the best strawberry cheesecake cookies. Once your dough is mixed, cover the bowl with plastic wrap and refrigerate it for at least 30 minutes, though an hour is even better. Chilling helps the dough firm up, making it easier to handle and preventing the cookies from spreading too much during baking.

If you’re short on time, you can pop the dough in the freezer for 15 minutes. However, don’t skip this step entirely it’s key to achieving cookies that are chewy and hold their shape.

Baking to Perfection

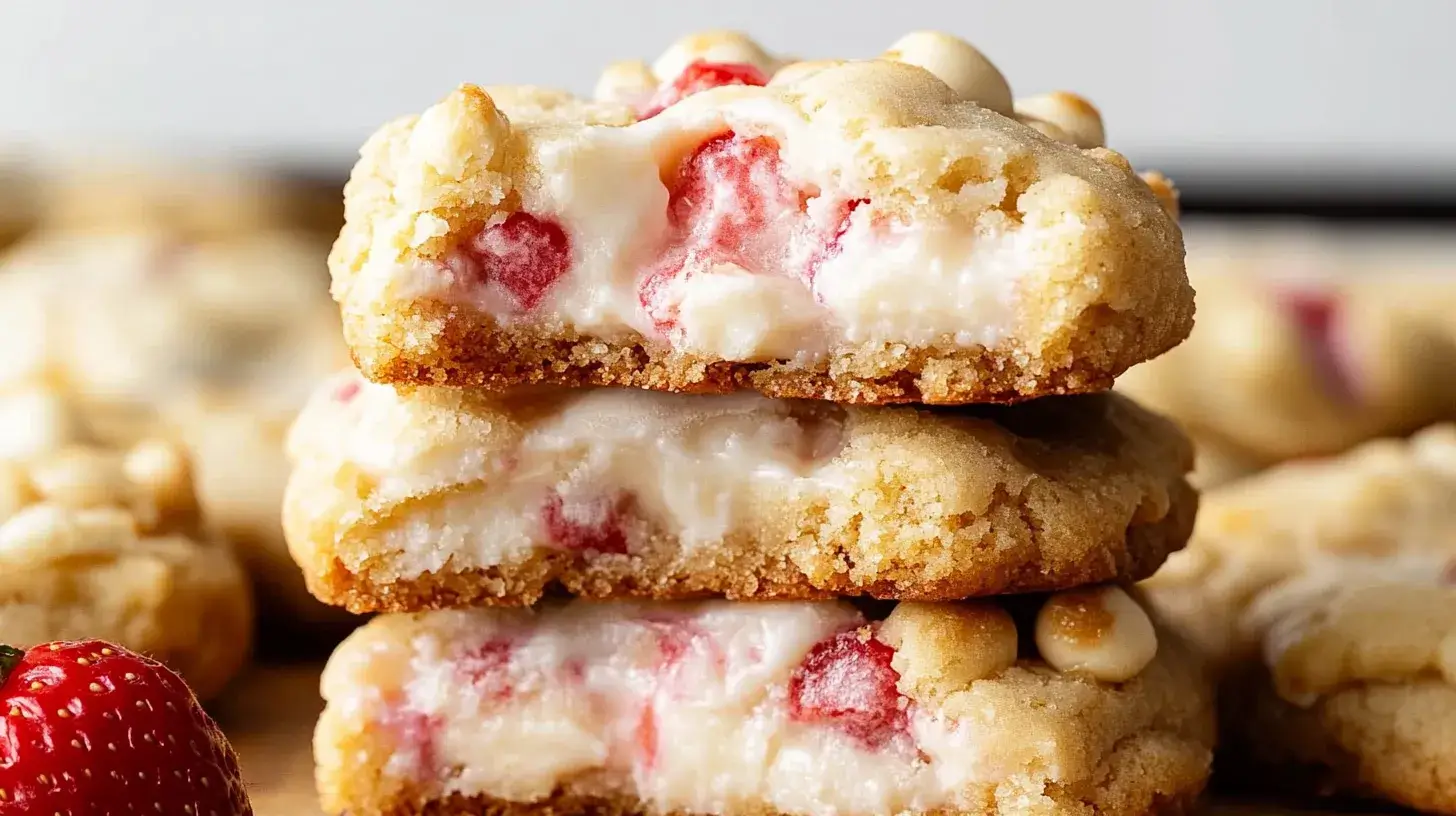
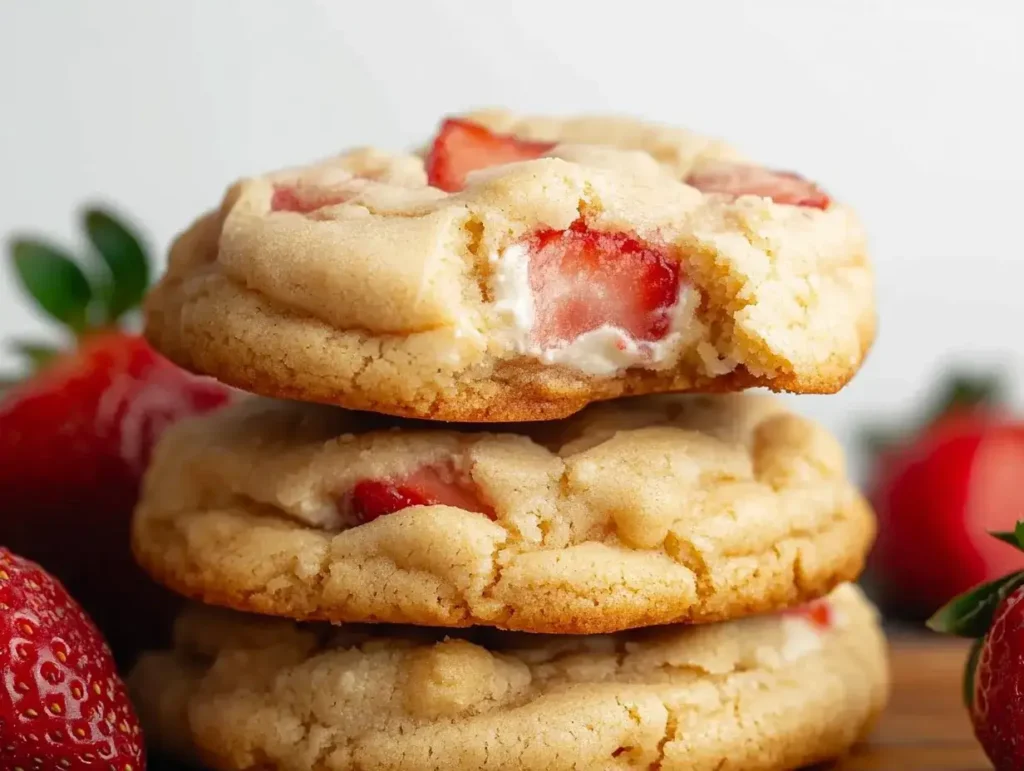
A stack of strawberry cheesecake cookies with vibrant strawberry pieces inside.
A delicious stack of strawberry cheesecake cookies showcasing their creamy texture and strawberry filling.

Once your dough is chilled, it’s time to bake! Use a cookie scoop or tablespoon to portion out evenly sized balls of dough, spacing them about two inches apart on your prepared baking sheets. Bake in the preheated oven for 10–12 minutes, or until the edges are golden brown but the centers still look slightly soft.

Remember, cookies continue to cook as they cool, so resist the urge to overbake. Let the strawberry cheesecake cookies cool on the baking sheet for a few minutes before transferring them to a wire rack. This step ensures they set perfectly and stay deliciously soft.

For more delightful recipes to try at home, check out how to make Gipfeli Recipe. It’s another crowd-pleasing option that’s sure to impress!

Expert Tips for Perfect Strawberry Cheesecake Cookies

Avoiding Common Mistakes

Making strawberry cheesecake cookies isn’t difficult, but a few common mistakes can trip you up. One major pitfall is overmixing the dough. When you overmix, the strawberries can break down, releasing too much juice and making the dough soggy. To avoid this, gently fold the strawberries into the dough at the very end.

Another issue is skipping the chilling step. Chilled dough is less sticky and easier to handle, and it prevents your cookies from spreading too thin during baking. Lastly, don’t forget to pat your strawberries dry before adding them to the dough. Excess moisture from the berries can cause uneven baking or overly soft cookies.

Enhancing Flavor and Presentation

 A stack of strawberry cheesecake cookies with fresh strawberries surrounding them.
A warm stack of strawberry cheesecake cookies garnished with fresh strawberries.

Want your strawberry cheesecake cookies to stand out? Try adding a drizzle of white chocolate or a dusting of powdered sugar on top once they’ve cooled. These simple touches make the cookies look as amazing as they taste.

For an extra flavor boost, roll the cookie dough balls in crushed graham crackers before baking. This gives them a delicious, crumbly texture reminiscent of cheesecake crust. And if you’re making these for a special occasion, consider using heart-shaped cutters to give them a fun, unique look. Presentation matters, especially when you’re serving cookies at a gathering!

Scaling the Recipe for Large Batches

If you’re baking strawberry cheesecake cookies for a crowd, you can easily scale the recipe up. Simply double or triple the ingredient quantities, but remember to mix the dough in batches to avoid overloading your mixer.

When scaling, it’s also important to chill the dough in smaller portions. Large bowls of dough can take much longer to chill, so divide it into smaller containers for even cooling. And don’t forget to bake in batches—overcrowding the baking sheet can lead to uneven cookies.

Freezing and Storing Strawberry Cheesecake Cookies

Did you know you can freeze strawberry cheesecake cookies for later? To do this, scoop the dough into balls and arrange them on a baking sheet. Freeze until solid, then transfer the frozen dough balls to an airtight bag or container. When you’re ready to bake, simply place the frozen dough on a baking sheet and add a couple of extra minutes to the baking time.

If you’ve already baked the cookies, store them in an airtight container at room temperature for up to three days, or in the freezer for up to three months. Proper storage keeps your cookies fresh and delicious, so you can enjoy them whenever the craving strikes!

Serving Ideas and Variations

Perfect Pairings for These Strawberry Cheesecake Cookies

Strawberry cheesecake cookies are delightful on their own, but pairing them with the right beverage or dessert can elevate your experience. Serve them with a hot cup of coffee for a cozy morning treat, or pair them with a chilled glass of milk for a classic cookie combination.

For a more decadent option, consider serving these cookies alongside a scoop of vanilla ice cream or a dollop of whipped cream. If you’re entertaining, arrange the cookies on a platter with fresh strawberries for an eye-catching presentation. Their sweet, tangy flavor also pairs beautifully with sparkling rosé, making them an unexpected yet delightful addition to brunch or dessert parties.

Creative Variations to Try

If you love experimenting in the kitchen, there are plenty of ways to put a unique spin on strawberry cheesecake cookies. Try adding white chocolate chips to the dough for extra sweetness, or swirl in a few tablespoons of strawberry jam for a more intense fruity flavor.

For those who enjoy texture, chopped nuts like almonds or pecans can add a delightful crunch. You could even try substituting the strawberries with other fruits, like raspberries or blueberries, to create your own signature cookie flavor. These small changes can transform the recipe into something completely new, while still capturing the essence of cheesecake-inspired cookies.

Seasonal Twists on the Recipe

Strawberry cheesecake cookies are a year-round favorite, but you can give them a seasonal twist to match the time of year. In summer, use fresh strawberries for their juicy sweetness. For fall, try incorporating a hint of cinnamon or nutmeg to complement the tangy cream cheese flavor.

During the holidays, add a sprinkle of crushed peppermint candy for a festive touch. If you’re baking in spring, consider using pastel-colored sprinkles or shaping the cookies into flower designs. These small adjustments allow you to enjoy these cookies in fresh, creative ways no matter the season.

Turning Cookies into Ice Cream Sandwiches

One of the most fun ways to enjoy strawberry cheesecake cookies is by turning them into ice cream sandwiches. Simply take two cookies, add a scoop of your favorite ice cream (vanilla or strawberry work wonderfully), and press them gently together.

For an extra special touch, roll the edges of the ice cream sandwich in crushed graham crackers or sprinkles. Wrap them individually in parchment paper and freeze for a few hours to create a grab-and-go dessert. These cookie sandwiches are perfect for summer gatherings, kids’ parties, or anytime you want to impress your guests with a creative twist.

FAQs

How to Make Strawberry Cheesecake Cookies?

Making strawberry cheesecake cookies is simpler than you might think. Start by creaming softened butter, cream cheese, and sugar together until light and fluffy. Add eggs and vanilla extract, mixing thoroughly. In a separate bowl, combine the dry ingredients: flour, graham cracker crumbs, baking powder, and salt. Gradually mix the dry ingredients into the wet mixture, then gently fold in diced strawberries. Chill the dough for at least 30 minutes, scoop onto a baking sheet, and bake at 350°F for 10–12 minutes. Let the cookies cool before serving. For step-by-step instructions, refer to the detailed guide above.

Why These Strawberry Cheesecake Cookies Work?

Strawberry cheesecake cookies are the perfect combination of creamy, tangy, and sweet flavors. The cream cheese adds richness and moisture, while the graham cracker crumbs give the cookies a subtle, crust-like texture. Fresh strawberries bring a natural sweetness and vibrant color, making these cookies as visually appealing as they are delicious. Additionally, chilling the dough ensures the cookies bake up chewy and maintain their shape, resulting in a dessert that’s both satisfying and unique.

What Kind of Cream Cheese Should I Use?

For the best strawberry cheesecake cookies, use full-fat cream cheese. Its rich texture and tangy flavor are essential for achieving the classic cheesecake taste. Avoid whipped or low-fat cream cheese, as they may not provide the same creamy consistency. Make sure the cream cheese is softened before mixing to ensure a smooth, lump-free dough.

Can I Use Frozen Strawberries?

Yes, you can use frozen strawberries in strawberry cheesecake cookies, but there are a few tips to keep in mind. Thaw the strawberries completely and pat them dry with a paper towel to remove excess moisture. This prevents the dough from becoming too watery and ensures the cookies bake evenly. Frozen strawberries are a convenient alternative when fresh strawberries aren’t in season, and they still deliver great flavor.

Conclusion

Strawberry cheesecake cookies combine the creamy tang of cheesecake, the sweetness of fresh strawberries, and the buttery richness of cookies into a dessert that’s sure to impress. From preparing the ingredients and chilling the dough to baking and enjoying, every step of the process is designed to create a treat that’s as delicious as it is easy to make.

Whether you’re serving them for a special occasion, gifting them to friends, or enjoying them with a cup of coffee, these cookies are guaranteed to become a favorite. With tips for variations, creative serving ideas, and answers to common questions, you’re now equipped to bake the best strawberry cheesecake cookies right in your kitchen. So, grab your apron and get started your next batch of irresistible cookies is just a few steps away!