baby back ribs with beer and Montreal steak seasoning

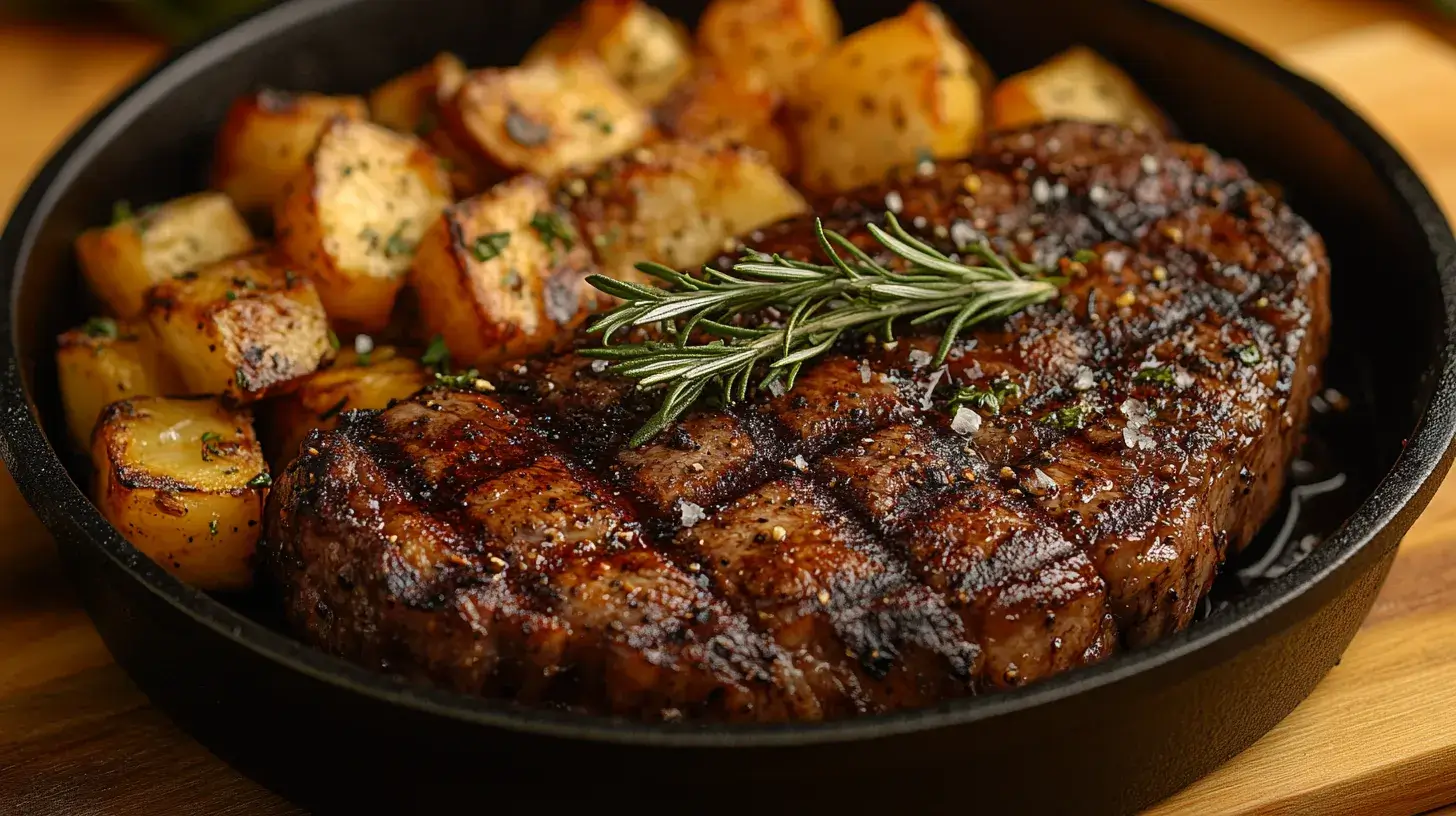
Imagine sinking your teeth into juicy baby back ribs that are perfectly tender, infused with the rich flavors of beer, and seasoned with the bold zest of Montreal steak seasoning. Moreover, this baby back ribs with beer and Montreal steak seasoning recipe is not just a meal—it’s an experience that brings the smoky, savory goodness of a backyard BBQ right into your kitchen. Additionally, whether you’re a seasoned grill master or a home cook looking to impress, this recipe is easy to follow and promises delicious results every time. Therefore, let’s dive into the steps that will transform ordinary ribs into a mouthwatering masterpiece your family and friends will rave about!

1. Gathering Your Ingredients

1.1 Essential Ingredients for Juicy Ribs

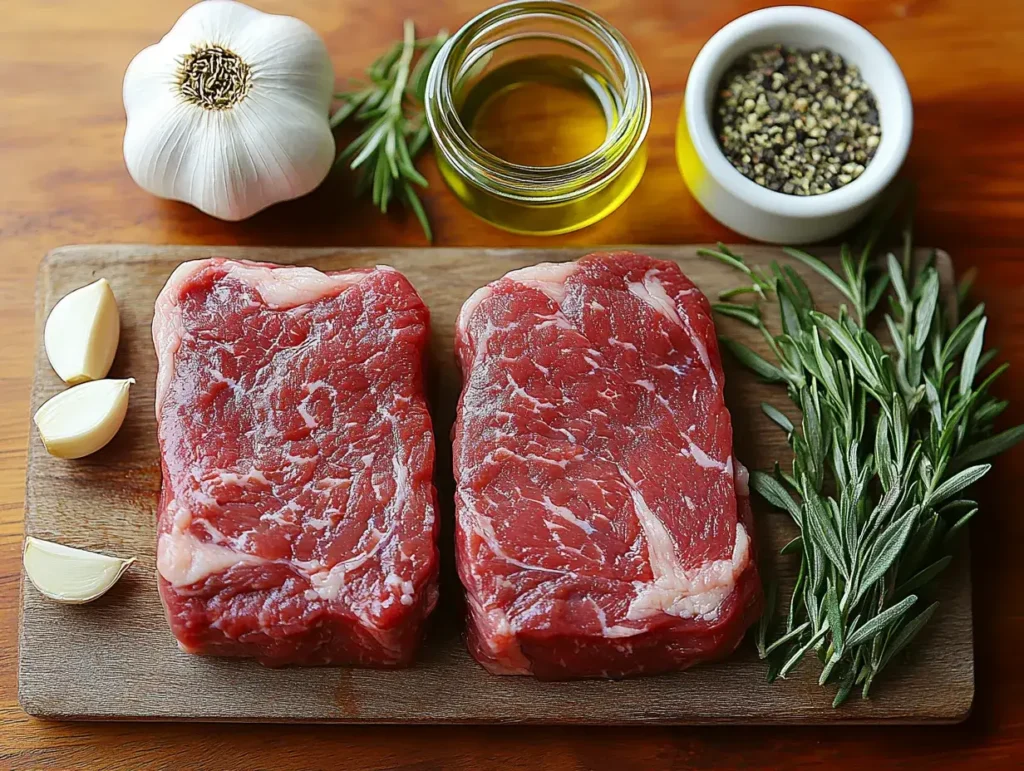
To create succulent baby back ribs with beer and Montreal steak seasoning, you need to start with the right ingredients. Here’s what you’ll need:

  • Baby Back Ribs: Choosing the right cut is crucial for tenderness. Look for ribs with a good amount of meat and minimal fat.
  • Montreal Steak Seasoning: This blend adds depth and a savory kick to your ribs.
  • Beer Selection: Opt for a lager or ale to enhance the taste without overpowering the flavors.

1.2 Additional Flavor Enhancers

Enhancing your ribs with a few extra ingredients can elevate the flavor profile:

  • Barbecue Sauce: Selecting the perfect sauce complements the savory seasoning.
  • Honey or Brown Sugar: Adds a sweet glaze that balances the spices.
  • Garlic and Onion Powder: These boost the seasoning profile, adding more layers of flavor.

1.3 Tools and Equipment Needed

Having the right tools makes the cooking process smoother:

  • Meat Thermometer: Ensures your ribs reach the perfect doneness.
  • Rib Racks: Helps in arranging ribs evenly for uniform cooking.
  • Aluminum Foil: Retains moisture during baking, keeping your ribs juicy.

1.4 Table: Ingredients List

IngredientQuantity
Baby back ribs2 racks (about 4 lbs)
Montreal steak seasoning3 tablespoons
Beer (lager or ale)1 bottle (12 oz)
Barbecue sauce1 cup
Honey2 tablespoons
Brown sugar2 tablespoons
Garlic powder1 teaspoon
Onion powder1 teaspoon
Salt and pepperTo taste

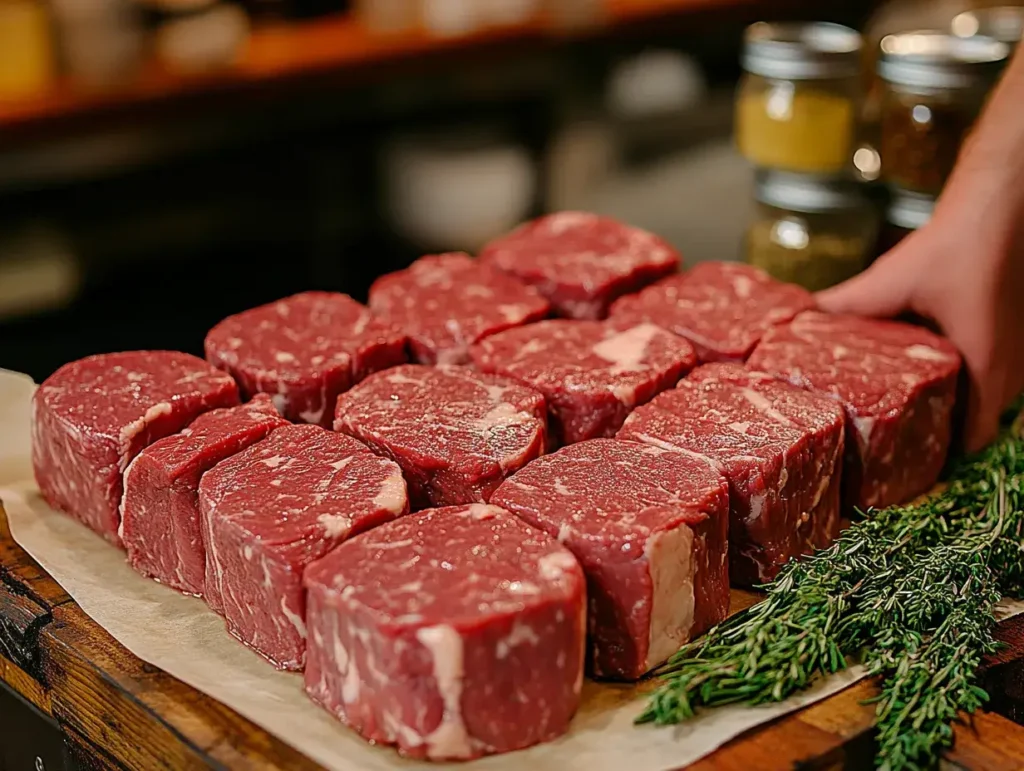
2. Preparing the Ribs

Preparing baby back ribs with beer and Montreal steak seasoning
Step-by-step preparation of juicy baby back ribs.

2.1 Cleaning and Trimming the Ribs

Before you start, it’s essential to prepare your ribs properly:

  • Removing the Membrane: Flip the ribs bone-side up and slide a knife under the membrane. Use a paper towel to grip and pull it off for easy removal.
  • Trimming Excess Fat: Trim any large pieces of fat to ensure lean and flavorful ribs.

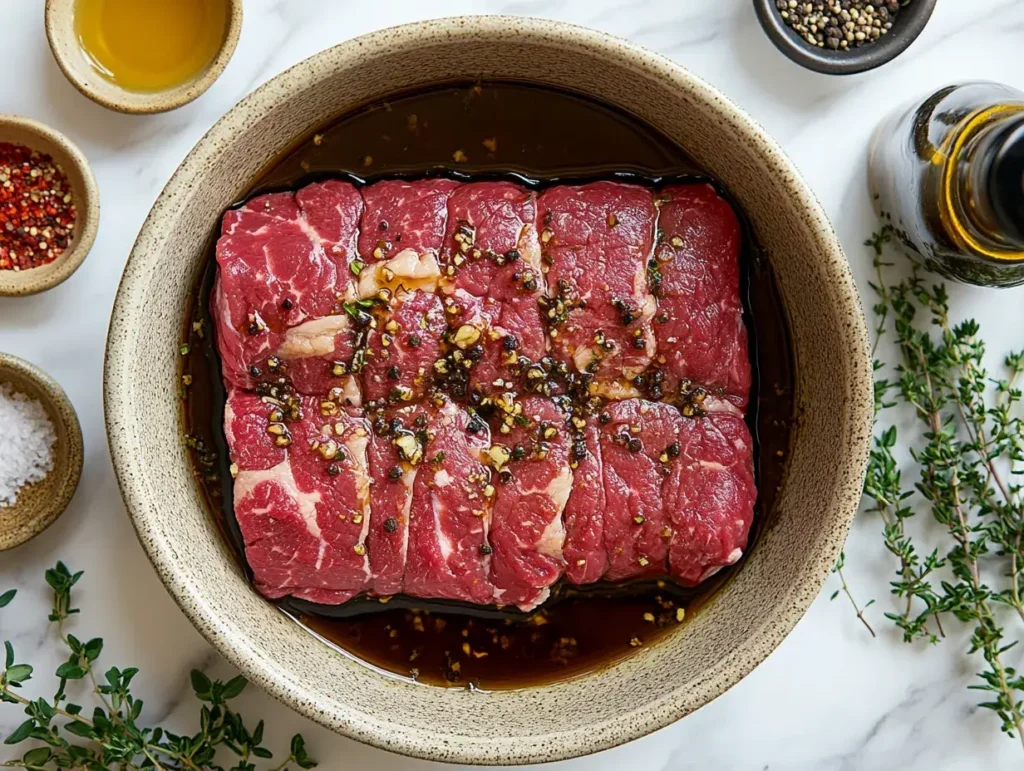
2.2 Applying the Montreal Steak Seasoning

Seasoning is key to flavorful ribs:

  • Even Coating: Sprinkle the Montreal steak seasoning evenly over both sides of the ribs. Massage it in to ensure thorough coverage.
  • Marinating Time: Allow the ribs to marinate for at least 2 hours, preferably overnight, to let the flavors penetrate the meat.

2.3 Marinating with Beer

Beer not only adds flavor but also helps tenderize the meat:

  • Beer Selection: Choose a lager or ale for a balanced taste. Each type of beer can impart a different flavor profile to the ribs.
  • Marinating Process: Place the seasoned ribs in a large container and pour the beer over them. Ensure the ribs are well-covered and refrigerate for the recommended time.

2.4 Resting the Ribs

After marinating, let your ribs rest:

  • Importance of Resting: Resting enhances tenderness by allowing the juices to redistribute.
  • Covering and Refrigeration: Cover the container and refrigerate the ribs for at least 2 hours, or overnight for best results.

3. Cooking Methods for Baby Back Ribs

Choosing the right cooking method can truly make or break your ribs. Moreover, each technique imparts its own unique flavor and texture, thereby allowing you to customize your baby back ribs with beer and Montreal steak seasoning to your personal taste. For instance, here we’ll delve deeper into three popular methods: oven baking, grilling, and smoking. Additionally, we’ll compare these methods to help you decide which one suits your needs best.

3.1 Oven-Baked Baby Back Ribs

Oven baking is a reliable and straightforward method that ensures consistent results every time. It’s especially great for those who prefer a hands-off approach without compromising on flavor or tenderness.

Preheating and Setup

First, preheat your oven to 300°F (150°C). This low and slow temperature is key to achieving tender ribs. While the oven is heating, prepare a baking sheet by placing a rib rack on it. If you don’t have a rib rack, you can use a wire cooling rack to elevate the ribs, allowing heat to circulate evenly around them.

Baking Instructions

Place your prepared ribs on the rack, bone side down. Cover the ribs tightly with aluminum foil. This creates a steamy environment that helps the ribs cook evenly and retain moisture. Bake the ribs in the preheated oven for 2.5 to 3 hours. You’ll know they’re done when the meat starts to pull away from the bones and becomes tender.

Wrapping in Foil

Wrapping the ribs in foil is a crucial step in this method. It retains moisture, preventing the ribs from drying out. Additionally, the foil helps to trap the flavors from the beer and seasoning, infusing the meat with a rich, savory taste. For an extra layer of flavor, you can add a splash of beer inside the foil packet before sealing it.

Tips for Oven-Baked Ribs

  • Check for Tenderness: After the initial baking time, gently twist a bone to see if the meat is tender. If it’s not quite there, rewrap and bake for an additional 30 minutes.
  • Broil for a Finish: If you prefer a bit of a crispy exterior, uncover the ribs during the last 10 minutes of baking and switch your oven to broil. Keep a close eye to prevent burning.

3.2 Grilling Baby Back Ribs with Beer

Moreover, grilling introduces a delightful smoky flavor that oven baking simply can’t replicate. Additionally, this method is perfect for those who enjoy the process of grilling and the unique taste it imparts to the ribs. Furthermore, grilling allows you to engage more interactively with your cooking, making it a rewarding experience. Therefore, if you prefer a hands-on approach and crave that authentic BBQ smokiness, grilling is the ideal choice for your baby back ribs with beer and Montreal steak seasoning.

Preparing the Grill

First, start by setting up your grill for indirect heat. This involves arranging the coals or burners on one side of the grill, thereby leaving the other side cooler. By doing so, indirect heat ensures that the ribs cook slowly without direct exposure to the flames, which can cause burning. Consequently, this method helps achieve tender and evenly cooked ribs without the risk of charring. Additionally, maintaining a consistent temperature is crucial, therefore using a reliable grill thermometer can help you monitor and adjust the heat as needed. Moreover, setting up the grill correctly not only prevents burning but also enhances the overall smoky flavor of your baby back ribs with beer and Montreal steak seasoning.

Grilling Techniques

Juicy baby back ribs with beer and Montreal steak seasoning
Perfectly glazed baby back ribs infused with beer and Montreal steak seasoning.

Place the ribs on the cool side of the grill, bone side down. Close the lid and maintain a steady temperature of around 250°F (121°C). Cook the ribs for 2 to 3 hours, turning them occasionally to ensure even cooking. Maintaining a consistent temperature is essential for tender, juicy ribs.

Basting with Beer Mixture

Occasionally baste the ribs with your beer marinade to keep them moist and enhance their flavor. You can use a brush or a spray bottle for this purpose. Basting not only adds moisture but also helps the seasoning penetrate deeper into the meat, resulting in a richer taste.

Tips for Grilling Ribs

  • Control the Heat: Use a thermometer to monitor the grill’s temperature. Too much heat can dry out the ribs, while too little can result in undercooked meat.
  • Add Wood Chips: For an extra smoky flavor, add wood chips like hickory or apple to your grill. Soak them in water for at least 30 minutes before adding to prevent them from burning too quickly.
  • Avoid Flare-Ups: Keep a spray bottle of water nearby to manage any flare-ups caused by dripping fat.

3.3 Smoking Baby Back Ribs

Smoking is the ultimate method for infusing deep, rich flavors into your ribs. This technique requires a bit more time and attention but rewards you with exquisitely tender and flavorful meat.

Using a Smoker

Begin by preheating your smoker to 225°F (107°C). Choose wood chips that complement the flavor of your ribs, such as hickory for a strong smoky taste or apple for a slightly sweet aroma. Place the ribs in the smoker, bone side down, ensuring they are not touching the sides to allow smoke to circulate freely.

Smoke Flavor Infusion

Smoke the ribs for 4 to 5 hours, adding wood chips as needed to maintain a consistent smoke throughout the cooking process. The slow exposure to smoke allows the ribs to absorb the flavors deeply, resulting in a complex and satisfying taste.

Cooking Duration

Patience is key with smoking. The extended cooking time at a low temperature ensures that the ribs become incredibly tender, with the meat easily pulling away from the bones. To test for doneness, insert a meat thermometer into the thickest part of the ribs; they should reach an internal temperature of 195°F (90°C).

Tips for Smoking Ribs

  • Maintain Consistent Temperature: Fluctuations in temperature can affect the tenderness of the ribs. Use a reliable thermometer to monitor and adjust as needed.
  • Spritzing with Beer: Every hour or so, spritz the ribs with a mixture of beer and apple juice to keep them moist and enhance the flavor.
  • Rest Before Serving: After smoking, let the ribs rest for about 20 minutes. This allows the juices to redistribute, ensuring every bite is juicy and flavorful.

3.4 Comparison of Cooking Methods

Each cooking method offers unique benefits and caters to different preferences and setups. Here’s a detailed comparison to help you choose the best approach for your baby back ribs with beer and Montreal steak seasoning recipe.

Oven vs. Grill vs. Smoker

MethodProsCons
Oven Baking– Easy and consistent results- Minimal setup- Great for beginners– Lacks smoky flavor- Less interactive
Grilling– Adds a smoky flavor- Interactive cooking- Versatile– Requires more attention- Weather dependent
Smoking– Deep, rich smoky flavor- Extremely tender meat- Authentic BBQ taste– Time-consuming- Requires specialized equipment

Flavor Profiles

  • Grilling and Smoking: Both methods impart a smoky taste to the ribs, but smoking offers a more intense and layered smoky flavor. Grilling provides a slightly charred exterior with a subtle smokiness, especially if you use wood chips.
  • Oven Baking: This method keeps the flavors more contained, allowing the beer and Montreal steak seasoning to shine without the added smokiness. It’s ideal for those who prefer a cleaner, more straightforward flavor profile.

Ease of Preparation

  • Oven Baking: The simplest method with minimal hands-on time. Perfect for those who want a hassle-free cooking experience.
  • Grilling: Requires more attention to maintain temperature and manage flare-ups. Ideal for those who enjoy the process of grilling and want to engage more with their cooking.
  • Smoking: Demands the most time and equipment but rewards with unparalleled flavor and tenderness. Best suited for dedicated BBQ enthusiasts willing to invest the extra effort.

Choosing the Best Method for Your Setup

Consider the following factors when deciding which cooking method to use:

  • Equipment Available: If you have a smoker, smoking your ribs can yield fantastic results. If not, oven baking or grilling are excellent alternatives.
  • Time Constraints: Oven baking is quicker and less time-consuming compared to smoking. Grilling falls somewhere in between, depending on your setup and attention to detail.
  • Desired Flavor: For the most authentic BBQ flavor, smoking is the way to go. If you prefer a simpler, yet still delicious method, oven baking is ideal. Grilling offers a balance between the two, adding some smokiness without the complexity of smoking.

Enhancing Your Cooking Method

Regardless of the method you choose, there are additional tips and tricks to elevate your baby back ribs with beer and Montreal steak seasoning recipe.

Using Marinades and Bastes

Incorporate a beer-based marinade or baste to infuse extra flavor and moisture into the ribs. This not only enhances the taste but also helps in tenderizing the meat.

Temperature Control

Maintaining a steady temperature is crucial for achieving tender ribs. Invest in a good quality meat thermometer to monitor internal temperatures accurately.

Resting the Meat

Allowing the ribs to rest after cooking is essential. This step lets the juices redistribute, ensuring each bite is juicy and flavorful.

Experimenting with Flavors

Don’t be afraid to experiment with different types of beer or seasoning blends. Each variation can bring a new dimension to your ribs, making the cooking process even more enjoyable.

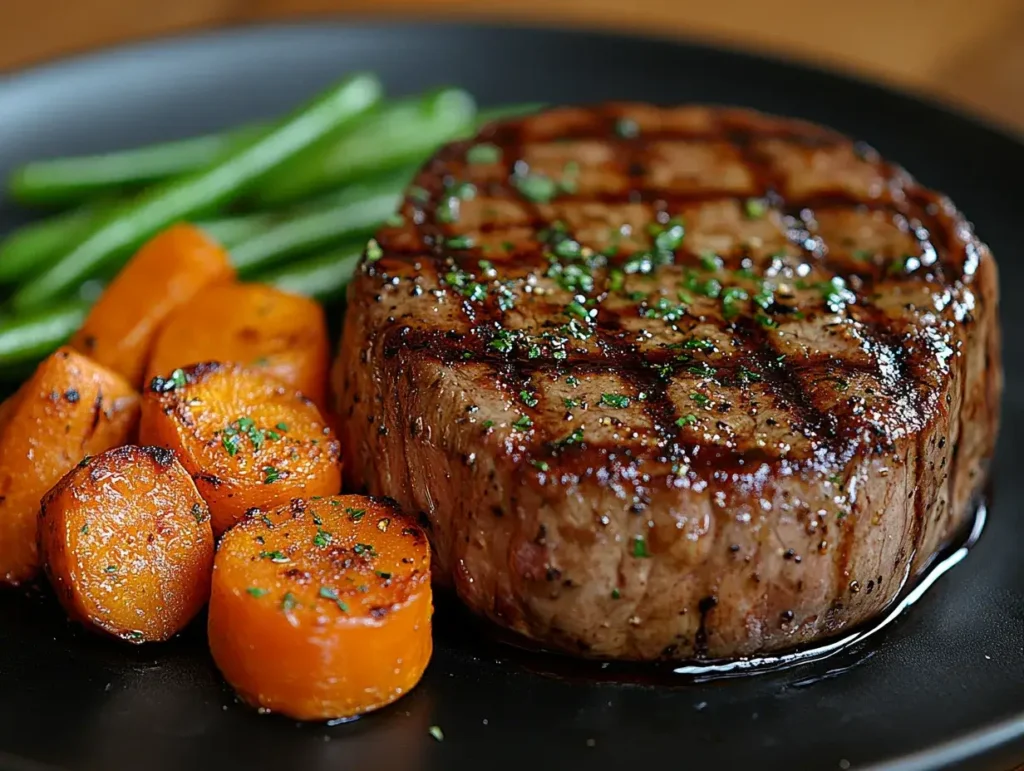
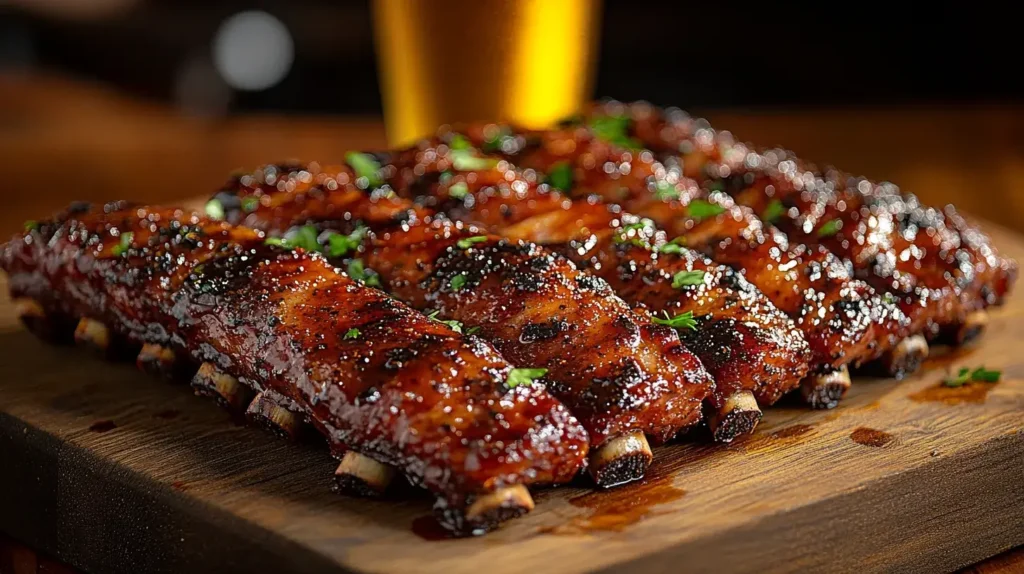
4. Finishing Touches and Serving

Once your ribs are cooked to perfection, it’s time to add the final touches and serve them up.

4.1 Applying the Barbecue Sauce Glaze

A good glaze can take your ribs to the next level:

  • Timing for Glaze Application: Apply the barbecue sauce during the last 30 minutes of cooking.
  • Glazing Techniques: Brush the sauce evenly over the ribs and let it caramelize for a sticky, flavorful coating.

4.2 Resting After Cooking

Allow your ribs to rest before serving:

  • Final Rest Period: Let the ribs rest for about 10 minutes after cooking to let the juices redistribute.
  • Covering Ribs for Warmth: Tent the ribs with foil to keep them warm and moist.

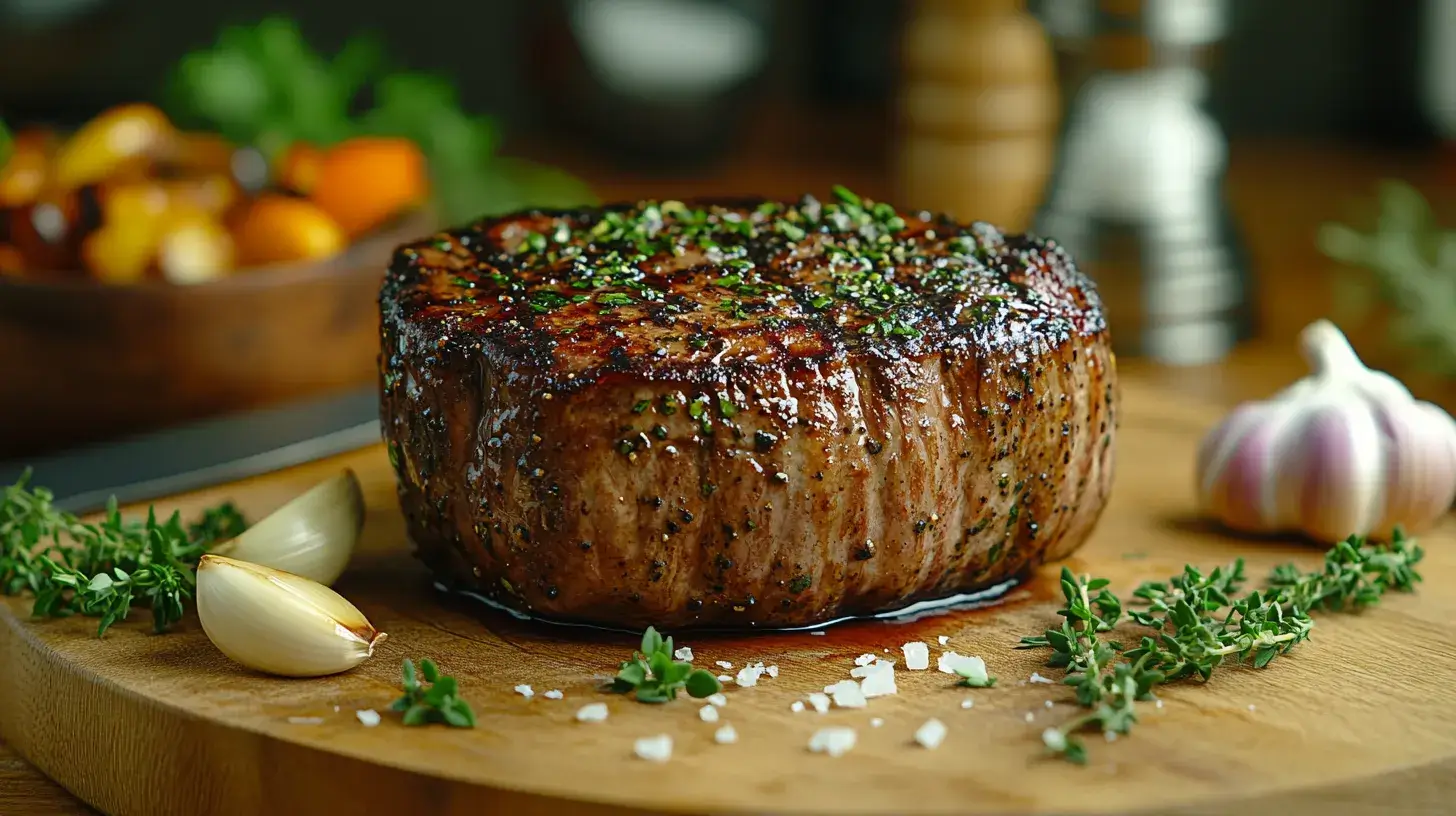
4.3 Slicing the Ribs

Proper slicing ensures an appealing presentation:

  • Proper Cutting Techniques: Use a sharp knife to cut between the bones for clean, even slices.
  • Serving Presentation: Arrange the ribs on a platter and garnish with fresh herbs for an appetizing look.

4.4 Pairing with Side Dishes

Complete your meal with delicious sides:

  • Coleslaw and Baked Beans: Classic BBQ sides that complement the rich flavors of the ribs.
  • Cornbread and Grilled Vegetables: Adds variety and a touch of sweetness to the meal.
  • Beverage Pairings: Craft beers, iced tea, or lemonade pair wonderfully with the smoky and savory flavors of the ribs.

5. Tips and Tricks for Perfect Ribs

Achieving perfectly juicy and flavorful ribs requires some insider tips:

5.1 Ensuring Maximum Tenderness

Tender ribs are the hallmark of a great recipe:

  • Low and Slow Cooking: Cooking ribs at a low temperature for an extended period ensures tenderness.
  • Moisture Retention Techniques: Using foil and marinades effectively keeps the ribs moist and succulent.

5.2 Flavor Boosters

Enhance the flavor profile of your ribs with these boosters:

  • Additional Spices and Herbs: Consider adding paprika, cumin, or thyme to the seasoning mix for extra depth.
  • Marinade Variations: Experiment with different types of beer or add ingredients like soy sauce or Worcestershire sauce to your marinade for unique flavors.

5.3 Troubleshooting Common Issues

Avoid common pitfalls with these solutions:

  • Dry Ribs: Prevent dryness by not overcooking and ensuring proper moisture retention during cooking.
  • Flavor Imbalance: Adjust seasoning and glaze quantities to achieve the perfect balance of savory and sweet.
  • Cooking Time Adjustments: Adapt cooking times based on your oven or grill type to ensure ribs are cooked perfectly.

5.4 Storage and Reheating

Store and reheat your ribs without losing flavor:

  • Storing Leftover Ribs: Refrigerate ribs in an airtight container for up to 3 days or freeze for longer storage.
  • Reheating Techniques: Reheat ribs in the oven wrapped in foil to maintain moisture, or gently microwave them with a splash of water or sauce.

Frequently Asked Questions (FAQs)

Is Montreal steak seasoning good for ribs?

Yes, Montreal steak seasoning is excellent for ribs as it adds a robust and savory flavor that enhances the meat’s natural taste. Its blend of spices complements the richness of the ribs, making them more delicious and flavorful.

What is the best seasoning to put on ribs?

The best seasoning for ribs depends on your flavor preference. Popular options include Montreal steak seasoning, BBQ dry rubs, garlic and onion powders, and sweet spices like brown sugar. Experimenting with different blends can help you find your perfect match.

Which of the cooking methods is best for baby back ribs?

The best cooking method for baby back ribs is subjective and depends on your equipment and desired flavor. Oven baking is great for ease and consistency, grilling adds a smoky flavor, and smoking offers the most authentic BBQ taste. Each method can produce tender and juicy ribs when done correctly.

What is the difference between Montreal and Chicago steak seasoning?

Montreal steak seasoning typically includes garlic, coriander, black pepper, and dill, offering a robust and savory flavor. Chicago steak seasoning may have a different spice blend, often sweeter or with additional herbs. The exact differences can vary by brand, but Montreal seasoning is generally more aggressive and savory.

What are ribs usually served with?

Ribs are usually served with classic BBQ sides such as coleslaw, baked beans, cornbread, and grilled vegetables. These sides complement the rich and savory flavors of the ribs, creating a balanced and satisfying meal.

What would you have with barbecue ribs?

With barbecue ribs, you can enjoy a variety of sides like potato salad, macaroni and cheese, corn on the cob, and pickles. Additionally, beverages like craft beer, iced tea, or lemonade pair wonderfully with the smoky and savory flavors of the ribs.

Conclusion

Crafting the perfect juicy baby back ribs with beer and Montreal steak seasoning is both an art and a science. By carefully selecting your ingredients, mastering your cooking method, and adding those finishing touches, you can create a mouthwatering dish that stands out at any gathering. Whether you prefer the convenience of oven baking, the smoky allure of grilling, or the deep flavors from a smoker, this recipe offers flexibility and delicious results every time. So, gather your ingredients, follow these steps, and enjoy the delightful experience of serving tender, flavorful ribs that everyone will love. Happy cooking!

The Best Pepper Steak Recipe for Quick Weeknight Dinners

You know that moment when you crave a satisfying meal, yet you need it straightaway? That’s precisely where this pepper steak recipe becomes a game changer. It combines a savory marinade, crisp peppers, and tender steak slices in one glorious skillet. Altogether, you get a balanced and mouthwatering dinner without spending hours in the kitchen.

Furthermore, this dish doesn’t rely on obscure ingredients or complicated steps. Instead, it features staples like bell peppers, onions, soy sauce, and a few flavorful spices. Additionally, it cooks in minimal time. If you wish to find reliable ways to choose wholesome protein sources, check out Harvard’s Protein Guidelines because they offer insights on adding lean proteins to your meal plan. You’ll see how a combination of lean steak and vibrant vegetables can fit into a healthy diet.

Why This Pepper Steak Recipe Stands Out

You might’ve scrolled through dozens of stir-fry ideas previously, but this one truly shines. Evidently, it’s the perfect union of taste, speed, and simplicity. Although other pepper steak variations use similar components, the approach here saves you time and delivers robust flavor. Accordingly, let’s see why:

Stir-fried pepper steak with red, yellow, and orange bell peppers, onions, and sesame seeds in a skillet.
A vibrant stir-fry of pepper steak and fresh vegetables, cooked to perfection.

Savory Flavors & Balanced Texture

  1. Quick Marinade: A blend of soy sauce, garlic, ginger, and cornstarch creates a savory base. This soy sauce marinade gently tenderizes the meat.
  2. Bright Bell Peppers: Red, green, or yellow peppers don’t just look pretty. Similarly, they offer a mild sweetness that pairs well with the steak’s richness.
  3. Subtle Heat: Red pepper flakes or even chili oil can give it a gentle bite. Certainly, you can adjust this for your spice tolerance.

Easy Preparation & Minimal Cleanup

  1. Fast Cooking: All steps—marinating, slicing, and stir-frying—happen quickly. Therefore, you won’t spend hours in the kitchen.
  2. One-Pan Meal: Using a single wok or skillet minimizes your cleanup. Indeed, that leaves you with more time to relax afterward.
  3. Less Stress: Because everything fits in one cooking vessel, you don’t juggle multiple pots and pans. Comparatively, other recipes often require more equipment.

Adaptable to Your Diet & Family Needs

  1. Lean Cuts: Flank steak or sirloin steak work beautifully, and both are comparatively leaner.
  2. Add More Veggies: Broccoli florets, snap peas, or mushrooms can easily join the party. Furthermore, it’s simple to omit what you dislike.
  3. Family-Friendly Appeal: Kids usually enjoy the colors and mild flavors. Nonetheless, you can spice it up for those who love heat.

Budget-Friendly

  1. Affordable Ingredients: Basic veggies and a modest amount of steak keep costs down.
  2. Reduced Waste: Leftovers reheat well, henceforth saving you from tossing extra produce.
  3. Smart Substitutions: If steak is pricey, try cuts on sale or buy in bulk and freeze portions. Eventually, you’ll notice the savings.

Gathering Your Ingredients and Tools to make pepper steak recipe

A cutting board with raw beef slices, fresh bell peppers, garlic, parsley, sesame seeds, black pepper, and sauce ingredients.
Fresh and colorful ingredients ready to create the perfect pepper steak recipe.

Before you start cooking, you’ll want to initially round up everything you need. Doing so avoids frantic dashing around the kitchen. Likewise, it streamlines your efforts, making mealtime a breeze.

Steak Selection

  • Flank Steak, Sirloin, or Round Steak: Choose a lean cut that’s easy to slice thin.
  • Marbling Check: Some marbling improves flavor. However, excessive fat can lead to greasiness.

Vegetable Essentials

  • Bell Peppers: Use red, green, or yellow. Mixing these adds color.
  • Onions: Medium white or yellow onions offer sweetness.
  • Optional Veggies: Try mushrooms, snap peas, or zucchini if you want variety.

Sauce & Seasonings

  • Soy Sauce: Regular or low-sodium. Subsequently, you can control saltiness better with a low-sodium version.
  • Cornstarch: Helps thicken your sauce.
  • Garlic & Ginger: Explicitly, these add zing.
  • Sesame Oil: A small drizzle provides a nutty fragrance.
  • Red Pepper Flakes: Adjust to your preferred spice level.

Tools for Efficiency

  • Wok or Large Skillet: A wide pan ensures even cooking.
  • Sharp Knife & Cutting Board: For thin, uniform slicing.
  • Measuring Cups & Spoons: You’ll need them for precise sauce mixing.
  • Paper Towels: Pat the steak dry to help with searing.

Recipe Ingredients in a Table

Below is a quick table so you can gather items without confusion. Afterward, you can prepare your workspace for an effortless cooking session.

IngredientQuantityNotes
Flank Steak (or Sirloin)1 lb (approx. 450g)Sliced thinly against the grain
Bell Peppers2 large, slicedRed, green, or a mix
Onion (medium)1, slicedWhite or yellow, thin slices
Soy Sauce3 tbspRegular or low-sodium
Garlic (minced)2 clovesFresh for stronger flavor
Ginger (minced)1-inch piecePeeled, grated or minced finely
Cornstarch2 tspFor marinade and sauce thickening
Sesame Oil1 tspAdds nutty aroma
Red Pepper Flakes¼ tspOptional, adjust to preference
Vegetable Oil1-2 tbspFor cooking (can use canola or peanut oil)
Water or Beef Broth¼ cupOptional, for thinning sauce if too thick

Step-by-Step Guide to Making the Best Pepper Steak

You’re now ready to bring this pepper steak recipe to life. Initially, be sure you have enough space around your stove. Certainly, you’ll want to move swiftly as the cooking progresses, especially if you decide to stir-fry. Let’s break it down to keep things clear.

1. Marinating the Steak

  1. Slice Thinly: Pat the steak dry before slicing it across the grain. This method shortens muscle fibers, leading to tender bites.
  2. Mix the Marinade: Whisk together 2 tablespoons of soy sauce, a clove of minced garlic, half of the ginger, and 1 teaspoon of cornstarch. Afterward, you might add red pepper flakes if you want some gentle warmth.
  3. Soak the Steak: Combine the sliced steak with the marinade in a bowl. Albeit a short marinade, 15 minutes is enough to infuse flavor. You can marinate for up to two hours, altogether intensifying taste.
  4. Avoid Over-Marination: If you let it sit for too long, the texture can turn mushy. Hence, 15 minutes to half an hour strikes the perfect balance.

2. Preparing the Vegetables

  1. Bell Peppers: Wash and slice them into thin strips. Comparatively, you may go thicker if you like them crunchier.
  2. Onions: Slice into half-moons or wedges. Eventually, your onions will sweeten as they cook.
  3. Optional Add-Ons: Mushrooms or snap peas need quick rinsing and trimming. Shortly, these can be tossed in alongside the peppers for extra color.

3. Stir-Frying the Steak

  1. Heat Your Pan: Warm a wok or skillet over high heat with a tablespoon of oil. Simultaneously, let it get really hot—steak sizzles best on high heat.
  2. Cook in Batches: Overcrowding lowers heat and steams the meat. Therefore, stir-fry the steak in portions to get that nice sear. Each batch should take about 2 minutes per side.
  3. Set Aside Cooked Steak: Transfer browned meat to a plate. Meanwhile, keep the pan hot for the veggies.

4. Making the Sauce

  1. Create the Mixture: In a small bowl, whisk 1 tablespoon of soy sauce with 1 teaspoon of cornstarch, remaining garlic, ginger, and ¼ cup water or beef broth. Add a drop of sesame oil if you like a deeper aroma.
  2. Deglaze the Pan: Add onions and peppers to the hot pan. Initially, stir for a couple of minutes, then pour in the sauce. Henceforth, scrape up any browned bits of steak on the bottom.
  3. Thicken Gently: As the sauce warms, you’ll see it thicken. Occasionally, stir to coat the vegetables. If it’s too thick, add a splash more water or broth.

5. Combine & Finish

  1. Reintroduce the Steak: Put the cooked steak back with the veggies. Shortly, everything will mix and absorb the sauce.
  2. Taste & Adjust: Sample the dish. Comparatively, you may need more soy sauce if it’s too mild, or extra pepper flakes if you like heat.
  3. Final Consistency: Once it’s glossy and well-coated, remove from heat. Surely, you’re ready to serve a piping-hot meal.

Serving Suggestions and Variations

Plate of tender pepper steak topped with sesame seeds and green onions, served with white rice and a side of sauce.
A flavorful pepper steak recipe paired with steamed rice, perfect for any meal.

You’ve just created a delicious pepper steak recipe. Nevertheless, you can elevate it further with smart sides or flavor tweaks. This is your chance to personalize the meal.

1. Best Side Dishes

  • Steamed Rice: White or brown rice works. Likewise, cauliflower rice keeps it low-carb if you’d prefer.
  • Noodles: Lo mein or rice noodles pair splendidly, soaking up the sauce.
  • Light Salad: A crunchy salad can counterbalance the savory components.

2. Creative Variations

  • Spicy Pepper Steak: Add chili oil or hot sauce. Evidently, this spikes the heat for those who like it fiery.
  • Sweet & Sour: Drizzle in honey or brown sugar for a tangy note. Moreover, you can swap peppers for pineapple chunks if you fancy a sweet contrast.
  • Extra Veggies: Toss in broccoli florets or carrots for color. Additionally, water chestnuts lend a fun crunch.

3. Storage & Leftover Tips

  • Fridge Storage: Place leftovers in a sealed container. Identically, they stay fresh for up to 3 days.
  • Easy Reheating: Use a skillet on medium heat. Occasionally, add a splash of water or broth to keep it from drying out.
  • Meal Prep: Cook a big batch on Sunday. Concurrently, portion out your lunches to simplify your workweek.

4. Dietary Adjustments

  • Gluten-Free: Swap soy sauce for tamari or coconut aminos. Nevertheless, confirm all other ingredients are GF-friendly.
  • Low-Sodium: Opt for reduced-salt soy sauce. Furthermore, rinse your veggies well to reduce any hidden sodium in canned items.
  • Meat Substitute: Use tofu or seitan if you’d rather skip steak. Henceforth, marinade times may differ, so keep an eye on texture.

Conclusion

You have just mastered a pepper steak recipe that merges bold flavor, colorful veggies, and an easy cooking method. Surely, it’s a top candidate for busy nights or when you just want a satisfying meal without fuss. Although it looks elaborate, the steps prove otherwise. Comparatively, many takeout options might seem appealing, but this homemade version offers freshness you can taste.

Chiefly, what makes this recipe shine is how approachable it is. Undoubtedly, the marinade hits the sweet spot for taste and tenderness. Meanwhile, high-heat stir-frying keeps each element crisp and juicy.

Lastly, try customizing this dish in line with your family’s tastes. Therefore, if you want even more heat, toss in extra chili flakes. If you adore sweetness, stir in a drizzle of honey or pineapple. The possibilities are endless, so don’t be afraid to experiment. Now’s the time to gather those peppers, slice that steak, and delight in a succulent meal.

Ready to dive in? Grab your wok and start sizzling. Ultimately, the aroma alone will have your household racing to the dinner table.

FAQs: Frequently Asked Questions

What cut of meat is a pepper steak?

Chefs usually choose flank steak, sirloin, or round steak for this recipe. They all offer a balance of lean texture and robust flavor. Slicing them thinly ensures tenderness.

What is pepper steak sauce made of?

Typically, it features soy sauce, cornstarch, garlic, ginger, and sometimes beef broth or water. This combination becomes glossy during cooking, coating the steak and peppers. Some folks also add sesame oil or a sprinkle of sugar for sweetness.

Why is Chinese pepper steak so tender?

High-heat stir-frying, combined with a quick marinade, creates that melt-in-your-mouth feel. Additionally, the marinade’s cornstarch helps lock in moisture, preventing the steak from drying out.

How do you make pepper steak not chewy?

First, slice the steak against the grain in thin strips. Second, marinate it to break down the fibers. Third, cook it quickly over high heat to seal in juices. Overcooking usually leads to chewiness, so keep an eye on the timing.

How much soy sauce in pepper steak recipe?

Most versions call for about three tablespoons of soy sauce total, divided between marinade and sauce. However, you can reduce or increase the amount based on your sodium preference. Remember that low-sodium varieties let you control salt levels more precisely.

Can you use London broil in a pepper steak recipe?

You certainly can. London broil is often a top-round cut that benefits from slicing across the grain. If you marinate it thoroughly, it becomes quite tender and works wonderfully in a stir-fry.

How to make pepper steak recipe?

You slice your steak thinly against the grain, then marinate it in soy sauce, garlic, ginger, and a little cornstarch. Next, stir-fry the peppers and onions, remove them, and cook your marinated steak in a hot wok or skillet. Finally, return the veggies, add your sauce, and let everything come together for a flavorful finish.

If you found this meal idea beneficial, share it with family and friends. Don’t forget to check out our Quickmealsrecipes for more recipes that fit your active lifestyle. Undoubtedly, you’ll discover more easy dinner solutions that save you time and deliver satisfaction. Try this pepper steak recipe tonight and let us know your thoughts!

Beef Petite Sirloin Steak 101: Everything You Need to Know

You’re standing at the meat counter, eyeing each package with both excitement and caution. Something about beef petite sirloin steak draws your attention. The cut looks lean yet promising, and you can almost imagine that mouthwatering sizzle once it hits the pan. At first glance, you might wonder if it’s worth adding to your cart. After all, there are so many steak varieties out there. Nevertheless, the price tag and moderate size make this particular steak seem like a great option for a weeknight dinner or even a special gathering.

If you’ve ever been curious about turning a lean steak cut into a show-stopping meal, you’ve come to the right place. In the next few paragraphs, you’ll discover exactly why beef petite sirloin steak has captured the hearts of both kitchen novices and seasoned home cooks. You’ll learn what makes it special, how to pick the best cut, and how to cook it so it’s flavorful in every bite. By the end, you’ll feel confident in serving this juicy, tender steak to friends, loved ones, or even just yourself after a long day. So, slip on your apron. Let’s dive into the world of one of the most underrated cuts of beef.

Understanding Beef Petite Sirloin Steak

Definition & Origin

You might be asking: What exactly is beef petite sirloin steak? Essentially, it’s a segment carved from the sirloin primal, sitting just behind the loin region. It’s notably smaller than typical sirloin cuts, which is why it often carries the name “petite.” Despite its more modest size, this lean beef cut generally presents a robust flavor. You’ll find it to be quite satisfying, albeit not as fatty as certain premium steaks.

Moreover, the history behind the sirloin section traces back to old-school butchering traditions. Traditionally, the sirloin primal was broken down into top sirloin, bottom sirloin, and a handful of smaller cuts—like this petite sirloin. Because it’s leaner, you might need to pay attention to cooking methods that infuse moisture and maintain tenderness. If you’d like a more detailed look into how beef cuts are categorized, you can check out the official USDA guide on general meat labeling. It explains the broad categories of each primal region.

Texture & Flavor Profile

Beef petite sirloin steak doesn’t carry the same degree of marbling that you’d see in a ribeye or New York strip. Consequently, it’s essential to follow cooking tips that ensure it stays tender. You’ll notice a hearty bite that, when cooked right, yields a juicy texture. Indeed, marinating or seasoning well can amplify its natural taste.

Comparatively, some folks sense a mild beefiness similar to top sirloin. Tender petite sirloin might not melt in your mouth in the same way as a more expensive steak, yet it can still become a succulent meal with minimal effort. In addition, you’ll discover that it pairs nicely with strong flavors like garlic, soy sauce, or dried herbs.

There are many reasons this specific steak is gaining traction. First and foremost, it tends to be more budget-friendly than certain high-end cuts. Furthermore, it’s versatile—you can grill it, pan-sear it, or even toss it in the oven if you prefer a more hands-off method. Additionally, it’s available in most grocery stores, which makes it convenient when you’re looking for a quick dinner idea.

  • Cost-Effective: You get a solid portion of lean protein for a respectable price.
  • Moderately Easy to Find: Most supermarkets carry some form of petite sirloin.
  • Cooks Quickly: The smaller size shortens steak cooking times.

Overall, beef petite sirloin steak hits the sweet spot between affordability and taste. If you’re striving to eat better or simply expand your steak repertoire, this cut deserves a place in your kitchen. For additional inspiration, you can see how professional chefs handle lean sirloin cuts on the BBC Good Food site, which often shares practical cooking suggestions.

How to Choose the Perfect Beef Petite Sirloin Steak

Color & Freshness

When you head to your local store, pay attention to color. Look for a vibrant, dark-red hue without excessive browning around the edges. Equally, the packaging should be intact, with no leaks or unpleasant odors. Before placing the steak in your cart, double-check the sell-by date. Likewise, keep an eye on any discount stickers. Occasionally, you can snag a top-notch steak at a bargain price right before its expiry date—just be sure to cook it sooner rather than later.

Furthermore, observe the texture if the package allows. Any slimy residue or questionable smell indicates you should probably pass. Essentially, you want a steak that looks firm, fresh, and appealing, ensuring you begin with the best possible starting point.

Marbling & Thickness

Because beef petite sirloin steak is quite lean, you won’t see large streaks of intramuscular fat. Nevertheless, a bit of fine marbling can promote extra moisture during cooking. The thickness often ranges between an inch to an inch and a half. If it’s thicker, you might need to adjust cooking times accordingly. Conversely, a thinner cut will cook more swiftly but may risk overcooking if not watched carefully.

When in doubt, talk to the butcher if one is available. They usually know a great deal about the day’s fresh supply, and they can even help you pick a piece that suits your cooking style. Comparatively, that personal touch sometimes leads to the best flavor outcome.

Organic vs. Conventional

Some individuals prefer organic beef for peace of mind, while others find conventional cuts to be more budget-friendly. Generally, this choice comes down to your preferences and dietary priorities. Nevertheless, don’t assume organic always means superior taste. It just offers certain assurances about feed quality and farming practices.

If you’re trying to decide, weigh factors like cost, availability, and your personal stance on pesticides or hormones. Undoubtedly, you can create a delicious meal with either choice, provided you follow the right techniques.

Storage Guidelines

You’ll want to handle your steak properly, especially if you’re not cooking it the same day. Place it in the coldest part of your refrigerator for up to two days. If you’re planning a meal further down the line, freeze it in airtight packaging to maintain freshness. Markedly, wrapping the steak in a layer of plastic wrap and then a freezer-safe bag reduces the risk of freezer burn.

When you’re ready to use it, allow it to thaw safely in the fridge. Previously, some folks thawed meat on the counter, but that’s risky for bacteria growth. Thawing in the fridge keeps the temperature consistent and safer for consumption.

Flavorful Ways to Cook Beef Petite Sirloin Steak

Essential Cooking Methods

There are plenty of ways to cook this nutritious lean cut. However, the following methods shine in terms of convenience and flavor:

  1. Pan-Seared: If you love a crusty exterior, pan-searing is your friend. Preheat a cast-iron skillet, add oil, and let it shimmer. Gently place your steak inside, hearing that sizzle that tells you it’s browning properly. Afterward, flip once a crust forms, surely about 2–3 minutes per side.
  2. Grilling: For a smoky essence, toss your beef petite sirloin steak on a hot grill. Brush the grates with oil to prevent sticking. Keep an eye on your timing—generally, 3–4 minutes per side yields a medium-rare center, though it also depends on thickness. Stick a thermometer in the thickest part if you want to be certain.
  3. Oven-Roasting: If your cut is on the thicker side, consider oven-roasting. Firstly, sear it on the stove to lock in juices, then transfer it to a preheated oven (around 400°F) for a few minutes to finish cooking. Eventually, this method keeps the interior juicy while still giving you an appealing crust.

Want more quick ways to prepare dinners? Check out How To Make Beef Bottom Round Steak Tender And Juicy Every Time

Steak Doneness & Internal Temps

It’s crucial to pay attention to steak cooking times, especially when dealing with a lean cut:

  • Rare: 125°F (52°C)
  • Medium-Rare: 130°F (54°C)
  • Medium: 140°F (60°C)

Insert a digital meat thermometer into the steak’s center to verify. Then, let it rest for a few minutes before slicing. Resting your steak prevents juices from spilling out prematurely. You’ll thank yourself when each slice tastes moist and succulent.

Beef Petite Sirloin Steak Marinade & Seasoning Tips

Raw Beef Petite Sirloin Steaks with Garlic and Herbs
Two raw petite sirloin steaks ready for seasoning and marinating

Marinating is often the key to success with any tender petite sirloin, especially if you want extra flavor. A quick marinade might include olive oil, garlic, soy sauce, and a splash of vinegar. Altogether, the acidic component helps tenderize the muscle fibers, while the oil keeps things from drying out.

Suggested Basic Marinade

  • 2 Tbsp olive oil
  • 1 tsp garlic powder
  • 1/2 tsp black pepper
  • 1 tsp sea salt
  • 1 Tbsp Worcestershire sauce

Moreover, you can throw in dried herbs like rosemary or thyme if you enjoy earthy flavors. Let the steak soak for at least 30 minutes—any longer, and the marinade can penetrate more deeply.

Table: Quick Marinade Ingredients

IngredientAmountNotes
Olive Oil2 tbspAdds moisture, mild flavor
Garlic Powder1 tspBoosts savory depth
Black Pepper1/2 tspProvides gentle heat
Sea Salt1 tspBalances overall taste
Worcestershire Sauce1 tbspContributes tangy richness

After mixing these, coat the steak evenly. Afterwards, pat it dry before cooking to help it sear. If you leave the surface too wet, you may not get that brown crust everyone craves. Nevertheless, do keep a slight film of oil on the meat to reduce sticking in the pan or on the grill.

Nutritional Benefits of Beef Petite Sirloin Steak

Lean Protein Source

Beef petite sirloin steak is typically a leaner choice. Because of its lower fat content, it’s suitable for those who watch their intake yet still crave red meat’s taste. A single serving often packs a punch of high-quality protein essential for muscle building and repair. It’s surely a more nutritious option if you’re trying to balance macros.

Vitamins & Minerals

You’ll find that this lean steak cut also brings key vitamins like B12 and B6 to the table, equally beneficial for energy production and nervous system health. Iron and zinc, two critical minerals, contribute to immunity and oxygen transport. Indeed, incorporating moderate portions of beef petite sirloin steak can help you maintain a balanced meal plan.

  • Iron: Supports hemoglobin function, helping deliver oxygen to cells.
  • Zinc: Aids immune system activity and wound healing.
  • Vitamin B12: Vital for red blood cell formation, particularly in preventing certain forms of anemia.

Calorie & Fat Content

When you look at the label, you may see that a typical 3–4 ounce serving hovers around 150–180 calories, depending on how much visible fat remains. That’s modest compared to fattier cuts like ribeye or T-bone. If you’re cutting calories or simply prefer a less fatty meal, petite sirloin hits a sweet spot. Just remember to watch your portion size because adding sides, sauces, and garnishes can ramp up the total calorie count.

Healthier Cooking Methods

Grilling, broiling, or pan-searing in minimal oil are often considered the best ways to keep your meal wholesome. Avoid deep-frying or drenching the steak in heavy creams. Surely, if you do want a rich sauce, you can whip up a light mushroom gravy or a simple red wine reduction instead. That way, you remain in control of added fats and flavors.

Serving Suggestions & Storage Tips for Beef Petite Sirloin Steak

Cooked Beef Petite Sirloin Steak Served with Vegetables
Sliced petite sirloin steak served with roasted veggies

Sides & Pairings

Sometimes, you want a complete meal that truly highlights the tender petite sirloin on your plate. You might pair it with roasted asparagus or a fresh spinach salad. Alternatively, mashed potatoes deliver a comforting touch. For a lighter option, consider grilled zucchini or bell peppers.

  • Roasted Veggies: Carrots, Brussels sprouts, sweet potatoes
  • Classic Sides: Mashed potatoes, mac & cheese, or a baked potato
  • Healthy Greens: Spinach salad, kale, or sautéed mushrooms

Surely, these pairings accentuate the savory notes of your steak. You could also add a splash of lemon juice or a sprinkle of chopped parsley at the end for an extra flavor lift.

Leftover Ideas

If you end up with extra slices, you can repurpose them in countless ways. Chop them into cubes for a quick stir-fry. Slice them thin for a steak sandwich with onions and peppers. Or lay them atop a hearty salad for a protein-packed lunch. You can find more leftover-friendly recipes on our site at Quickmealsrecipes – Leftover Creations.

Stored properly in the fridge, leftover steak stays good for about two to three days. Subsequently, you can freeze it for up to two months if you want to use it in stews or soups later on.

Storage & Reheating Best Practices

Use airtight containers or wrap your steak in foil. Place it in the refrigerator if you plan on consuming it soon. If you wish to freeze it, use freezer-safe ziplock bags and label them with the date. When reheating, opt for low heat. You can warm it in a skillet with a touch of broth or in an oven set at around 300°F. This gentle approach helps retain moisture. Likewise, zapping it in the microwave can sometimes cause it to become rubbery, so be cautious if you choose that route.

Table: Simple Steak Meal Plan

DayMealNotes
MondayPetite sirloin with roasted vegetablesLean approach, quick to prepare
TuesdaySteak sandwich with sautéed onionsGreat for lunch, add melted cheese if desired
WednesdayStir-fry with petite sirloin stripsBalanced with rice or noodles

Using a meal plan like this ensures that you don’t waste your beef petite sirloin steak. You’ll keep variety in your dinners and lunches, consequently making the most of your grocery budget.

Conclusion

Now that you’ve had a closer look at the ins and outs of beef petite sirloin steak, you’re primed to create a memorable meal without breaking the bank. This particular cut brings you a lean, cost-effective way to enjoy that classic steak experience. Surely, you can harness its potential by focusing on proper selection, mindful cooking methods, and strategic seasoning. So, gather your favorite marinades, warm up your skillet or grill, and let the aroma of a perfectly cooked sirloin fill your kitchen.

FAQ: Beef Petite Sirloin Steak

1. How to cook beef petite sirloin steak?

Beef petite sirloin steak is lean yet flavorful. You can season it with salt, pepper, and garlic powder, then either grill or pan-sear it over medium-high heat for 2–3 minutes per side. To finish, let it rest for a few minutes so the juices redistribute before serving.

2. What is beef petite sirloin steak?

Beef petite sirloin steak is a smaller, leaner cut from the larger sirloin primal. It offers robust beefy flavor with less marbling than other sirloin cuts, making it a budget-friendly yet satisfying choice for quick meals.

3. How to cook beef petite sirloin steak in the oven?

To cook beef petite sirloin steak in the oven, start by searing it on the stovetop for about 2 minutes per side to form a crust. Then, transfer the steak to a preheated oven at 400°F (200°C). Cook for 5–10 minutes (depending on thickness) until it reaches your preferred doneness. Rest it for 5 minutes before slicing.

4. Aldi USDA Choice Black Angus Beef Petite Sirloin Steaks Pack

Aldi’s USDA Choice Black Angus beef petite sirloin steaks come pre-packaged, typically in vacuum-sealed packs. They’re known for their tenderness and affordability. Since each pack is portioned, you can easily season, marinate, or cook them in various ways—grilling, broiling, or pan-searing—to enjoy a lean, savory meal.

How To Make Beef Bottom Round Steak Tender And Juicy Every Time

You know the moment: you’re standing in the kitchen, eyeing that beef bottom round steak with both anticipation and a hint of uncertainty. In your heart, you imagine a melt-in-your-mouth bite, rich with flavor and succulent juices—the kind of steak that inspires nods of approval and requests for seconds. Yet, at the same time, you may wonder if this lean cut is destined to emerge tough and chewy. If you’ve been there—caught between your culinary vision and practical concerns—rest assured, you’re not alone. Plenty of individuals have approached the challenge of preparing this particular piece of beef, only to wonder where to begin.

The wonderful news is that you hold all the power to transform it into a mouthwatering dish. Armed with the right techniques and a little patience, you can coax out incredible taste and tenderness from the often-overlooked bottom round steak. This comprehensive guide will lead you step-by-step, ensuring you’re fully equipped to make a memorable meal that brings everyone around the table with satisfied smiles.

Why Beef Bottom Round Steak Deserves Your Attention

You might ask: Why should you focus on beef bottom round steak in the first place? After all, the meat counter offers so many attractive choices, from pricey ribeyes to marbled strip steaks. Yet the bottom round steak stands out for several key reasons that may surprise you:

  1. Budget-Conscious Option
    • Beef bottom round steak costs less than some of the more famous cuts. If you’re being mindful of your grocery budget, this lean slice offers solid value. It allows you to serve a hearty meal without straining your resources.
  2. Nutrient Powerhouse
    • Lean cuts often carry a lower fat profile, which can be ideal if you’re balancing your meal plan. Bottom round steak is still rich in protein, iron, zinc, and other vital vitamins, making it a healthy centerpiece for your dinner table.
  3. Adaptability in Cooking
    • Despite its reputation for being a tougher cut, the bottom round steak can be crafted into numerous delicious dishes. You can marinate it, slow-cook it, or even treat it with a quick sear if you use the correct technique. That versatility makes it a smart staple to keep on hand for various cooking adventures.
  4. Satisfying Flavor
    • Though it’s less marbled than other cuts, you’ll discover that bottom round steak retains a bold, beefy taste. When you allow it to cook properly and break down the connective tissues, you’ll experience a dish that surprises you with its robust flavor.

In essence, beef bottom round steak offers a perfect combination of affordability, flavor, and health benefits. It’s a cut that lets you dive into gourmet-level cooking without spending lavishly. By giving it a bit of special care, you can enjoy a mouthful of savory delight.

Selecting the Perfect Beef Bottom Round Steak

Before you start seasoning or tenderizing, it’s crucial to choose the right piece of beef bottom round steak. It’s easy to overlook a few simple cues when you’re in a hurry at the store, but paying attention at this stage sets you up for success in the kitchen.

A close-up of a fresh beef bottom round steak being inspected by a hand, placed on a wooden cutting board with soft natural lighting. The steak has a deep red color and faint marbling, surrounded by kitchen essentials like a knife, salt, and pepper grinder
Inspecting the marbling and freshness of a beef bottom round steak—an essential step for a successful recipe.

Look for Good Marbling

You often hear “marbling” referenced in steak descriptions—those thin veins of white fat that thread through the lean portion. While beef bottom round is generally leaner, you might spot slight marbling. These delicate lines of fat can enhance moisture retention, especially when you’re cooking on lower heat for longer stretches. The key is to look for a balanced ratio: You don’t want a piece so fatty that it loses its “lean” status, but you also don’t want something entirely devoid of these little flecks that add flavor.

Inspect Thickness

It’s also wise to check the thickness of the steak. A cut that’s too thin might dry out quickly, especially if you plan to sear or grill it. On the other hand, an overly thick piece needs longer cooking and might intimidate you if you’re short on time. Ideally, you’ll aim for steaks that measure around one inch thick, giving you a nice balance between cooking time and consistency of results.

Freshness Matters

You can spot freshness by observing the coloration—rich, bright red typically indicates a fresher cut. Steaks that appear more brownish might have been sitting for a while. Use your nose as well. Any sharp or off-putting scent should be an immediate red flag. When you have a choice, purchase steaks that are packaged on the same day or check the “best by” date to ensure you’re getting a top-quality piece.

Essential Tools and Techniques for Tenderizing

The difference between a tough, dry steak and one that is tender and juicy can come down to the steps you take prior to cooking. Let’s delve deeper into proven methods that soften the meat fibers so you end up with an exquisite dining experience.

Mechanical Tenderizing with a Meat Mallet

Using a meat mallet or tenderizer is one of the oldest yet most efficient ways to improve the texture of a tough cut. Certified Angus Beef explains various tenderizing methods and best practices you can follow at home. Moreover, if you’re interested in safety and proper handling, check out USDA guidelines on mechanical tenderization to ensure you’re preparing your beef responsibly.

  • Wrap or Cover the Steak: Place the beef in plastic wrap or a sealed bag. This prevents juice splatters and keeps your workspace clean.
  • Even Pressure: Apply consistent force across the surface, focusing on thicker segments.
  • Moderation: Avoid over-flattening. You want the fibers softened, not pulverized.

Using a mallet may seem old-fashioned, but there’s a reason this technique has stuck around for generations.

Marination Methods

Beef bottom round steak soaking in a glass dish filled with a citrus-based marinade, including lime slices, garlic, cilantro, and olive oil, surrounded by fresh herbs and a wooden spoon on a rustic countertop.
Transform your beef bottom round steak with flavorful marinades. This image highlights a vibrant citrus-based blend that tenderizes and infuses rich flavors

Marinating is another go-to approach that both tenderizes and infuses flavor. You’ll want to choose a balanced blend of acid, oil, and aromatics. For acid, options include vinegar, citrus juices, or wine. These ingredients break down tougher fibers. The oil adds moisture, while herbs and spices layer on the flavor dimension. A few recommendations to consider:

  • Citrus-Based Marinades: Perfect if you want a tangy zing. Lime, lemon, or even pineapple juice can work wonders.
  • Vinegar Infusions: Red or balsamic vinegar offers a deeper flavor.
  • Wine-Soaked Blends: Red wine or even certain white wines can introduce subtle complexities.

Allow your steak to soak for at least 2 hours, but you’ll often get better results if you can marinate overnight. Just be sure not to overdo it—too much acidity for too long can compromise the meat’s texture, making it mushy rather than beautifully tender.

Slow Cooking or Braising

For those who prefer a one-pot approach that practically guarantees tenderness, slow cooking or braising is the way to go. This method uses low heat and extended cooking times to break down connective tissues. Braising involves searing the steak first to lock in flavor, then partially submerging it in a flavorful liquid (like beef stock or a savory sauce), and allowing it to simmer gently. Alternatively, using a slow cooker with ample liquid, vegetables, and spices can yield an equally delicious result. The extended heat exposure transforms the fibrous meat into a succulent centerpiece. If you favor a set-it-and-forget-it approach, you’ll find slow cooking to be your best friend when working with tougher cuts like beef bottom round.

Step-by-Step Method to Make Beef Bottom Round Steak Tender and Juicy

Let’s walk through a general method that combines a few of the best practices described above. Feel free to tweak these steps based on personal preferences or the ingredients you have on hand. The goal here is to simplify your approach, ensuring consistent success every time.

Step 1 – Tenderize the Steak

In this crucial first step, you can use a meat mallet if you want to physically break down tougher fibers. If you don’t have a mallet, a rolling pin or the back of a sturdy skillet can also do the trick. Start gently and then gradually build pressure until the steak looks uniformly flat.

Step 2 – Season Generously

Seasoning isn’t just about flavor. Salt helps draw moisture into the proteins, so you’ll want to apply it evenly across both sides of the steak. Pepper, garlic powder, onion powder, and your favorite herbs can also add depth. The idea is to enhance the steak’s natural qualities without overwhelming its inherent flavor.

Step 3 – High-Heat Searing

Begin cooking by searing the steak over high heat. You can do this in a skillet with a bit of oil or on a grill. Two to three minutes on each side often achieves a lovely crust that locks in essential juices. Keep a close eye to avoid scorching. This step sets the foundation for a steak that remains moist and savory.

Step 4 – Lower Heat and Cook Slowly

Once you’ve locked in those initial juices, transition to a slower cooking method. That could mean placing the steak in your oven at a moderate temperature (around 325°F/160°C) or transferring it to a slow cooker with some broth or sauce. The prolonged exposure to gentle heat works magic on the connective tissues, leaving you with a fork-tender result.

Step 5 – Rest Before Serving

As tempting as it may be to slice in the second it’s done, giving the steak a rest of about 5 to 10 minutes is essential. When you let it sit, the juices that have migrated to the center during cooking redistribute through the meat, ensuring each bite is succulent.

Following these five steps can bring about a beautiful transformation, taking a humble piece of bottom round steak and turning it into a dish that wows both you and your dinner companions.

Mouthwatering Recipes to Try

Now that you’ve got a solid understanding of how to pick, tenderize, and cook beef bottom round steak, let’s move on to some recipes that highlight its versatility. Each option below demonstrates a slightly different approach, so pick the one that aligns best with your mood and schedule.

Recipe #1: Classic Marinade for Beef Bottom Round Steak

Perhaps you want a quick method that you can prepare in the morning and then have ready by evening. A well-structured marinade can do most of the work while you go about your day. Here’s an example that relies on a handful of common pantry items yet delivers a powerful flavor punch.

Ingredients Table

IngredientQuantityNotes
Olive Oil2 tbspHelps keep the steak moist and adds richness
Soy Sauce2 tbspContributes savory depth, pairing well with beef
Worcestershire Sauce1 tbspBalances savory and tangy notes
Lemon Juice1 tbspAdds acidity to tenderize, brightens overall taste
Garlic (minced)2 clovesInfuses a pungent aroma
Black Pepper1 tspA traditional seasoning element

Instructions:

  1. In a medium bowl, whisk together the olive oil, soy sauce, Worcestershire sauce, lemon juice, minced garlic, and black pepper. You’re creating a liquid that blends tanginess, umami, and subtle aromatic undertones.
  2. Place your beef bottom round steak in a sealable bag or airtight container. Pour the marinade on top, making sure to coat all sides evenly.
  3. Seal the bag or container. Let it chill in the refrigerator for at least 2 hours. For maximum infusion, aim for about 8 hours or overnight.
  4. When you’re ready to cook, remove the steak from the marinade. Pat it dry slightly with paper towels (excess marinade might burn if you plan to sear).
  5. Sear each side over medium-high heat for a couple of minutes to lock in flavor. Then, reduce the heat or move the steak to indirect heat until it reaches your desired internal doneness. A medium-rare to medium range often suits this cut particularly well.

Flavor Tip: Adding a dash of onion powder or paprika can lend more depth to your marinade if you appreciate an extra kick. Feel free to customize the balance of citrus, soy, and herbs according to your taste preferences.

Recipe #2: Slow Cooker Comfort Beef Bottom Round Steak

Slow Cooker Comfort Beef Bottom Round Steak"

Alt Text:
"A slow cooker filled with tender beef bottom round steak, carrots, potatoes, and onions, simmering in a rich broth, with steam rising in a cozy kitchen setting.
Effortless and delicious, this slow cooker beef bottom round steak recipe delivers tender, flavorful results for your busy days.

If you’ve got a day packed with errands or personal commitments, the slow cooker method can be your best friend. It frees up your time while delivering a mouthwatering payoff, as slow heat tenderizes the meat to a delightful texture.

Ingredients Table

IngredientQuantityNotes
Beef Broth1 cupKeeps the steak moist and adds a savory base
Onion (sliced)1 mediumContributes sweet, aromatic depth
Carrots (sliced)2Adds natural sweetness and color
Garlic Powder1 tspSimplifies seasoning, pairs well with onion
Thyme (dried)1 tspA subtle herbal component
Salt & PepperTo tasteAdjust seasoning at the end if needed

Instructions:

  1. Start by searing your bottom round steak in a hot skillet. Two to three minutes per side sets a caramelized crust that locks in the steak’s juices.
  2. Transfer the steak to your slow cooker. Pour in the beef broth, then layer the onions and carrots around the meat. Sprinkle garlic powder, thyme, and a dash of salt and pepper.
  3. Cover the slow cooker and set it to low heat. Let it cook for about 6 to 8 hours. This gentle method gradually coaxes out the connective tissues, leaving you with a steak so tender it practically falls apart.
  4. Before serving, sample the broth and adjust seasonings if needed. Some prefer additional salt, a splash of soy sauce, or a sprinkle of fresh herbs to brighten the final dish.
  5. Plate your steak with the carrots and onions, drizzling a bit of the cooking juices on top for extra flavor. This is one of those comfort meals that pairs nicely with mashed potatoes or crusty bread to sop up the sauce.

Time-Saving Tip: If your mornings are too hectic to handle the searing step, you can still place all ingredients in the slow cooker without it. While you’ll miss out on some browning effects, the steak will still be incredibly succulent after a full day’s simmer.

Pro Tips for Serving and Storage

Once your steak is cooked to perfection, you don’t want to lose any of that tenderness or flavor due to improper handling. Consider these final touches that ensure your meal goes from good to absolutely unforgettable.

Slice Against the Grain

When you carve your steak, pay attention to the muscle fibers. You’ll notice they typically run in one direction. Cutting across those fibers shortens them, making each mouthful far easier to chew. This small step can make a huge difference in texture.

Properly Store Leftovers

Any steak that remains unused can be stored in airtight containers or wrapped in heavy-duty foil. Keep it in the fridge for up to three days. The key is to seal out as much air as possible, preventing excess drying and preserving the steak’s succulence.

Reheat Gently

You’ve put in all this effort to achieve tenderness, so the last thing you want is to overcook it when reheating. Warm your steak slowly using low heat—either in a covered skillet with a splash of broth or in a low-temperature oven. By using this approach, you lock in moisture instead of evaporating it.

Get Creative with Leftovers

Leftover beef bottom round steak can reinvent itself in numerous ways. Slice it thinly for sandwiches, chop it into cubes for stews, or even cut it into strips for tacos. This ensures you get the most mileage out of your meal without feeling like you’re eating the same thing repeatedly.

Experiment with Sauces

Maybe you want a peppercorn sauce, a mushroom gravy, or even a tangy chimichurri. Sauces can transform the same base dish into something entirely different. Feel free to play around with different flavors to find what resonates with your palate.

Final Serving Thoughts

By considering these serving and storage tips, you extend the life and enjoyment of your delicious creation. Whether you’re dishing up steak for a special occasion or planning for flavorful leftovers, these steps will keep your meal tasting fresh, tender, and unforgettable.thoughtfulness.

Conclusion

Indeed, you’ve journeyed through every crucial phase of handling beef bottom round steak—selecting, tenderizing, cooking, and even storing it properly. What once appeared as a potentially tough, underappreciated cut can now become a star attraction at your dining table. In fact, all it takes is a thoughtful approach: tenderizing techniques, flavorful seasoning, and the patience to cook it low and slow when needed. By focusing on these simple but powerful concepts, you empower yourself to create meals that satisfy your cravings and delight your loved ones.

Moreover, imagine the compliments you’ll hear when you serve up slices of tender, juicy steak for a weeknight dinner or a cozy weekend gathering. Simultaneously, picture the aroma that fills your kitchen, the sizzling sear in your pan, and the satisfying first bite that reminds you why you chose beef bottom round in the first place. In that moment, you’ll discover that culinary success doesn’t need to hinge on pricey cuts. Therefore, your skill and care are more than enough to transform a modest piece of beef into a restaurant-caliber feast.

So, are you ready to get cooking? Consequently, it’s time to put your newfound knowledge into practice. Whether you prefer a bright marinade or the simplicity of a slow cooker meal, you now have an arsenal of strategies to ensure your steak is mouthwateringly tender every time. Similarly, you know precisely which steps to follow, which pitfalls to avoid, and which finishing touches can elevate the dish from ordinary to extraordinary. Finally, take that next step: gather your ingredients, heat your pan, and let the luscious fragrance of perfectly cooked steak fill your home.

FAQ: Beef Bottom Round Steak

What is the best way to tenderize beef bottom round steak?

You can choose from multiple approaches, but a classic marinade with acidic elements (like lemon juice or vinegar) is a great option. You might also find success using a meat mallet to break up tough fibers before cooking. Each strategy loosens the muscle structure, boosting tenderness.

How long should I marinate my beef bottom round steak?

Aim for at least 2 hours, although letting it rest in the marinade overnight usually provides even deeper flavor. Ensure you don’t exceed 24 hours, as an overly acidic soak can degrade the texture.

Can I cook beef bottom round steak quickly on high heat?

While a high-heat sear is helpful to lock in juices initially, this cut usually benefits from a follow-up of lower, slower cooking. If you rely solely on intense heat, you might wind up with a tough final product.

What’s the best internal temperature for beef bottom round steak?

Medium-rare to medium (approximately 130°F–140°F or 54°C–60°C) often delivers the ideal level of tenderness. That said, personal taste can dictate how cooked you prefer your steak. Use a reliable meat thermometer to avoid guesswork.

Are there any alternative cuts similar to beef bottom round steak?

Yes. You might explore top round or eye of round, which offer comparable lean profiles. Just remember that each cut has its own subtle differences in flavor and texture. But if you’ve got your tenderizing methods down, you’ll likely enjoy good results with those cuts as well.

When you feel the excitement building about finally tackling that beef bottom round steak, trust yourself. You’ve got the knowledge to make it work, the tools to ensure success, and the passion to create a memorable meal. So why not turn today into the day you step into your kitchen and give it a go?