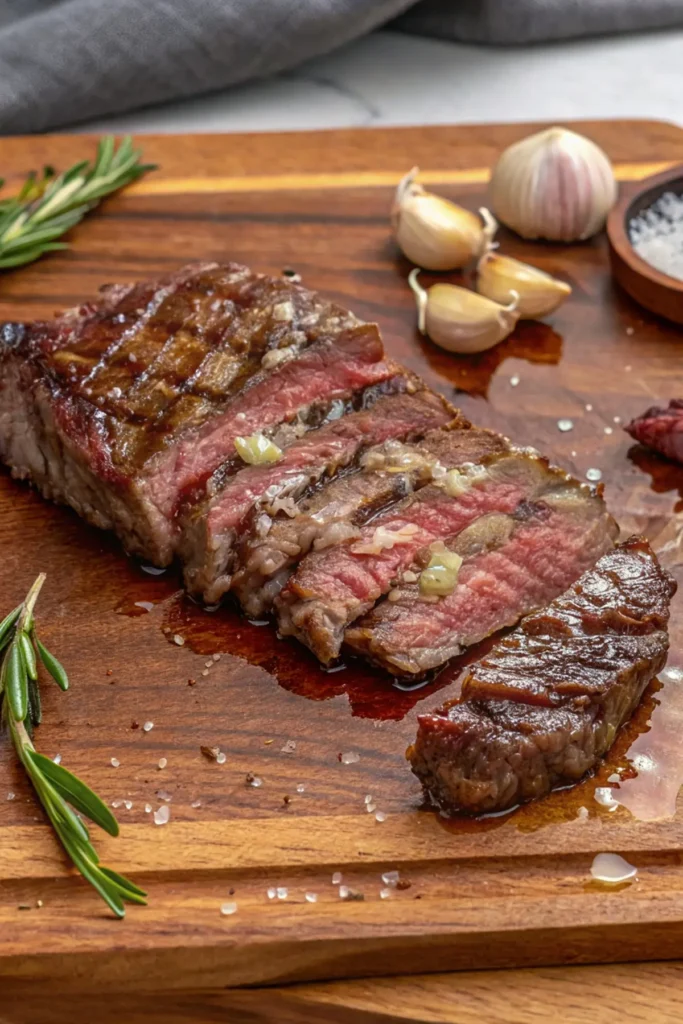
When it comes to premium beef cuts, one name reigns supreme among steak aficionados—theSpinalis Steak, also known as the ribeye cap. Praised for its unparalleled tenderness, rich marbling, and intense flavor, this steak is often referred to as the crown jewel of beef. But what exactly is it? How does it compare to other cuts, and most importantly, how can you cook it to perfection?
Table of Contents
In this ultimate guide, we’ll explore everything you need to know about the Spinalis Steak, from its origins and unique qualities to the best cooking techniques. By the end, you’ll be ready to impress your friends and family with this exceptional cut of beef.
What Is a Spinalis Steak?
Anatomy of the Ribeye Cap (Spinalis Dorsi)
The spinalis steak comes from the ribeye primal cut, specifically the spinalis dorsi muscle, which lies on the outer edge of the ribeye. This muscle, often trimmed from the main ribeye during butchering, is celebrated for its incredible tenderness and rich, beefy flavor. Its marbled fat content melts into the meat during cooking, creating a buttery texture that’s hard to rival.
Why It’s Called the Ribeye Cap
The name “ribeye cap” perfectly describes its position: it caps the top of the ribeye steak. Unlike the center portion of the ribeye, which is firmer and leaner, the cap is incredibly tender and marbled, making it the most prized part of the cut.
How It Compares to Other Premium Cuts
The ribeye cap is often compared to other high-end cuts such as filet mignon, ribeye, and New York strip. Here’s how it stacks up:
Filet Mignon: More tender but lacks the bold flavor of the ribeye cap.
Ribeye: Rich in flavor, but the cap offers a softer texture.
New York Strip: Leaner and firmer, with a milder taste compared to the ribeye cap.
What Makes Spinalis Steak Special?
Tenderness and Marbling
The spinalis steak is among the most tender cuts of beef, second only to filet mignon. Its natural marbling contributes to its juiciness and deep flavor, making it a cut that doesn’t require heavy seasoning or complicated cooking techniques.
Unique Flavor Profile
The ribeye cap delivers an intense beefy flavor, thanks to its fat content and marbling. When cooked, the fat melts into the meat, enhancing its natural taste and giving it a melt-in-your-mouth quality.
Rarity of the Cut
Unlike other cuts, the spinalis steak is rare. Only a small portion of the cow yields this delicacy, making it a prized find for steak enthusiasts. Its exclusivity also adds to its appeal, making it a luxurious choice for special occasions.
How to Cook Spinalis Steak to Perfection
Best Cooking Methods
The ribeye cap’s tenderness and marbling make it incredibly versatile. Here are the best ways to cook it:
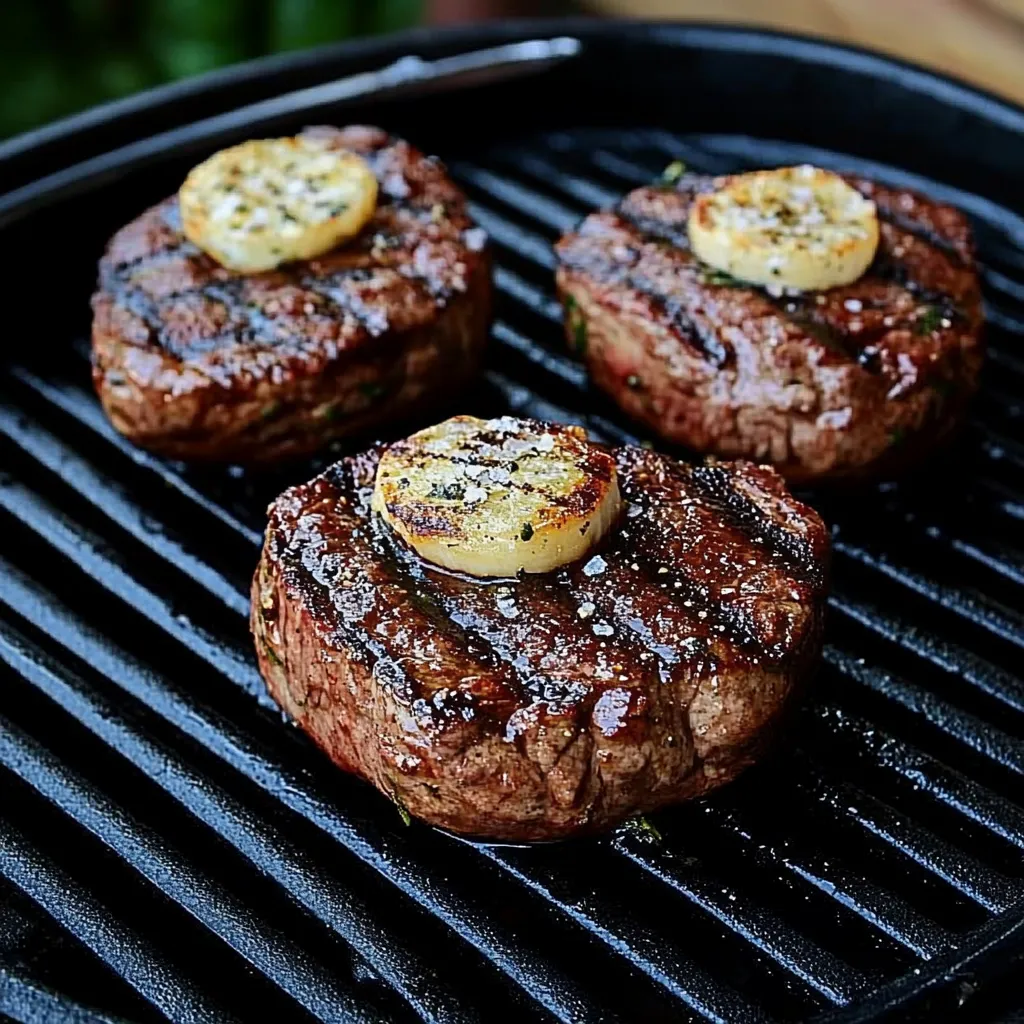
Grilling: The high heat of the grill brings out its robust flavor and creates a beautiful crust.
Pan-Searing: A cast-iron skillet is perfect for locking in flavor and achieving an even sear.
Sous-Vide: Ideal for precision cooking, this method ensures the steak is perfectly tender before a quick sear for added texture.
Step-by-Step Directions: Grilling Spinalis Steak
Follow these steps to grill your spinalis steak to perfection:
Prepare the Steak:
Take the steak out of the fridge 30-40 minutes before cooking to bring it to room temperature.
Pat the steak dry with paper towels to remove excess moisture.
Season generously with kosher salt, freshly ground black pepper, and optional spices like garlic powder or smoked paprika.
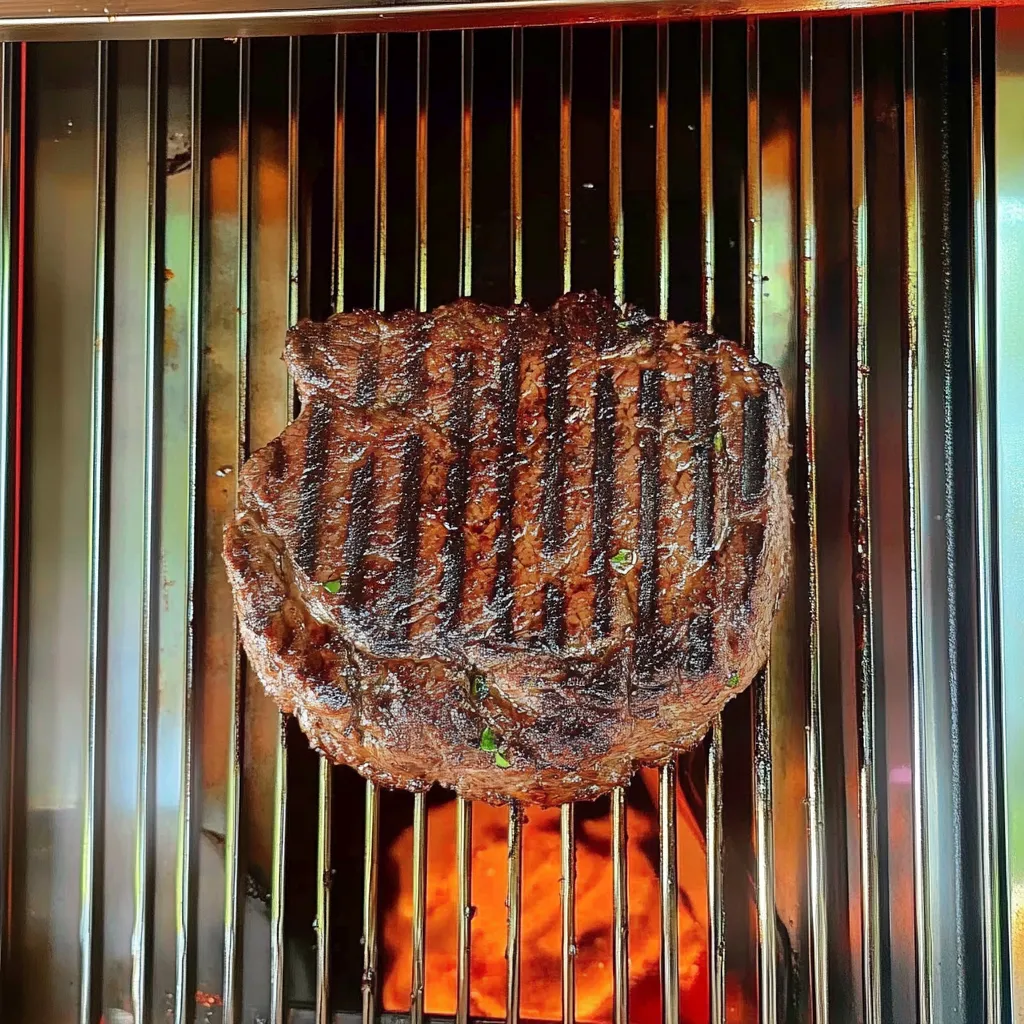
Preheat the Grill:
Heat your grill to high (450°F to 500°F).
If using charcoal, ensure the coals are evenly distributed and glowing red.
Sear the Steak:
Place the steak directly on the hottest part of the grill.
Sear for 2-3 minutes per side, flipping only once, to create a golden-brown crust.
Move to Indirect Heat:
Transfer the steak to a cooler part of the grill to finish cooking.
Close the lid and monitor the internal temperature with a meat thermometer:
Rare: 120°F
Medium-Rare: 125°F
Medium: 135°F
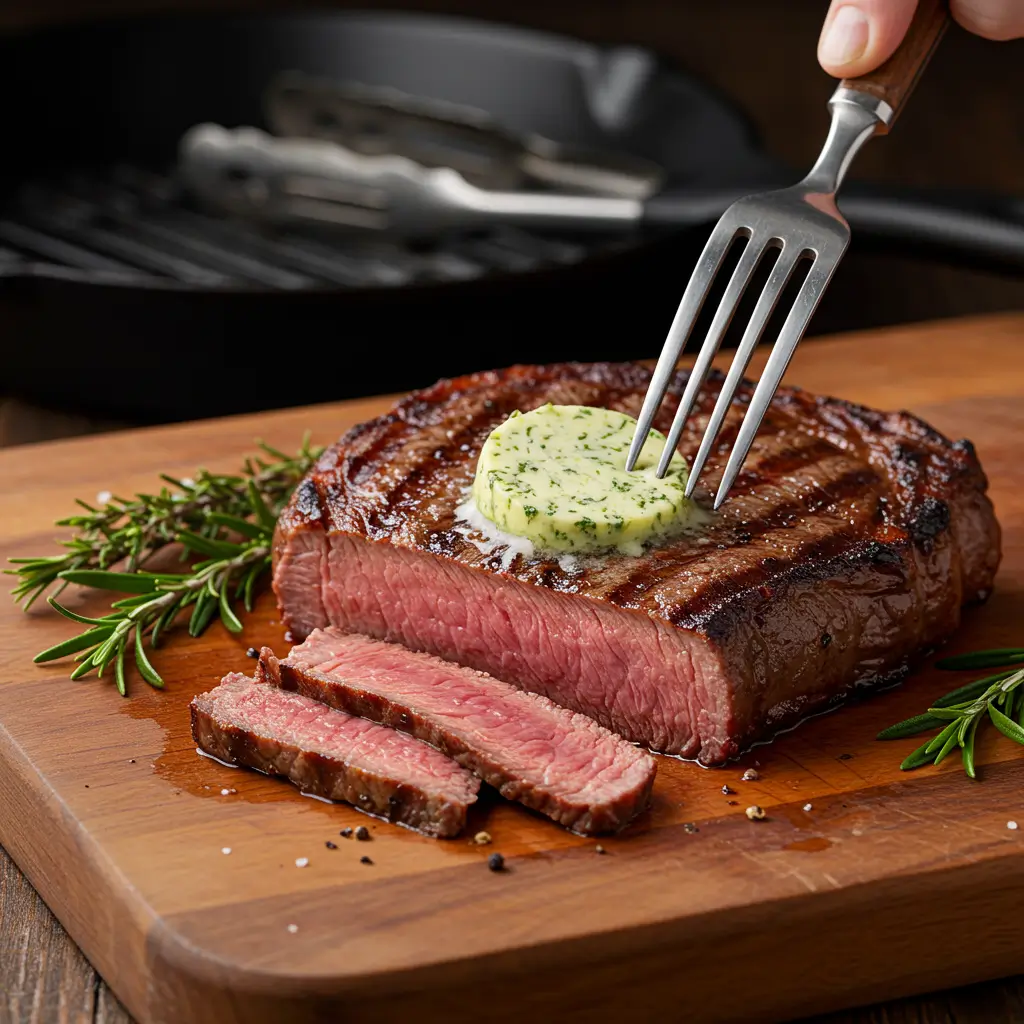
Rest the Steak:
Remove the steak from the grill and let it rest for 5-10 minutes.
Resting allows the juices to redistribute, ensuring every bite is flavorful.
Slice and Serve:
Slice the steak against the grain for maximum tenderness.
Serve with your favorite sides and sauces.
Pairing Spinalis Steak with Sides and Sauces
For a complete meal, pair your ribeye cap steak with:
Sides: Roasted vegetables, garlic mashed potatoes, or a crisp Caesar salad.
Sauces: Herb butter, chimichurri, or a tangy balsamic reduction.
Where to Buy Spinalis Steak and What to Look For
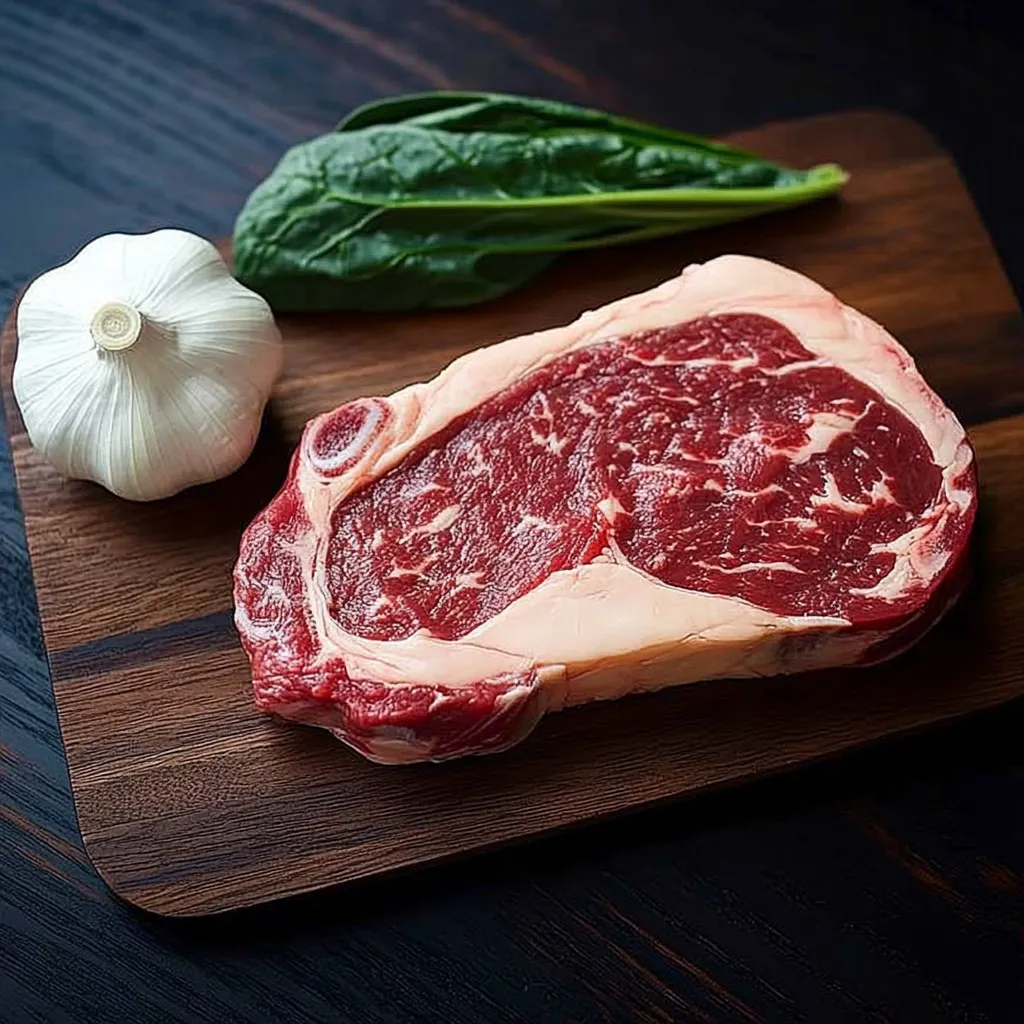
Choosing the Best Cut
When shopping for ribeye cap steaks, look for:
Bright Red Color: Indicates freshness.
Even Marbling: Ensures consistent flavor and tenderness.
Vacuum-Sealed Packaging: Helps preserve quality and prevents freezer burn.
Online vs. Local Butchers
Both online and local sources can provide high-quality spinalis steaks.
Local Butchers: Offer fresher cuts and expert recommendations.
Online Retailers: Provide access to specialty cuts like grass-fed or dry-aged ribeye cap.
Questions to Ask Your Butcher
Don’t hesitate to ask your butcher:
“Is this ribeye cap USDA Prime or Choice?”
“How fresh is this cut?”
“What’s the best cooking method for this steak?”
Spinalis Steak vs Other Popular Cuts
Ribeye Steak vs Ribeye Cap
When it comes to flavor, both cuts are incredibly rich. However, the ribeye cap is more tender due to its concentrated marbling, which melts during cooking. In terms of texture, the ribeye tends to be firmer, while the cap delivers a buttery, melt-in-your-mouth experience that’s hard to beat.
Ribeye Cap vs Filet Mignon
Filet mignon is renowned for its tenderness, often considered the most tender cut of beef. Despite this, the ribeye cap holds its own by offering a bolder, beefier flavor. While filet mignon is prized for its soft texture, the ribeye cap provides an unrivaled combination of tenderness and robust taste.
Spinalis Steak vs Baseball Steak
When comparing the spinalis steak and the baseball steak, both are exceptional cuts with unique characteristics that cater to different preferences. Here’s how they stack up:
Flavor
The spinalis steak offers a bold, beefy flavor thanks to its rich marbling, which melts during cooking and enhances its natural taste. On the other hand, the baseball steak, cut from the center of the top sirloin, delivers a slightly milder flavor. While still robust, it lacks the concentrated fat content of the ribeye cap.
Texture
Spinalis steak is known for its buttery, melt-in-your-mouth texture due to its high fat content and delicate muscle fibers. In contrast, the baseball steak is leaner and firmer, offering a satisfying chew. It’s a great choice for those who prefer less fat in their steak.
Cooking Methods
Spinalis Steak: Best suited for high-heat methods like grilling or pan-searing to achieve a crispy crust while preserving its tender interior.
Baseball Steak: Its uniform thickness makes it ideal for grilling, pan-searing, or even roasting. It holds up well to marinades, making it a versatile option for various recipes.
Availability
The spinalis steak is a rarer, more premium cut, often sourced from specialty butchers or online retailers. Baseball steak, being a portion of the sirloin, is more commonly found in grocery stores and butcher shops.
Ribeye Cap vs New York Strip
Compared to the New York strip, the ribeye cap offers a completely different texture. The strip steak is firmer and leaner, making it ideal for those who prefer less fat. On the other hand, the ribeye cap is indulgent, with a melt-in-your-mouth quality that steak lovers crave.
Conclusion
The spinalis steak, or ribeye cap, is the epitome of steak perfection. With its tender texture, intense flavor, and rarity, it’s a must-try for anyone passionate about high-quality beef. Whether you’re grilling, pan-searing, or exploring sous-vide techniques, this cut delivers unmatched results.
Today, I’m super excited to share with you one of my absolute favorite cuts of beef that doesn’t always get the attention it deserves. the baseball steak. As a busy mom who’s always juggling a million things, I’ve fallen in love with this juicy, flavorful cut that delivers steakhouse quality without the eye-watering price tag!
Table of Contents
What Makes Baseball Steak Special?
The first time I tried a baseball steak, I honestly wondered where it had been all my life! Cut from the center of the top sirloin, this thick, round beauty gets its playful name because – you guessed it – it puffs up during cooking to look just like a baseball. But don’t let the cute name fool you – this steak packs serious flavor!
What I love most about baseball steak is that wonderful balance it strikes. You get the rich, beefy taste similar to expensive cuts, but at a price that won’t make your wallet cry. It’s become my go-to for those Friday night meals when we want something special without splurging on ribeyes.
Why You’ll Love This Baseball Steak Recipe
Listen, I get it – weeknights are crazy, and the last thing you need is a complicated recipe with a million steps. That’s exactly why baseball steak has become such a staple in my house! Here’s why it might become your new favorite too:
Budget-friendly luxury: Tastes expensive but costs way less than premium cuts
Forgiving to cook: Not as finicky as filet mignon or other pricier options
Impressive presentation: That round, plump shape looks fantastic on a plate
Versatile for any occasion: Perfect for both casual family dinners and special celebrations
I still remember serving this at a backyard barbecue last summer. My neighbor Tom (who fancies himself quite the steak connoisseur) couldn’t believe it wasn’t a much more expensive cut. The look on his face when I told him what he was eating was priceless!
What You’ll Need
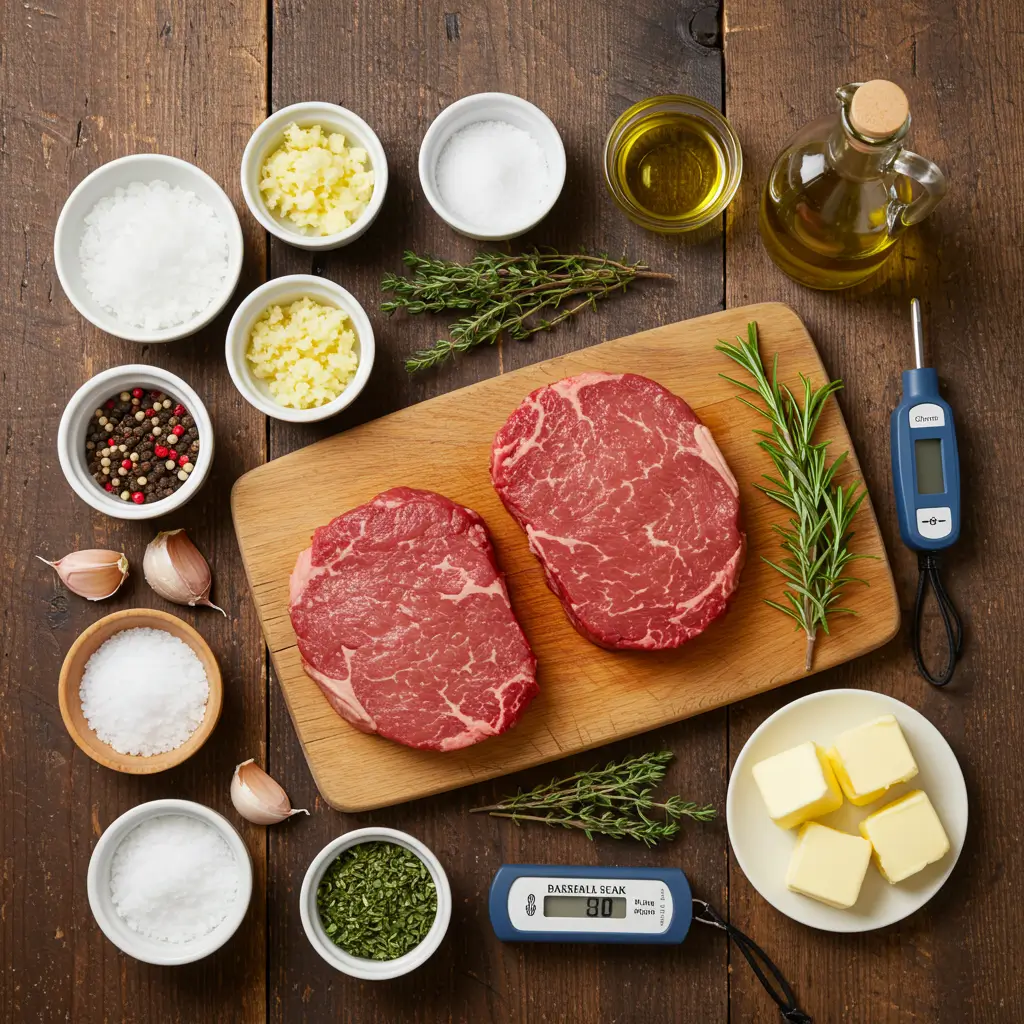
Ingredients:
Everything you need to create a restaurant-quality baseball steak at home – simple ingredients, extraordinary results
Meat thermometer (trust me, this is a game-changer!)
Tongs
Sharp knife
Cutting board
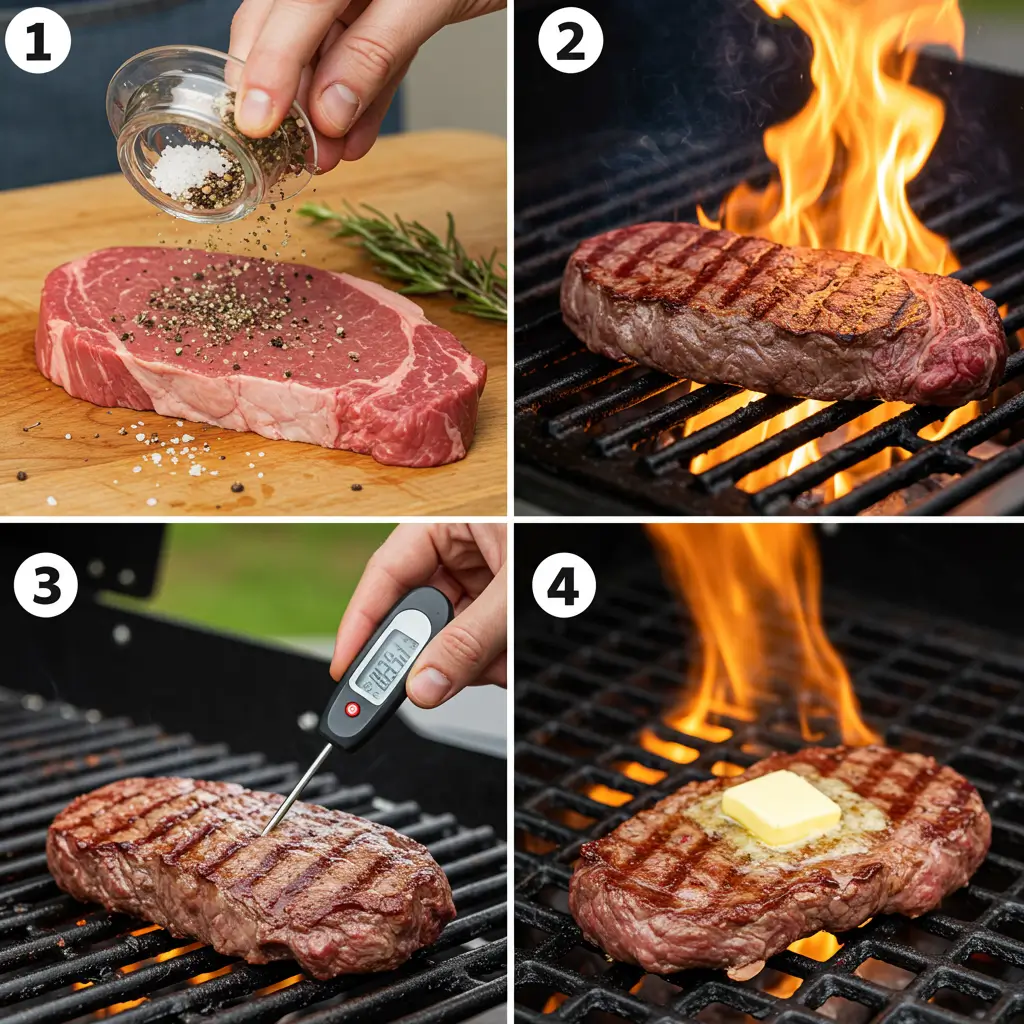
Let’s Get Cooking!
Step 1: Prep Your Steak
Take your baseball steaks out of the fridge about 30 minutes before cooking. This little step makes a huge difference! Cold meat + hot grill = uneven cooking. Nobody wants that!
Pat the steaks dry with paper towels (this helps get that beautiful sear we’re after). Then, drizzle them with olive oil and season generously with salt and pepper. Add the minced garlic and rosemary, gently pressing the seasonings into the meat.
Step 2: Fire Up the Grill
Preheat your grill to high heat (around 450-500°F). If you’re using a cast-iron skillet instead, get it nice and hot over medium-high heat.
Step 3: Grill to Perfection
Place those beautiful baseball steaks on the hottest part of the grill. Here’s my cooking cheat sheet that hasn’t failed me yet:
Rare (cool red center): 4-5 minutes per side (125°F internal temp)
Medium-rare (warm red center): 5-6 minutes per side (135°F internal temp)
Medium (warm pink center): 6-7 minutes per side (145°F internal temp)
Remember, these times are just guidelines! Your best friend is that meat thermometer. Different grills heat differently, and steak thickness varies.
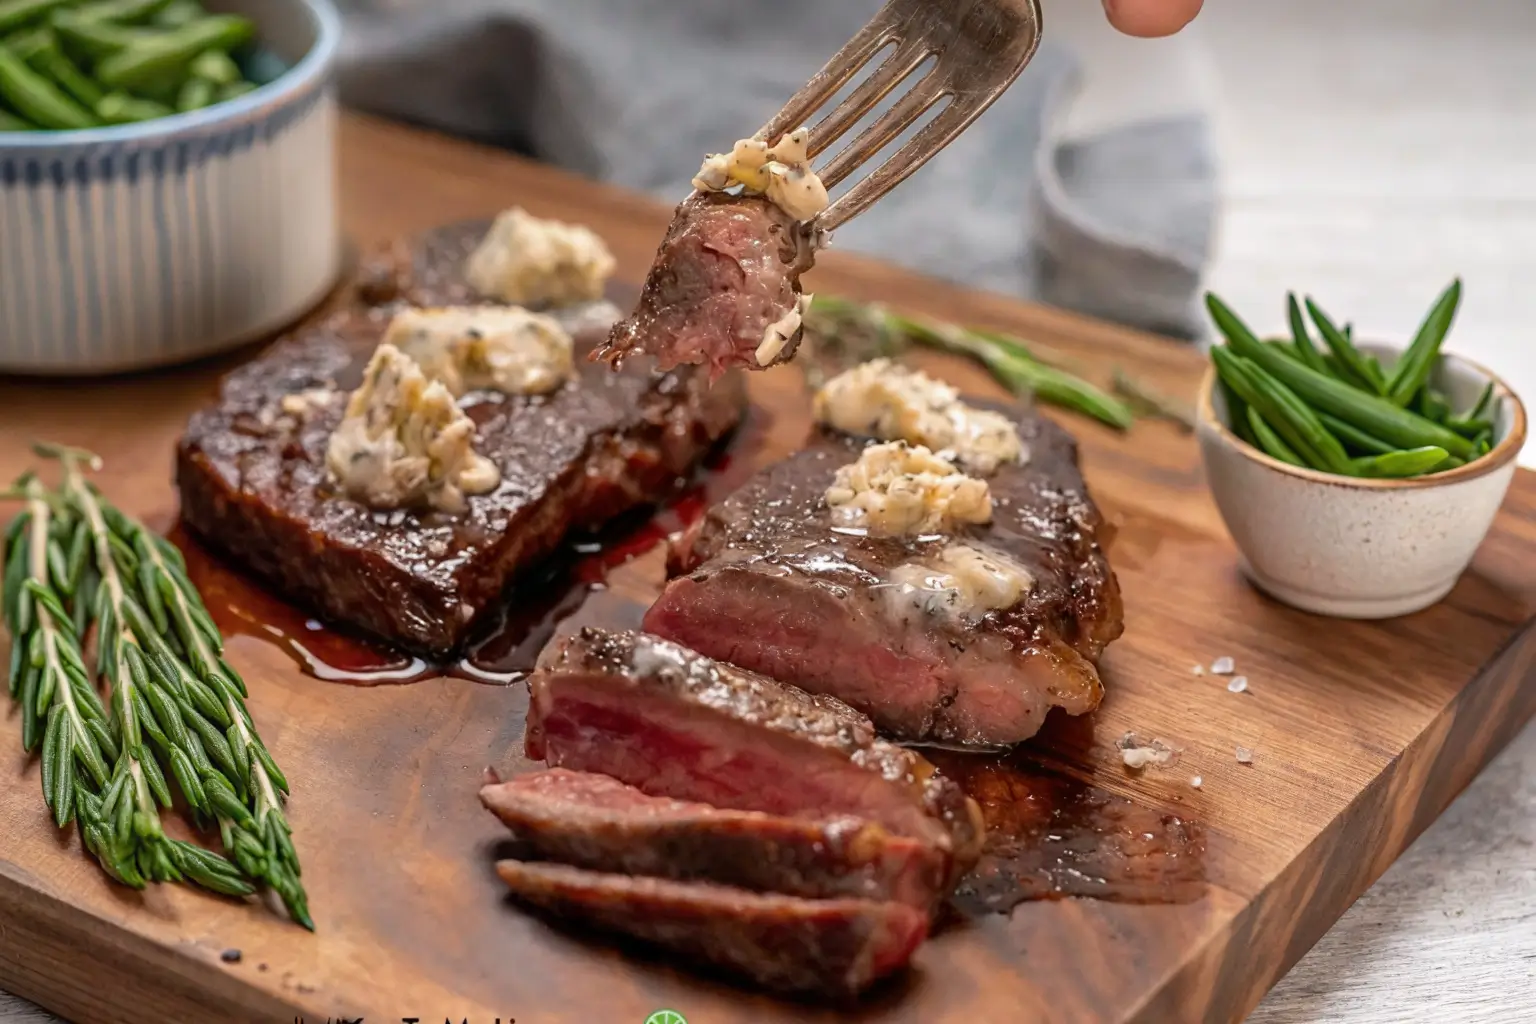
Step 4: The All-Important Rest
This is where patience pays off! Transfer your steaks to a cutting board and top each with a tablespoon of butter and a sprig of thyme if using. Tent loosely with foil and let them rest for at least 5 minutes.
I know it’s tempting to cut right in (trust me, I’ve made this mistake plenty of times), but giving your steak time to rest lets all those yummy juices redistribute through the meat instead of spilling all over your plate.
Follow these four simple steps for steakhouse-quality results every time
My Favorite Serving Suggestions
The beauty of baseball steak is how versatile it is! Here are some of my go-to pairings that always get rave reviews at my table:
After cooking this steak more times than I can count (seriously, my family requests it weekly!), I’ve picked up a few tricks:
Don’t be shy with seasonings – This cut can handle bold flavors. My husband loves when I add a sprinkle of smoked paprika to the mix!
Be patient with the sear – Don’t flip too early! Let the steak develop that beautiful crust before turning.
Check for doneness at the thickest part – The round shape means different parts cook at different rates.
Slice against the grain – This makes even a slightly overcooked steak more tender. Look for the lines in the meat and cut perpendicular to them.
Try compound butter – Mix some herbs, garlic, and even a little blue cheese into softened butter, then melt it over your resting steak. Game-changer!
The first time I made baseball steak, I invited my in-laws over (no pressure, right?). My father-in-law, who usually drowns everything in sauce, actually pushed the sauce boat away, saying “This doesn’t need anything else!” Still one of my proudest cooking moments!
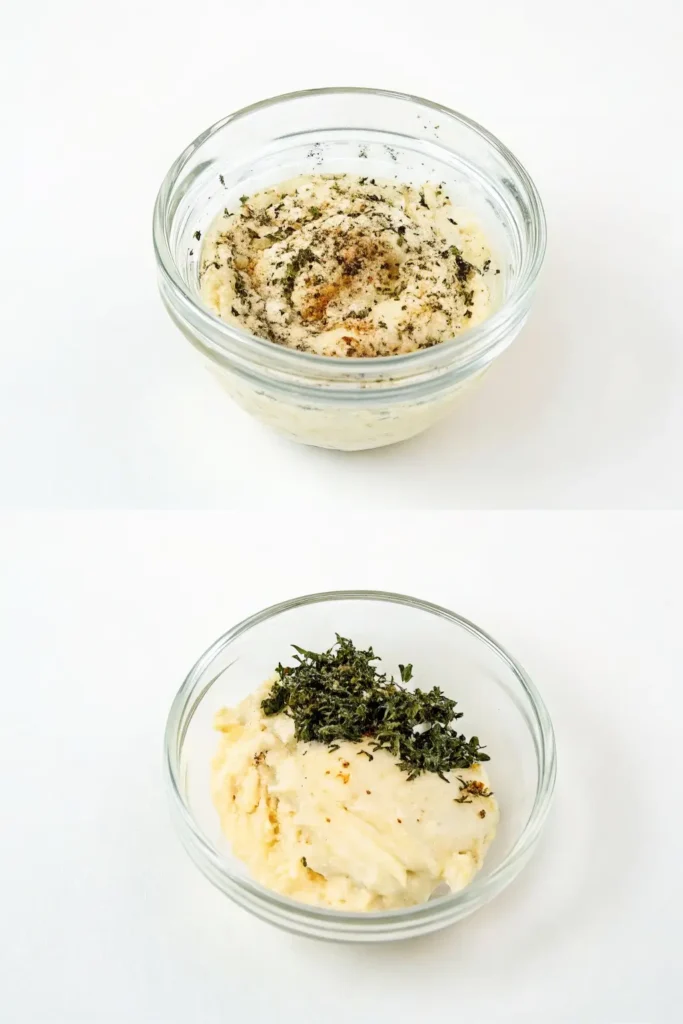
The Secret Sauce: Baseball Steak Chimichurri
If you really want to elevate your baseball steak game, try my quick chimichurri sauce. It’s bright, herbaceous, and cuts through the richness of the beef perfectly:
Elevate your baseball steak with this bright, herby chimichurri sauce – the perfect flavor complement
Mix everything together and let it sit for at least 15 minutes before serving. The longer it sits, the more the flavors meld together. This sauce keeps in the fridge for about a week and is amazing on everything from eggs to roasted veggies!
From My Table to Yours
I hope this guide helps you discover the joy of cooking baseball steak at home! It’s become such a staple in our household, and I love hearing from readers who’ve tried it and feel the same way.
Remember, cooking is about more than just following recipes – it’s about creating moments around the table with people you love. There’s something so satisfying about serving a beautiful steak dinner that looks and tastes like it came from a fancy restaurant, but actually took minimal effort and didn’t break the bank!
Next time you’re at the meat counter, give this underrated cut a try. I’d love to hear how it turns out for you! And if you’re looking for more budget-friendly meat options, check out my article on Black Pepper Angus Steak for another amazing option.
Common Questions About Baseball Steak
Can I cook baseball steak in a cast-iron skillet?
Absolutely! I do this all the time when the weather doesn’t cooperate for grilling. Get your skillet screaming hot, sear the steak for 2-3 minutes per side, then finish in a 375°F oven until you reach your desired internal temperature.
What’s the difference between baseball steak and filet mignon?
While both are tender cuts, baseball steak comes from the top sirloin area, while filet mignon comes from the tenderloin. Baseball steak has a bit more flavor (thanks to better marbling) but is significantly more affordable! If you’re interested in trying another premium cut at home, check out my Filet Mignon in Air Fryer recipe for a foolproof method.
How do I find baseball steak at the store?
Some grocers might not label it specifically as “baseball steak.” Ask for “top sirloin center cut” or “top sirloin cap” instead. A good butcher will know exactly what you’re looking for! You might also enjoy my guide to Spinalis Steak, another underrated cut that’s worth seeking out.
Can I marinate baseball steak?
You bet! While it’s flavorful enough on its own, marinating for 2-4 hours can add wonderful depth. Just don’t marinate too long (over 8 hours) as the acid in most marinades can start to break down the meat too much. For marinade inspiration, check out my Chicken Fajita Marinade which can easily be adapted for beef!
Beef chuck eye steak is one of the best hidden treasures at the meat counter. While many people rush to buy expensive cuts, beef chuck eye steak offers great marbling and tenderness for much less money. Home cooks have found that this affordable cut turns into something special with the right cooking methods. With a few simple tricks, this budget-friendly option can become the star of your dinner table.
Table of Contents
What Is Beef Chuck Eye Steak?
What Makes Chuck Eye Steak Unique?
What makes beef chuck eye steak special is where it comes from on the cow. It sits right where the shoulder meets the rib area. Beef chuck eye steak contains the same muscle as ribeye but extends into the chuck section. This location gives beef chuck eye steak rich flavor from the chuck part with some of the tenderness you’d expect from ribeye, making it a great deal for people who love steak but want to save money
Chuck Eye Steak vs. Ribeye Steak: A Detailed Comparison
Characteristic
Chuck Eye Steak
Ribeye Steak
Cost
$7-10 per pound
$15-25+ per pound
Flavor Profile
Rich, beefy, slightly more intense
Rich, buttery, milder
Fat Content
Good marbling with some connective tissue
Excellent marbling throughout
Tenderness
Moderately tender with proper cooking
Very tender naturally
Best Cooking Methods
Pan-searing, grilling, reverse sear
Pan-searing, grilling, broiling
Value Rating
★★★★★
★★★☆☆
While ribeye might win slightly on tenderness, the chuck eye’s deeper beef flavor and dramatically better value make it the smarter choice for weekly meals and special occasions alike.
While ribeye gets most of the attention, Beef Chuck Eye Steak offers similar marbling patterns to black pepper angus steak but typically costs 40-60% less.
Best Cuts and Grades for Chuck Eye Steak
For the ultimate chuck eye steak experience, look for:
USDA Choice or Prime grades: The higher grades ensure better marbling throughout the meat
Uniform thickness: Aim for steaks at least 1-1.5 inches thick for even cooking
Vibrant color: Fresh chuck eye should display a bright, cherry-red color
Even marbling: Look for fine white flecks of intramuscular fat distributed throughout the meat
Limited connective tissue: Some is inevitable due to its location, but excessive gristle should be avoided
Pro tip: Develop a relationship with your local butcher and specifically request chuck eye steaks cut from positions closer to the ribeye (sometimes called “chuck eye roll”) for the most tender results.
Secret #1: Choosing and Preparing the Perfect Cut
Look for beef chuck eye steaks with visible marbling throughout for the juiciest, most flavorful results
How to Select a Tender Chuck Eye Steak
Finding the perfect chuck eye steak requires a discerning eye:
Know what you’re looking for: Ask your butcher specifically for “chuck eye steak” (not to be confused with chuck roast or regular chuck steak)
Inspect the marbling: Look for fine, web-like intramuscular fat patterns throughout the meat
Check thickness: Select cuts between 1-1.5 inches thick for optimal cooking control
Examine the color: Choose steaks with vibrant red coloring and avoid those with brown edges
Consider the source: When possible, opt for grass-fed or sustainably raised beef for superior flavor
Remember that a quality chuck eye steak should resemble a slightly less marbled ribeye, not a typical chuck steak.
Pre-Cooking Preparation: Critical Steps for Success
Proper preparation is essential for transforming chuck eye steak from good to exceptional:
Temperature acclimation: Remove the steak from refrigeration 30-45 minutes before cooking to allow it to reach room temperature
Moisture management: Pat the steak thoroughly dry with paper towels to ensure proper searing
Trim selectively: Remove excessive external fat if desired, but leave some for flavor
Season strategically: Apply salt at least 40 minutes before cooking (or just before) to avoid drawing out moisture during the critical in-between period
These preparation steps create the foundation for perfect texture and flavor development during cooking.
Marinades and Seasoning Options That Elevate Chuck Eye Steak
While chuck eye steak is naturally flavorful, the right seasoning approach can enhance its inherent qualities:
This simple garlic-herb compound butter is the secret to elevating beef chuck eye steak to steakhouse quality
Remember: With quality chuck eye steaks, less is often more. Sometimes a generous application of kosher salt and freshly ground black pepper is all you need to let the beef’s natural flavors shine.
Secret #2: Mastering Cooking Techniques
Pan-Searing Perfection: Step-by-Step Guide
Unlike tougher cuts that need hours of cooking, beef chuck eye steak cooks quickly while staying juicy. A 1½-inch thick beef chuck eye steak needs about 4-5 minutes on each side for medium-rare when cooking in a pan. This short cooking time is another reason beef chuck eye steak is perfect for busy weeknight meals when you don’t have much time but still want a tasty dinner.
Preheat properly: Heat a cast-iron skillet over high heat until it just starts to smoke
Add the right oil: Add 1-2 tablespoons of high smoke-point oil like avocado, grapeseed, or clarified butter
Sear with purpose: Place the steak in the pan and press gently to ensure full contact; don’t move it for at least 2-3 minutes
Monitor the crust: Cook until a deep, golden-brown crust forms (about 3-4 minutes for 1.5-inch steaks)
Flip once: Turn the steak over just once and reduce heat to medium-high
Enhance with aromatics: Add 2 tablespoons butter, 2 garlic cloves, and fresh thyme or rosemary to the pan
Baste continuously: Tilt the pan and spoon the melted butter mixture over the steak repeatedly
Check temperature: Cook to desired doneness, using a meat thermometer for precision
Rest properly: Transfer to a cutting board and rest for 5-7 minutes before slicing
This method creates the perfect combination of a flavorful crust and juicy interior that defines a perfect steak.
Grilling Chuck Eye Steak Like a Professional Chef
The grill adds another dimension of flavor to chuck eye steak:
Preheat strategically: Set up a two-zone fire with high direct heat and moderate indirect heat areas
Oil prevention: Oil the steak lightly (not the grates) to prevent sticking and flare-ups
Sear efficiently: Place over direct heat for 2-3 minutes per side to develop grill marks and crust
Manage the cook: Move to indirect heat to finish cooking to desired doneness
Close the lid: Keep the grill lid closed when cooking on indirect heat to maintain temperature
Rest correctly: Rest the steak on a warm plate tented with foil for 5 minutes
For gas grills: Preheat one side to high (450-500°F) and the other to medium (325-350°F). For charcoal: Arrange coals on one side for a natural two-zone setup.
For additional beef grilling techniques, you might enjoy our guide to baseball steak grilling which uses similar principles for perfect doneness
Elevate your beef chuck eye steak with herb-infused compound butter for restaurant-quality results
The Reverse Sear Method: A Game-Changer for Thick-Cut Chuck Eye
For thicker chuck eye steaks (1.5+ inches), the reverse sear method yields extraordinary results:
Low and slow start: Preheat oven to 275°F and place steak on a wire rack over a baking sheet
Cook gently: Bake until internal temperature reaches 10-15°F below your target doneness (about 20-25 minutes for medium-rare)
Rest briefly: Remove and rest for 10 minutes while heating a cast-iron skillet until smoking hot
Sear rapidly: Sear the steak for 45-60 seconds per side in the hot skillet with high smoke-point oil
Finish with butter: Add butter and aromatics for a final flavor boost in the last 30 seconds
Serve immediately: The beauty of reverse sear is minimal additional resting time is needed
This method provides unparalleled edge-to-edge doneness with a perfect crust, transforming chuck eye into a steak that rivals those from high-end steakhouses.
The reverse sear method works beautifully for both chuck eye steak and beef bottom round steak when you want perfect edge-to-edge doneness
Secret #3: Achieving Perfect Doneness
Getting the right temperature is key when cooking beef chuck eye steak. For the most tender results, cook beef chuck eye steak to medium-rare (130-135°F) or medium (140-145°F). If you cook it more than that, the beef chuck eye steak can get tough as the fat melts away without enough time to soften the small amount of tough tissue in this cut
Doneness
Temperature
Description
Best For
Rare
120-125°F
Cool red center, very soft
Highest quality, extremely fresh chuck eye
Medium-Rare
130-135°F
Warm red center, tender
Most chuck eye steaks (recommended)
Medium
140-145°F
Pink center, slightly firm
Steaks with more connective tissue
Medium-Well
150-155°F
Slight pink, firmer texture
Not ideal for chuck eye
Well-Done
160°F+
No pink, much firmer
Not recommended for chuck eye
Since chuck eye contains slightly more connective tissue than ribeye, cooking to medium-rare or medium allows enough heat to melt the fat and collagen while maintaining tenderness.
Tools for Perfect Doneness
Instant-read digital thermometer: The most reliable method for precision cooking
The touch test: Compare the feel of the steak to different parts of your hand (thumb and palm connection = rare, base of thumb = medium-rare, etc.)
Timing method: For 1-inch steaks: 4 minutes per side for medium-rare, 5 minutes for medium (adjust for thickness)
Remember that carryover cooking will raise the temperature by 5-10°F during resting, so remove the steak slightly before it reaches your target temperature.
Secret #4: Avoiding Common Steak Cooking Mistakes
Overcooking: The #1 Enemy of Chuck Eye Steak
Chuck eye’s sweet spot is medium-rare to medium. Beyond that, you risk losing the tenderness that makes this cut special.
Prevention strategy:
Use a reliable meat thermometer
Remove the steak 5-10°F before target temperature
Remember that thinner steaks cook faster
When in doubt, undercook slightly – you can always cook more, but never less
The Critical Resting Phase: Why It Matters
Resting allows the meat’s proteins to relax and reabsorb juices, resulting in a significantly more tender and flavorful steak.
Perfect resting technique:
Rest for approximately 5 minutes per inch of thickness
Place on a warm plate or cutting board
Tent loosely with foil (don’t wrap tightly)
Resist the urge to cut into the steak prematurely
Remember that the steak will continue cooking slightly during this time
Seasoning Mistakes That Ruin Good Chuck Eye Steak
Many home cooks either under-season or season at the wrong time.
Seasoning best practices:
Season generously – more than you think you need
Use kosher salt rather than table salt for better adhesion and flavor
Season either 40+ minutes before cooking OR right before cooking (avoid the in-between period that draws out moisture)
Season from a height of 8-12 inches for even distribution
Don’t forget to season the sides of the steak, not just the top and bottom
Temperature Management: A Professional Approach
Starting with properly tempered meat ensures even cooking.
Temperature guidelines:
Remove steak from refrigerator 30-45 minutes before cooking
Never cook straight from the freezer (even if the package says you can)
Ensure your cooking surface is properly preheated before the steak touches it
Let cooking equipment recover heat between batches if cooking multiple steaks
Secret #5: Creative Recipes and Pairing Ideas
Chuck Eye Steak with Compound Butter Variations
Compound butter is the secret weapon of steakhouses, adding richness and flavor complexity.
Classic Garlic-Herb Butter
8 tablespoons unsalted butter, softened
3 cloves garlic, minced
1 tablespoon fresh parsley, finely chopped
1 teaspoon fresh thyme leaves
1 teaspoon fresh rosemary, finely chopped
½ teaspoon lemon zest
¼ teaspoon sea salt
Blue Cheese Butter
8 tablespoons unsalted butter, softened
3 tablespoons quality blue cheese, crumbled
1 tablespoon chives, finely chopped
½ teaspoon freshly ground black pepper
Pinch of kosher salt
Instructions: Mix ingredients, form into a log using plastic wrap, refrigerate until firm, then slice into medallions to top hot steak.
Slow-Cooked Chuck Eye Steak Recipes
Transform tougher chuck eye steaks into fork-tender delights:
Red Wine Braised Chuck Eye
Season 2-3 chuck eye steaks generously with salt and pepper
Sear on high heat until well-browned on both sides
Remove steaks and sauté 1 diced onion, 2 carrots, and 2 celery stalks
What is beef chuck eye steak, and why is it called the “poor man’s ribeye”?
Beef chuck eye steak comes from where the shoulder (chuck) meets the rib section. It’s called the “poor man’s ribeye” because it contains the same muscle as ribeye (longissimus dorsi) but costs significantly less since it’s technically from the chuck primal.
How does chuck eye steak compare to other budget steak options like flank or skirt steak?
Unlike flank or skirt steak that require special preparation like marinating and slicing against the grain, chuck eye has marbling similar to premium cuts, making it more forgiving to cook. It offers better tenderness than other budget options when prepared properly.
Is chuck eye steak as tender as ribeye?
Not quite, but properly cooked chuck eye can come remarkably close. The first few chuck eye steaks cut closest to the rib section are much more tender than those further into the shoulder.
How do I make chuck eye steak more tender?
For maximum tenderness: 1) Don’t overcook (medium-rare to medium is ideal); 2) Ensure proper resting time; 3) Slice against the grain; 4) Consider using a marinade with acidic ingredients for tougher cuts; 5) Use the reverse sear method for thicker steaks.
What’s the best way to cook beef chuck eye steak?
For 1-1.5 inch steaks, pan-searing in a cast-iron skillet with the butter-basting technique yields exceptional results. For thicker cuts, the reverse sear method provides the best balance of edge-to-edge doneness and crust development.
Beef chuck eye steak represents the perfect intersection of value and flavor in the world of beef. By applying these five secrets selecting the right cut, preparing it properly, mastering cooking techniques, achieving perfect doneness, and exploring creative serving options you’ll transform this budget-friendly cut into a meal worthy of the finest steakhouses.
The beauty of chuck eye steak lies in its versatility and forgiving nature. Whether you’re a novice cook or a seasoned chef, this underappreciated cut rewards proper technique with exceptional results that will have friends and family questioning how you achieved such flavor without breaking the bank.
I’d love to hear about your experiences cooking chuck eye steak! Have you tried any of these techniques? Do you have additional tips to share? Let me know in the comments below.